
6 Inch Cake Recipe Ideas
As an Amazon Associate, I earn from qualifying purchases. Read the full disclosure here.
Learn how to make a two or three layer 6 inch cake from any of your favorite cupcake or 8 inch cake recipes, including this 6 inch vanilla bean cake recipe. This size cake is perfect for small gatherings and smash cakes for 1st birthdays.
Depending on how long you’ve been a reader here, you may or may not know that I got started with baking when I owned and operated my own cake and cupcake decorating business (you can read all about how that happened on my meet Lynn page).
I made a lot of cakes for birthday parties, baby and bridal showers, and even weddings, but I also made a lot of small cake recipes for smash cakes at first birthday parties and, believe it or not, a lot of 6 inch cakes for the tops of cupcake towers.
It was always quite simple to convert my standard 8 or 9 inch cake recipes to a 6 inch cake (or even sometimes a 4 inch cake!), and since I get a lot of questions about exactly how to make a cake 6 inch instead of 8 or 9 inch, it felt high time to put it all here for you (with a giant surprise at the bottom– a Skillshare course!).
While the recipe at the bottom of this tutorial is a vanilla cake recipe (specifically a vanilla bean cake!), I have included lots of links to various cake and cupcake recipes that will help you navigate this 6 inch cake conversion easily and well-equip you to choose the best recipe for a small cake of your desired flavor.
Let’s get started!
Vanilla Bean 6 Inch Cake Recipe ingredients
For this 6” vanilla bean cake, you will need:
• whole milk or cream
• vanilla bean or vanilla paste
• all-purpose flour
• all-purpose flour
• baking powder
• baking soda
• salt
• unsalted butter
• granulated sugar
• egg
• full fat yogurt or sour cream
• vanilla extract
For the vanilla bean frosting, you will need:
• unsalted butter
• powdered sugar
• vanilla bean or vanilla paste
• milk or cream
• salt
Make 6 Inch Cake with Cupcake Batter
Standard cupcake recipes that yield anywhere from 12 to 15 cupcakes are the perfect amount of batter (3 to 4 cups) for 6 inch cakes, whether they’re two or three layers.
Of course, if you use the same amount of batter for two pans split into three pans, your three layers will be a little thinner than what the two layers would be. This is all about personal preference and desired aesthetic.
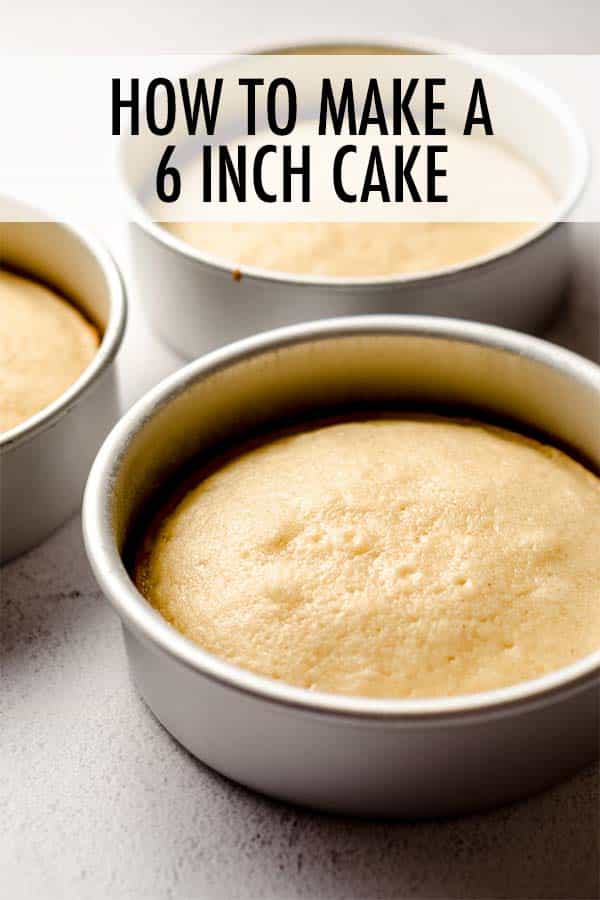
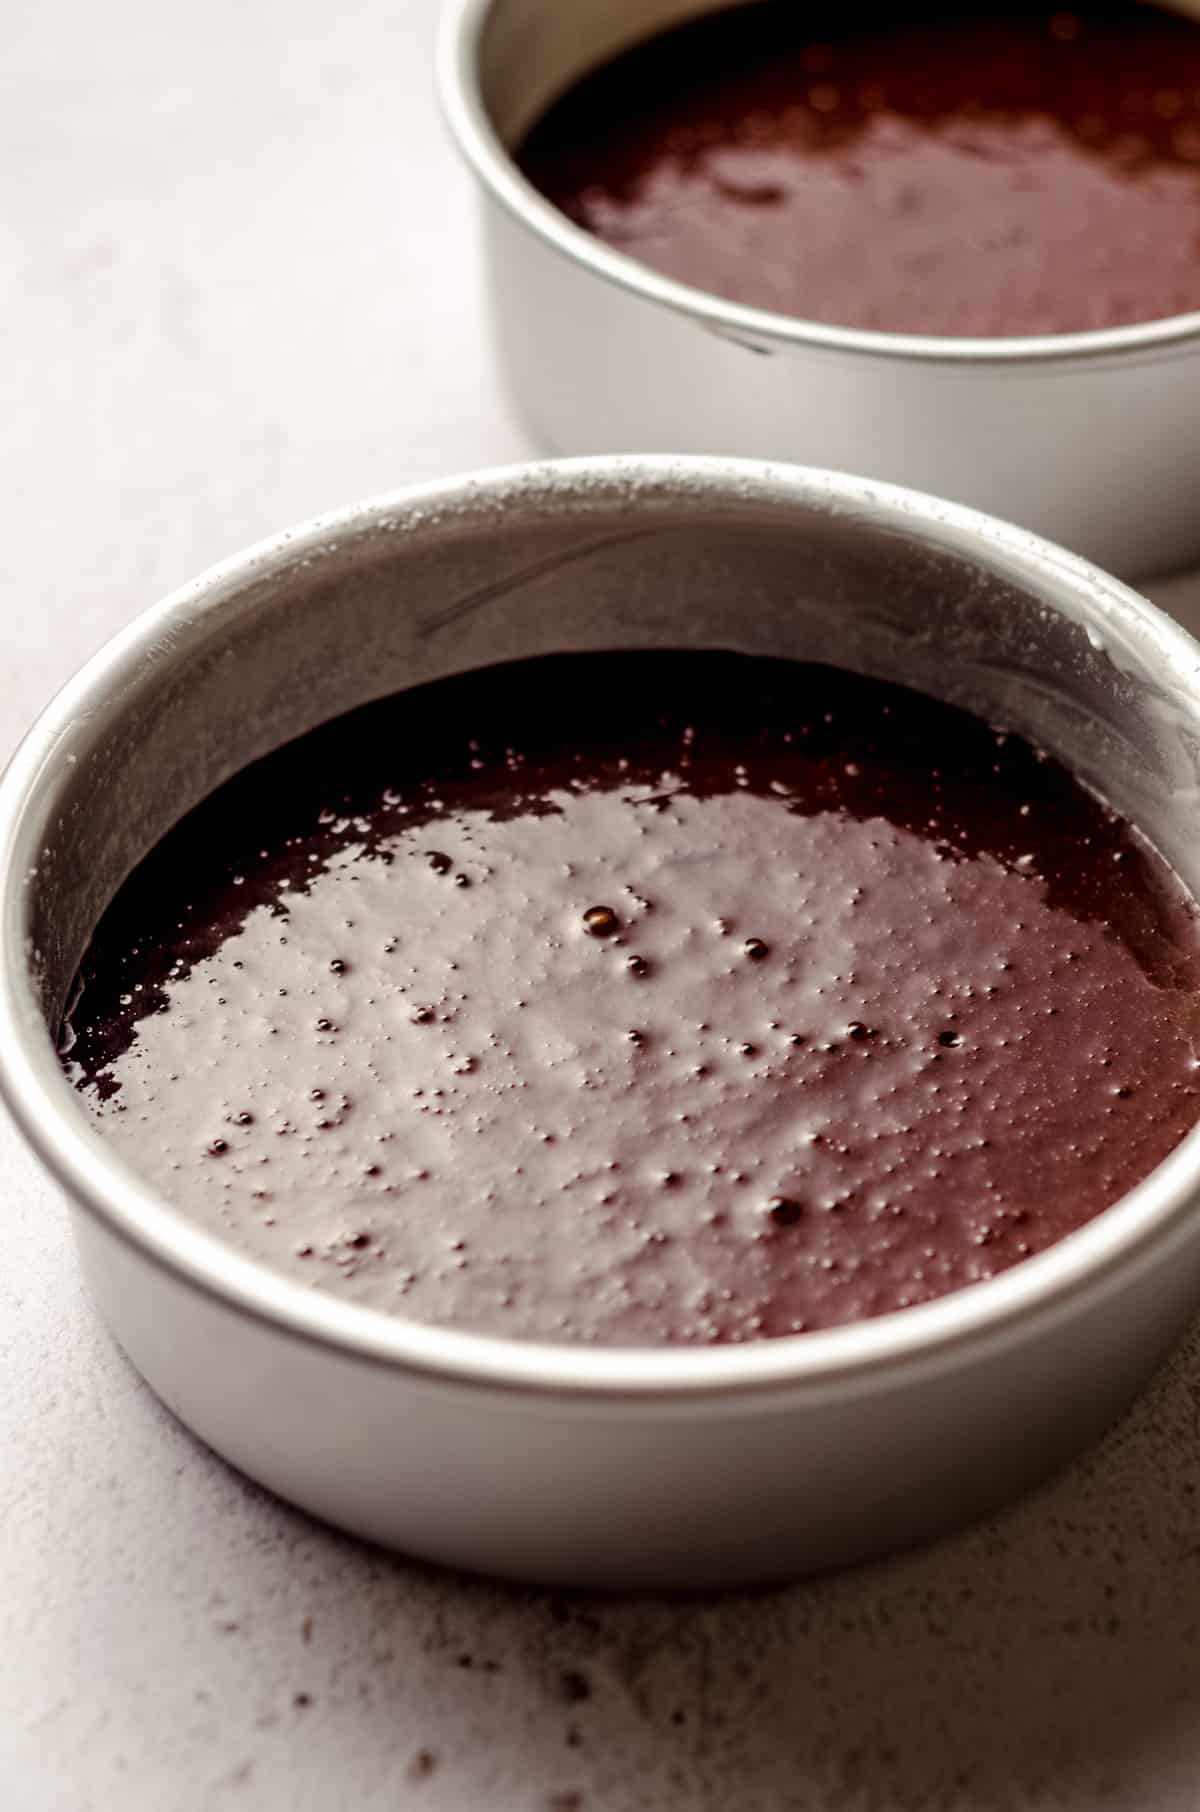
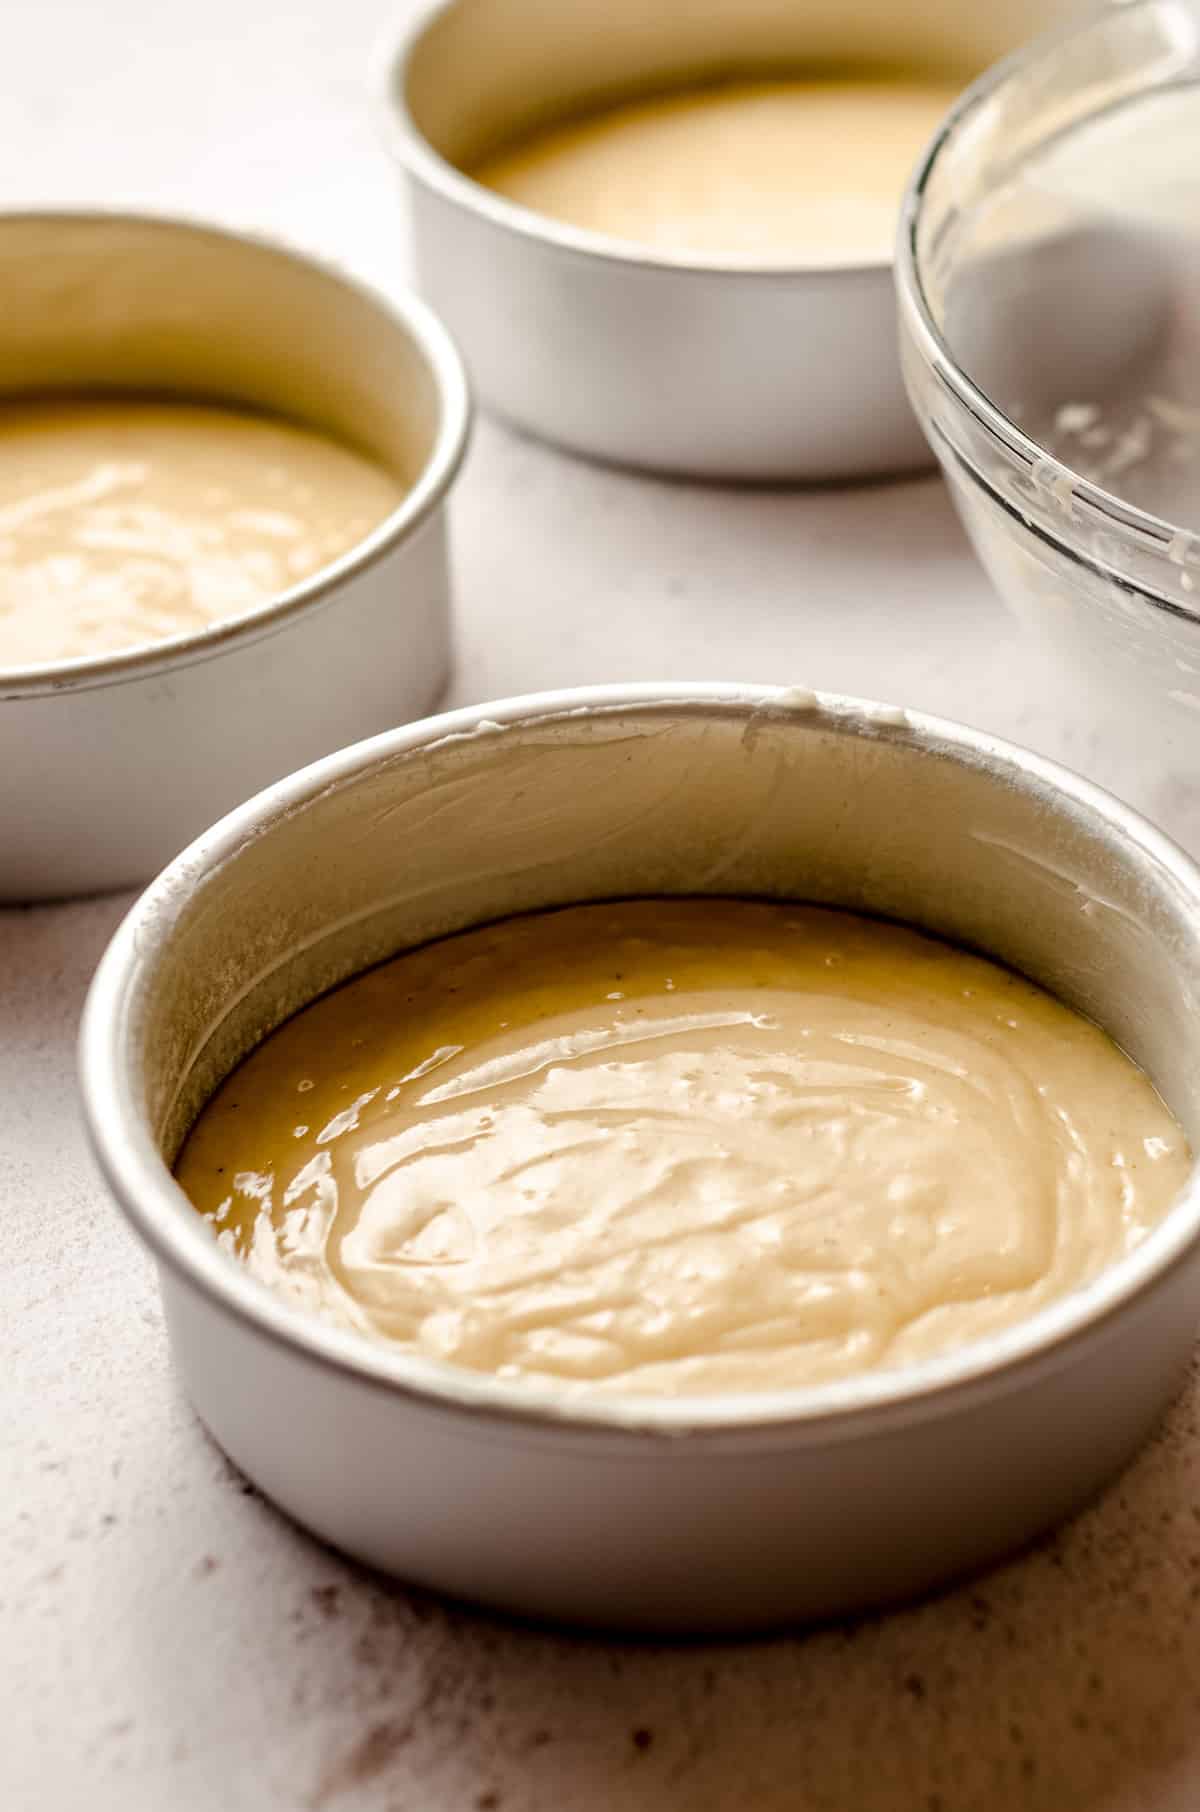
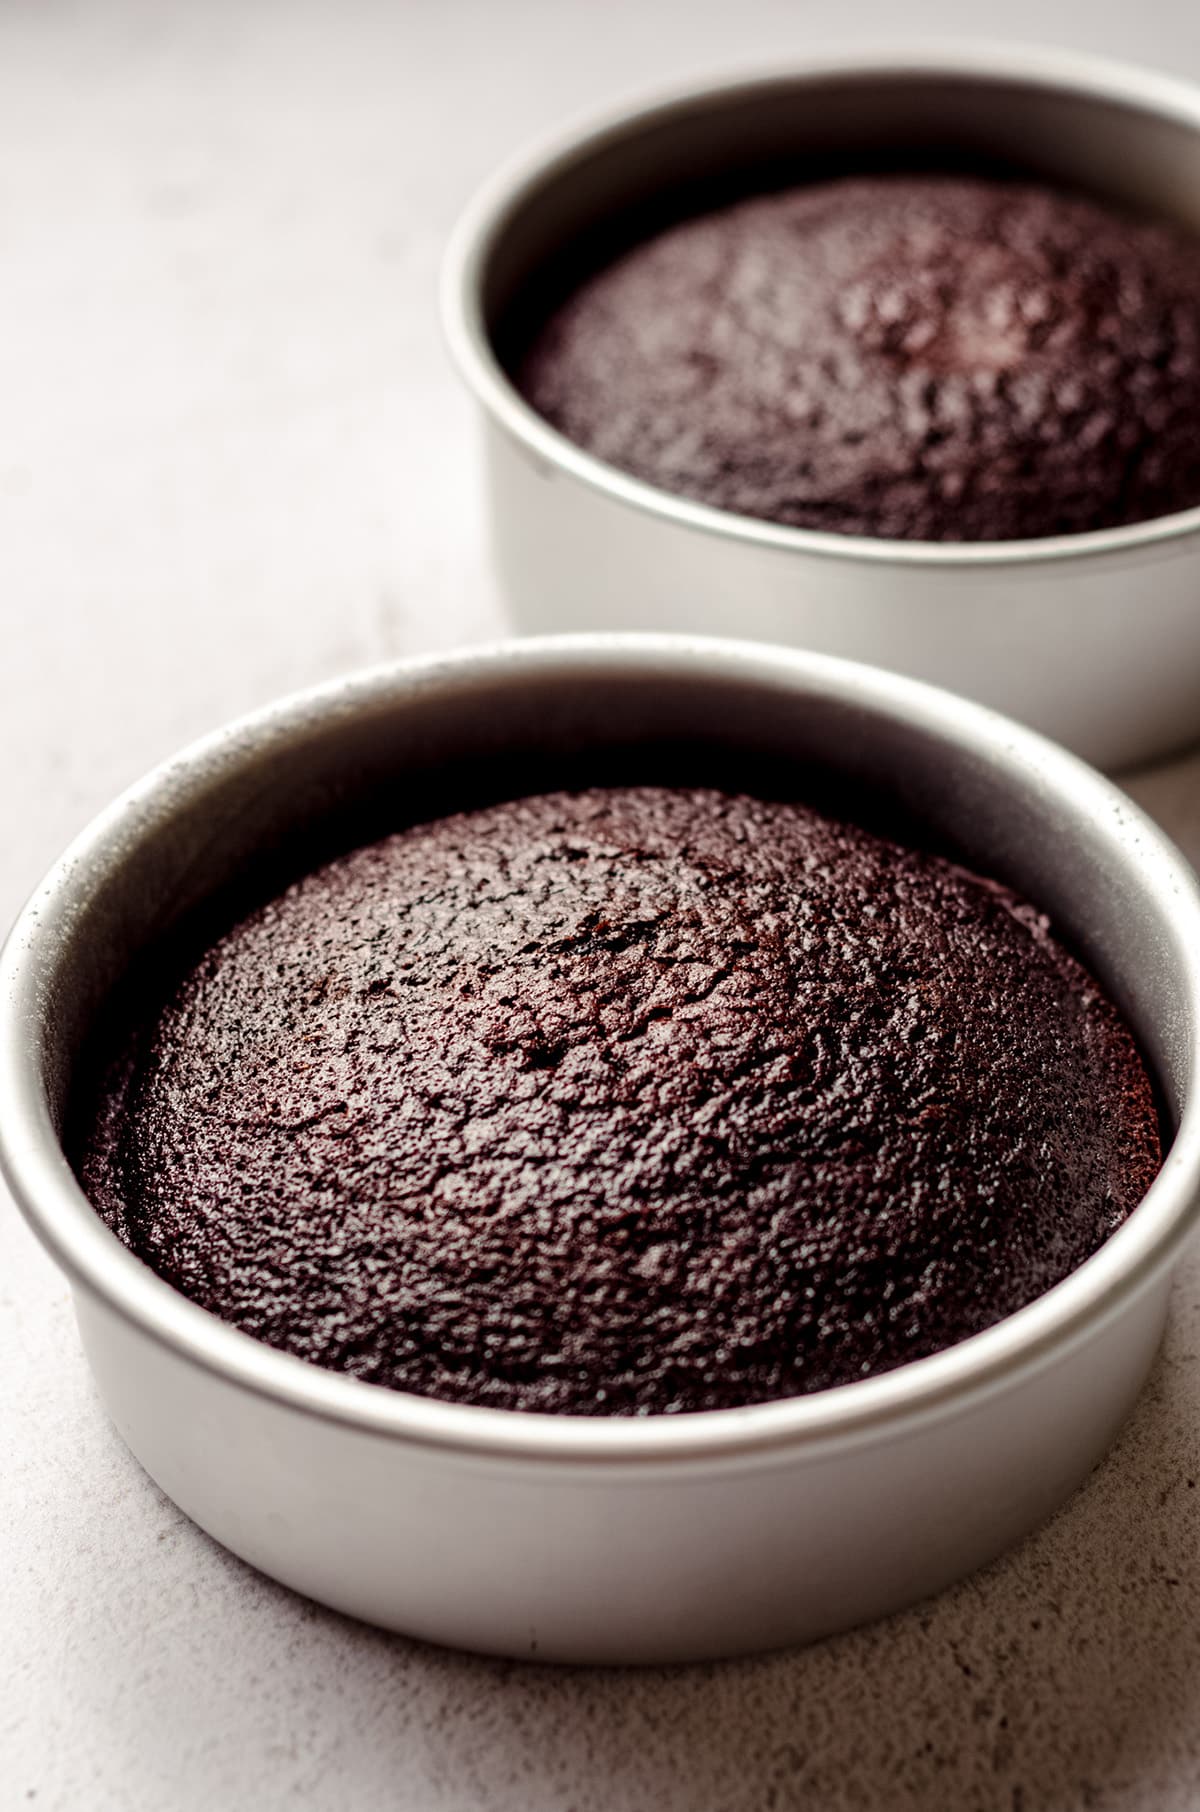
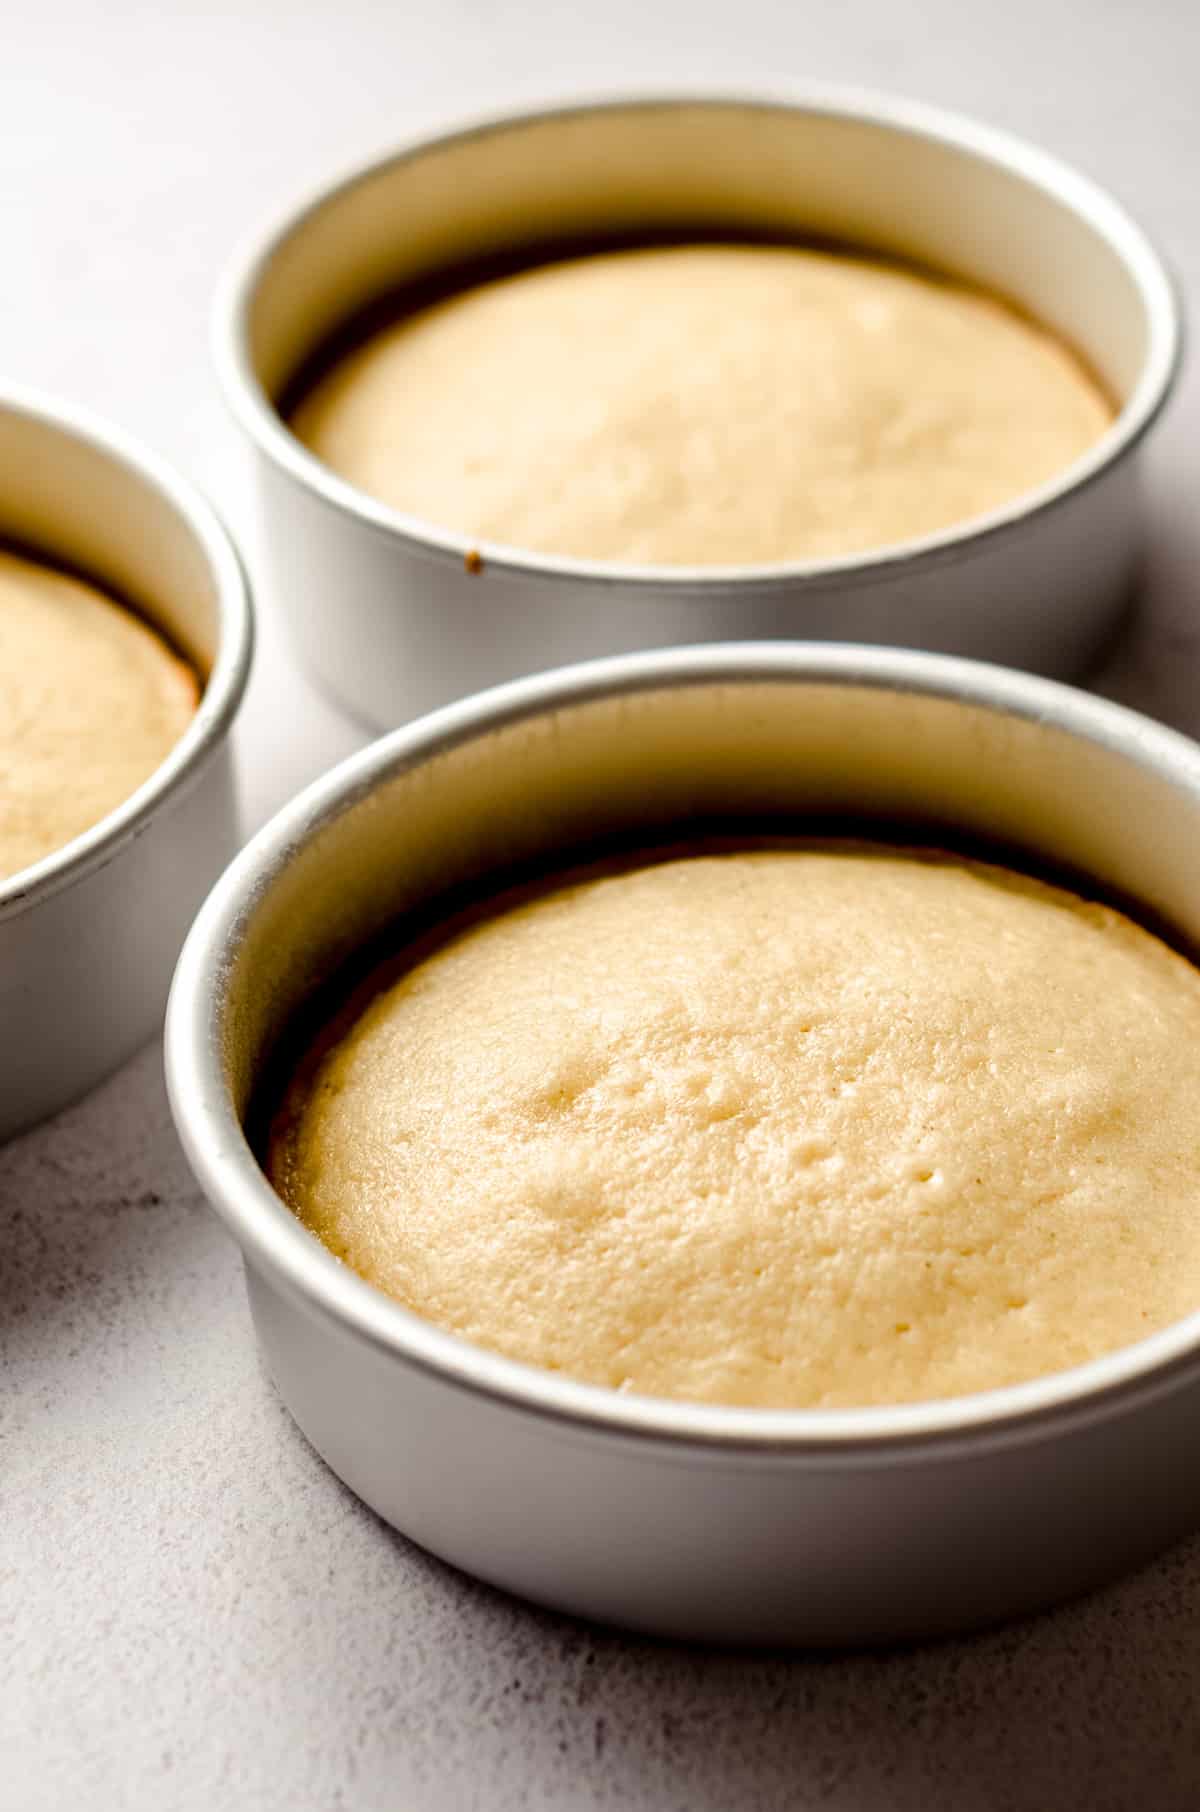
Here are two sets of pans filled with cake batter. On the left, my chocolate cake batter (recipe from my simple chocolate cupcakes). On the right, my vanilla bean cake batter (recipe below, from my vanilla bean cupcakes).
TURN ANY OF THESE CUPCAKE RECIPES INTO A 6 INCH CAKE
• Red velvet cupcakes
• Triple lemon cupcakes (be sure to check out how to fill a stacked cake in my recipe below if you want to fill the layers with lemon curd)
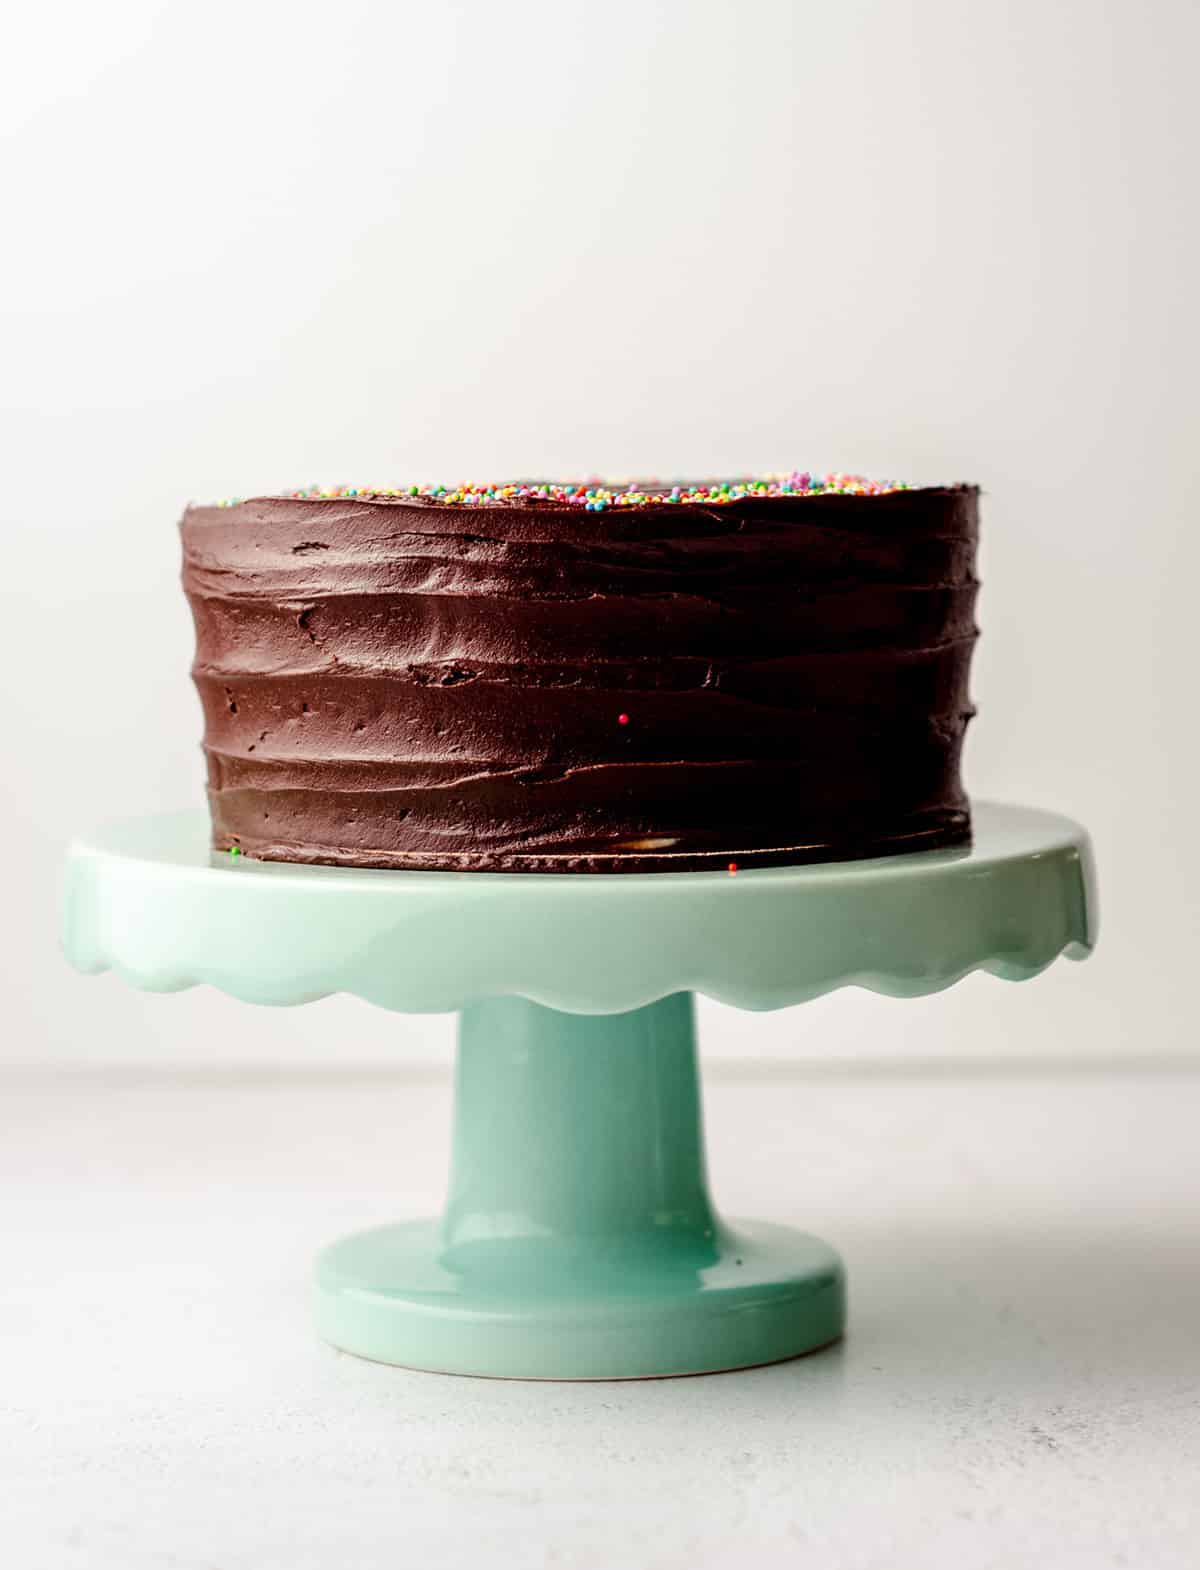
• Simple chocolate cupcakes (pictured here as a filled two layer 6 inch cake)
• Homemade funfetti cupcakes
• Carrot cake cupcakes
• Gingerbread cupcakes
• Guinness cupcakes
• Mint chocolate chip cupcakes
• Blueberry lemon cupcakes
• Mini cookies & cream cupcakes (this recipe makes 42 mini cupcakes, but 14 standard size cupcakes, which translates well to your 6 inch cake– you can even still line the cake pans with Oreos!)
Make a 6 inch Round Cake with Cake Batter
There are about 6 to 8 cups of cake batter in a standard 8 (or 9) inch cake recipe, which, if cut in half, translates well to that 3 to 4 cups of batter we talked about in cupcake batter that yields about 12 to 15 cupcakes.
This means that you can take any of your favorite 8 inch cake recipes and turn them into a 6 inch cake recipe by simply halving the cake batter recipe.
I do not recommend halving the frosting recipe, as you probably won’t have enough to completely cover your cake. If you want to reduce it at all, I would only reduce by ¼ of the recipe (so you’d be making ¾ of the suggested frosting recipe).
HALVE ANY OF THESE CAKE RECIPES TO TURN THEM INTO A 6 INCH CAKE
• Orange creamsicle layer cake
• Carrot walnut cake
• Mocha cake
• Champagne layer cake
• Black velvet layer cake
• Brown butter pumpkin layer cake
• S’mores layer cake
• Fresh strawberry cake
• White layer cake
• Dark chocolate layer cake
• Yellow layer cake
How long to bake a 6 Inch cake at 350
Bake times for 6 inch cake layers are typically about the same across the board.
Two layers will take about 20-22 minutes and three layers will take about 18-20 minutes, baked at 350ºF (177ºC). Of course, this can vary by a few minutes based on the specific batter you use, but in general, this is a good rule of thumb and a good place to start.
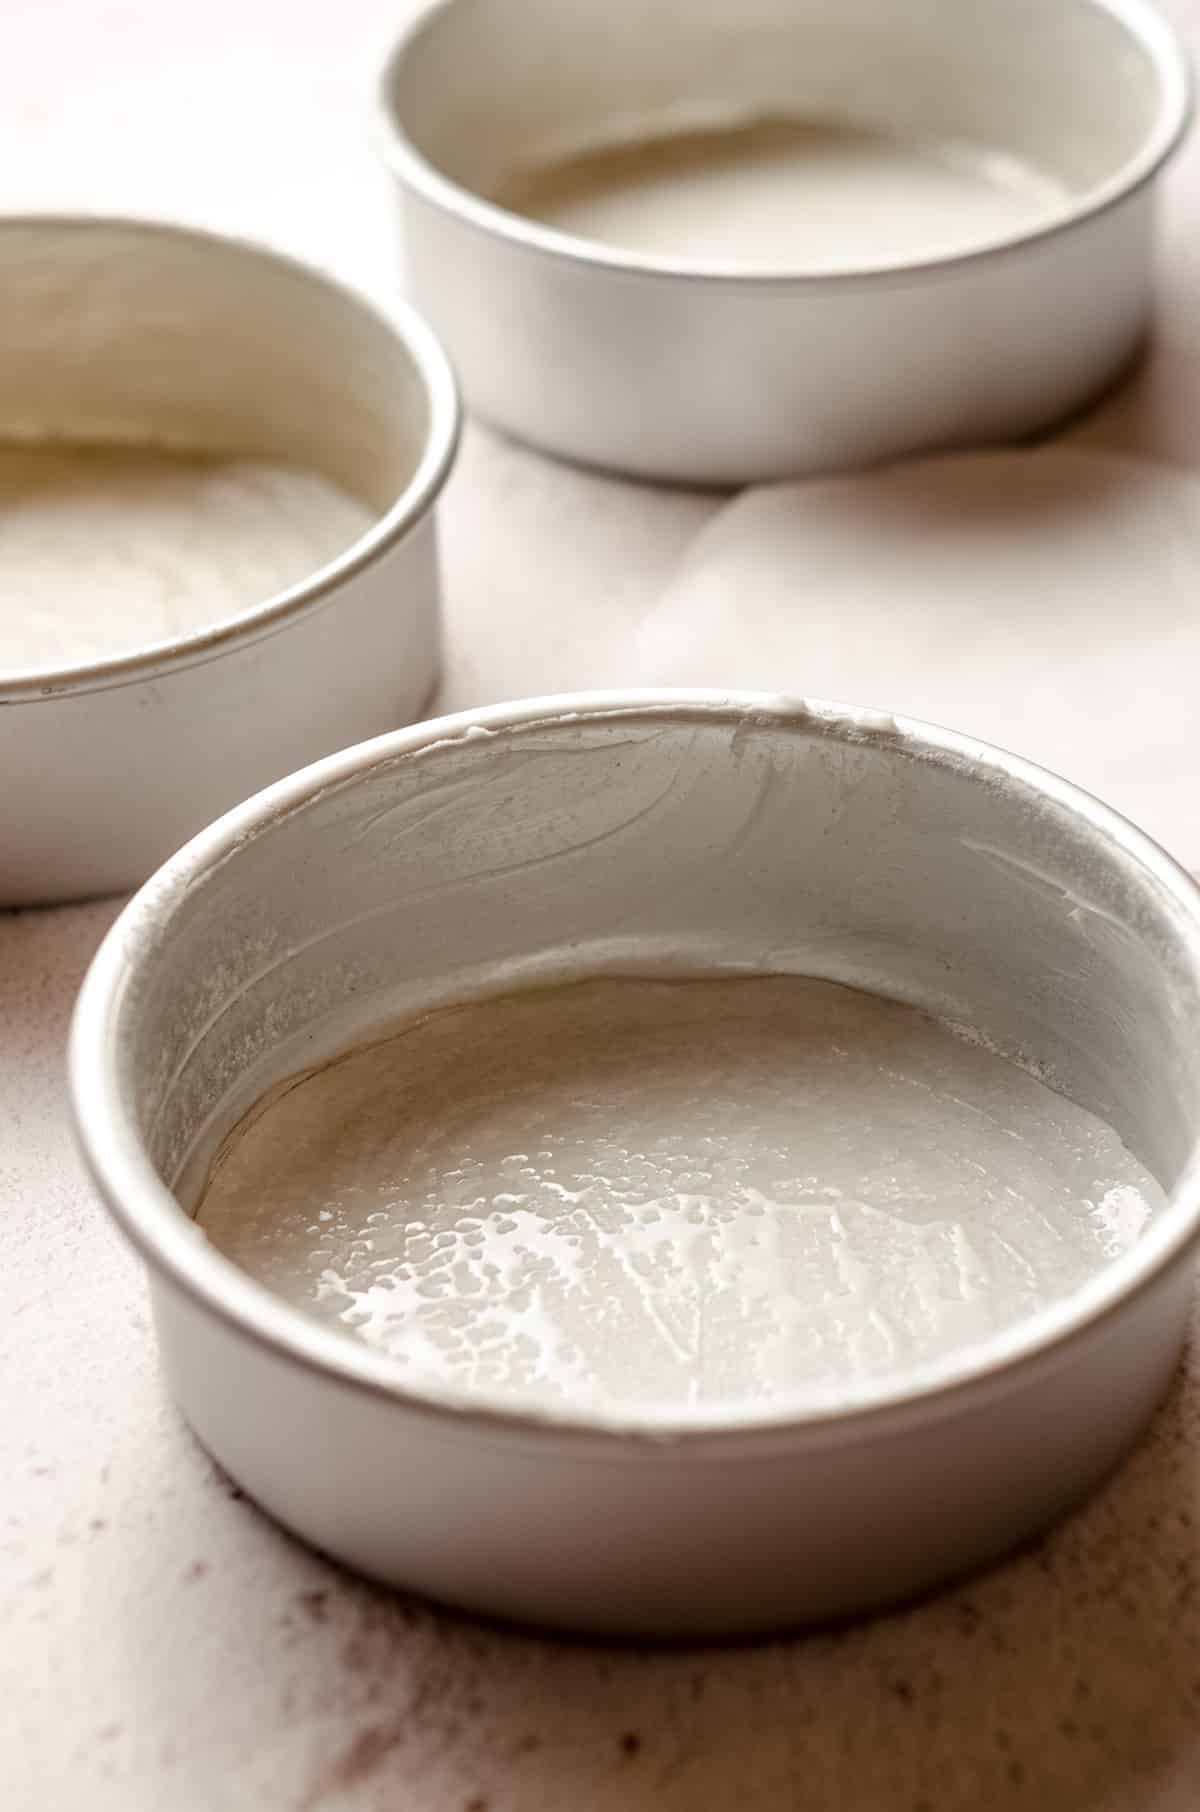
Preparing a 6 inch Cake Pan
I haven’t always been a parchment paper round user, but once I realized that smaller 6 inch cakes (and 4 inch cakes!) were much harder to get out of the pans, I started using parchment paper rounds on them. I will, on occasion, use them for my 8 inch cakes, but not always.
For 6 inch cakes, I highly recommend this method combined with my homemade cake release.
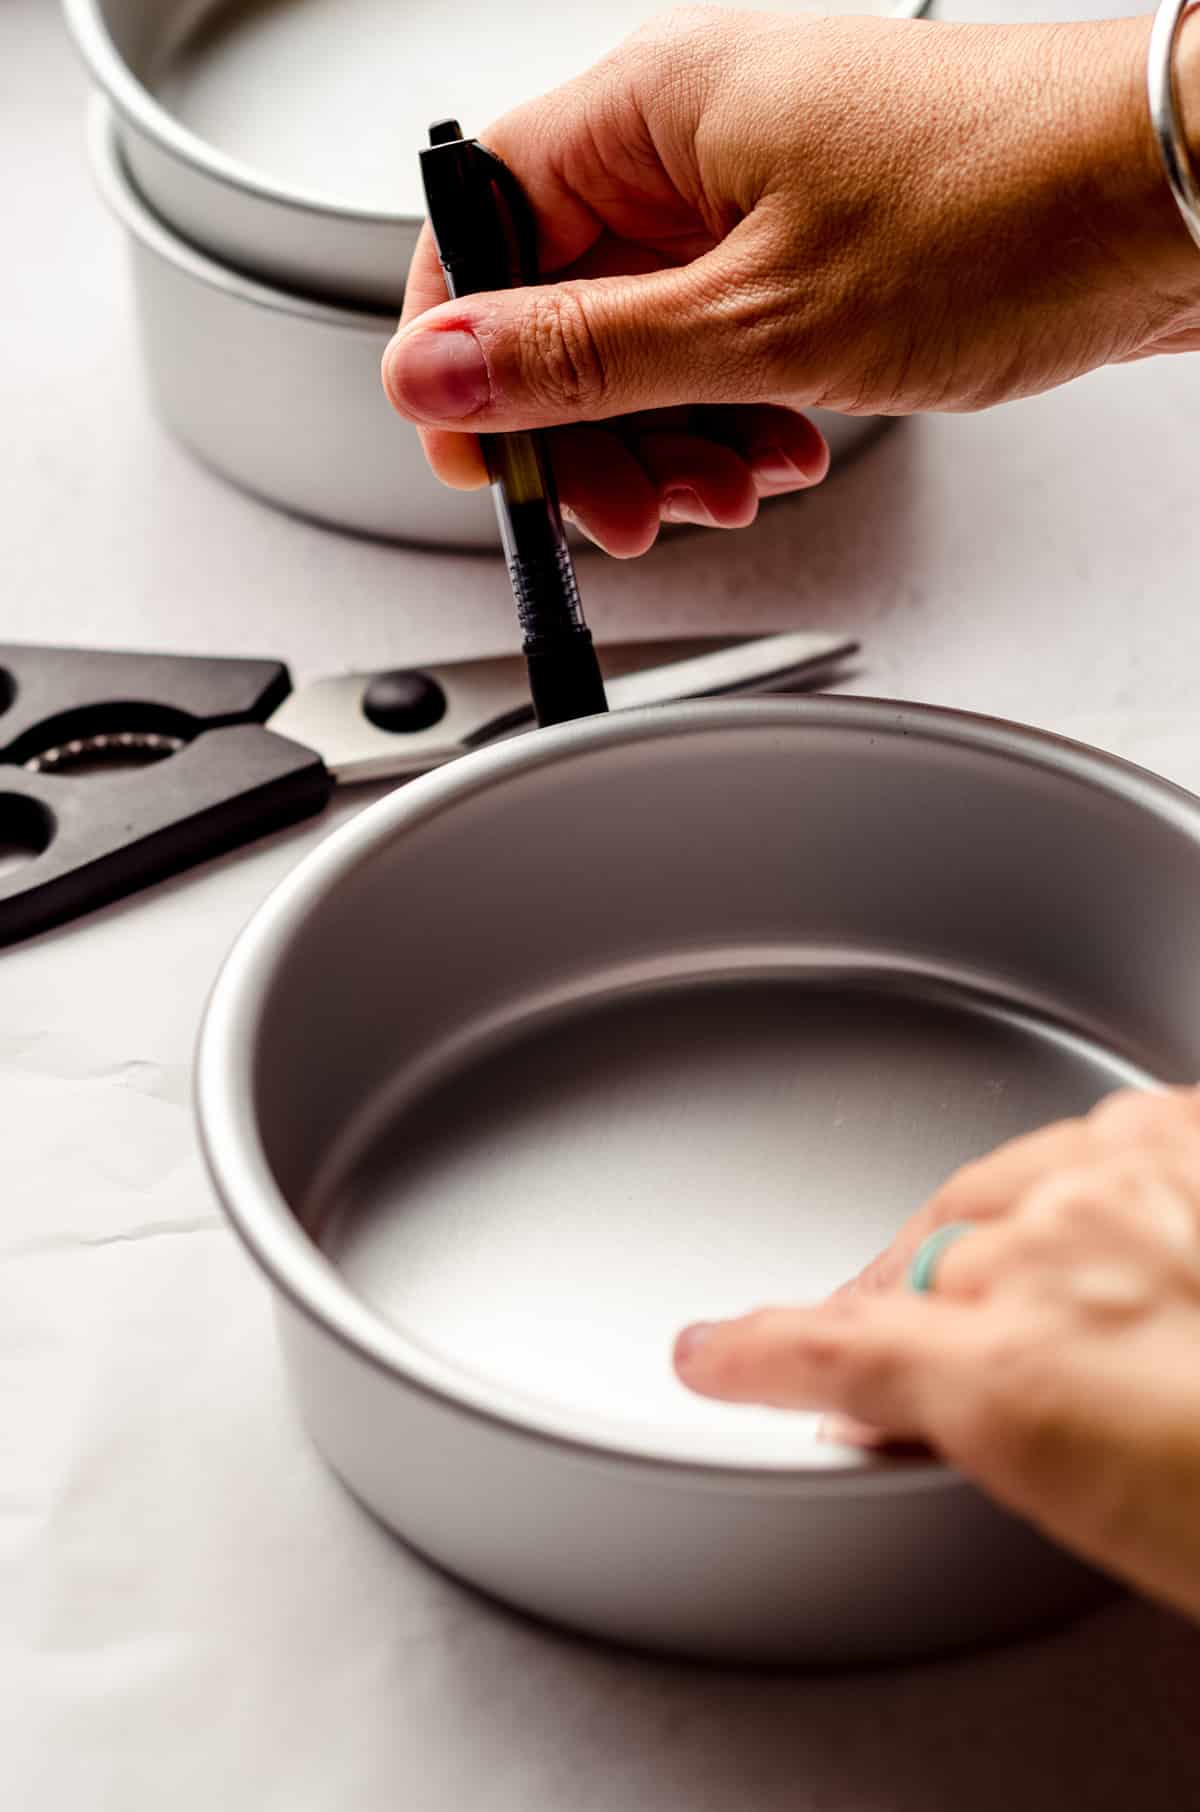
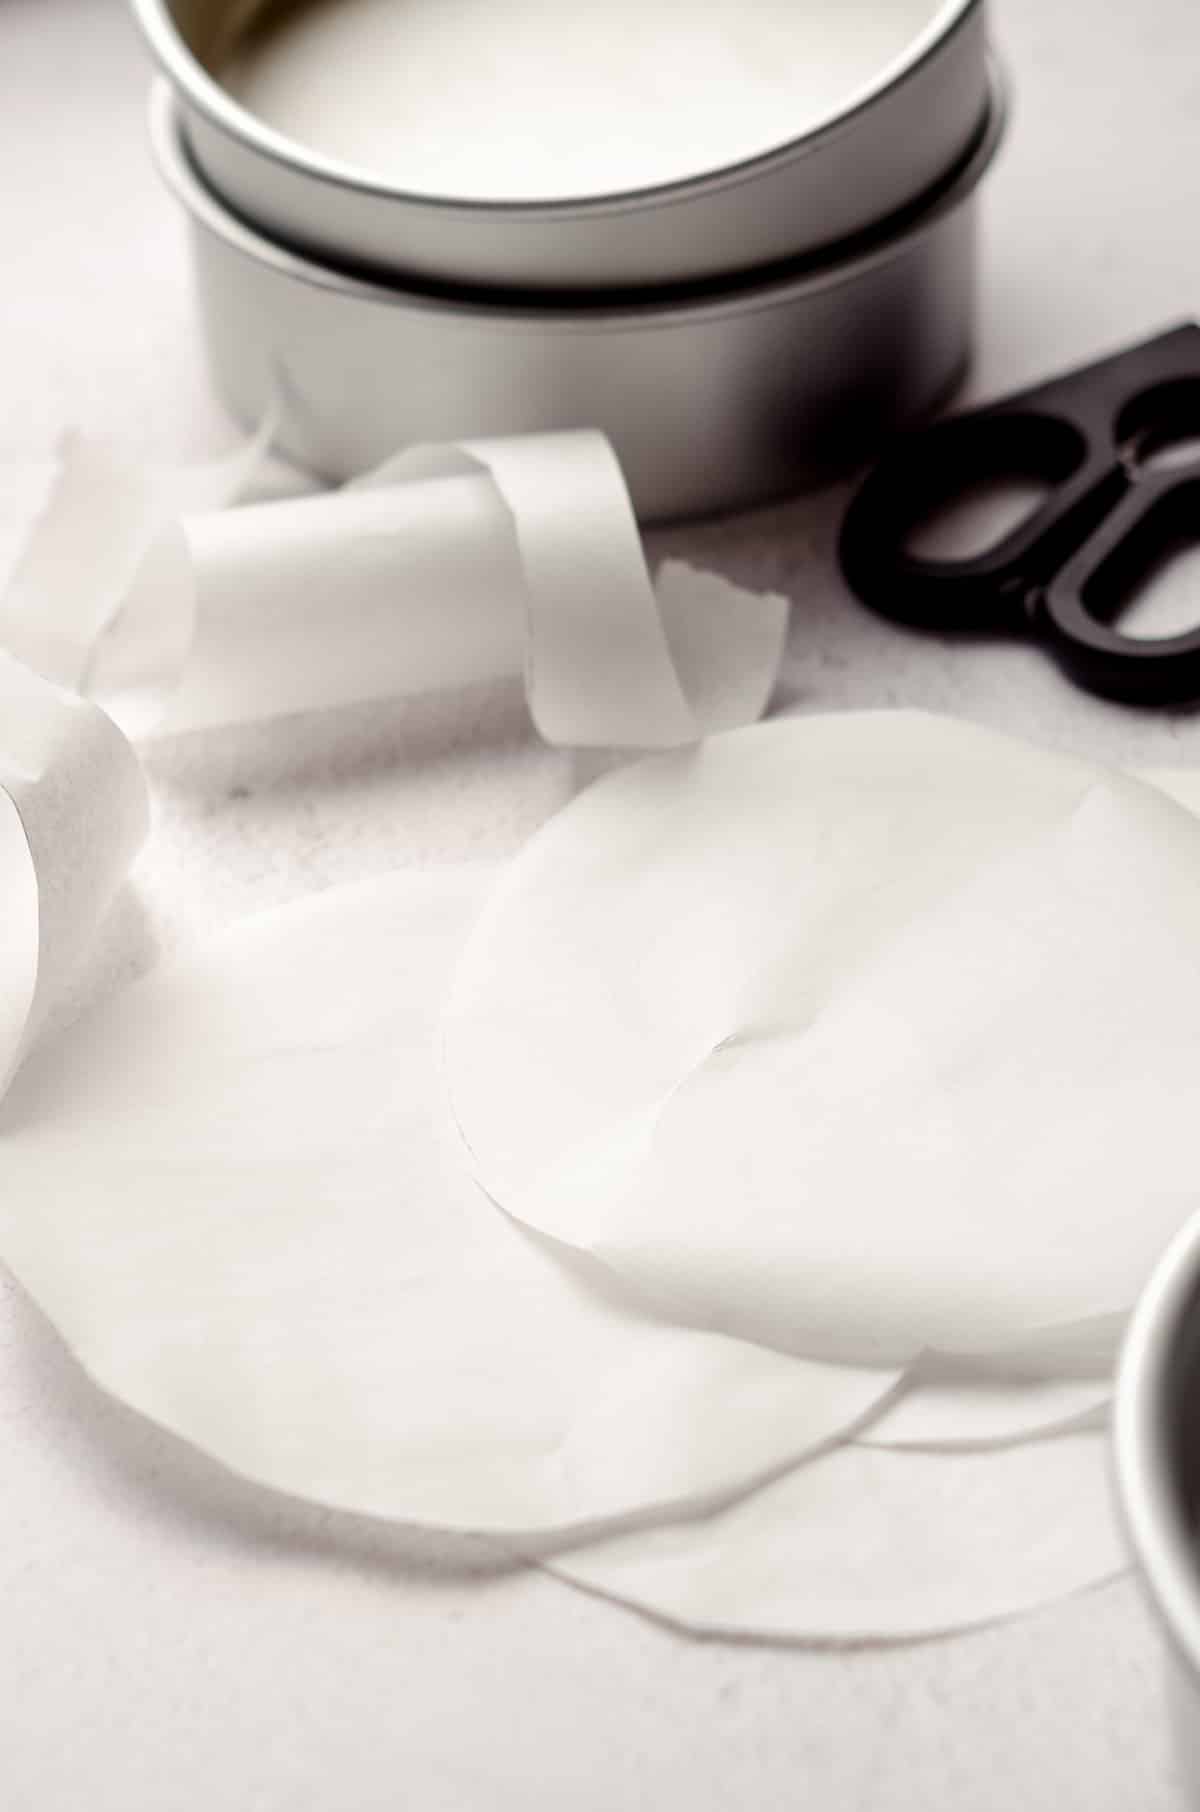
First, start by making parchment rounds, if you don’t already have them.
Trace your pan on a sheet of parchment paper, then cut out the circles, scraping them against the side of a table to flatten them out (parchment tends to curl, so scraping it on the side of a table like you would a crinkly dollar bill is incredibly helpful).
Next, lightly grease the bottom of your cake pan, then press a parchment round into the bottom of the pan.

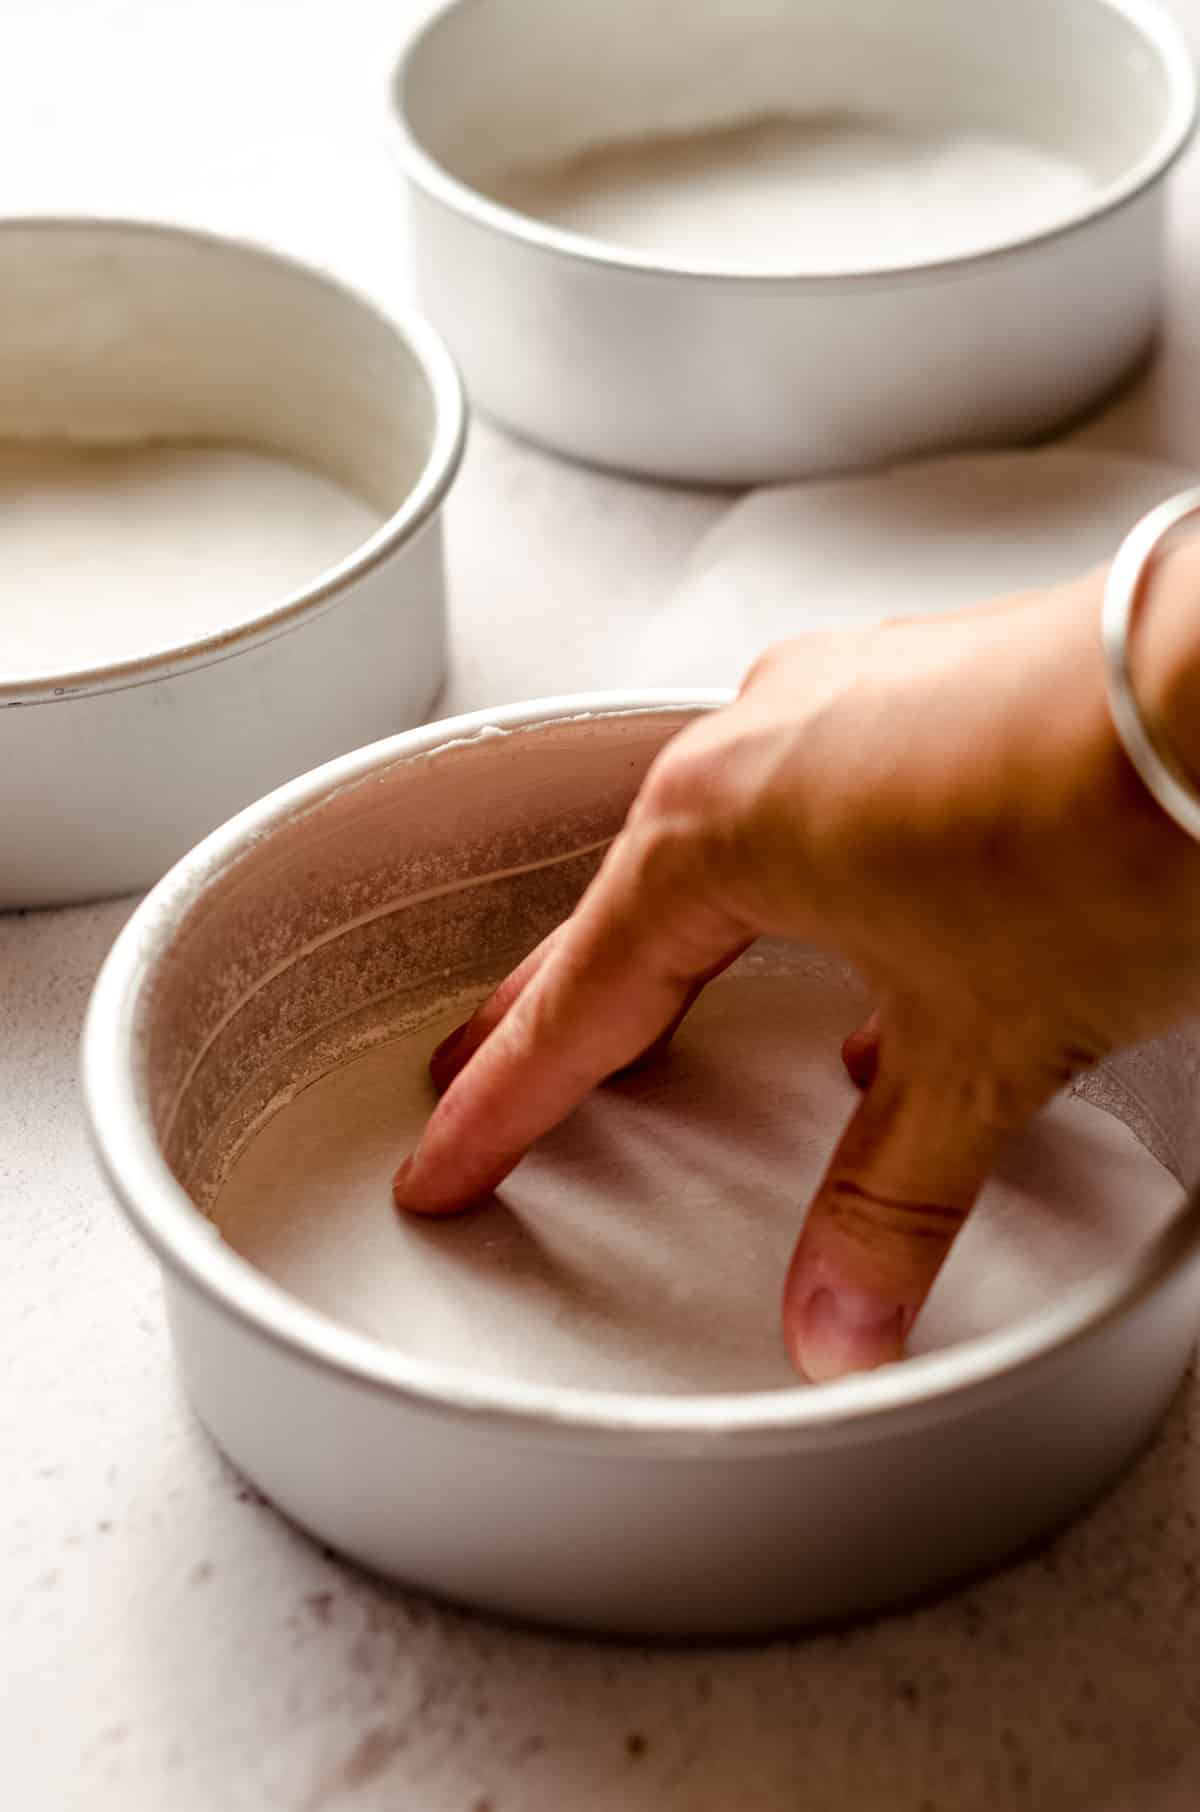
Grease and flour the rest of the pan, including the parchment paper, or use my homemade cake release. Now you’re ready for some batter and beautiful baked cake layer removal later on!
How to make this 6″ Cake Recipe
MAKE THE VANILLA BEAN CAKE BATTER
STEP #1: Pour the cream into a small saucepan. If using a vanilla bean: using a sharp knife, split the vanilla bean in half, scrape out the seeds, and put everything into the saucepan with your cream. If using vanilla paste, simply pour into the cream and stir to combine.
STEP #2: Heat the cream over low heat until it just starts to steam. Remove from heat and allow to steep for 30 minutes. After the 30 minutes, remove the pods with a fork or tongs. Cream is now ready to use. If you used vanilla paste, it is ready to use after the 30 minutes.
STEP #3: Whisk together the flour, baking powder, baking soda, and salt, then set this mixture aside.
STEP #4: Mix together the melted butter, sugar, egg, yogurt, infused cream, and vanilla extract on medium to high speed until completely smooth.
STEP #5: Reduce the mixer speed to low, then slowly add the dry ingredients to the wet ingredients until just combined. Then, fold gently by hand with a large spatula and press out any large lumps of flour that remain by scraping them against the side of the bowl. Small lumps are ok.
STEP #6: Divide the batter evenly between the two or three pans, then bake 18-20 minutes for three layers or 20-22 minutes for two layers until a toothpick inserted in the center comes out clean. Allow to cool completely in the pans before removing and assembling.
MAKE THE VANILLA BEAN FROSTING
STEP #7: In a large bowl with a handheld mixer, or a stand mixer fitted with the paddle attachment, beat the butter on medium speed until creamy, about 2 minutes.
STEP #8: With the mixer on low, add in the powdered sugar, vanilla, and milk or cream. Increase mixer speed to medium and beat until completely smooth, about 3 minutes. Add salt to taste.
Perfect amount of frosting for a 6 in Cake
You will need about 3 cups of frosting to frost a three layer 6 inch cake with basic borders (if you want to include those). As a rule of thumb, any frosting recipe that uses 1 cup of butter and about 4 to 5 cups of powdered sugar will provide enough frosting for your 6 inch cake + simple decorations.
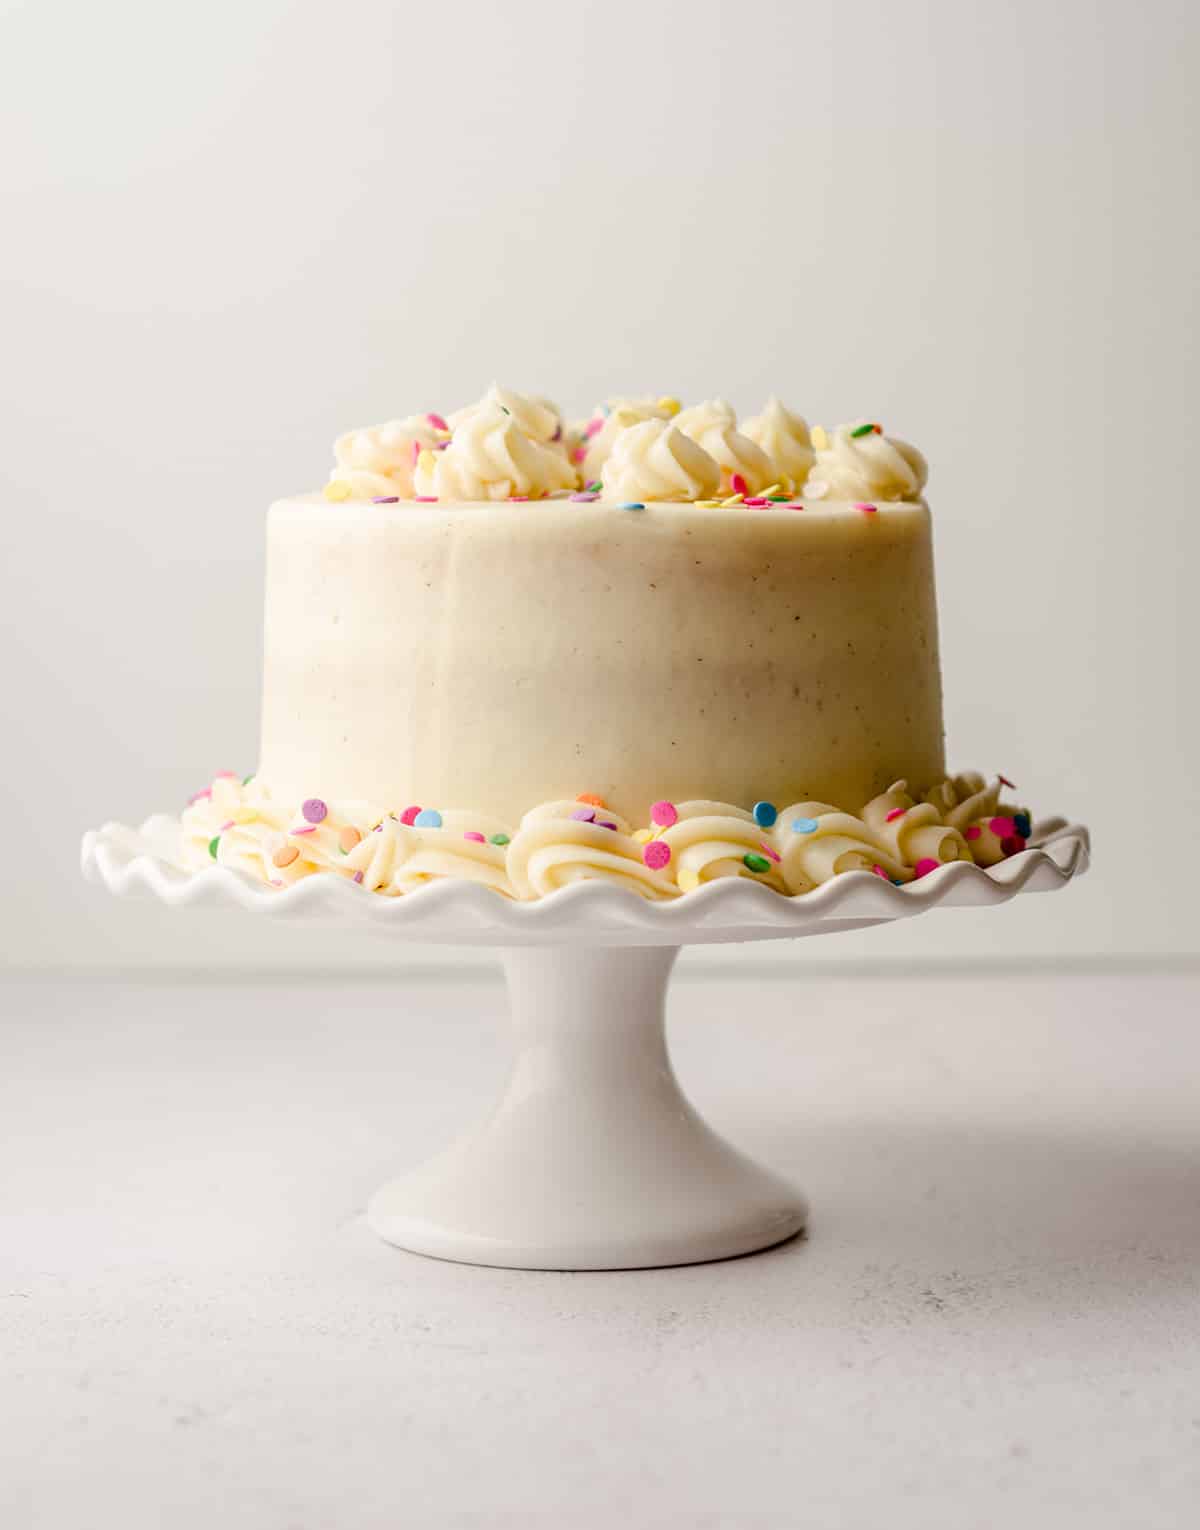
HOW TO ASSEMBLE AND DECORATE A 6 INCH CAKE
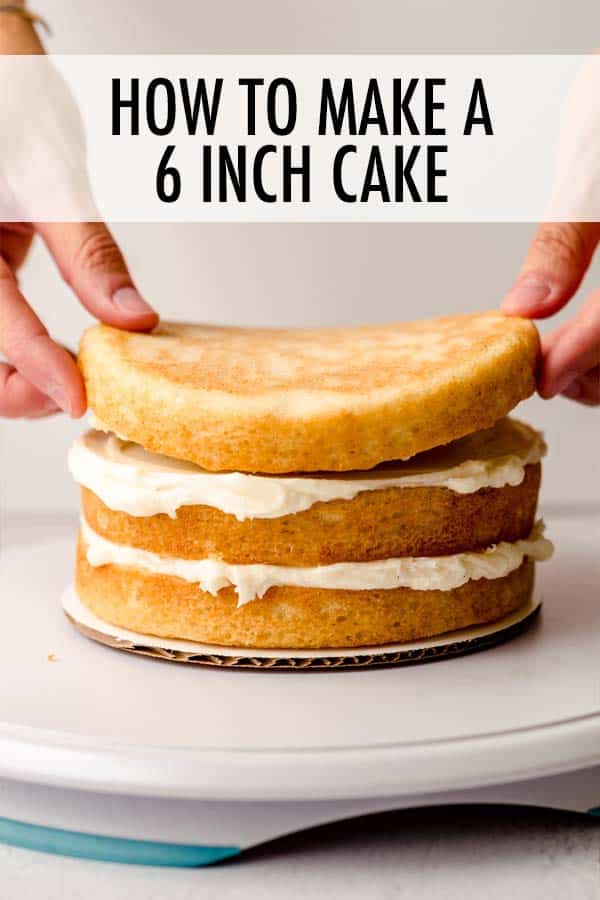
Now that you have your cake layers, you can choose to simply stack them, or you can choose to fill them. Let’s start with stacking your cake without a filling.
ASSEMBLE A NON-FILLED CAKE
This is as simple as being sure your cake layers are level, then stacking them by frosting surfaces between cake layers.
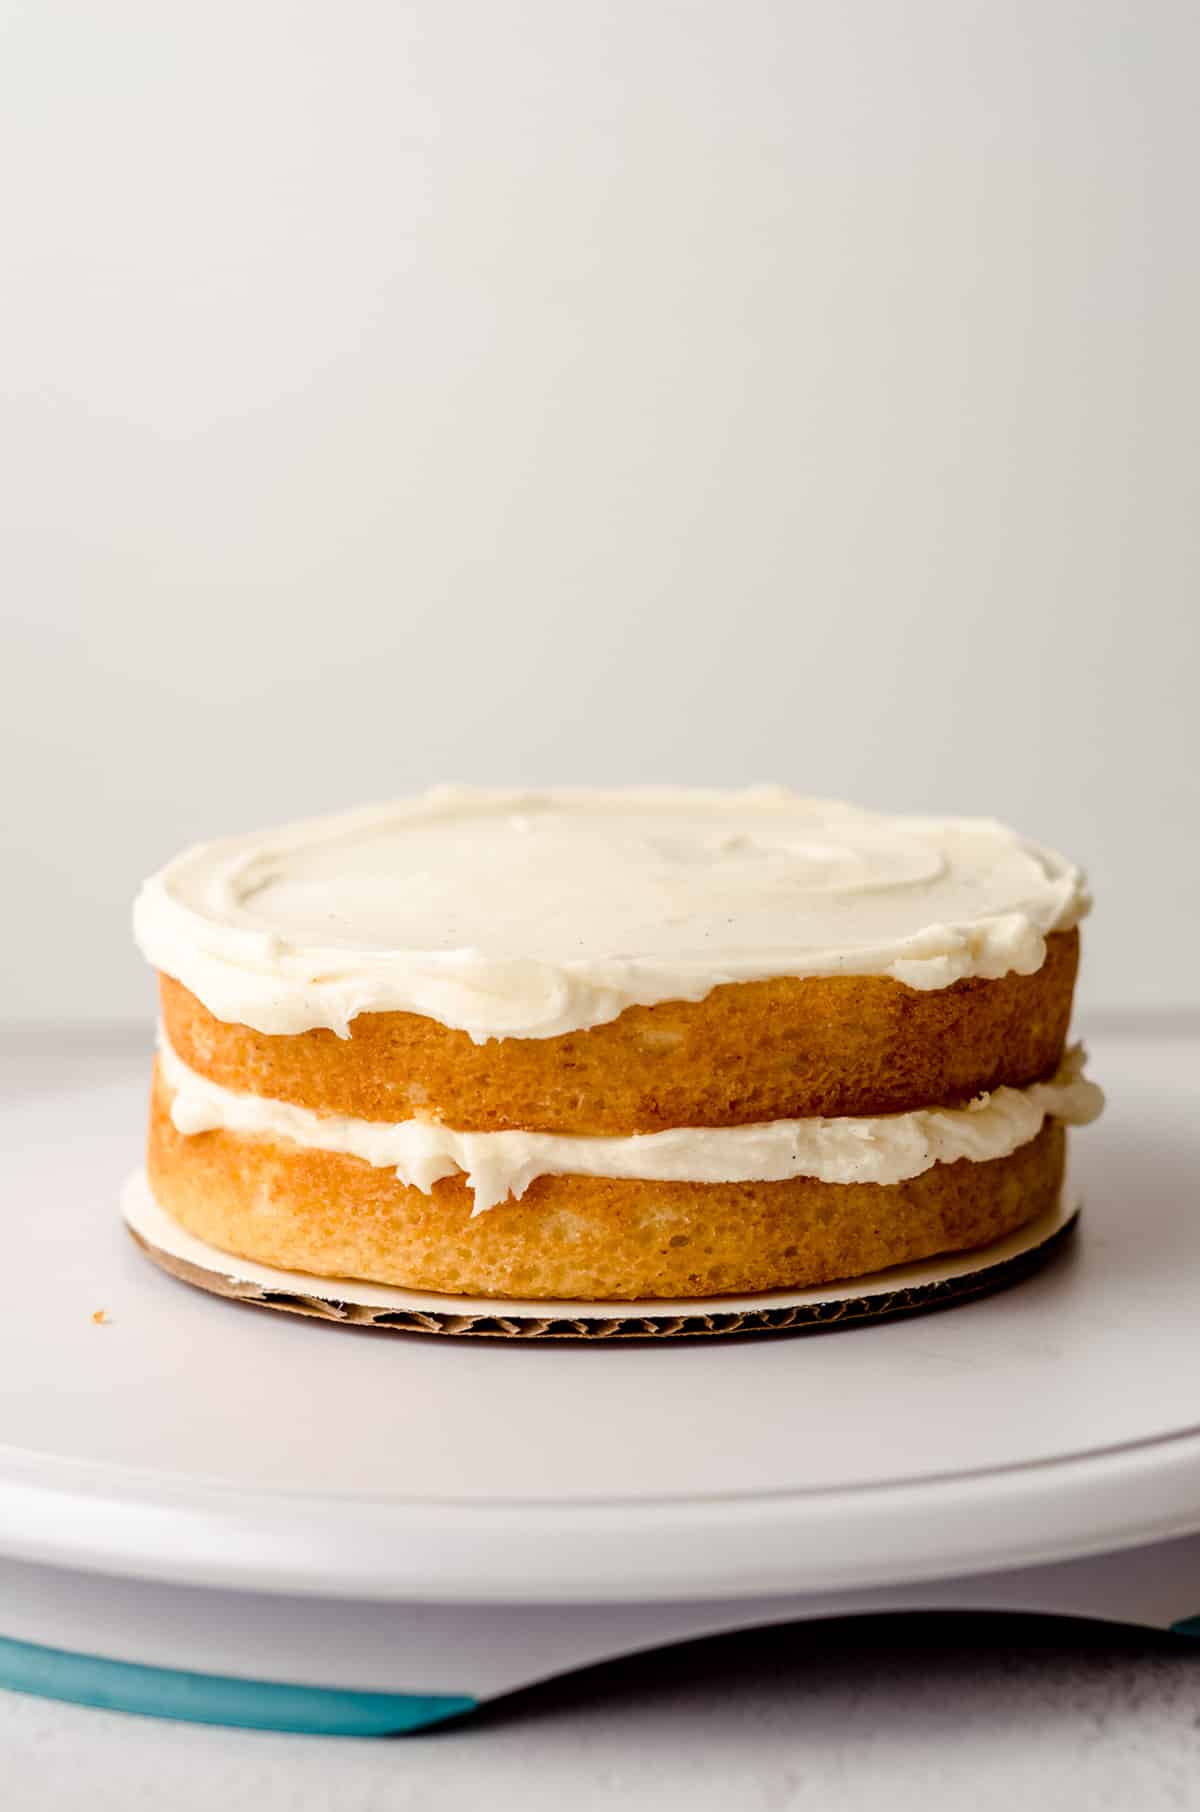
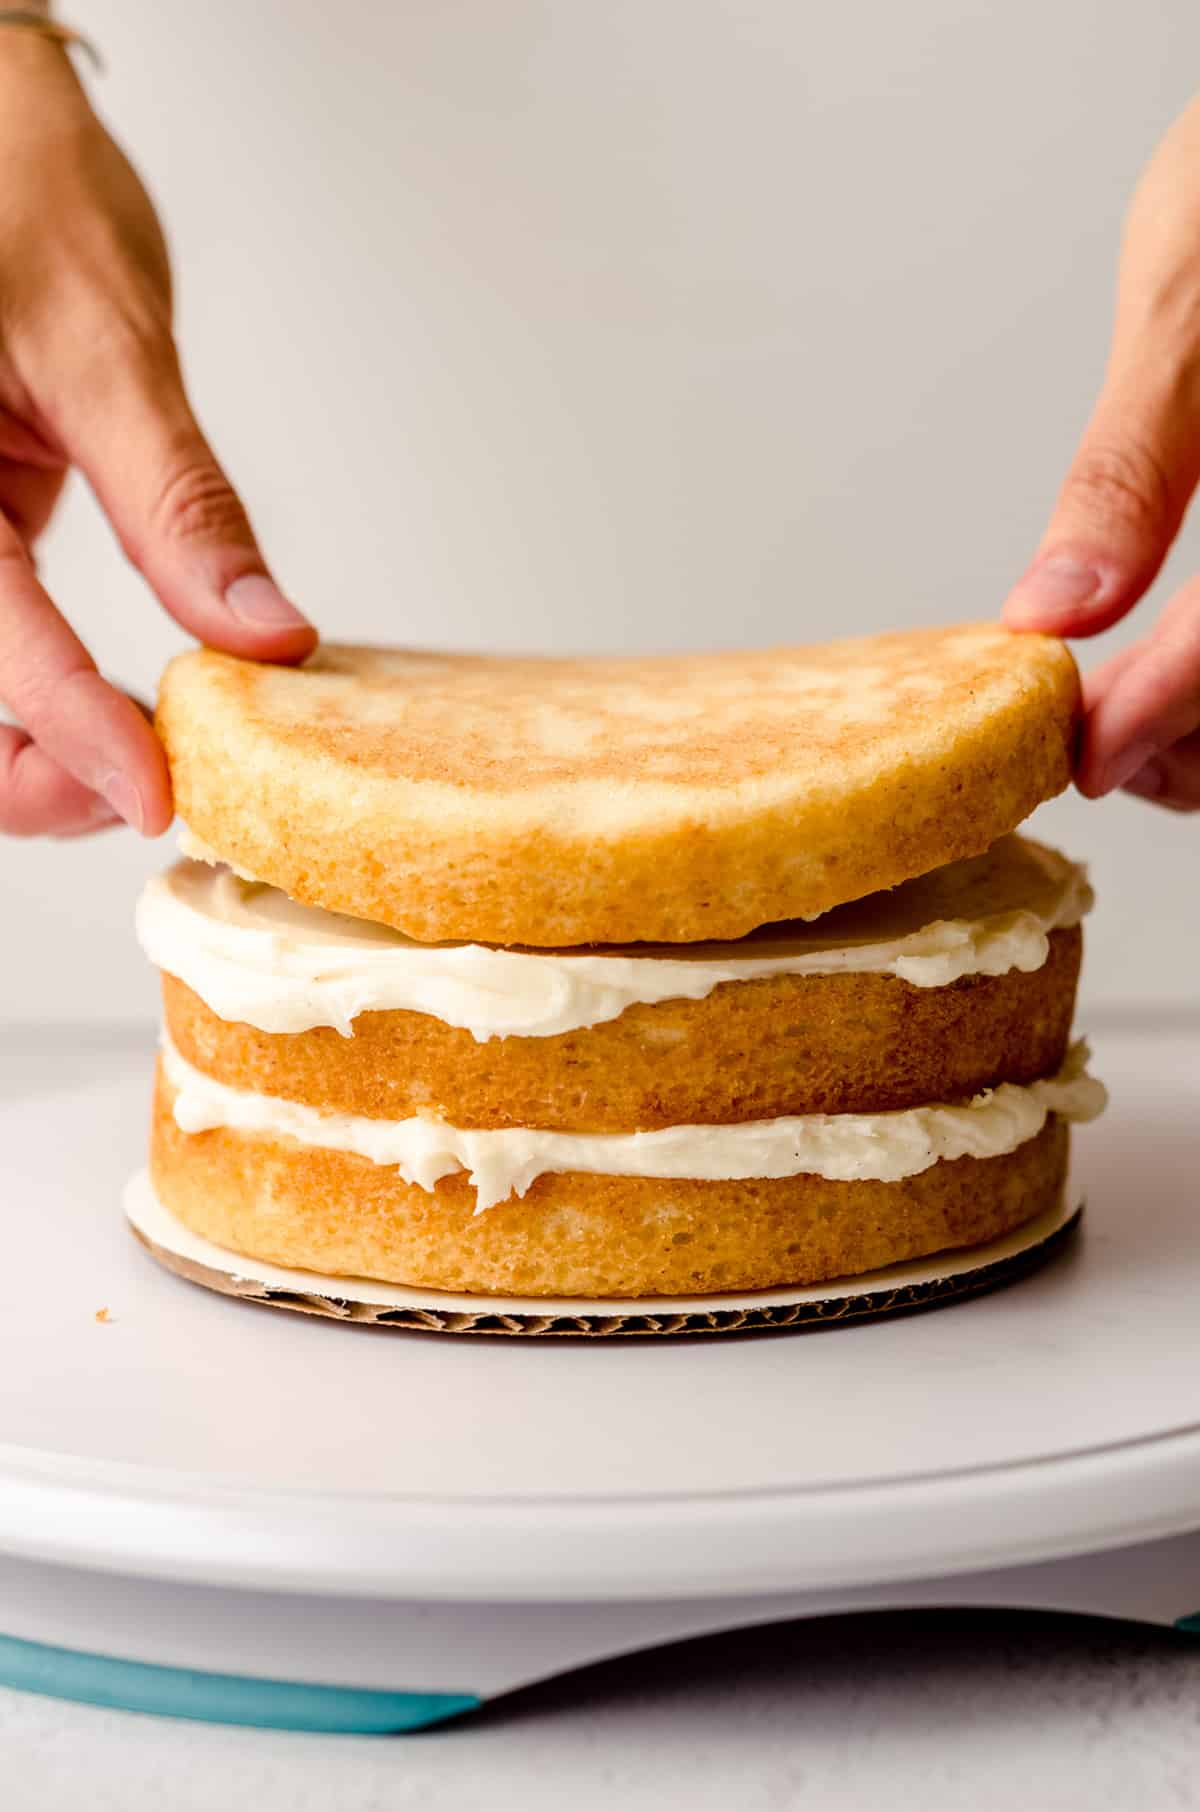
Keep the frosting even across the layers to keep your cake level.
ASSEMBLE A CAKE WITH A FILLING
When adding filling between cake layers, you want to create a well of frosting.
A “filling” is really anything that isn’t the same frosting that’s going on the outside of the cake. You can see here with my black velvet layer cake exactly what a well is and looks like.
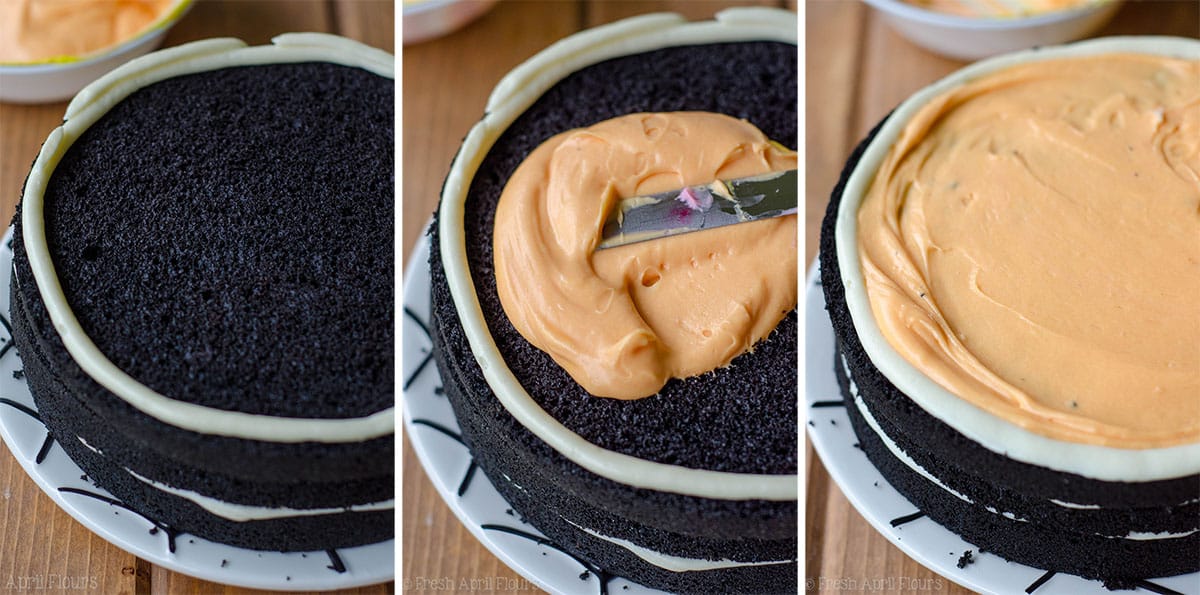
Creating a well seals in the filling and also prevents any of the filling from mixing with the outside frosting.
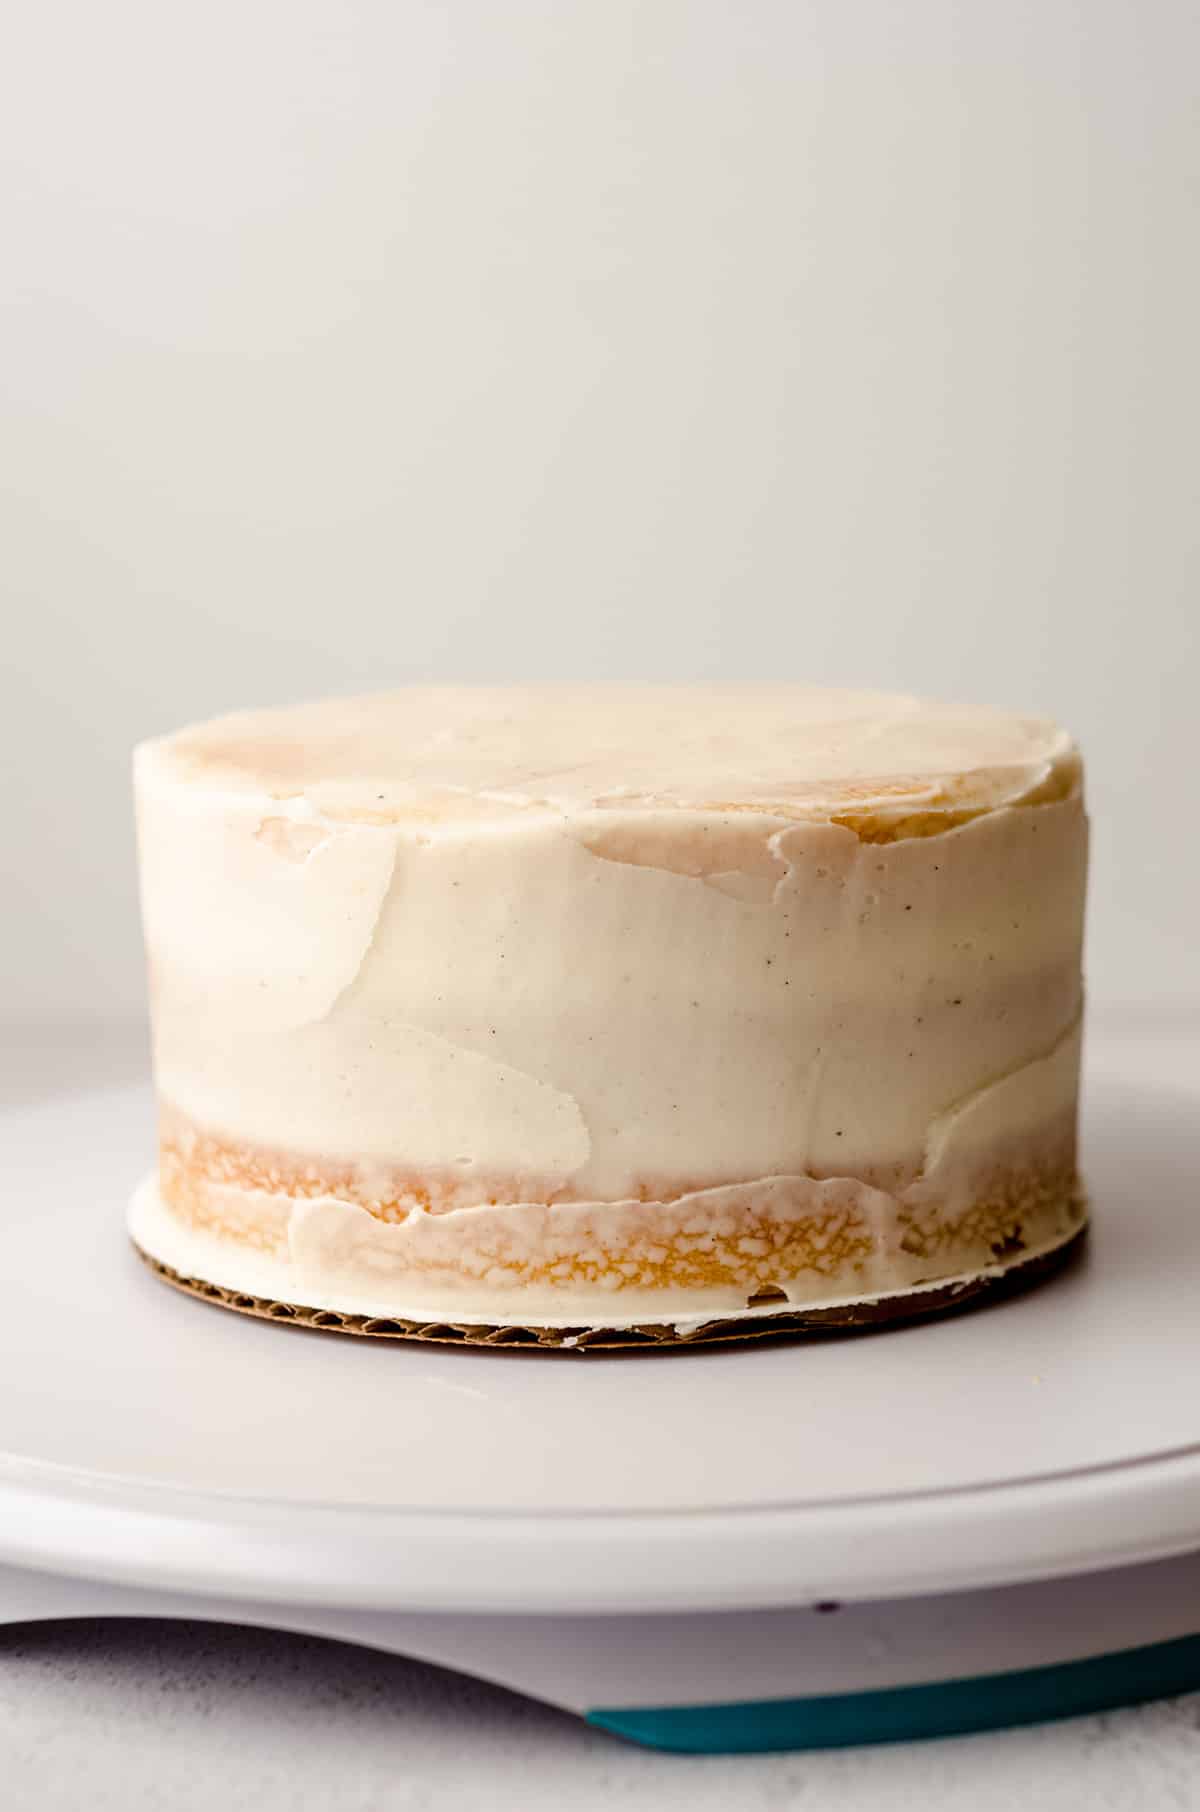
ADD AN OPTIONAL CRUMB COAT
What is a crumb coat, you ask? This is a thin layer of frosting used to seal cake layers together and lock in crumbs. If you’re interested in really learning all about this crumb coat…
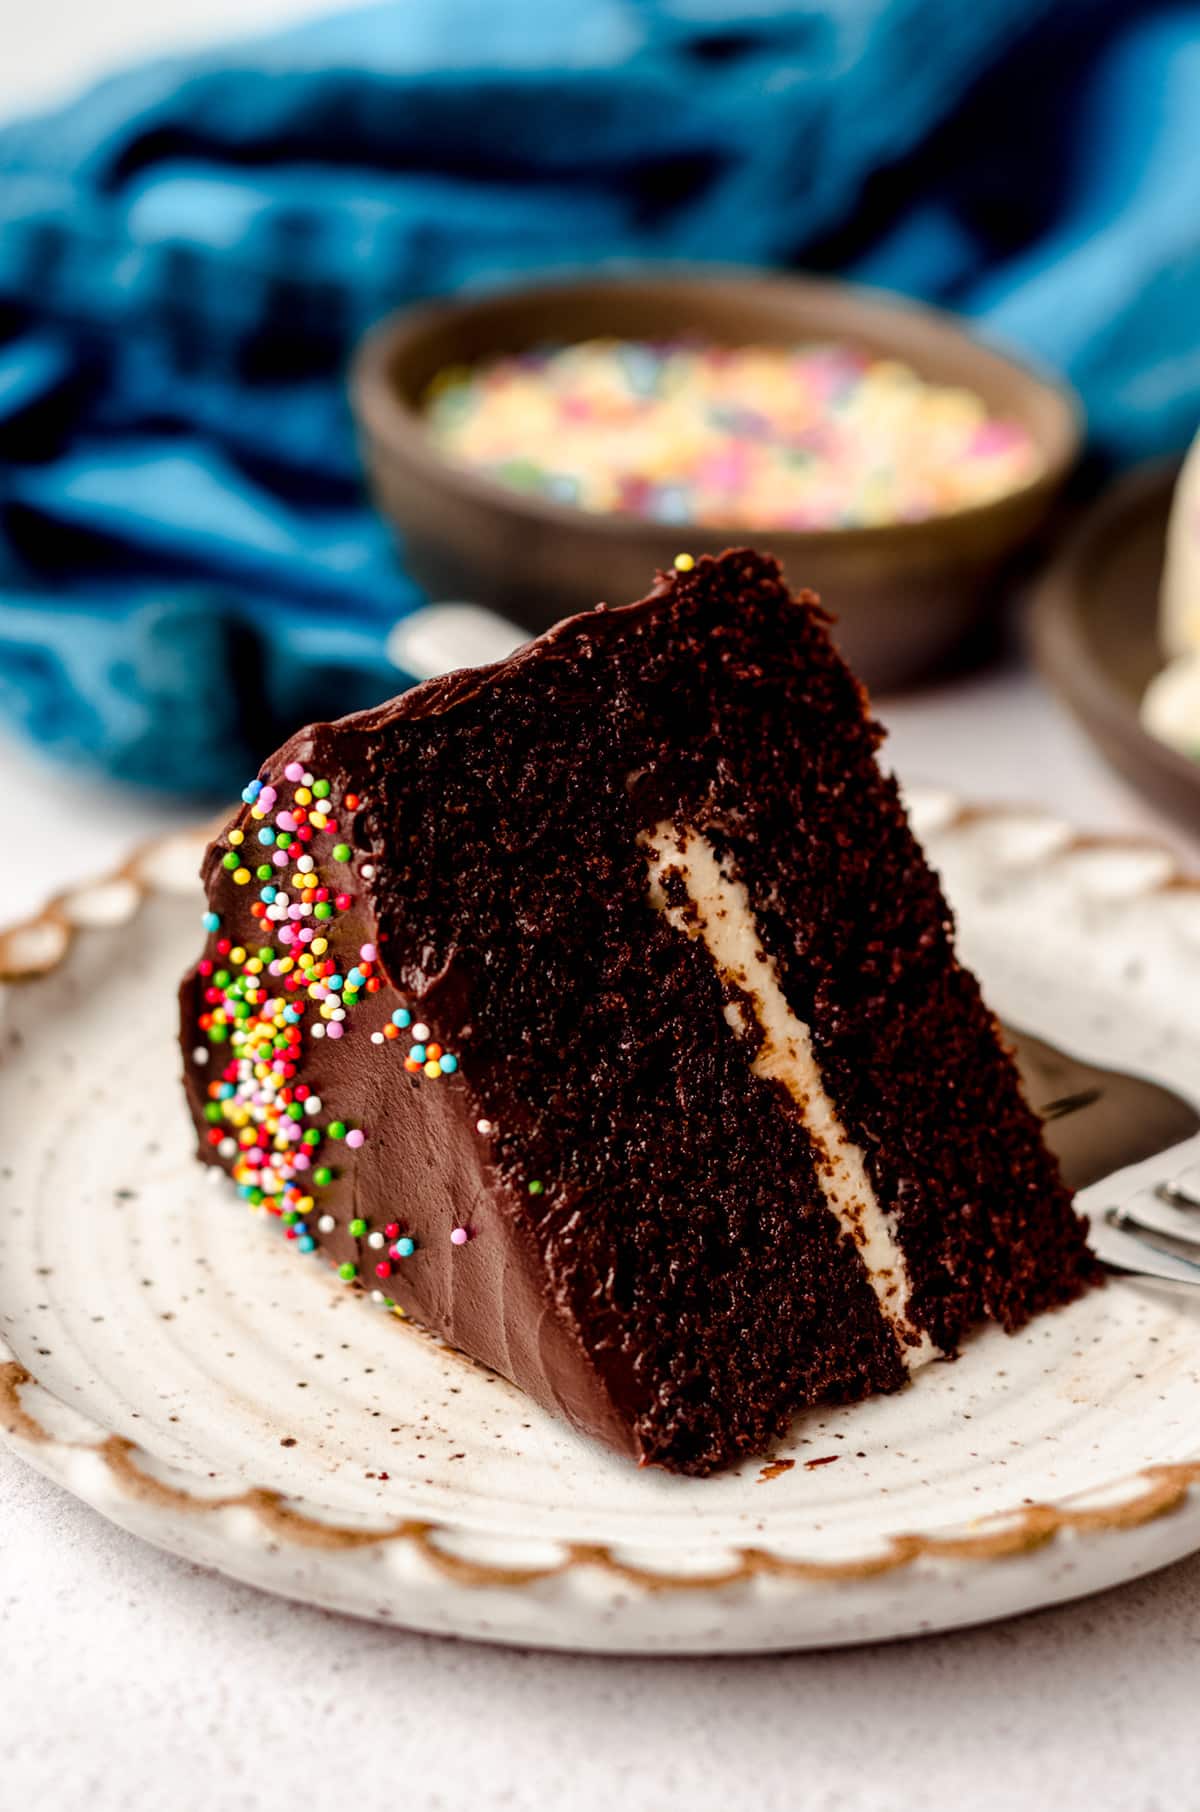
How many people does a 6 inch cake feed?
As I mentioned, a 6 inch cake is a great option for a small gathering, and you can get 8 decent slices out of this size of a cake. This can, of course, depend on how big or small your slices are, but this is a general guideline and serves a Goldilocks size slice of cake, even for kids.
I hope that this post (and perhaps my course) have left you well-prepared to make your next small birthday cake, smash cake for your kid or another kiddo you love, or simply understand how to easily adapt your favorite cake recipe into a simple recipe for 6 inch cake for whatever reason you have to eat cake (you don’t actually need one at all, really).
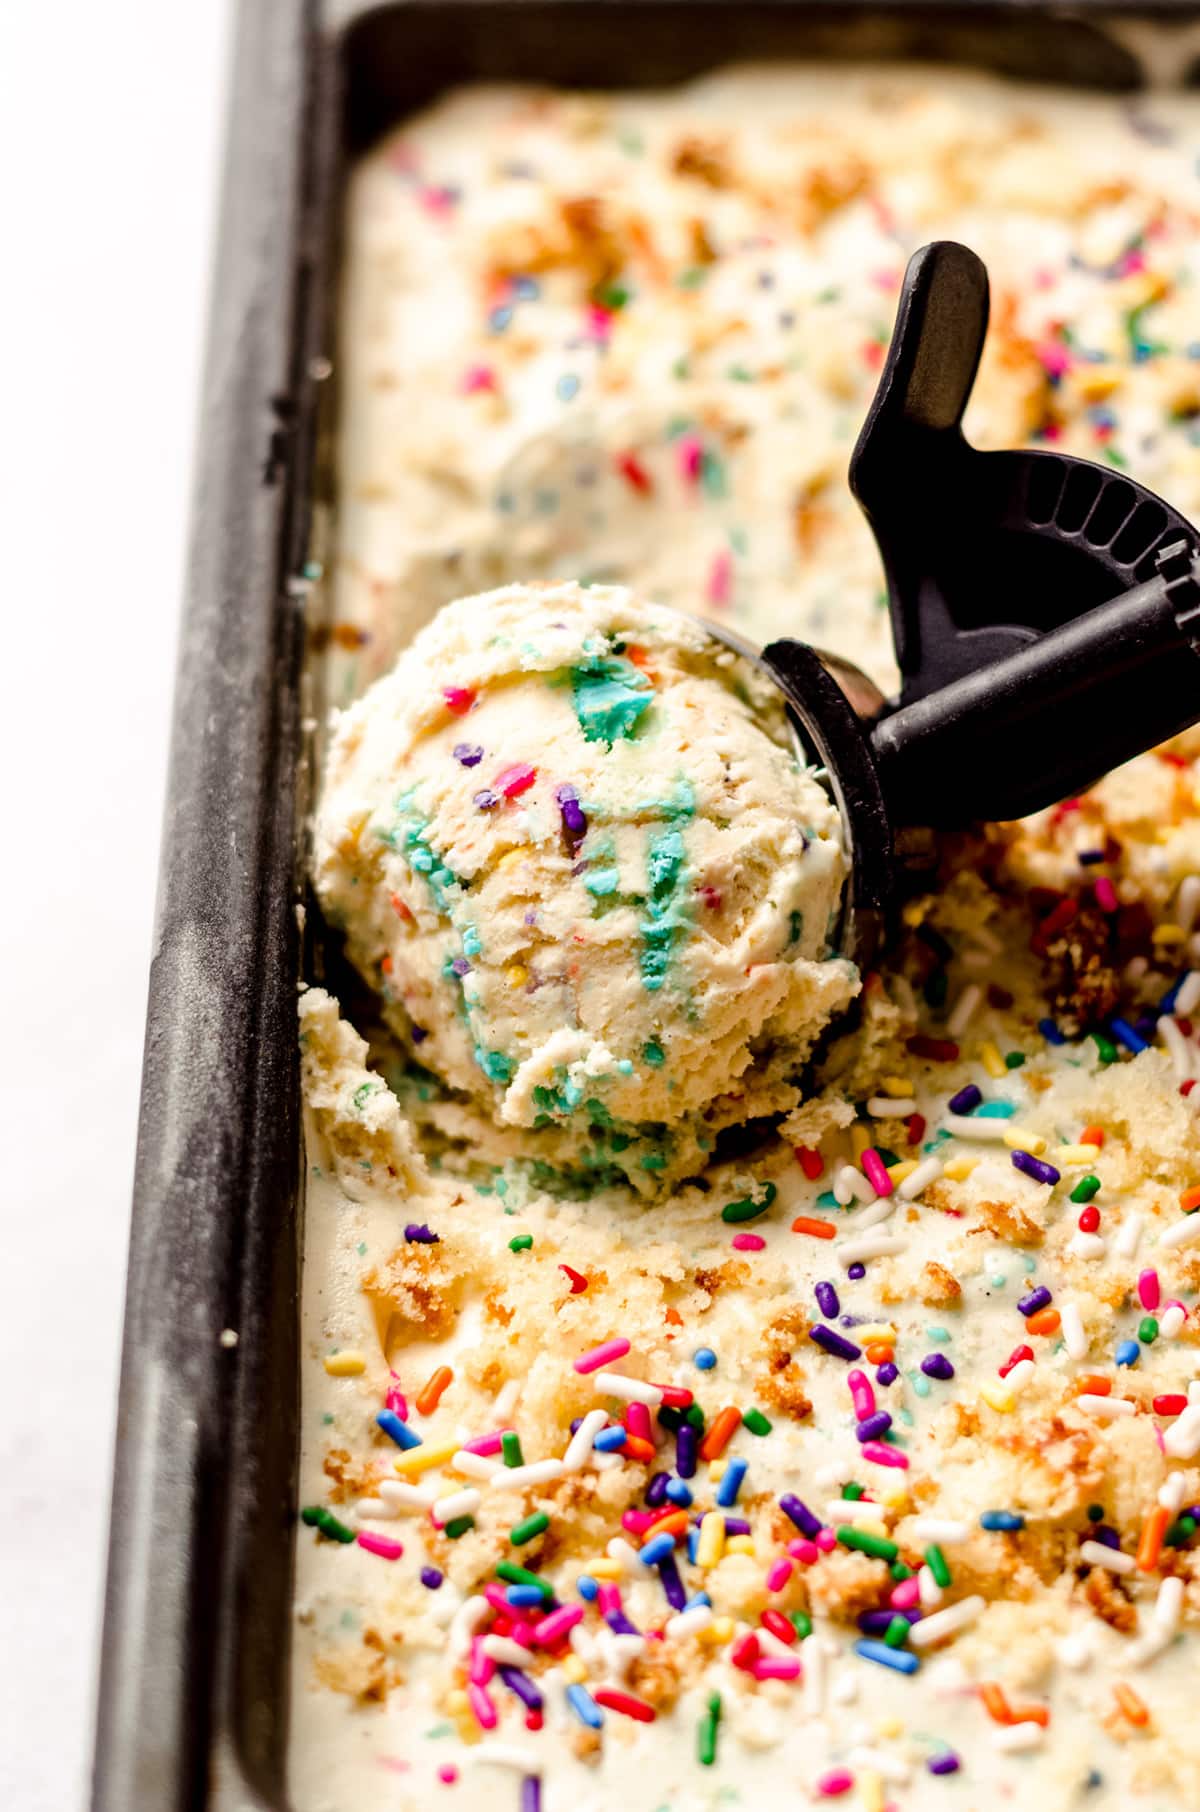
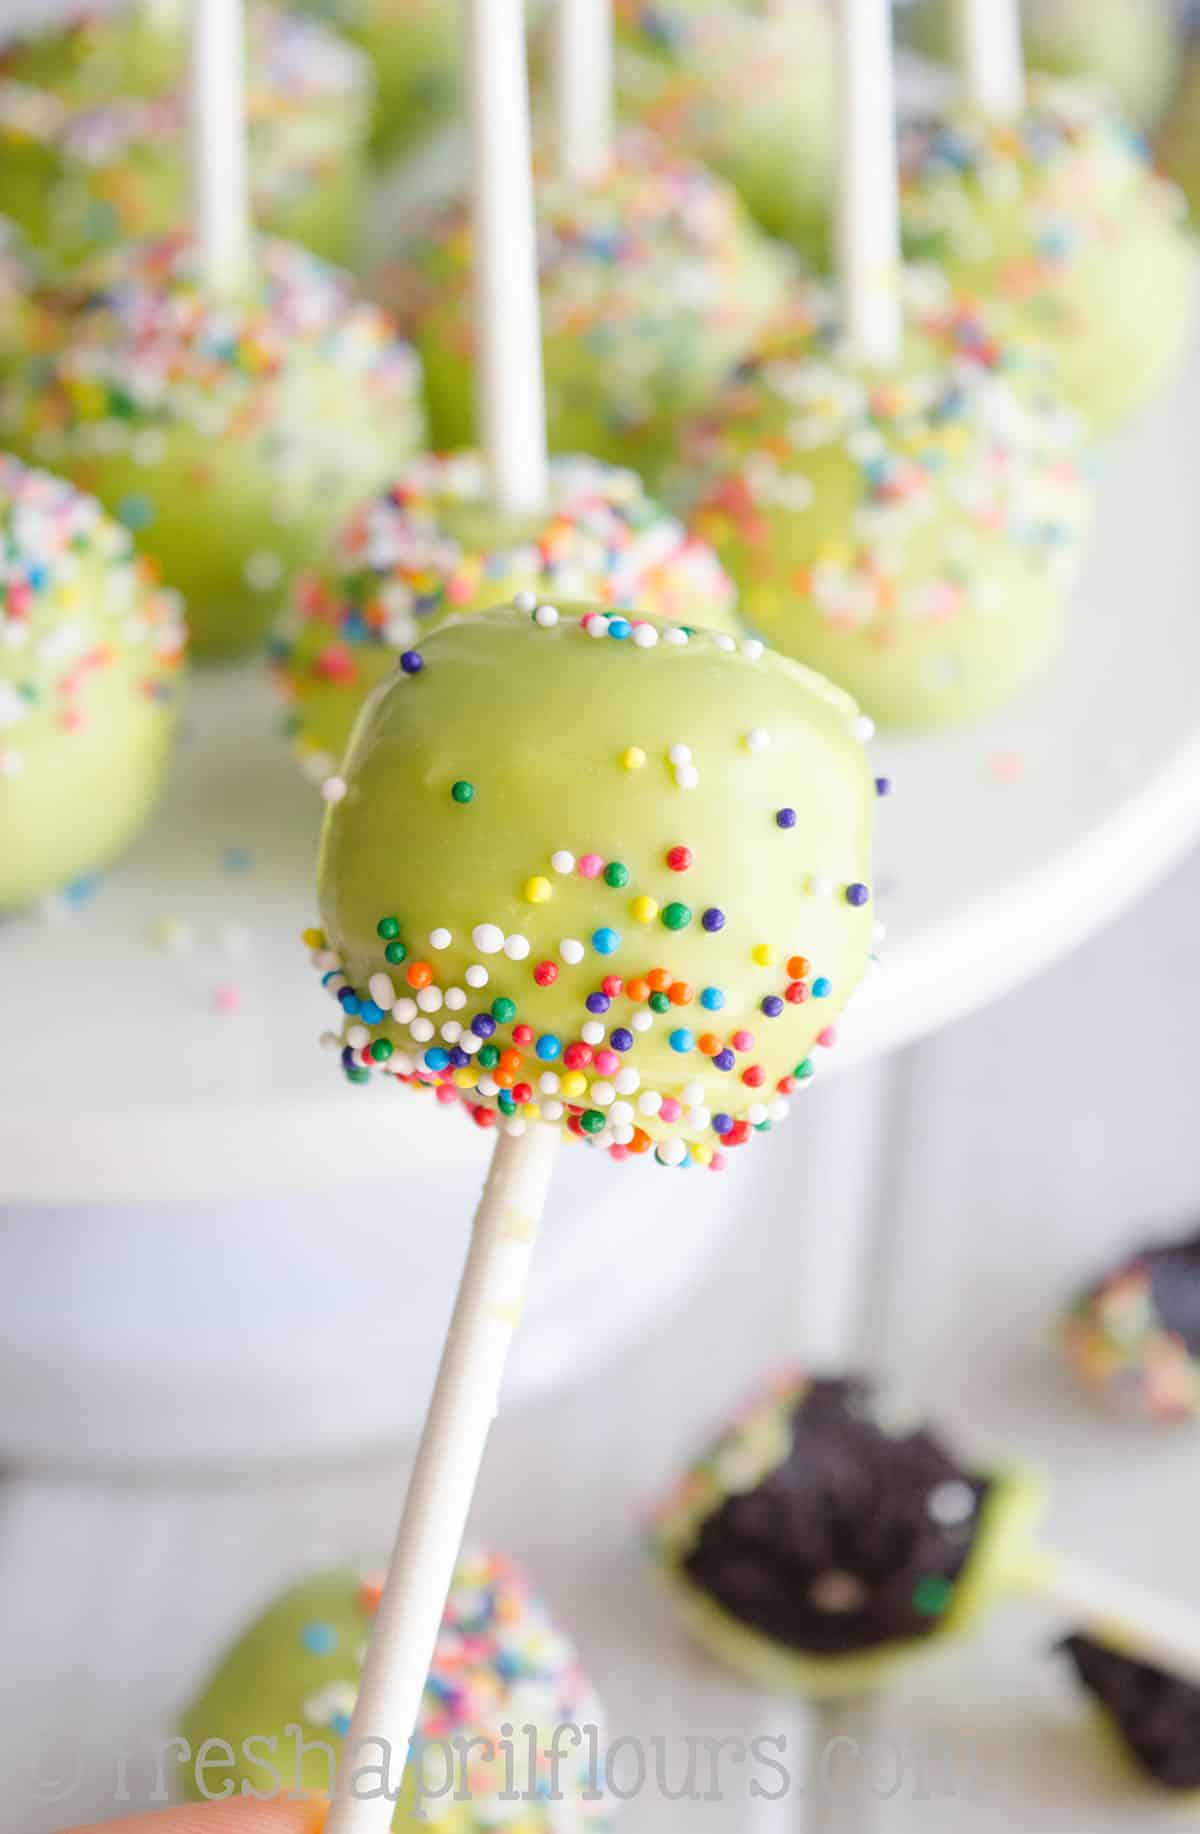
And remember… There are ways to use up leftover cake scraps and frosting! My birthday cake ice cream or cake pops are a great place to start (and, BONUS, you can freeze cake and frosting to save for making these goodies at another time).
I look forward to seeing you inside my Skillshare course, but if that’s not your thing, I still hope to see your beautiful 6 inchers on Insta and Facebook!
More Favorites from Fresh April Flours
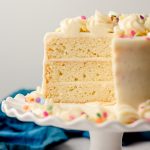
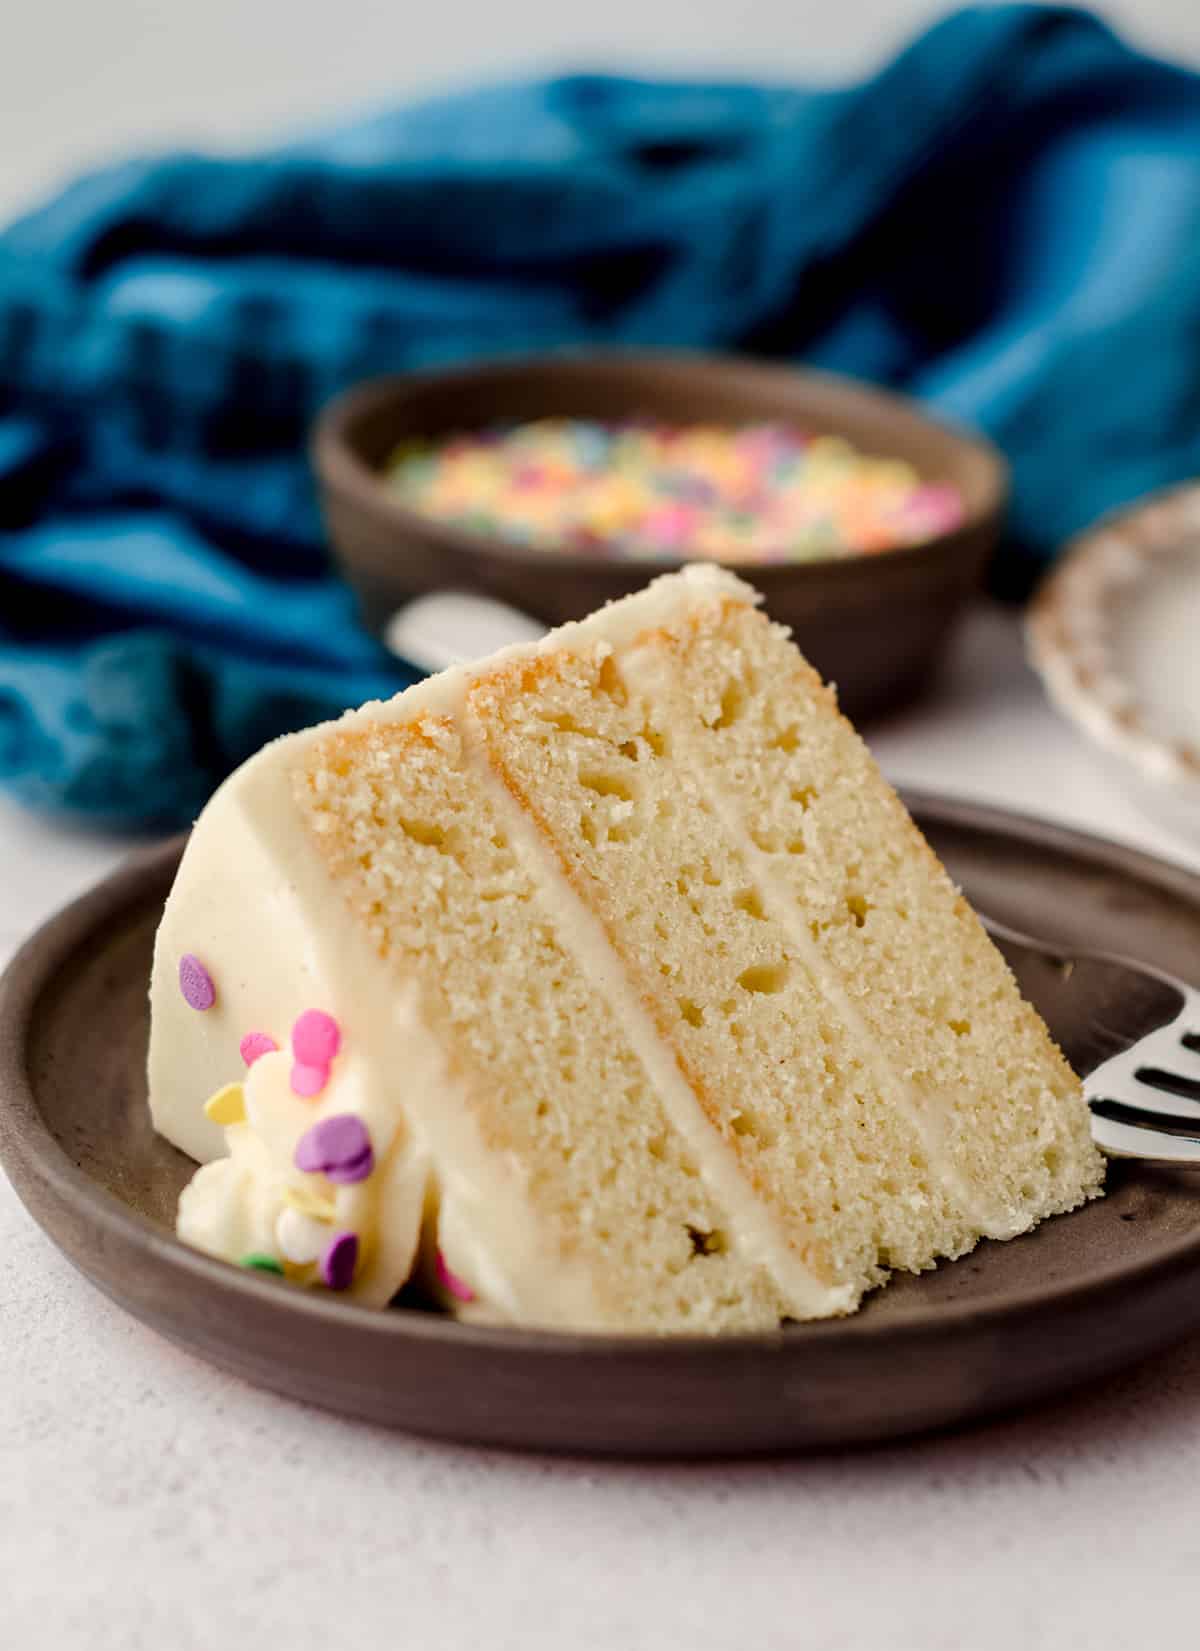
6 Inch Vanilla Bean Cake
Ingredients
VANILLA BEAN CAKE
- ¾ cup (180g) whole milk or cream
- 1 whole vanilla bean or 1 teaspoon vanilla paste
- 1 and ⅔ cups (200g) all-purpose flour be sure to measure properly
- ½ teaspoon baking powder
- ¼ teaspoon baking soda
- ½ teaspoon salt
- ½ cup (113g) unsalted butter melted and allowed to cool
- 1 cup (200g) granulated sugar
- 1 large egg room temperature1
- ¼ cup (61g) full fat yogurt or sour cream room temperature1,2
- 1 teaspoon vanilla extract
VANILLA BEAN FROSTING
- 1 cup (226g) unsalted butter softened to room temperature
- 4 to 5 cups (480-600g) powdered sugar
- 1 whole vanilla bean or 1 teaspoon vanilla paste
- ¼ to ⅓ cup (60-80g) milk or cream
- ⅛ to ¼ teaspoon salt
Instructions
VANILLA BEAN CAKE
- Pour the cream into a small saucepan. If using a vanilla bean: using a sharp knife, split the vanilla bean in half, scrape out the seeds, and put everything into the saucepan with your cream. If using vanilla paste, simply pour into the cream and stir to combine.¾ cup (180g) whole milk or cream, 1 whole vanilla bean or 1 teaspoon vanilla paste
- Heat the cream over low heat until it just starts to steam. Remove from heat and allow to steep for 30 minutes. After the 30 minutes, remove the pods with a fork or tongs. Cream is now ready to use. If you used vanilla paste, it is ready to use after the 30 minutes.
- Preheat oven to 350ºF (177ºC). Grease two or three 6 inch cake pans (here are single 6 inch pans or a bundle of four pans), line with parchment paper3, then grease and flour the parchment paper (or use homemade cake release). Set aside.
- In a large bowl, whisk together the flour, baking powder, baking soda, and salt. Set aside.1 and ⅔ cups (200g) all-purpose flour, ½ teaspoon baking powder, ¼ teaspoon baking soda, ½ teaspoon salt
- In a large bowl with a handheld mixer or the bowl of a stand mixer fitted with the paddle attachment, beat together the melted butter, sugar, egg, yogurt, infused cream, and vanilla extract on medium to high speed until completely smooth.½ cup (113g) unsalted butter, 1 cup (200g) granulated sugar, 1 large egg, ¼ cup (61g) full fat yogurt or sour cream, 1 teaspoon vanilla extract
- Reduce the mixer speed to low, then slowly add the dry ingredients to the wet ingredients until just combined. Then, fold gently by hand with a large spatula and press out any large lumps of flour that remain by scraping them against the side of the bowl. Small lumps are ok.
- Divide the batter evenly between the two or three pans, then bake 18-20 minutes for three layers or 20-22 minutes for two layers until a toothpick inserted in the center comes out clean. Allow to cool completely in the pans before removing and assembling.
VANILLA BEAN FROSTING
- In a large bowl with a handheld mixer, or a stand mixer fitted with the paddle attachment, beat the butter on medium speed until creamy, about 2 minutes.1 cup (226g) unsalted butter
- With the mixer on low, add in the powdered sugar, vanilla, and milk or cream. Increase mixer speed to medium and beat until completely smooth, about 3 minutes. If frosting is too stiff, add more milk. If it is too thin, add more powdered sugar. Add salt to taste.4 to 5 cups (480-600g) powdered sugar, 1 whole vanilla bean or 1 teaspoon vanilla paste, ¼ to ⅓ cup (60-80g) milk or cream, ⅛ to ¼ teaspoon salt
- For more buttercream troubleshooting tips, see my book, The Home Baker's Guide to Basic Buttercream.
ASSEMBLE THE CAKE
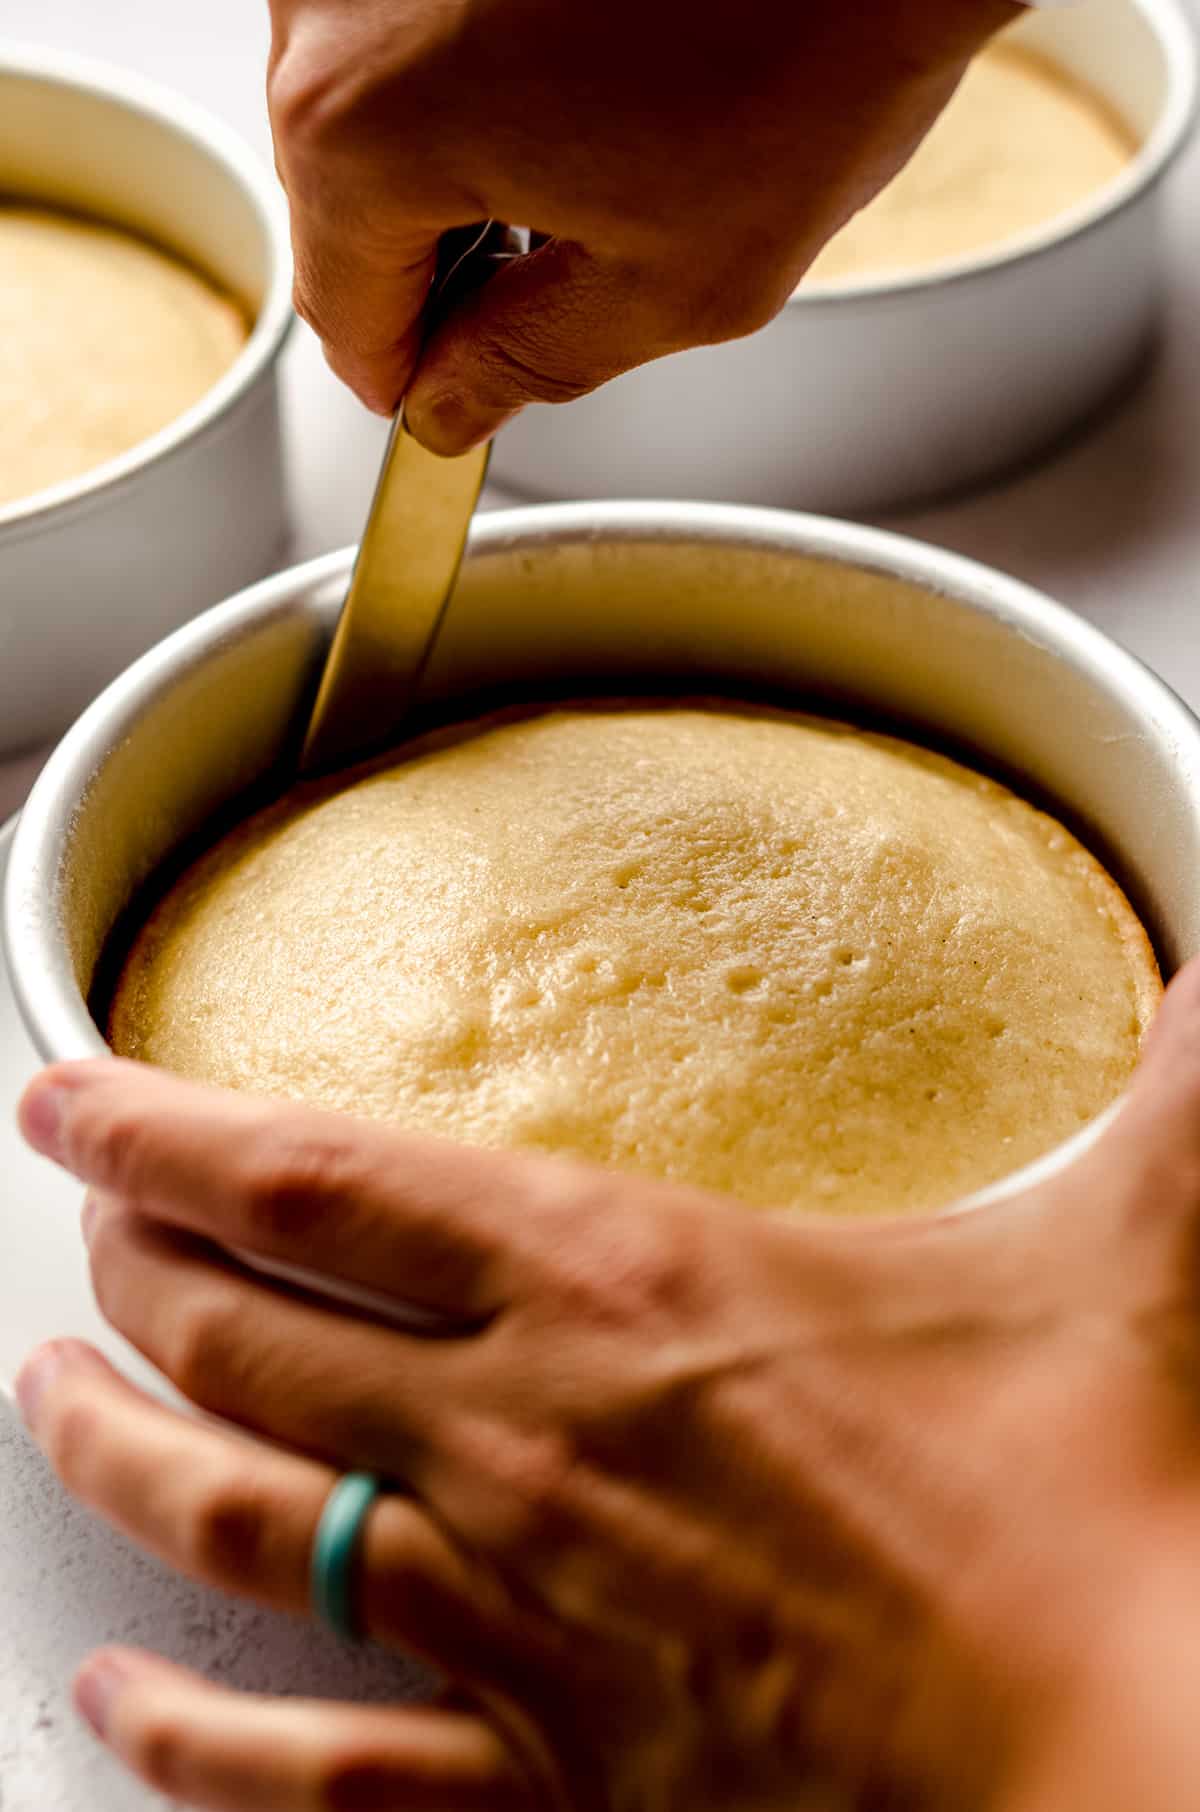
- Using a large serrated knife or a cake leveler, level the cake layers4 to create flat surfaces.
- Place one cake layer cut side up on your cake turntable, serving platter, or cake stand. Using a small offset spatula, spread frosting over the cut surface, spreading it out evenly.
- Place the second layer cut side down, and repeat step 2 with more frosting. If you have a third layer, place that one on top of the frosted second layer, again, cut side down.
- To make a crumb coat: this is not a required step, but I always like to include one. After your cake is stacked, smooth out the frosting on the sides of the cake peeking out from the layers, then refrigerate the cake for about 20 minutes. When your cake is chilled, spread a thin layer of frosting all over the top and sides of the cake to lock in the crumbs. Refrigerate for 20-30 minutes before adding the final coat of frosting.
- Spread the remaining frosting all over the top and sides of the cake, then use a bench scraper, if desired, to smooth out the top and sides. Decorate as desired.
- To add filling to any of the layers: use a piping bag to create a well of frosting around the edges of your cake layer, then spread your filling evenly into the space you created with your well, being careful not to fill higher than the line you created. See photos in the text above for a visual.
- Refrigerate cake for at least 30 minutes before slicing to help the cake hold its shape. Store leftover cake covered tightly at room temperature up to 3 days, or in the refrigerator up to 5 days.
Notes
- Room temperature ingredients: these are always a good idea when using room temperature butter as it makes for easier incorporation into the batter. To bring eggs to room temperature quickly, place eggs in a bowl of warm water for 5-10 minutes.
- Full fat dairy: it is imperative to use full fat dairy in this recipe for moisture, since we’re using melted butter, therefore removing some natural moisture.
- Parchment paper rounds: I highly recommend parchment paper rounds with any cakes, but more specifically 6 inch cakes, because the smaller the cake, the harder it is to get out of the baking pan. Trace your pan on parchment paper, then cut out rounds with scissors.
- Cake scraps: use your cake scraps in my birthday cake ice cream or cake pops.
- More flavors: see the text above for all of my favorite cupcake recipes that you can turn into a 6 inch cake.
Nutrition Disclosure
All nutritional values are approximate and provided to the reader as a courtesy. Changing ingredients and/or quantities will alter the estimated nutritional calculations.
This tutorial was literally perfect. I chose the vanilla bean cake recipe as written and it turned out beautifully for my nephew’s smash cake! Thanks so much for such a thorough post!
Thank you, Jenna! 🙂
OMG, amazing. This was so helpful for making my daughter’s smash cake. I used the chocolate cake recipe and whipped cream buttercream. Sooo good!
Thanks, Lindsay! So glad it worked out well for you.
Thank you so much for this!!! I needed a small cake for a bachelorette party and this page did not disappoint! The vanilla cake is so soft and it was just the right size for 5 of us! Will be making this again 🙂
I’m so happy to hear this! Thank you, Jamie!
Your recipe sounds good! I typically make 6″ cakes, but like my layers taller (1 1/2″ at least). Would your recipe give me 3 6″ round layers about as tall as I like? Thank you.
Hey, Paula– good question! This recipe will give you three 1″ (ish) layers. If you want higher ones, I would 1.5x or 2x the recipe for sure. Let me know how it turns out!
Thank you!
We made a small cake today for our Friendsgiving celebration (6 guests). I made your carrot cake and it was so good. THanks for breaking it down in this guide!
Great choice– thanks, Desiree!
Made this vanilla bean cake as written – except I subbed gluten-free all-purpose flour – and it was fantastic! Super moist and tender, with lots of vanilla flavor. Would definitely make again! It was so helpful to have a recipe made for a 6” pan size too.
Thanks so much, Alex! I’m so glad it worked out well 🙂
Thanks so much, Min!
This recipe turned out beautifully! A lovely vanilla flavor and a wonderful crumb, not too moist and not too dry. The icing was super easy, too. I made three 6-inch layers, put some lemon curd in between the layers, and garnished with a big fat strawberry on top. This recipe is a keeper!
Thanks so much, Jan! I’m so glad you enjoyed it 🙂
Would someone mind giving me advice? My daughter has many food allergies, so I have a safe go to recipe. The problem is it’s for a 9×13. Any advice how to reduce this recipe for a 3 layer 6″ cake? Would I use all of the 9×13 batter or decrease the recipe? I’m just not sure on equivalents and for safety do not want to use a different recipe. Thanks so much!!
Hey, Lori– a 9×13 recipe typically makes two 8″ layers. So if you halve the recipe, you can get two thick or three thin 6″ layers. Hope that helps!
Could I use a recipe that makes a two-layer / eight inch cake in a three-layer / six inch cake? Thank you!
Hi! A recipe for two 8″ layers will be four 6″ pans, but you might be able to squeeze it into 3 with some leftover for a few cupcakes. Hope that helps!
Thank you, it really does! Much appreciated.
Sure thing!
Thanks to the detailed instructions and tips, I tackled my daughter’s 1st birthday cake with success! I’d never made a layer cake from scratch before and I was able to complete it with confidence. I was so proud of the finished product, and even made the same flavor cupcakes, too. As stated, it was the perfect recipe for a smash cake!
Awesome, Georgie! This is what I love to hear 🙂
Can I put this mixture in to a 6×3 inch pan and just make one cake to split in half?
Hi, Rachael– I would not do that. It would overfill the cake and be too much batter. If you feel comfortable halving the recipe, you could put it one pan.
I would double this then for 3 8 in round cakes, yes?
Yes!
I made this cake for my daughter’s birthday and it was perfect! I love all of the recipes on Fresh April Flours! Thank you!!!!
Thanks so much, Tiffany!