
Pistachio Cheesecake
As an Amazon Associate, I earn from qualifying purchases. Read the full disclosure here.
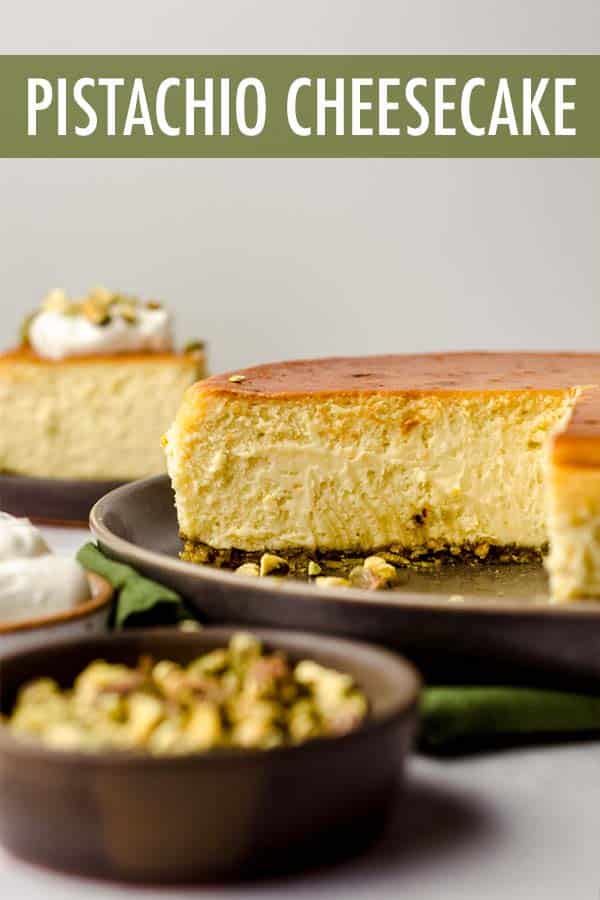
This creamy, sweet, and slightly salty pistachio cheesecake recipe is made and flavored with nothing but pure pistachios. There is no pudding or artificial pistachio flavoring involved but rather instructions for making incredibly flavorful homemade pistachio butter to flavor your cheesecake.
If there’s one dessert that I think flies under the radar as a really good option, it’s cheesecake. Cheesecake is creamy, versatile, and often gets a bad rap of being hard to make.
I taught myself how to make cheesecake with my funfetti cheesecake recipe, and I just keep finding more and more flavors to share, because making cheesecake from scratch is actually so simple once you have the basic techniques down.
Other delish cheesecake recipes I have are a fresh peach cheesecake, a cinnamon roll cheesecake, a pumpkin sheet cake style cheesecake, cheesecake brownies, and even no bake cheesecake bites for when the urge hits in the dog days of summer.
The Best Pistachio Cheesecake Recipe
I couldn’t wait to share this pistachio cheesecake recipe with you, because my recipes that include pistachios are actually quite popular on my site! So many of us have intense sweet and salty cravings, and this creamy and nutty cheesecake satisfies both of those cravings.
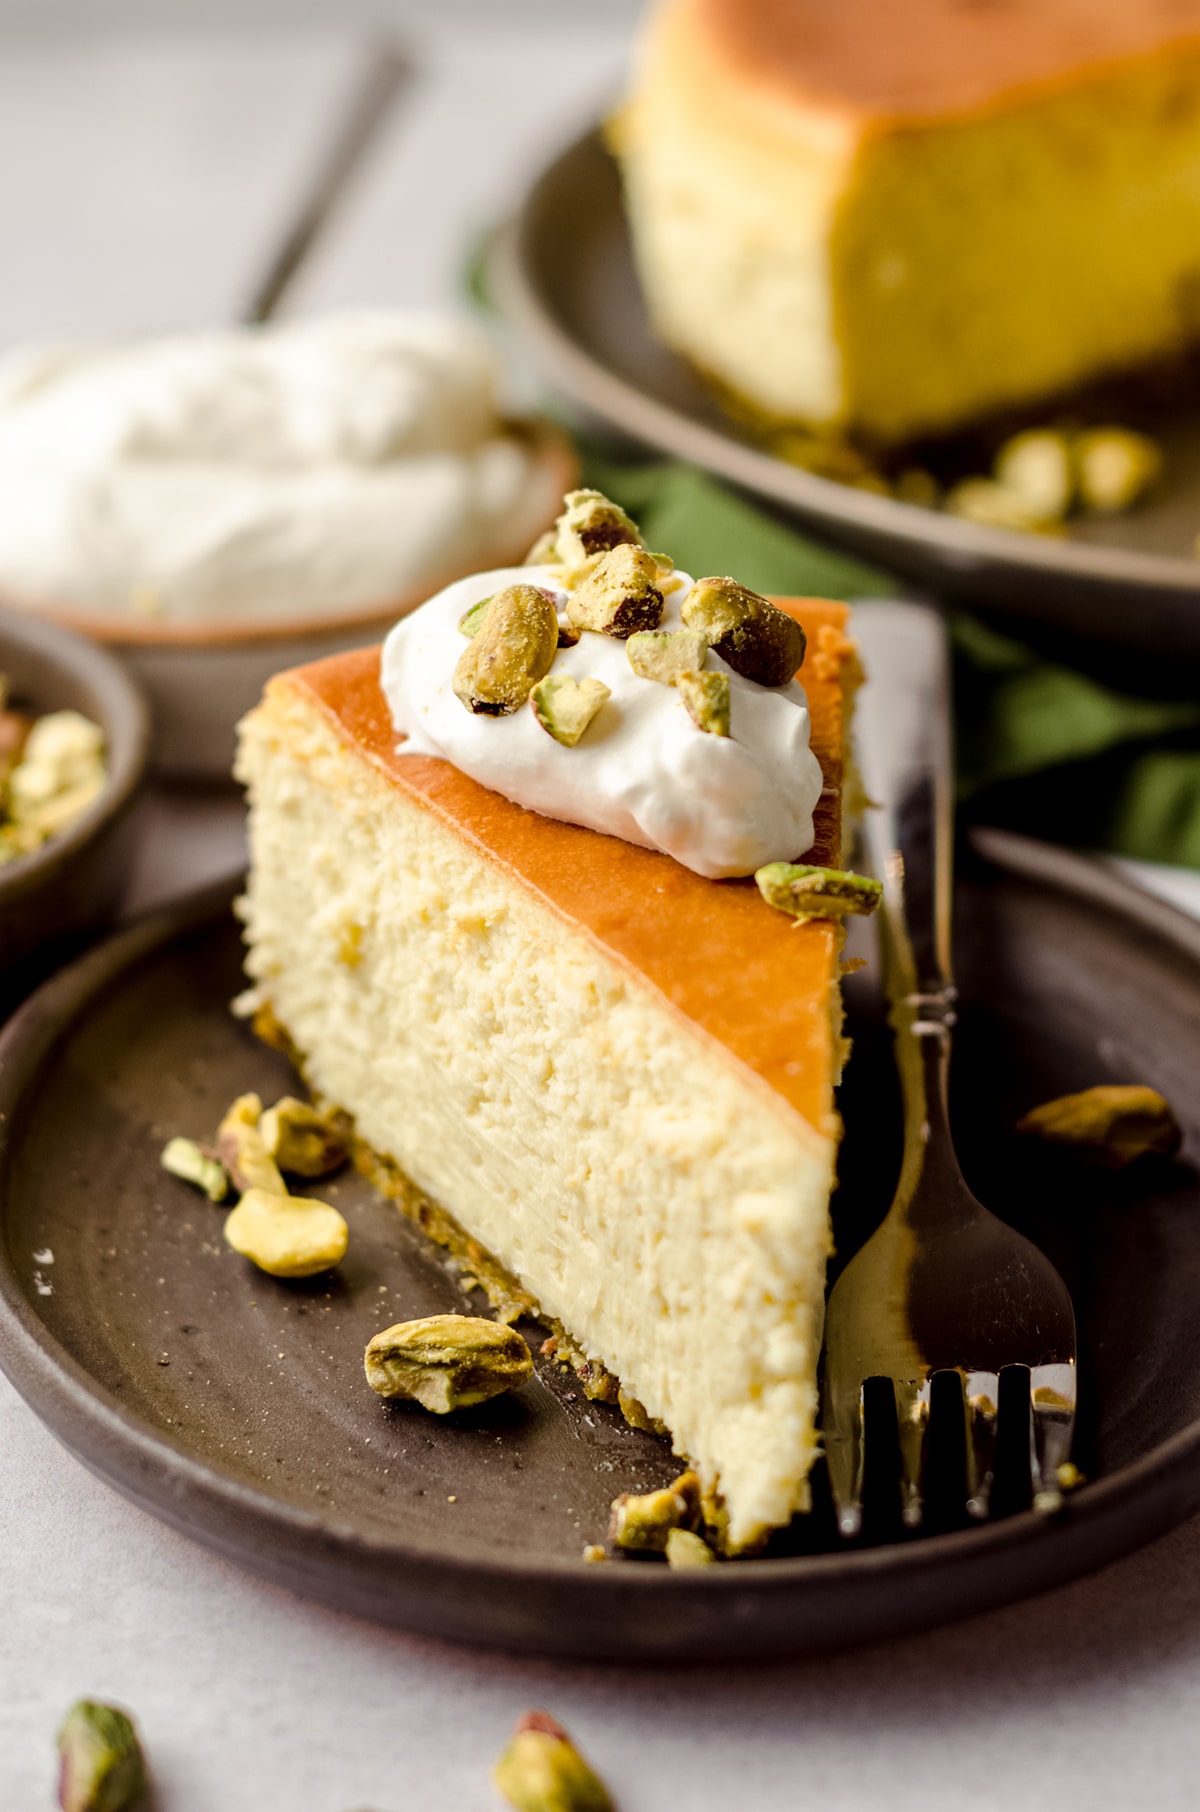
Smooth pistachio flavor, a crunchy and nutty crust, and the sweet, creamy filling make for an explosion of pistachio in every single bite. You’re going to love this recipe as much as I do, I just know it!
Everything that makes this Pistachio Cheesecake Recipe Irresistible
While every cheesecake follows roughly the same outline, this homemade pistachio cheesecake, in particular, involves a bit more elbow grease than it might seem at first glance, but I assure you that if you plan ahead, you’ll find the whole process quite simple.
This easy pistachio cheesecake is flavored with nothing but real pistachios, and since weighing down the inside of the cheesecake with bulky pistachios wasn’t exactly what I was going for in this recipe, I took to some of my friends around the blogosphere to help me out.
I figured there had to be an easier way to flavor my pistachio cheesecake with glorious pistachio flavor without the use of pudding or artificial flavoring, and I found that Sweet and Savory by Shinee had a really simple tutorial for making homemade pistachio paste or pistachio butter (they’re considered the same thing).
We’ll get to exactly how to do that in a bit (it’s really simple, it just takes some time), but know that pistachios really are the stars of the show in this pistachio crust cheesecake.
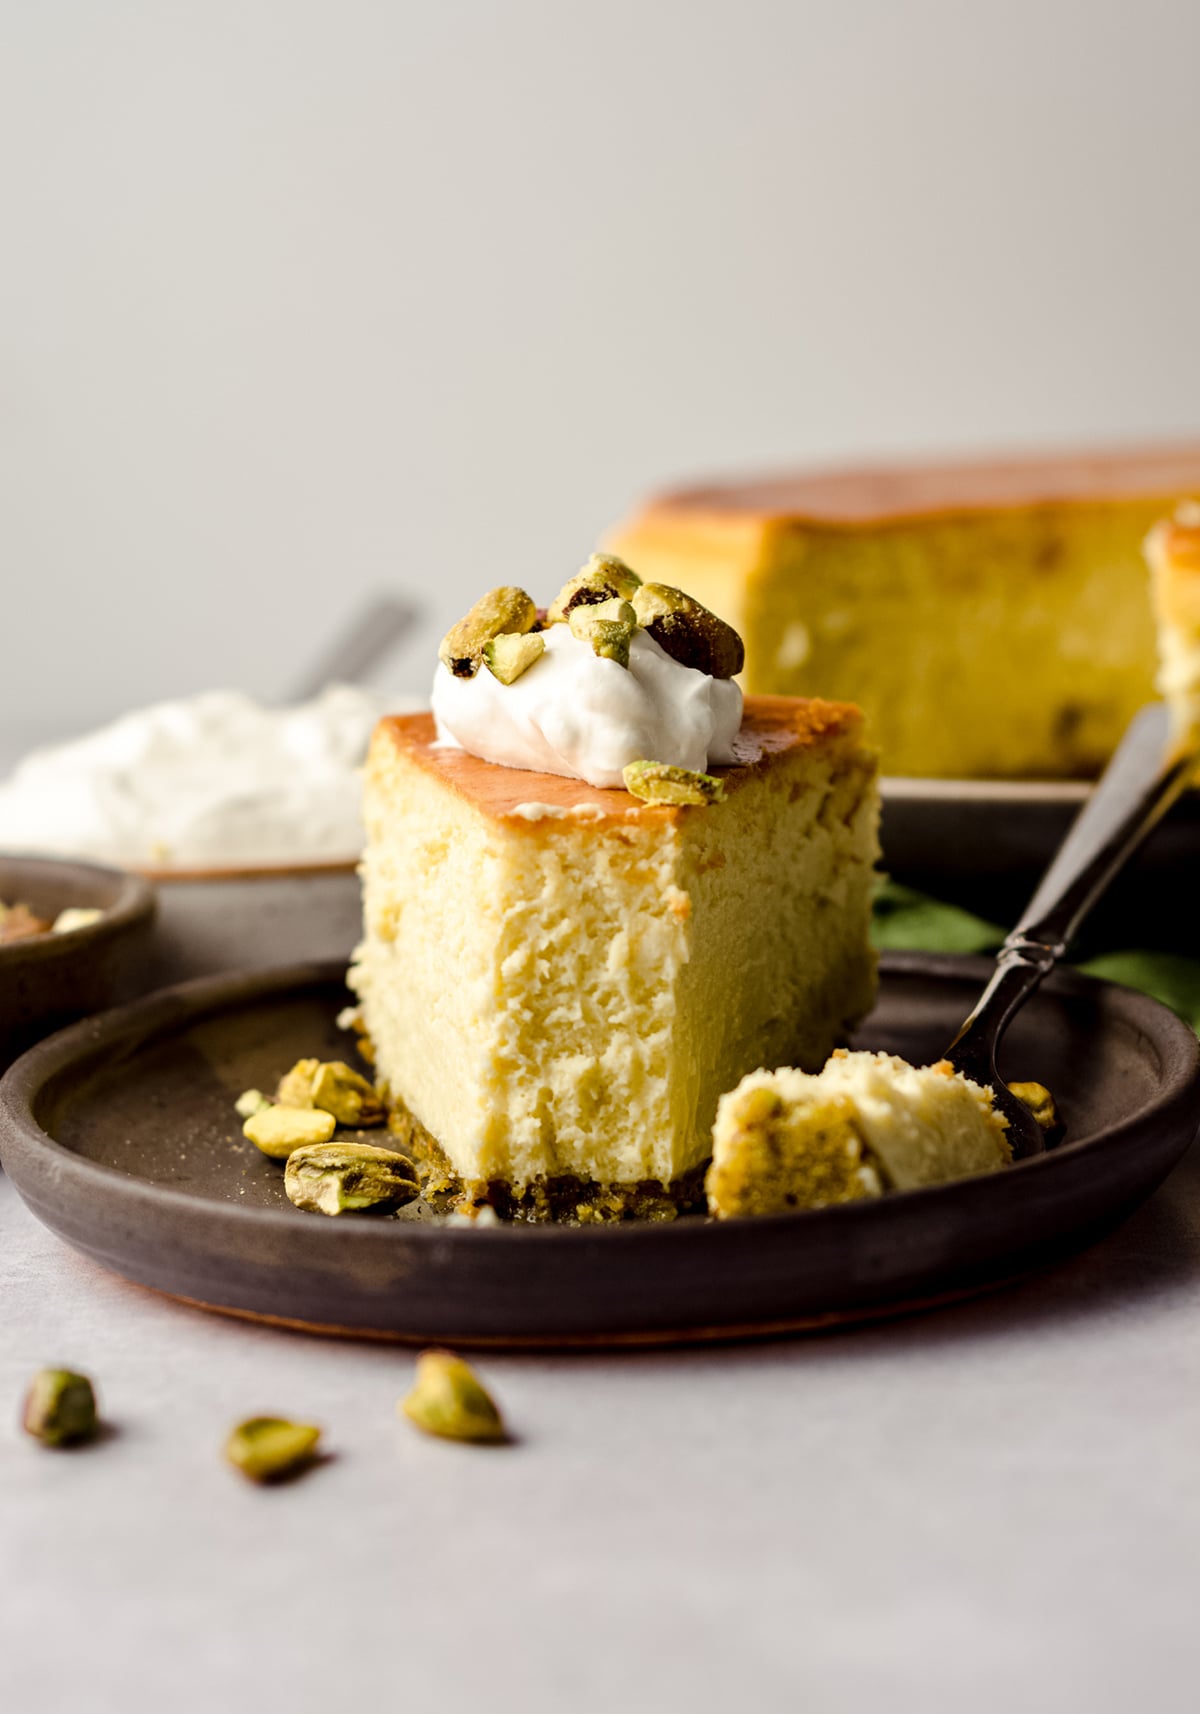
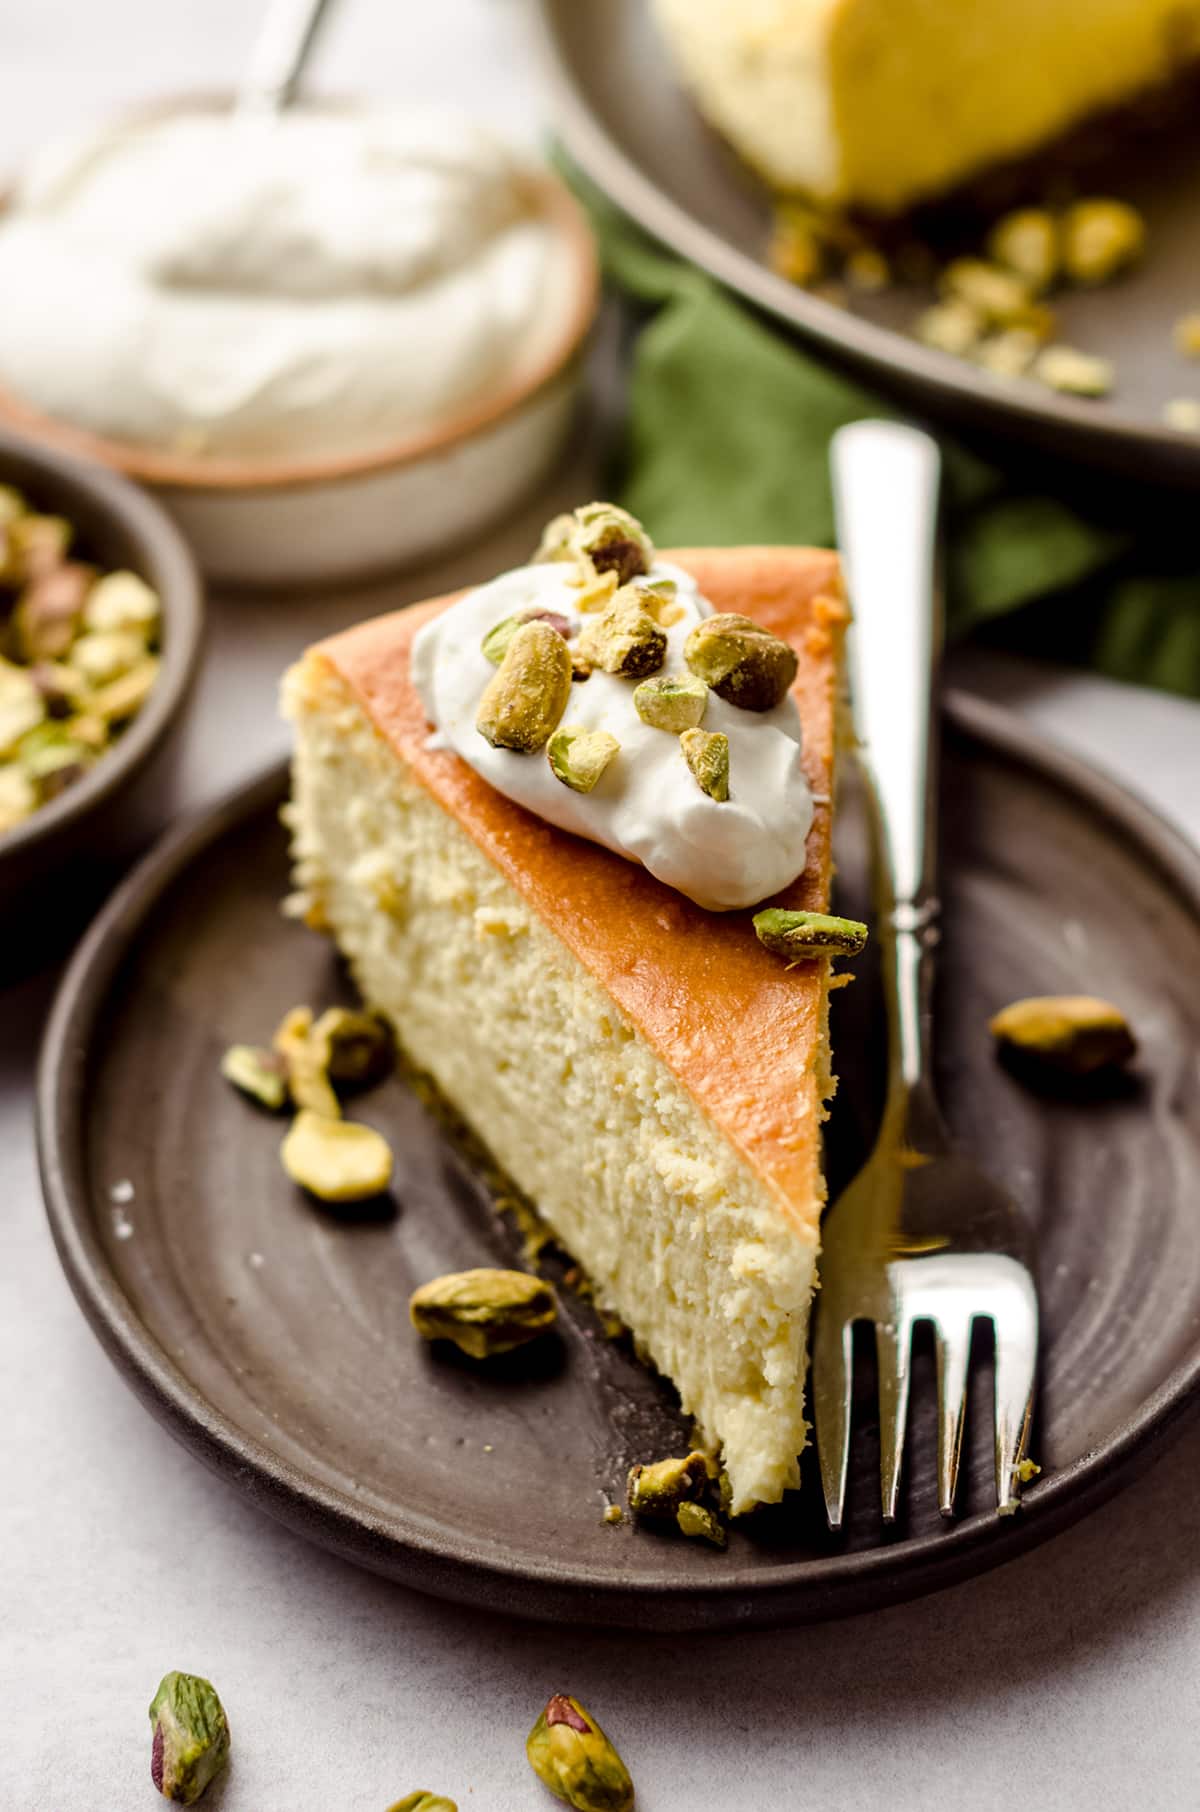
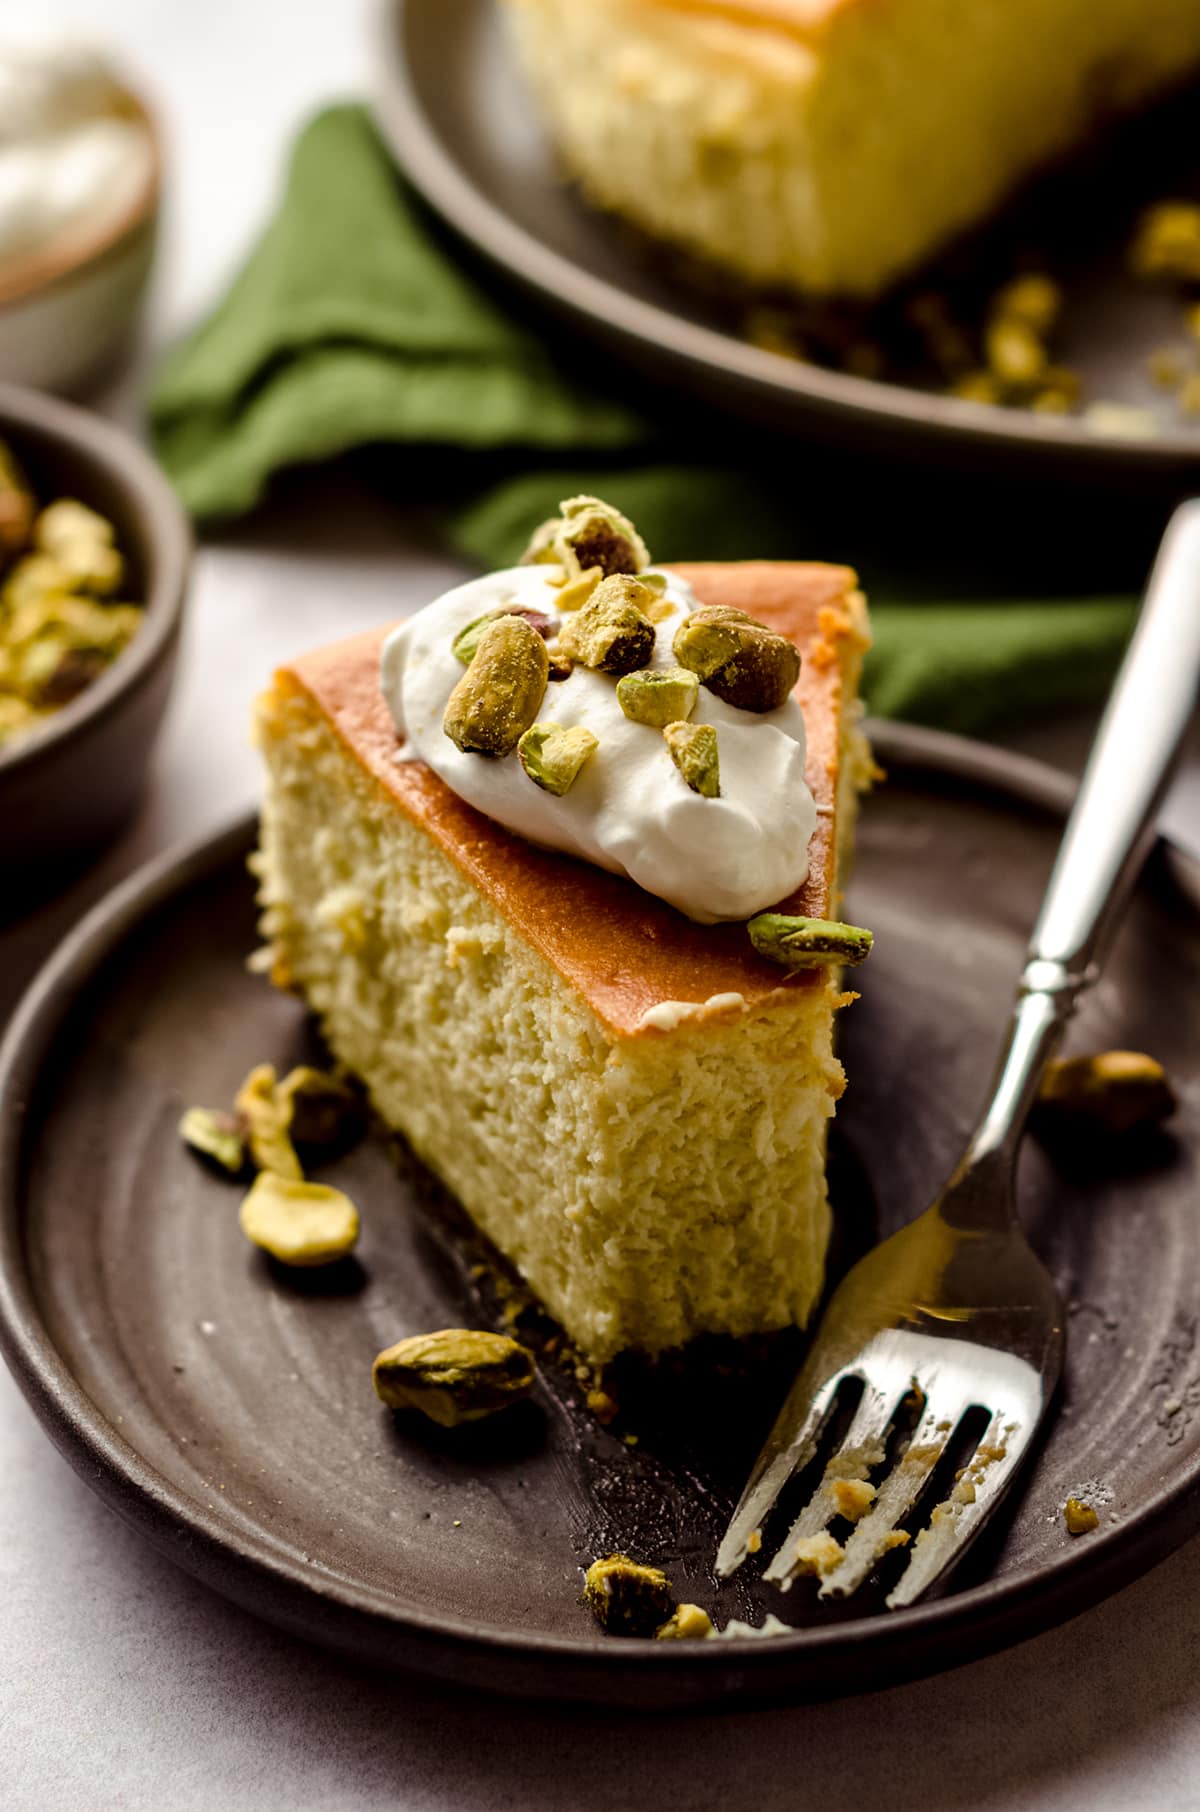
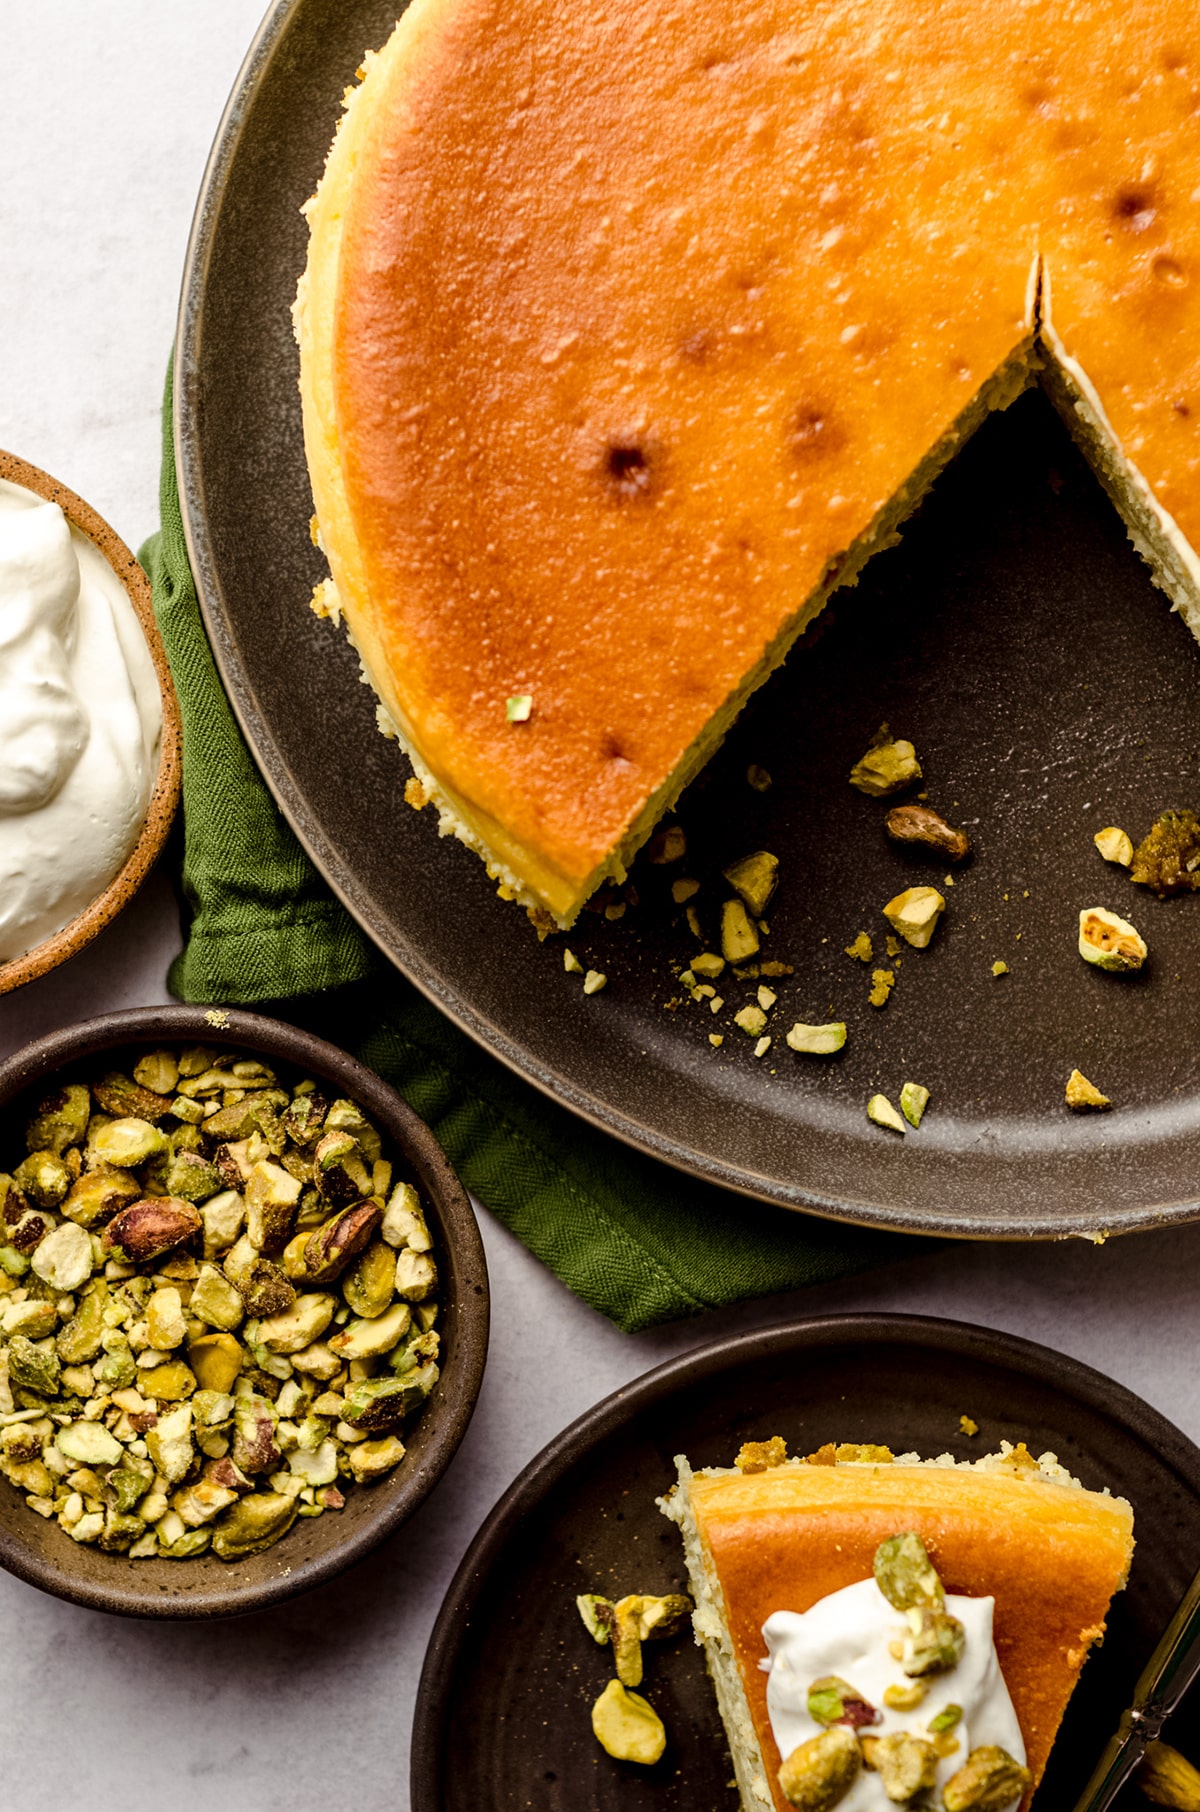
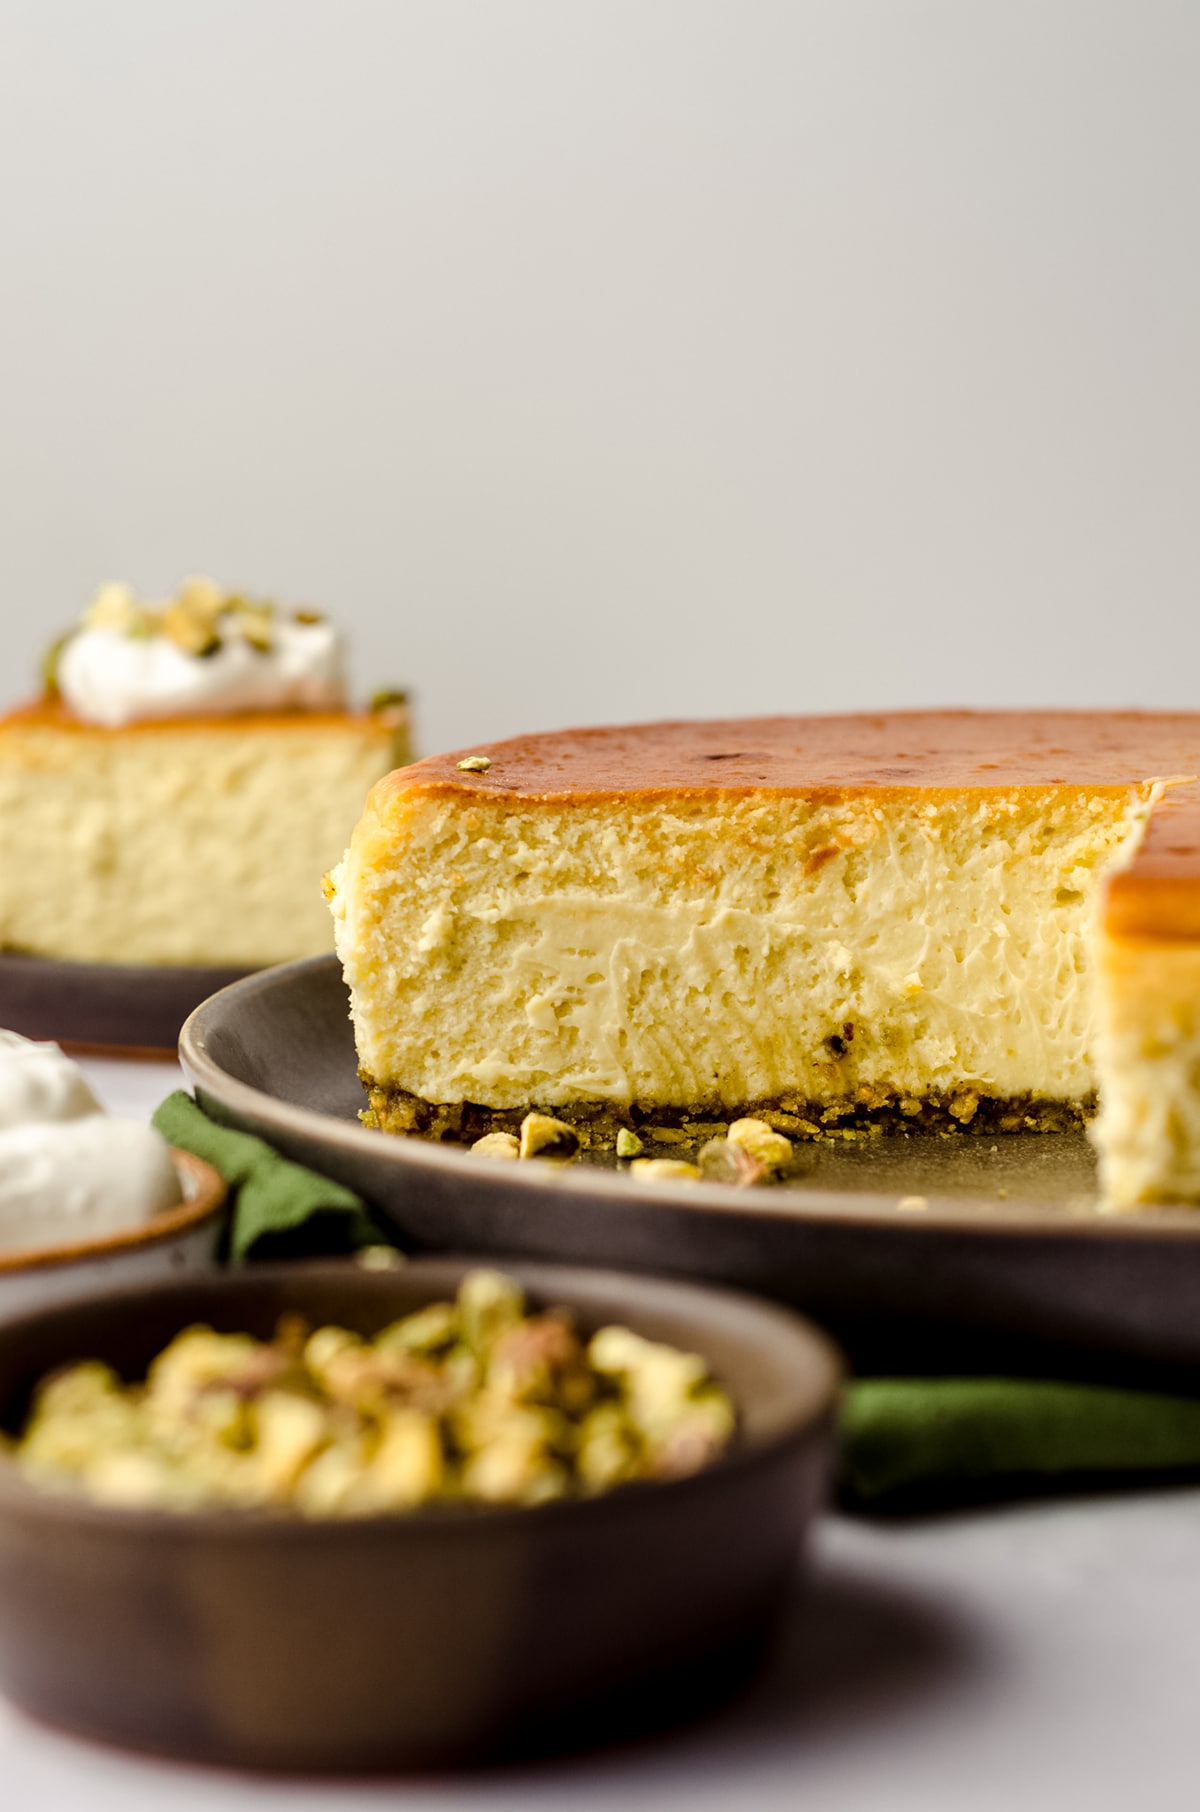
Alongside the pistachio butter/pistachio paste inside the filling of the cheesecake, we’re also making the crust entirely of pistachios and topping the whole thing with a simple garnish of fresh homemade whipped cream and coarsely chopped pistachios.
Cheesecake Pistachio Ingredients
Like I mentioned, one of the best things about this pistachio cheesecake recipe is how simple the ingredient list is! In addition to the traditional cheesecake ingredients like cream cheese, heavy cream, and sour cream, you’ll find that this recipe relies on just a few simple additions. Most notably, pistachios!
And I don’t mean just a handful, we are talking about serious amounts of these amazing, salty, and crunchy little green nuts.
Give Me All the Pistachios
When it comes to nuts, most recipes get their flavor by including an extract to up the ante. Since nuts naturally have mild and subtle flavors, extract is needed to give it a little boost.
While I absolutely love almond extract, and use it often (including in this recipe, if you’d like to use it), pistachio extract is really hard to find. Further, even high quality brands just don’t provide the authentic buttery pistachio flavor we all know and love.
And while many recipes rely on pistachio pudding for a flavor infused filling, that was just not something I wanted for this cheesecake. I wanted real, incredible pistachio flavor.
For that, there was only one way: include a whopping 1 and ½ cups of pure pistachio goodness. And when I tell you this, I mean it: this cheesecake is 100% worth all of the shelling you may or may not have to do.
While you can absolutely use shelled pistachios, buying pistachios in the shell is considerably cheaper AND you get to sneak a handful as a labor tax. That sounds like a great deal to me, don’t you think?
Oh, and if you happen to buy a huge bag (because bulk deals, of course!), make sure to try my recipes for pistachio biscotti and pistachio muffins. Like this recipe, they are sweet, salty, and totally worth any shelling you have to do.
How to Make Pistachio Cheesecake
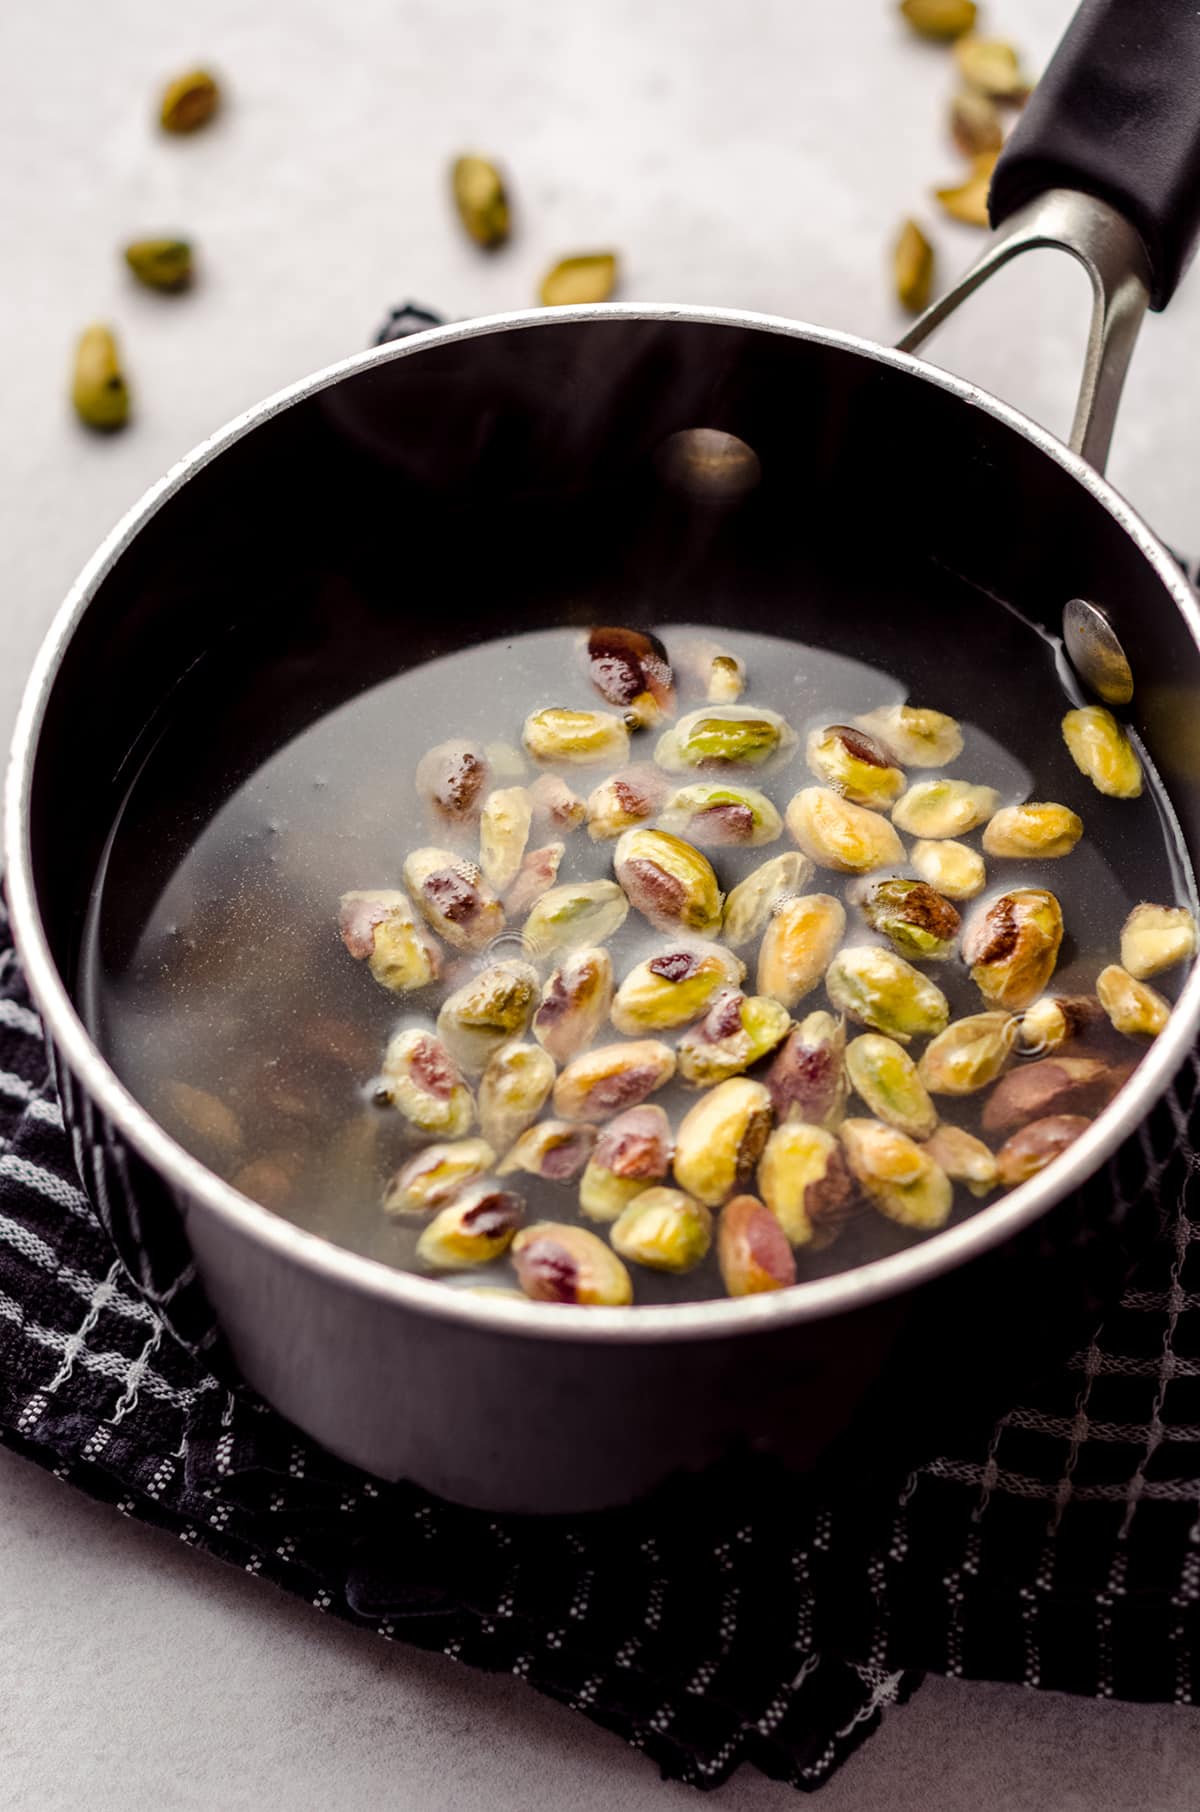
MAKE THE PISTACHIO PASTE
STEP #1
Bring a medium size saucepan of water to a boil, then turn off or remove from heat, then add the raw pistachios.
STEP #2
Allow the pistachios to soak for 4-5 minutes, then drain.
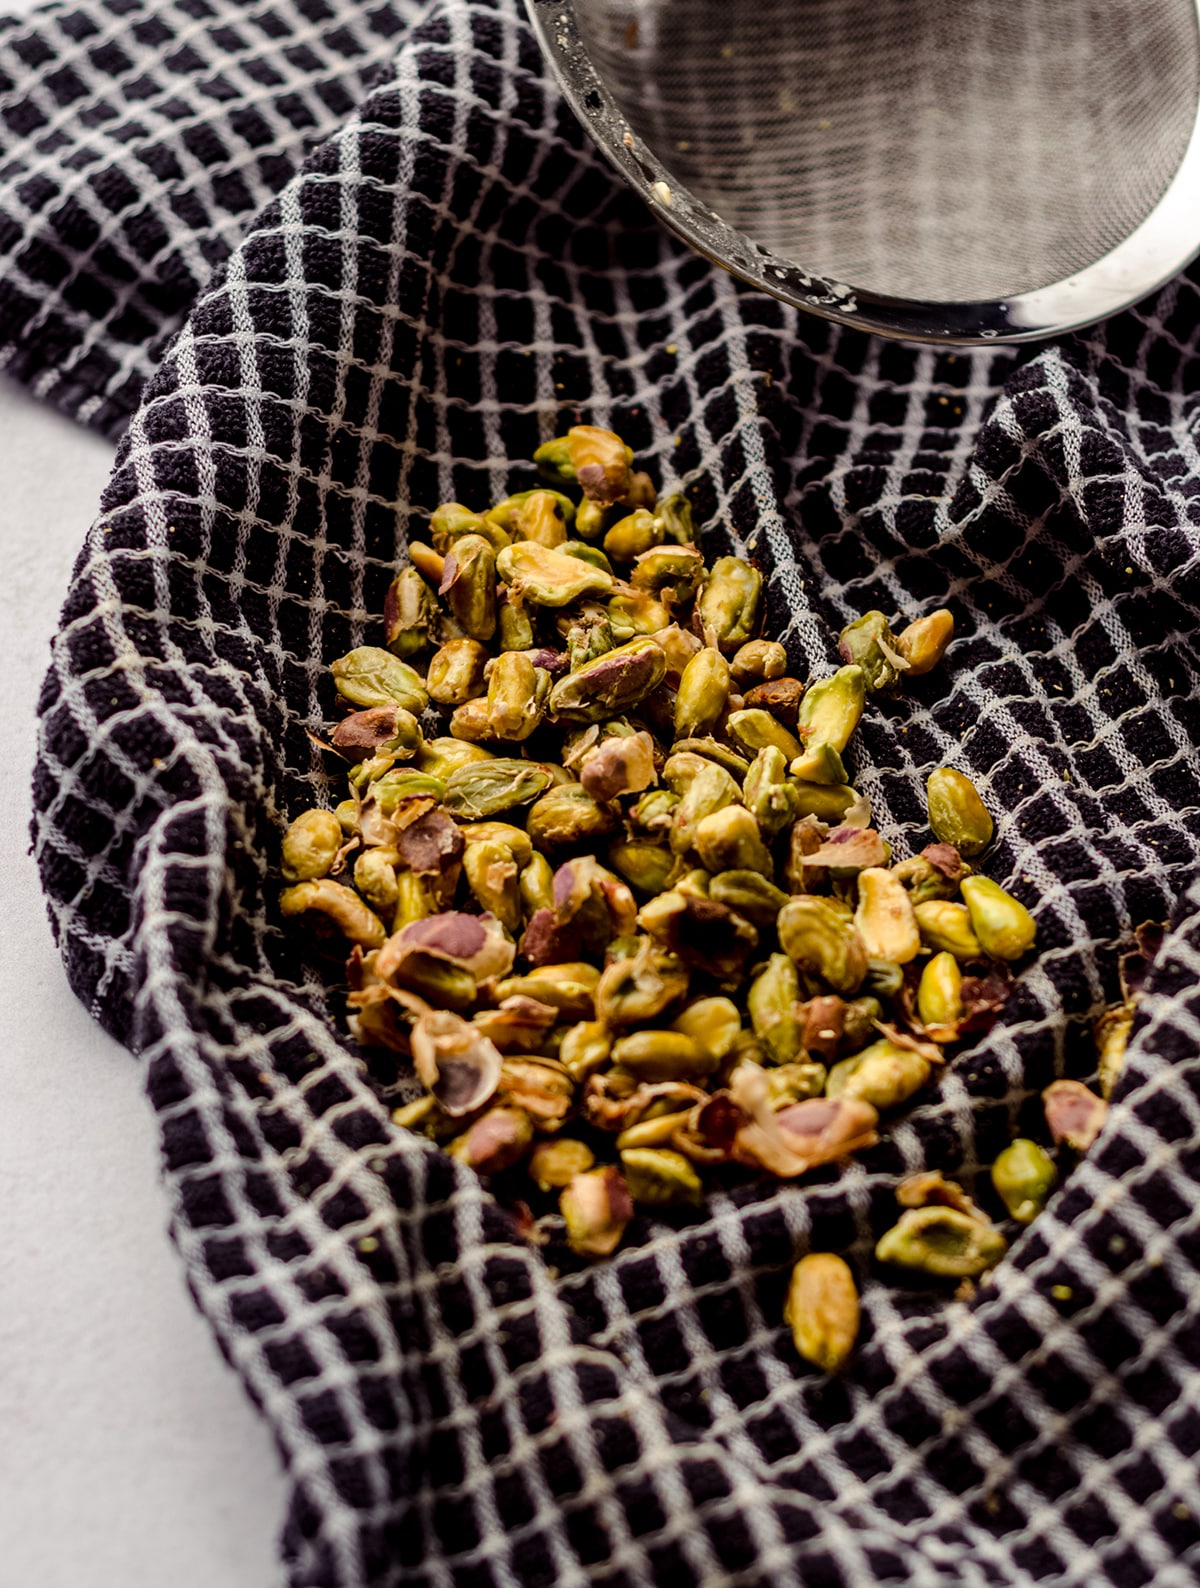
STEP #3
Place the blanched pistachios in a clean kitchen towel, then rub the pistachios together to remove the skins. You may have to use your hands to remove stubborn skins.
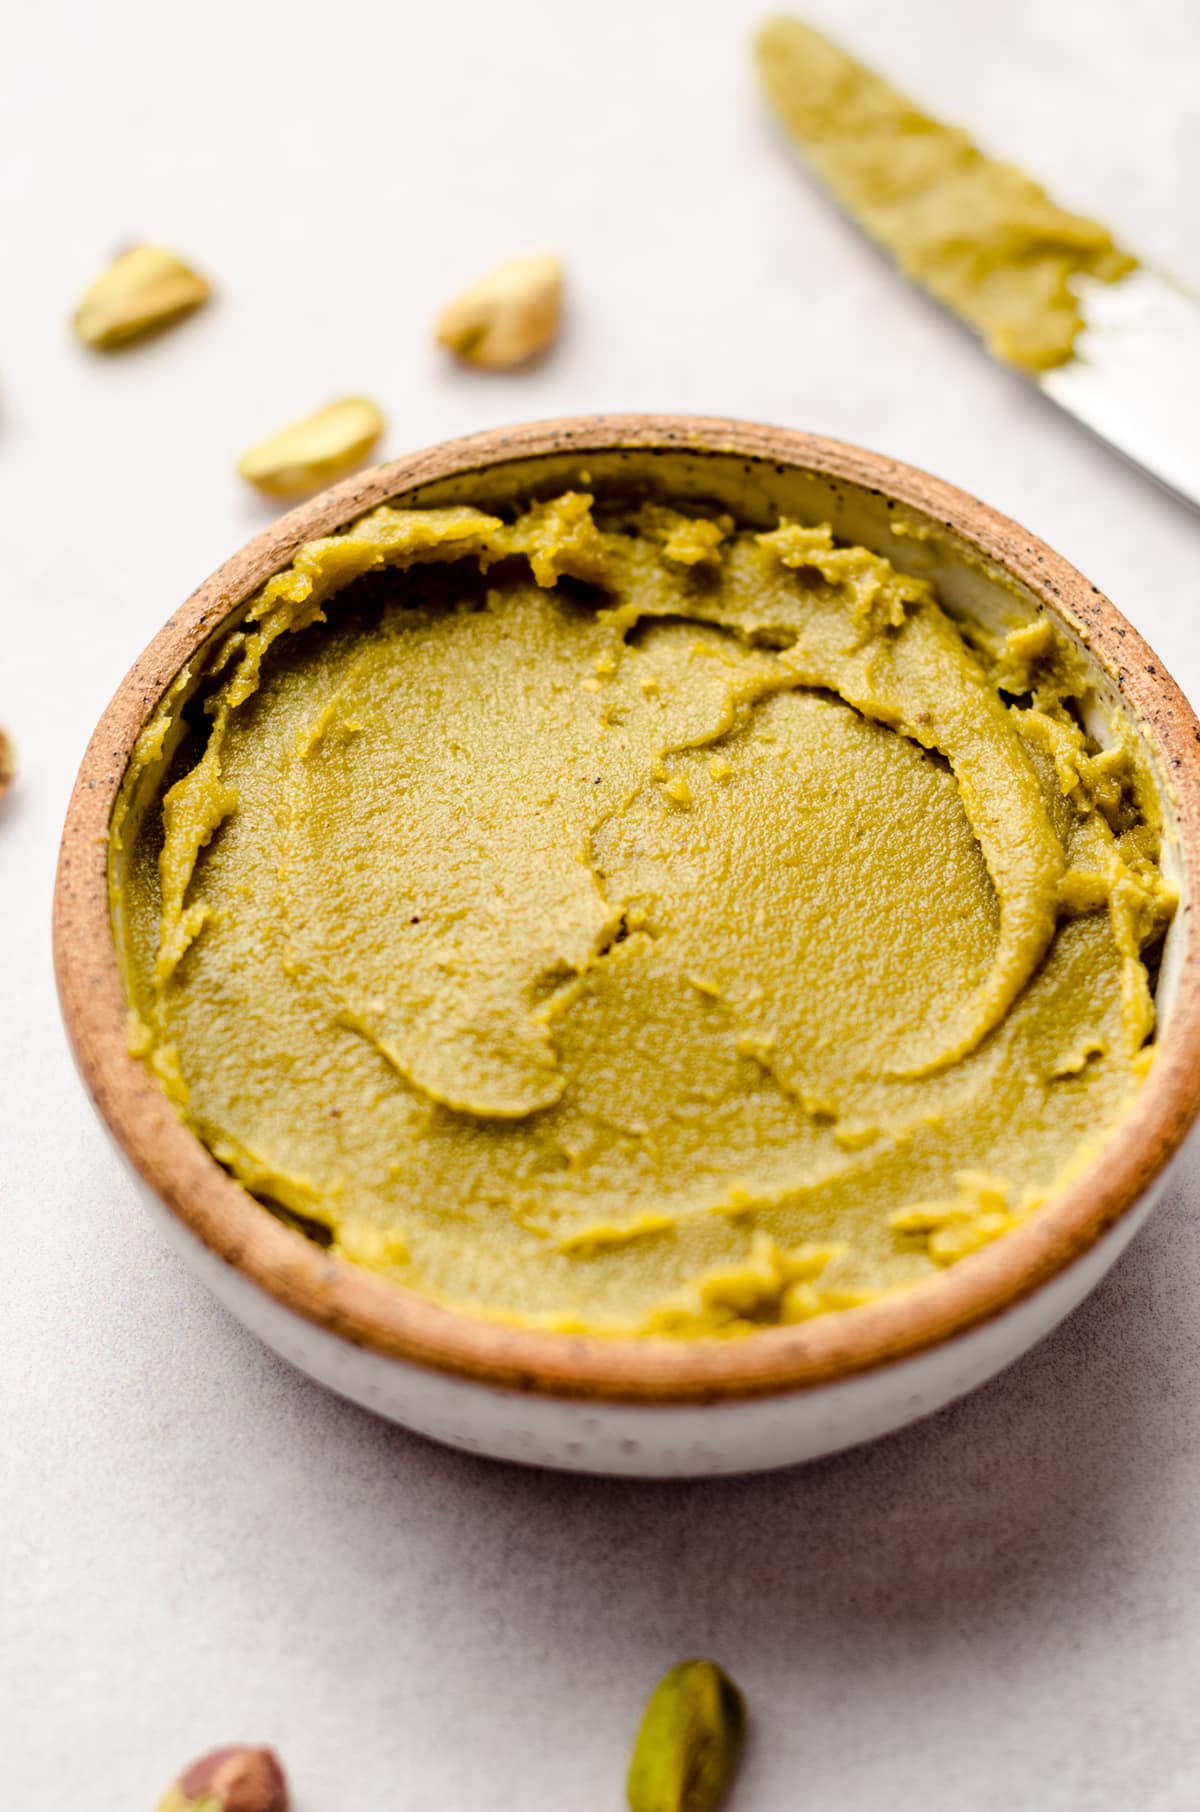
STEP #4
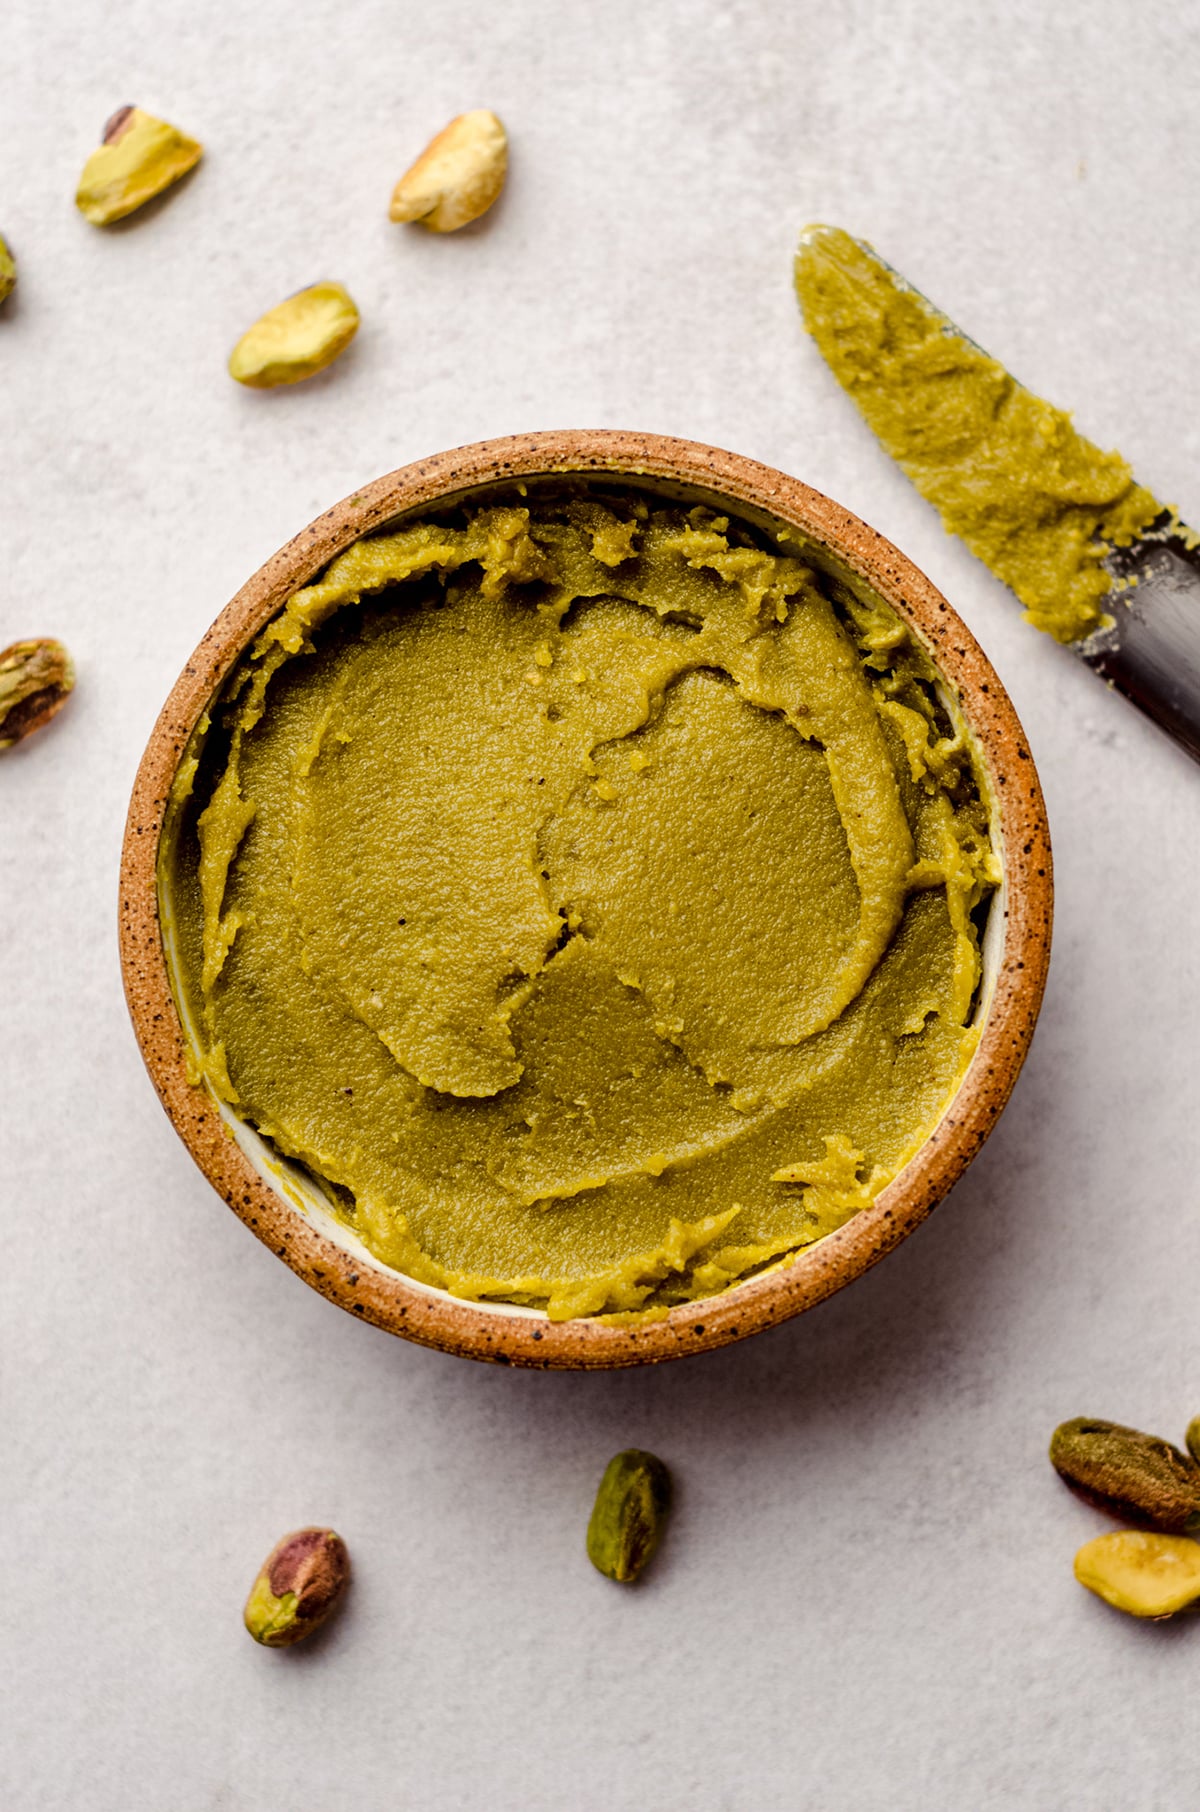
Place the skinless pistachios into a food processor, then process until smooth. Add the water one Tablespoon at a time when pistachios seem to be clumping. Scrape down the sides of the food processor as needed.
STEP #5
Remove pistachio paste from the food processor and set aside to use right away in the cheesecake, or store in the refrigerator until ready to use.
MAKE THE PISTACHIO CRUST
STEP #6
In a food processor, pulse the pistachios until they become small pieces. Pour the crushed pistachios into a medium size bowl, add the sugar, melted butter, and salt, then stir to combine.
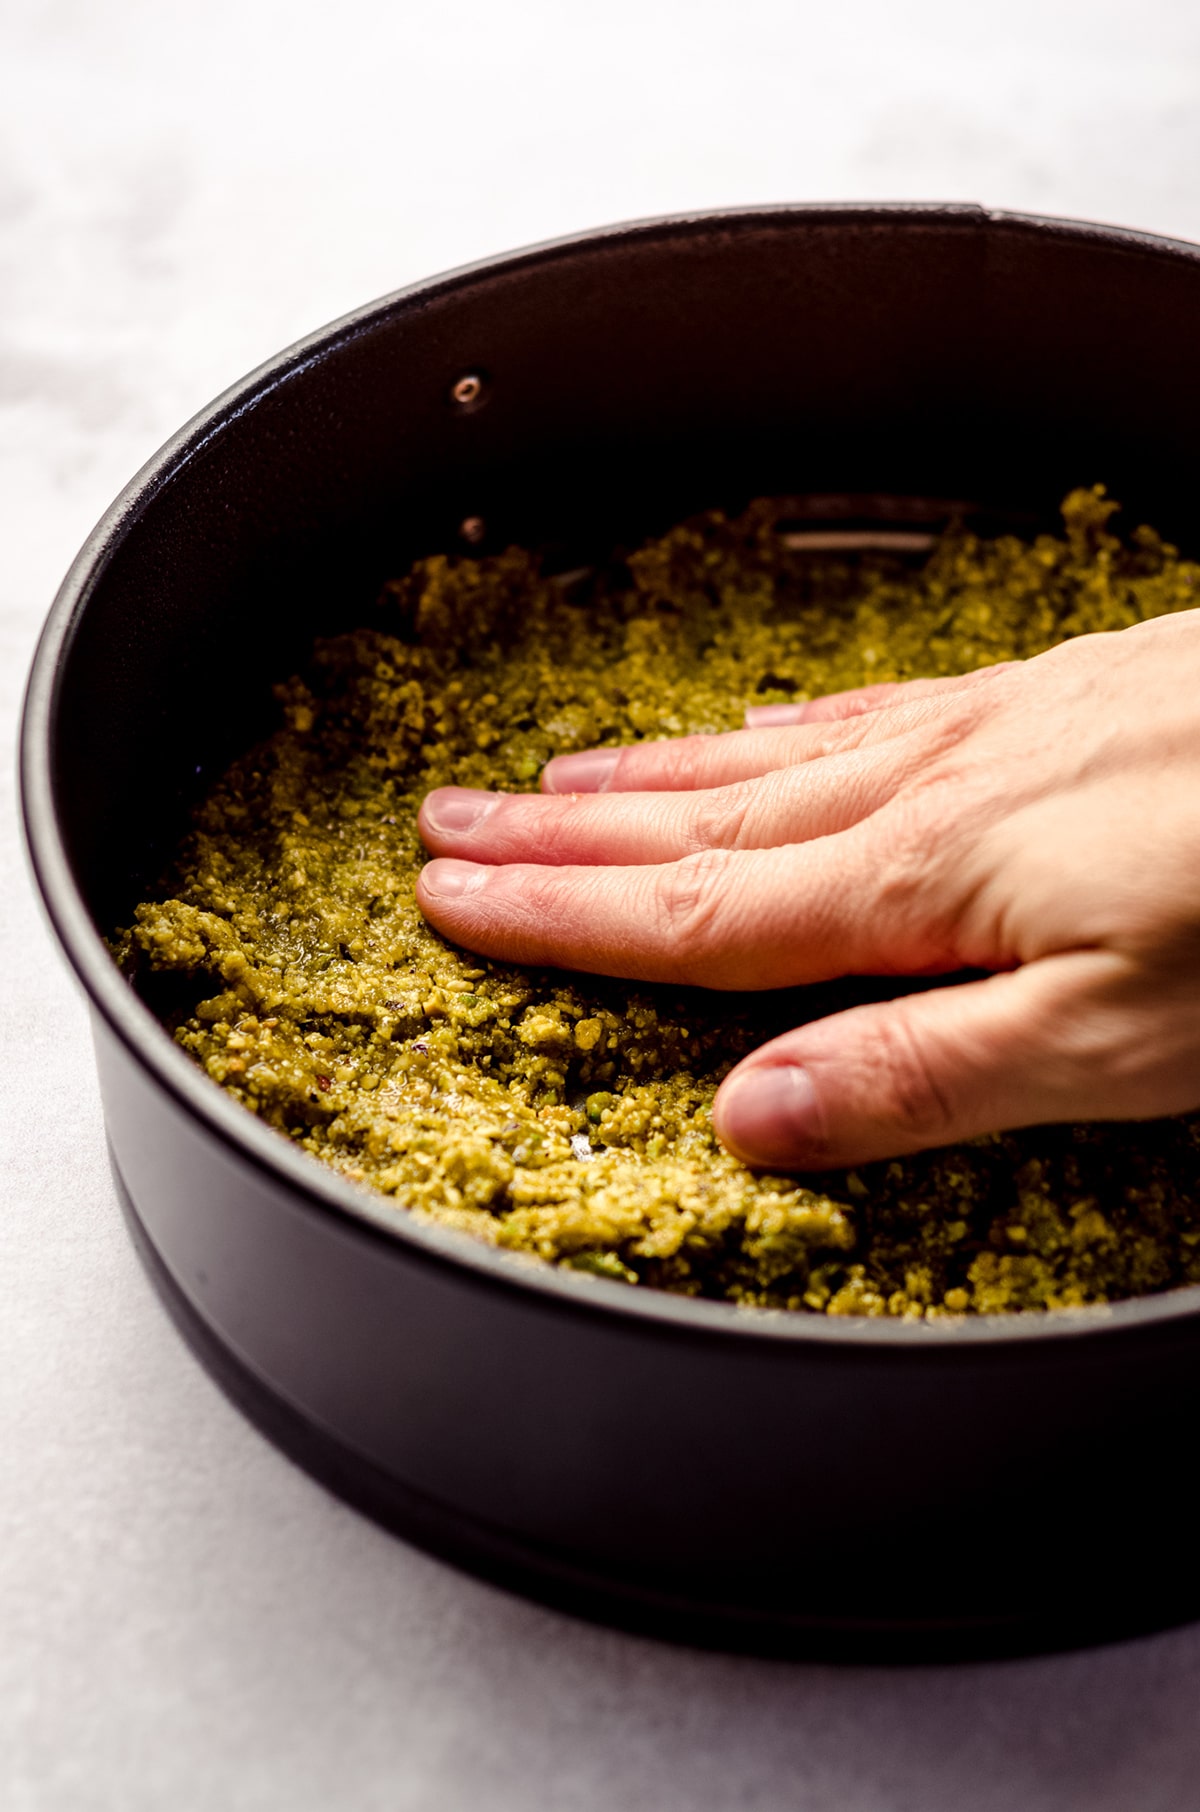
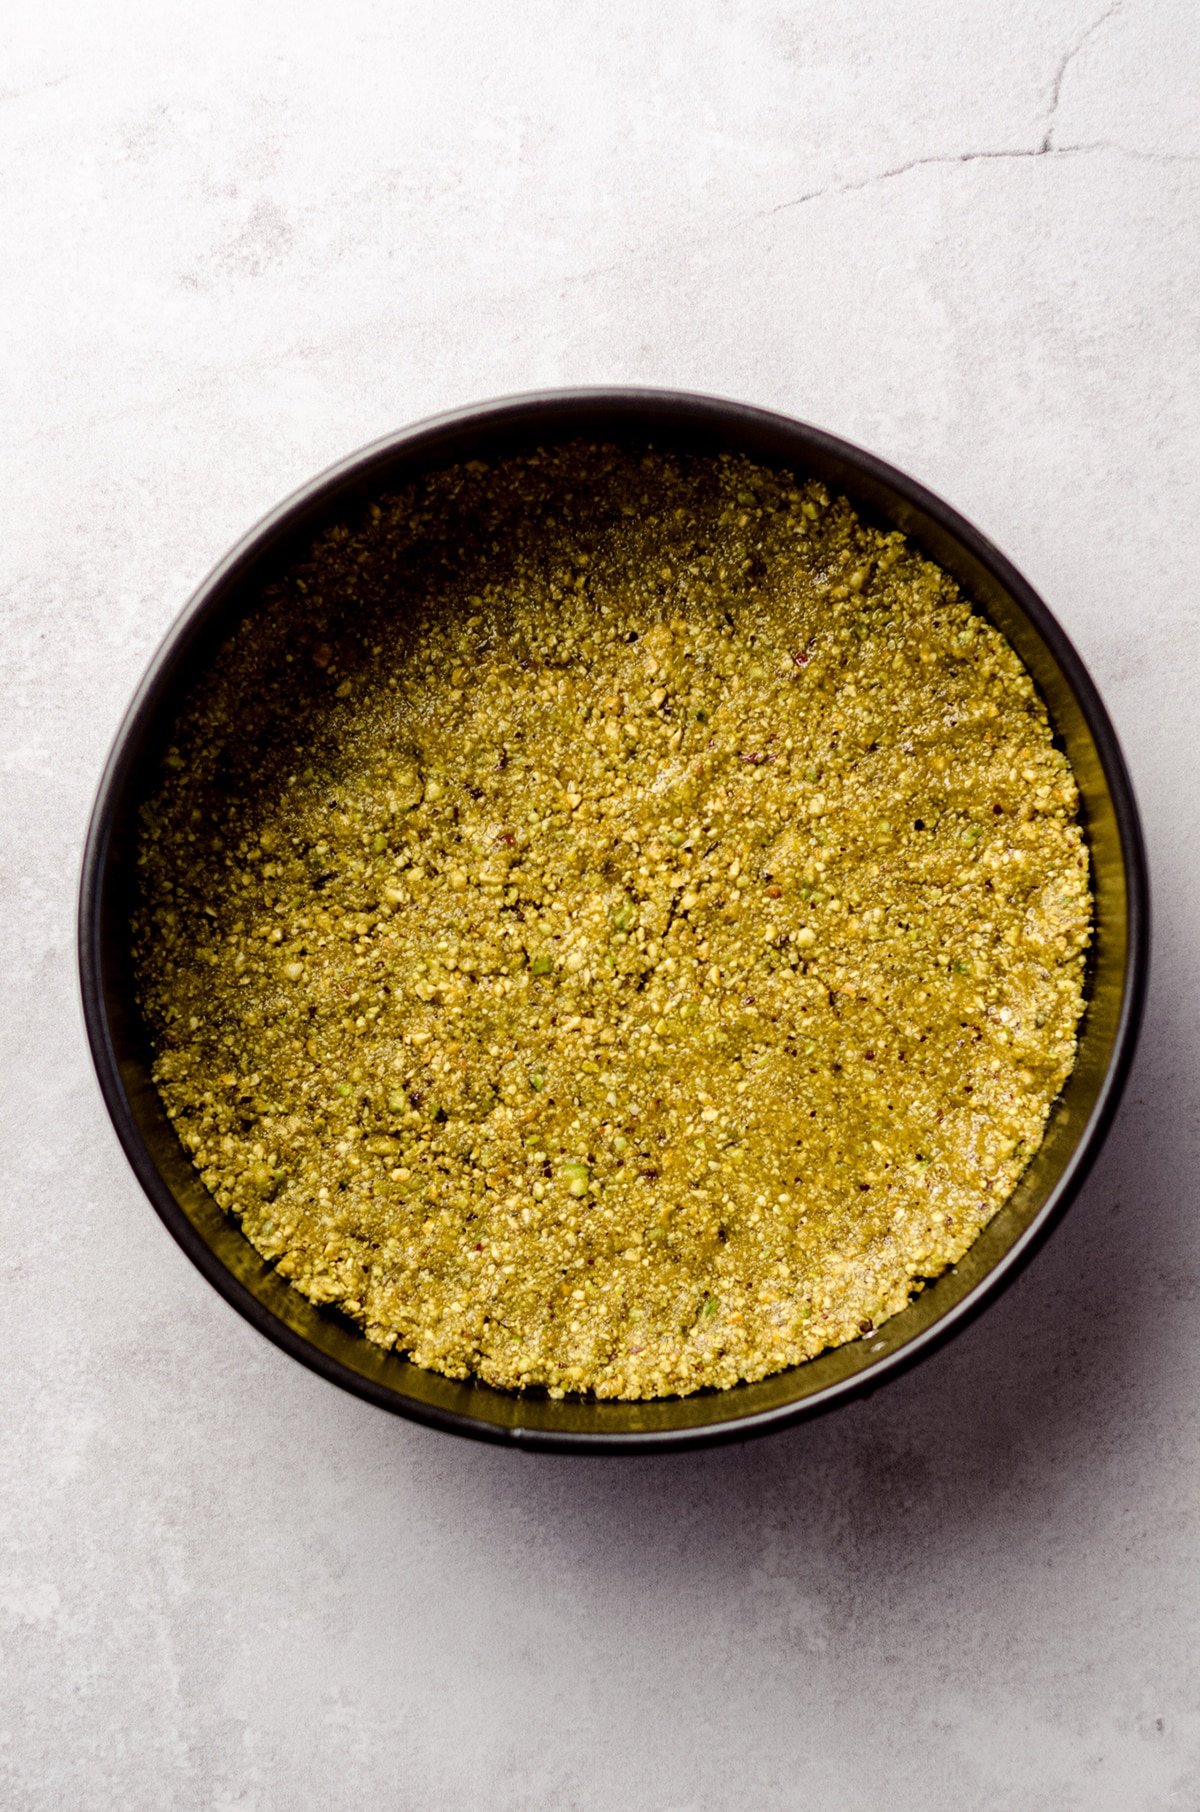
STEP #7
Press the pistachio mixture into the bottom of the prepared pan, then bake the pistachio crust for 8-10 minutes, until crust is fragrant and set. Remove from the oven and allow to cool while you prepare the filling.
MAKE THE PISTACHIO CHEESECAKE FILLING
STEP #8
Start by beating the cream cheese on medium high speed until smooth, about 2 minutes. Add the granulated sugar, pistachio paste, and salt, then beat again until combined, about another 2 minutes.
STEP #9
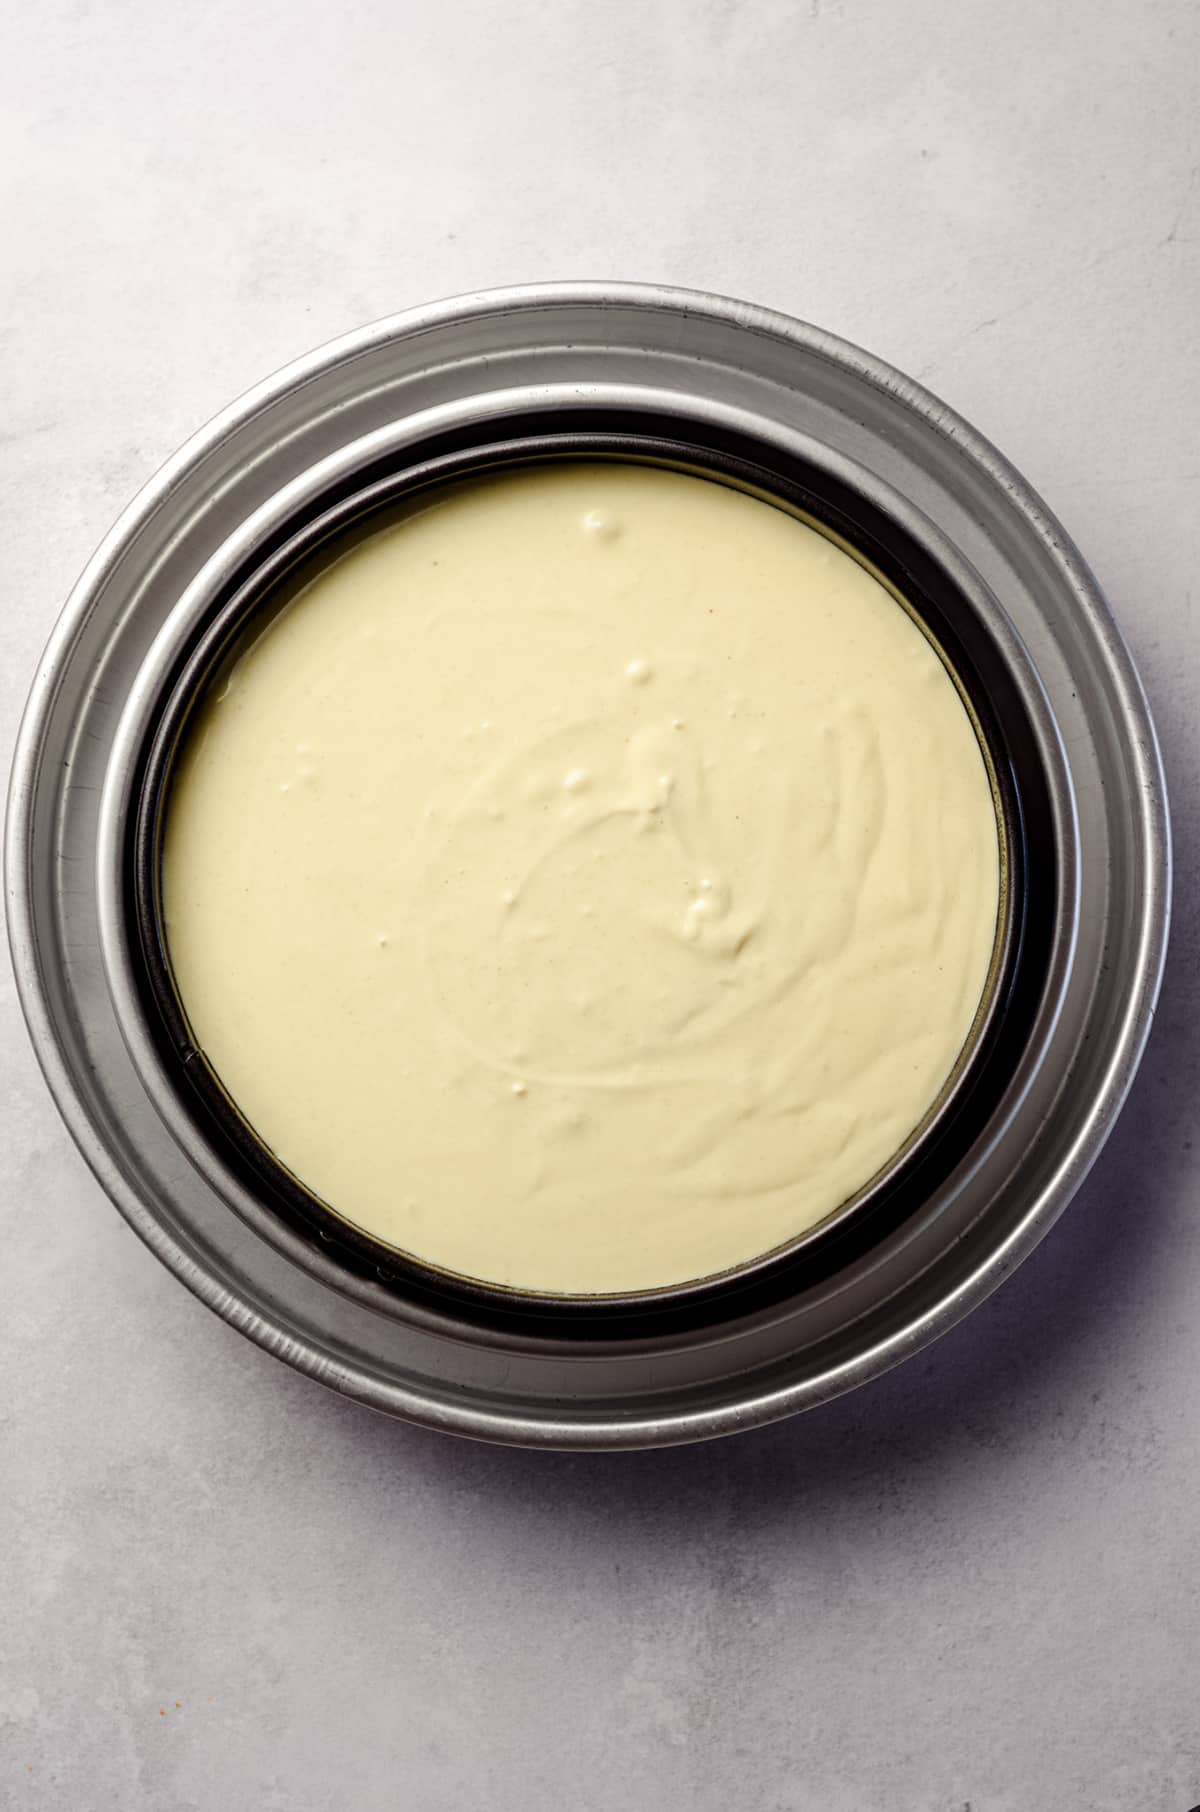
Reduce the mixer speed to low, then add the heavy cream, yogurt or sour cream, and vanilla and almond extracts and mix until completely combined. Add the eggs one at a time and continue mixing on low until eggs are just combined. Your batter should be smooth and creamy without lumps.
STEP #10
Pour the batter into the prepared pan. Create a water bath by placing the 9″ springform pan in a slightly larger round pan (I like to use a 10″ cake pan) and then place that pan into an even larger round pan (I like to use a 12″ cake pan) or roasting pan. See this post for details and links to my favorite pans for this.
STEP #11
Fill the outer pan with hot water halfway up the sides of the middle pan, then carefully transfer the whole thing to the oven.
STEP #12
Bake the cheesecake. See the recipe card below for details on how to tell when your cheesecake is done.
Pistachios Cheesecake Recipe Tips
ALWAYS USE ROOM TEMPERATURE INGREDIENTS
The most important thing to remember when we’re talking about baking cheesecake is to always use room temperature ingredients.
While this may seem like a tedious and unnecessary step, it really is essential to the success of your cheesecake.
Using ingredients that are too cold, or not all the same temperature results in a lumpy, uneven cheesecake. I don’t know about you, but biting into a lump of pure cream cheese when what I’m really wanting is a creamy, sweet pistachio cheesecake filling is just not going to fly.
Using room temperature ingredients helps your eggs, cream cheese, and sour cream blend together effortlessly and become a uniform (and delicious) cheesecake filling that will have you swooning over the super smooth and creamy texture.
I know, the waiting is torturous. But I promise: it’s worth it. Plan ahead and let your ingredients warm up before you get started.
A WATER BATH IS A MUST
For the creamiest, smoothest cheesecake, a water bath is essential! If you want avoid cracking, have an evenly baked filling, and live in the land of cheesecake bliss, a simple water bath is the answer to all of your cheesecake woes.
I’m sure you’ve seen water baths done with foil, huge pans, and boiling water spilling everywhere, but I have a super simple method that I’ve been using for all of my cheesecakes and it works like a dream.
I go into detail in my peach cheesecake recipe, but the idea is that you place your 9″ springform pan inside of a 10″ cake pan, and then fill a 12″ cake pan with water. There is no leaking of the filling, no crazy amounts of foil, and it works perfectly every single time. You can find a link for the exact pans that I use in the recipe card, along with detailed instructions on how to properly prepare your water bath.
A FULLY BAKED CHEESECAKE WILL JIGGLE
Perhaps the most surprisingly thing to new cheesecake bakers is that the filling will look underdone, when in fact it is perfectly cooked through. This is why it’s so important to know what to expect!
Once your cheesecake has baked for 90-105 minutes, the middle should jiggle just a little bit.
If the area that jiggles has a diameter larger than about 2″, you’ll want to return your pistachio cheesecake to the oven to bake for a little longer.
A great way to tell if your cheesecake is completely baked through is to use an instant read thermometer to test the internal temperature. You’re looking for a temperature of 145°F (63°C).
PROPER COOLING PREVENTS CRACKING
Once the cheesecake is fully cooked, turn the oven off and allow your cheesecake to cool in the oven with the door partially open. I like to use a wooden spoon to keep the oven propped open, but you can use any heat safe utensil you have on hand.
Let you cheesecake cool in the oven for about 1 hour, then remove the springform pan from the other pans and let cool on a rack for 2 hours.
Once the cheesecake is cooled, wrap it tightly with plastic wrap and chill it in the fridge for at least 6 hours, ideally overnight.
Taking the time to cool and chill the cheesecake prevents the top cracking, and gives the most wonderful creamy and delicious texture possible. Trust me, it’s worth the extra time!
We served this cheesecake at Christmas Eve dinner, and it was a huge hit. I also found myself stealing bites of leftovers every time I went to the fridge those first few days of our holiday break.
The filling is so creamy and luscious with little bits of pistachio throughout. The flavor is subtle but absolutely there and complemented by that intensely flavorful and textured pistachio crust.
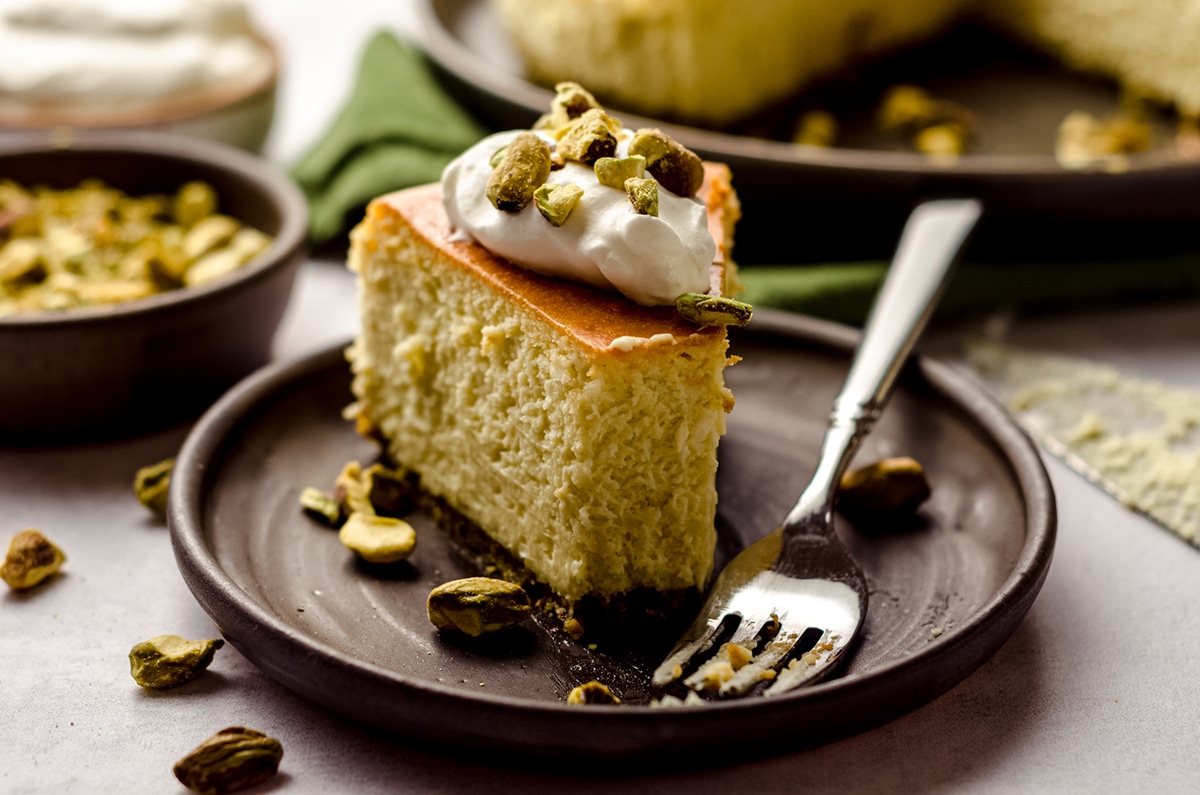
If you’re a pistachio fan, this cheesecake is 100% for you. You will be so pleased with its natural pistachio flavor and how it highlights that fantastic nut as the star of the show in your dessert.
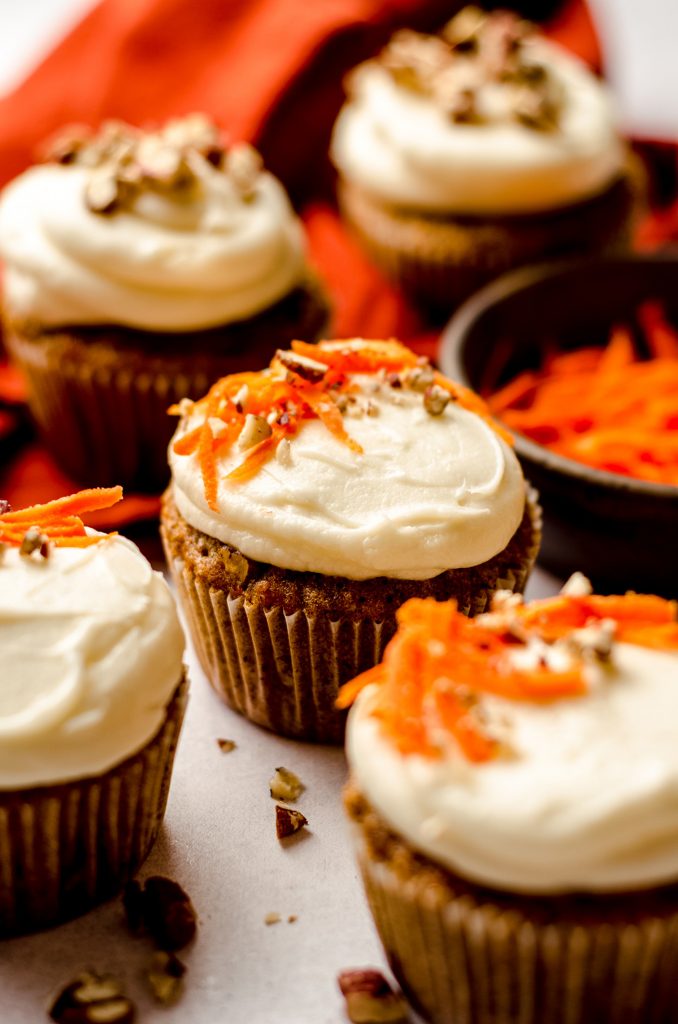
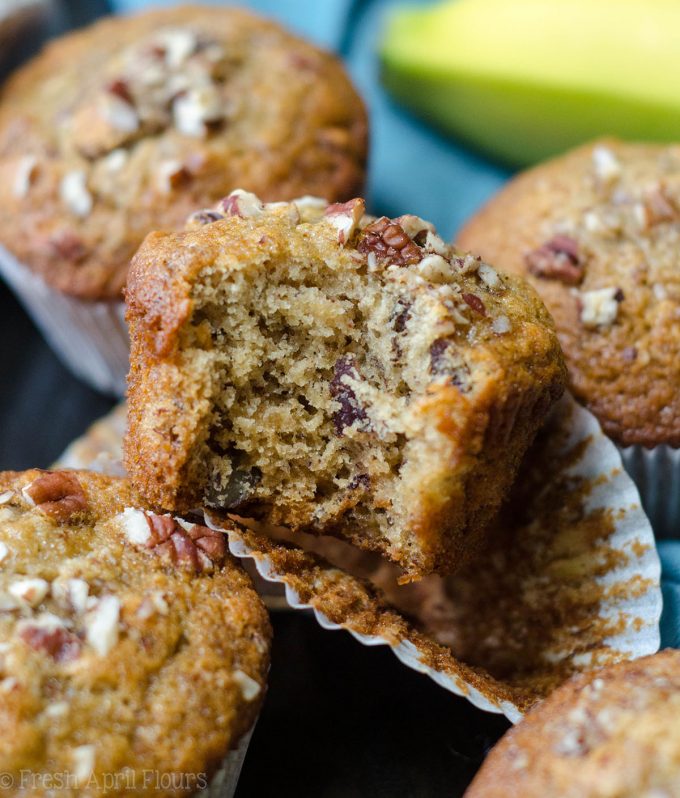
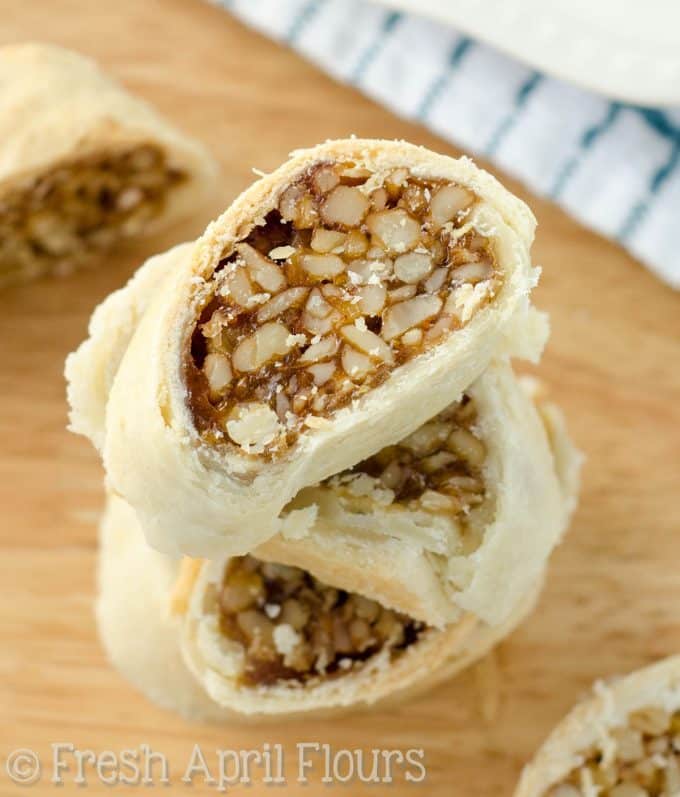
Now that you’ve tried your hand at baking a deliciously nutty cheesecake, try some of my other recipes that use nuts! A few of my favorites include these white chocolate chunk macadamia nut cookies, carrot cake cupcakes, banana nut muffins, and my honey walnut cookie sticks.
More Favorites from Fresh April Flours

Best Pistachio Cheesecake Recipe
Ingredients
PISTACHIO PASTE
- ½ cup (60g) raw shelled pistachios1
- 2 Tablespoons (30mL) water
PISTACHIO CRUST
- 1 cup (120g) raw shelled pistachios
- ¼ cup (50g) granulated sugar
- ¼ cup (57g) unsalted butter melted and allowed to cool
- ¼ teaspoon salt
PISTACHIO CHEESECAKE
- 32 ounces (900g) full fat block cream cheese completely softened to room temperature
- 1 cup (200g) granulated sugar
- ¼ cup (60mL) heavy whipping cream at room temperature
- 5 ounces (153g) Greek yogurt or sour cream about ⅔ cup; at room temperature
- ½ teaspoon vanilla extract
- ¼ teaspoon almond extract2
- ¼ teaspoon salt
- 4 large eggs at room temperature
- 2 large egg yolks at room temperature
Instructions
PISTACHIO PASTE
- Bring a medium size saucepan of water to a boil. Turn off or remove from heat, then add the raw pistachios.½ cup (60g) raw shelled pistachios1
- Allow the pistachios to soak for 4-5 minutes, then drain.
- Place the blanched pistachios in a clean kitchen towel, then rub the pistachios together to remove the skins. You may have to use your hands to remove stubborn skins.
- Place the skinless pistachios into a food processor, then process until smooth. Add the water one Tablespoon at a time when pistachios seem to be clumping. Scrape down the sides of the food processor as needed.2 Tablespoons (30mL) water
- Remove pistachio paste from the food processor and set aside to use right away in the cheesecake, or store in the refrigerator1 until ready to use.
PISTACHIO CRUST
- Preheat the oven to 325ºF (162ºC). Spray a 9" springform pan or my very favorite Fat Daddio's cheesecake pan with nonstick spray. Set aside.
- In a food processor, pulse the pistachios until they become small pieces. Pour the crushed pistachios into a medium size bowl, add the sugar, melted butter, and salt, then stir to combine.1 cup (120g) raw shelled pistachios, ¼ cup (50g) granulated sugar, ¼ cup (57g) unsalted butter, ¼ teaspoon salt
- Press the pistachio mixture into the bottom of the prepared springform pan, then bake the pistachio crust for 8-10 minutes, until crust is fragrant and set. Remove from the oven and allow to cool while you prepare the filling.
PISTACHIO CHEESECAKE
- In a large bowl with a handheld mixer or the bowl of a stand mixer fitted with the paddle attachment, beat the cream cheese on medium high speed until smooth, about 2 minutes. Add the granulated sugar, pistachio paste, and salt, then beat again until combined, about another 2 minutes.32 ounces (900g) full fat block cream cheese, 1 cup (200g) granulated sugar, ¼ teaspoon salt
- Reduce the mixer speed to low3, then add the heavy cream, yogurt or sour cream, and vanilla and almond extracts and mix until completely combined. Add the eggs one at a time and continue mixing on low until eggs are just combined. Your batter should be smooth and creamy without lumps.¼ cup (60mL) heavy whipping cream, 5 ounces (153g) Greek yogurt or sour cream, ½ teaspoon vanilla extract, ¼ teaspoon almond extract2, 4 large eggs, 2 large egg yolks
- Pour the batter into the prepared pan. Create a water bath4 by placing the 9" springform pan in a slightly larger round pan (I like to use a 10" cake pan) and then place that pan into an even larger round pan (I like to use a 12" cake pan) or roasting pan.
- Fill the outer pan with hot water halfway up the sides of the middle pan, then carefully transfer the whole thing to the oven.
- Bake the cheesecake for 1 hour 35 minutes to 1 hour 50 minutes. The middle of the cheesecake (a center approximately 2" wide) should jiggle just a little bit. I use my digital instant-read thermometer to check the internal temperature has reached 145ºF (63ºC). Turn the oven off5 and allow the cheesecake to cool in the oven for 1 hour. After 1 hour, remove the springform pan from all of the other pans and allow to cool on a cooling rack for another 2 hours. When the cheesecake is completely cool, cover or wrap tightly and allow to chill in the refrigerator for at least 6 hours, ideally overnight.
- Remove the cheesecake from the fridge and use a spatula or butter knife to gently loosen the crust from the side of the pan, then release the outer ring of the springform pan.
- Top the cheesecake with fresh whipped cream (I use my homemade whipped cream recipe) and crushed pistachios, if desired. Store leftovers in the refrigerator up to 5 days. Cheesecake freezes well, up to 3 months. Thaw in the refrigerator overnight.
Notes
- Pistachio paste: instead of making your own pistachio paste, you can also use store-bought. Use ⅓ cup of pre-made pistachio paste. Making your own takes about 20 minutes (if you’re using shelled pistachios) and can be done ahead of time and kept in the fridge until needed (pistachio paste will last in the refrigerator about 2 weeks). Be sure to use raw unsalted pistachios.
- Almond extract: this is not imperative, but it enhances the pistachio flavor.
- Mixer speed: it’s important not to go above low (or low-medium) speed after you’ve beaten the cream cheese. Incorporating too much air will create bubbles and potential cracks in your finished cheesecake.
- Water bath pans: here is a bundle that includes all the pans I use. Using this method eliminates the need to wrap anything in foil.
- Cool the cheesecake: I like to prop the oven door open with a wooden spoon or spatula.
Nutrition Disclosure
All nutritional values are approximate and provided to the reader as a courtesy. Changing ingredients and/or quantities will alter the estimated nutritional calculations.
Oh my goodness! Give me all the pistachio things forever! I cannot wait to make this one soon!
Can’t wait to try this recipe! I have the ready pistachio paste how much should I use? Your recipe doesn’t say how much in measuring cup your pistachio paste came out.
Thank you
Oh! Good call! I have updated the recipe to reflect that. Check the notes!
WOW, absolutely stunning cheesecake!!! I can’t wait to try this one!! I’m so happy my pistachio paste tutorial was helpful! Thank you for sharing!!!
Thank YOU, Shinee! xo
What temp do you bake the cheesecake? The crust says 325 but it never says a temp for the whole thing?
You keep the oven temp the same the whole time.
Complete disaster. I’ve been making cheesecake for nearly 30 years. My cookbooks are packed so I turned to the web- And was reminded that anyone can publish here. I’m going back to vetted recipes. Please save yourself the time, cost, and waste of ingredients and bake from Cook’s Illustrated or similar.
I’m often reminded that anyone can COMMENT, too. Bummer this recipe didn’t work out for you– all of my cheesecake recipes are the same base, and I’ve never had a problem with them nor had anyone else say it didn’t work for them. I actually checked out Cook’s Illustrated’s cheesecake recipe, and it’s not very different from mine. There are only so many ways to *do* cheesecake. I’ve proved myself here in the internet world with plenty of my recipes. It’s unfortunate you felt the need to dismiss all of them with YOUR poor experience. Thanks for visiting!
Thank you, Ann!
Made this yesterday — super yummy! It did crack — but every cheesecake I have ever made does so. Oh well. And it was soft — maybe I didn’t cook long enough — but still super delish. I added some of the paste to the whipped cream, as another commenter suggested, and it was excellent. Used the whipped cream as a frosting and added chopped pistachios and fresh raspberries to the top. My guests loved it. Would post a pic, but no way to do so. Will make again.
Thanks so much, Clair! It might have needed a bit more time in the oven, but it sounds like it was still perfect! I did see your email, thank you 🙂
Should I husk the nuts for the crust like for the paste?
I’d like to say this recipe worked fine for me. I use a cake nail for all my cheesecakes and I’ve been using the water bath pan “trick” for a while. Just wanted to add for those who are unsure that this is the best, least messy method for baking cheesecakes.
However, I was unsure whether you husked the nuts for the crust as you did for the paste or not. I did and it was okay. I have ingredients left over and I’m waiting for my pistachio extract to make another cake. How would you suggest I prepare the nuts for the crust?
You do not need to remove the peel from the pistachios for the crust the same way you do for the crust. In fact, that will make them soft and mushy and cause the crust to be mushy, too. Hope that helps!
Thank you. Baking the crust removed the moisture but I think the blanching may remove a bit of flavor. I will try it without blanching in a few days. Thanks again.
Sure thing! I’d love to hear how round 2 goes 🙂
First of all, thanks for this recipe. I made 2 more cakes – 1 with raw nuts crust; one with roasted & salted nuts. Surprisingly both were about the same. You could taste more salt with the roasted but the raw (as per recipe) had a salty taste also. Both contrasted well with the tart cream cheese. I also used pistachio extract (easily found on the river) instead of almond and it was slightly more pistacioy. But pistachios aren’t a strongly flavored nut in cooking anyway. So, it was a hit. My family loved playing taste-testers.
I’d add a few “tips:”
~ I’ve baked hundreds of cakes and dozens of cheesecakes. All ovens and batters are different. For a surefire bake, use a cake nail.In fact, most springform pans have an indentation in the bottom just for a nail.
~ For this recipe, I made sure to use large eggs and not extra large. 4 XL eggs is 8oz.; 4 L eggs are 6.4 oz so there is a difference in firmness.
~ I learned many years ago the hard way to put the crust into the 10×3 baking pan before baking it. That way the butter doesn’t leak out and set off all your smoke alarms.
Glad I found your site and looking forward to trying more of your recipes. Cheers.
Thanks so much for all the feedback, Joe!
This turned out fantastic! I used pistachio flour from The Pistachio Factory instead of grinding them up myself. I baked it the full 1 hour and 50 minutes and got a nice golden brown color on the top with no cracks! Thank you for using real ingredients and NO instant pudding mix!
You are SO welcome, Anna! That’s exactly what I wanted to do with this cheesecake 🙂 so glad you enjoyed it.
This is going to be Brad’s birthday present! I cannot wait to see how it turns out!
Please report back!!
Hi Lynn
I’m looking for a mint /pistachio cheesecake . Would it be possible to omit the almond extract and add mint?
Hi, Stella– you could definitely try that! Let me know how it goes!
Quite labor intensive, but sooooo worth it! Best cheesecake I’ve ever had!
Thank you so much, Kim! 🙂