
How To Make A Cheesecake Water Bath (Without Foil)
As an Amazon Associate, I earn from qualifying purchases. Read the full disclosure here.
Whether it’s a classic cheesecake recipe or a flavored version like cinnamon roll cheesecake or pistachio cheesecake that you’re making, baking your cheesecake in a water bath is key for the perfect lift, an even bake, and a crack-free surface. With my simple tried-and-true method, you can skip wrapping your springform pan in foil, saving you time and materials.
WHAT IS A CHEESECAKE WATER BATH?
No, a water bath is not where you’re cleaning your cheesecake, even if you’re eating it Chandler and Rachel style.
Hopefully you never have to question whether or not your cheesecake is clean enough to eat! A cheesecake water bath, rather, is one of the most crucial keys to cheesecake success. You might even see this arrangement called a bain marie.
Many folks turn to wrapping their springform pan in foil and placing it in a literal pan of water, but I find this extra step of a foil-wrapped pan totally unnecessary. No fancy equipment, no crazy appliances, no wasting layers of foil, and in my experience, the best way to be sure with 100% certainty that no water gets into your cheesecake.
That dreaded water bath can completely ruin a perfect cheesecake, even if everything else went smoothy (you know, making sure your ingredients are at room temperature and that you haven’t overmixed your batter).
WHAT IS THE PURPOSE OF BAKING CHEESECAKE IN A WATER BATH?
A water bath provides the humid environment that cheesecakes love. The water bath produces steam which circulates throughout the oven, ensuring that the cheesecake cooks evenly. Sometimes you’ll see people place a large pan of hot water under their cheesecake on the bottom rack of the oven, but I prefer this 2-pan method because it really helps moderate the temperature around the sides of the pan, ensuring the edges cook at the same time as the rest of the cheesecake.
I often hear from people that the reason they are fearful to bake cheesecake is because they seem “finicky” and temperamental. The truth is, well, they can be. But they don’t have to be.
If you follow the instructions laid out clearly and extensively in my cheesecake recipes and take the couple extra minutes it costs to prepare your cheesecake water bath, you will be rewarded with a beautiful cheesecake with an even texture, flawless crack-free top, and velvety smooth interior that will show you that homemade cheesecake is absolutely something you can do. And do it well.
WHAT IS THE ADVANTAGE OF A CHEESECAKE WATER BATH?
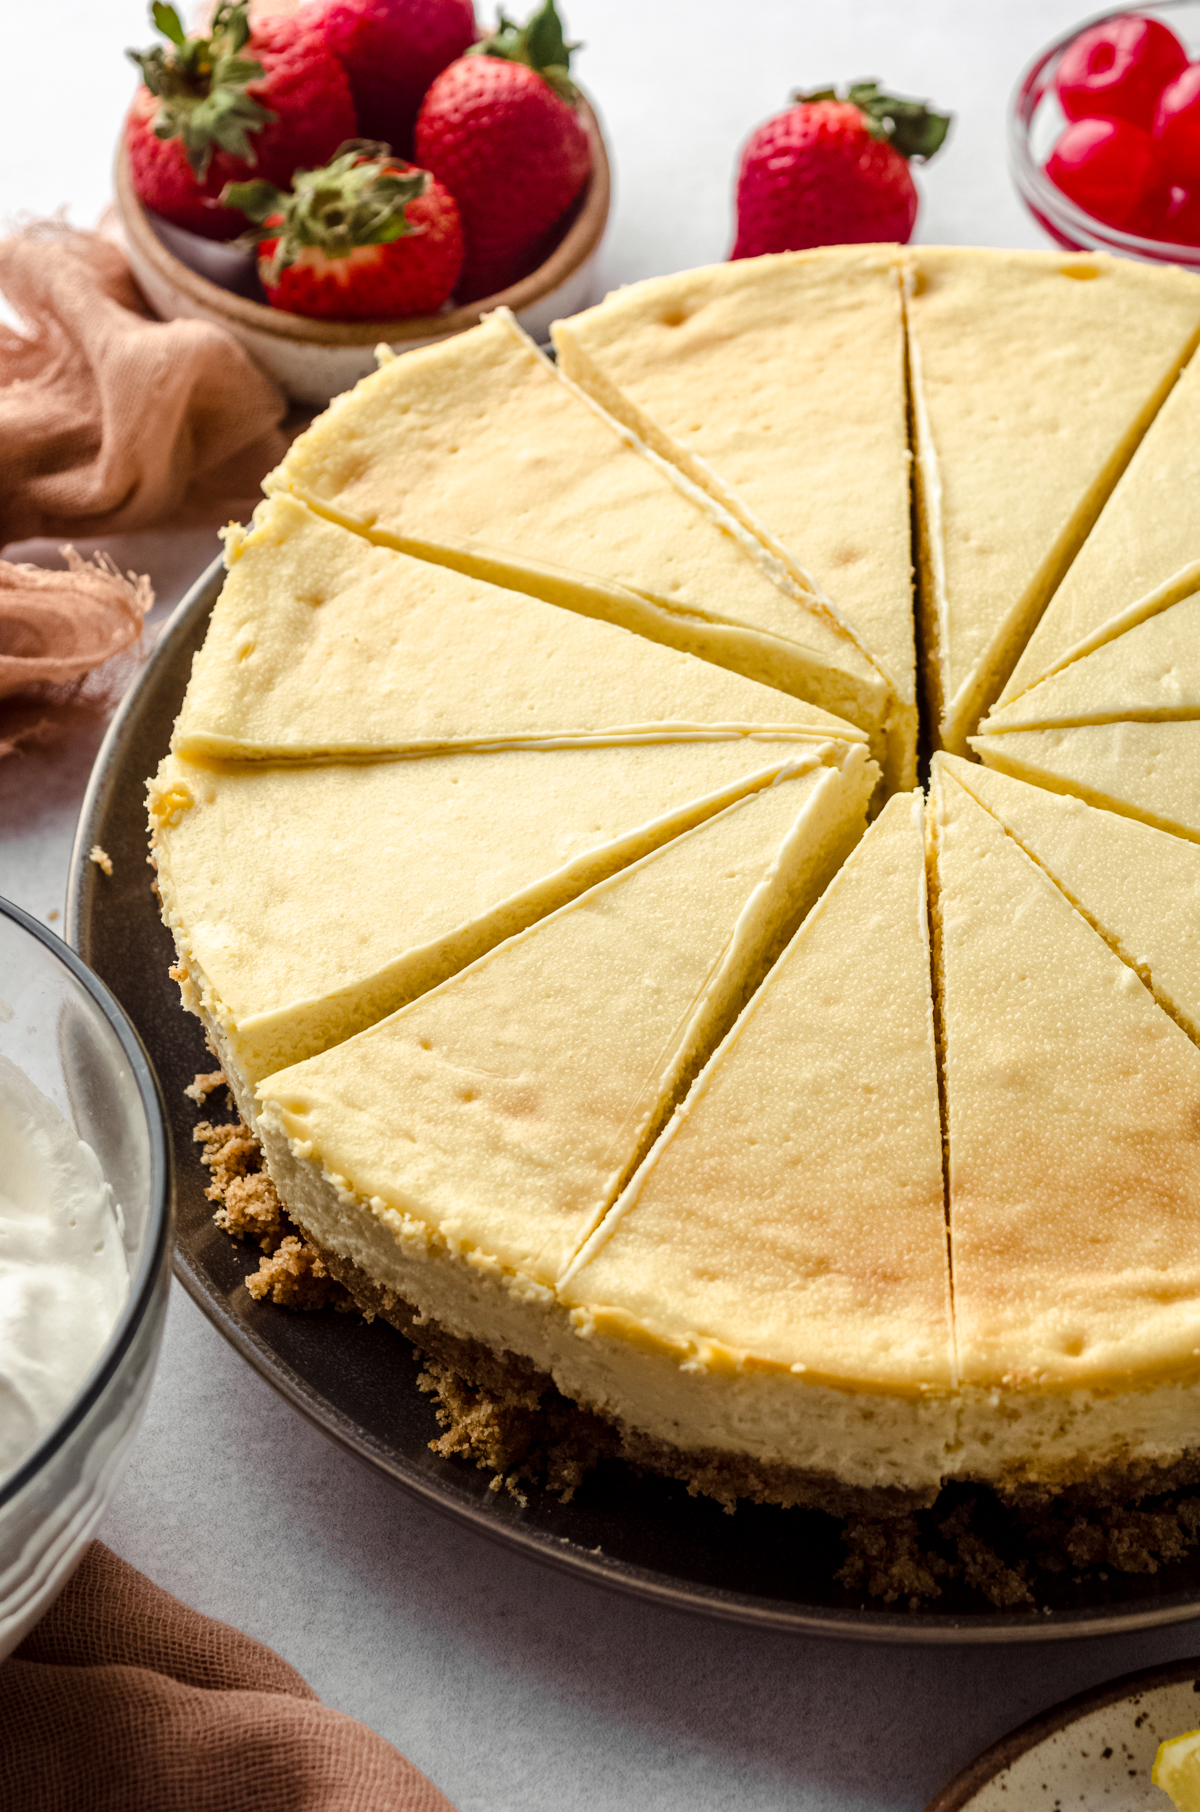
Let me be the first to say that a cheesecake made without a water bath can and will still taste amazing, given you use a really delicious recipe (here’s my best cheesecake recipe, classic style).
But if you’re looking for that flawless, crack-free cheesecake that bakes up evenly with consistent color and texture, a water bath is the way to go.
WHAT YOU NEED
Like I mentioned, there is no fancy equipment necessary to make a water bath. Below you’ll see exactly what I use to make mine, and where you can find the pans to replicate it exactly.
There’s a good chance you already have the materials to make this arrangement without purchasing anything new, so I have some suggestions for alternative equipment.
To make my easy water bath, you will need:
• a springform pan
• a 10″ round cake pan
• a 12″ round cake pan
• hot water
HOW TO MAKE A CHEESECAKE WATER BATH WITHOUT FOIL
STEP #1
Follow your recipe and prepare your cheesecake as directed in the recipe instructions. It will likely call for an 8″ or 9″ springform pan. All of my recipes use a 9″ springform pan.
STEP #2
Place the 12″ cake pan on the rack in the oven.
STEP #3
Place the 10″ pan inside the 12″ pan.
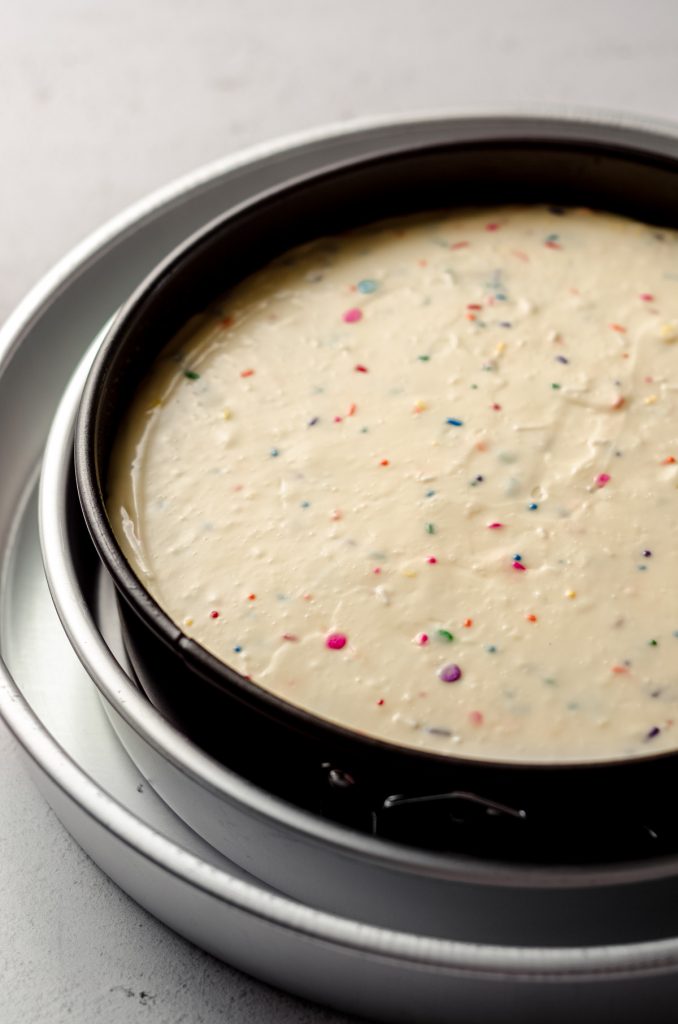
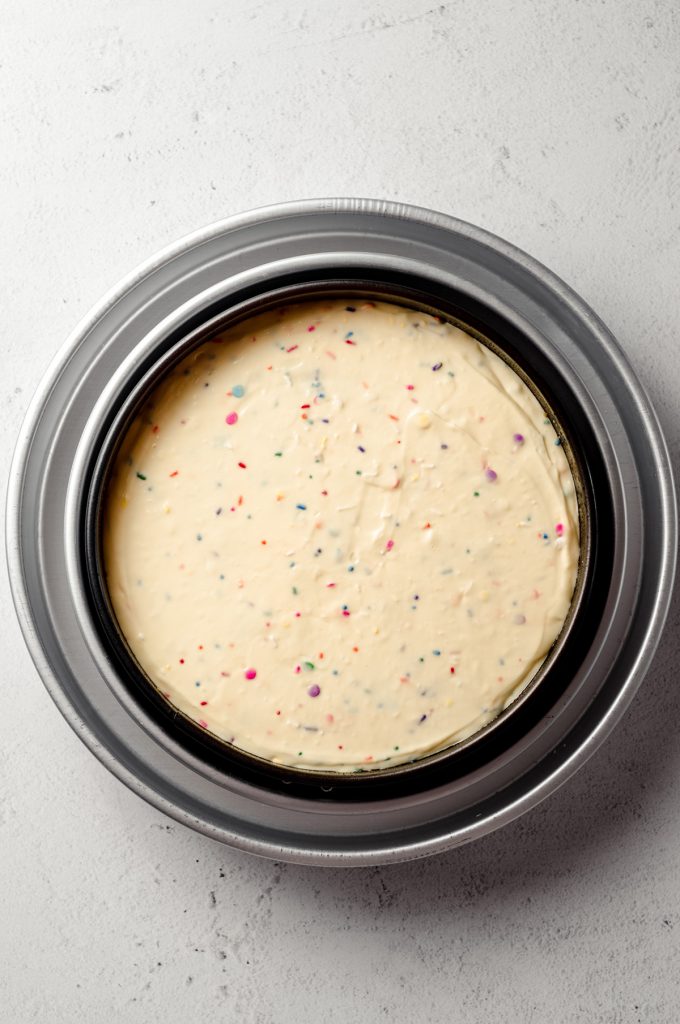
STEP #4
Place the springform cheesecake pan filled with cheesecake batter inside the 10″ cake pan.
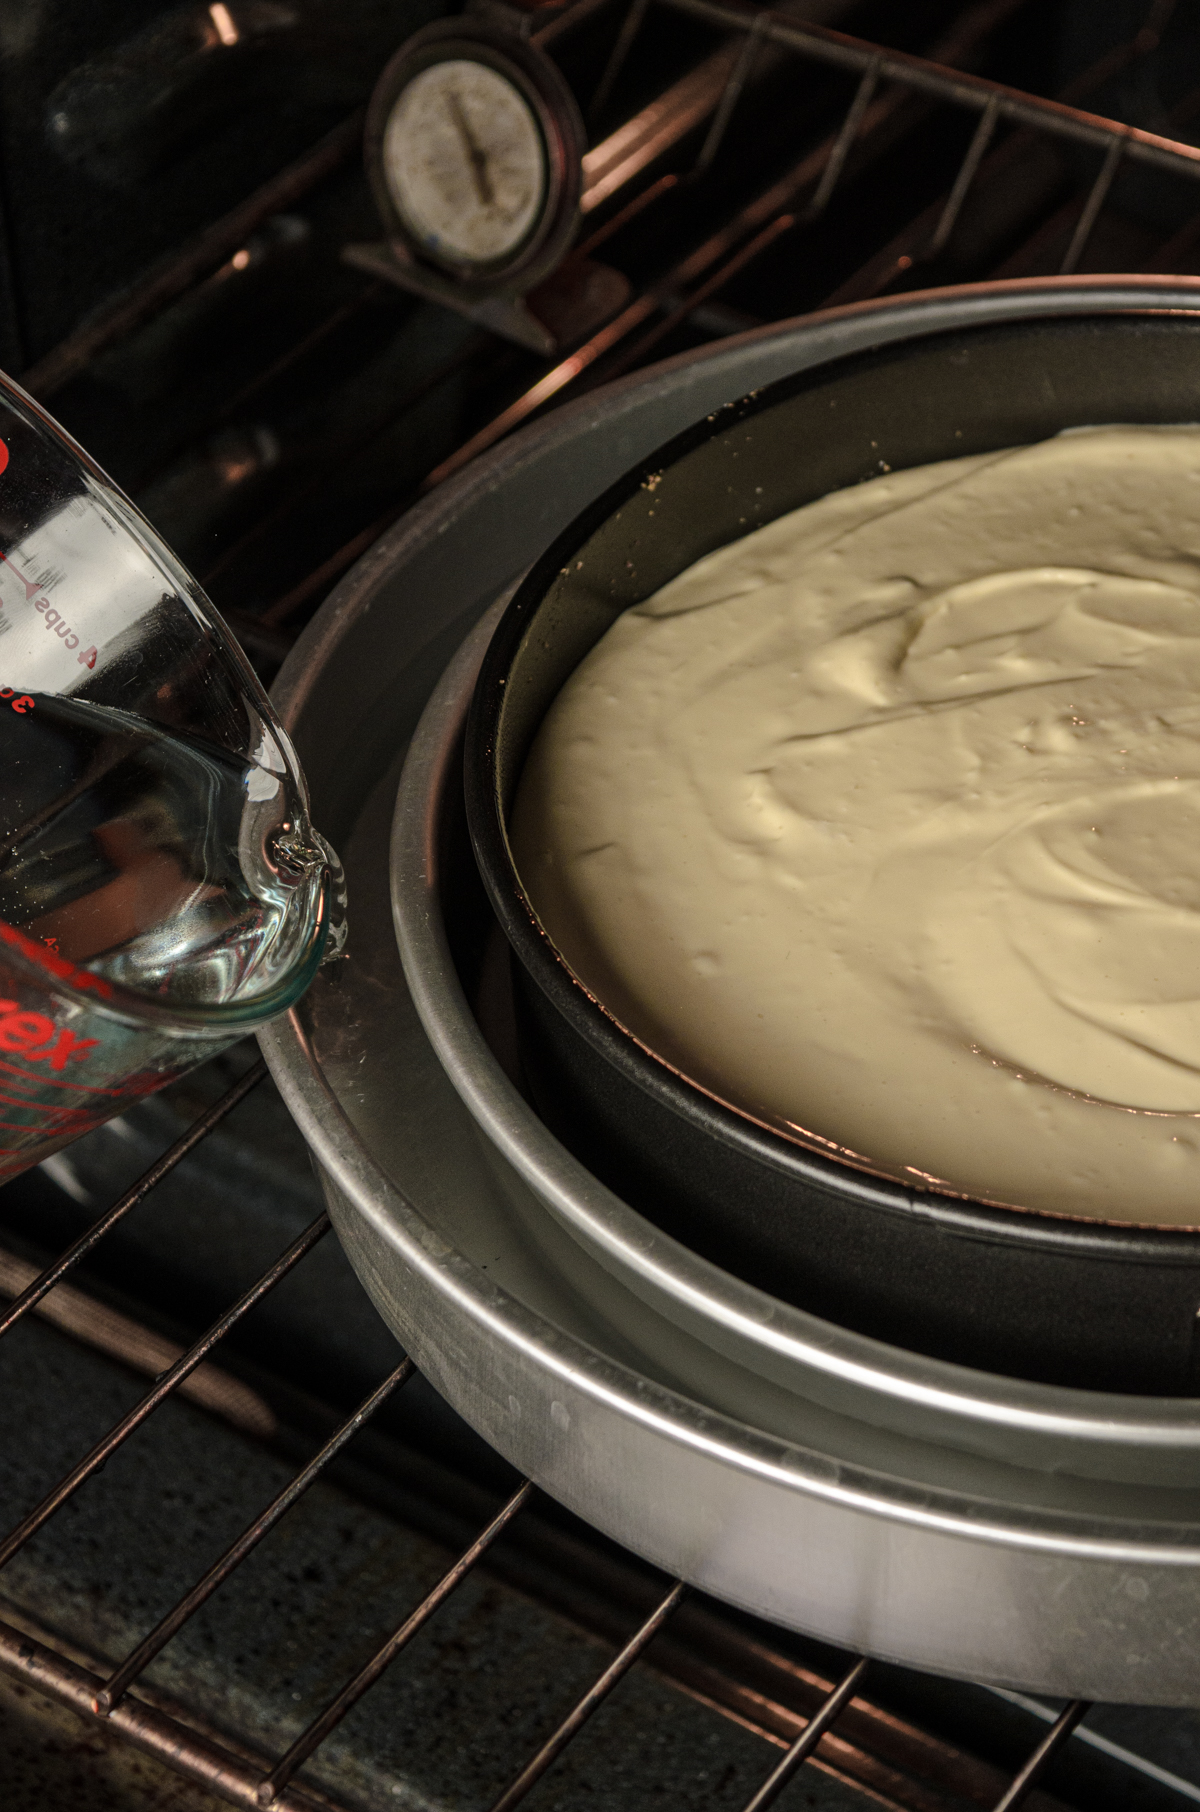
STEP #5
Pour hot water into the outside 12″ pan, taking care not to get any water inside the 10″ pan.
STEP #6
Try not to open the oven while your cheesecake bakes. Use your oven light to peek inside and only open it when you want to test for doneness. Keep all that precious steam inside!
ALTERNATIVE METHOD
You can arrange all of these pans outside of the oven and then carefully transfer everything to the oven. This is my preferred method, as it keeps more of the hot air trapped in my oven, but it’s important to arrange everything close to the oven so you don’t have to walk as far! Just be sure you’re taking care not to splash or spill– that hot water could burn you or at the very least startle you and cause you to drop everything on the floor.
Sort of like Chandler and Rachel, but way sadder.
EQUIPMENT ALTERNATIVES
If you don’t already have these sizes of pans and don’t want to purchase anything new, I get it. You likely have a larger pan, a large roasting pan, perhaps even a large Dutch oven, that could accommodate this water bath arrangement. Just make sure you’re checking that everything fits nicely before starting your cheesecake filling— you don’t want to be ready to bake with an insufficient setup!
COOL THE CHEESECAKE IN THE WATER BATH
Your cheesecake is done baking when there is about a 2″ diameter in the center that still jiggles when you tap the pan, or when the internal temperature reaches 145ºF (63ºC). This is my very favorite instant-read digital thermometer, and this is my favorite budget-friendly digital thermometer.
Now, you’ll want to make sure your cheesecake cools gradually and evenly. To cool your cheesecake, turn off the oven, crack the door (I like to prop mine open with the wooden handle of a spatula), and allow the steam to dissipate, and the water and the cheesecake to gradually cool down. The humid cooling environment will ensure all of that perfect baking the cheesecake did in the oven was not in vain!
A sudden change in temperature can shock your cheesecake’s system and cause it to sink too quickly, possibly cracking the top and leading to an uneven surface.
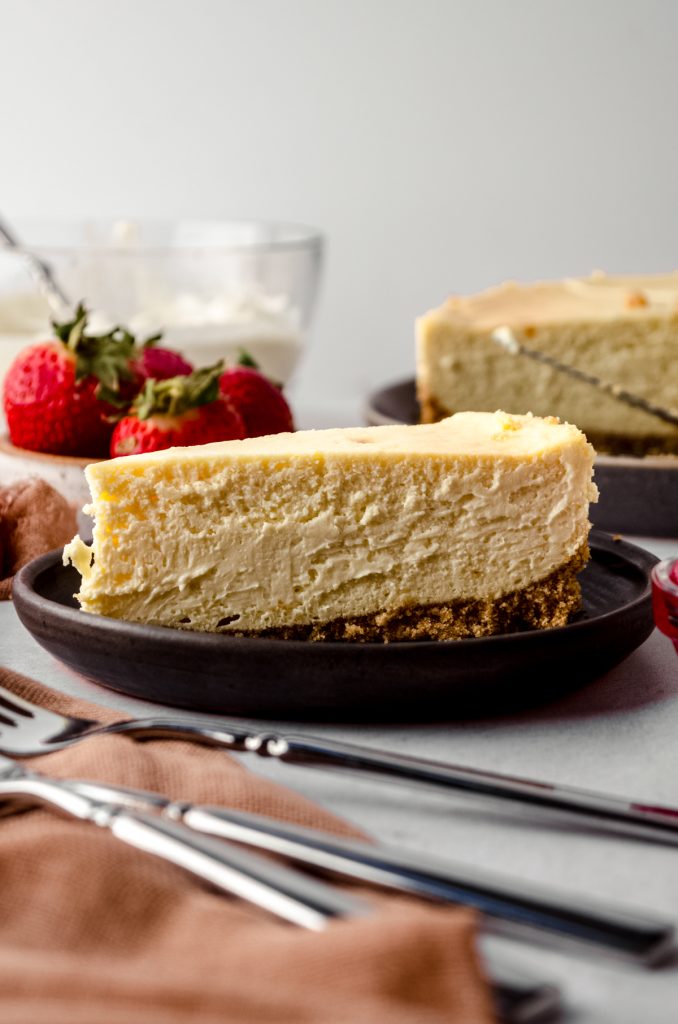
If your perfectly creamy cheesecake still cracks, fear not! Whipped cream, salted caramel sauce, hot fudge sauce, strawberry compote, lemon curd, or fresh fruit, do an amazing job of covering the surface. And don’t miss my pumpkin spice whipped cream for your pumpkin cheesecake!
Now that you’ve got this technique down, it’s time for my perfect cheesecake recipe atop a buttery graham cracker crust. If you’re interested in other flavors, be sure to visit my extensive (and always-growing!) cheesecake recipe collection.

How To Make A Cheesecake Water Bath (Without Foil)
Ingredients
- cheesecake recipe
- 9" springform pan1
- 10" round cake pan1
- 12" round cake pan1
- 2 to 3 cups hot water this is an approximation– I always heat more than I know I will need
Instructions
- Preheat the oven to the temperature directed in your cheesecake recipe. Move a rack in the oven to the middle position.
- Make the cheesecake crust and, if pre-baking, bake as normal without a water bath. Proceed with the rest of your cheesecake recipe.
- HEAT WATER: I like to fill my large glass measuring cup with water and then heat it to boiling in the microwave. You will need enough water to go about halfway up the sides of the pan, about 1 and ½ inches.
- Pour the cheesecake batter into the crust as directed in your recipe.
- Place the largest pan2 onto the oven rack, followed by the middle size pan, then add your springform pan with the cheesecake batter in it. Carefully pour the hot water into the outermost pan, ensuring the water level is about halfway up the pan. Work quickly but carefully so as not to lose too much heat.
- Close the oven and bake the cheesecake as directed in your recipe, trying hard not to open the oven until it's time to check for doneness.
- When your cheesecake is done, turn the oven off and prop the oven door open a bit. Allow the cheesecake and the water bath to sit in the oven for at least 1 hour to cool down gradually. Remove the cheesecake and the water bath from the oven and set the springform pan on a wire rack to cool completely at room temperature. Once cooled to room temperature, refrigerate or freeze the cheesecake as directed in your recipe.
Notes
- Water bath pans: here is a bundle that includes all the pans I use. I like this bundle because although it comes with two additional pans, it’s cheaper to buy this than individual pans. Using this method eliminates the need to wrap anything in foil.
- Assemble the water bath: you can arrange this whole thing outside of the oven and transfer the whole thing at one time to the preheated oven. Just be sure you’re taking care not to splash or spill the hot water.
Nutrition Disclosure
All nutritional values are approximate and provided to the reader as a courtesy. Changing ingredients and/or quantities will alter the estimated nutritional calculations.
I’ll have to give this a try, but I’ve never had my foil leak — I take my square of foil into a dark room, and shine a flashlight behind it. If the light shines though, they’re always the same shape; tiny “c”‘s, which tells me that it’s a manufacturing issue. If the foil passes the test, then I wrap the cheesecake very carefully, never sliding it, but lift and turn. Then I put it into a large turkey roasting pan, and pour in a large carafe of water. The setup turns out to be heavy and clumsy. But when it’s done, how to remove it from this large turkey pan? So, I use a few layers of foil underneath the cheesecake pan, with handles sticking up. I know — so much work, right? Your method is so much easier.
Oh man, Scot! That is a TON of work! Definitely use this method next time!
I’ll have to try this method. In the past I’ve always wrapped my spring form pan with the extra heavy duty extra wide aluminum foil that is sometimes sold at Costco or restaurant supply stores, its industrial strength, I did have a question about using a Dutch oven as one of the larger pans for the Bain Marie. I’ve always avoided doing this even though I own an enormous le creuset pot, since cast iron holds heat but other forms of metal like aluminum and stainless steel conduct heat but do not retain heat, I wondered if cast iron would overcook the edges of the cake because it takes forever to cool down. What has been your experience? Does it make no difference?Thanks, Matthew
Hi, Matthew– I have never made a cheesecake in a cast iron, so I’m not sure how to advise! If you try it, please report back.