
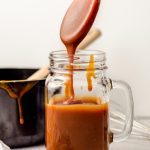
Homemade Salted Caramel

As an Amazon Associate, I earn from qualifying purchases. Read the full disclosure here.
You only need four simple ingredients to make your own homemade salted caramel sauce. In this recipe, I use the “wet” caramel method which is my tried and true method.
The first time I made my own salted caramel sauce, I was super nervous.
Once it was finished and I was staring lovingly at a saucepan full of beautifully browned and perfectly salted caramel sauce, I sighed a big sigh of relief and haven’t bought a jar of pre-made sauce since.
Many of you have said that you have struggled with whatever salted caramel sauce recipe you tried, and I love that you come to me knowing I only give you the easiest ways to get things done!
That said, I very much prefer the “wet” caramel method to the “dry” caramel method, and I’ve done this so many times (dozens and dozens) with minimal issues, so I’m ready to coach you through making the best salted caramel sauce in your own kitchen.
Are you ready? Shake out those willies– we’re getting it done, and fabulously!
WHAT IS CARAMEL?
Next, let’s talk about exactly what caramel is so that we understand what we’re looking to accomplish.
Caramel is simply cooked sugar (just like the word “caramelized” referring to the natural sugars in food cooking to brown), taken juuuuust to the edge of burning. In fact, some people prefer to burn their sugar a bit to give it even more depth of flavor, so if you’re into that flavor profile, there’s room for you here, too!
Salted Caramel: Wet vs. Dry Method
So let’s first talk about this wet vs dry method, because when we think about food being “wet,” it can give us a weird association. And you might be thinking… “Isn’t caramel sauce, uhh, wet? Wouldn’t it be caramel candy if it was dry?”
That would be a great thought, but the wet vs dry refers to the method in which we cook the sugar.
The “wet” version involves water, and the “dry” version does not. Simple!
With the “wet” version, we allow the sugar to dissolve before it cooks. With the “dry” method, you just go right to cooking the sugar, which can sometimes lead to a grainy caramel sauce and can oftentimes clump together while cooking.
There are many folks who swear by one method over the other, and to that I say… Whatever works for you, stick to it.
But if you’ve struggled with the “dry” method before, or even if you’ve struggled with the “wet” method, too, I’d love to show you this can be simple, not scary, and totally doable with minimal stress.
I even have some troubleshooting tips at the bottom of this post so that you can be successful even if you run into some hiccups.
The wet method tends to take a bit longer, since we have to wait for the water to evaporate, but aside from that, I think you’ll really enjoy this way to make salted caramel sauce.
Why You’ll Love This Salted Caramel Sauce Recipe
There is nothing like homemade caramel sauce, even though you can get some really great options at your local grocery store these days. It is smooth and buttery and it makes the perfect addition to so many desserts. When stored properly, it can last quite some time, which makes it a great option for host/hostess and/or holiday gifts.

Homemade Salted Caramel Sauce Ingredients
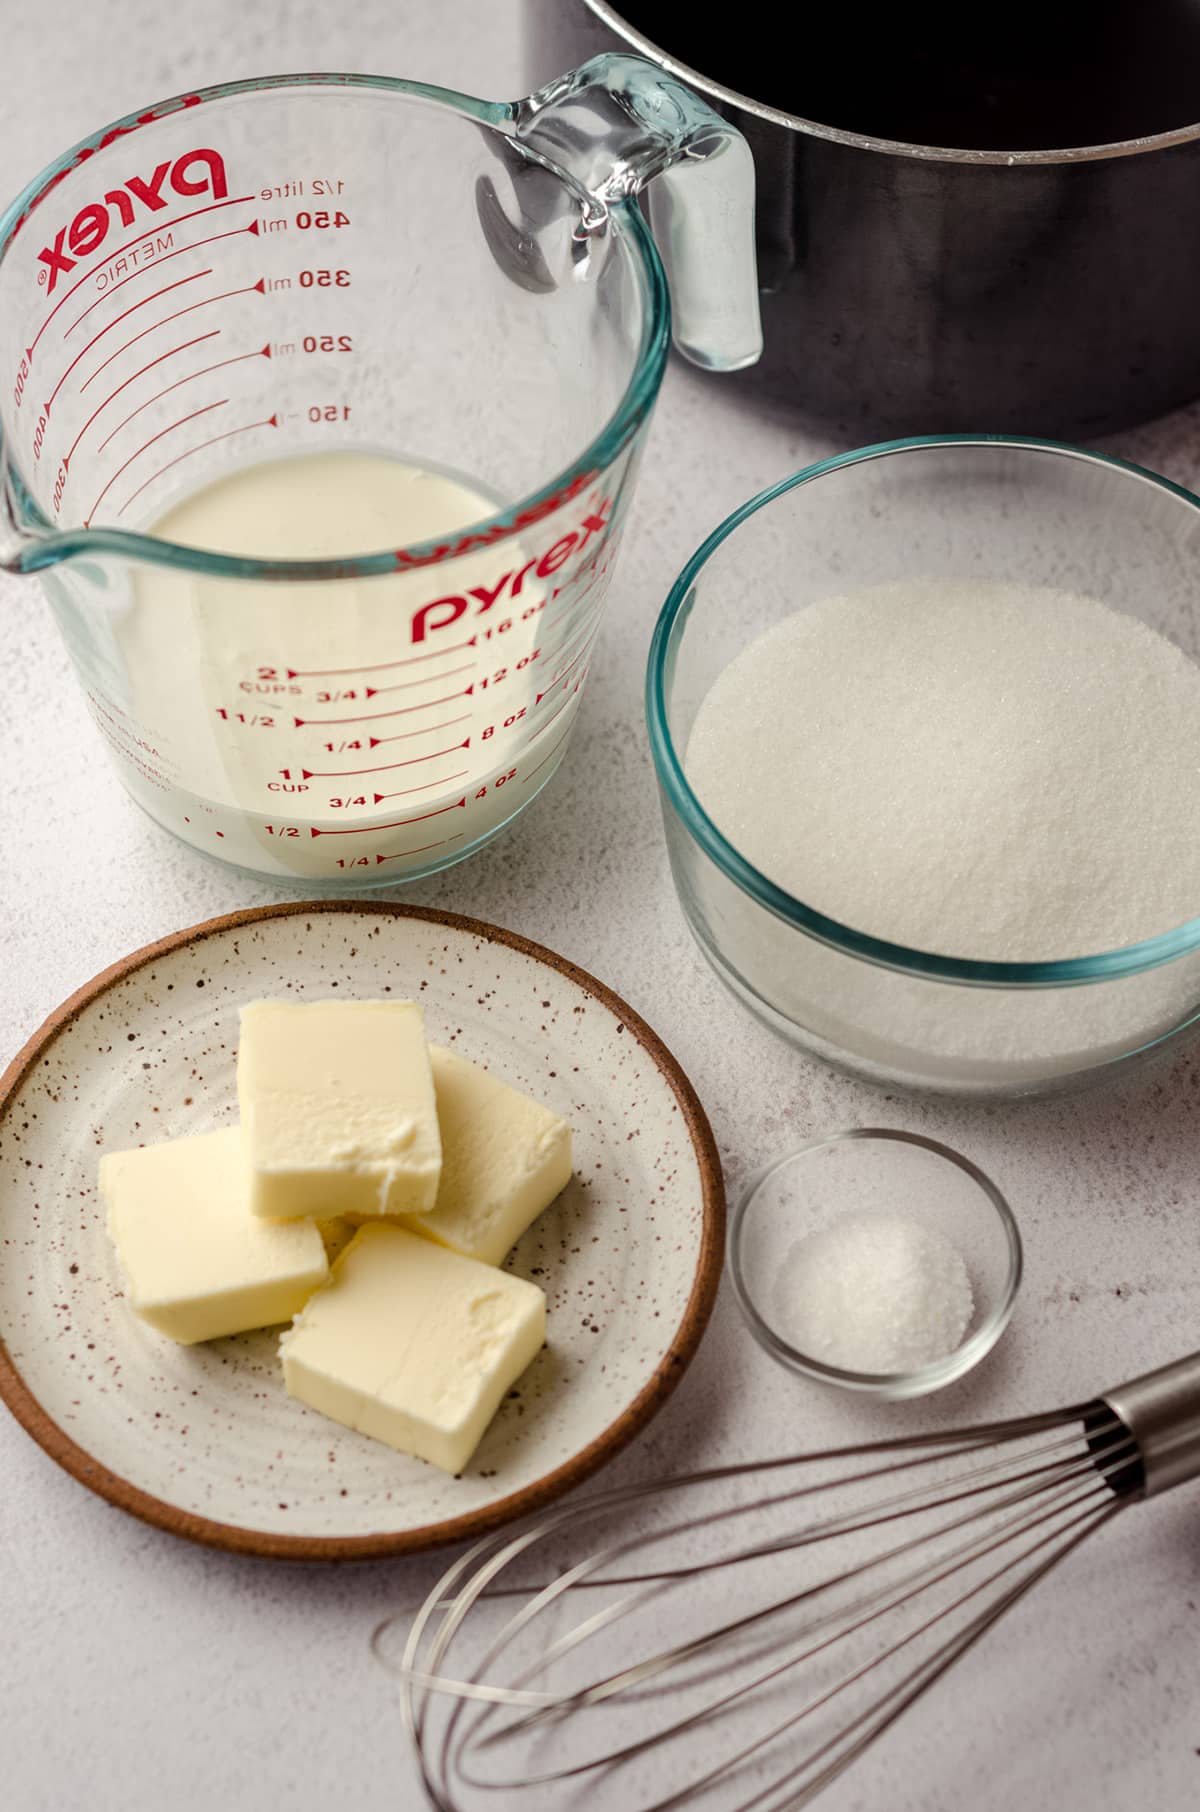
GRANULATED SUGAR: some recipes for caramel sauce start with brown sugar, but I prefer to use granulated.
WATER: since we’re using the wet method of making caramel, we’ll be using water to help dissolve and cook our sugar.
BUTTER: use salted or unsalted butter here. See notes for adjusting the recipe based on the salt content of your butter.
HEAVY CREAM: this is where your caramel sauce gets its creaminess. You can use heavy cream, whipping cream, or heavy whipping cream. Do not use half-and-half or regular milk.
SALT: this can be regular table salt, kosher salt, or sea salt. I prefer “fine sea salt.” See notes for how to adjust the amount of added salt based on the size of your salt crystals.
How to Make Salted Caramel Sauce
I mentioned that all of this begins with cooking sugar. Yes, it’s that simple.
Add your sugar and water to a medium size saucepan. This looks exactly like you expect it to… Not very exciting.
I urge you to use a light-colored saucepan so you can see the color of the mixture as it cooks a little more easily, but you can see I use a dark saucepan. I’m very comfortable with the caramel making process, but when I first started, light-colored was the best way to see it.
If all you have is darker pans, fear not! You can get this done. Just be sure you have ample light where you’re cooking and try to use a light-colored wooden spoon or heatproof spatula.
COOK THE SUGAR
You’ll initially heat the sugar and water over low heat. There’s also a lot of controversy over what I’m about to say next, but remember… I’ve done this many many times without issue…
You’ll want to stir this mixture as it cooks. But here’s the thing: you need to stir slowly, and you need to use a wooden spoon or a heatproof spatula.
You’ll see a whisk in my photos, but that’s for after the sugar has cooked completely and we’re adding butter and heavy cream.
It’s a personal preference, and you are welcome to stick to the wooden spoon or heatproof spatula the entire time. All of this is outlined in the recipe, so you can decide what you’d prefer to use when you get there.
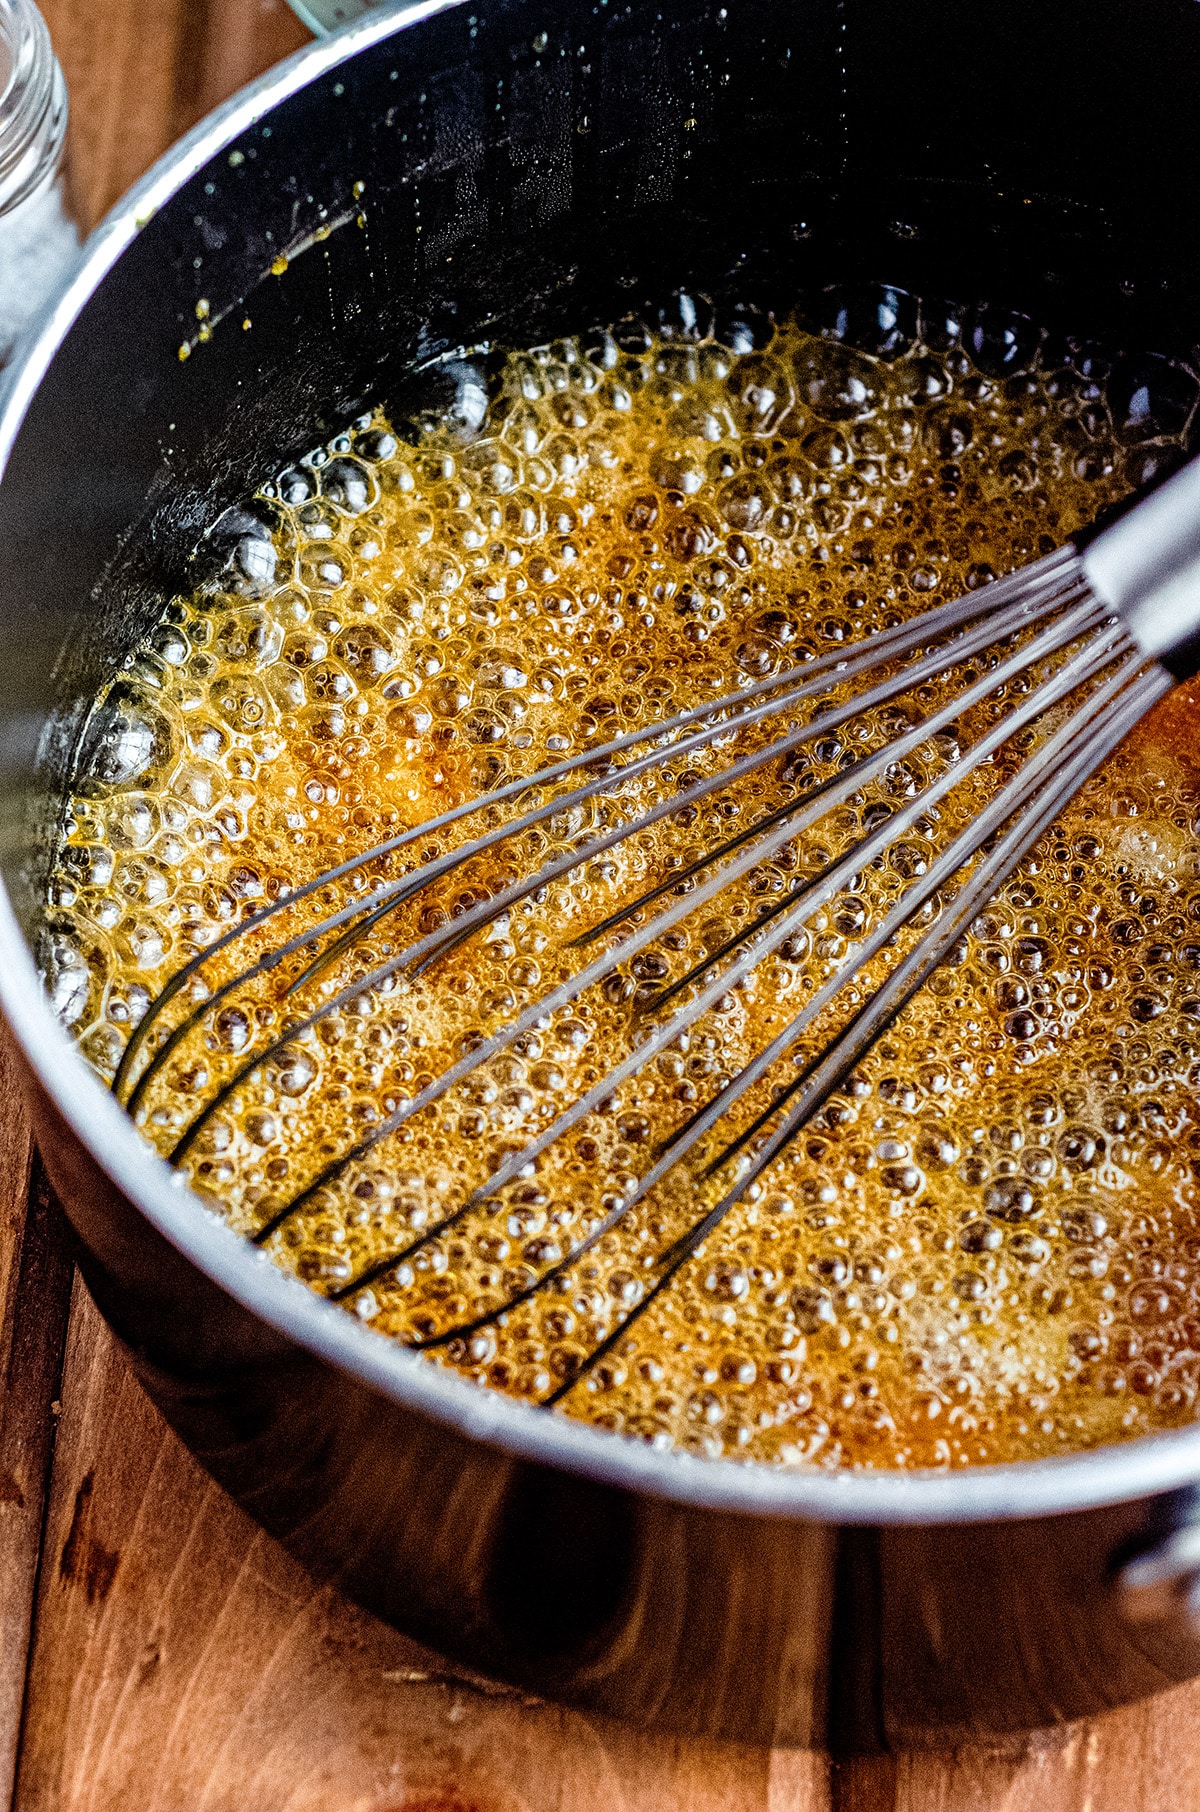
Once the sugar is completely dissolved and the mixture is clear, you can turn the heat up just a touch to medium-low then bring the mixture to a low boil.
As the sugar continues to cook and you stir it slowly, there is a possibility that sugar crystals may collect on the sides of the saucepan. I like to keep a wet pastry brush on hand to keep these crystals at bay, gently “painting” the sides as needed while the sugar cooks.
While the sugar low boils/cooks, it will turn dark amber progressively.
It will go from colorless/clear to a champagne color, to light brown, to light amber, then finally dark amber. It’s at the dark amber point that it’s considered completely cooked and you can remove it from the heat.
Remember how I said there’s room for those of you who like more of a burned caramel taste? You can cook it a tad longer, but please only do this if you’re sure you really like that burned flavor! And know that it will happen much quicker than you expect it to.
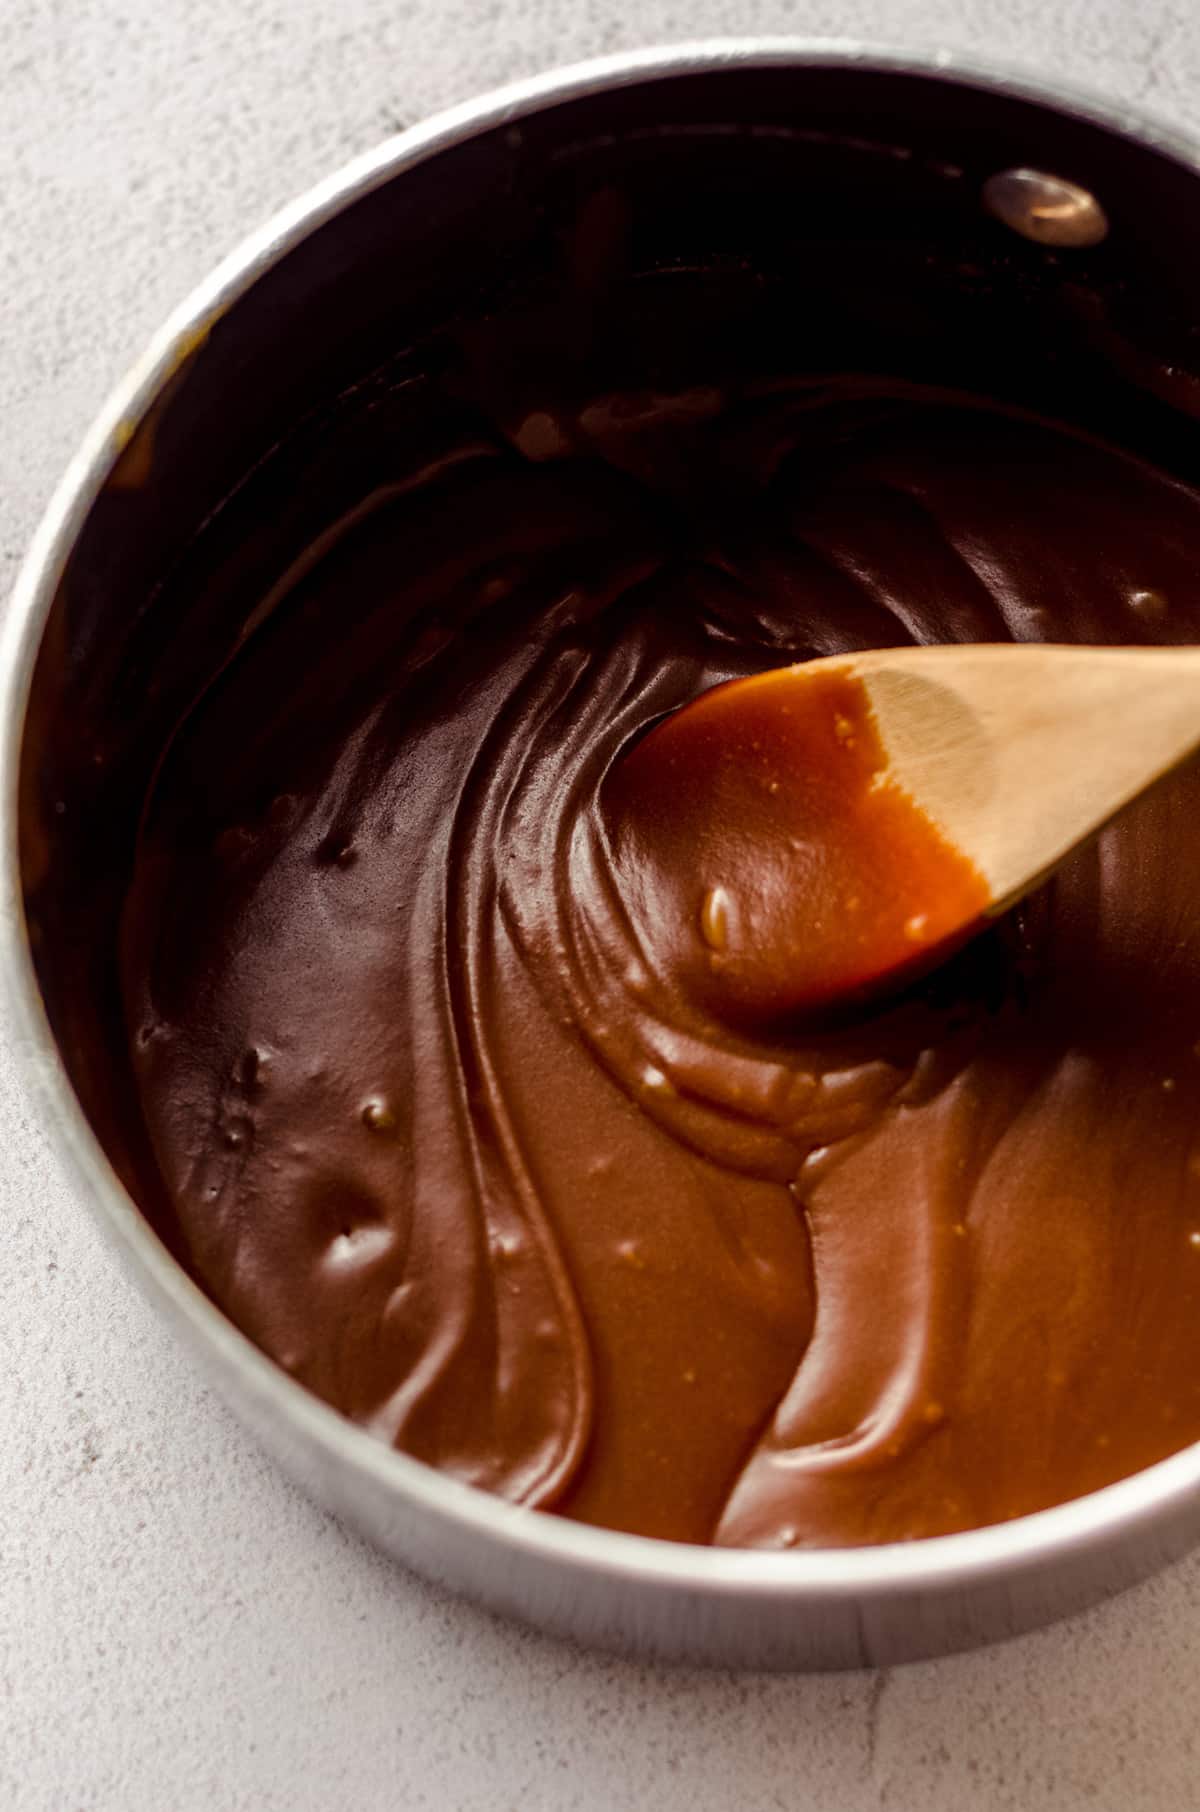
ADD THE BUTTER AND HEAVY CREAM
Once removed from heat, you’ll add the sliced, room temperature butter. Since we do this immediately after the sugar is ready, I only have a photo of the butter already in the amber sugar. But!! You can see the color you’re aiming for around the melted butter.

The butter will melt as you whisk and the mixture should be smooth but bubbly.
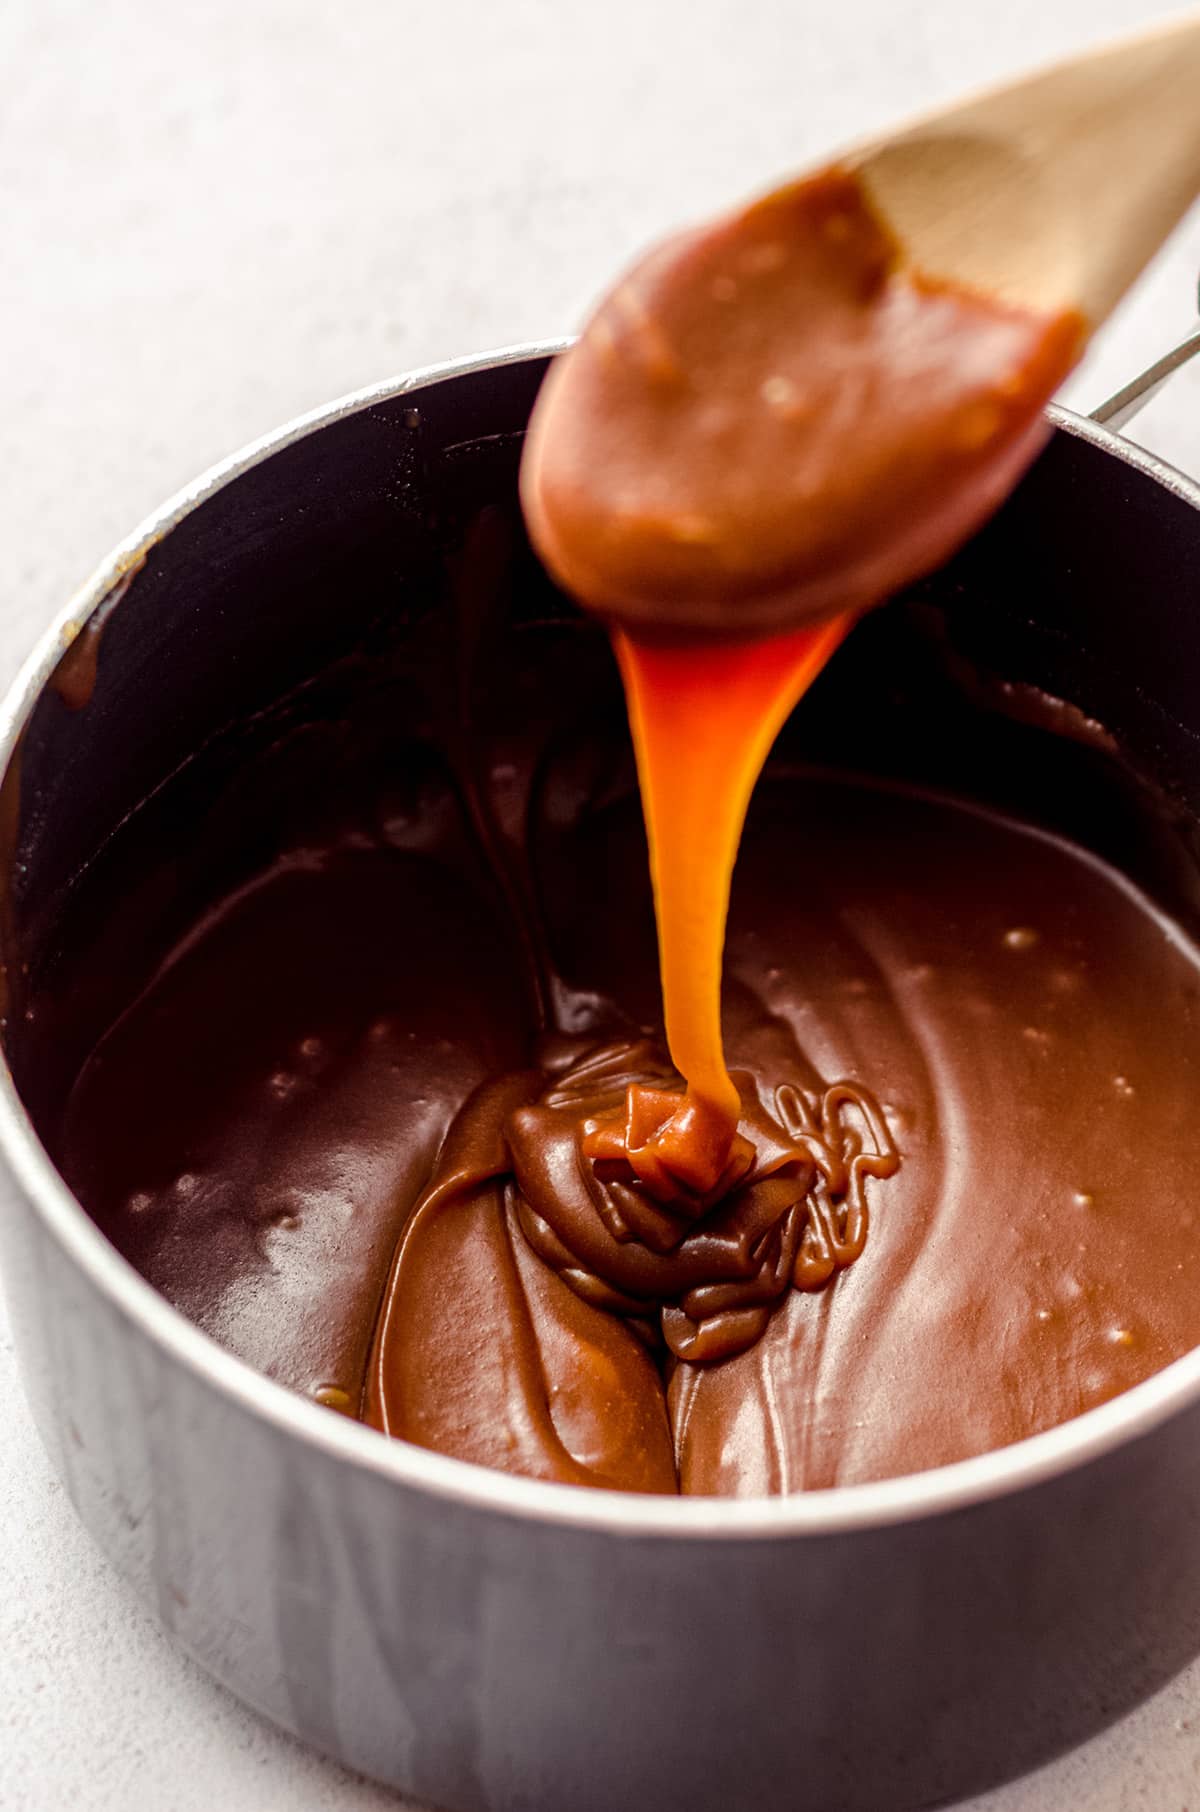
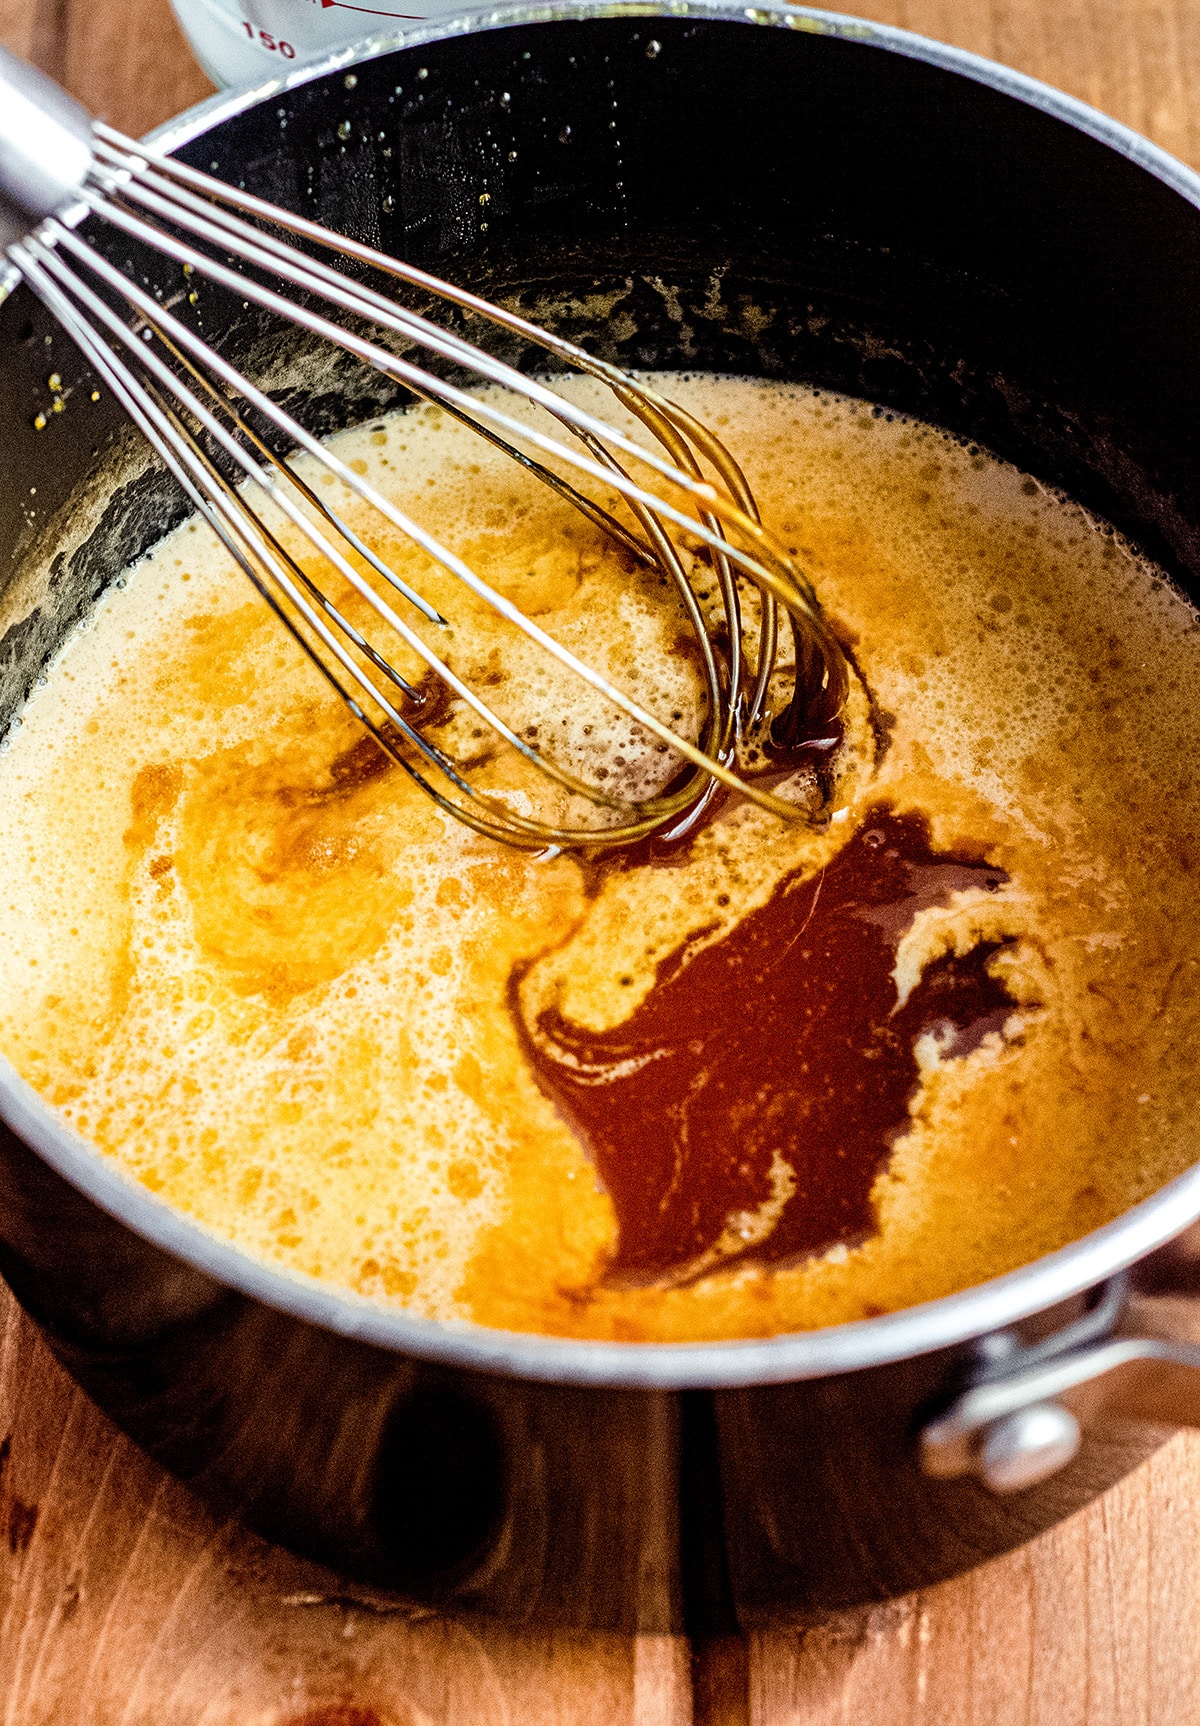
After you stir/whisk in the butter and it’s all melted, drizzle in the heavy cream while keeping the whole mixture moving.
Although your heavy cream will be at room temperature, it’s still much cooler than your sugar and butter mixture, so everything will bubble up rapidly.
This is ok and it’s what you want to happen! Again, keep it moving.
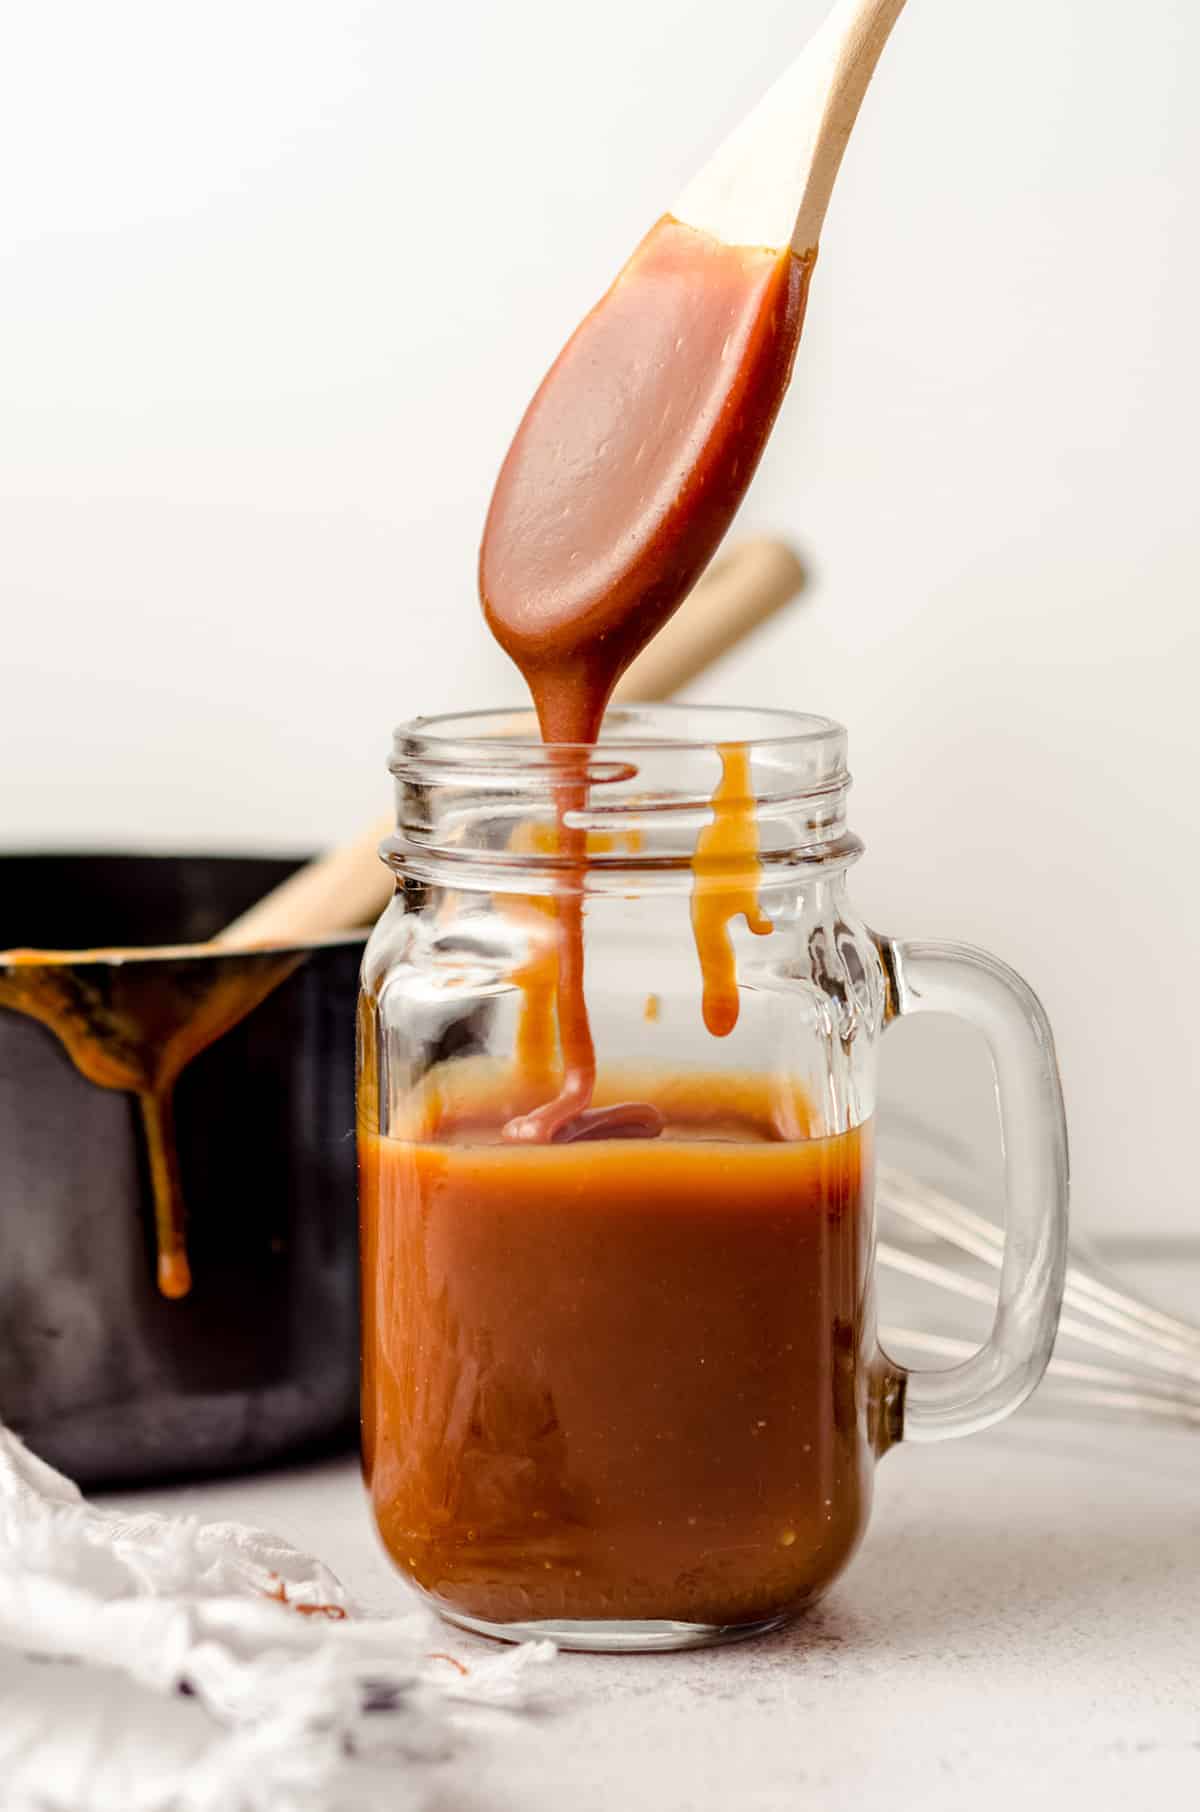
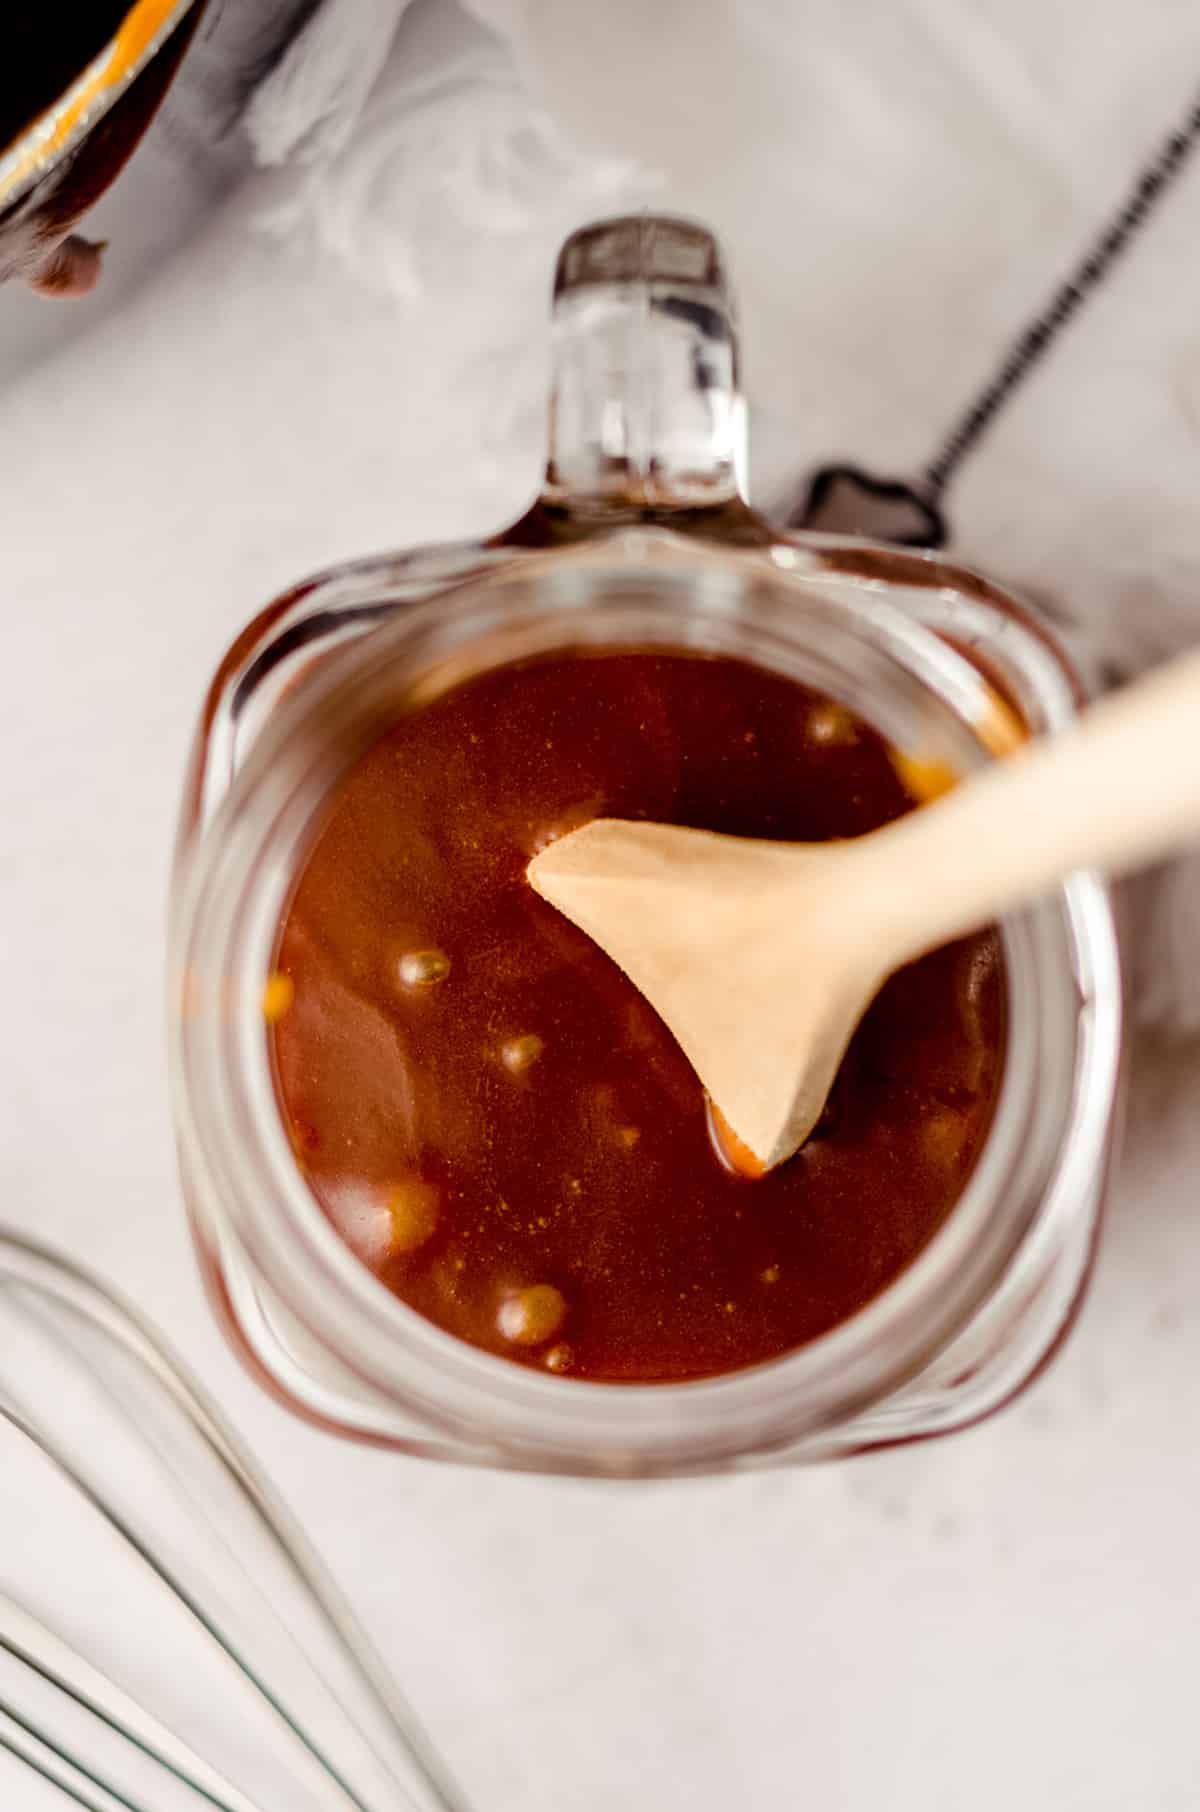
Once everything is incorporated, add the salt, then stir very well to insure the salt is distributed evenly throughout the entire batch of caramel.
The mixture will be quite hot, but I encourage you to dip a clean spoon into the sauce and taste it. Does it need more salt? Add some a tiny bit at a time.
Do you want some bourbon in there? There’s space here for you, too– head over to my bourbon caramel sauce recipe!
Troubleshooting Homemade Salted Caramel
As I mentioned, I haven’t run into too many issues with the wet method for how to make salted caramel, but the most common issue I have had is that the water evaporates too quickly and the sugar starts to crystallize.
If your sugar crystallizes, you can add more water to encourage the sugar to re-dissolve, and I also suggest turning down the heat just a bit.
Did your sugar just turn to dust/clumps? Again, add more water and turn down the heat.
Did your sugar stick to or clump up on the spoon/spatula? Again, add more water and turn down the heat.
Is it still not working? Try a larger saucepan. You need enough surface area for the whole mixture to heat evenly.
Also be sure not to double or halve this recipe for salted caramel sauce. Cooking sugar is a very finicky process. Make multiple batches if you need more than 1 cup of sauce.
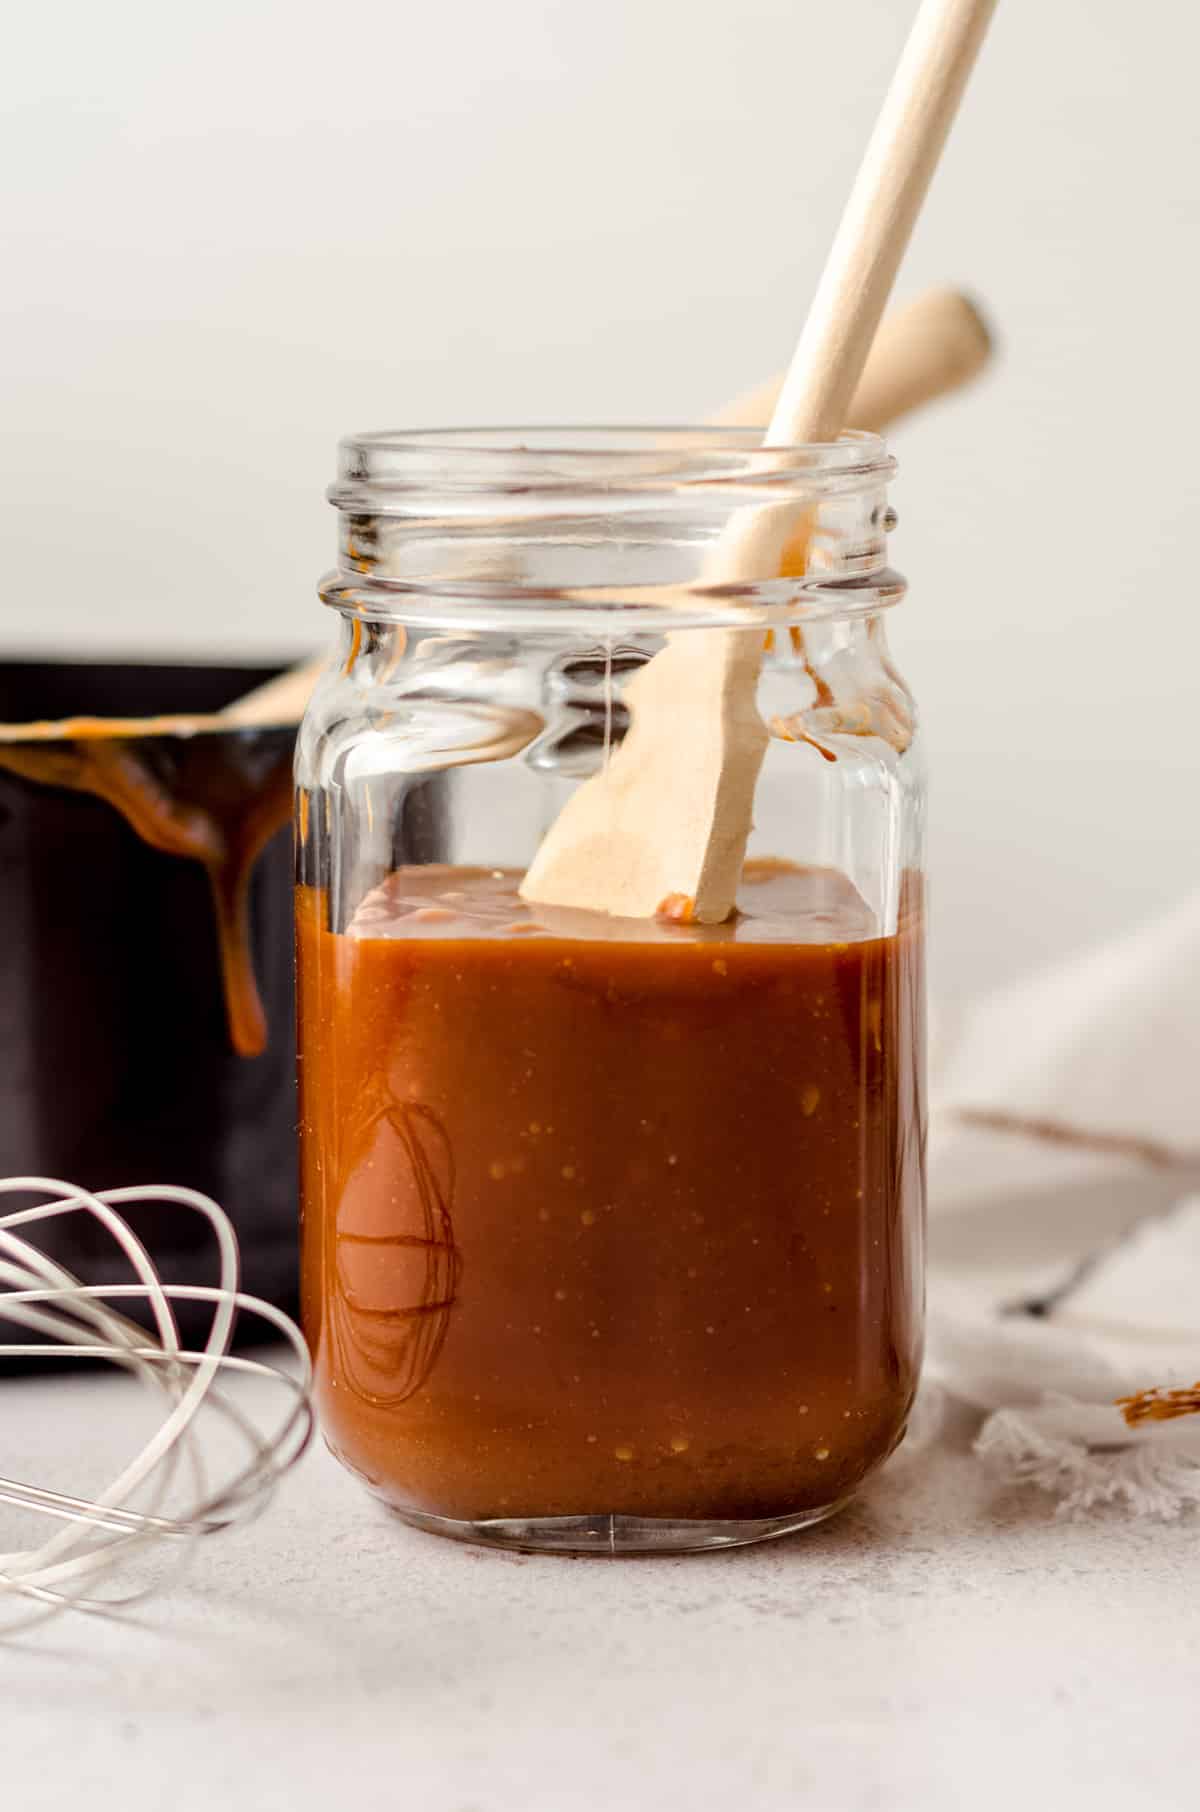
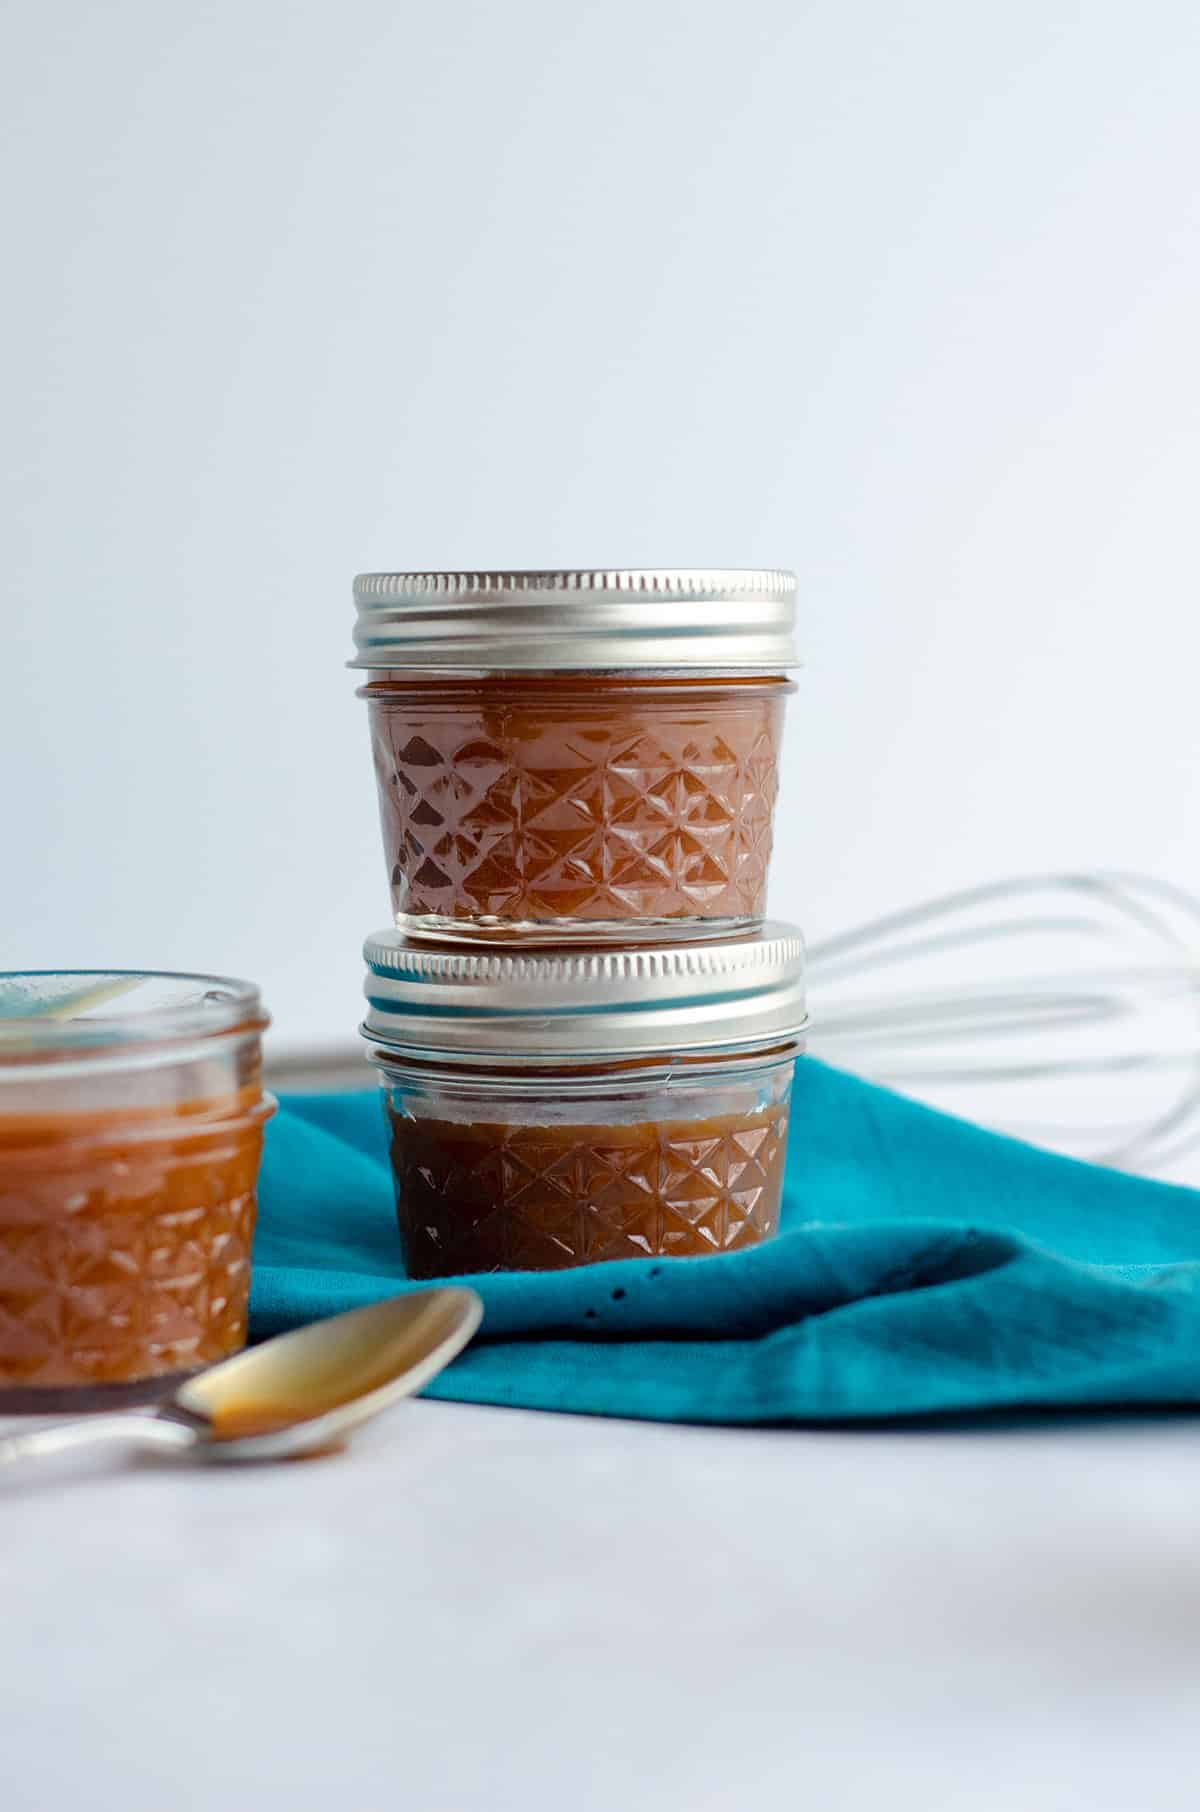
How to Store Homemade Salted Caramel Sauce
This sauce can be stored in the refrigerator for up to 1 month, but will be fine at room temperature for a day or two if it needs to travel or be in the mail. You can also freeze your caramel for up to 3 months.
How to Use Salted Caramel Sauce
Umm, well, for everything.
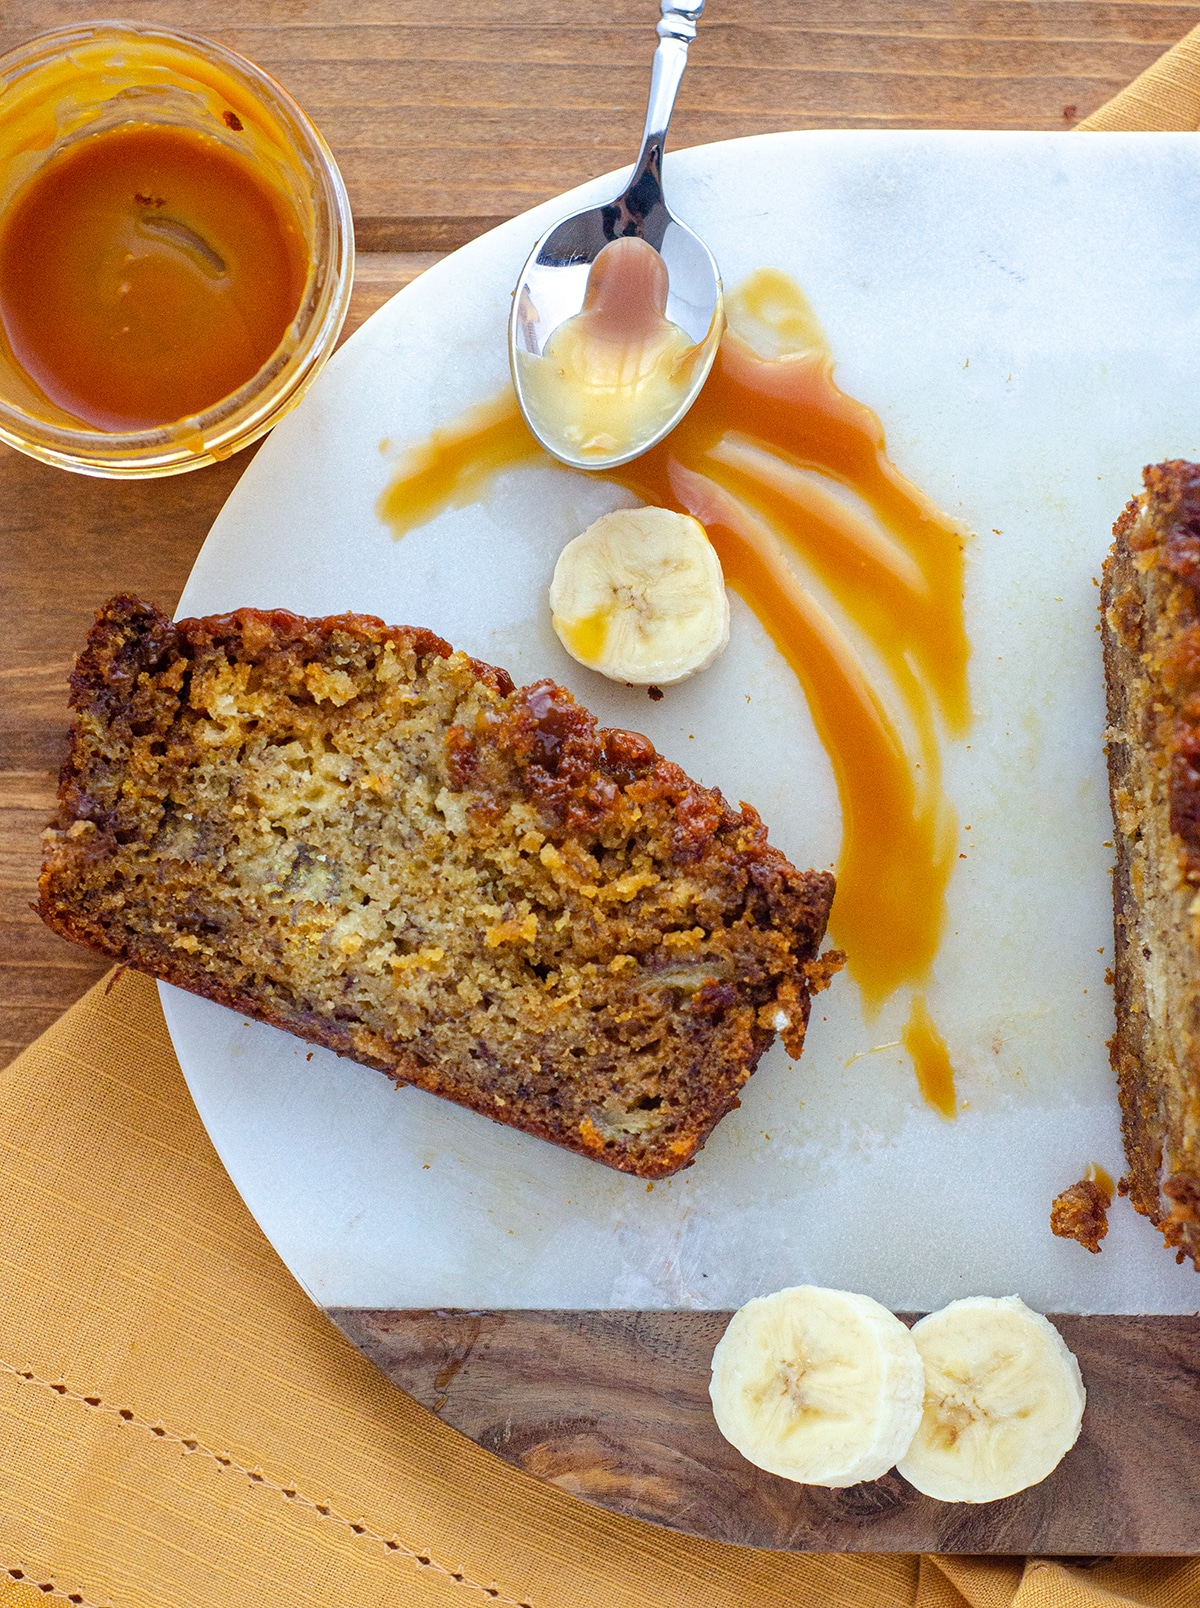
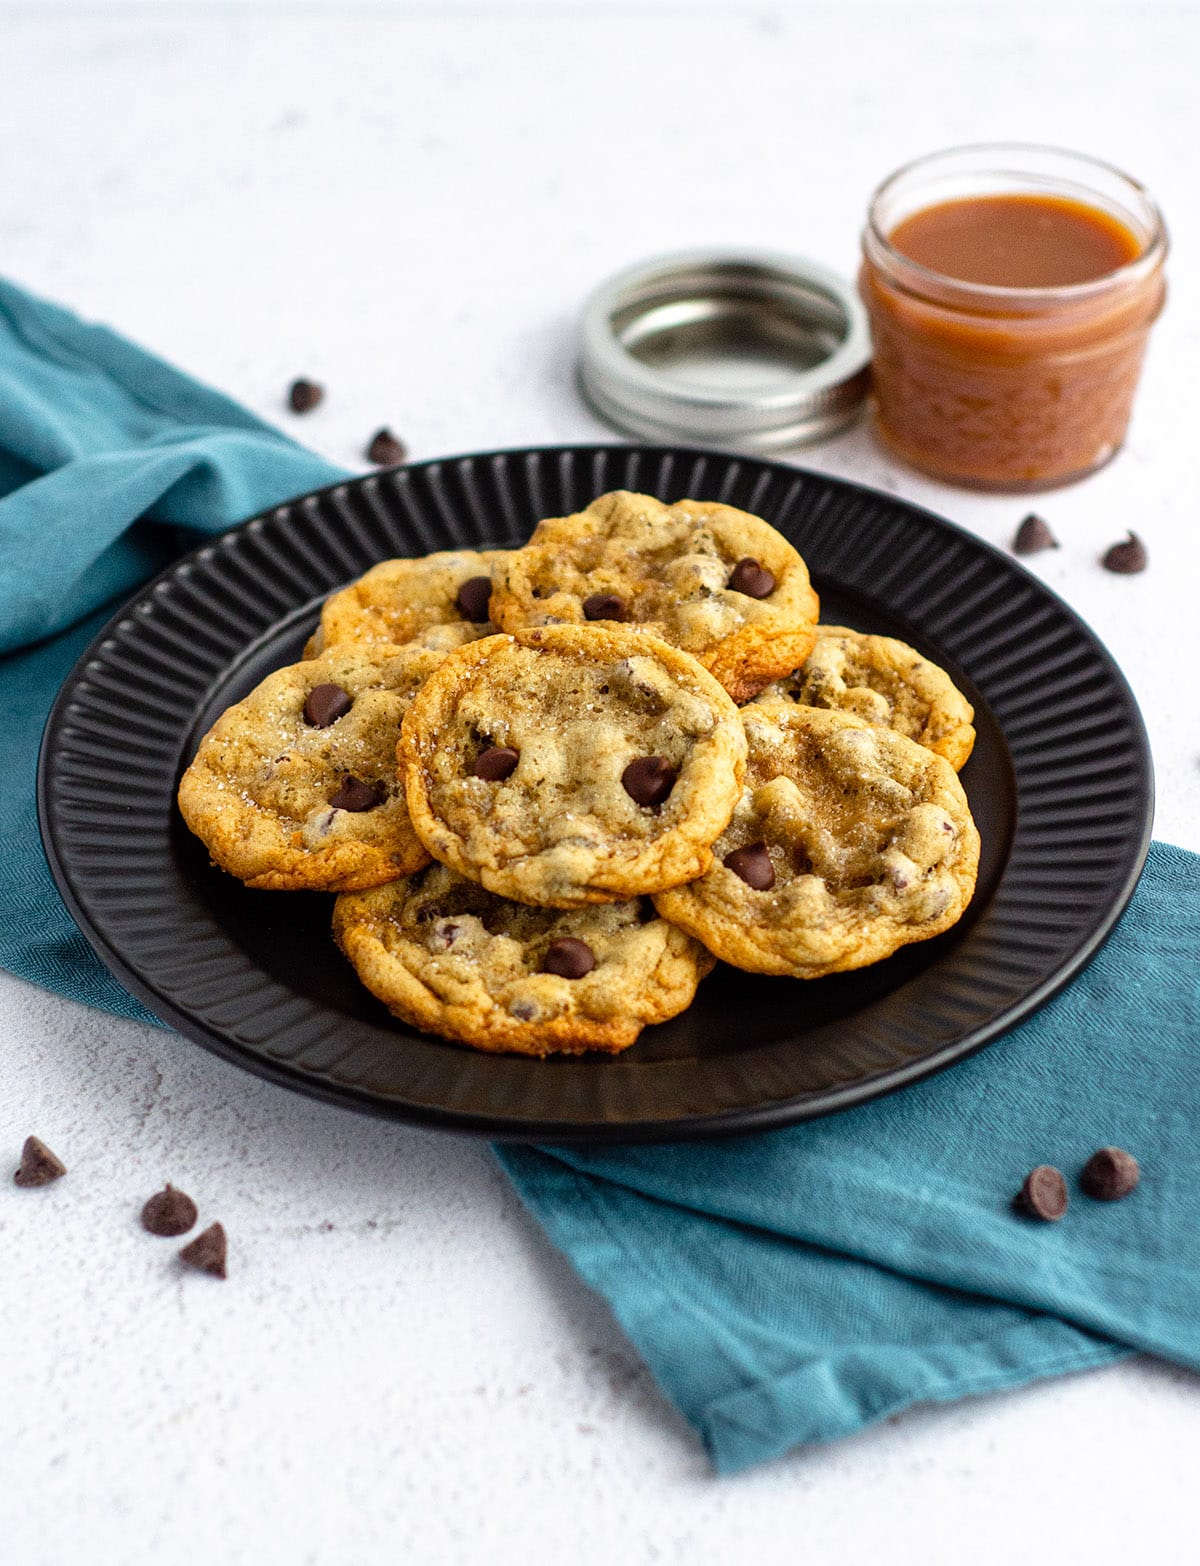
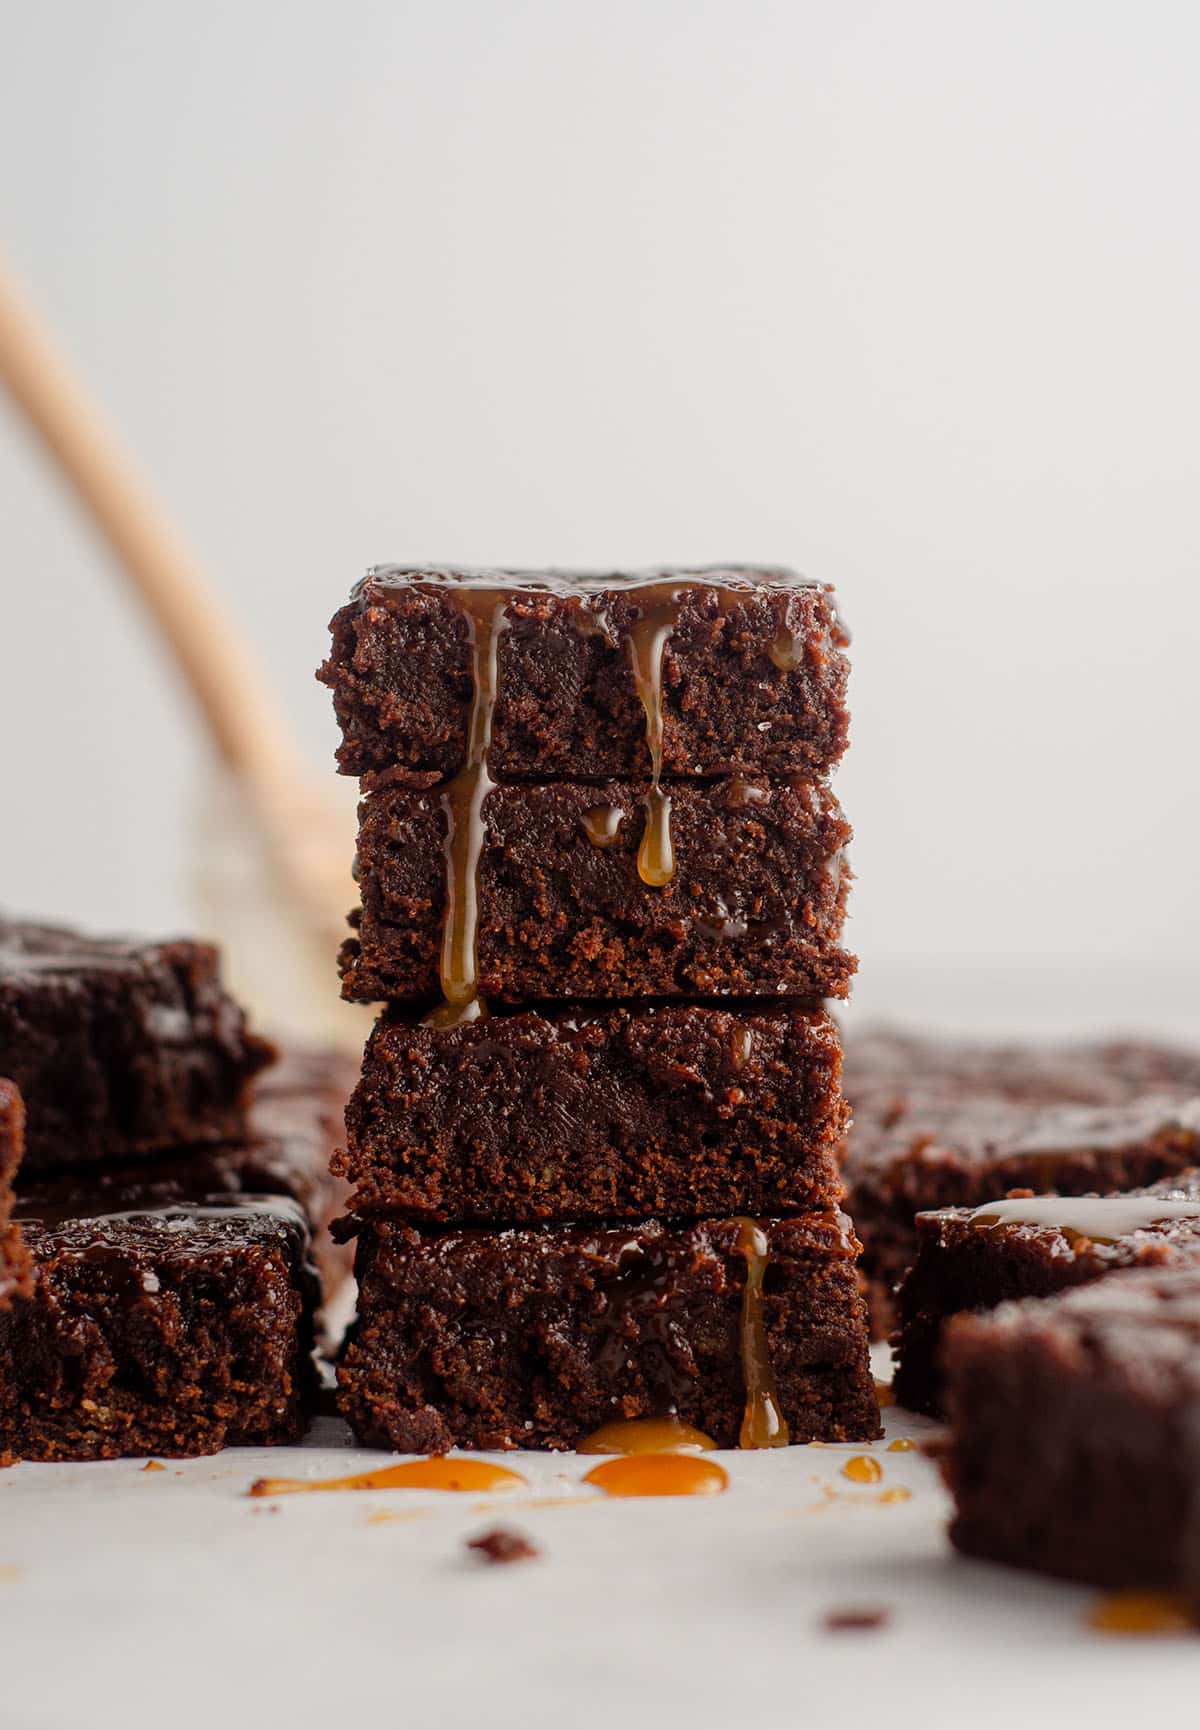
Ok no but really, to be more specific, you can use caramel sauce for cheesecake, cookies, bread, cakes, cupcakes, ice cream, yogurt, fruit, pie (like my apple hand pies)…
Or, my favorite: give it as a gift!
I often give homemade salted caramel out to friends and family at the holidays and it is always a huge hit. Another huge hit is gifting homemade vanilla extract. Love those homemade baking ingredients.
Now that you’re a homemade caramel sauce pro, I highly urge you to try my salted caramel sauce-centric recipes: try my salted caramel banana bread, my salted caramel chocolate chip cookies, or my salted caramel brownies for starters!
Homemade Salted Caramel Sauce
Ingredients
- 1 cup (200g) granulated sugar
- ¼ cup (60mL) water
- ¼ cup (57g) butter (salted or unsalted)1 room temperature, cut into 4 pieces
- ½ cup (120mL) heavy whipping cream2 room temperature
- 1 teaspoon sea salt3
Instructions
- In a medium saucepan over low heat, combine the sugar and water. Use a wooden spoon or heat-resistant spatula to stir frequently but gently. Once all of the sugar is dissolved, turn the heat up just a touch to medium-low and let the mixture come to a low boil. Keep an eye on the sides of the pan in case sugar crystals start to form during the cooking process. You can use a pastry brush dipped in water to keep crystallized sugar at bay, brushing it gently on the sides if needed.1 cup (200g) granulated sugar, ¼ cup (60mL) water
- As the sugar low boils/cooks, it will start to turn colors. Keep a careful eye on the color to determine when it's done. The progression is champagne color to light brown to light amber to dark amber. When it is dark amber (a golden/red brown), remove it from the heat.
- Immediately but carefully add the butter. Mixture will start to bubble, but stir quickly with your wooden spoon or spatula (or switch to a whisk, as I prefer) to incorporate the butter as it melts.¼ cup (57g) butter (salted or unsalted)1
- When all of the butter is melted, slowly drizzle in the heavy cream while continuing to stir or whisk the mixture. It will bubble rapidly. This is ok.½ cup (120mL) heavy whipping cream2
- Once all of the heavy cream is incorporated, add the salt to your liking. Allow to cool before using (it will thicken as it cools). Store leftovers in the refrigerator up to 1 month. Heat in microwave or on the stovetop before using. Caramel will be fine at room temperature for a day or two if it needs to travel. Caramel may be frozen, up to 3 months. Thaw in refrigerator and warm as needed.1 teaspoon sea salt3
Notes
- Butter: salted or unsalted butter is fine in this recipe. No changes to salt in recipe necessary.
- Heavy cream: this is the same thing as whipping cream. Either is fine for this recipe, but do not use milk.
- Salt: use regular table salt, kosher salt, or sea salt. I prefer “fine sea salt.” If using a larger, coarser salt, add 1 teaspoon, taste, and add more if necessary. If you are concerned about too much salt, add ¾ teaspoon, taste, and add more if desired. Do not leave salt out completely. If you don’t want “salted” caramel sauce, reduce to ½ teaspoon.
- Bourbon caramel sauce: if you want bourbon caramel sauce, the process is exactly the same. See my bourbon caramel sauce recipe for exact measurements and process.
Nutrition Disclosure
All nutritional values are approximate and provided to the reader as a courtesy. Changing ingredients and/or quantities will alter the estimated nutritional calculations.
This method really was super simple. Thanks for breaking it down the way you did! Making your bourbon sauce next.
I’m so happy to hear you liked it, Kathryn. Enjoy the bourbon version!
Hey Lynn any reason why there is no vanilla in this recipe?
Hi, Stella– you can add it if you want, but it’s an unnecessary addition as the primary flavor of caramel is, well, caramel!
I’m curious to know, if there might be a substitute for the whipping cream, maybe coconut milk cream (milk allergies)?
Hi, Kari– I’ve not tried any other milk, but it will work just fine, yes! Let me know how you like it!
Heaven on a spoon!!! I never made homemade caramel sauce before and botched it four times before finally succeeding! If this is you- don’t give up! My first failure was due to getting cocky and ignoring Lynn’s warning to not double the recipe due to the tricky nature of cooking sugar. Sure enough – FAIL. After some research I used the exact ingredients in this recipe but did two things differently. On my first successful batch I didn’t stir the mixture because when I stirred in previous attempts it kept crystallizing. It seems that there are a lot of different opinions on what to do, what not to do, and I just kept trying and finally figured out what works for my cookware/stove and I’m just gonna go with it. Second- I used a candy thermometer. (Removed the sugar from heat when it reached 338 degrees F. When I took it to 350 like some people suggested the caramel burned and tasted bitter.) The thermometer takes the guesswork out of it and since I’m no expert I’m happy to have a tool to make my life easier, haha! Now I can’t stop making caramel sauce! I’ve made the bourbon (definitely 2 Tbsp for that delicious whiskey flavor please!) and just the regular salted caramel. We drizzle it on cakes, cookies, ice cream … I even enjoy it in my iced coffee. Thank you for a delicious recipe Lynn!
Thank you so much for this review, Hillary! I’m so glad you finally nailed it 🙂