
Homemade Pie Crust Recipe
As an Amazon Associate, I earn from qualifying purchases. Read the full disclosure here.
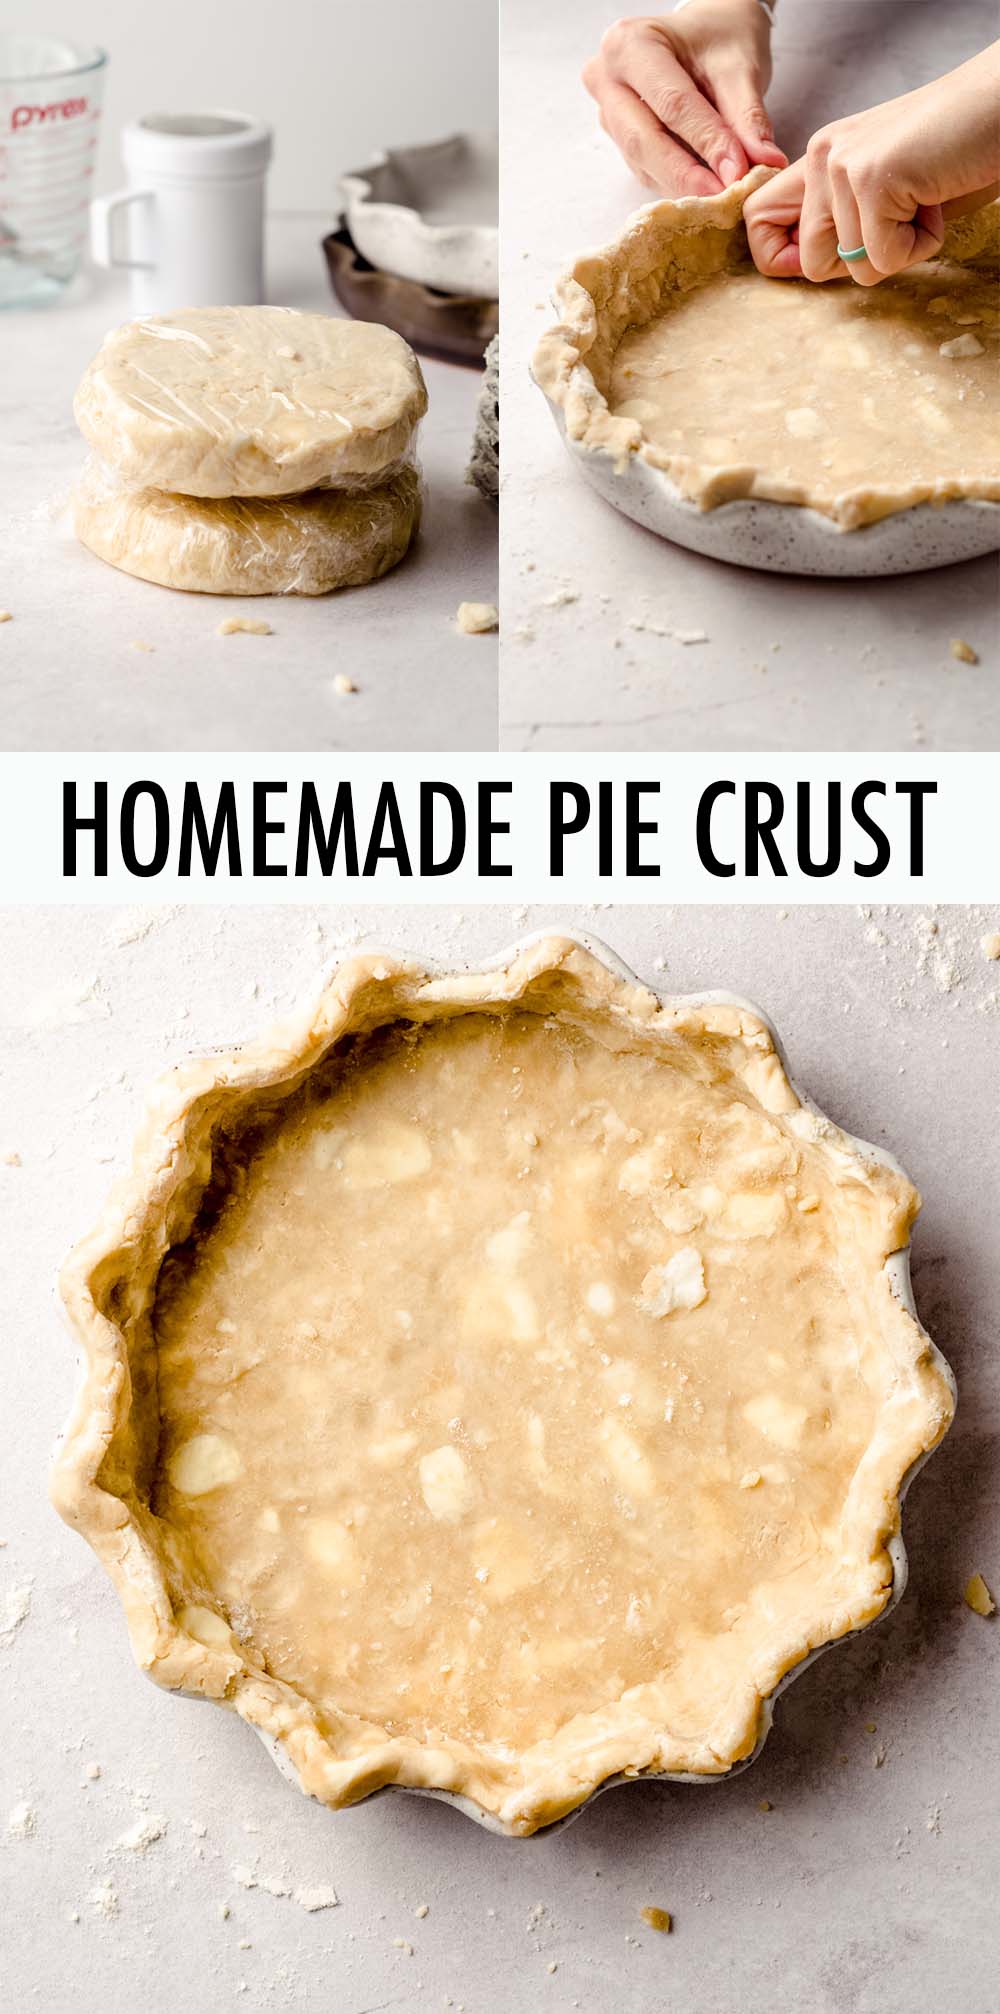
Learn how to make your own buttery, flaky, perfect pie crust at home. With a combination of butter and shortening, this crust has delicious taste, strong structure, and works whether you’re making a traditional pumpkin pie, stunning lemon meringue pie, an impressive lattice top peach pie, or a simple apple pie. I am confident this crust will be your new favorite. This is a double crust recipe.
Why you’ll love Home Made Pie Crust
Fair warning… I feel very passionately about pie crust. In fact, see my collection of Pies of The Month from the year I wanted to really learn how to make fabulous pies from scratch.
Admittedly, I had previously been slightly intimidated by pie and liked to take care of all of that pie-intimidation by making my favorite apple hand pies. Of course, I always make a pumpkin pie at Thanksgiving, but if I’m going to choose to make a dessert, I’ll typically make cookies or a cake.
I strongly believe that having a solid, easy homemade pie crust recipe in your baking arsenal is very important as a baker. I have used my favorite homemade pie crust for so much more than pies over my years of baking, even quiche and cookies.
This Flaky Pie Crust is Versatile
Cookies, you say? Why yes. I actually have two cookie recipes that include pie crust. My honey walnut cookie sticks and pecan pie tarts!

Those cookies are made a million times better thanks to homemade pie crust. Of course, you always have the option of buying a pre-made pie crust, but nothing compares to the buttery, flakiness of a homemade pie crust done right.
And that’s what I have for you here: my favorite buttery, flaky, goes-with-anything, perfect, very easy pie crust.
Think I’m exaggerating? Read and bake on, my friend. You will agree with me in no time, I guarantee it.
Homemade Pie Crust Recipe Ingredients
All pie crusts begin with the same ingredients: flour, salt, sugar (sometimes), cold water, and cold fat.
The other ingredients that you’ll be working with are butter and shortening. I have tried making pie crust with purely butter and I just wouldn’t want to know what an all shortening crust would taste like.
All butter? Much too greasy for me and very hard to handle. It also tastes like straight up butter. Good, but lots of the other flavors get lost in the shuffle.
All shortening? I would imagine no flavor. And that’s just not what we want at all.
All-purpose flour
For the flour, we’re just working with all-purpose. Nothing fancy there.
Salt
This is for flavor. If you just mixed flour and fat together with nothing to jazz it up, you’d basically be eating Play-Doh. Let’s not forget some saltiness.
Granulated sugar
There is much debate out there about whether or not sugar belongs in pie crust. I firmly believe that it does, but with that, I must say there is only 1 Tablespoon in this entire recipe, which makes 2 pie crusts, so we’re talking ½ of a Tablespoon in each pie crust.
Juuuuust enough to add a teeny bit of sweetness and also help with slight browning in the oven. That’s almost nothing, but at the same time, gives my pie crust the slightest sweetness. Not too sweet though– you never want your pie crust to actually be sweet. Just a touch of sweetness is what I prefer in my homemade pie crust.
Because YES, I do use this pie crust as is for my quiches. Seriously, I promise you won’t even notice the sugar.
Ice water
The liquid you’ll add to your pie crust is water, but it must be cold water. We do not want any of the fat in our pie crust to melt (yet), so in order to keep everything nice and chilled, you’ll be working with ice cold water.
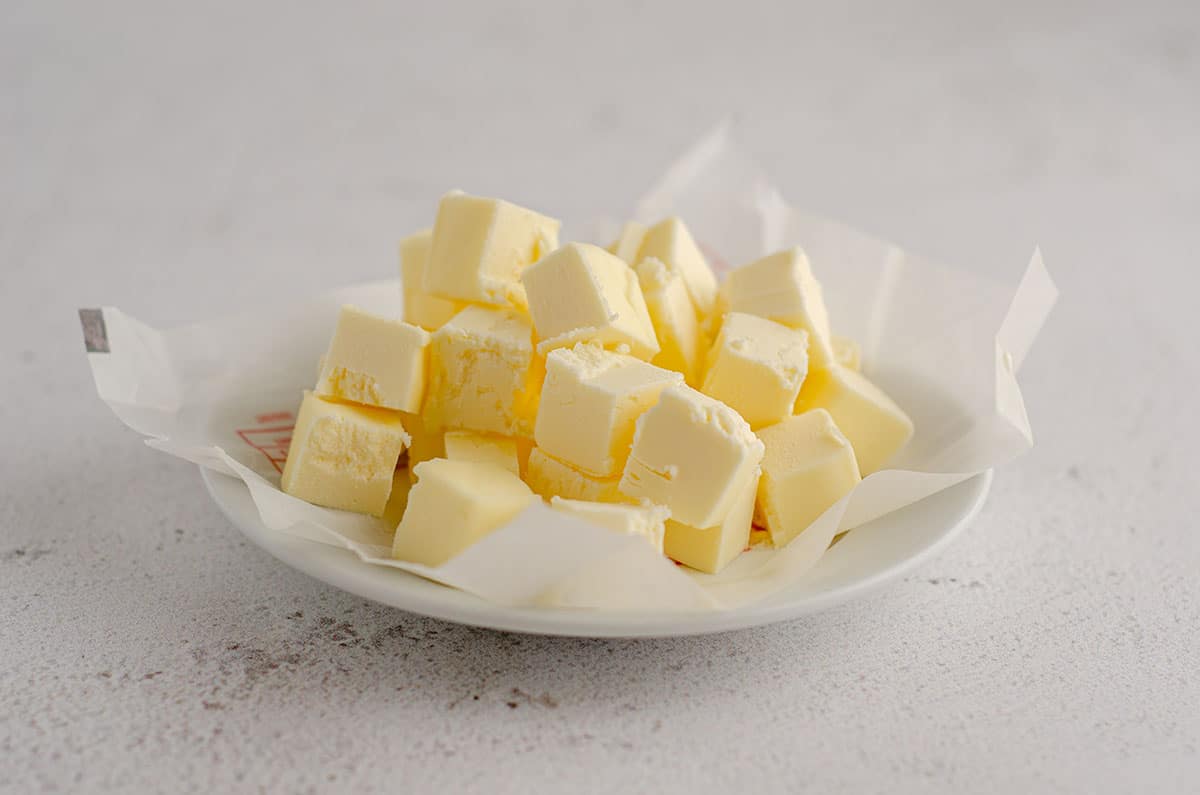
Cold unsalted butter
Unsalted butter is key, since we’ll be adding additional salt. If all you have or all you use is salted butter, you can reduce the added salt.
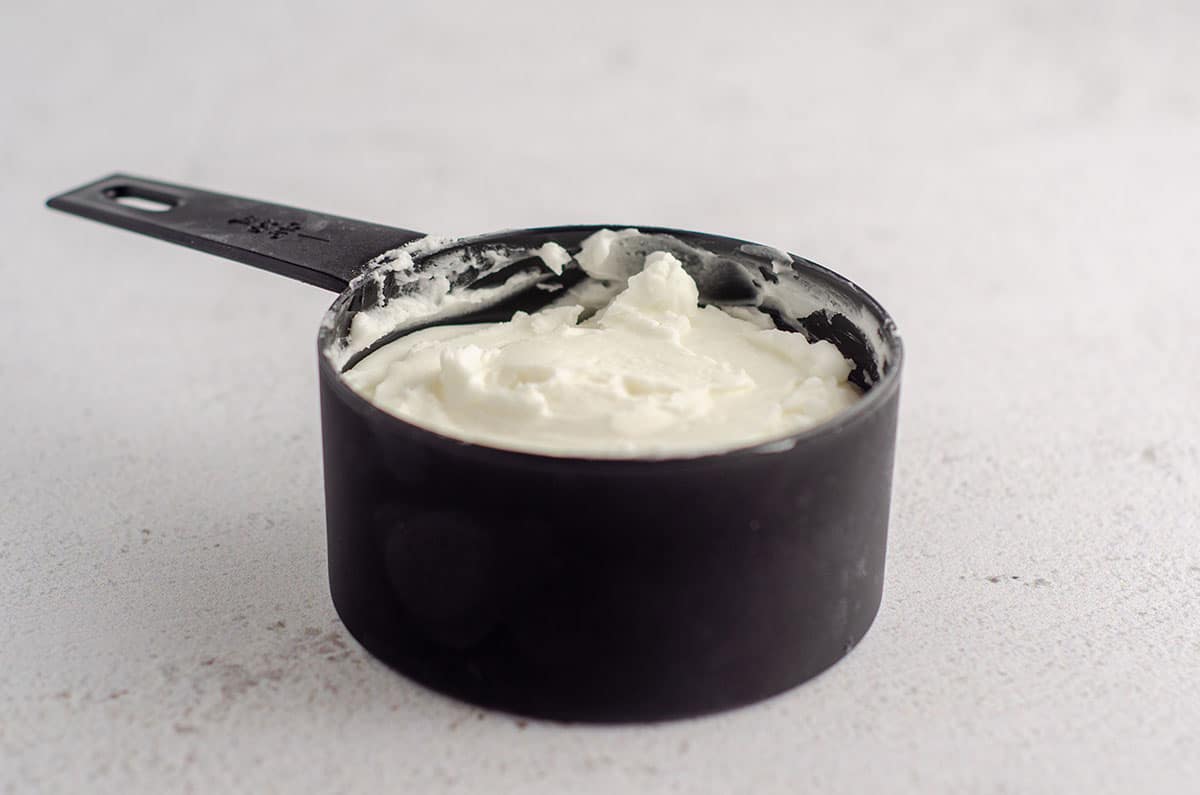
Chilled vegetable shortening
Go for unflavored shortening here and not the butter flavored kind.
How to make Homemade Pie Crust
I cut my butter up into tiny squares and freeze them on a plate for about 1-2 hours before I begin my pie crust. If they can freeze longer than that, great! For the shortening, I measure it out onto a plate and just keep it in the fridge.
SO let’s put that all together.
STEP #1
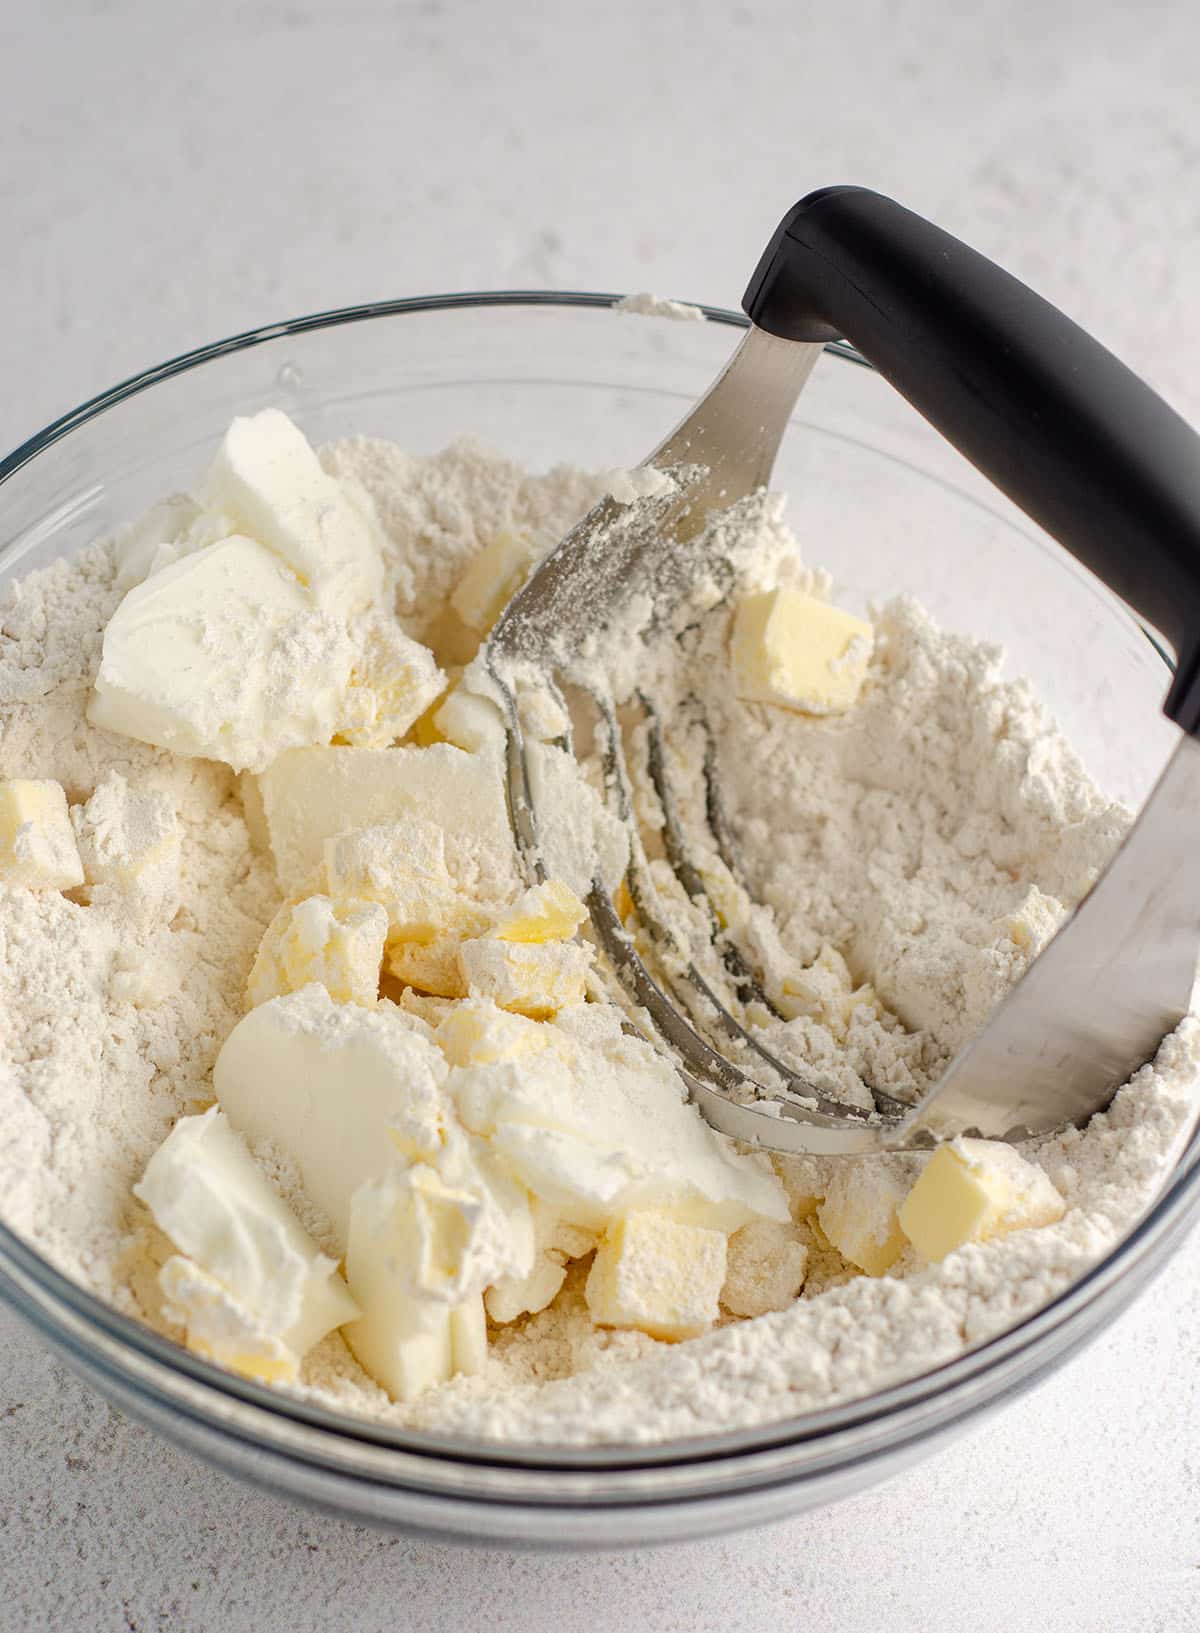
Start by whisking together your flour, salt, and sugar. Then, add the fats.
STEP #2
Using a pastry blender, cut the fats into the flour mixture until it becomes coarse and crumbly. You may use a fork or two knives to do this, but a pastry blender will save you a lot of time. Plus, they’re relatively inexpensive. Every baker should own one.
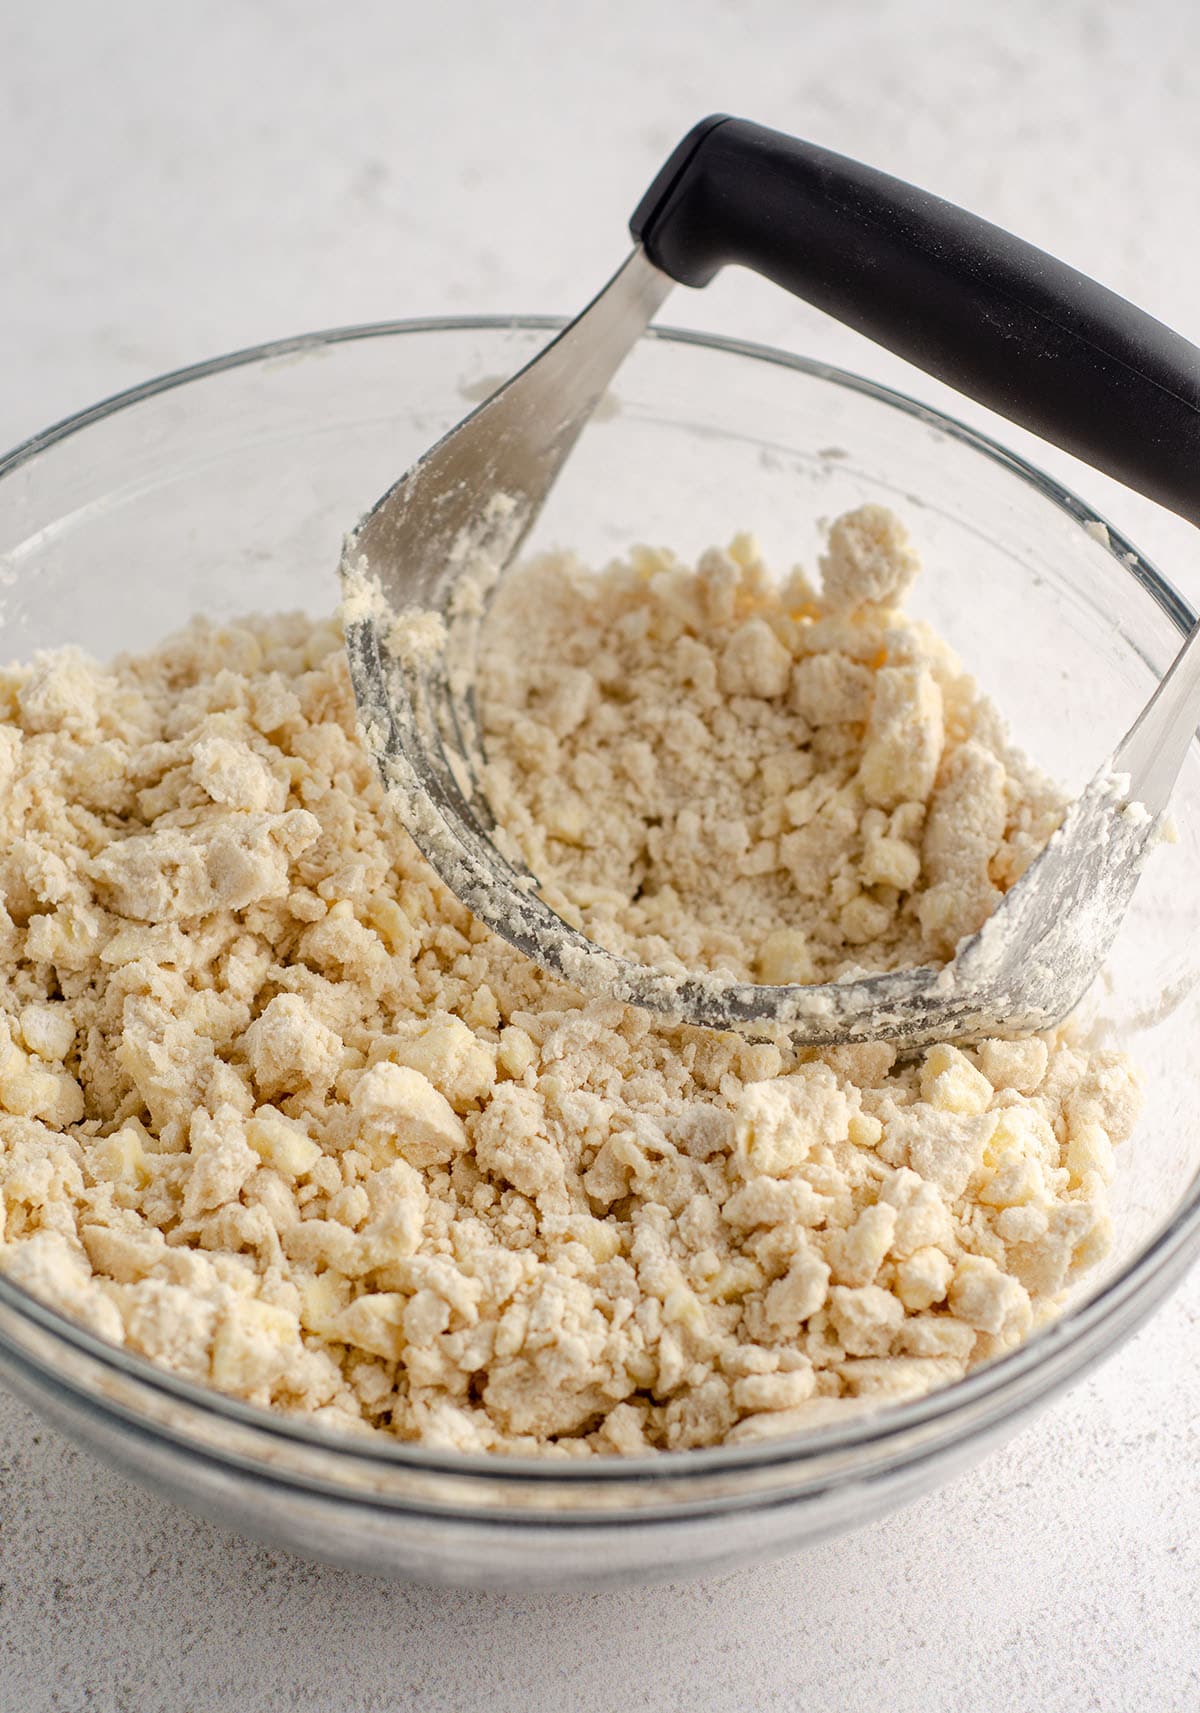
A lot of pie crust recipes tell you to look for “pea size chunks” when cutting fat into flour, but I find that my shortening/butter combination gives me shreds and circle shapes. This is often referred to as a “shaggy” appearance. Look for small circular bits and ¼″ to ½″ shreds.
STEP #3
Once all of your fats are incorporated, it’s time to add the ice water.
STEP #4
Add 1 Tablespoon at a time, stirring after each addition. It may seem silly to stir after the first few Tablespoons, but you do not want your pie crust to get too wet. Similarly, you don’t want it too dry either. Stop adding water when it starts to clump together like this:

STEP #5
Transfer your dough to a floured surface. Make sure all of the bits and excess flour make it onto the surface as well. It will be very piece-y. This is perfect.
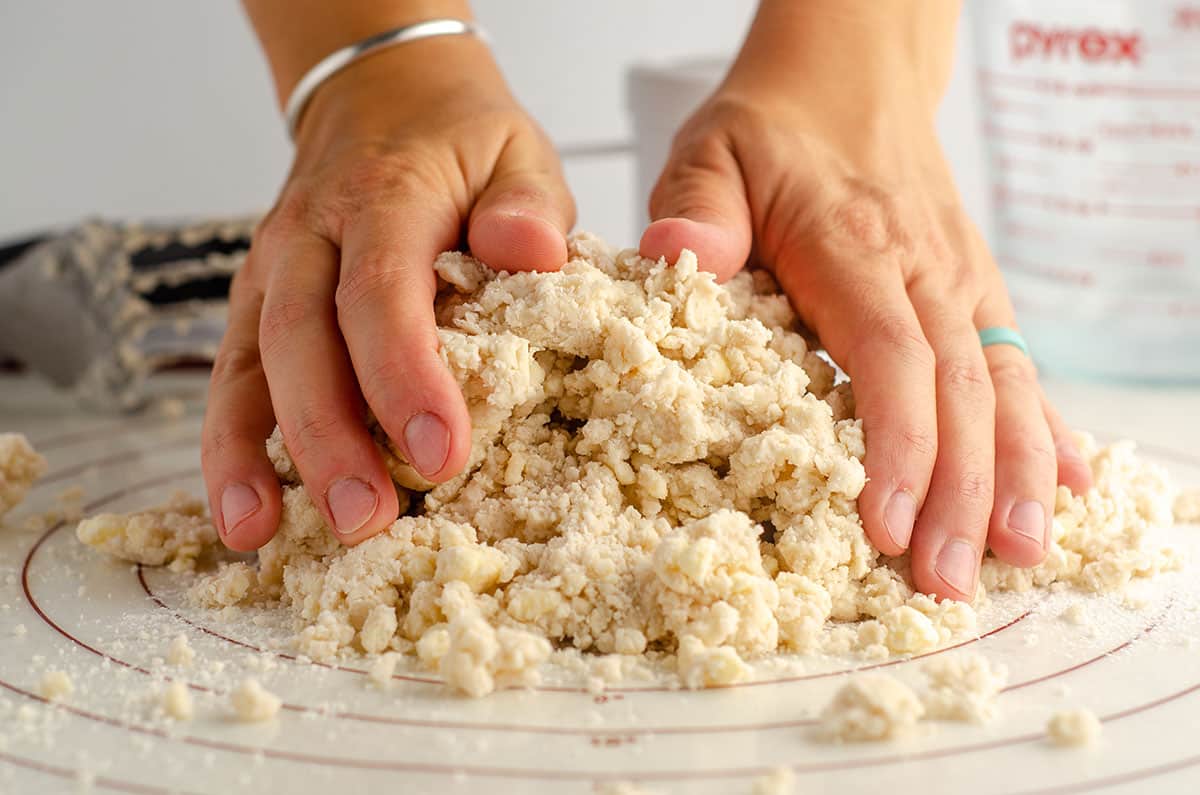
STEP #6
Using floured hands, fold the dough onto itself until all of the bits of dough and flour are incorporated.
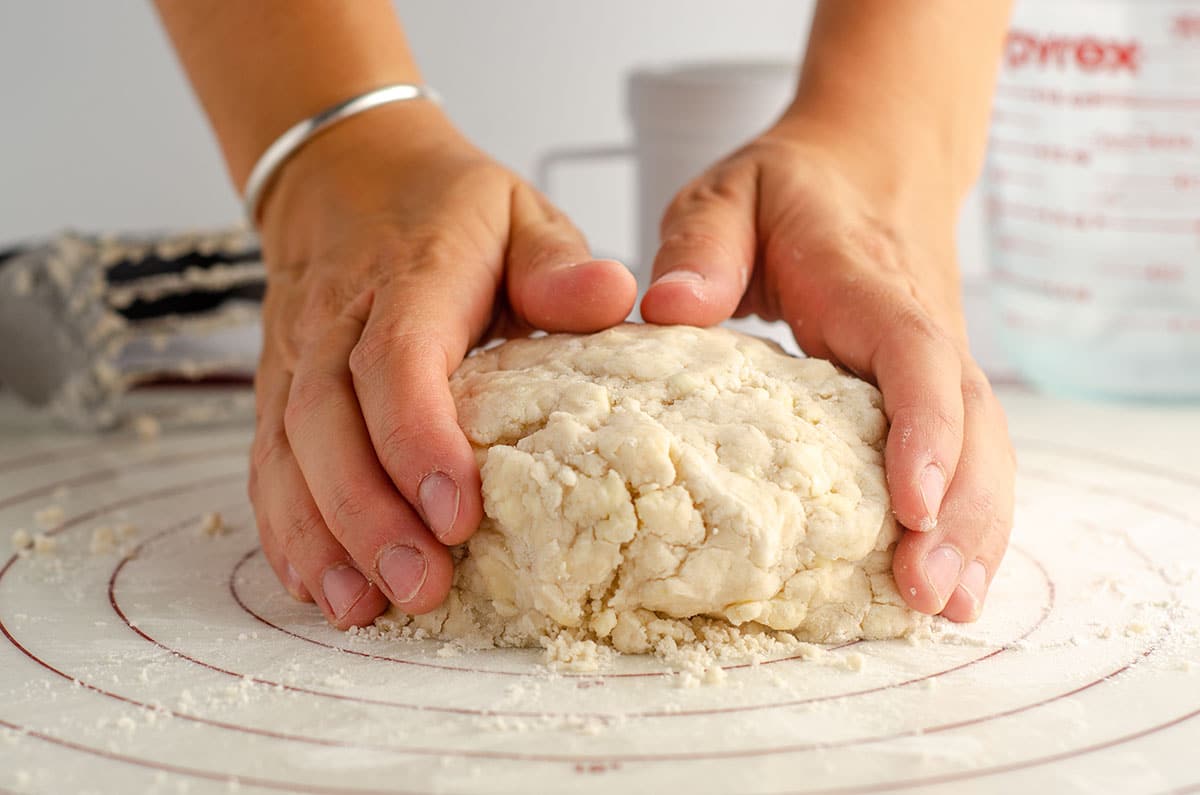
STEP #7
The dough should come together easily, not crumble, and not feel overly sticky. Be careful not to overwork the dough because it will become tough once it’s baked. Yuck.
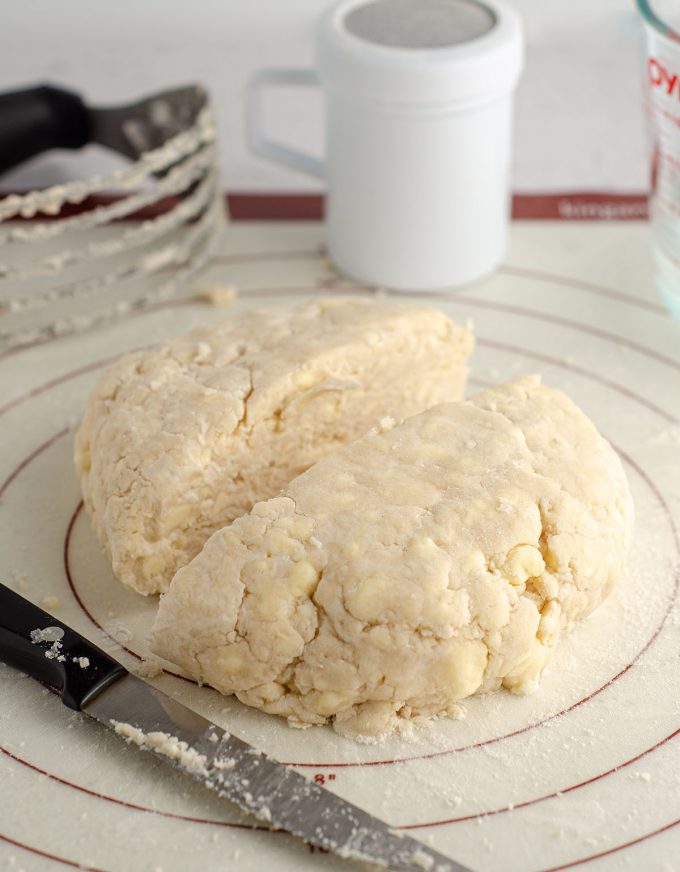
STEP #8
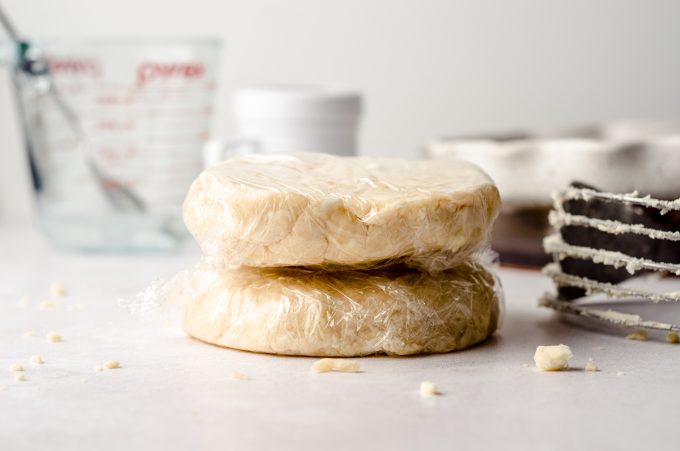
Form the dough into a slightly flattened ball, cut it in half, and flatten each half into a disc about 1″ thick and wrap tightly with plastic wrap. Refrigerate at least 2 hours or up to 5 days.
HOW TO ROLL OUT AND PREPARE PIE CRUST
When you are ready to use your pie crust, roll it out gently. Use a rolling pin to roll from the center of the circle outwards. Turn the dough about ¼ turn each time so as to roll it out evenly.
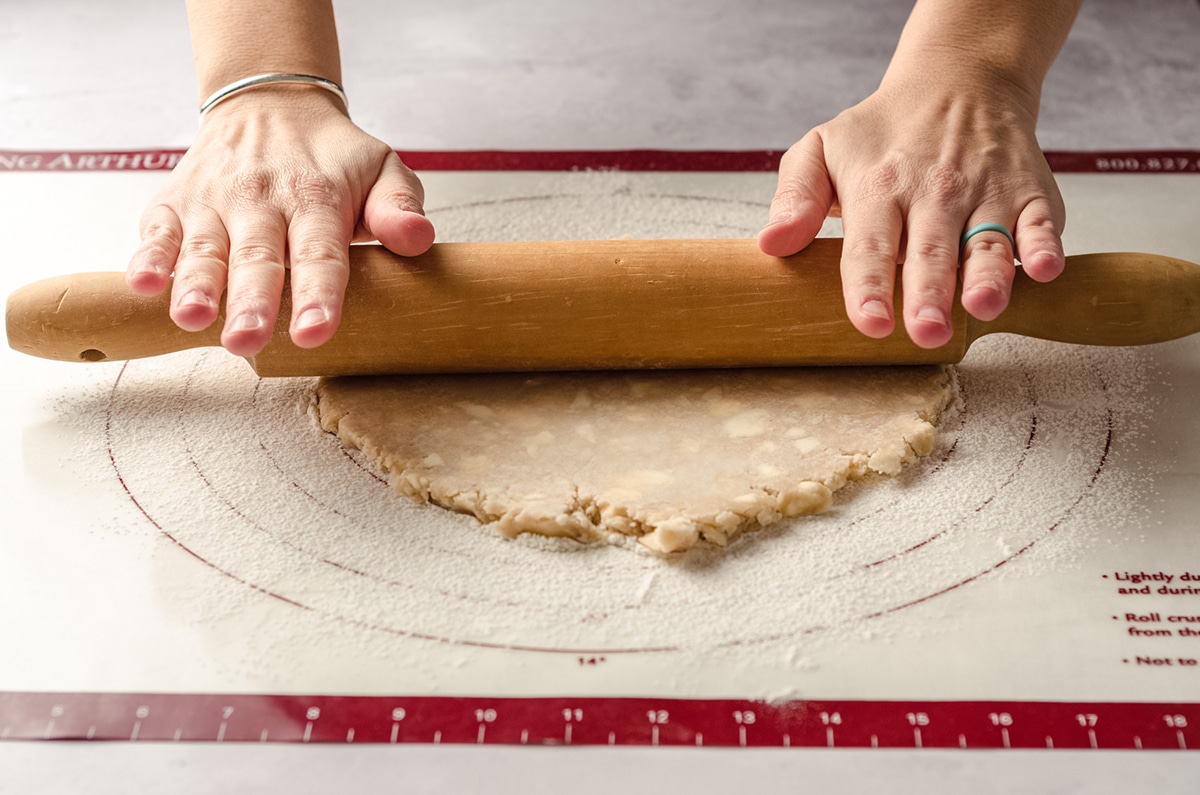
You’re probably working with a 9″ pie plate, so rolling your dough to 12″ will give you enough room to work with an edge.
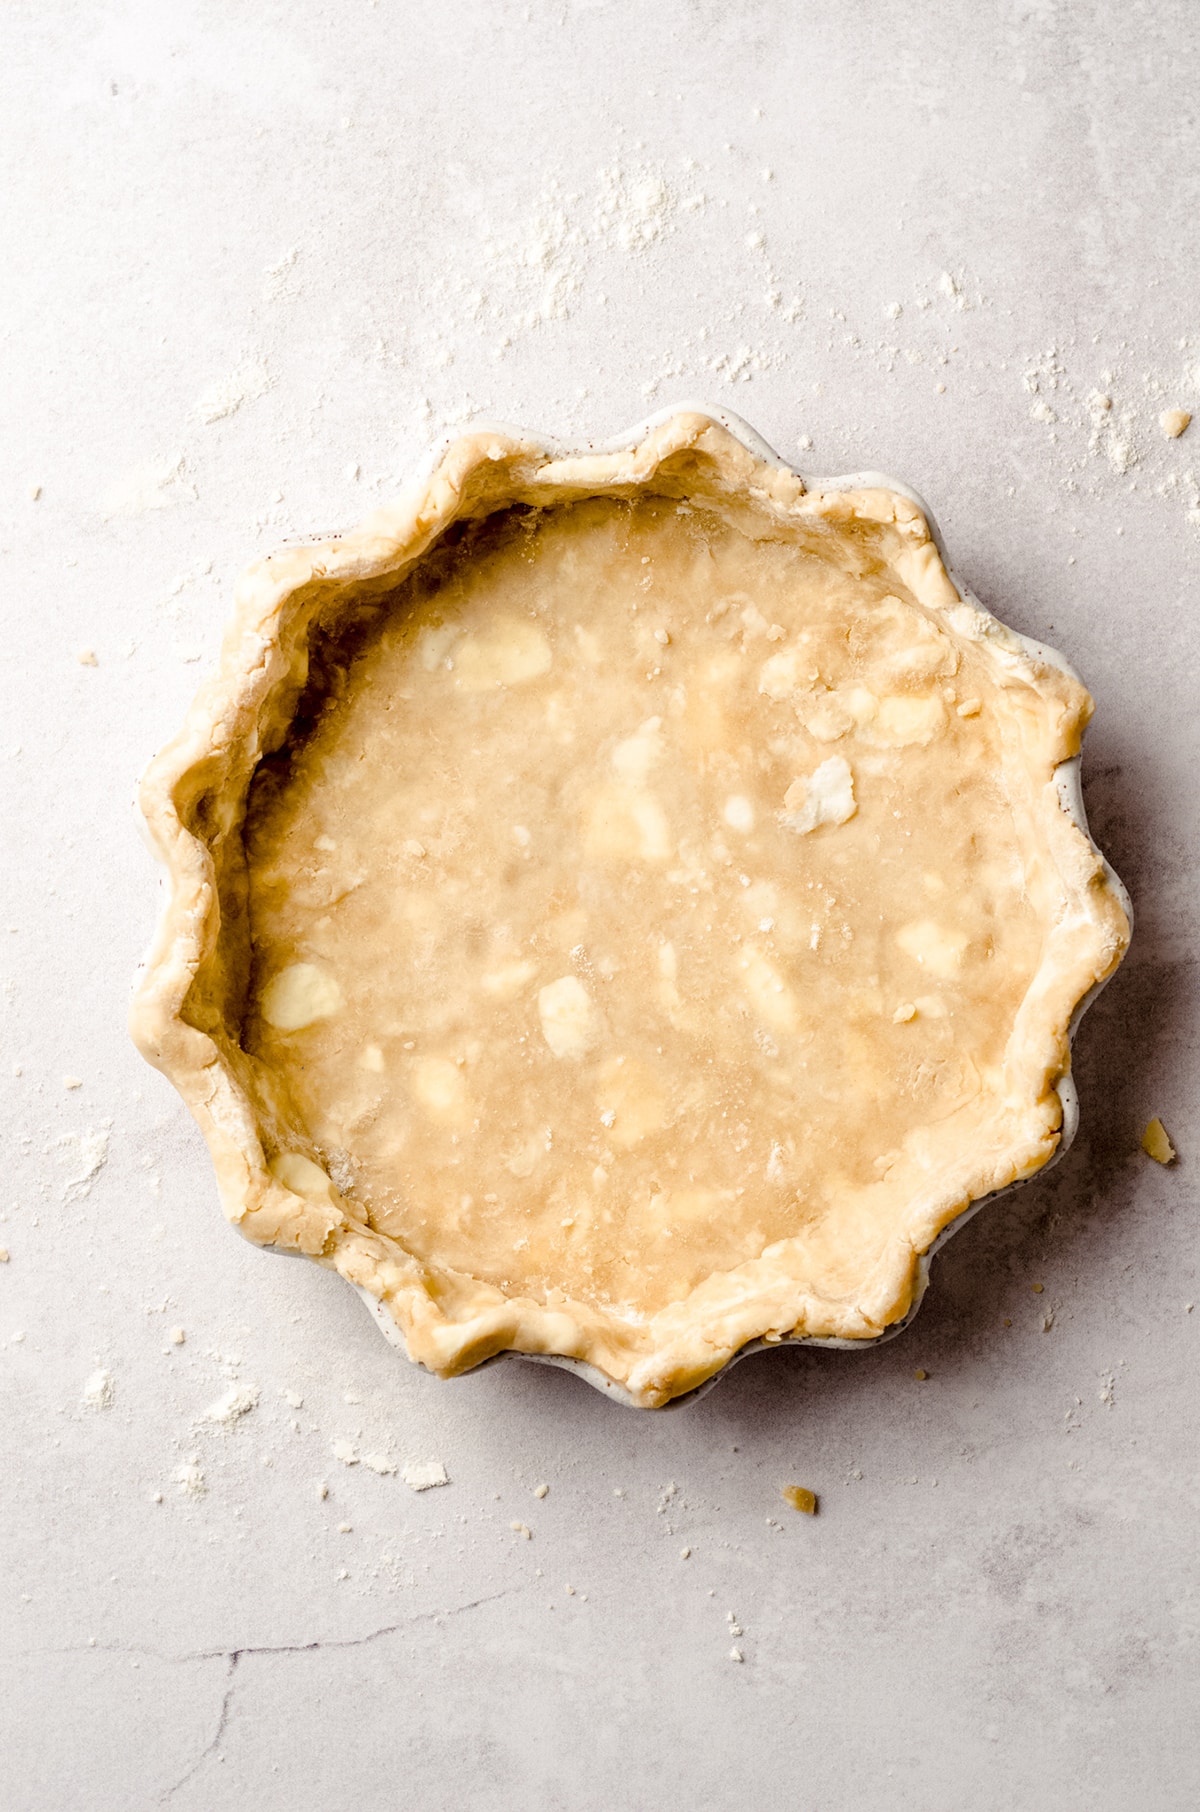
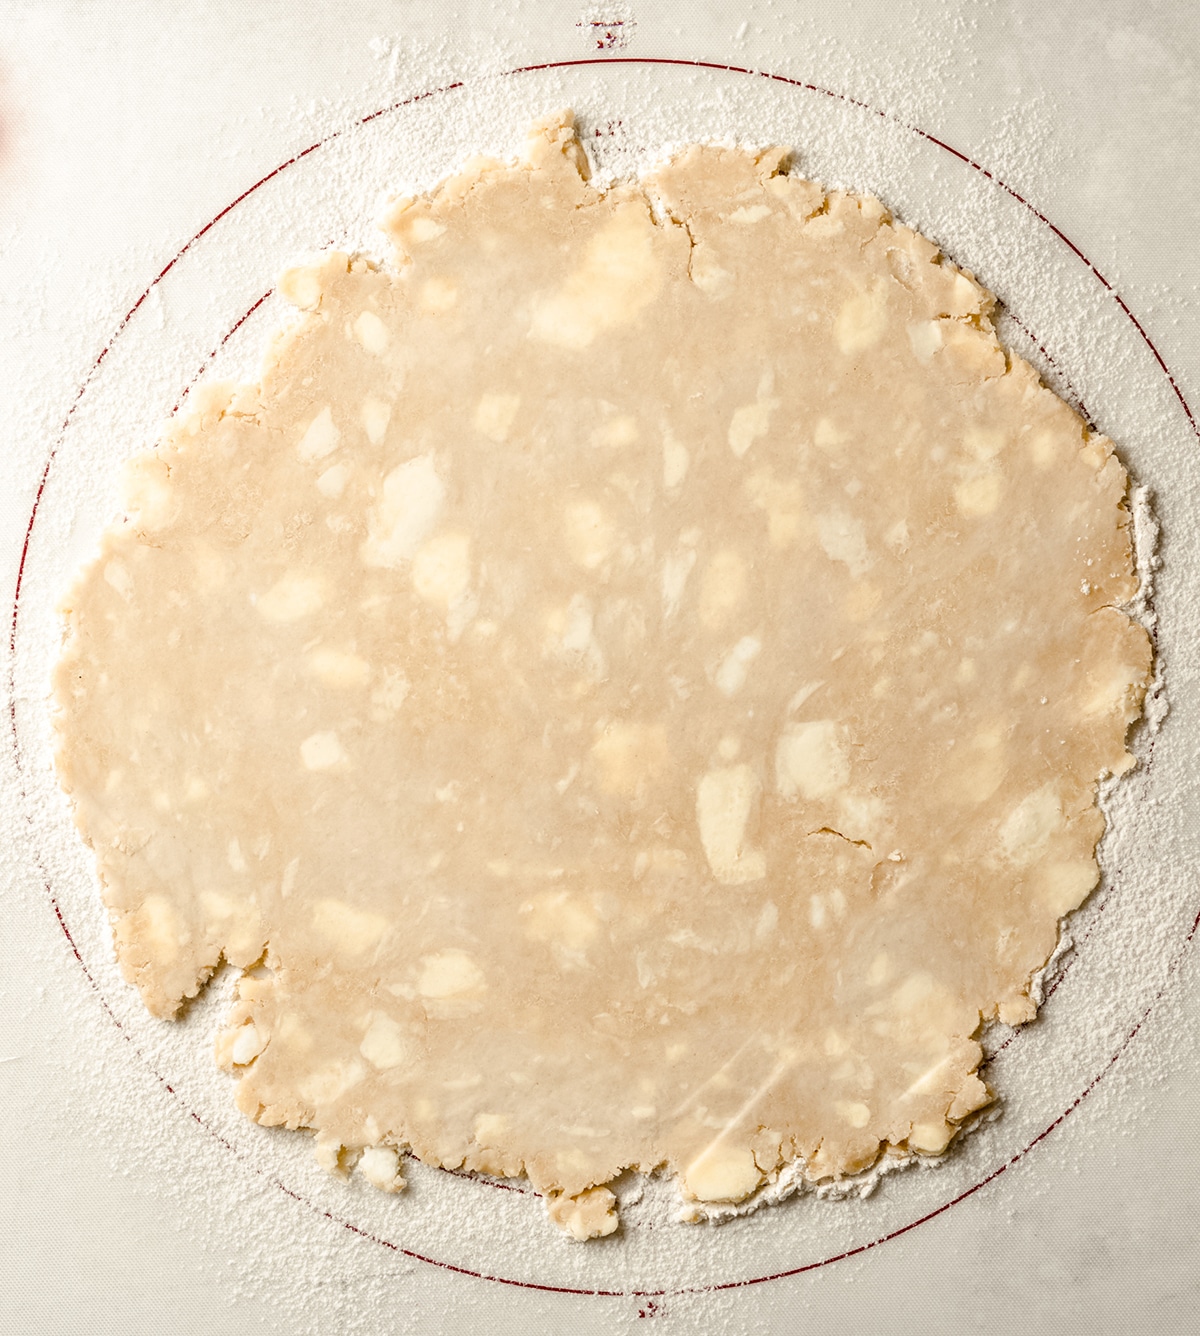
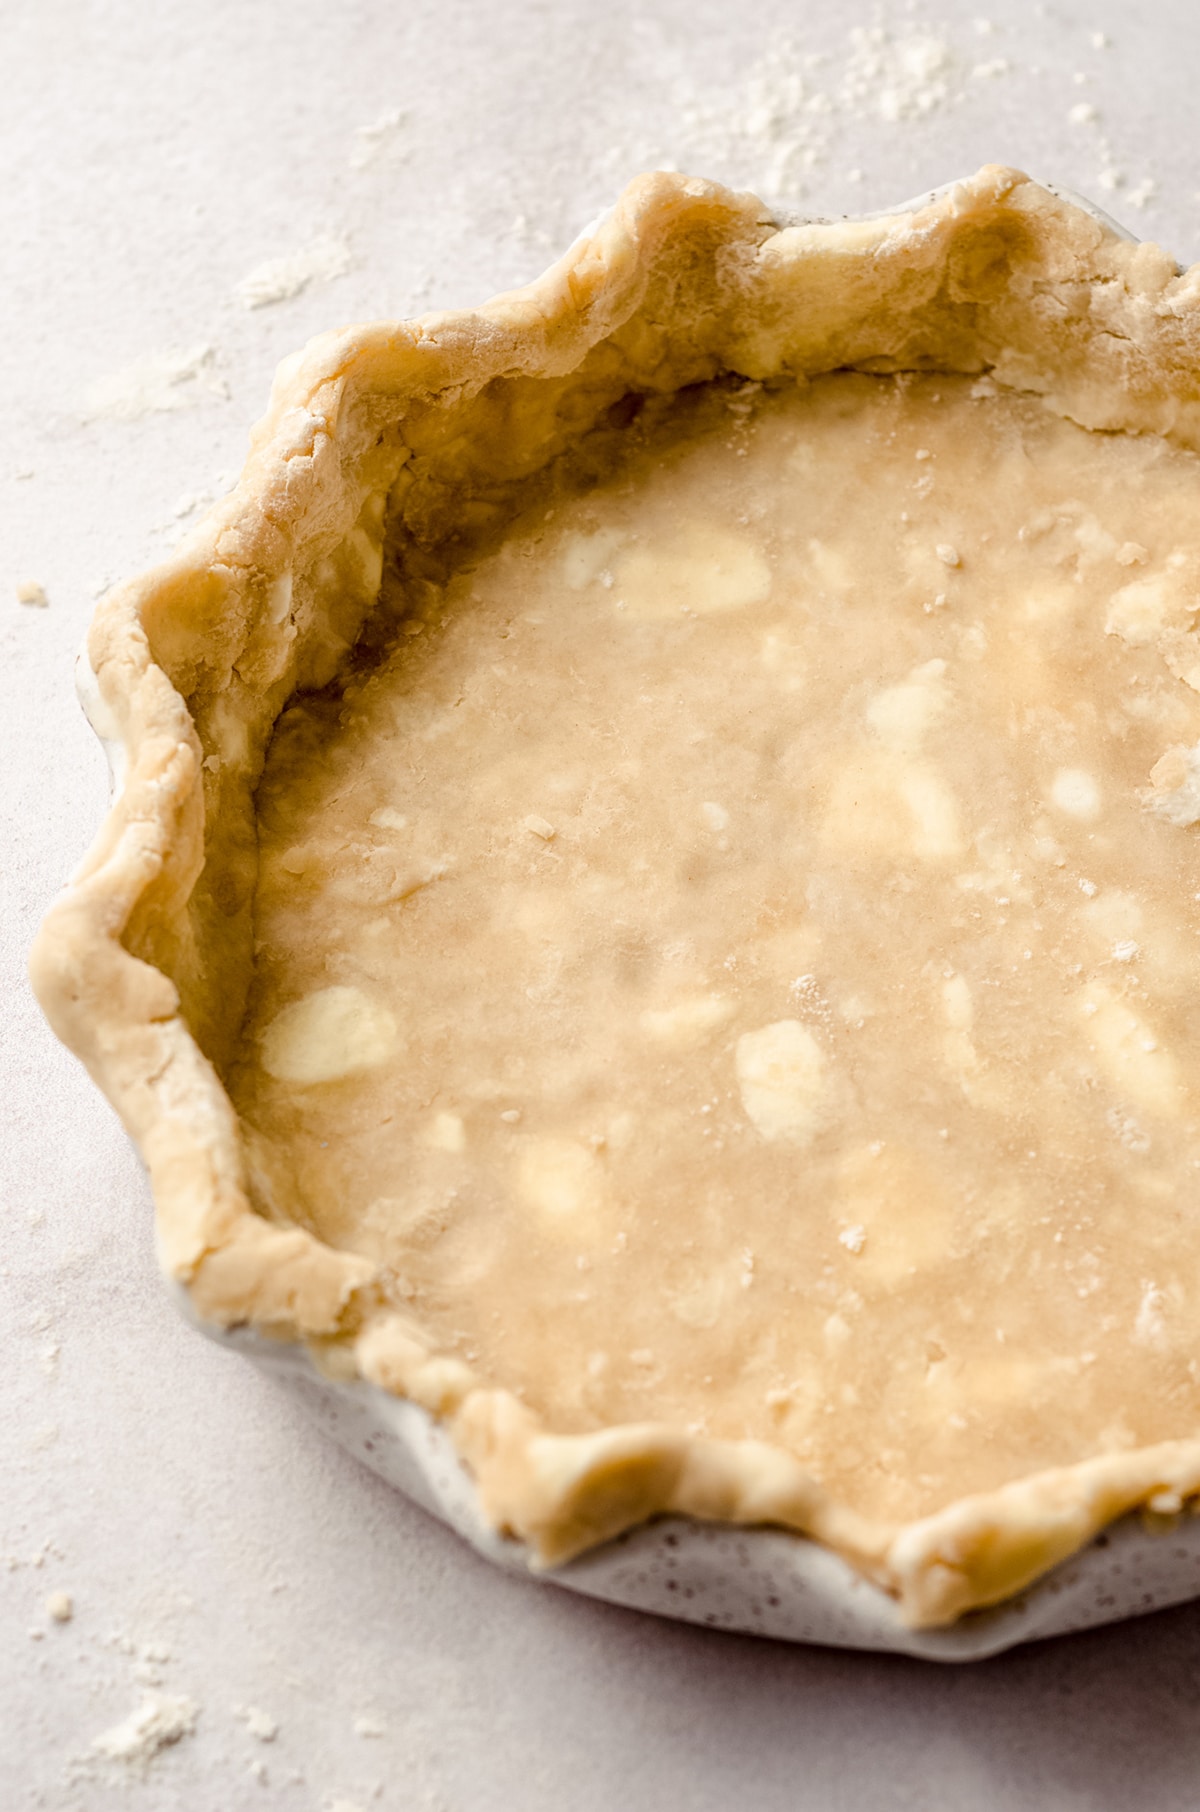
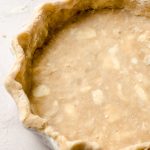
Look at all those beautiful chunks of fat! This is what you want your pie crust to look like– all those chunks will make for some beautiful flakes.
Some folks like to roll the crust up around the rolling pin and then transfer it to the pie plate. I do not like this method much, and completely prefer to use a large rolling mat, then picking the whole thing up and flipping it into the pie plate. My very favorite rolling mat is from King Arthur Flour, but this is another great one that I own.

Once it’s in the pie plate, simply use your hands to press the crust into place. Don’t worry about getting this done quickly. Take your time until you get more comfortable with what this feels and looks like. And while we don’t want to melt any of the butter or shortening, it might happen while you’re figuring things out.
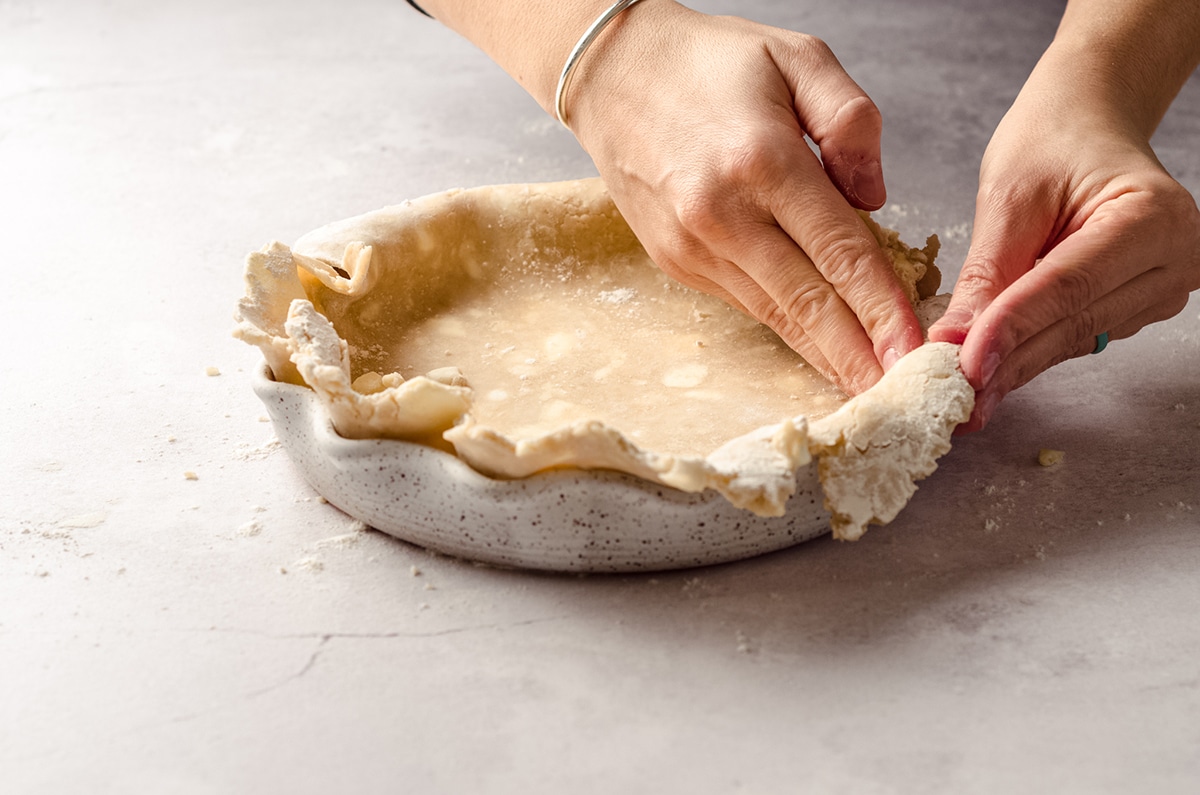
No sweat! Just pop the pie crust back into the fridge for at least 15 minutes after it’s fitted into the pie plate to firm up the fat again. I do this all the time.
Once your pie crust is in the pie plate, crimp or flute the edges of your pie crust and then proceed with the instructions given in your recipe.
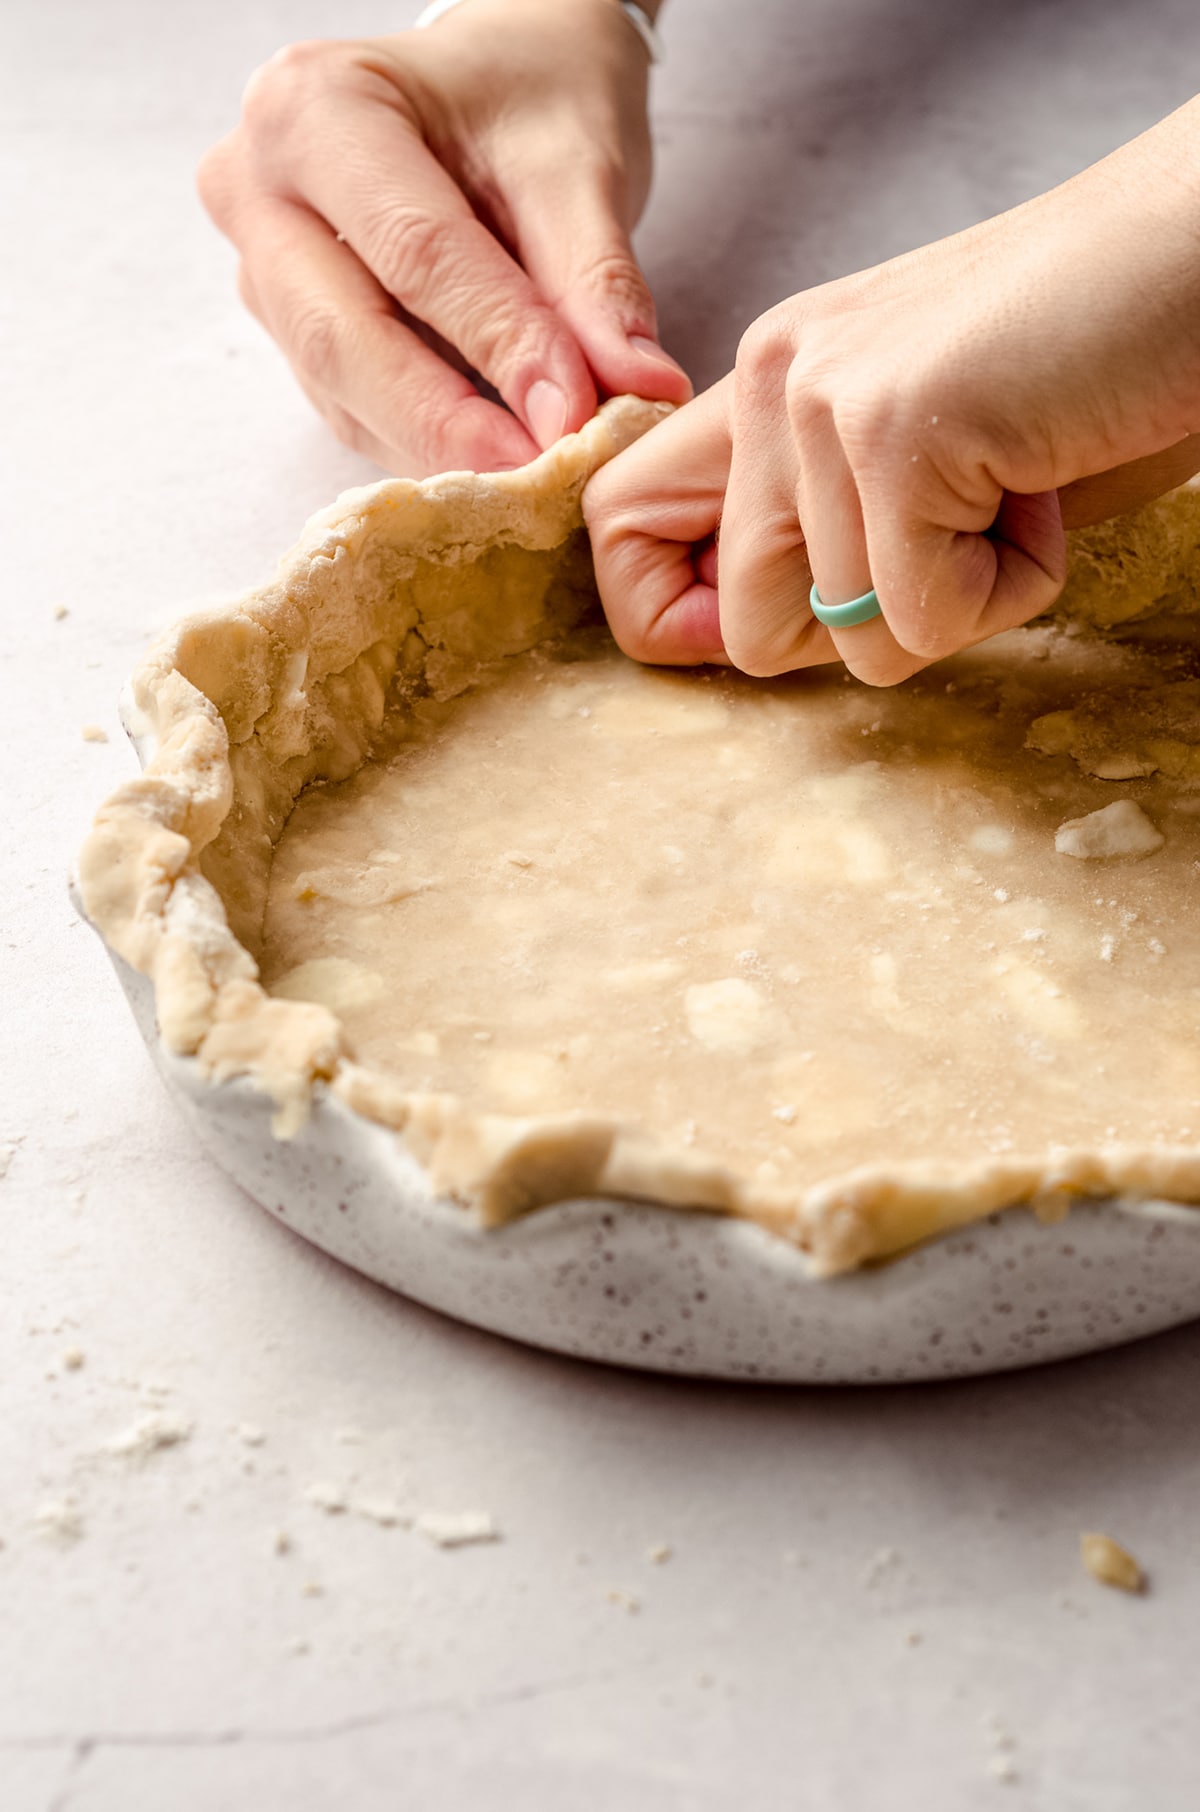

To crimp pie crust: use the second knuckle of your pointer finger of one hand to push the pie crust up onto the edge of the pie plate while you form a triangle of dough around that knuckle with the thumb and pointer finger of your other hand. See photo above for a visual.
How to bake this Flaky Pie Crust Recipe
Always follow the instructions written in your recipe to be sure you’re baking the crust when appropriate. You may be putting your filling into a completely raw pie crust, or you may par bake or fully bake it before adding the filling.
Homemade Pie Crust Tips
ICE COLD WATER KEEPS THE FAT COLD
I use anywhere from ⅓ to ½ cup of water for my pie crusts, so I start by measuring ½ cup of water into my glass measuring cup. To that, I add a few ice cubes, stir it around, and measure out of the ice cold water by the Tablespoon (more on that in the step-by-step instructions).

THE PURPOSE OF USING BOTH BUTTER AND SHORTENING
Butter, of course, brings tons of flavor. Also, the moisture in the butter helps to create lots of defined flakes. We want a lot of this.
Shortening also adds flakiness, but also lends to the tenderness we all love so much in pie crust. Flaky + tender = pieeeeeefection!
Just like the water, your fats must be cold.
We don’t want the fats melting before they get into the oven, otherwise, the result will be greasy, crunchy, and totally unappealing. If we keep the fats cold as long as possible, they will melt in the oven, release the steam, and create pockets of air that then result in flakes.
Following? Cold, cold, cold fats!
Personally, I think that knowing how to make a pie crust from scratch can totally amp up your pie game. Remember how I said I’m not huge on pie? When it’s in this crust? I’m all about it.
And even more so, my homemade quiches + this crust are simply the best.
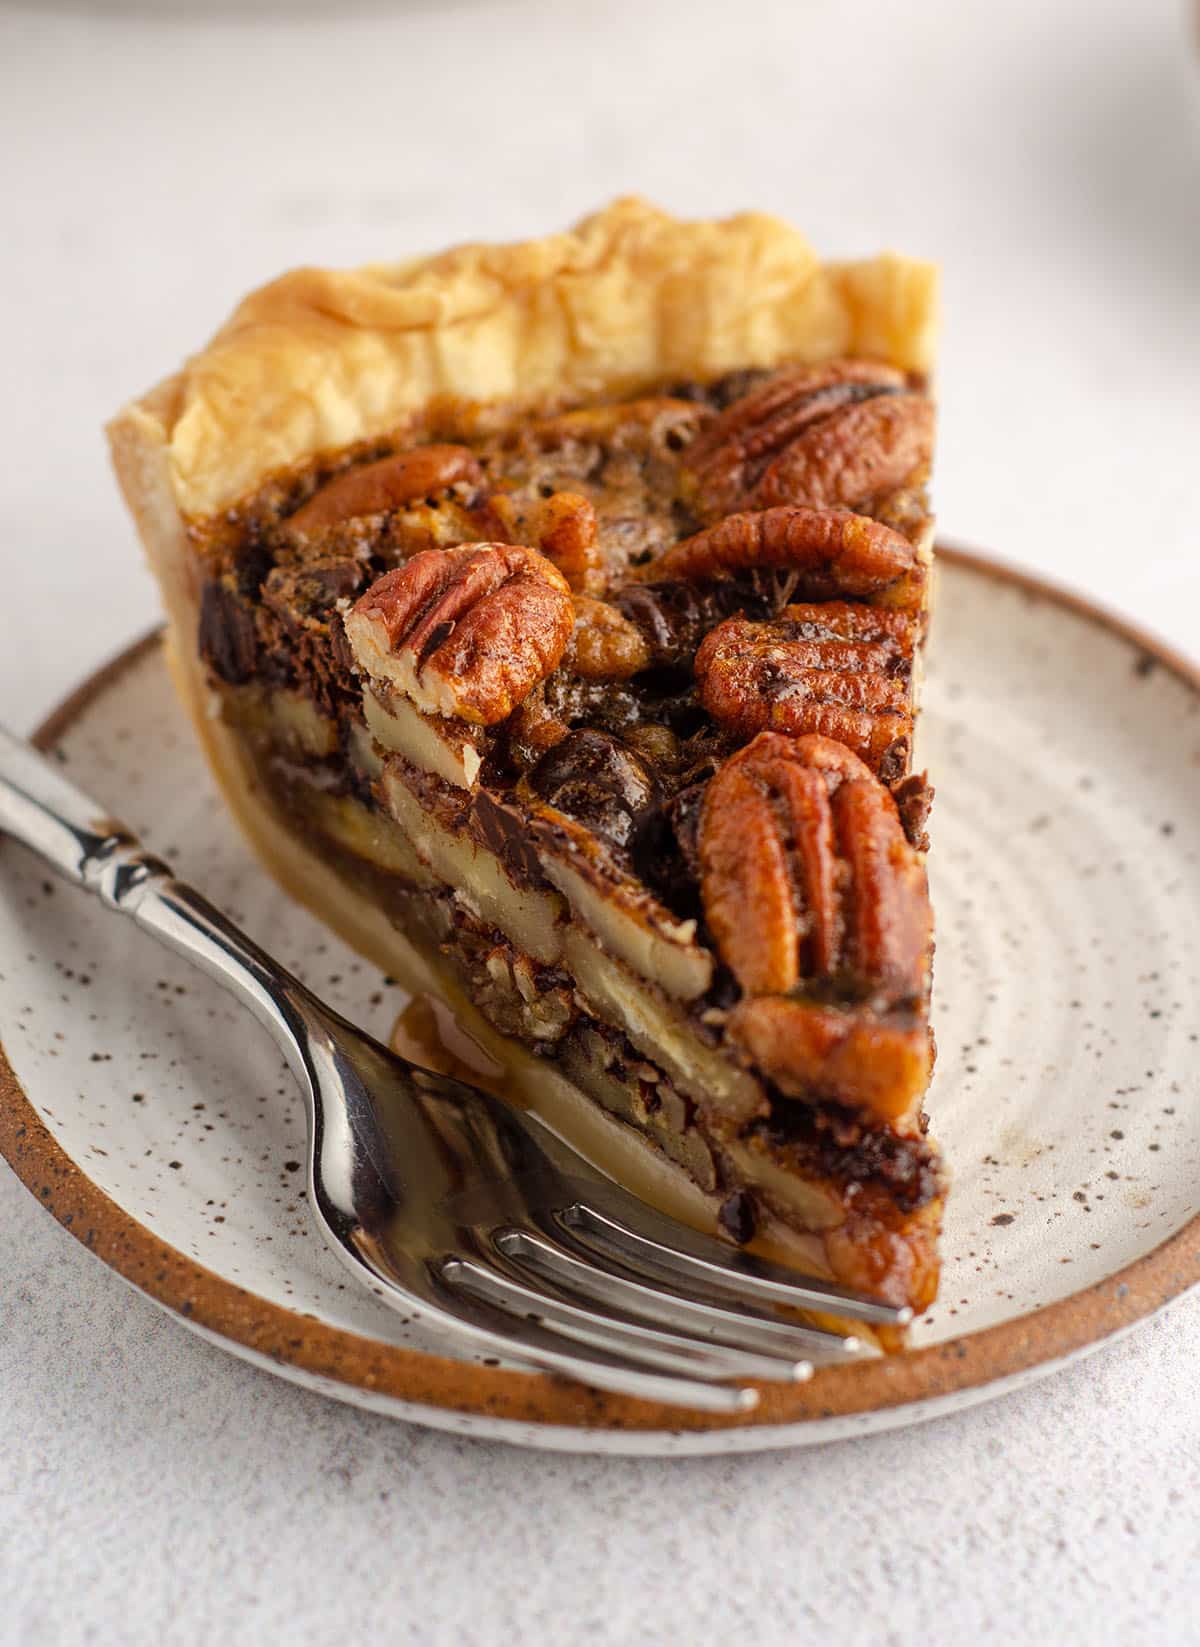
Tons of flavor, tons of texture, and a sturdy base for whatever filling your pie heart desires.
Even the gooey filling of my chocolate chip pecan pie!
How to store this Recipe for Homemade Pie Crust
It is best to store homemade pie crust in discs wrapped in the refrigerator or freezer. If you find yourself with a pie plate lined with a pie crust ready to go but need to save it for when you’re ready to finish the pie, wrap it tightly and either store it in the refrigerator for up to 3 days or in the freezer for up to 3 months. If you are freezing it, thaw before proceeding with your recipe.
CAN HOMEMADE PIE DOUGH BE FROZEN?
Since this recipe for pie crust yields two crusts, you may find yourself wondering what to do with the other half if your recipe doesn’t call for a double pie crust (one for the pie plate and the other for the top).
Pie crust freezes beautifully, for up to 3 months. Simply thaw a frozen pie crust dough in the fridge overnight. Fresh pie crust is ready to use as soon as it’s thoroughly chilled.
WHAT TO DO WITH LEFTOVER PIE CRUST
My favorite thing to do with leftover pie crust is to make pie crust cookies.
CAN PIE CRUST BE MADE AHEAD OF TIME?
Homemade pie crust can absolutely be made ahead of time. In fact, I almost always have a disc of frozen pie crust in my freezer so there’s always a pie crust ready to go! If I know I’m baking a pie, I will always prepare the crust at least one day in advance so it has plenty of time to chill before I need to use it.
Flaky Pie Crust FAQs
I hope that after reading, you feel great about conquering the homemade pie crust world– you can totally do this!
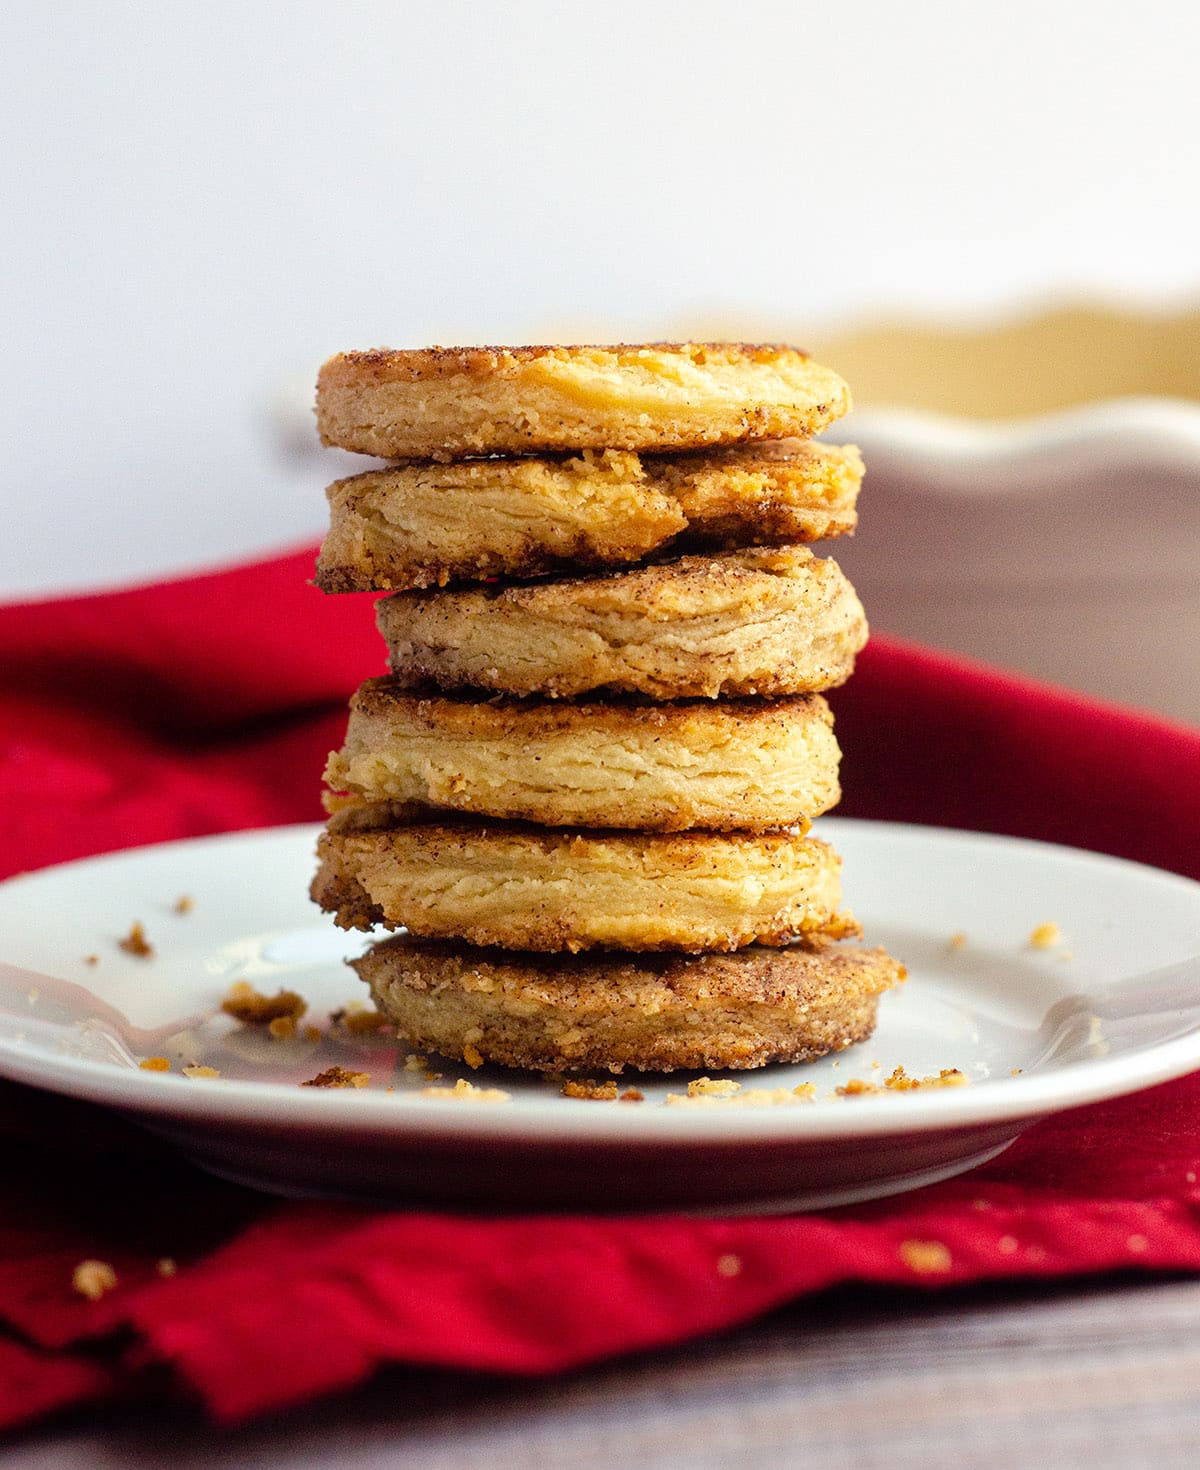
And don’t worry, if you have leftover pie dough, you’ll find my pie crust cookies a helpful place to use it up!
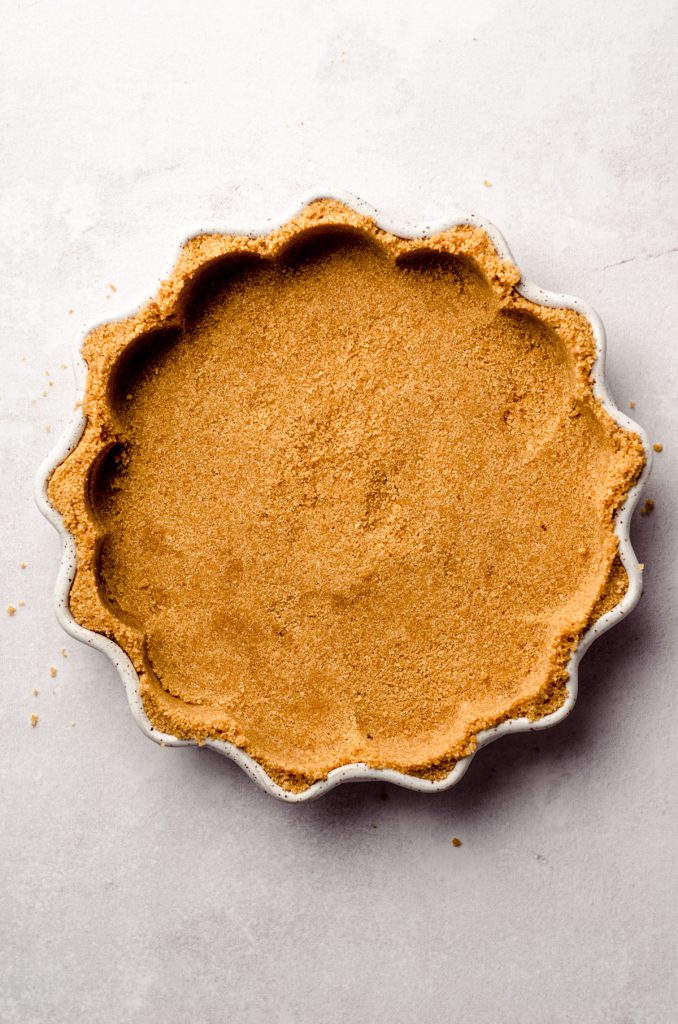
More pie crusts: graham cracker crust and Oreo crust.

Flaky Pie Crust
Ingredients
- 2 and ¾ cups (330g) all purpose flour be sure to measure properly
- 1 Tablespoon (15g) granulated sugar
- 1 teaspoon salt
- ½ cup (113g) unsalted butter cubed and chilled
- ⅔ cup (128g) vegetable shortening chilled
- ½ cup (120mL) ice water
Instructions
- In a large bowl, whisk together the flour, sugar, and salt.2 and ¾ cups (330g) all purpose flour, 1 Tablespoon (15g) granulated sugar, 1 teaspoon salt
- Add the butter and the shortening and, using a pastry cutter or two forks, cut the butter and the shortening into the mixture until it has mostly shredded and created some smaller bits. A few larger chunks is ok, but a mostly shaggy dough is what you're looking for.½ cup (113g) unsalted butter, ⅔ cup (128g) vegetable shortening
- Measure ½ cup of water into a cup, bowl, or glass measuring cup. Add a few ice cubes and stir it around.½ cup (120mL) ice water
- Add the ice water to the dough 1 Tablespoon at a time, stirring with a rubber spatula or wooden spoon after each addition. Stop adding water when the dough begins to form large clumps. I usually use between ⅓ and ½ cup of water. Do not add more water than you need to.
- Transfer dough to a floured work surface, being sure to add all of the bits of dough and extra flour. Using floured hands, fold the dough into itself until the extra bits and flour are fully incorporated.
- Form the dough it into a ball, divide dough in half, and flatten each half into a 1" thick disc. Wrap each disc tightly in plastic wrap and refrigerate for at least 2 hours and up to 5 days.
- When you are ready to make your pie: gently roll out your dough on a lightly floured surface starting from the center of the disc and working your way outwards. I like to use a pastry mat with circle measurements on it. Turn the dough ¼ turn between each roll. If you're working with a 9" pie dish, roll your crust out to about 12". If using a pastry mat, flip the entire thing over and into the pie dish. This makes transferring quite simple!
- Before proceeding with my pie recipe, I like to chill the pie crust in the pie plate in the refrigerator for about 15-20 minutes to allow the fats to get cold again. This step is optional, but I prefer to include it. Proceed with the pie per your recipe's instructions.
Video
Notes
- Prepare your pie crust ahead of time: prepare the dough through step 4 of this recipe and freeze for up to 3 months. Thaw overnight in the refrigerator before using.
- Double the recipe: this pie crust recipe doubles beautifully (note: it will yield 4 total pie crusts). Add the water 2 Tablespoons at a time, press into a disc, and cut into quarters.
Nutrition Disclosure
All nutritional values are approximate and provided to the reader as a courtesy. Changing ingredients and/or quantities will alter the estimated nutritional calculations.
I used this recipe again this Thanksgiving and the RAVE REVIEWS came rolling in. The pumpkin and apple pies were both amazing. Follow it exactly – Lynn knows what she’s talking about!
Thank you so much, Cindy! I’m so glad you enjoyed it 🙂