
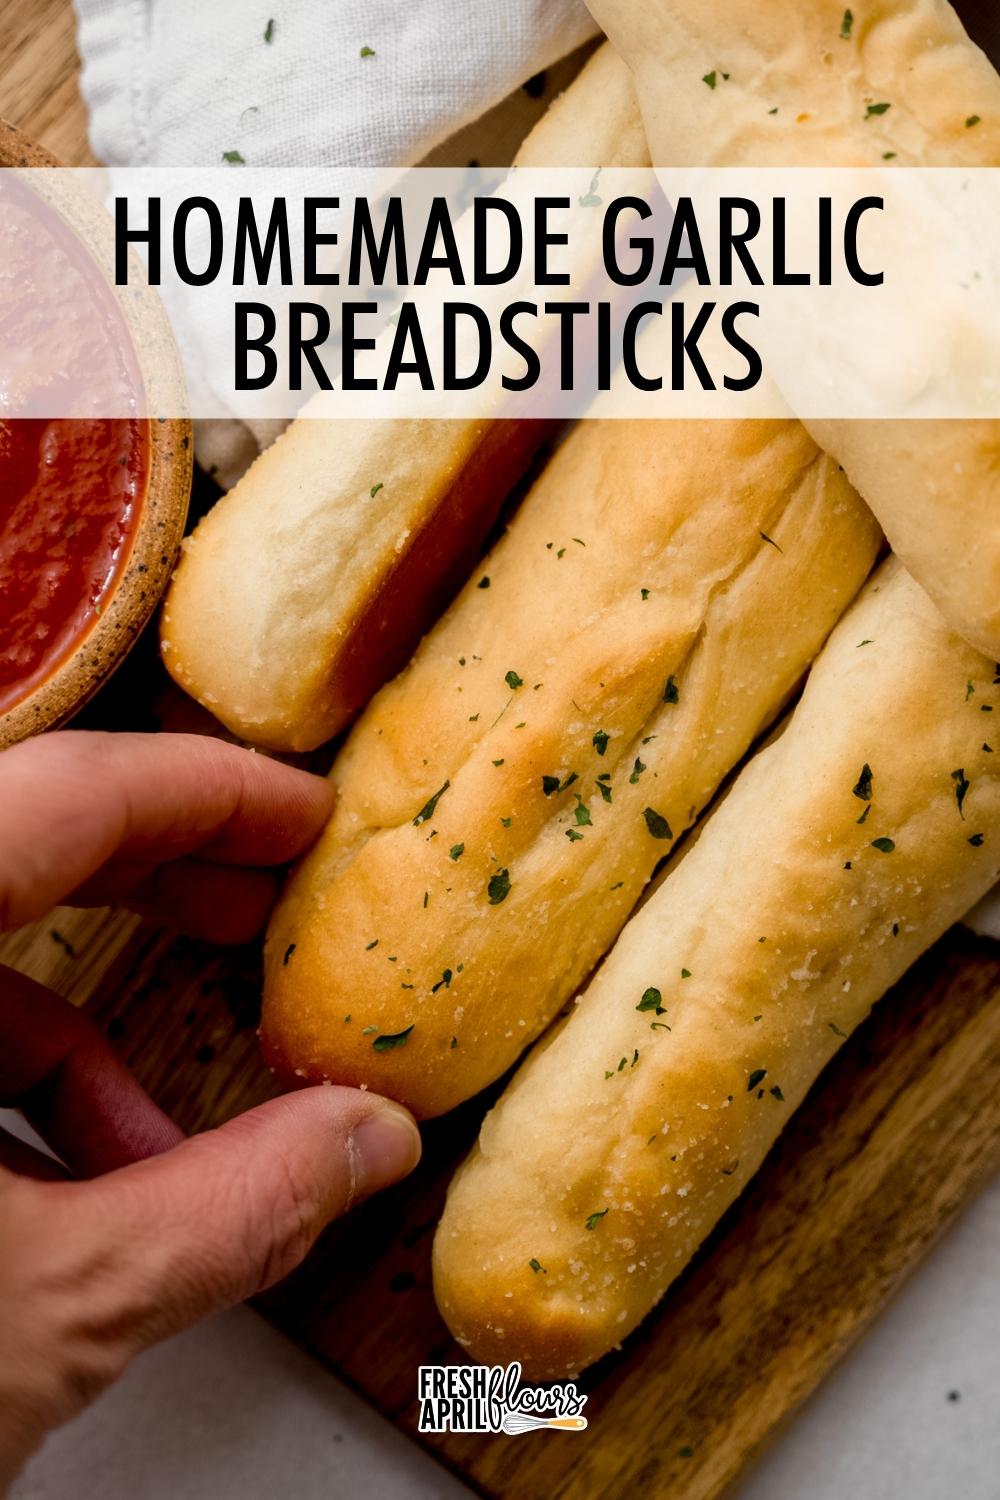
Homemade Garlic Breadsticks
As an Amazon Associate, I earn from qualifying purchases. Read the full disclosure here.
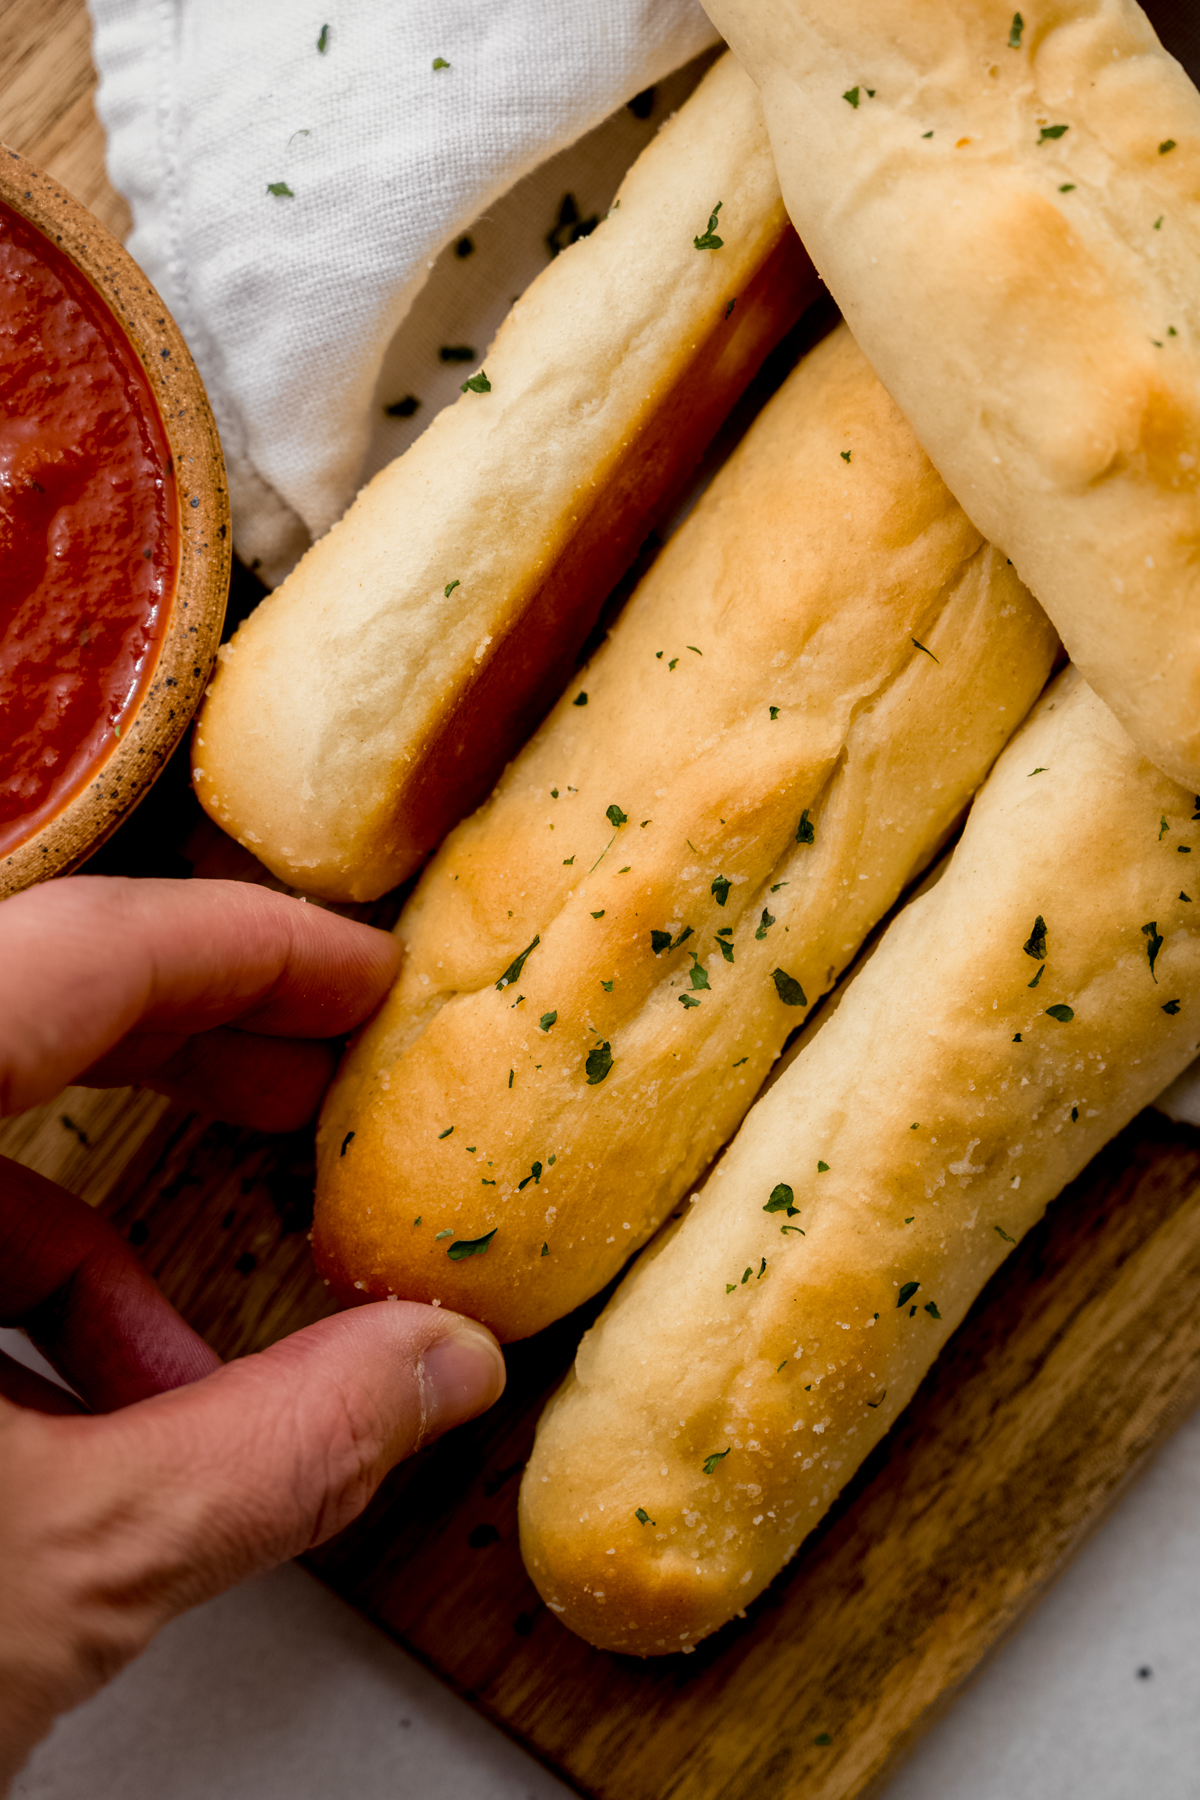
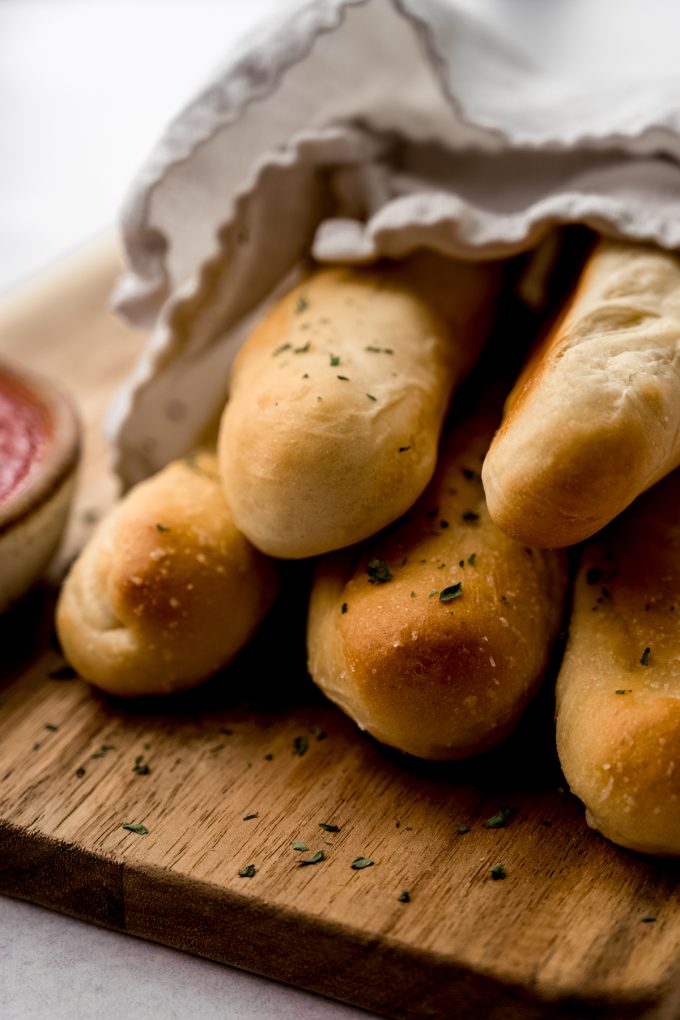
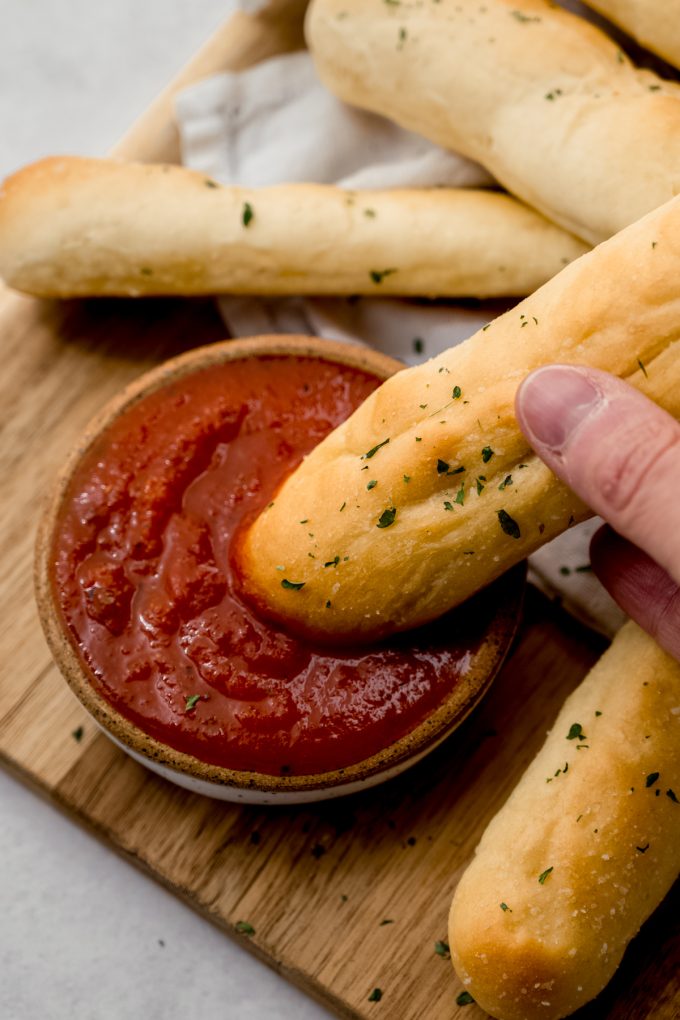
These homemade breadsticks are soft and fluffy on the inside and brushed with salted garlic butter for a flavorful addition to any meal. They will remind you of the ones from Olive Garden! See my post about baking with yeast for answers to all of your common FAQs.
YOUR NEW FAVORITE BREADSTICK MADE AT HOME
Before I tell you anything about these homemade garlic breadsticks or show you how to make them, I’m going to need to warn you: they are going to rock your homemade bread world.
In fact, we have one picky eater in the house who refuses to eat anything with too much flavor (????), and even he came back for seconds of these breadsticks, two nights in a row.
If it’s not the soft and tender interior of the finished product, the mega flavor in every bite, or the versatility of this recipe to be a side dish or the main event, it could be the easy approach to the recipe that will keep you coming back to it again and again.
Because if there’s one thing I do really well around here, besides convert Toll House diehards to my perfect chocolate chip cookies regularly, it’s give you a way to make yeast bread simple and approachable. I’ve broken down everything you need to succeed with this yeast bread recipe on the first try so that you not only feel like a yeast bread champ, but you get some really delicious homemade bread out of the whole thing.
A MIX OF TWO READER FAVORITE RECIPES
These garlic breadsticks are a careful blend of two recipes: my favorite pizza dough and my beginner-friendly yeast rolls. From the pizza dough– a lean dough, meaning no butter, eggs, or milk– I borrowed how easy it is to handle, which matters here since you’ll be touching the dough a lot. From the yeast rolls, I borrowed what makes them so soft and fluffy: butter.
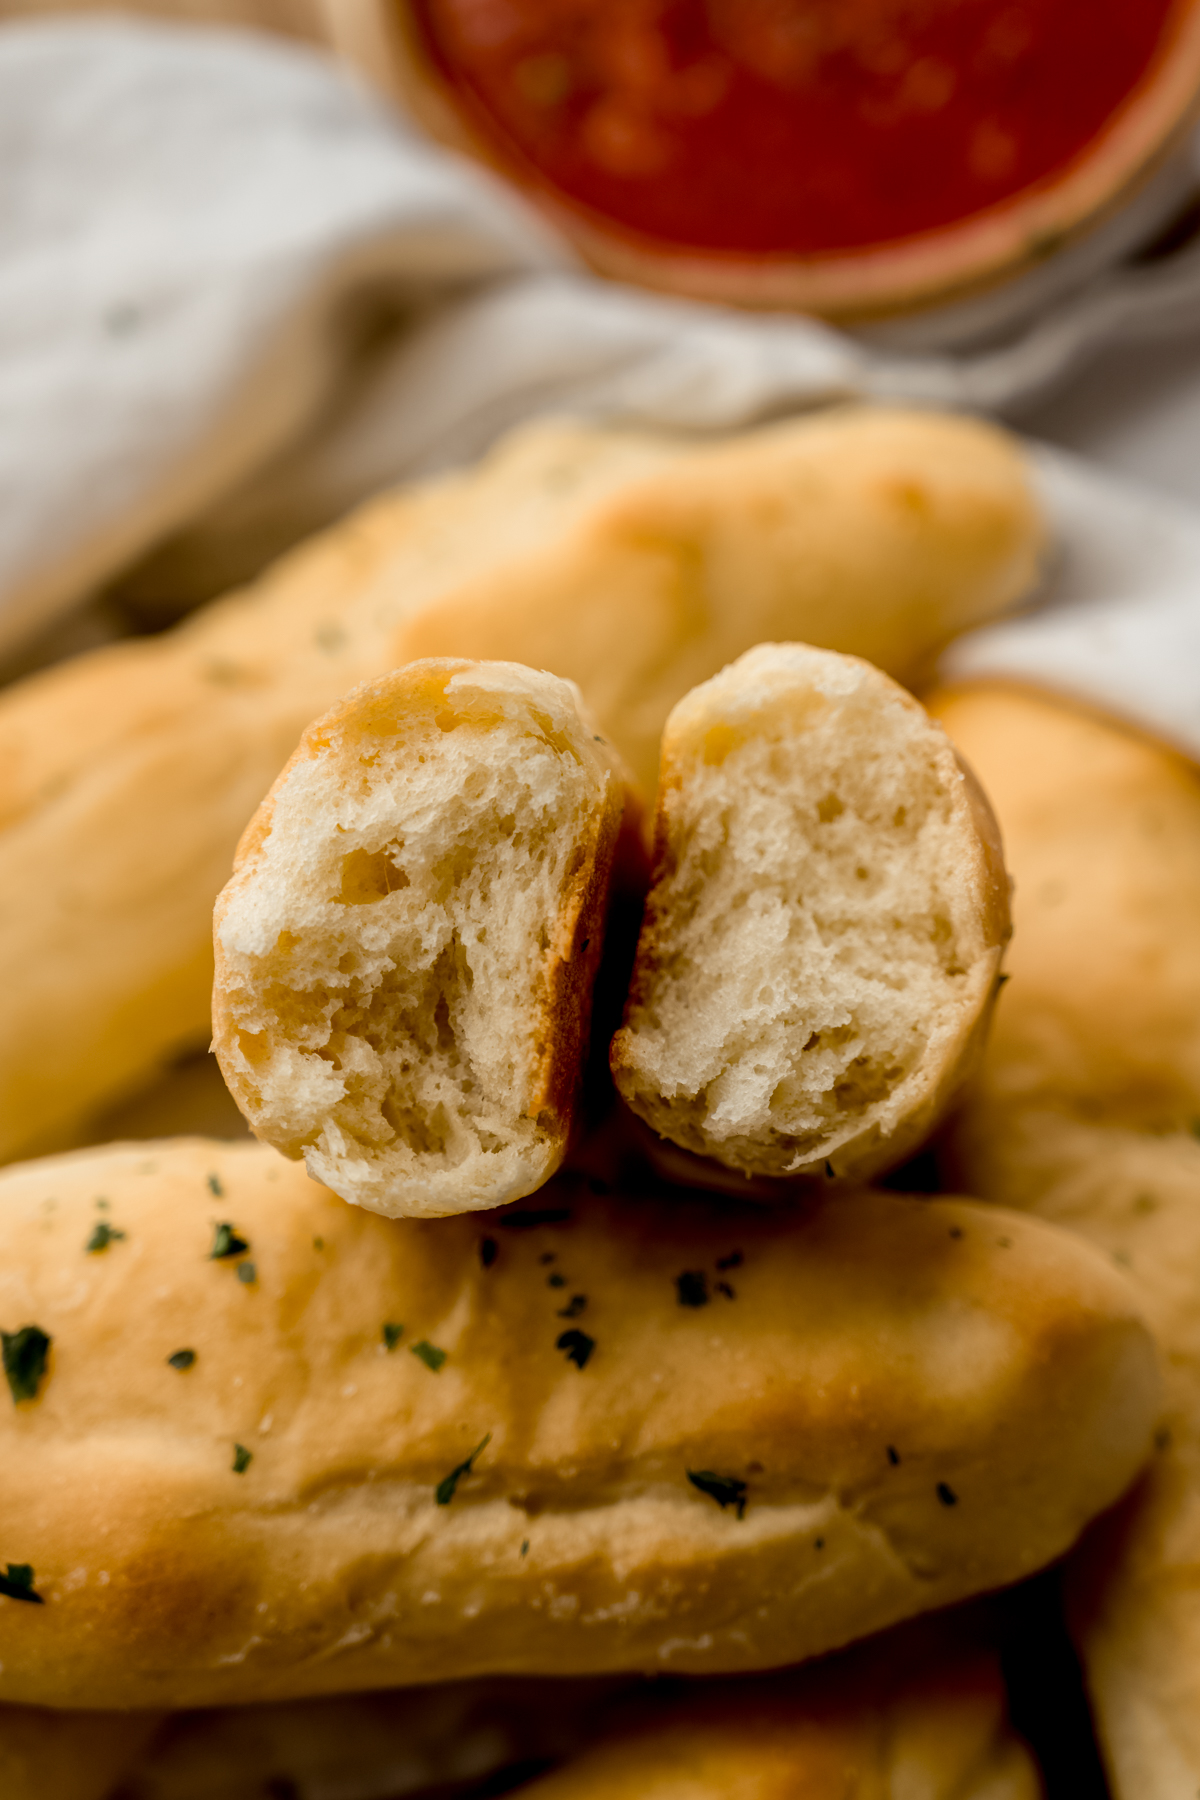
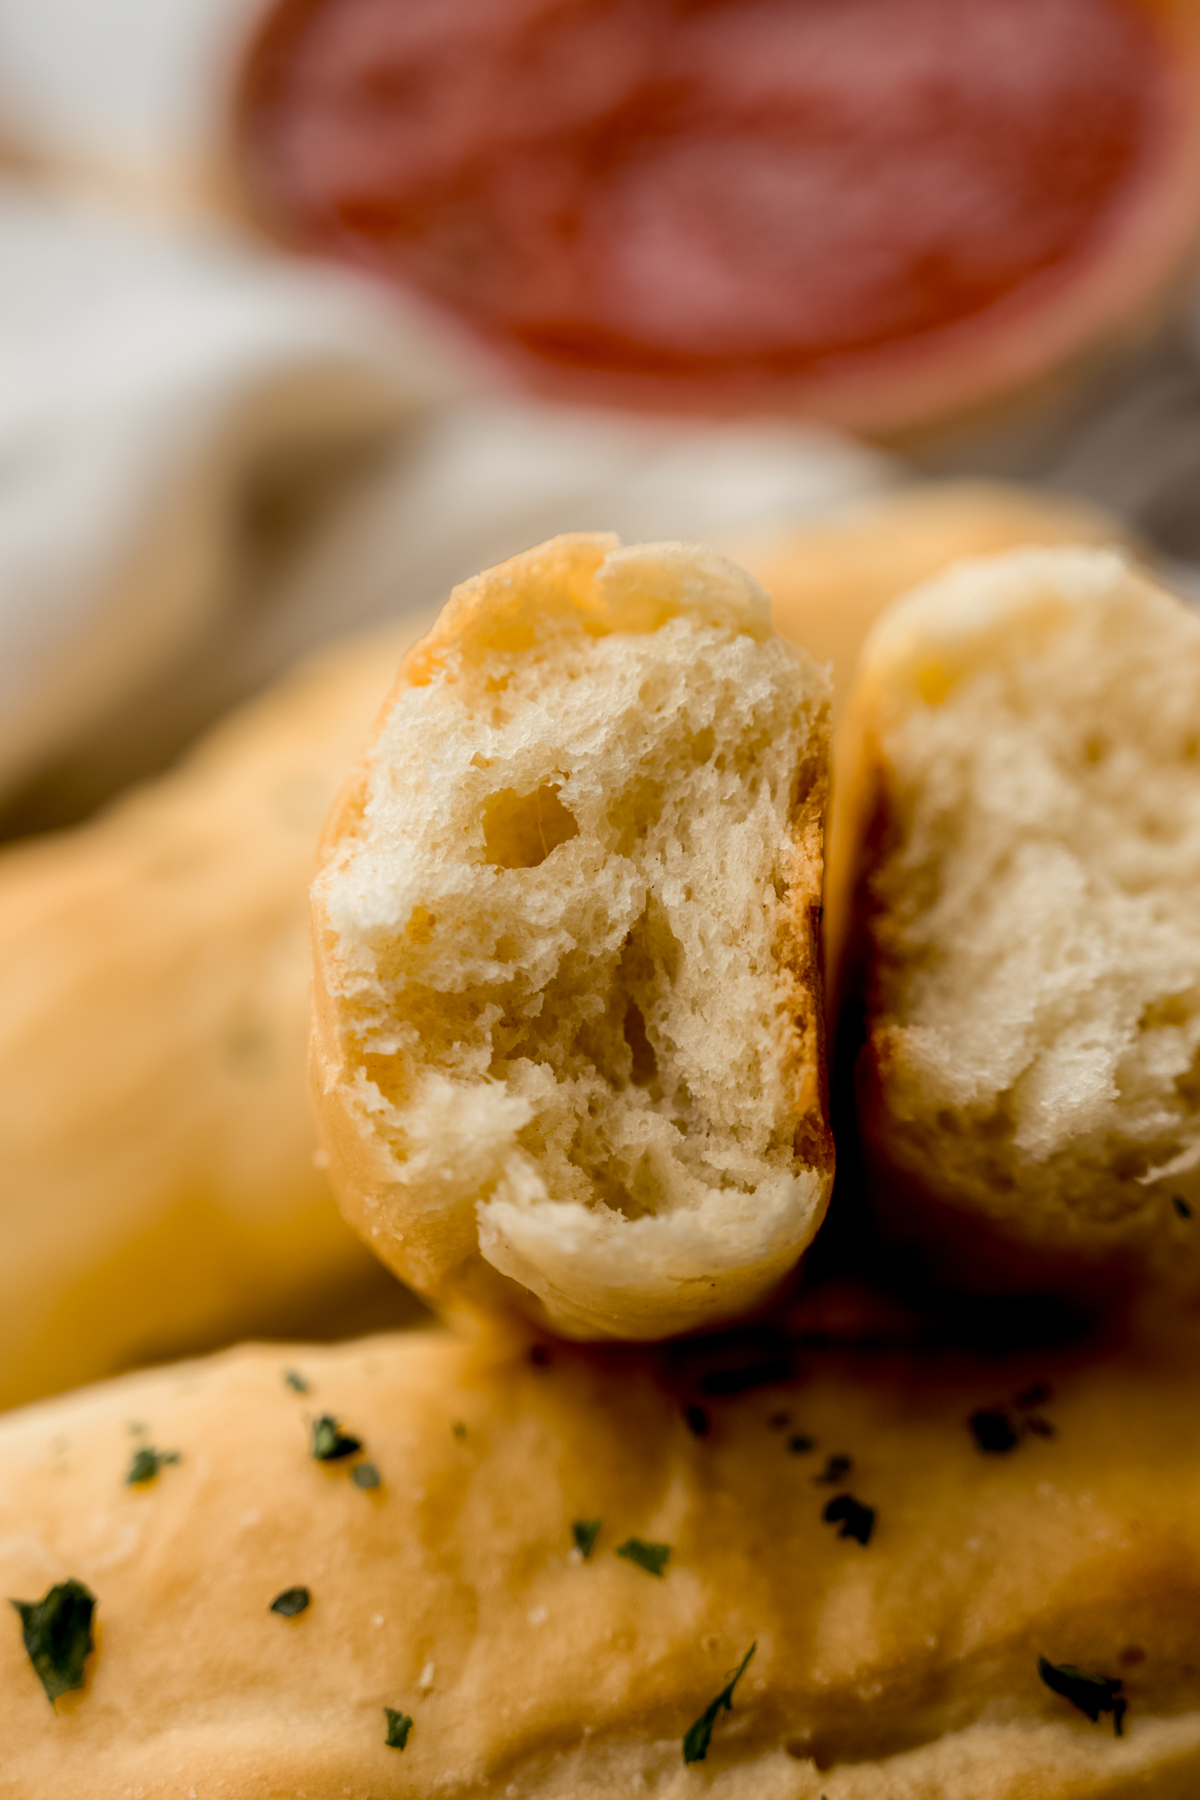
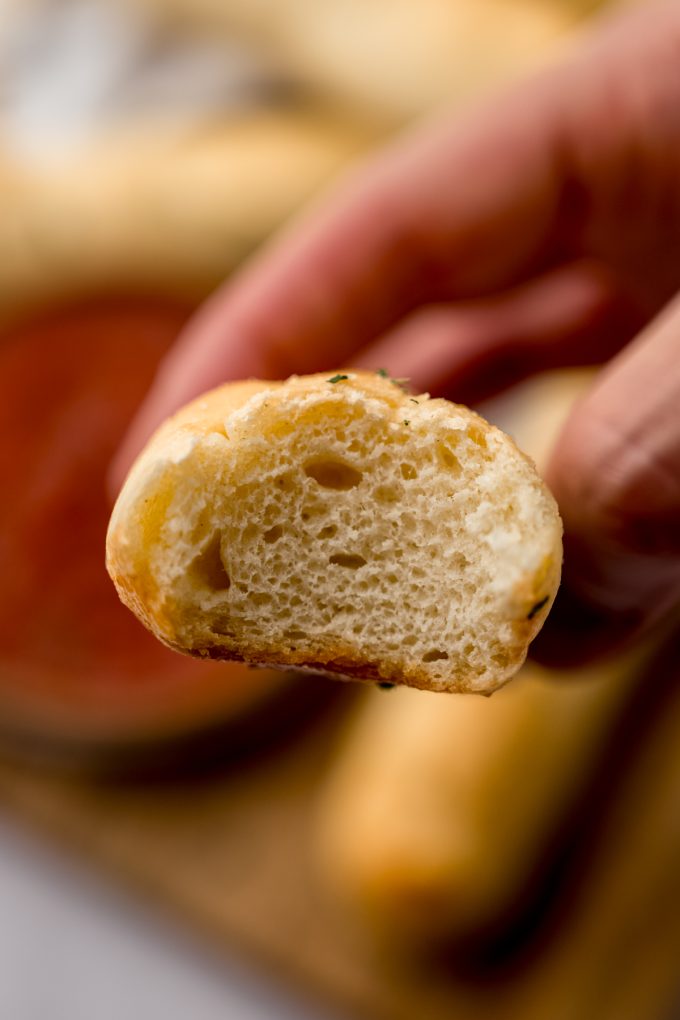
The result is a bread that’s buttery but not overwhelmingly so. Doughs with too much butter can be tricky to handle and tend to produce something richer, like cinnamon rolls. This one stays light, with a soft and fluffy interior and just a touch of chew. I also stirred garlic powder directly into the dough to build in a little extra flavor from the start.
The last component of the recipe– the garlicky butter that gets brushed on the breadsticks while they’re hot and fresh– comes from my easy homemade garlic knots recipe. That recipe utilizes fresh garlic, but we’re leaning into garlic powder here to mimic that granular, ultra flavorful finish that Olive Garden taught us to love so much.
Endless breadsticks at home, anyone?
GRAB THESE 7 INGREDIENTS
This list is simple, but take note of the flour especially!
WATER: we’ll use warm water to activates the yeast. Aim for about 100–110°F (38–43°C).
YEAST: you’ll need one standard packet of yeast. I always use dry active, but you can use instant if that’s what you prefer. See notes section in the recipe for guidance.
SUGAR: sugar feeds the yeast and helps to tenderize the bread dough.
MELTED BUTTER: unlike the olive oil I use in my pizza crust, butter brings flavor to everything while adding a softness to the dough. We’re also using some at the end of the recipe, so make sure you’re paying carefully attention to melt two portions of butter separately.
SALT: another ingredient we’ll use in the dough and in the finished butter brush.
ALL-PURPOSE FLOUR: you can use all-purpose or bread flour in this recipe, the latter of which will give you slightly more chew. We tested this recipe with both, and the difference wasn’t so significant that I’d steer you toward either over the other. Basically, if you have bread flour, feel encouraged to use it, but don’t make a special purchase if all you have is all-purpose.
GARLIC POWDER: garlic powder goes right into the dough as well as the melted butter topping.
HOW TO MAKE GARLIC BREADSTICKS
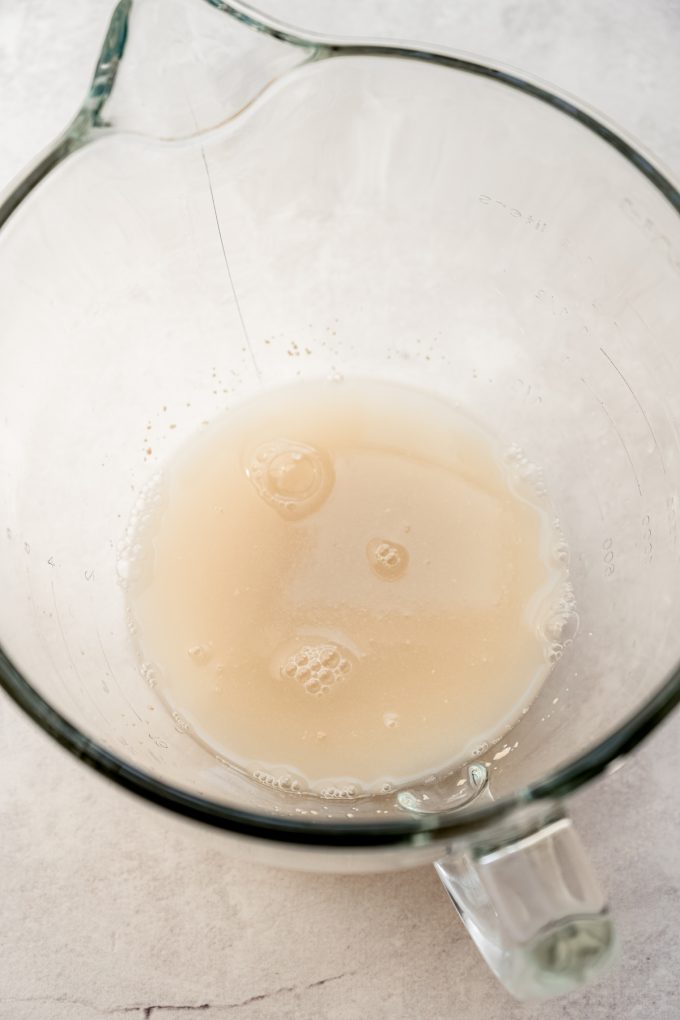
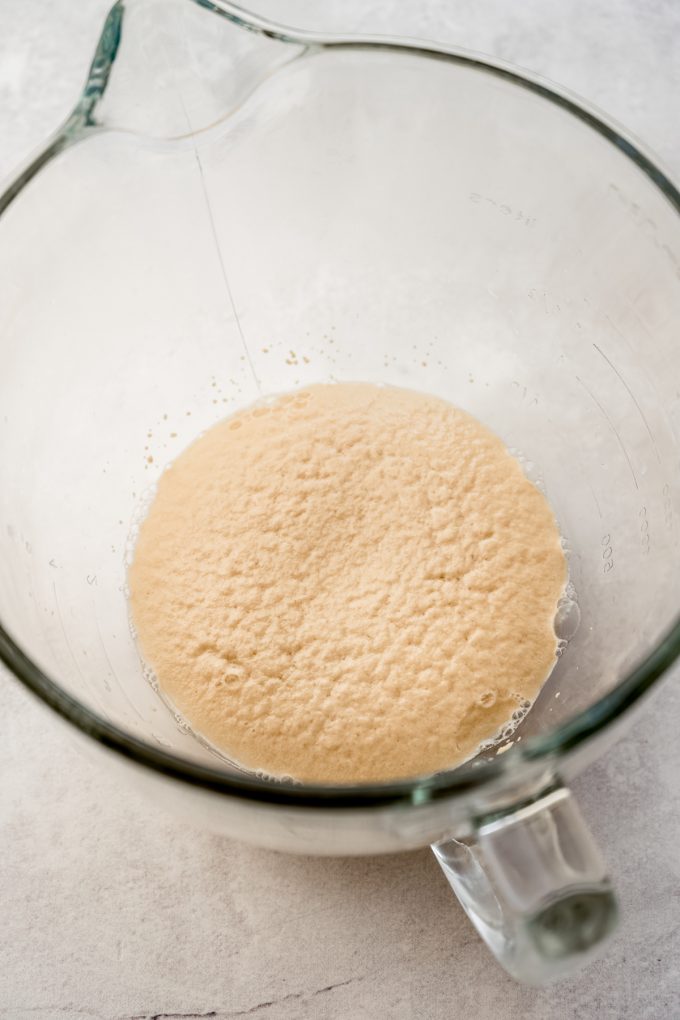
Activate the yeast: we’ll use the warm water and the sugar to wake up the yeast and get it ready to work.
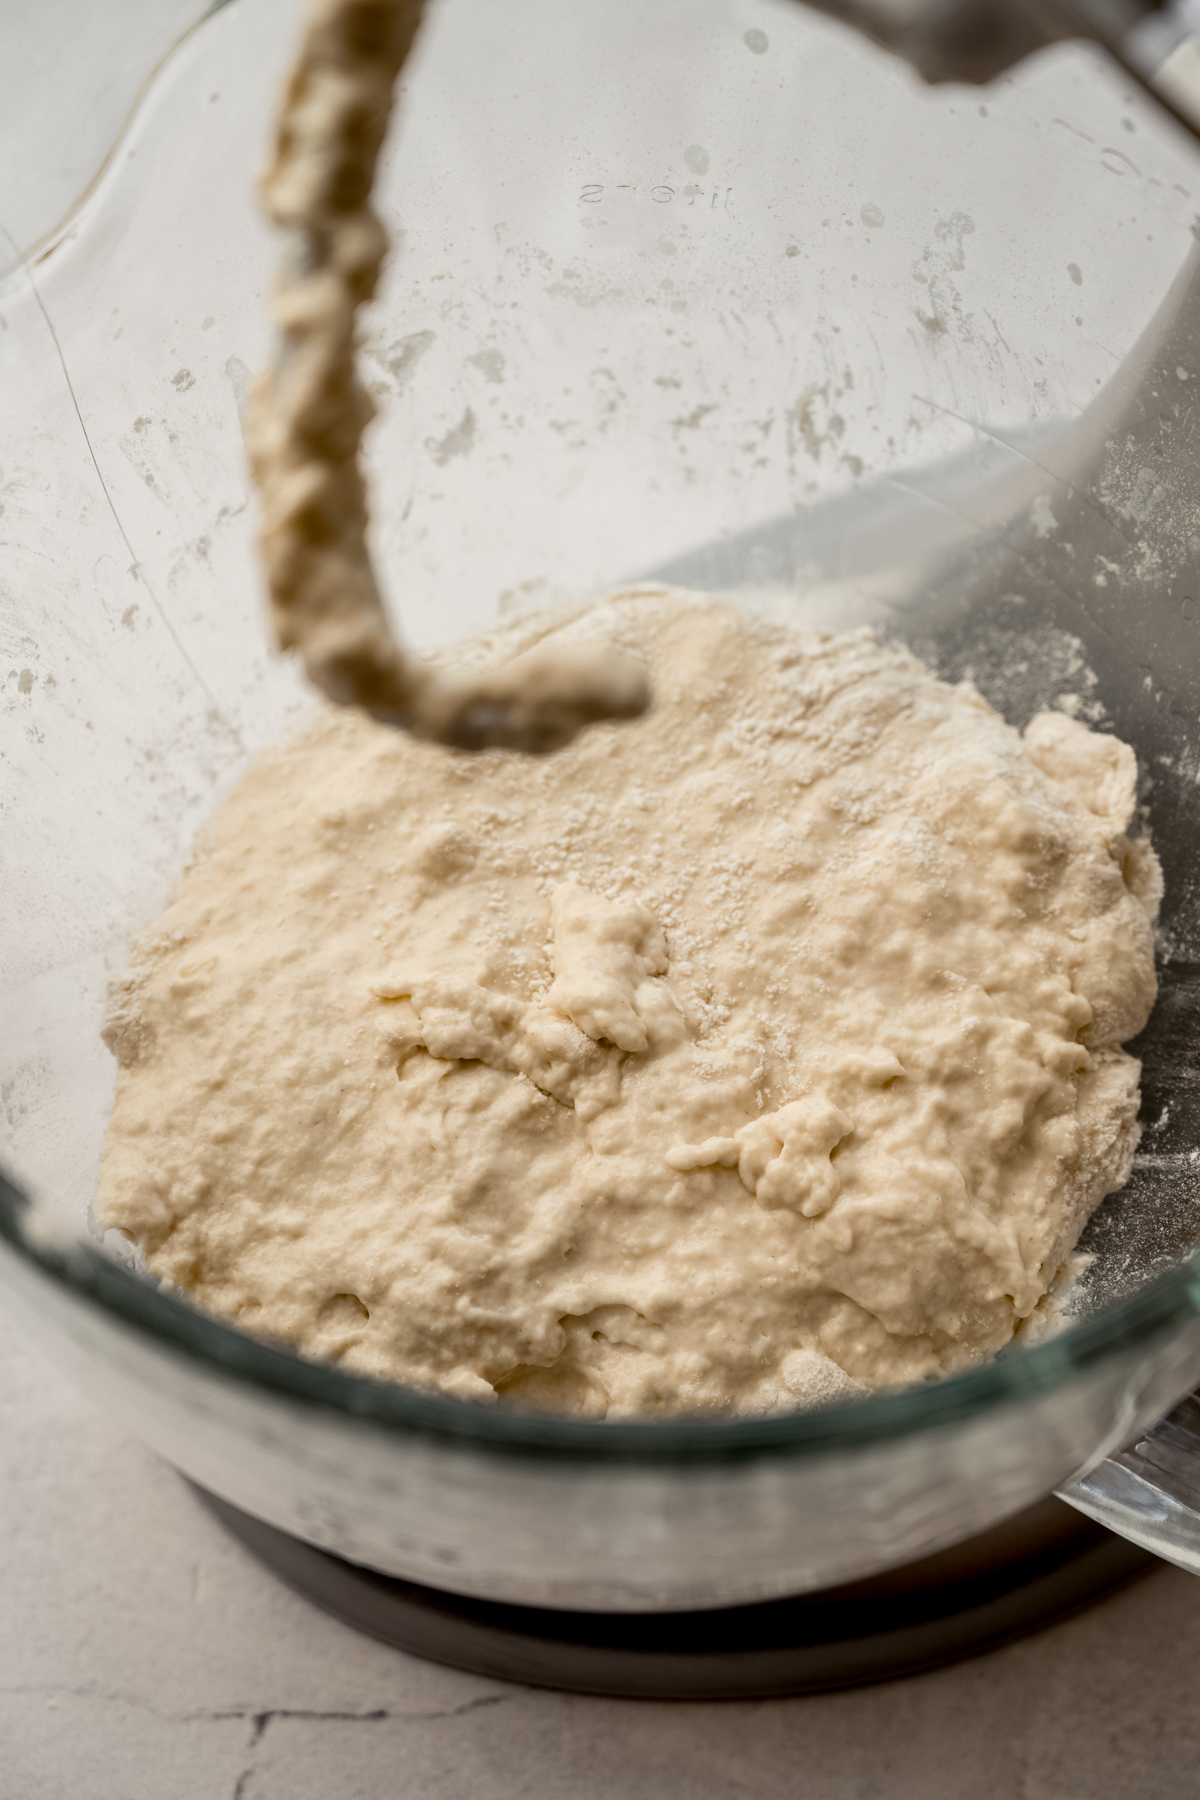
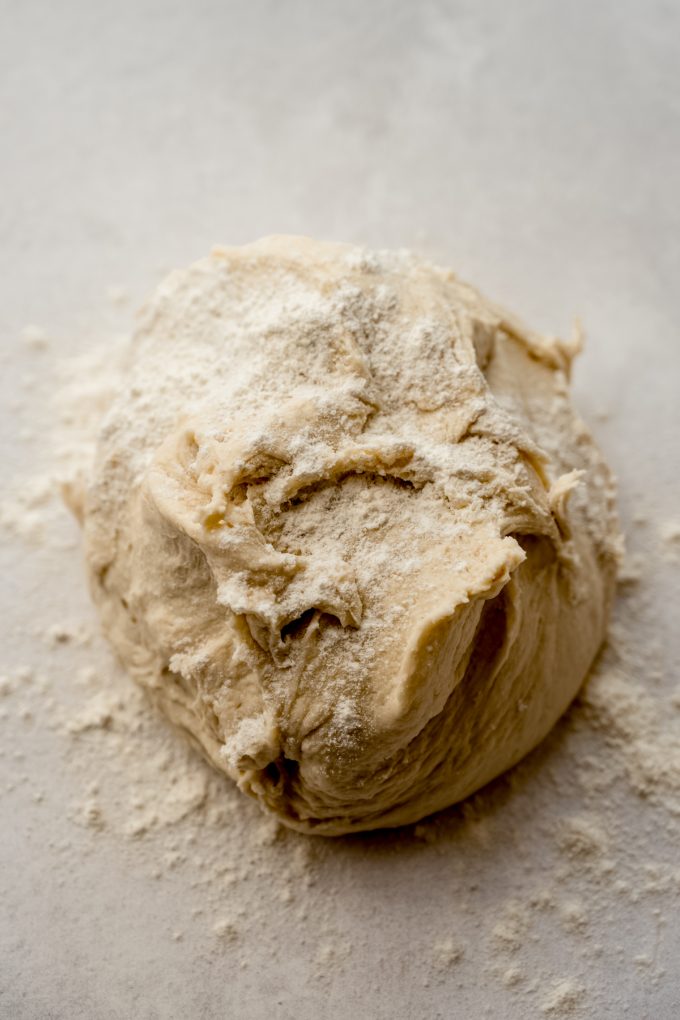
Add the rest of the ingredients + some flour: you don’t have to be exact with your flour measurement. We’re just looking to start combining all of the ingredients and get that flavorful garlic powder moving around.
Add the remaining flour: pay close attention to how much flour you’re adding. I have an amount range in the recipe, and you’ll want to start with the lowest amount first then add as you go. Do not add more flour than you need.
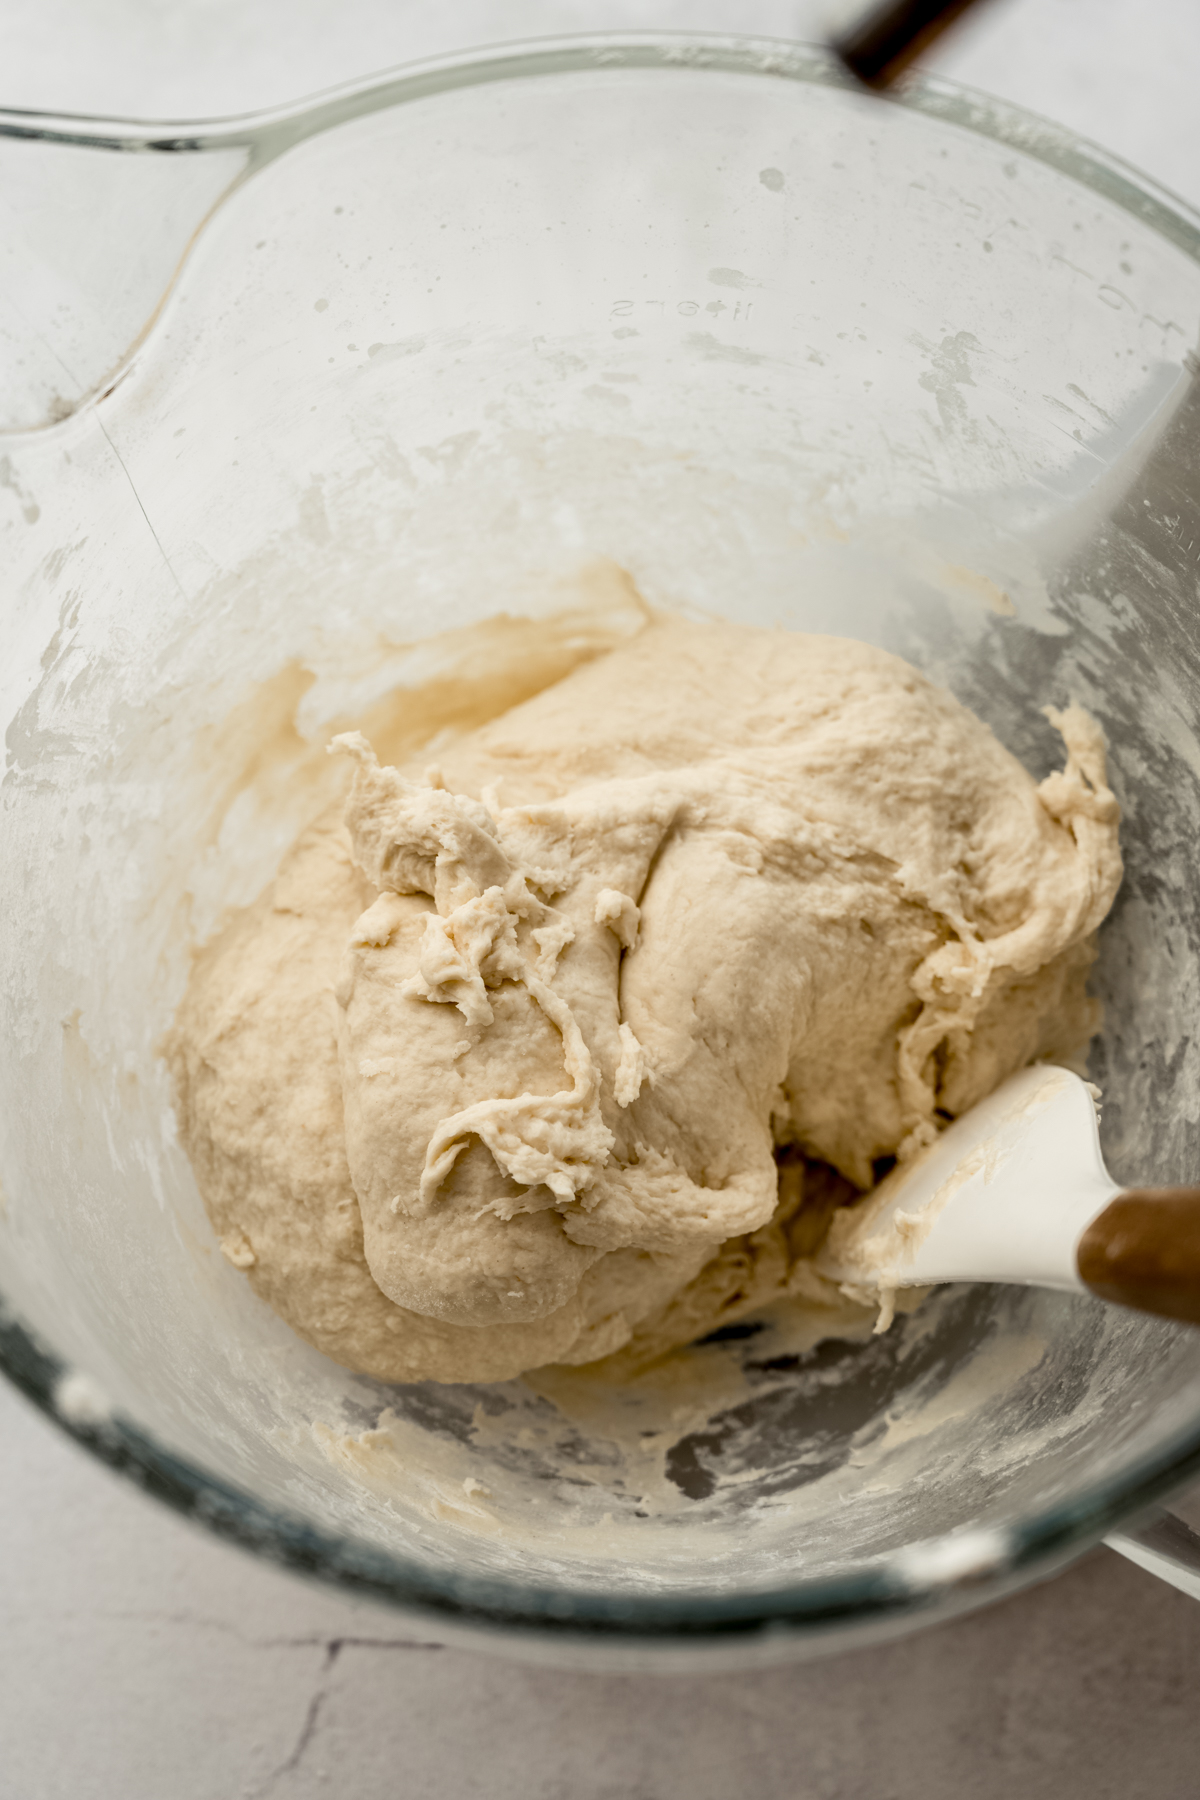
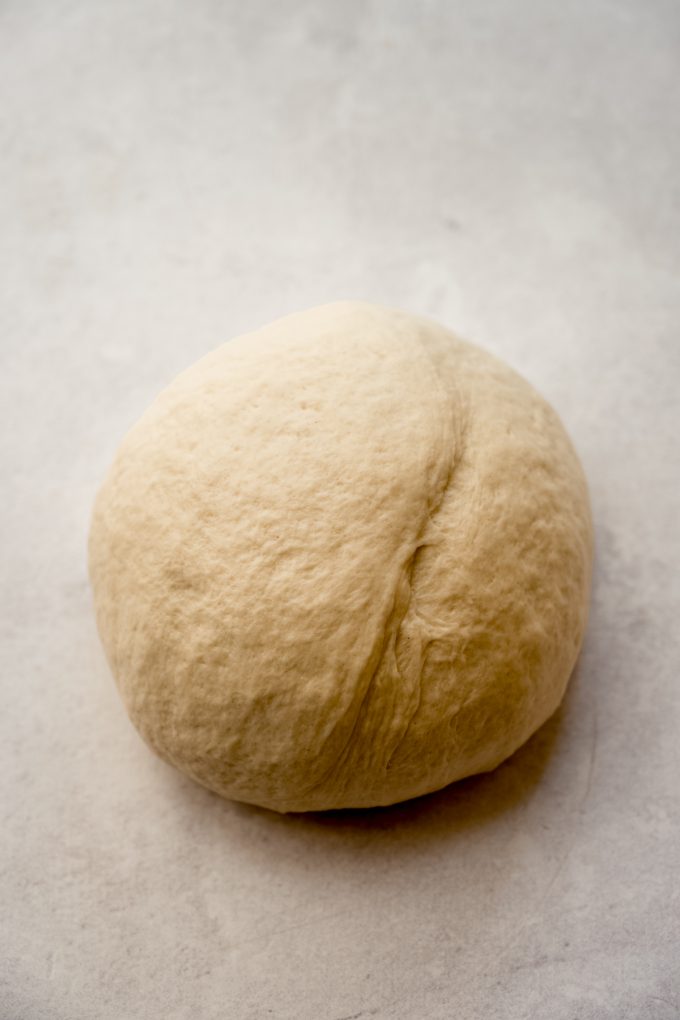
Knead the dough: you’ll knead this dough for 8–10 minutes, either by hand on a lightly floured surface using the heels of your hands, or in a stand mixer. The long knead is important as it builds the gluten network that keeps these thin breadsticks soft and gives them that satisfying chew.
HOW DO I KNOW I’M DONE KNEADING?
You’ll know the dough is ready when it stretches without tearing and slowly springs back when you poke it. Visually, it will go from shaggy/rough to very smooth.
Note: if at any time during your kneading, the dough is too sticky, add flour about 1 teaspoon at a time. Kneading alone will soften the dough and make it less sticky, but if it’s stringy and really sticking to your surface, you may need to help it along.
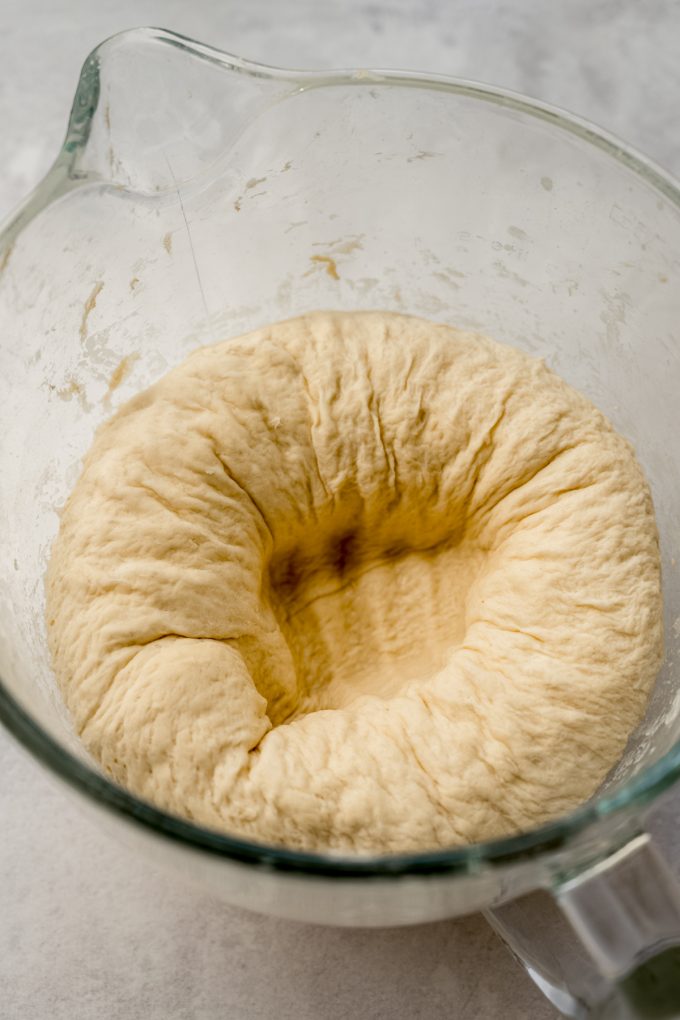
Allow the dough to rise: after kneading, this dough needs one long rise of about 1 and ½ to 2 hours. It gets a shorter 20 minute rise after shaping.
SHAPE THE HOMEMADE BREADSTICKS
Punch down the risen dough, then flip the dough out onto your surface and cut the whole thing in half. You’ll have two halves that are each approximately one pound.
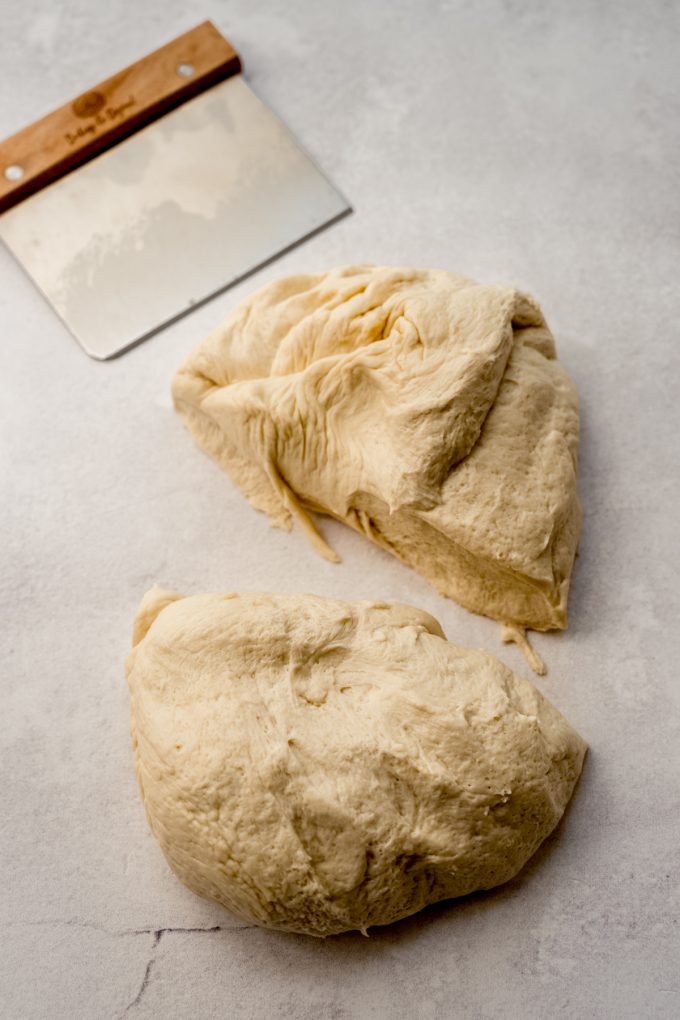
At this point the dough will be tacky but it shouldn’t be so sticky that it’s sticking to everything. It also shouldn’t be so floured that it’s slipping all over the place!
Aim for the sweet spot right between: tacky so that it “grabs” the surface a little bit and you can roll it into a log shape.
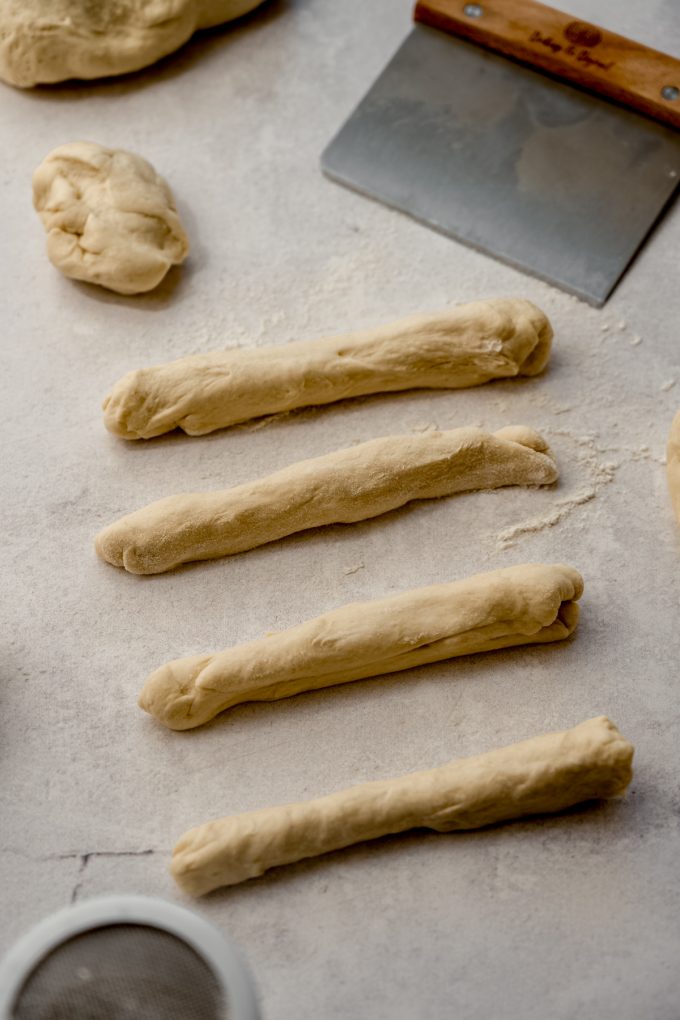
Portion the dough: working with one half of the dough at a time, cut it into 8 pieces. If you want to weigh your portions so they are exact, each one will be about 2 ounces.
Roll into a log: roll each portion of dough into a log about 6-7” long, then lay it on a prepared baking sheet.
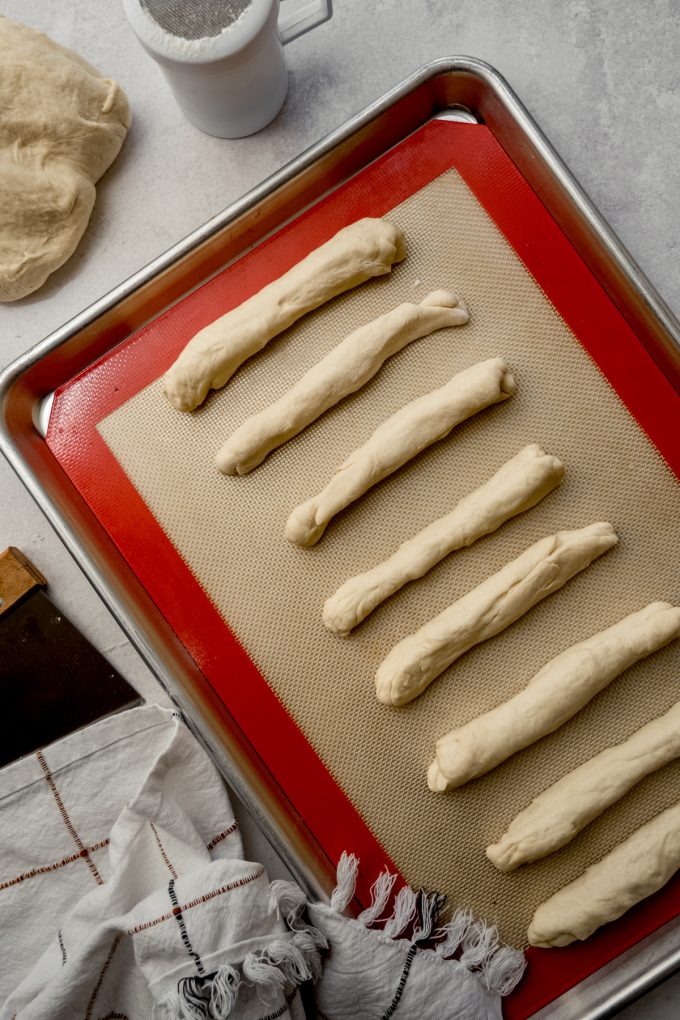
Allow the dough to rise briefly: cover the breadsticks loosely with a towel and allow them to rise for about 20 minutes. This is also where you’ll preheat your oven so it’s nice and hot when you’re ready to bake the breadsticks.
Bake: these breadsticks will bake for about 20 minutes, and you’ll want to rotate the pans (top to bottom, bottom to top) about halfway through. Bake them until they become golden brown– that’s the perfect distance between underdone and overdone, bringing flavor without drying them out.
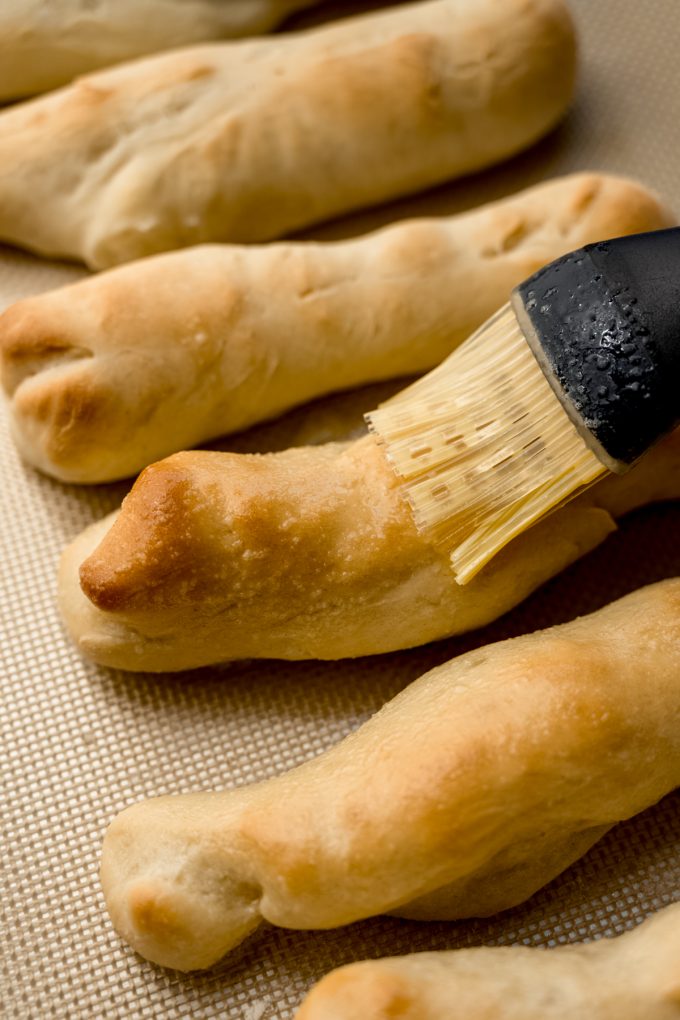
BRUSH ON THE GARLIC BUTTER TOPPING
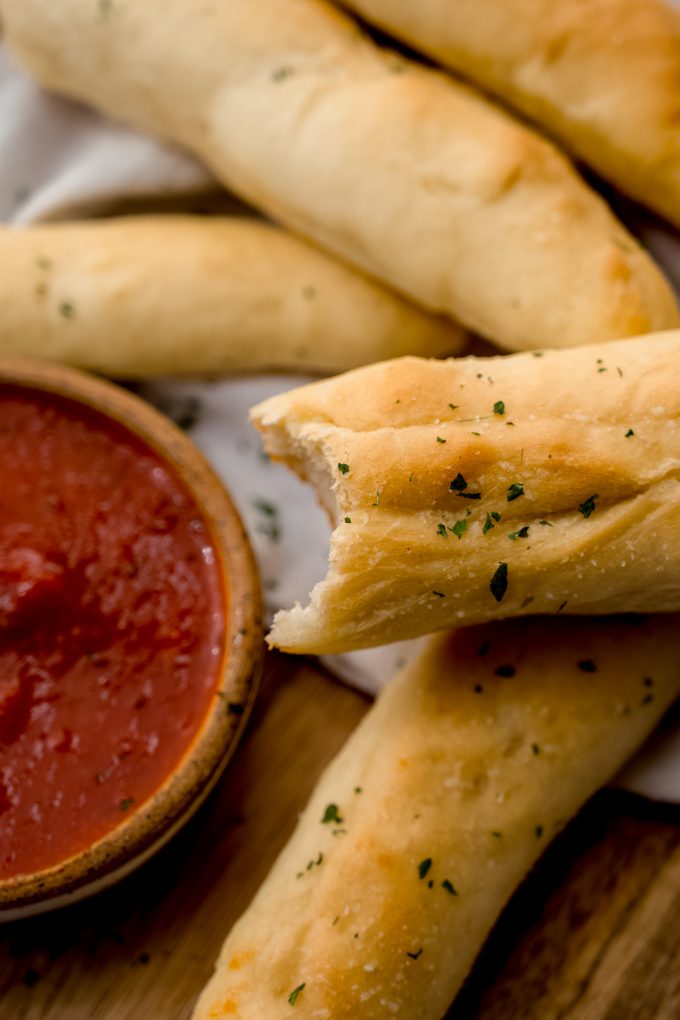
Once the breadsticks come out of the oven, immediately brush them with the melted garlic butter and, if desired, sprinkle some dried herbs on top for a little fancy finish.
WHAT TO SERVE BREADSTICKS WITH
Consider making a batch of these garlic breadsticks with my favorite baked ziti, spaghetti casserole, ravioli lasagna, zucchini ravioli, or any pasta dish you’re making with my dad’s homemade meat sauce.
If soup is more your bread pairing style, consider sausage tortellini soup or any other brothy soup that has a lot of liquid to soak up!
These breadsticks would also go perfectly with my homemade pesto or any salad with homemade Italian dressing on it.
Homemade Garlic Breadsticks
Ingredients
DOUGH
- 1 and ⅓ cups (320mL) warm water
- 2 and ¼ teaspoons (7g) dry active yeast1 one packet
- 1 and ½ Tablespoons (19g) granulated sugar
- 3 Tablespoons (43g) unsalted butter melted
- 1 and ½ teaspoons salt
- ½ teaspoon garlic powder
- 3 and ¾ to 4 cups (450-480g) all-purpose flour
TOPPING
- ¼ cup (56g) unsalted butter melted
- ½ teaspoon salt
- ½ teaspoon garlic powder
- optional: dried parsley or other herbs for sprinkling on top
Instructions
MAKE THE DOUGH
- In the bowl of a stand mixer or a large bowl (if you're going to do everything by hand), whisk together the warm water, yeast, and sugar. Allow the mixture to rest and activate for 5-10 minutes.1 and ⅓ cups (320mL) warm water, 2 and ¼ teaspoons (7g) dry active yeast1, 1 and ½ Tablespoons (19g) granulated sugar
- Once the yeast is frothy, add the melted butter, salt, garlic powder, and approximately 1 cup of the flour. Fit the mixer with the hook attachment, or use a silicone spatula or wooden spoon to blend the ingredients (about 30 seconds).3 Tablespoons (43g) unsalted butter, 1 and ½ teaspoons salt, ½ teaspoon garlic powder, 3 and ¾ to 4 cups (450-480g) all-purpose flour
- Add the remaining flour then beat the dough on medium speed until it comes together and pulls away from the sides of the bowl, about 2 minutes. If the dough is way too sticky, add 1 Tablespoon of flour and allow it to incorporate. Do not add more flour than you need to, otherwise the dough can become tough.
- Allow the dough to continue mixing, or kneading, for 8-10 minutes. You can also do this by hand on a lightly floured surface. If you are kneading by hand and the dough is too sticky, add only 1 teaspoon of dough at a time and keep kneading. The dough is finished kneading and ready to rise when it is slightly tacky and soft (it will remind you of fresh PlayDoh).
- Lightly spray a large bowl with oil or nonstick spray, then place the dough in the bowl, turning it to coat all sides. Cover the bowl with a clean kitchen towel and allow it to rise2 for 1 and ½ to 2 hours or until double in size.
SHAPE THE BREADSTICKS
- Line 2 baking sheets with parchment paper or silicone baking mats and set them aside.
- When the dough is ready, punch it down to release the air then flip it out onto your work surface and divide it in half. The dough will be approximately 2 pounds total, so each half will weigh about 1 pound (this does not need to be exact).
- Working with one half at a time, cut the dough into 8 pieces roughly equal in size (each piece will weigh about 2 ounces). Lightly flour your hands, then use the "tackiness" of the dough to gain grip on your surface and roll each piece of dough into a log about 6-7" long. Arrange shaped breadsticks on each prepared baking sheet, 8 per baking sheet. Repeat with the remaining half of the dough.
- Cover the shaped breadsticks loosely with a clean kitchen towel and allow to rise until puffy, about 20 minutes. Meanwhile, preheat the oven to 400°F (204°C).
- Remove the towel cover from the breadsticks and bake them for 18-20 minutes or until golden brown on top. Halfway through the baking time, rotate the pans (top to bottom and bottom to top). If the tops are browning too quickly for your liking, you can tent them with foil.
MAKE THE TOPPING
- When the breadsticks have a couple minutes left, melt the butter in a small bowl, them stir in the salt and garlic powder.¼ cup (56g) unsalted butter, ½ teaspoon salt, ½ teaspoon garlic powder
- Remove the breadsticks from the oven then use a pastry brush to brush them with garlic butter topping. Sprinkle with dried parsley or other dried herbs, if desired. Allow the breadsticks to cool for a couple minutes before serving them warm. Store leftover breadsticks covered tightly at room temperature for no longer than one additional day. They will stay fresh refrigerated for up to 5 days. Reheat in the microwave, toaster oven, or air fryer. See notes3 for make ahead and freezer instructions.optional: dried parsley or other herbs for sprinkling on top
Notes
- Yeast: you can also use instant yeast in this recipe. Skip the activation step and just add the yeast (and warm water) in with the ingredients in step #2.
- First rise: yeast prefers to rise in a warm environment. If your kitchen is particularly cool, you can preheat your oven to 200ºF (93ºC), turn it off, then place the bowl of dough in the warm oven with the door propped open.
- Make ahead: this dough can be made the ahead of time through step 3 of the “shape the breadsticks” instructions. Cover breadsticks with plastic wrap and allow to rest in the refrigerator overnight or up to 18 hours. When you are ready to bake them, remove them from the refrigerator and allow to rise in a warm environment, about 30 minutes. Continue with baking.
- Two options to freeze unbaked breadsticks: parbake the breadsticks for 10 minutes at 400°F (204ºC). Allow to cool completely, cover tightly, then freeze. Remove the breadsticks from the freezer and allow to thaw in the refrigerator overnight. Finish baking for the remaining 8-10 minutes before serving OR freeze the breadsticks directly after shaping and pull them out about 1 hour before you want to bake them. Allow them to thaw and rise covered at room temperature and bake when ready.
Nutrition Disclosure
All nutritional values are approximate and provided to the reader as a courtesy. Changing ingredients and/or quantities will alter the estimated nutritional calculations.