
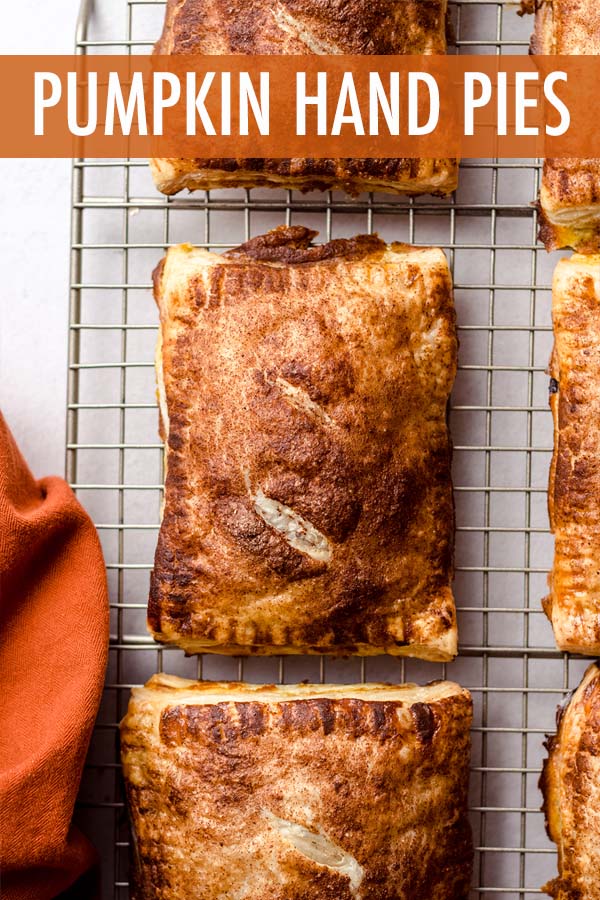
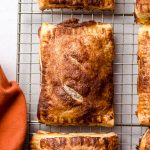
Pumpkin Hand Pies
As an Amazon Associate, I earn from qualifying purchases. Read the full disclosure here.
Simple handheld pies stuffed with a spiced pumpkin filling and made with pre-made puff pastry for an easy assembly and even easier eating!
From the beginning of September (ok, maybe the end of August if I’m being honest) until Black Friday, this girl is ALL about pumpkin season.
Everything from pumpkin granola to homemade pumpkin coffee creamer lines the shelves of my pantry and fridge, and chances are I have a fresh cup of pumpkin cream cold brew on my desk just to top things off.
These pumpkin hand pies are a variation of my apple hand pies, and they are the ideal way to welcome chilly weather and falling leaves. They’re also a great alternative to traditional pumpkin pie to serve at Thanksgiving.
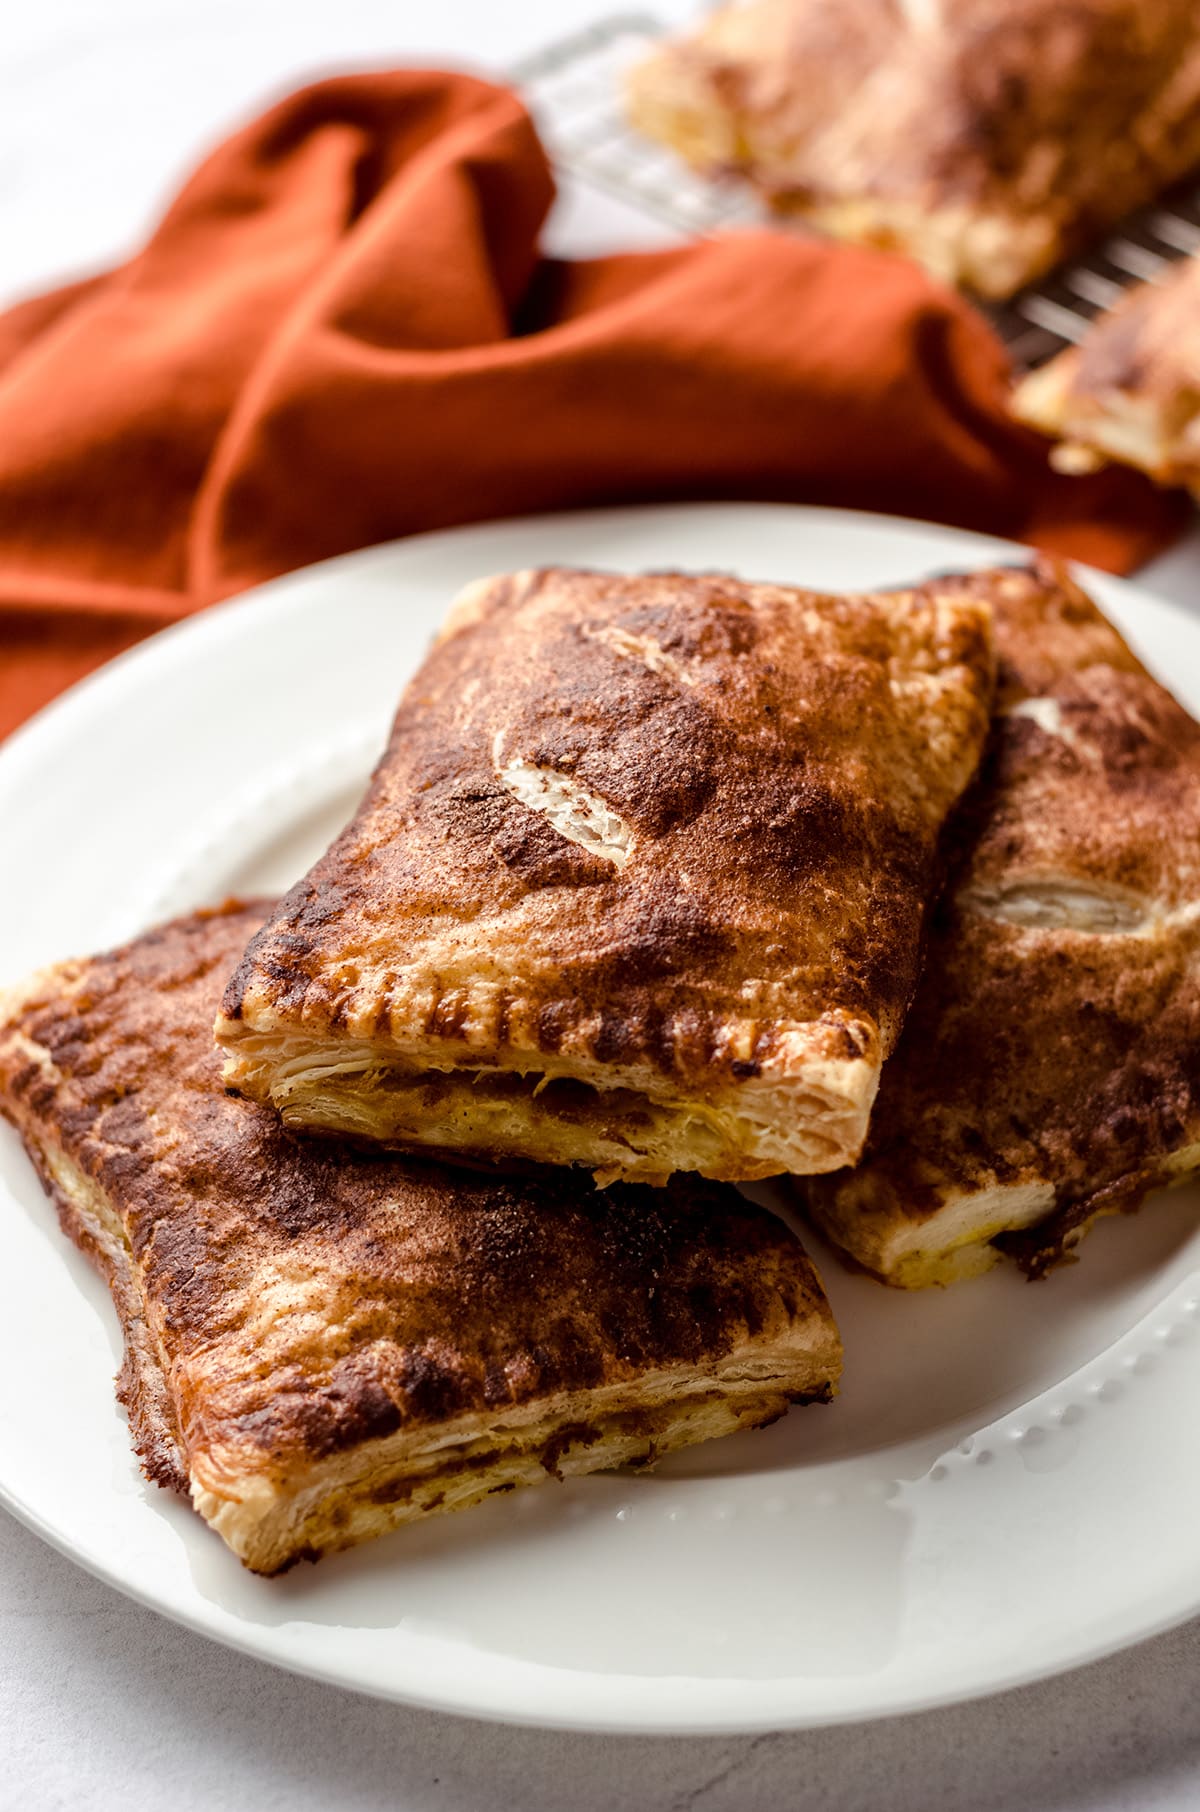
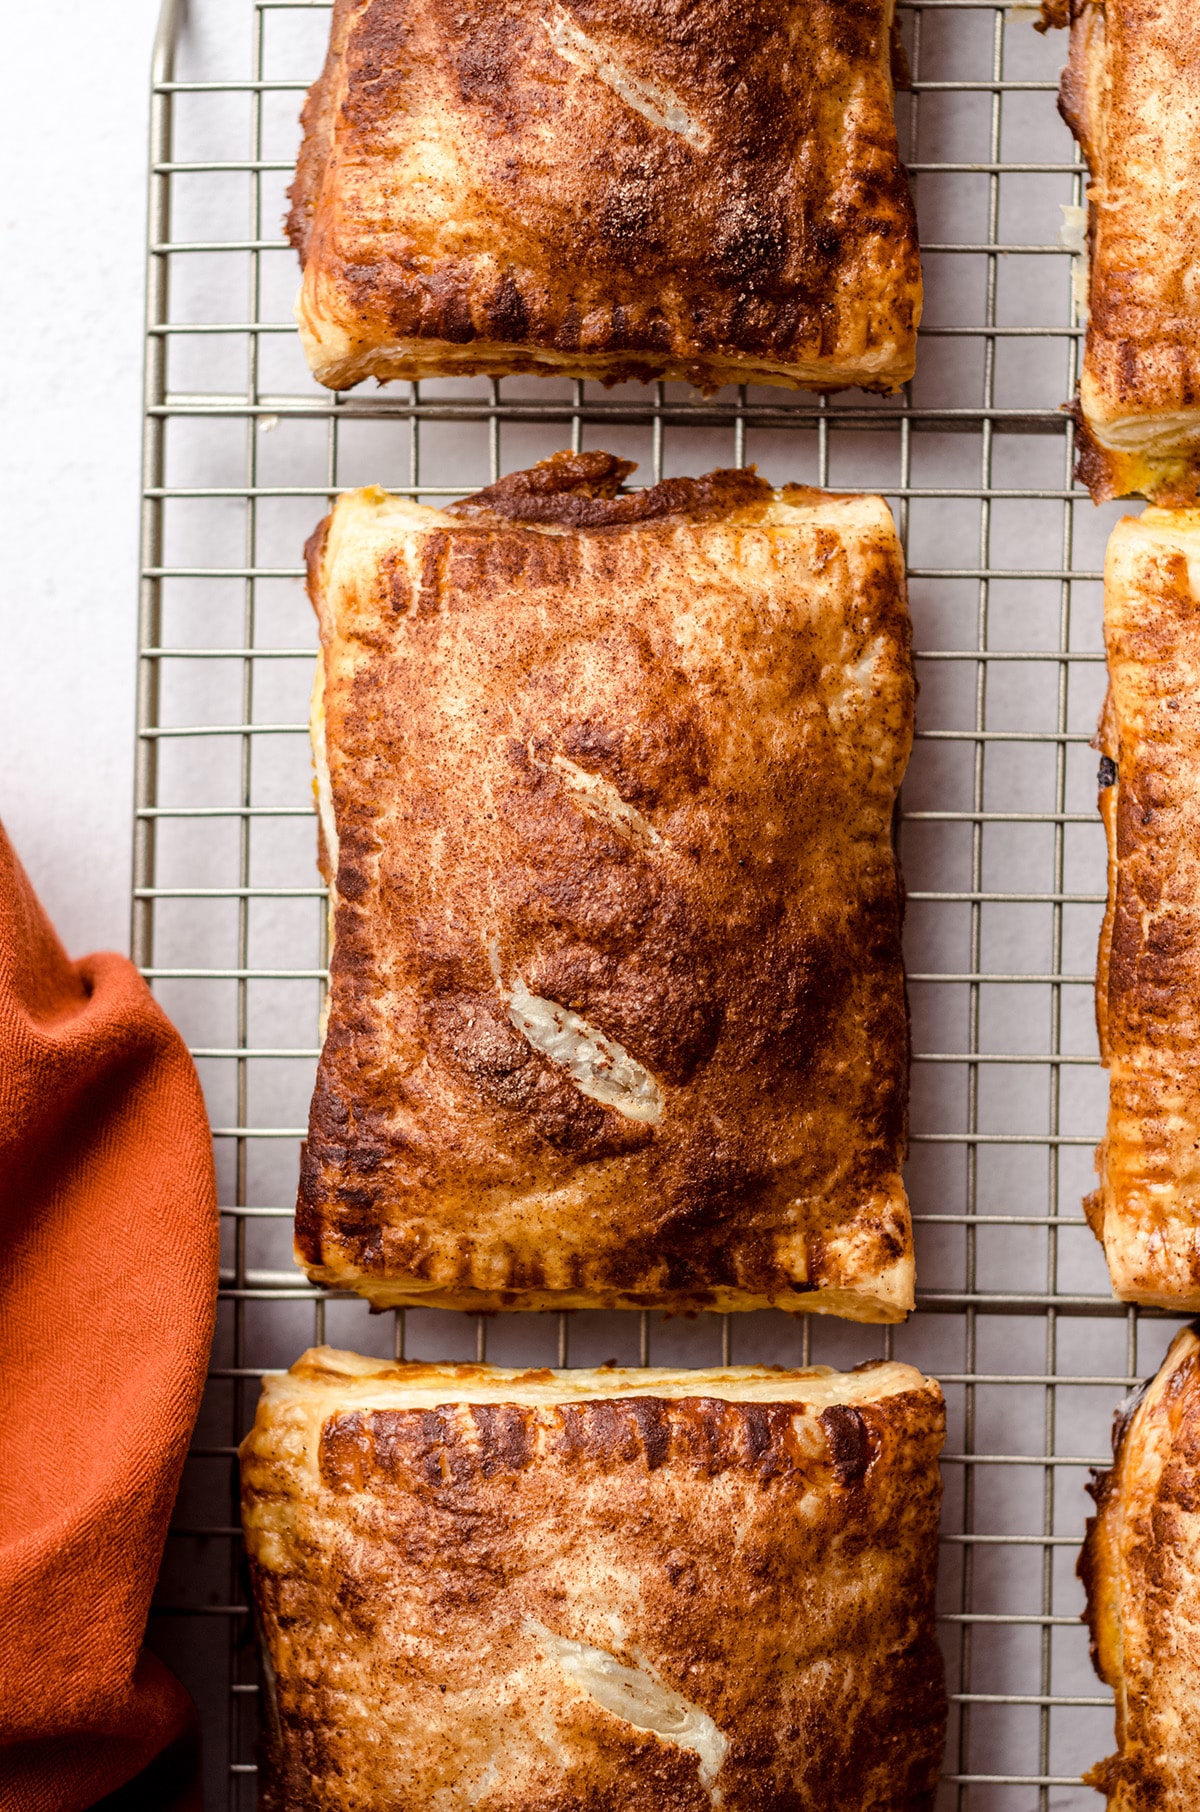
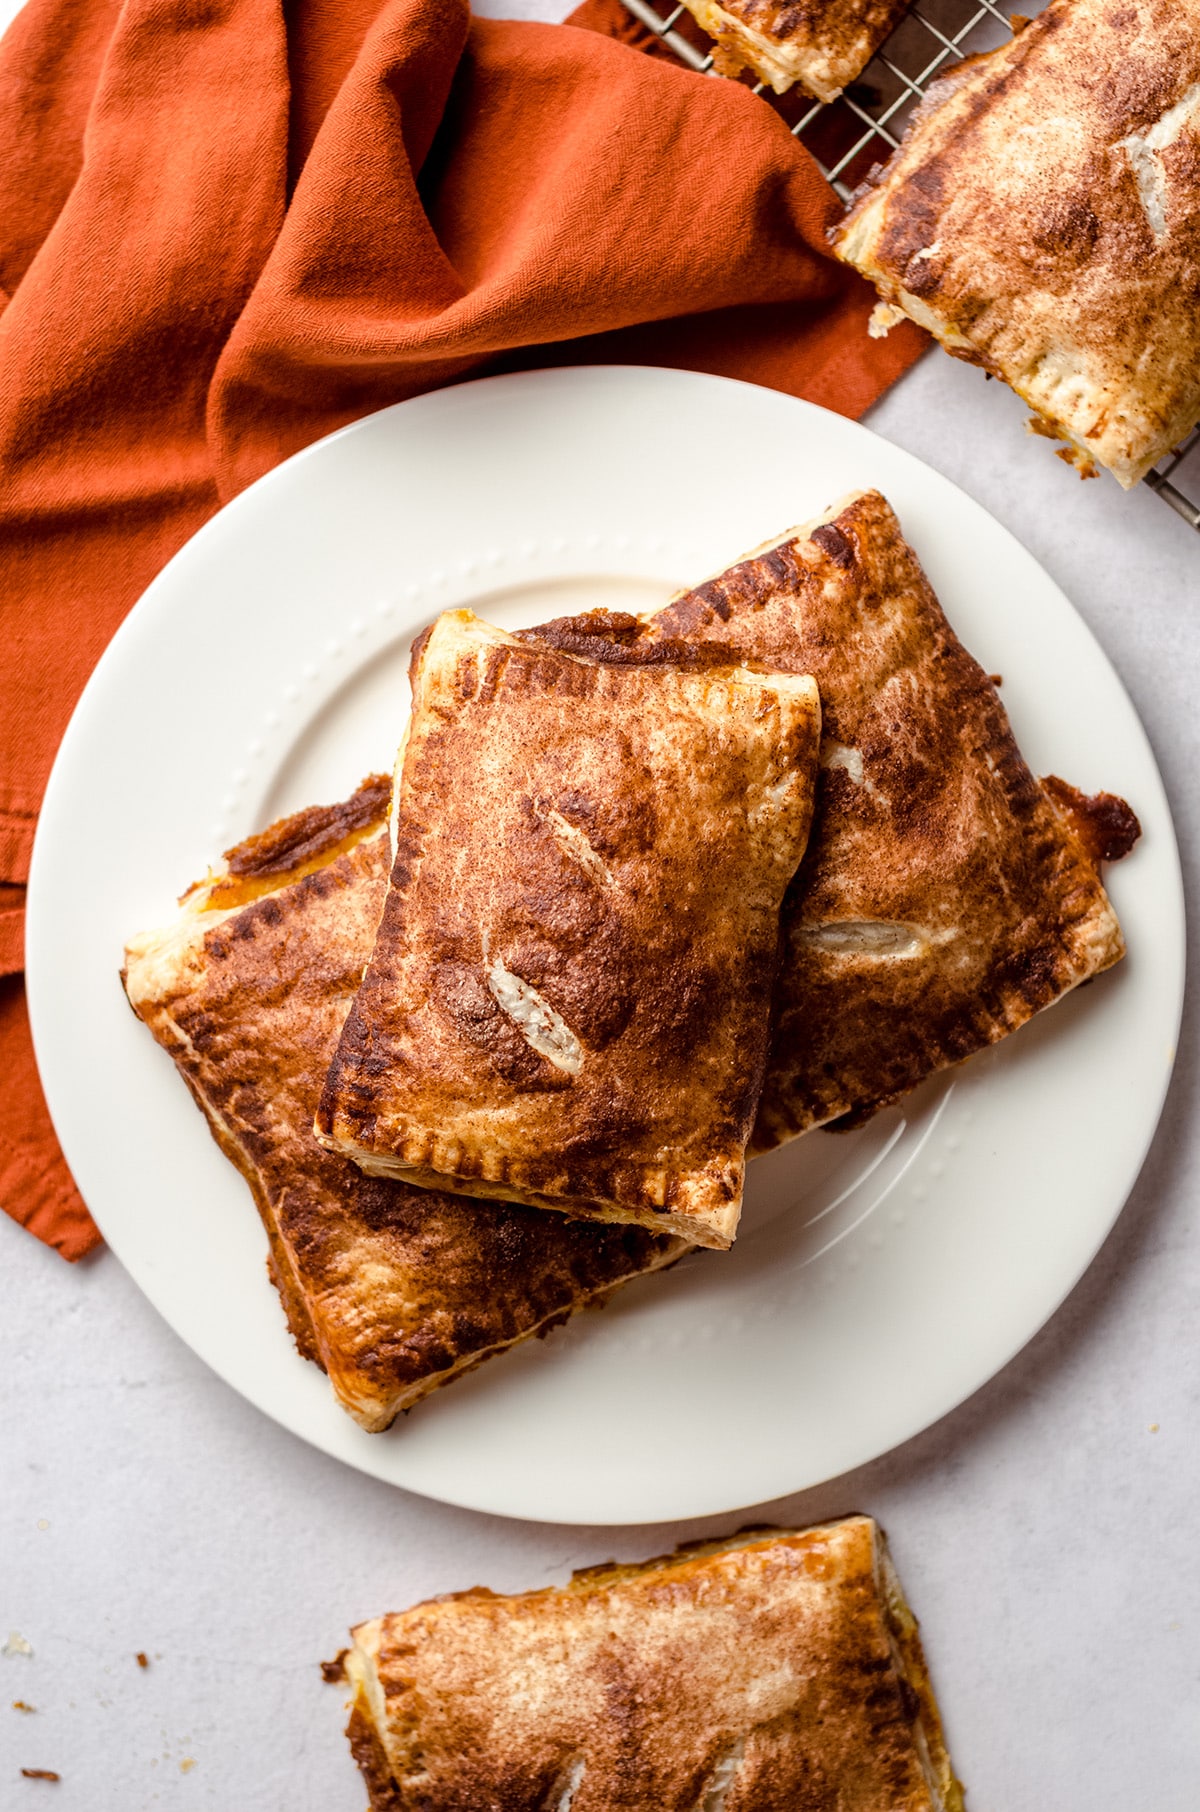
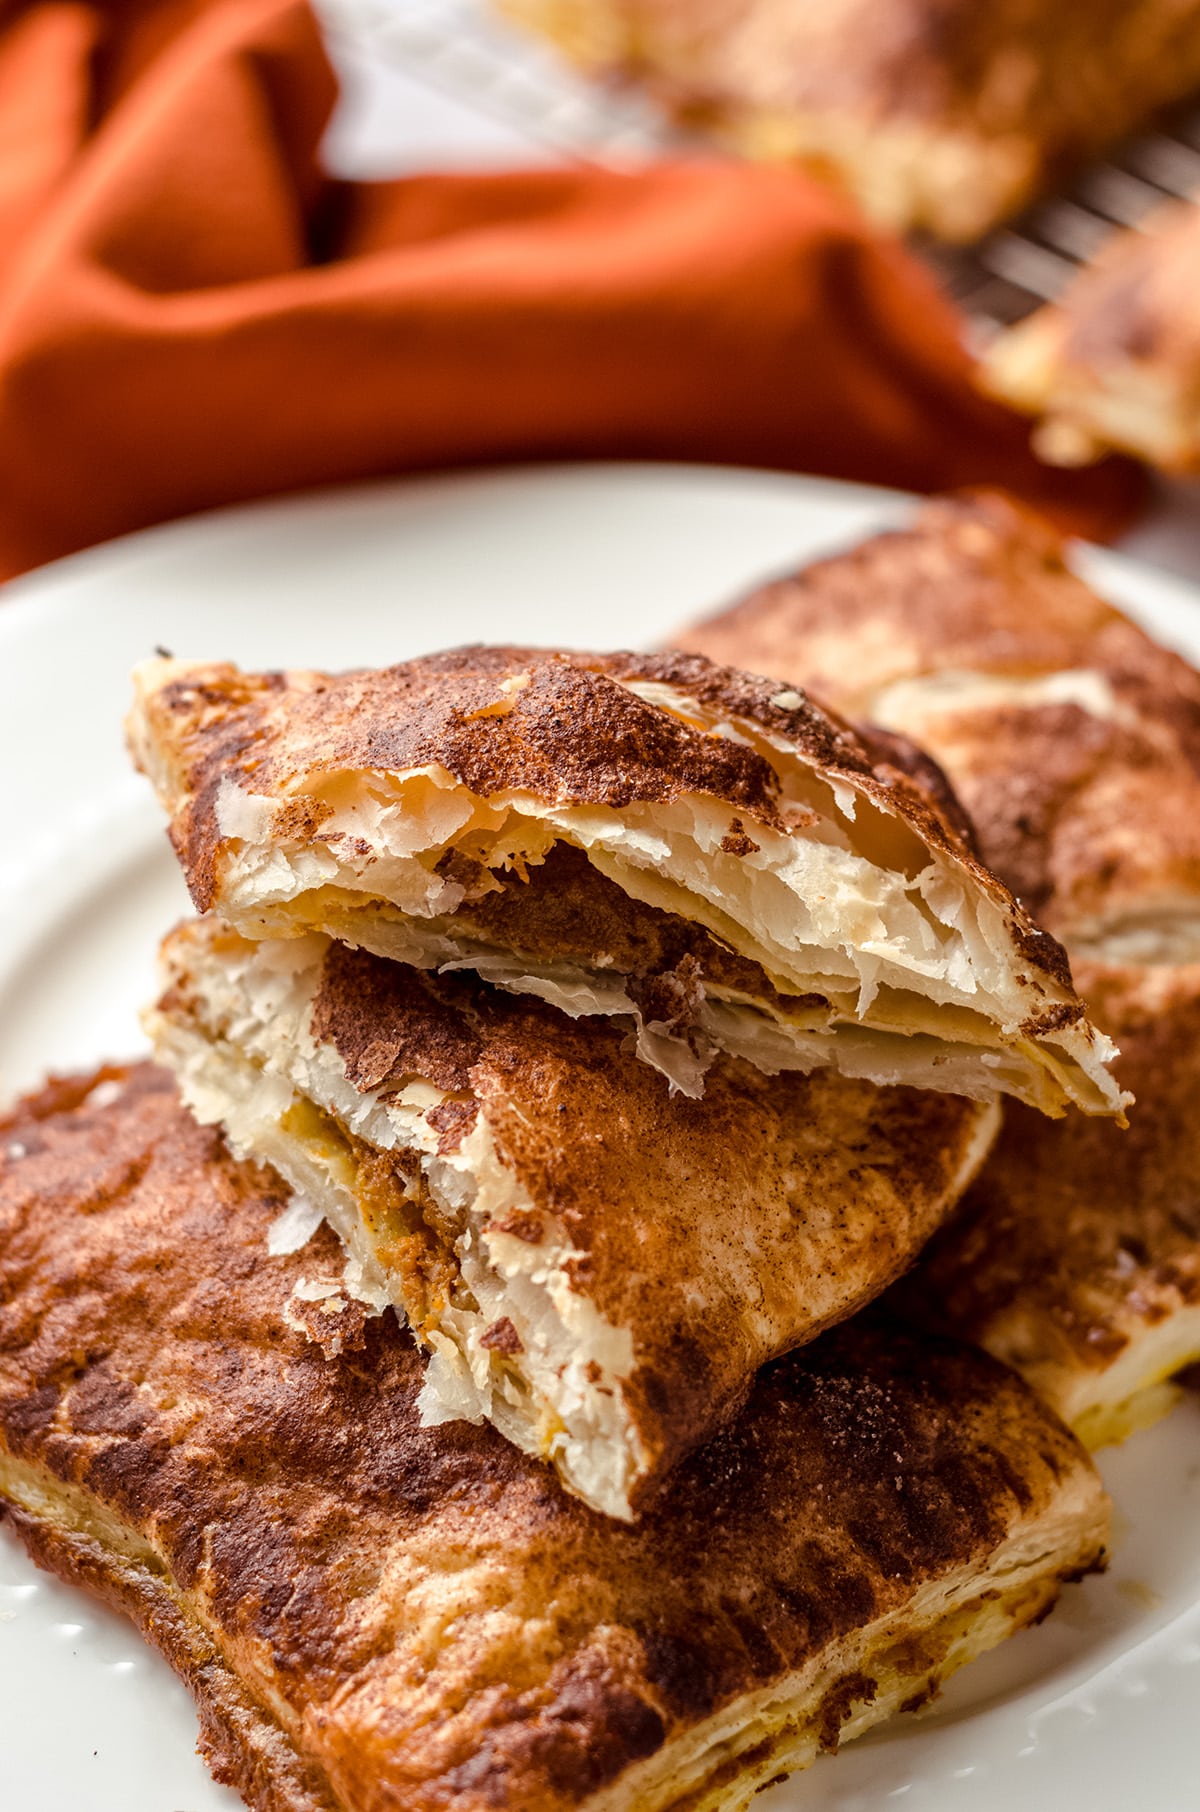
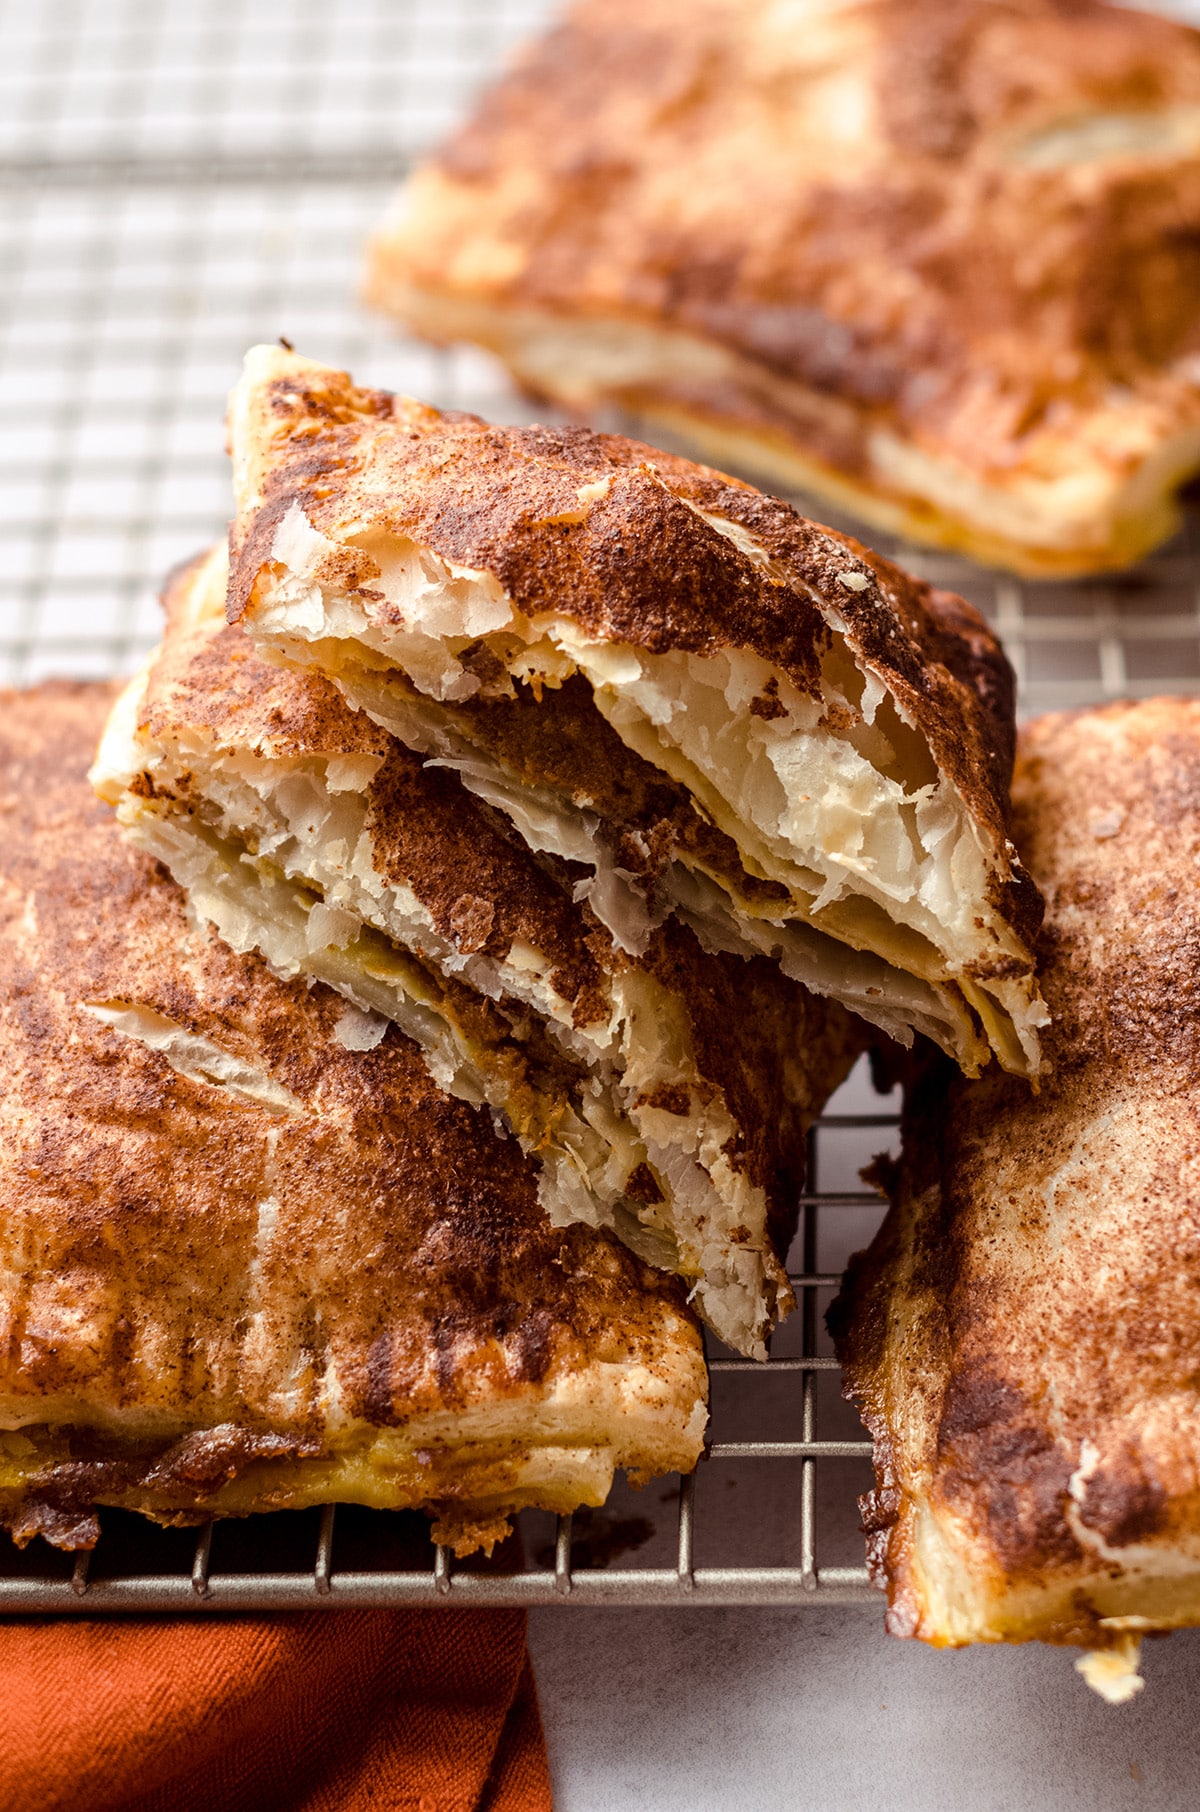
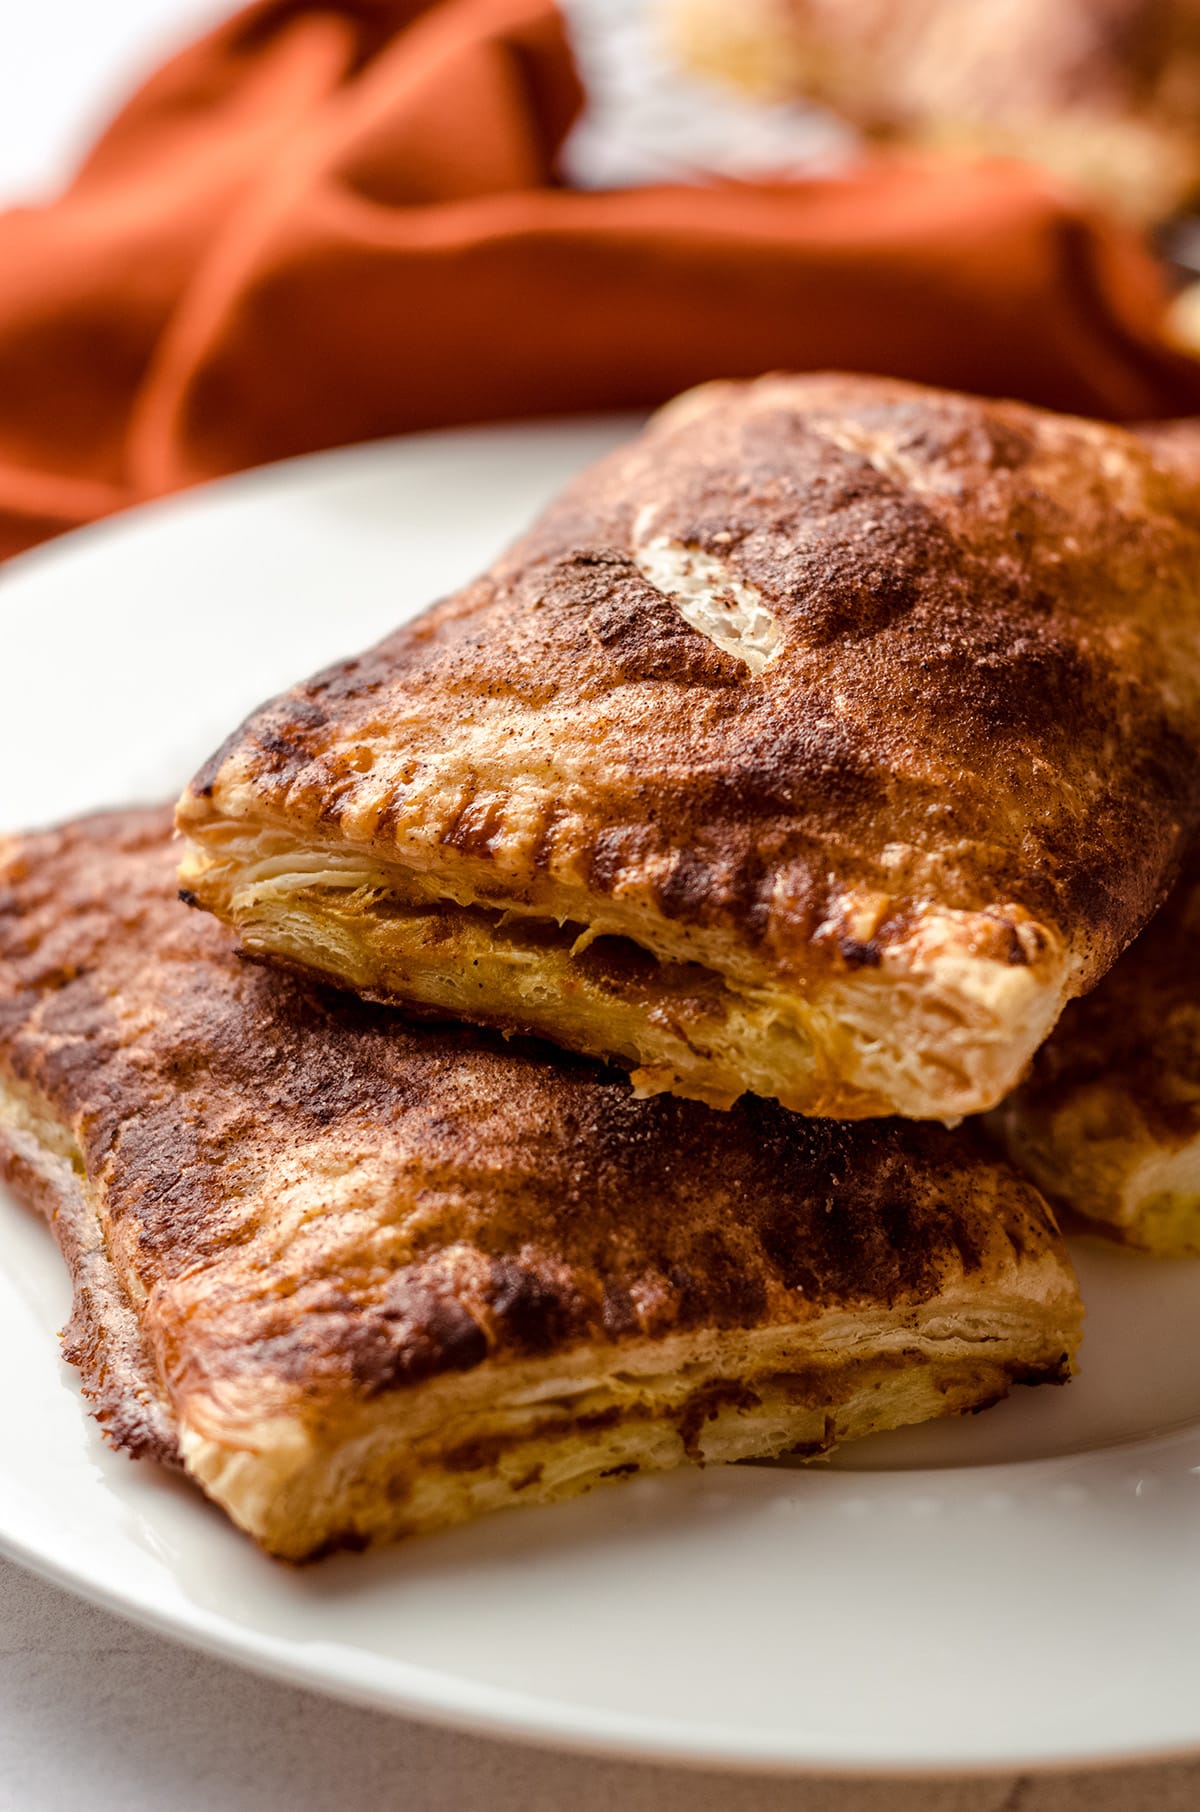
The perfectly spiced, perfectly textured pumpkin filling is enveloped by a flaky puff pastry shell and sprinkled with pumpkin spiced sugar. They are SO easy to make and perfect for welcoming guests or a last-minute dessert.
OH! And if you’re in the mood for baking, and pies are your thing (hello, September installment of Pie of The Month), of course you have to try my apple hand pies.
May I also recommend this coconut custard pie, a classic pumpkin pie, or these adorable pecan pie tarts? They are sure to scratch your itch for flaky, sweet, and delicious dessert recipes!
INGREDIENTS
If “easy as pie” is a thing, we really need to make “easy as hand pies” a thing. Not only are these handheld desserts SO simple to make, but they are also ready in a fraction of the time it takes to bake a traditional pie.
How can a homemade dessert be so easy and quick to make, you ask? Well, we have a short list of ingredients for these adorable pumpkin hand pies to thank for that!
HAND PIE CRUST
One of my favorite things about this easy recipe for pumpkin spice hand pies is that the crust is made with frozen puff pastry. As much as I love baking pie crust from scratch, it’s nice to have a shortcut every now and then!
Homemade puff pastry is a real undertaking, and the frozen stuff is of good quality, so I opt to use that when I’m baking with something that requires the flaky, buttery layers that puff pastry delivers.
In addition to a box of frozen pastry, you’ll need an egg (for brushing the pies with an egg wash), some sugar, and some pumpkin pie spice.
PUMPKIN FILLING
While you could totally opt for a can of pumpkin pie filling, I like to go the homemade route whenever possible (hence the recipe site!). This pumpkin filling is so easy to make with just a few simple ingredients.
All you need is 1 and ½ cups of pumpkin purée, an egg, some brown sugar, a bit of salt, and some pumpkin pie spice to round out this pumpkin hand pies recipe. Easy peasy, and made in one bowl in mere minutes.
HOW TO MAKE PUMPKIN HAND PIES
Since we’re using puff pastry for this recipe (although you could certainly use a homemade pie crust if you prefer), it’s easiest to start off with preparing the filling.
Just make sure that your puff pastry is thawed and ready to go before you start. I like to take the pastry out of the freezer about one hour before baking, which is usually plenty of time to allow the sheets to thaw. You can also stick them in the fridge to thaw slowly overnight if that works better for you.
MAKE FILLING
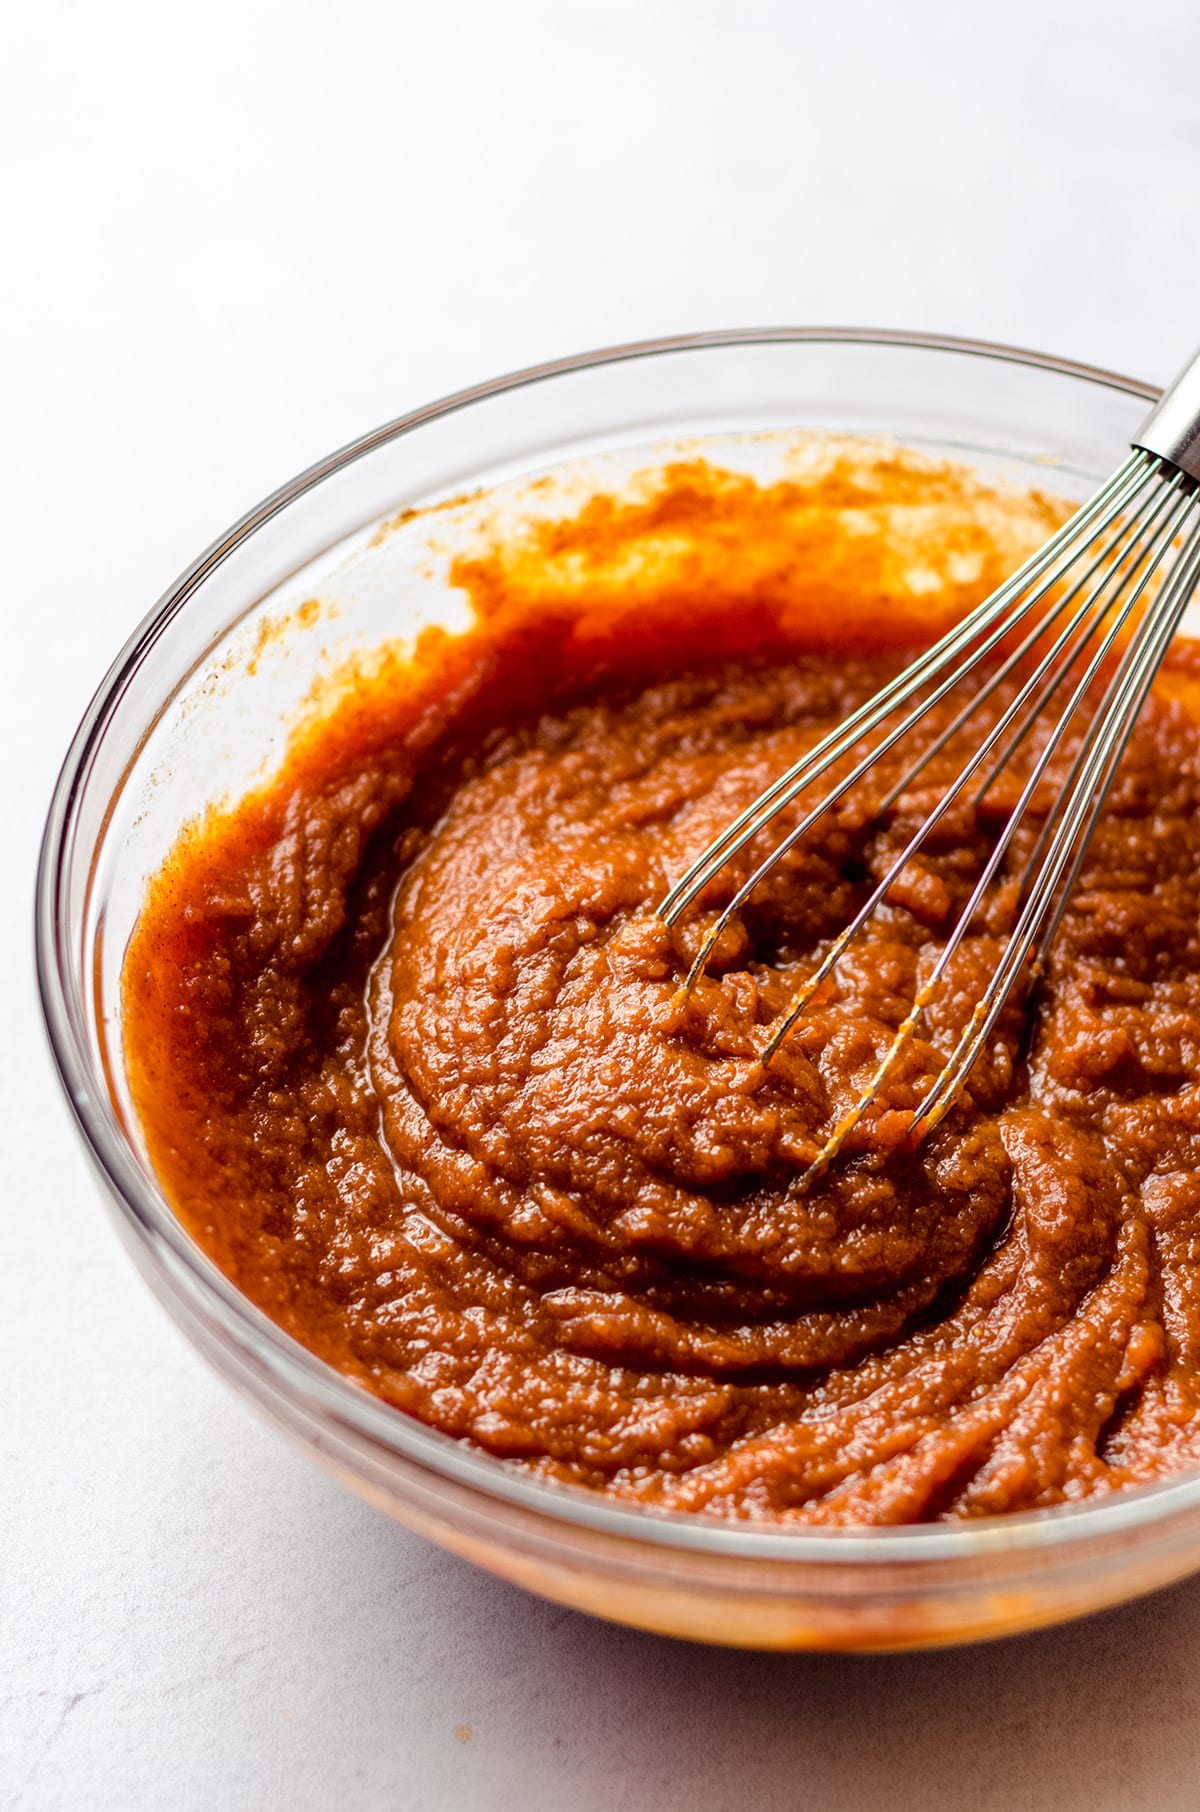
To make the pumpkin filling, add the pumpkin purée and egg to a large bowl. Whisk it together until smooth and the egg is fully incorporated.
Then add in the brown sugar, pumpkin pie spice, and salt. Whisk everything again until well combined. Set the bowl aside while you prepare the puff pastry.
We’ll be back in just a moment to bring everything together, so no worries about covering or refrigerating the bowl!
PREPARE PIE BOTTOMS
To get started, preheat your oven to 400ºF (204ºC) and line a large baking sheet with parchment (or a silicone baking mat). Set aside while you prepare the pastry for the oven.
Lightly flour your work surface (a clean counter or pastry mat works great!) and gently unfold one of the pastry sheets.
Use a super sharp knife or a pizza cutter to cut the sheet into 6 rectangles, aiming to get it as even as you can. No need to haul out a tape measure, just do the best you can!
You may notice my apple hand pies make 12 pies, and that these pumpkin hand pies will only make 6. That’s because the filling is very runny, and smaller pies was just too goopy and gloppy at that size.
More pie per hand this way! A total win!
Place the rectangles on the prepared baking sheet. These are the bottoms of your pumpkin hand pies. You want to leave enough space, so if you feel like your rectangles are a bit crowded, use two large baking sheets instead, placing 3 rectangles on each sheet.
A note about the pie shape: I wanted so badly to use a pumpkin cookie cutter to make pumpkin shapes for these pumpkin hand pies (how many times can we say “pumpkin” in this recipe?), but in the end, I didn’t want to waste any puff pastry, and I wasn’t sure I’d be able to make them big enough to hold all that filling.
If you’re looking to go the pumpkin shape route, go for it. I’d love to hear/see how it turns out!
FILL PIES
Grab the bowl of pumpkin filling that you prepared earlier, and spoon 6 tablespoons (a heaping ⅓ cup) into the center of each rectangle.
Make sure you leave a border of ¼” around the edges to allow for crimping and to prevent the filling from seeping out too much (some will seep out, and this is fine and encouraged– we just don’t want tons of it coming out so there’s nothing left on the inside).
You may have a bit of filling left over. You can either discard it, or you can top up the filled pastry rectangles and overfill a bit. Totally up to you!

PREPARE AND ADD PIE TOPS
Unfold and roll out the second sheet of puff pastry, and cut it into 6 rectangles– exactly how you did for the bottoms. These are the tops of your hand pies.
Again, no precision measuring is required, just aim for consistency! It tastes just as delicious whether it looks absolutely perfect, or if it’s a little more “rustic.”
Place the rectangles on top of the pumpkin-filled bottoms, slightly stretching the top pastry rectangle to fit if needed (likely so)– don’t worry, puff pastry is super sturdy and flexible, so it’s unlikely you’ll tear it!
Use the tines of a fork to crimp the edges to seal. Some of the filling may squish out a bit, but that’s ok. Again: rustic tastes just as delicious as a perfectly made hand pie.
In fact, I think hand pies are even more charming when they are a bit lopsided. Homemade food should look homemade, after all.
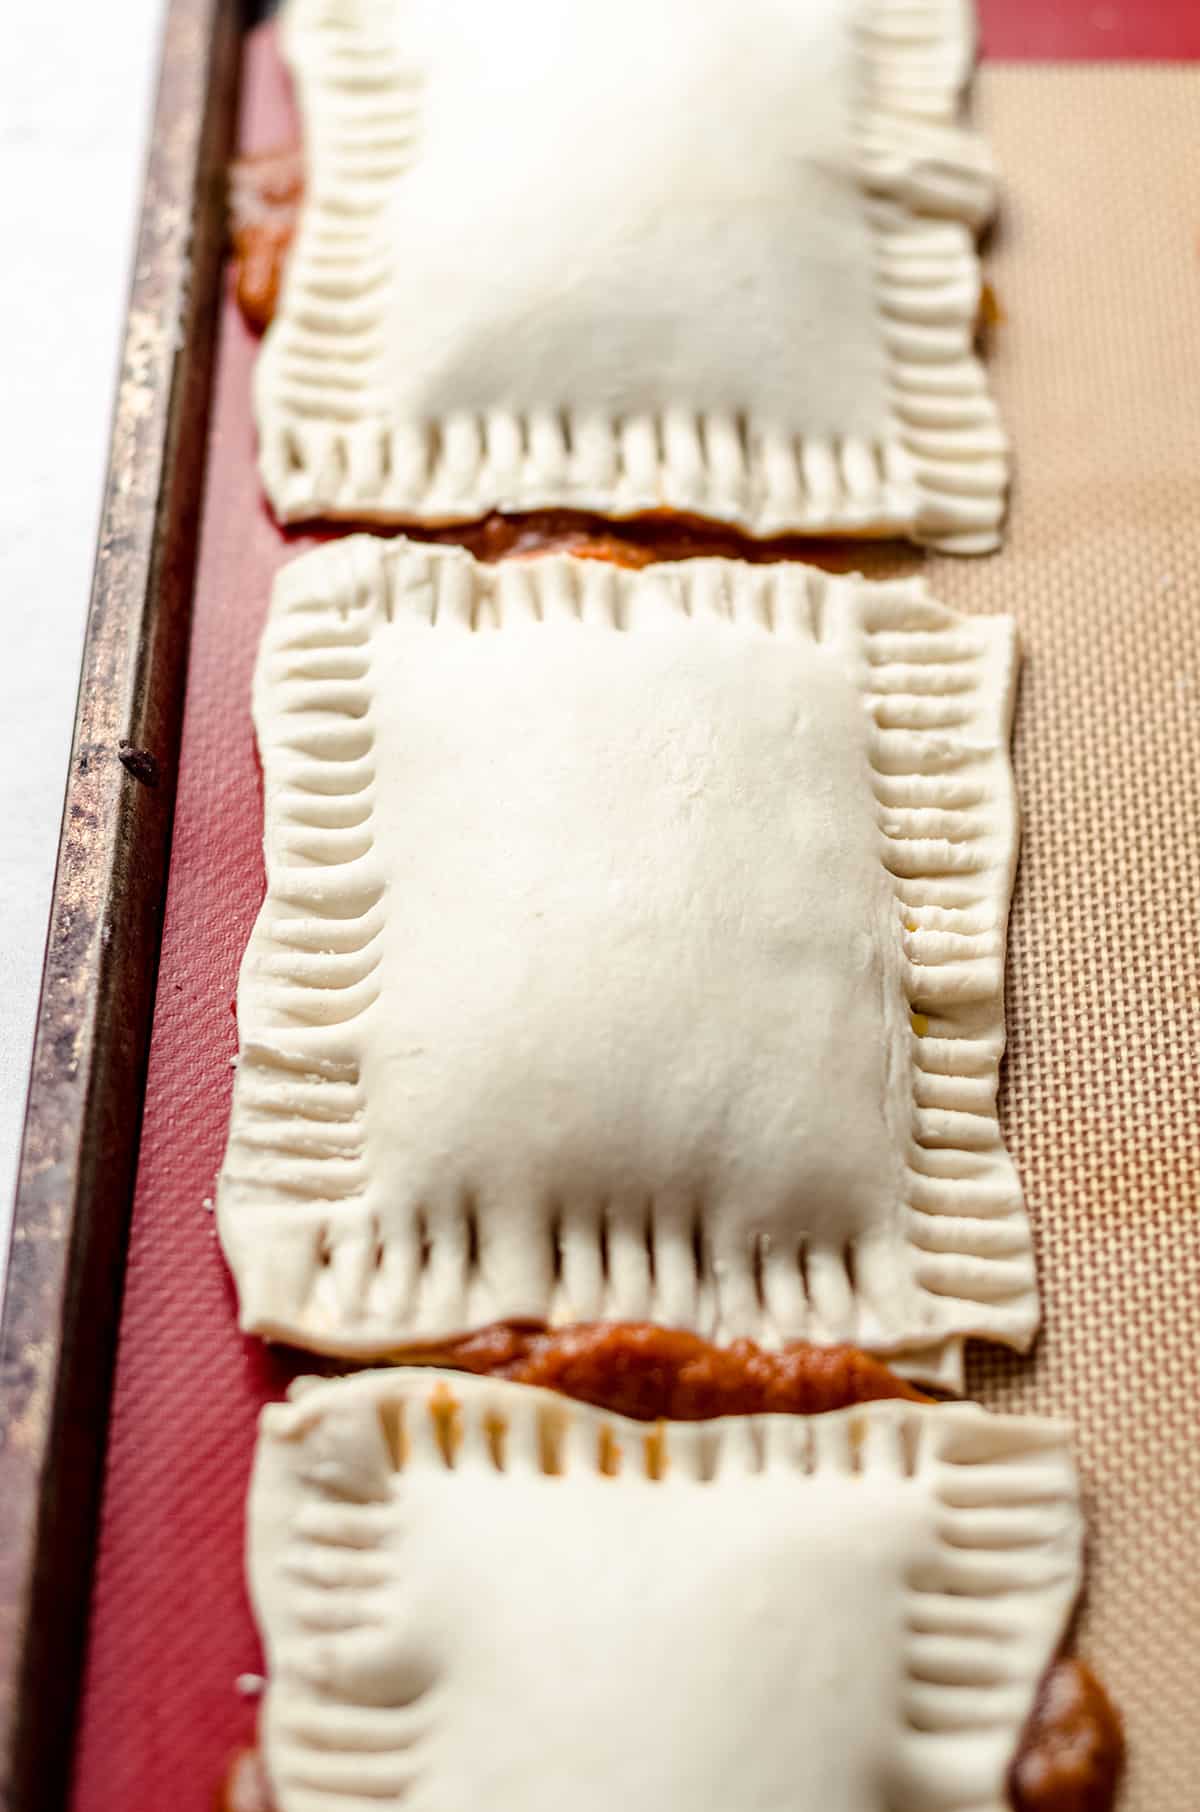
Cut two small slits with a sharp knife into the top of each hand pie. This will allow steam to escape and prevent the pie from bursting during baking.
ADD EGG WASH AND SPICES
Once your pumpkin hand pies have been assembled you’re ready to move on to the finishing touches before baking: brushing with egg wash and sprinkling with spices.
Combine 1 large egg and 1 Tablespoon of water in a small bowl and beat it until combined. Then, add 1 teaspoon of pumpkin pie spice to a small bowl, along with 1 and ½ teaspoons of granulated sugar. Give a gentle stir to combine.
Brush the assembled pastries with the egg wash, and then sprinkle with the pumpkin pie spice and sugar mixture.

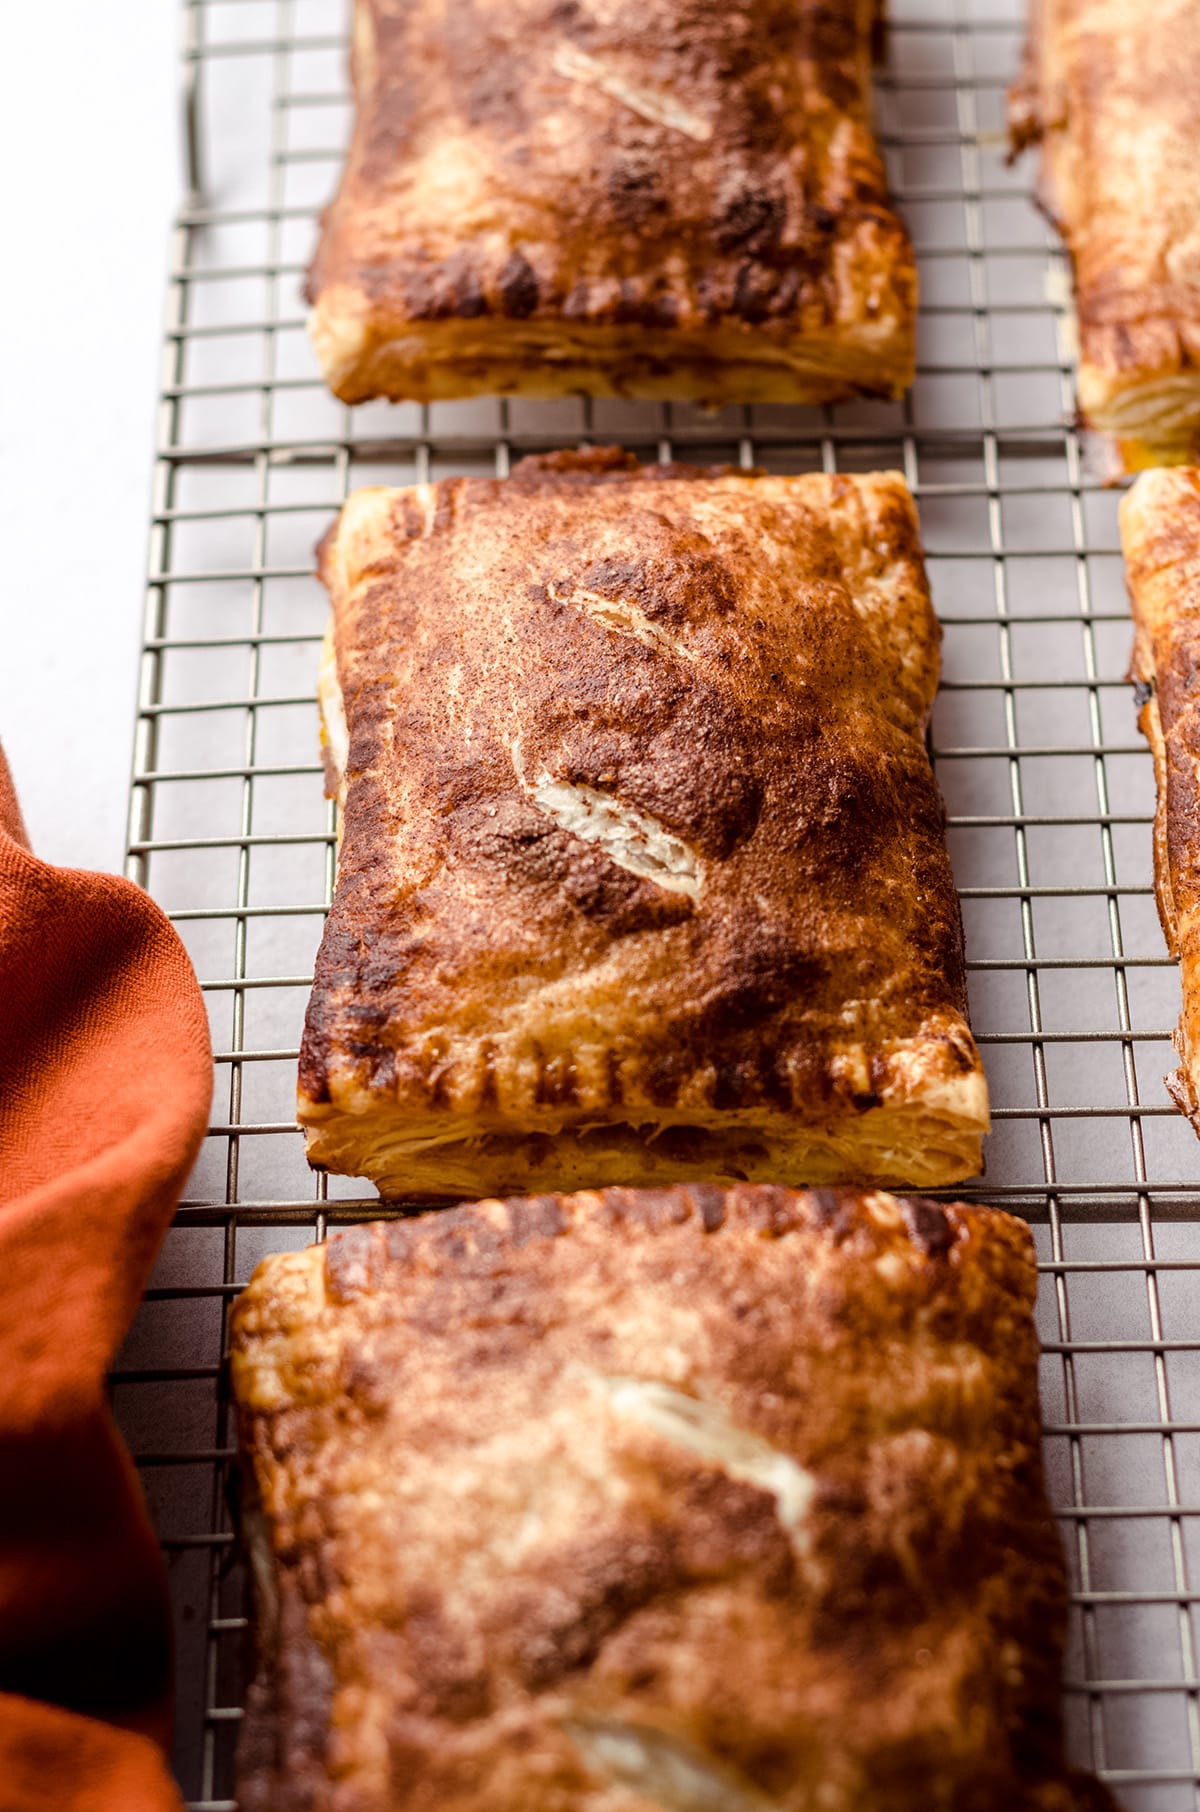
Bake the pies in the preheated oven for 30 minutes, or until the tops are a golden to dark brown color (depending on your preference, of course!).
If using two baking sheets, make sure you rotate them halfway through baking time. This will give everything a chance to brown up evenly.
Remove the baking sheets from the oven and allow the pies to cool directly on the sheets until they are cool enough to serve and handle easily.
I like to serve mine still warm (um, hellooooo comforting pumpkin filling and warm layers of buttery pastry), but you could opt to chill them before serving if you prefer.
If, and that’s a big IF, you have any leftover hand pies, they can easily be stored in the refrigerator for up to 5 days. Just wrap them tightly in plastic wrap, and reheat in the microwave OR in a 300ºF (149ºC) oven for 10-15 minutes.
They also crisp/warm up nicely in the air fryer. Bake at 350ºF (177ºC) for 6-8 minutes or to desired crispness.
Serve your mini pumpkin pies with anything you love to enjoy with pumpkin pie. I like mine just plain, but you could serve with a cream cheese frosting on the side, caramel sauce, or even top with a dollop of homemade whipped cream (or pumpkin spice whipped cream if you’re feeling fall-licious).
CAN I MAKE PUMPKIN HAND PIES AHEAD OF TIME?
While my apple hand pies can most certainly be made and assembled ahead of time, the nature of the pumpkin filling for these hand pies is a whole different beast.
Since pumpkin is such a wet ingredient, filling the pies and letting them sit will, unfortunately, make them extra soggy and likely quite leaky.
If you’d like to prepare the pumpkin filling ahead of time, you can cover it and keep it in the fridge for up to 12 hours. Moisture will collect at the bottom of the bowl, which you will want to stir back into the filling before proceeding with the pie recipe.
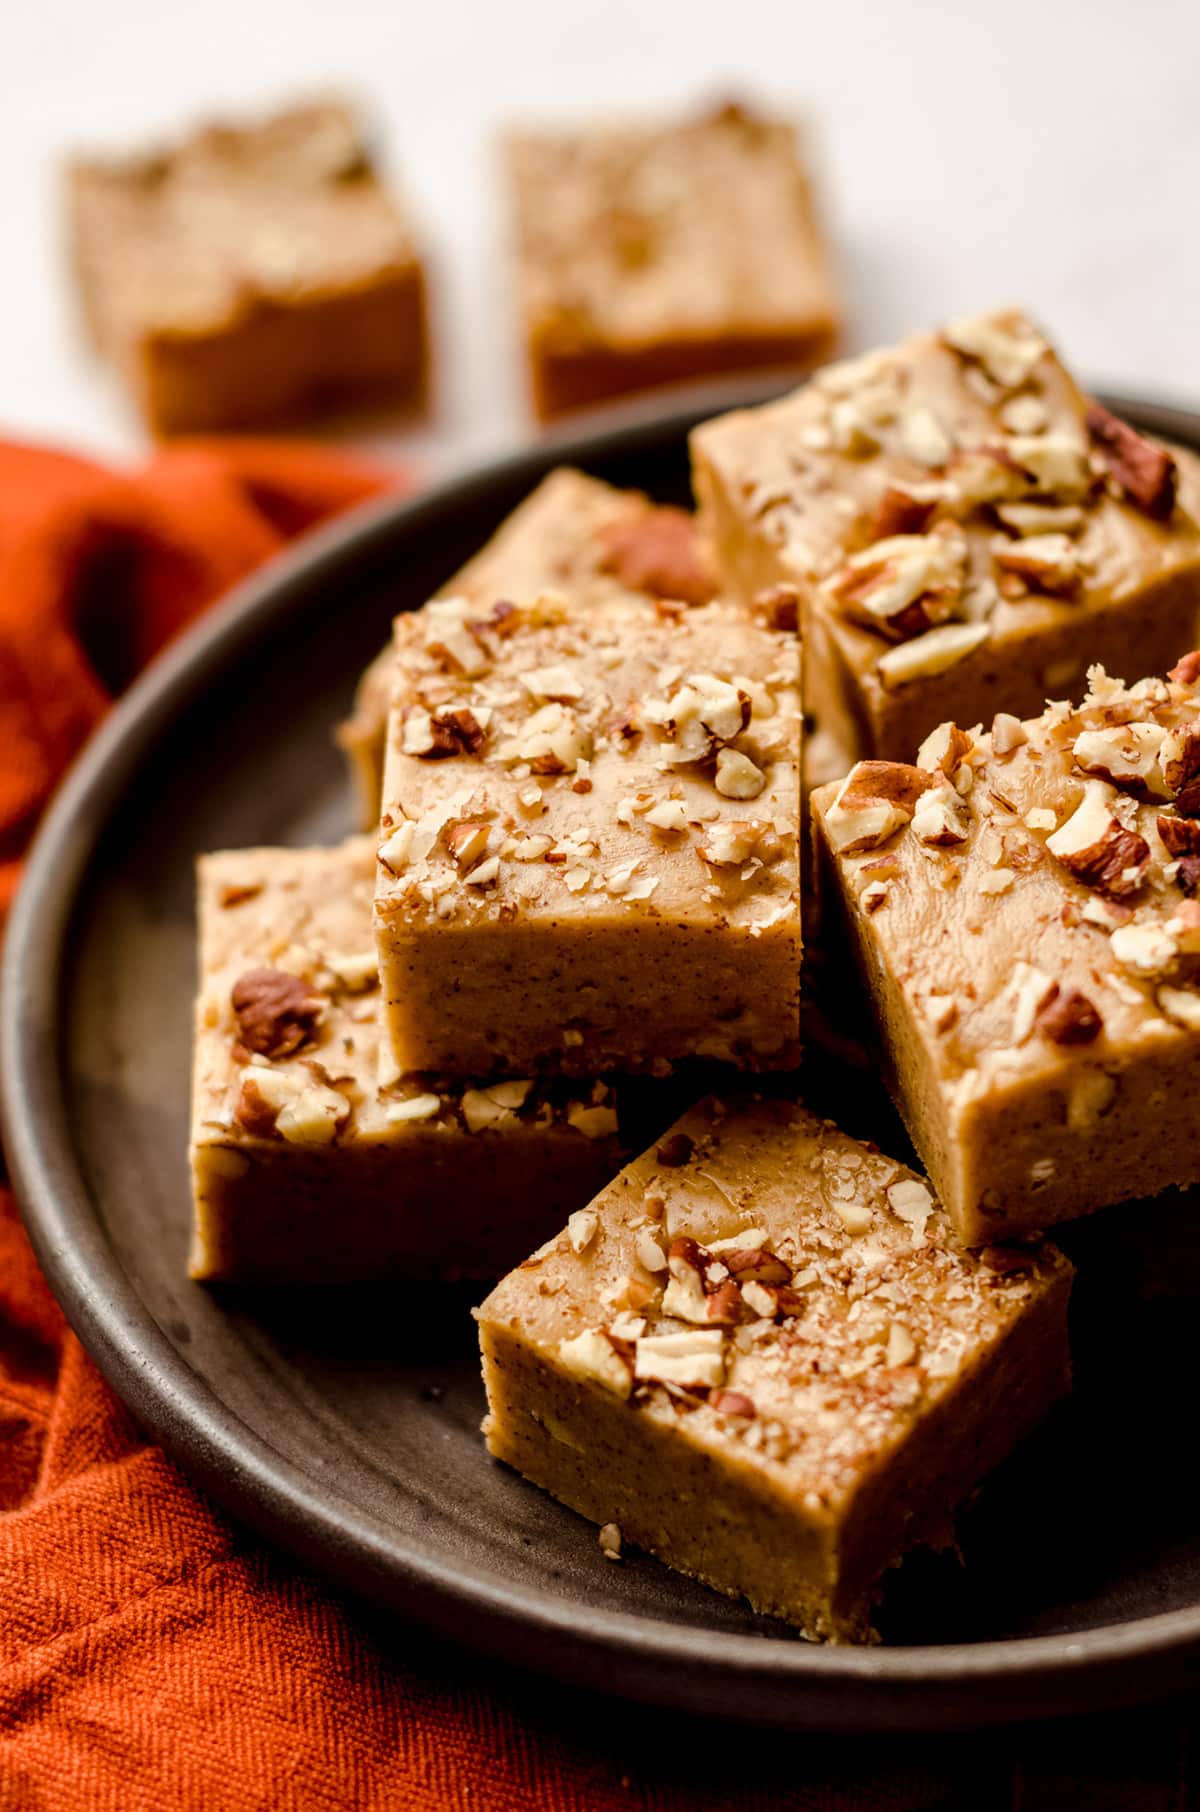
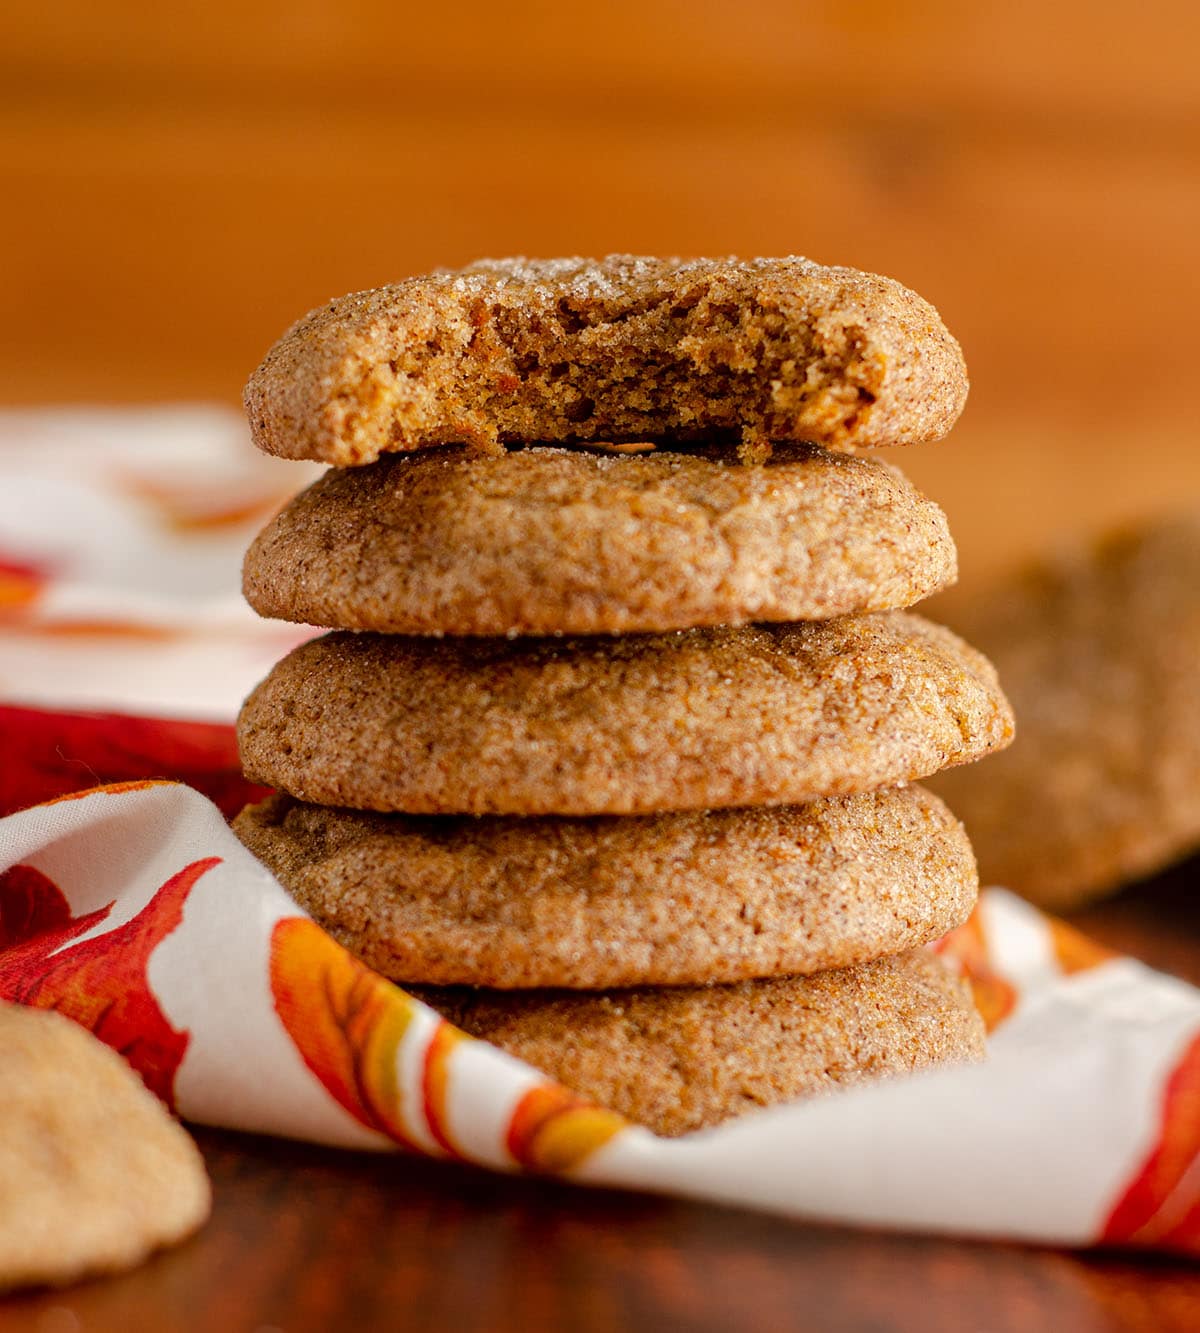
Now that you’ve welcomed the fall season (and its pumpkin-spiced glory), you’re probably ready for more pumpkin-tastic recipes, right? I highly recommend you try a few of my most popular pumpkin recipes like my (all-time favorite) pumpkin fudge, pumpkin spice cookies, or these better-than-Dunkin pumpkin streusel muffins.
Pumpkin Hand Pies Recipe
Ingredients
FILLING
- 1 and ½ cups pumpkin purée1
- 1 large egg
- ½ cup (100g) firmly packed brown sugar
- 1 and ½ teaspoons pumpkin pie spice
- ¼ teaspoon salt
CRUST
- 1 box (2 sheets) frozen puff pastry thawed
- 1 large egg beaten with 1 Tablespoon (15mL) water
- 1 and ½ teaspoons granulated sugar
- 1 teaspoon pumpkin pie spice
Instructions
FILLING
- In a large bowl, whisk together the pumpkin purée and egg until smooth.1 and ½ cups pumpkin purée1, 1 large egg
- Add the brown sugar, pumpkin pie spice, and salt, and whisk again until everything is combined. Set aside.½ cup (100g) firmly packed brown sugar, 1 and ½ teaspoons pumpkin pie spice, ¼ teaspoon salt
CRUST
- Preheat the oven to 400°F (204ºC). Line one large baking sheet with parchment paper or a silicone baking mat. Set aside.
- On a lightly floured surface, roll out one pastry sheet. Using a pizza cutter or sharp knife, cut the sheet evenly into 6 large rectangles. These will be the bottoms of your pies.1 box (2 sheets) frozen puff pastry
- Place the pie bottoms on the prepared baking sheet. If you feel they are crowded, use two large baking sheets (3 pies per sheet) instead.
ASSEMBLE HAND PIES
- Spoon 6 Tablespoons of pumpkin pie mixture onto each of the 6 bottom rectangles, leaving about ¼" border around the edge for crimping. You may have a little bit of filling leftover, but can certainly use it all up by overfilling the crusts.
- Roll out the second she of puff pastry. Cut into 6 rectangles. Place the top rectangles over the filled bottoms, slightly stretching the top layer if necessary (puff pastry is very sturdy and forgiving). Crimp the edges with a fork to seal. If some of the filling squishes out, that's ok.
- Cut two small slits in the top of each hand pie, then brush with egg wash and sprinkle with the pumpkin pie spice/sugar mixture.1 large egg beaten with 1 Tablespoon (15mL) water, 1 and ½ teaspoons granulated sugar, 1 teaspoon pumpkin pie spice
- Bake the pies for 30 minutes, or until the tops are desired golden to dark brown color. Rotate the baking sheets once during bake time. Remove pies from the oven and allow to cool on the baking sheet until safe to handle and serve. Leftover hand pies can be stored in the refrigerator, wrapped tightly in plastic wrap, up to 5 days. Reheat in microwave or in a 300°F (149ºC) oven for 10-15 minutes.
Notes
- Pumpkin: I always measure pumpkin purée with measuring cups as the moisture content can wildly change the weight measurements, depending on the brand.
Nutrition Disclosure
All nutritional values are approximate and provided to the reader as a courtesy. Changing ingredients and/or quantities will alter the estimated nutritional calculations.
These are a great way to take your pumpkin pie to work with you! Super yummy.
Yes, so smart!!
Delicious twist to a traditional pumpkin pie!
Thanks, Lynn! We agree!
These taste like they came from a bakery! I made these for a family brunch and they were all gone!
Love that, Sandra! Thanks so much 🙂
These are great to make for an apple picking picnic! (And maybe breakfast…)
10000% for breakfast!
These are like the best adult fall poptarts!! I feel like a kid again when I eat one!
YES, Ann!! Totally!!
Such a delicious recipe! Perfect for the Fall!
It really is!
I made these sweet pumpkin hand pies yesterday and wow! My family devoured them and I’m bookmarking to make over the holidays!
Thanks so much, Sue!
Haha, that’s what I like to hear!
These hand pies were SO EASY to make and SO delicious! My family and friends are going to enjoy these all pumpkin season long!
They are our new fav!
Haha, it really is!!