
How to Make Crêpes (Sweet or Savory Option)

As an Amazon Associate, I earn from qualifying purchases. Read the full disclosure here.
You only need 6 basic ingredients to make your own buttery homemade crepes at home. This recipe produces thin and delicate crepes with crisp edges that can be enjoyed with a simple dusting of powdered sugar or filled with sweet whipped cream. I’ve also included instructions for making savory crepes to fill with your favorite sandwich fillings. I am confident that you can make these crepes this without any special pans or equipment, and you’ll find all of my best tips and tricks to be successful without any specific or advanced skills.

This Recipe For Crepes is Ridiculously Easy
If you’re anything like me, you’ve consumed your fair share of crepes in cafes and restaurants, possibly even some of those in Europe, and watching those giant crepe spreaders made you think “there’s no way I can do this myself.”
If you’ve had that thought, you’d be so wrong, my friend!
As it turns out, you can absolutely make and succeed at making your own simple crepe recipe at home, without a special pan, without a special spreader, and with all of the flavor, texture, and fill-ability you’d get anywhere else.
Don’t believe me? Well, believe me. Years ago, I vowed to learn how to make cheese blintzes, which are essentially just a rolled and filled crepe. To make blintzes, I had to nail down how to make a crepe, and I’m here to promise you: it’s much simpler than you think.


Here’s what crepes entail:
• a simple batter consisting of a few simple ingredients
• a rest time for the batter
• a trusty skillet + proper greasing
• a topping of your choosing
Lucky for you, I have all the photos, tips, tricks, pep talks, and instructions to help you nail this basic crepes recipe so you can get to adding all your favorite toppings and stuffing in all of your favorite fillings.
You’ve got this! I believe in your crepes.
Ingredients For Homemade Crepes
I normally include lots of substitutions and wiggle room for my baking recipes, but crepes are so delicate and particular that I don’t recommend straying much from the list below UNLESS you stick to the suggestions I’ve made in various sections below).
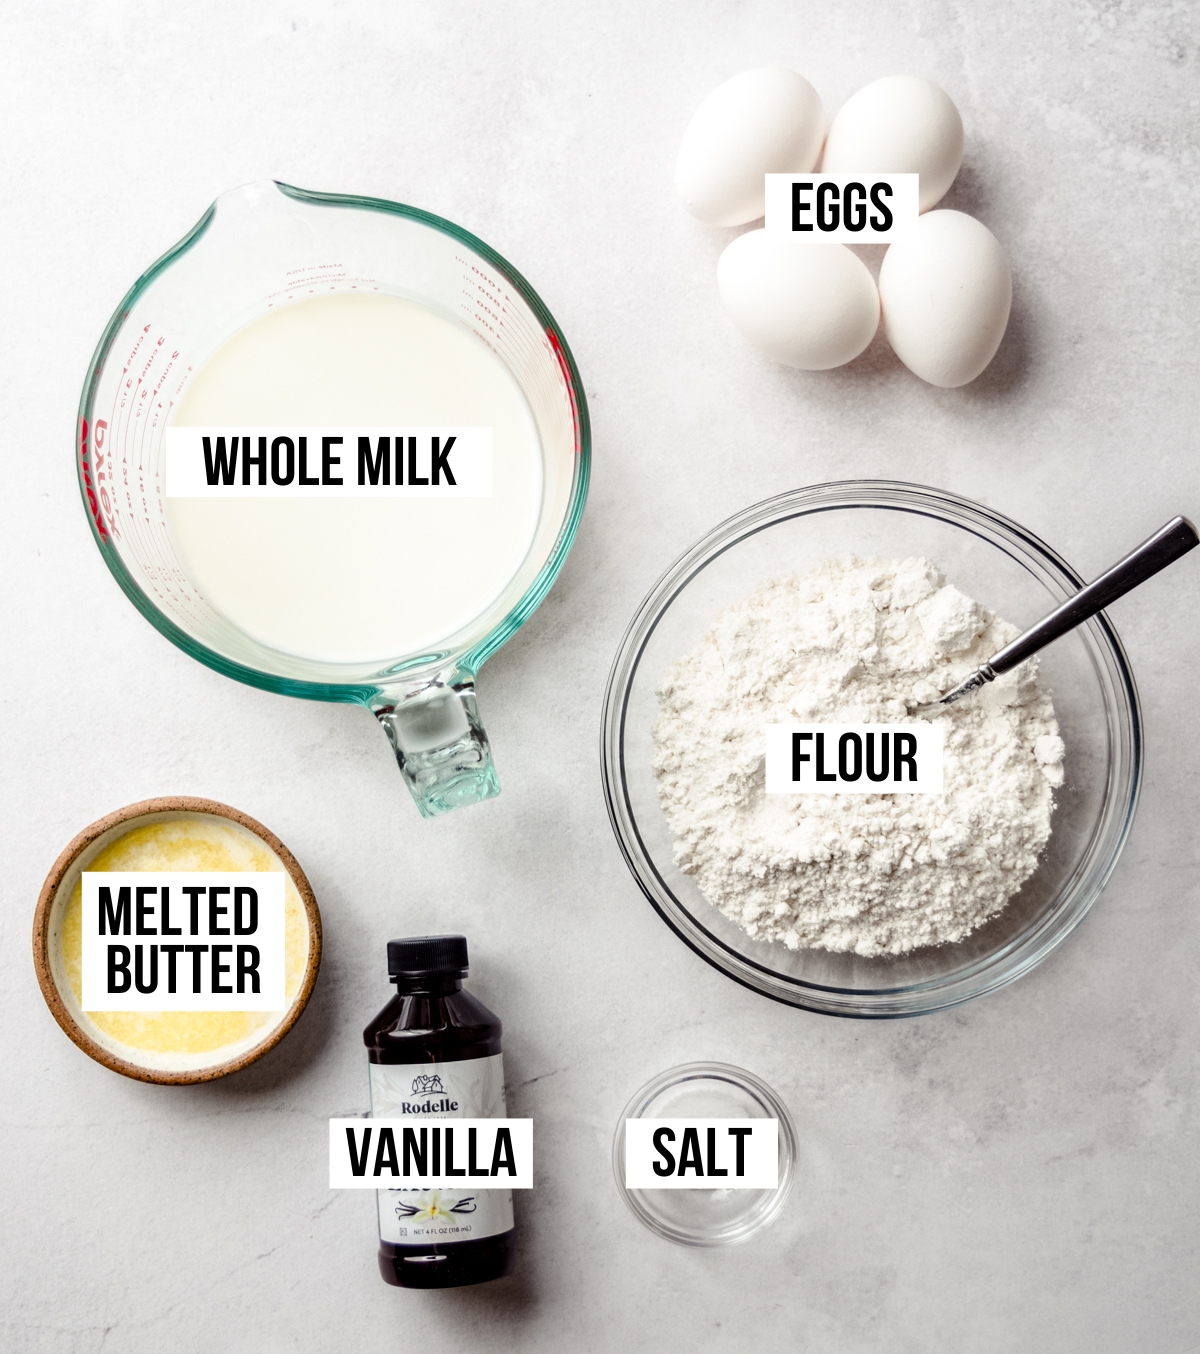
EGGS: this is a very rich batter, full of lots of eggy flavor and feeling. Eggs lend the majority of the structure for the crepes and holds the batter together.
MILK: use a full fat milk. If you want to make these dairy-free, see my notes below about recommended alternatives.
UNSALTED BUTTER: butter is a crucial ingredient, and you’ll want to have extra butter handy for the skillet. I like to use unsalted butter in my crepes and salted plant-based butter for my pan.
VANILLA EXTRACT & SALT: for flavor! If you want to make savory crepes, leave out the vanilla.
ALL-PURPOSE FLOUR: flour provides the overall structure of the crepes. See below for gluten-free notes, but know that this is a delicate swap and the results are quite different.
DO I NEED A SPECIAL PAN TO MAKE CREPES?
No, you do not need a special pan nor a T-tool to make paper thin crepes. In fact, I don’t even suggest using a pan that’s much larger than 8″ or 10″ as it’s just unnecessary.
The key to successful crepes comes in properly greasing the pan as well as getting the right “feel” of the pan and swirling motion.

How to Make Crepes From Scratch
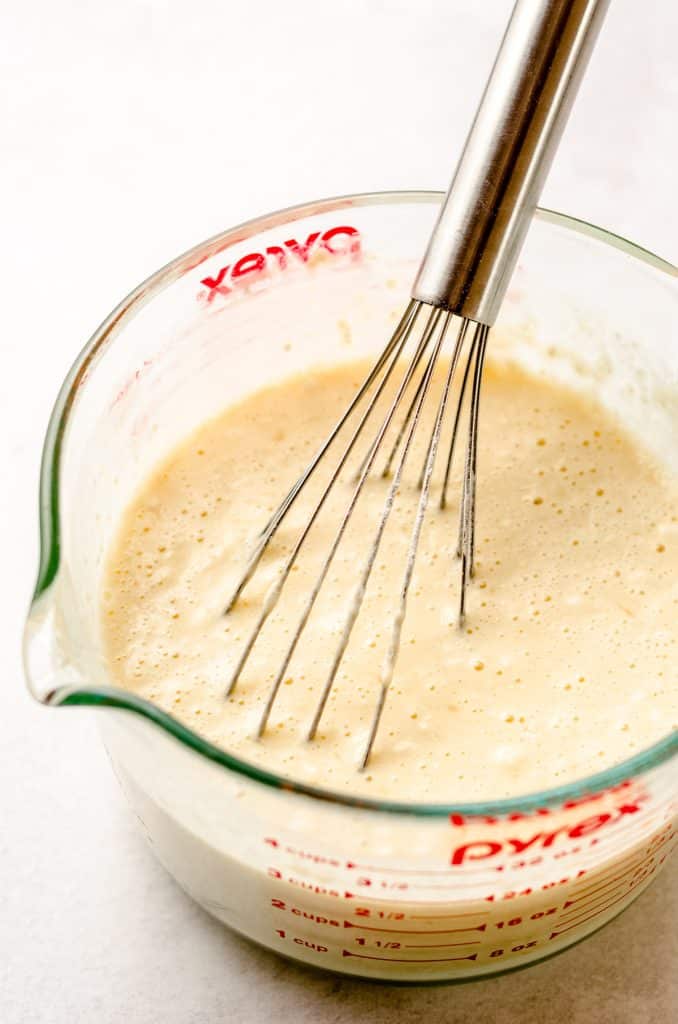
STEP #1: start by whisking the eggs together in a large bowl (I prefer a large measuring cup with a spout). Add the milk, melted butter, and vanilla and whisk again to combine. Add the flour and salt and whisk vigorously to combine. If some lumps remain, that’s ok. They will absorb as the batter rests. Alternatively, you can add all of the crepe ingredients to a blender and process until smooth.
STEP #2: allow batter to rest at room temperature for 30 minutes, or covered in the refrigerator up to 2 days.
STEP #3: after 30 minutes, whisk the batter again to eliminate any remaining lumps of flour, or use a spatula to press out larger chunks, if you prefer.

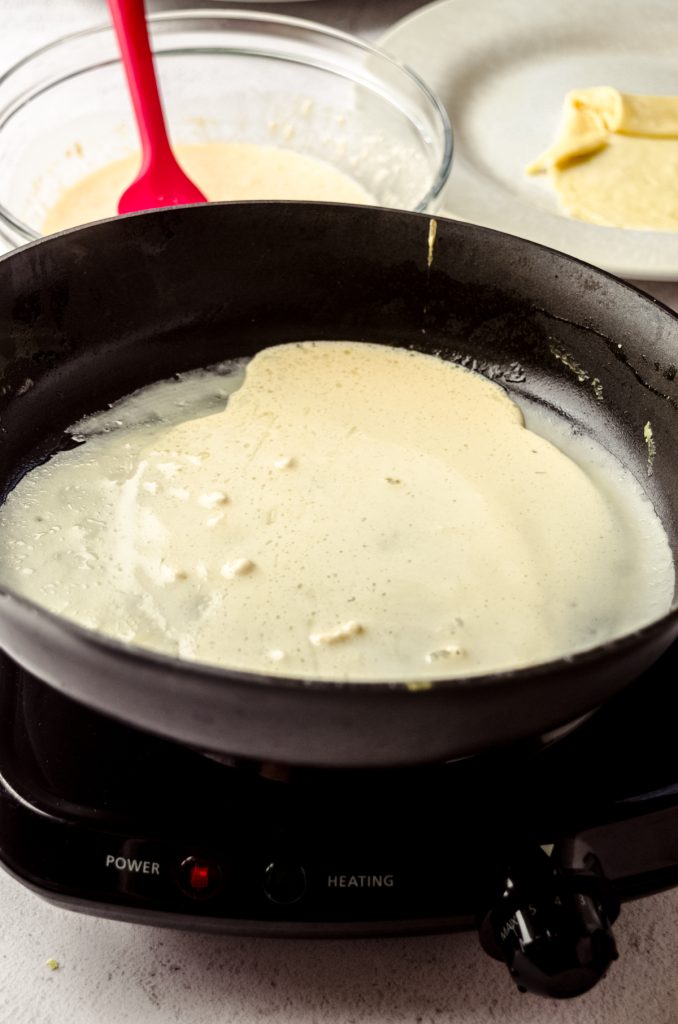
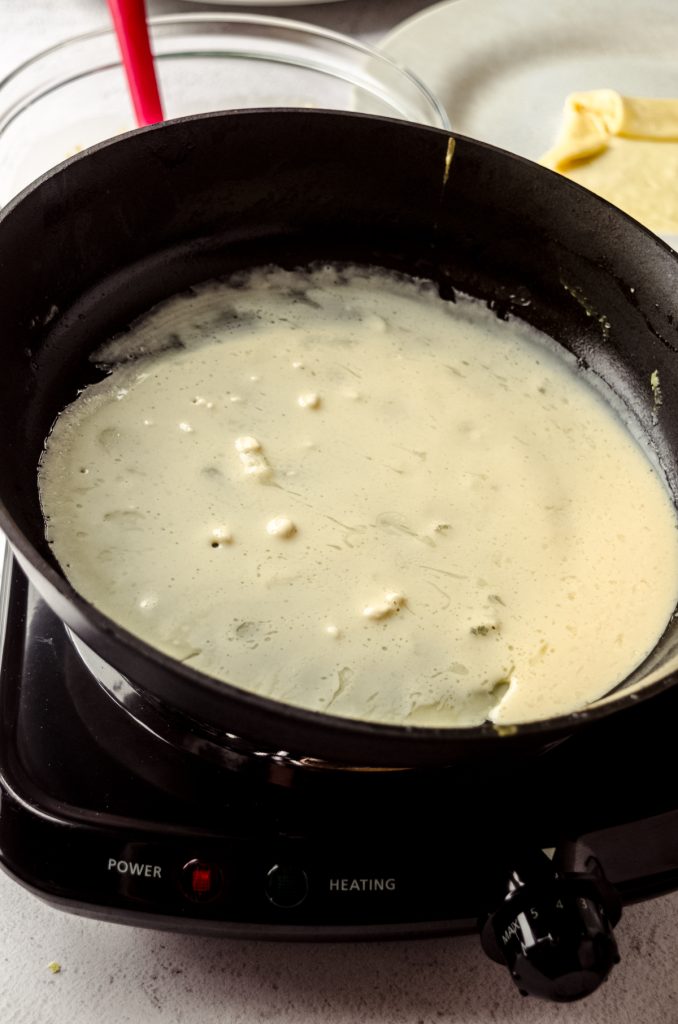
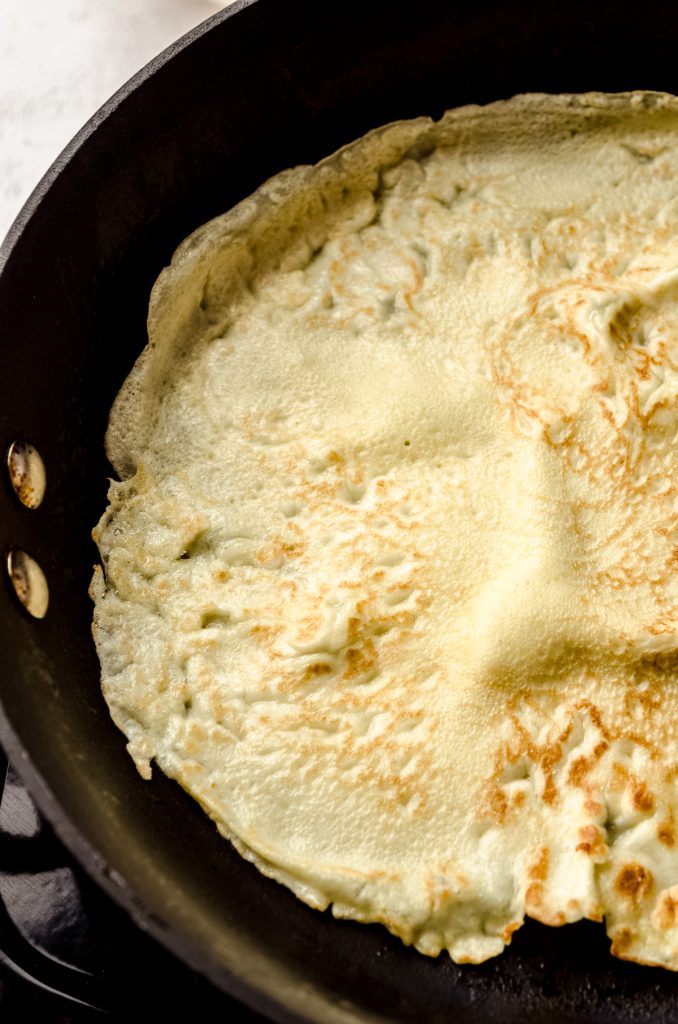
STEP #4: heat an 8″ to 10″ nonstick skillet over medium heat. When the skillet is hot, lightly coat it with butter. Pour about ¼ cup of batter into the skillet, remove it from the heat, then quickly but gently swirl the batter around to evenly coat the bottom of the skillet. Continue to rotate the pan until all of the batter is set.
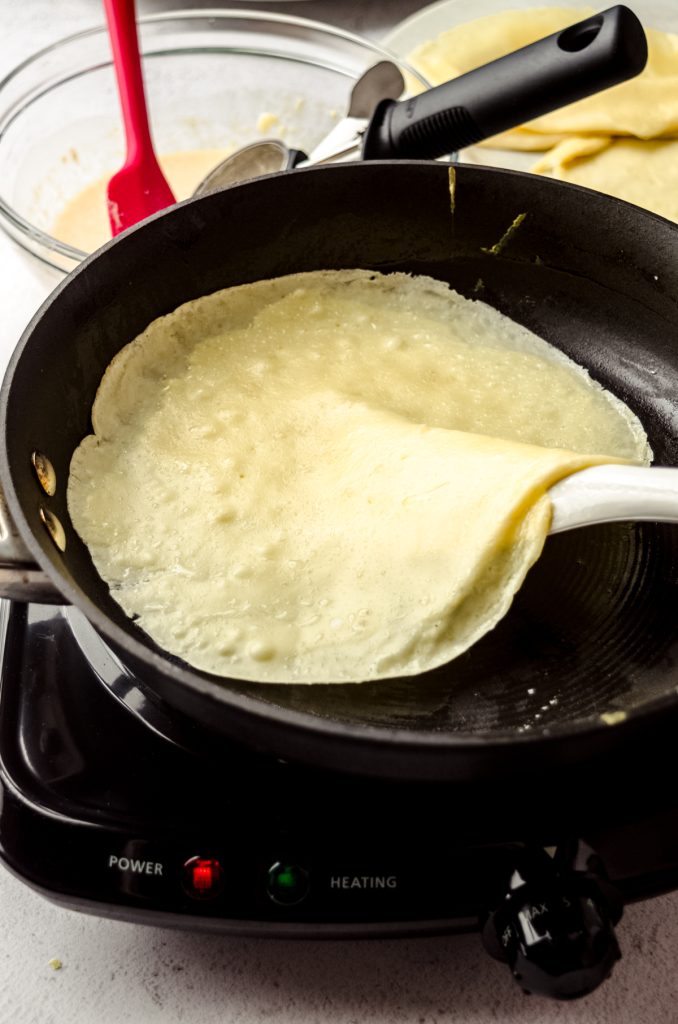
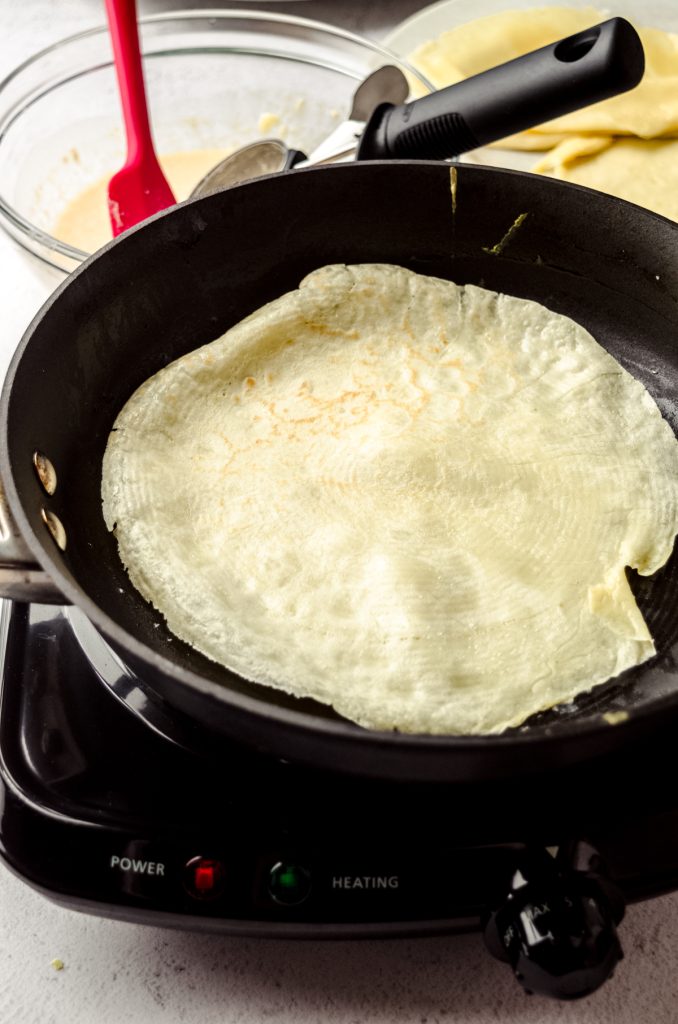
STEP #5: set the skillet back down on the heat and cook the crepe until the top is set and opaque but still slightly sticky (about 75 seconds). Use a silicone spatula to lift and slide the crepe out of the pan and quickly flip it over to cook the other side, only about 30 seconds.
STEP #6: use the spatula to slide the crepe out of the pan and onto the prepared plate. If the crepe doesn’t slide out of the pan easily, continue to cook for another 15-20 seconds.
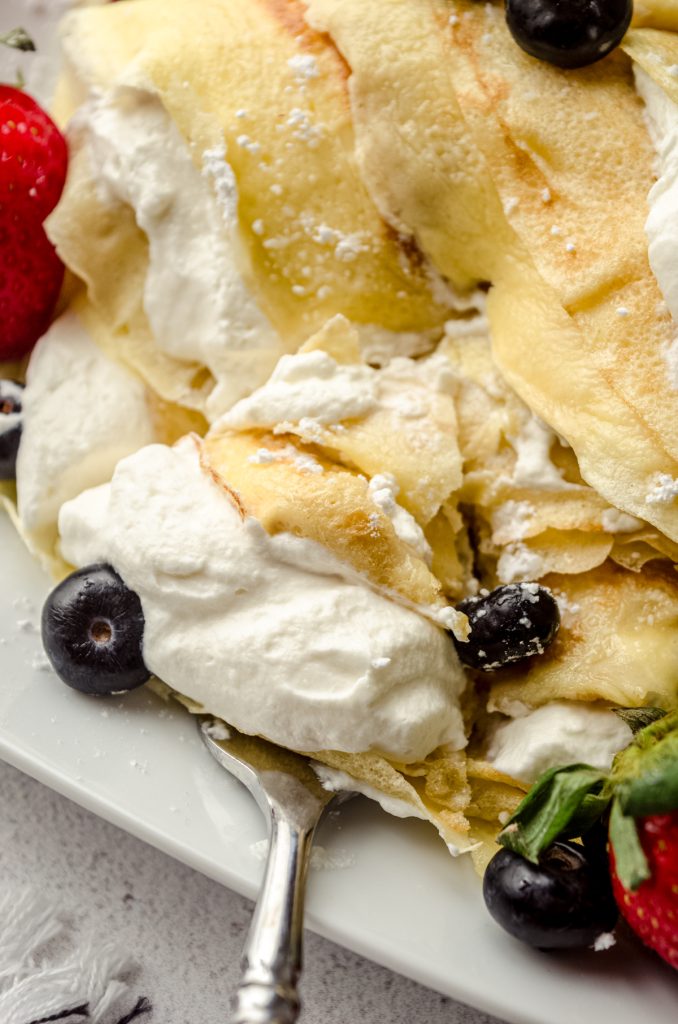
STEP #7: your crepes are ready to use warm but you can also let them cool before using them. See below for filling options.
Variations of Homemade Crepes
While crepe batter tends to be a bit particular, I have had success making my crepes not only gluten free but also dairy free.
Use a gluten free 1:1 all-purpose sub that contains xanthan gum OR almond flour in place of the regular all-purpose flour.
If you want to make your crepes dairy-free, use a plant based butter or neutral oil instead, and I recommend using coconut cream in place of the milk so you still have a solid fat source. If you use a lower fat plant-based milk, you may just have to be extra careful with your flipping.
I do not recommend making crepes egg-free as the eggs carry a great deal of fat that keeps a solid crepe structure.

SWIRLING CAN TAKE PRACTICE
There is a bit of an art to swirling the pan perfectly– it can take practice! Even as much as I’ve made crepes, I still have to get the “feel” of the batter and the pan on the first try.
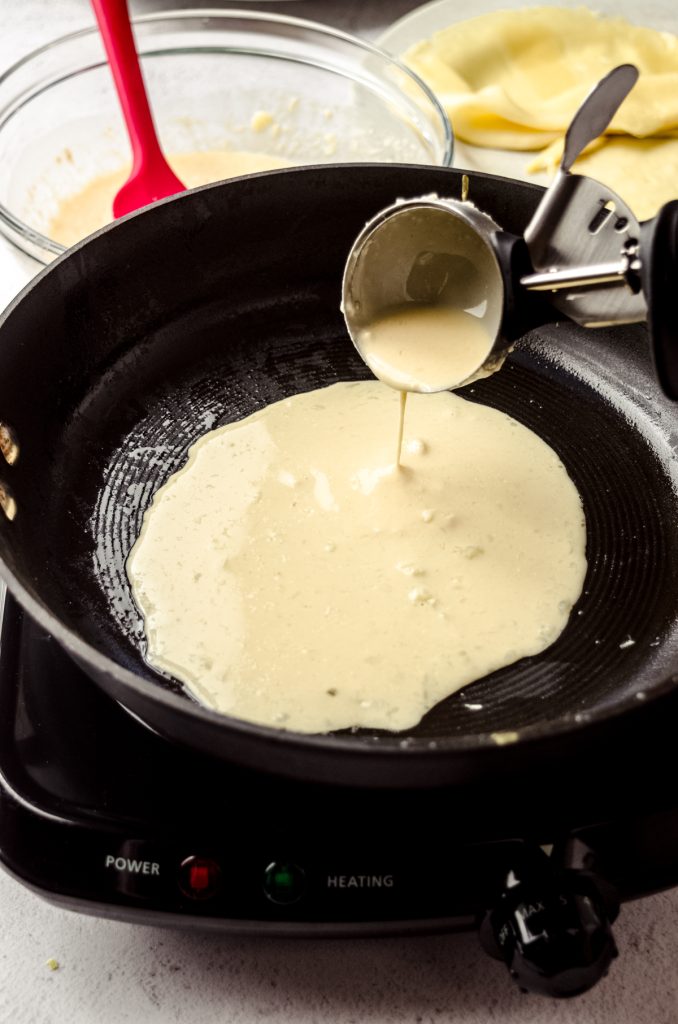
Here’s my best tip: pretend you have a marble in your pan and try to roll it around just on the edges of the pan. Work quickly as the batter will thin out and start to cook immediately as it hits the hot pan, but work carefully as a smooth motion brings the best results. You can (and should!) remove the pan from the heat to do this. It will only take a few seconds to swirl. Don’t worry if it’s not a perfect circle! You will get the hang of it with practice.
HOW TO FLIP A CREPE
When I outsourced questions on Instagram about crepe worries, this was a common one. While your crepe will be floppy and admittedly annoying to flip, you can look and feel for when it’s ready.
Look for…
• the disappearance of the sheen of “wet” batter/a dry surface
• edges that just start to pop off of the pan
• a golden brown bottom if you lift up one of the edges and peek under
If you start to lift your crepe off of the pan and it rips, it’s not ready. You’ll want to grease your pan liberally, which will help the whole crepe lift off and slide around when it’s done.
Before flipping, I like to run my spatula the entire way around the edge of the crepe to be sure all of the edges are set and ready. Then, confidently push your spatula under the crepe with a firm hand, lift, and flip quickly.
The Best Crepe Recipe Tips For Success
Aside from perfecting the wrist swirl, there are a few key ingredients and methods to help you achieve crepe-fection.
USE BUTTER: many crepe recipes don’t use butter, but I like to include it for fat and flavor. You’ll also use butter to grease and prep your pan, which creates crisp and buttery edges that are just unmatched against recipes without it.
USE A BLENDER, IF NECESSARY: I don’t use a blender to mix my batter as I find that whisking everything again after the rest period rids the batter of any huge flour clumps, but if you’re struggling to get out larger lumps, break out the blender or immersion blender to help you. USE A REGULAR SKILLET: the skillet you use to do your regular cooking is all you need! Resist the urge to use too large of a pan to keep the crepe size manageable.
LET THE BATTER REST: resting is crucial in producing soft crepes with top notch flavor. This time allows the flour to absorb the fats and liquids for a cohesive and smooth batter.
USE A SCOOP WITH A THUMB TRIGGER: you will pour about ¼ cup of batter into the skillet, and I like to use an ice cream scoop with a trigger for consistency of the amount and ease of transfer.
DON’T OVERCOOK THE CREPES: you’re looking for very soft and floppy crepes. You want the shine to just be disappearing before flipping. Once flipped, the underside should be delicately browned/have light brown spots. Flipping should be slightly difficult (but not impossible!) to do. Too stiff and they’re definitely overcooked.
GREASE BETWEEN CREPES: re-butter your pan every time you make a new crepe. You can get away with using less butter every other time, but don’t rely on what you think you have left in the pan. This is a recipe for a disaster, trust me!
USE A LARGE SPATULA FOR FLIPPING: no need to use a giant spatula or anything oversized. When I was teaching myself how to make crepes, I used a very wide spatula and it was more trouble than it was worth.
FLIP QUICKLY: just like when you’re making pancakes, flip with a quick but confident hand. A swift flip will ensure your crepe lands without folding over on itself.
KEEP PRACTICING: if at first you don’t succeed, try again! The secret to mastering crepes is simple: just keep making them (and eating them– DARN). That first one might tear or look a little wonky (it happens), but don’t give up! By the time you’ve worked your way through the batter, you’ll have the hang of it, and before you know it, you’ll be flipping crepes like a total pro!

How to Store Homemade Crepes
Store crepes covered tightly in the refrigerator for up to 5 days. There is no need to separate them with parchment or paper towels. Crepes freeze well, up to 3 months. You can freeze them flat or rolled up. Thaw them in the refrigerator overnight.
HOW TO FREEZE CREPES
You can freeze crepes for up to 3 months. You can roll them up and wrap them individually or stacked. Be sure your crepes are completely cooled before freezing.
TO FREEZE INDIVIDUALLY: fold each crepe into quarters and wrap each one in plastic wrap, then flash freeze for about 1 hour on a plate. Transfer to a zip-topped bag.
TO FREEZE STACKED CREPES: place a sheet of wax or parchment paper between each crepe on a plate or platter. Wrap the entire plate with plastic wrap so there are no exposed edges.
TO THAW CREPES: thaw overnight in the refrigerator then reheat in the microwave or over medium heat on an ungreased skillet or griddle, about 20-30 seconds per side.
SUCCESS TIP
Handle frozen crepes with care as they will be extra fragile when frozen. To prevent the crepes from tearing, allow them to thaw completely before unwrapping and handling.

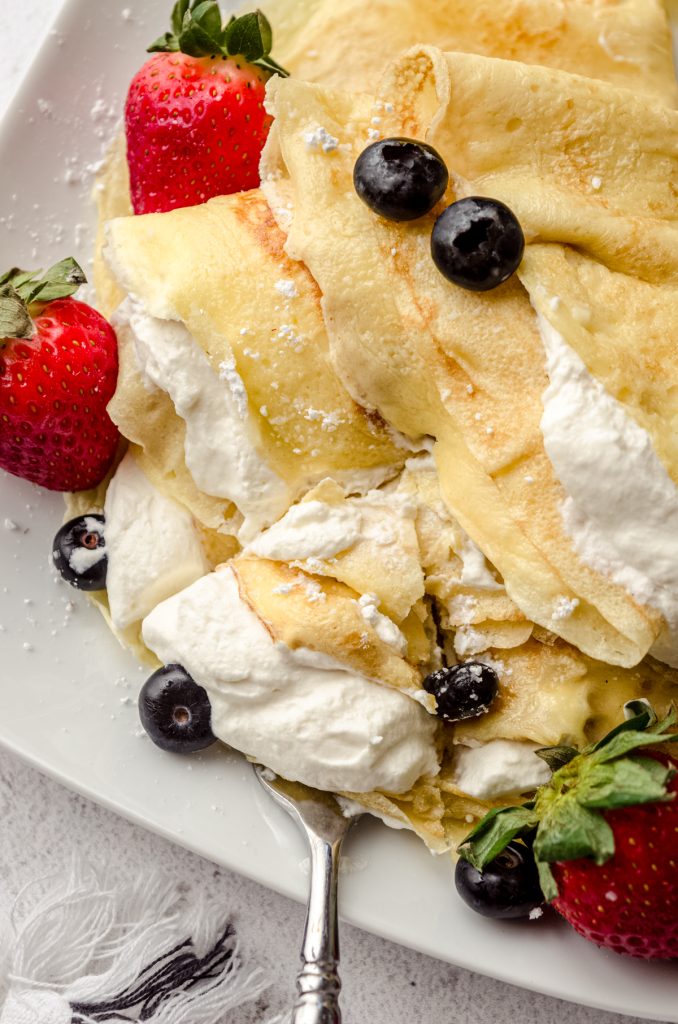
Savory Crepe Filling Ideas
- powdered sugar
- fresh fruit
- fresh whipped cream
- coffee whipped cream
- cinnamon + sugar mixture
- pumpkin spice whipped cream
- apple butter
- peach compote
- strawberry compote
- brown butter
- dulce de leche
- fresh bananas + caramel sauce + candied pecans (Bananas Foster crepe)
- maple syrup
- hot fudge sauce
- salted caramel sauce
- bourbon caramel sauce
- lemon curd
- peach curd
- cranberry curd
- cinnamon honey butter
- Nutella, peanut, or almond butter
- no bake cheesecake filling
- cream cheese
- fresh bananas + dulce de leche (banoffee crepe)
SAVORY CREPE FILLINGS & TOPPINGS
- pesto
- quesadilla sauce
- taco fillings/toppings
- pizza fillings/toppings
- scrambled/fried eggs + meat
- cream cheese + salmon + red onion
- I’ve had a mac and cheese crepe before and YES, make it
- your favorite slider or sandwich fillings
- use layers of crepes in this turkey sliders recipe
- as the base for Eggs Benedict
- pizza toppings + sauce


Homemade Crepes
Ingredients
- 4 large eggs
- 1 cup (240mL) milk1
- 2 Tablespoons (28g) unsalted butter melted; plus more for the pan
- 1 teaspoon vanilla extract
- 1 cup (120g) all-purpose flour
- ½ teaspoon salt
Instructions
- In a medium size bowl, whisk the eggs. Add the milk, melted butter, and vanilla and whisk again to combine. Add the flour and salt and whisk vigorously to combine. If some lumps remain, that's ok. They will absorb as the batter rests. Alternatively, you can add all of the crepe ingredients to a blender and process until smooth.4 large eggs, 1 cup (240mL) milk1, 2 Tablespoons (28g) unsalted butter, 1 teaspoon vanilla extract, 1 cup (120g) all-purpose flour, ½ teaspoon salt
- Rest the batter: allow batter to rest at room temperature for 30 minutes, or covered in the refrigerator up to 2 days.
- After 30 minutes, whisk the batter again to eliminate any remaining lumps of flour. Use a spatula to press out larger chunks, if you prefer.
- Set out a large dinner plate or platter lined with parchment or wax paper.
- Cook the crepes: heat a 9" nonstick skillet over medium heat. When skillet is hot, lightly coat it with butter. Pour ¼ cup of batter into the skillet (I like to use an ice cream scoop with a trigger), remove it from the heat, then quickly but gently swirl the batter around2 to evenly coat the bottom of the skillet. Continue to rotate the pan until all of the batter is set.
- Set the skillet back down on the heat and cook the crepe until the top is set and opaque but still slightly sticky (about 75 seconds). Use a silicone spatula to lift and slide the crepe out of the pan and quickly flip it over to cook the other side, only about 30 seconds.
- Use the spatula to slide the crepe out of the pan and onto the prepared plate. If the crepe doesn't slide out of the pan easily, continue to cook for another 15-20 seconds.
- Continue with the rest of the batter until you have about 8-10 crepes that are approximately 8" in diameter.
- Fill your crepes: I like to use a basic homemade whipped cream for my filling and top with powdered sugar, fresh fruit, and/or a strawberry sauce. See the "fillings & toppings" sections (one for sweet and one for savory) in the post above for other filling and topping suggestions. Store crepes covered tightly in the refrigerator for up to 5 days. You can enjoy them cold or warm them up. Crepes freeze well, up to 3 months. Thaw in the refrigerator.
Video
Notes
- Milk: I recommend full fat/whole milk. Using a lower fat milk runs the risk of your crepes tearing or ripping. If you want to make your crepes dairy-free, use a plant based butter or neutral oil instead, and I recommend using coconut cream in place of the milk so you still have a solid fat source. If you use a lower fat plant-based milk, you may just have to be extra careful with your flipping.
- Swirling the batter: this can take practice! Even as much as I’ve made crepes, I still have to get the “feel” of the batter and the pan on the first try. Here’s my best tip: I like to pretend I have a marble in my pan and I’m trying to roll it around just on the edges of the pan. Work quickly as the batter will thin out and start to cook immediately as it hits the hot pan, but work carefully as a smooth motion brings the best results. You can (and should!) remove the pan from the heat to do this. It will only take a few seconds to swirl. Don’t worry if it’s not a perfect circle! You will get the hang of it with practice.
- Savory crepes: to make a savory crepe instead of a sweet one, omit the vanilla extract.
Nutrition Disclosure
All nutritional values are approximate and provided to the reader as a courtesy. Changing ingredients and/or quantities will alter the estimated nutritional calculations.