
Peanut Butter Chocolate Cheesecake Recipe
As an Amazon Associate, I earn from qualifying purchases. Read the full disclosure here.
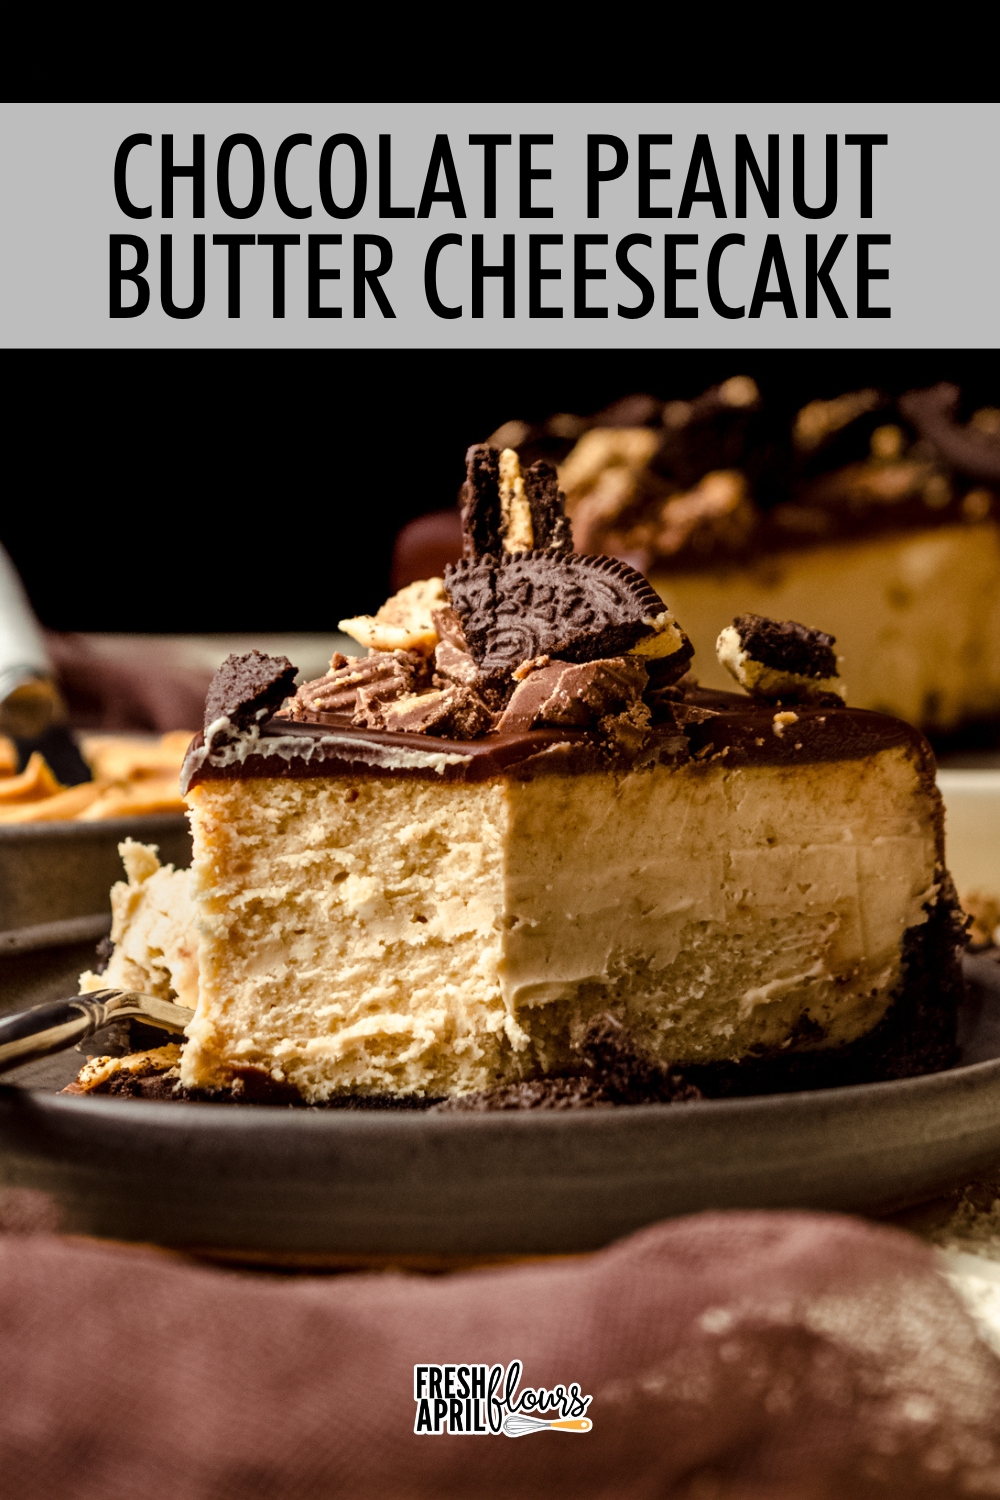
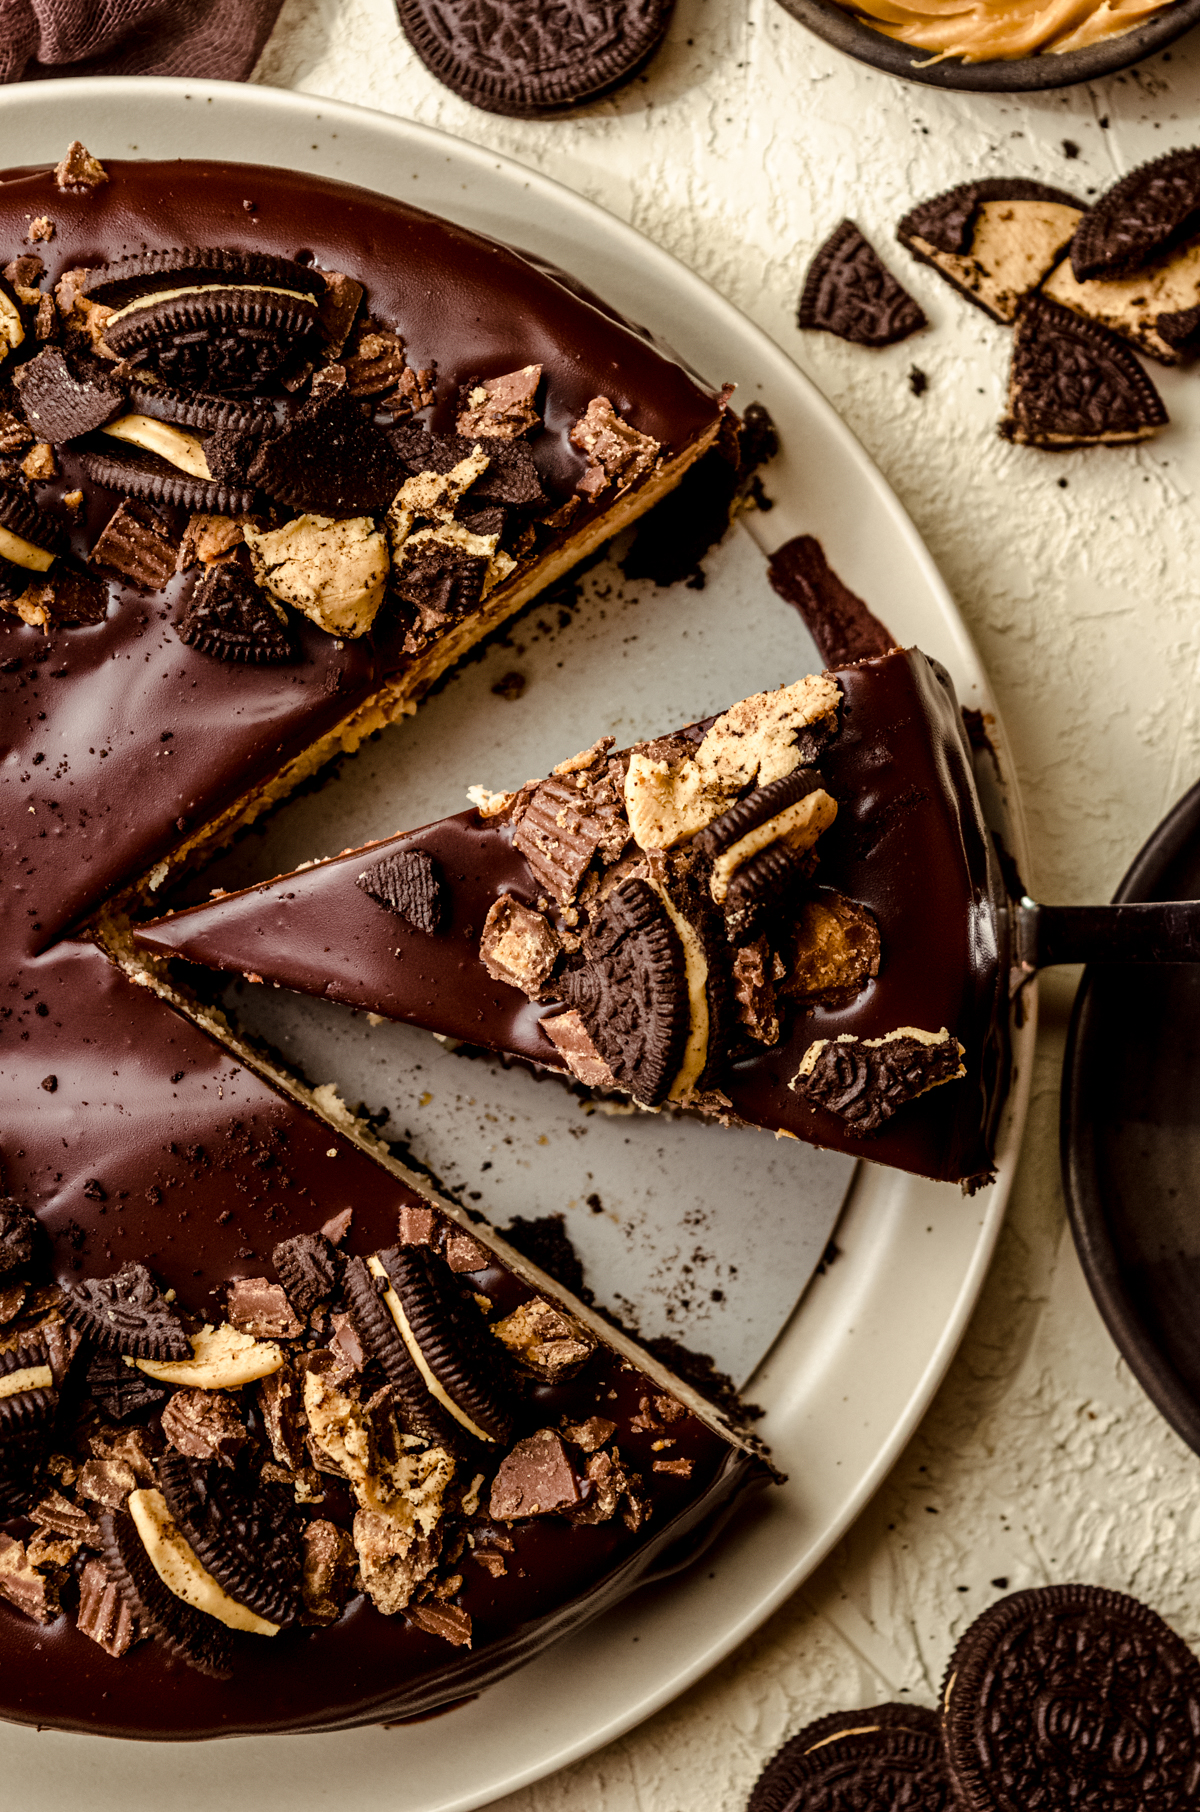
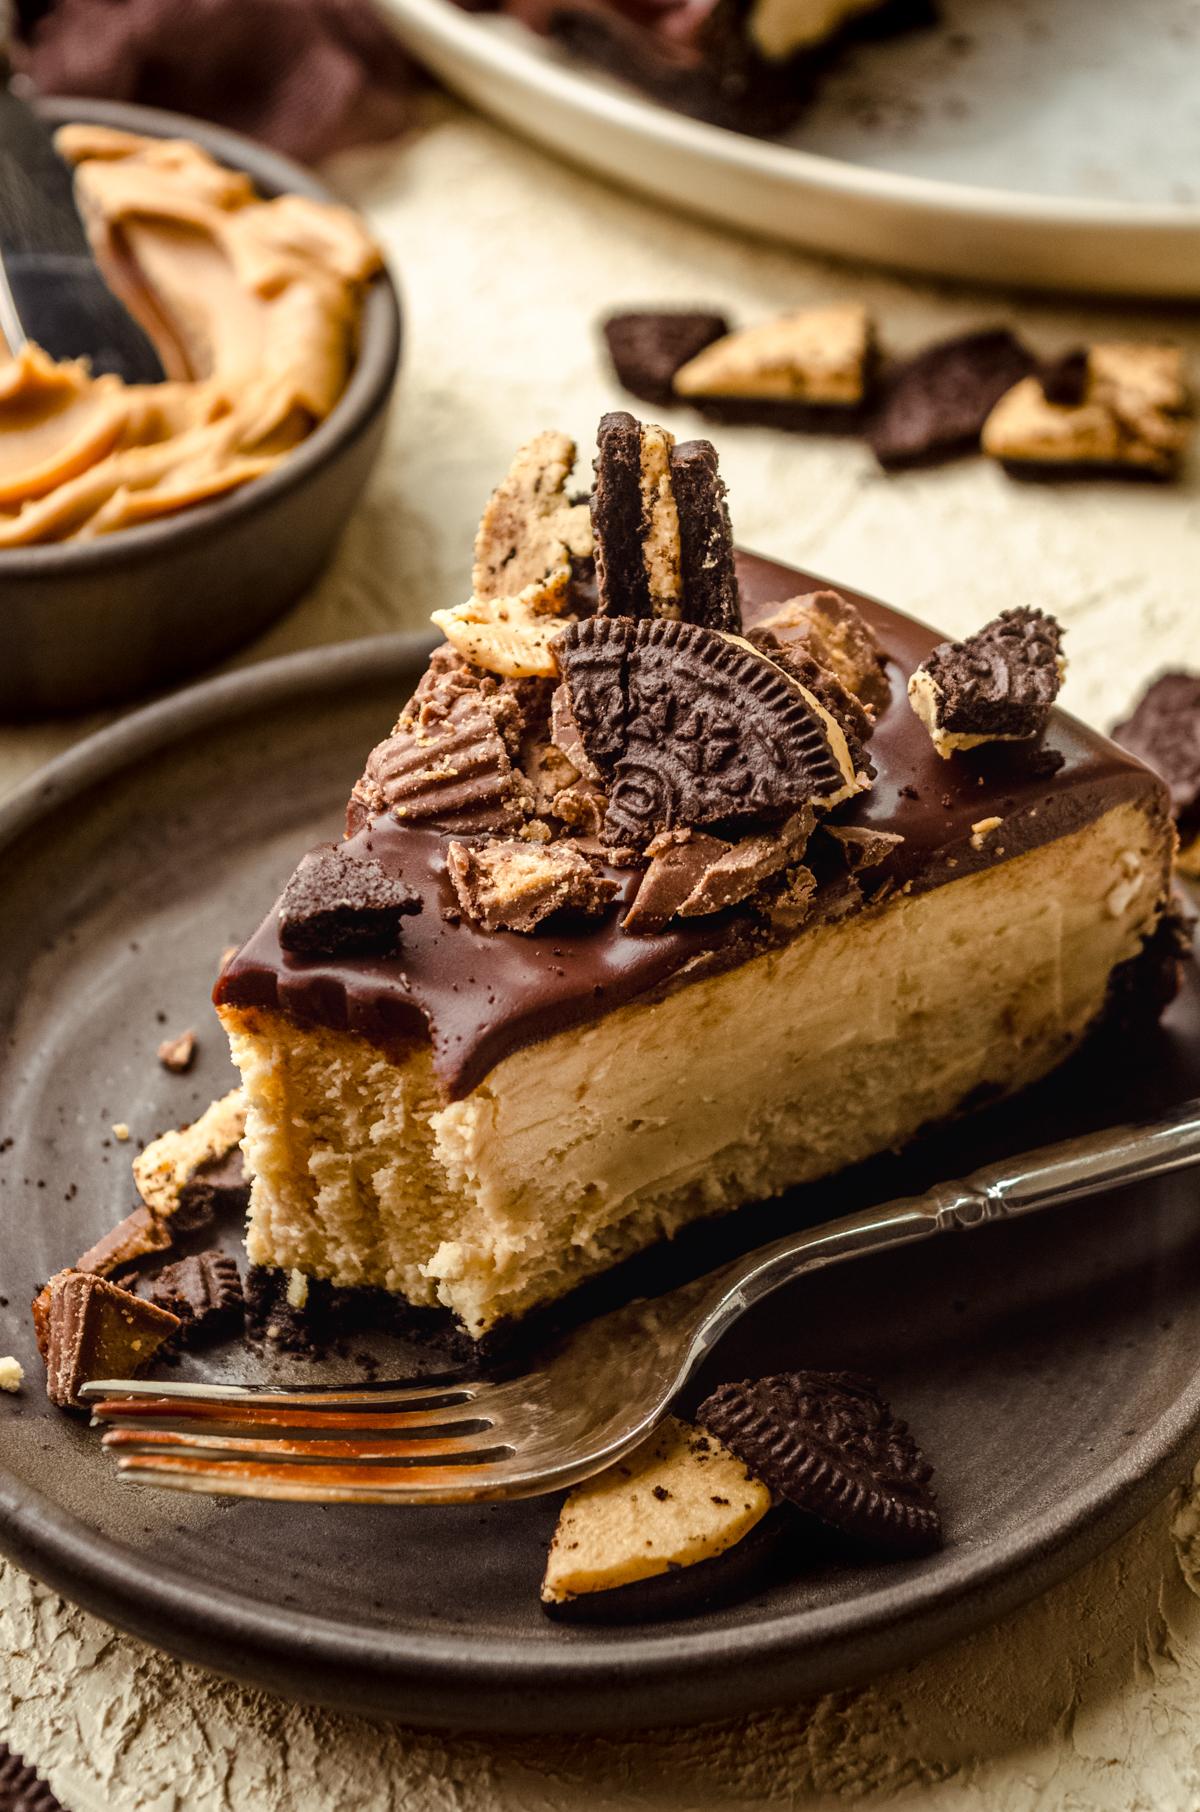
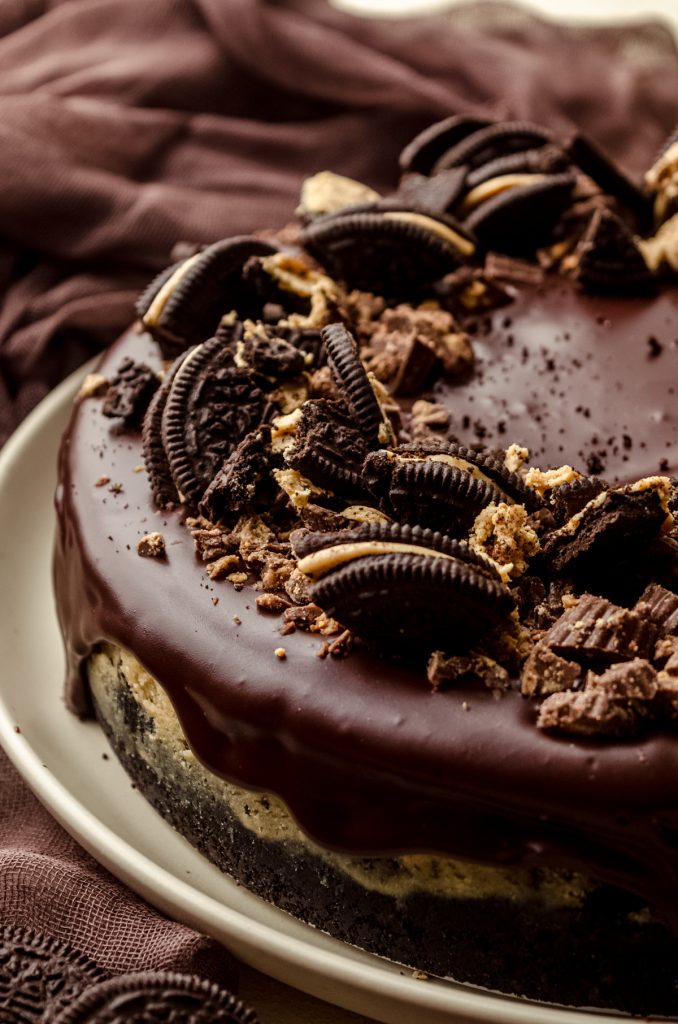
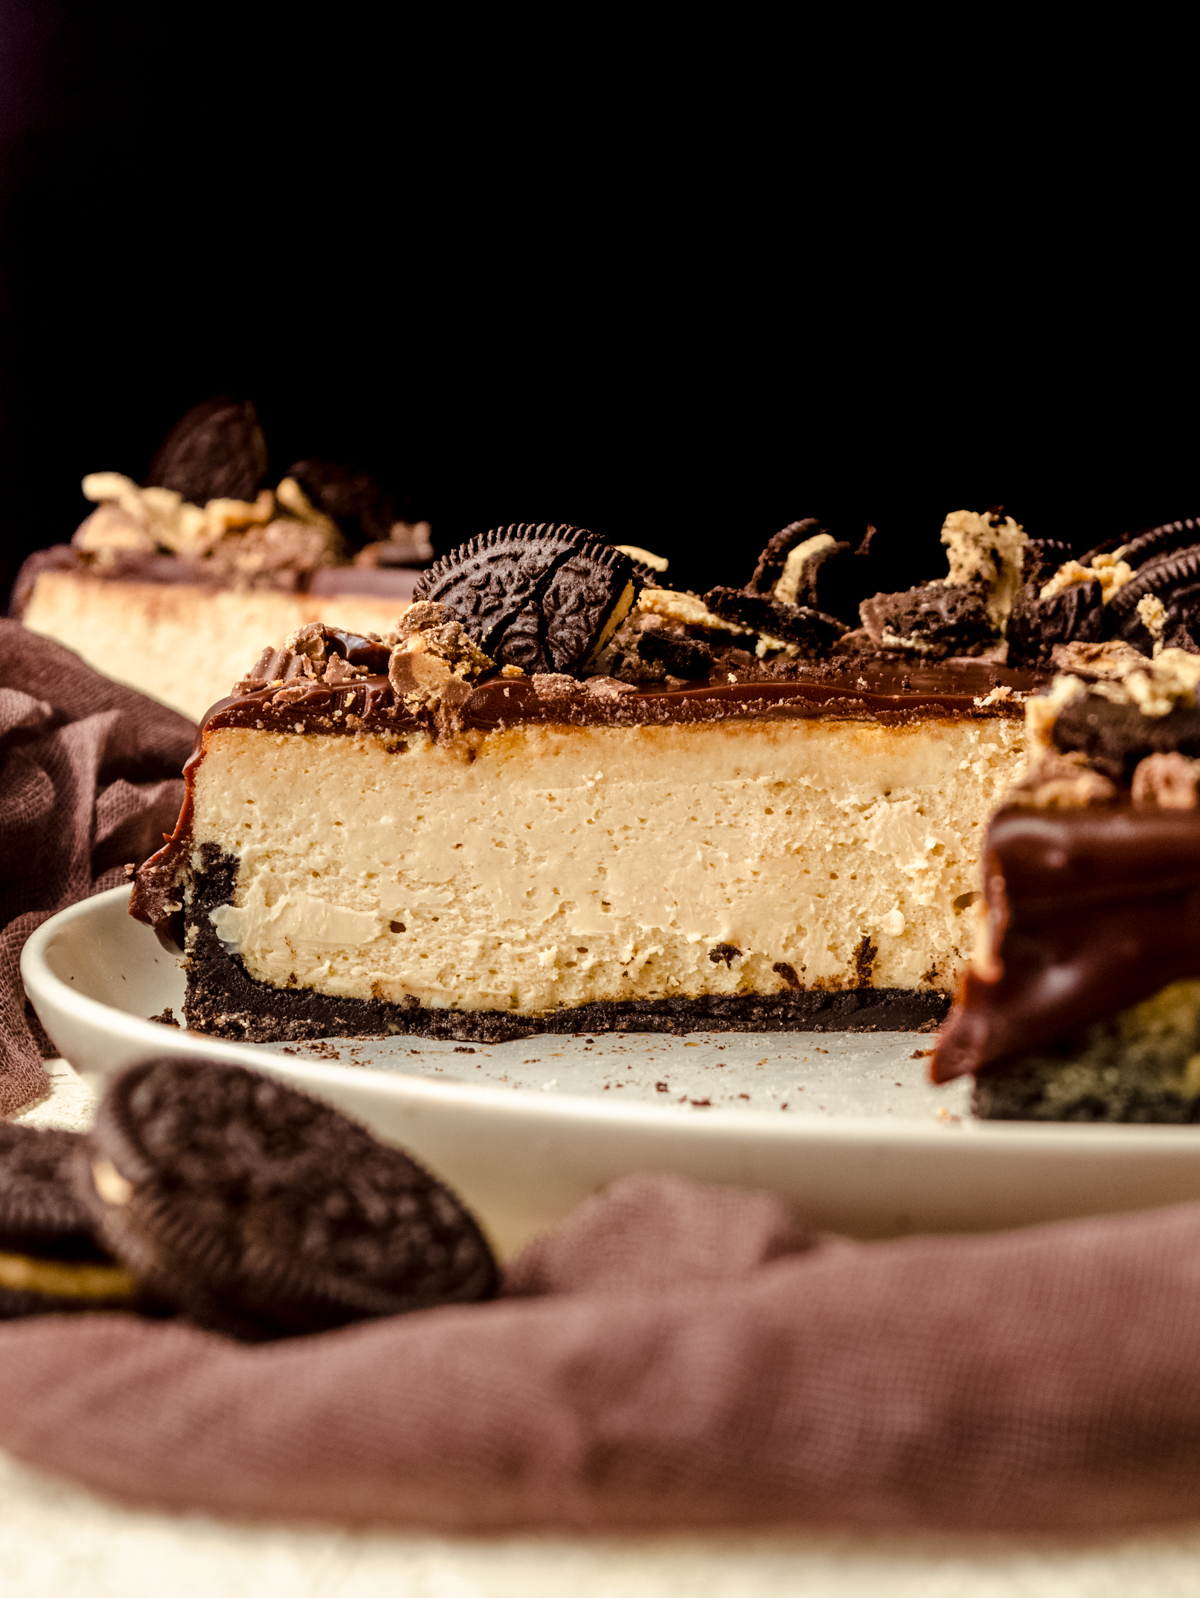
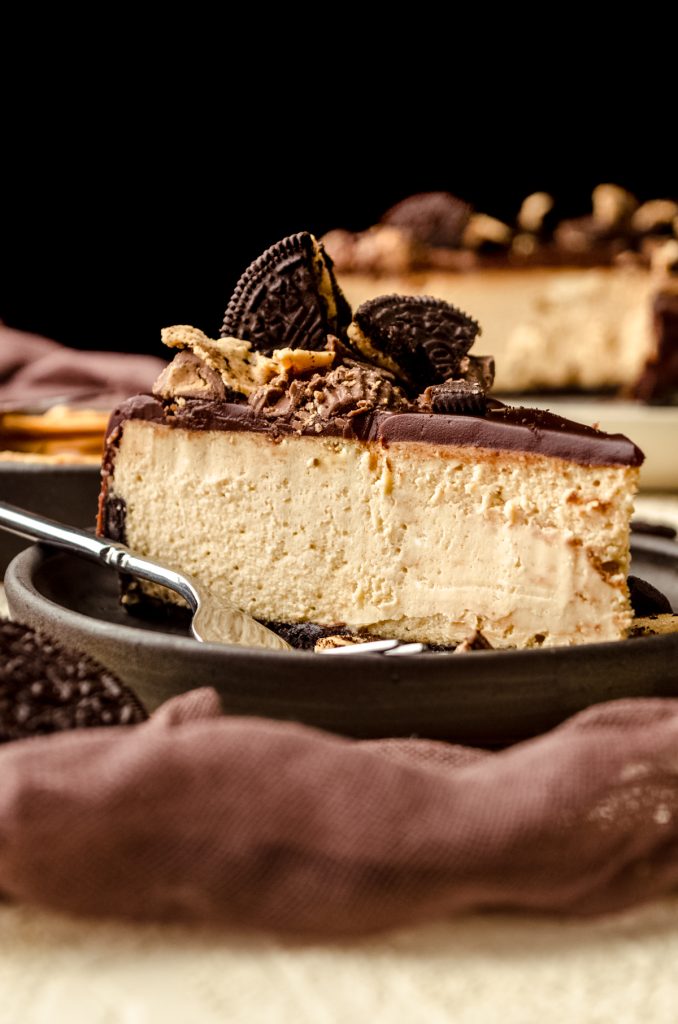
This ultra creamy peanut butter cheesecake topped with smooth chocolate ganache sits atop a peanut butter Oreo crust and gets finished with a topping of chopped peanut butter cups. Chocolate peanut butter lovers, this one is for you! Use my no-foil method to make the easiest cheesecake water bath.
The BEST Peanut Butter Cheesecake
Before creating a category of cheesecake recipes bursting with fun flavors, it was imperative that I nail down a solid basic cheesecake recipe to build upon. After several iterations of cheesecake, I finally landed on my go-to cheesecake recipe that is simple, easy, and the best cheesecake I’ve ever had.
My combination of ingredients and methods in the kitchen always yield me a rich, creamy, and smooth texture, so you can bet that any variation on this theme delivers the same silky smooth bite, is bursting with flavor, but still stays true to the tanginess you love about basic cheesecake.
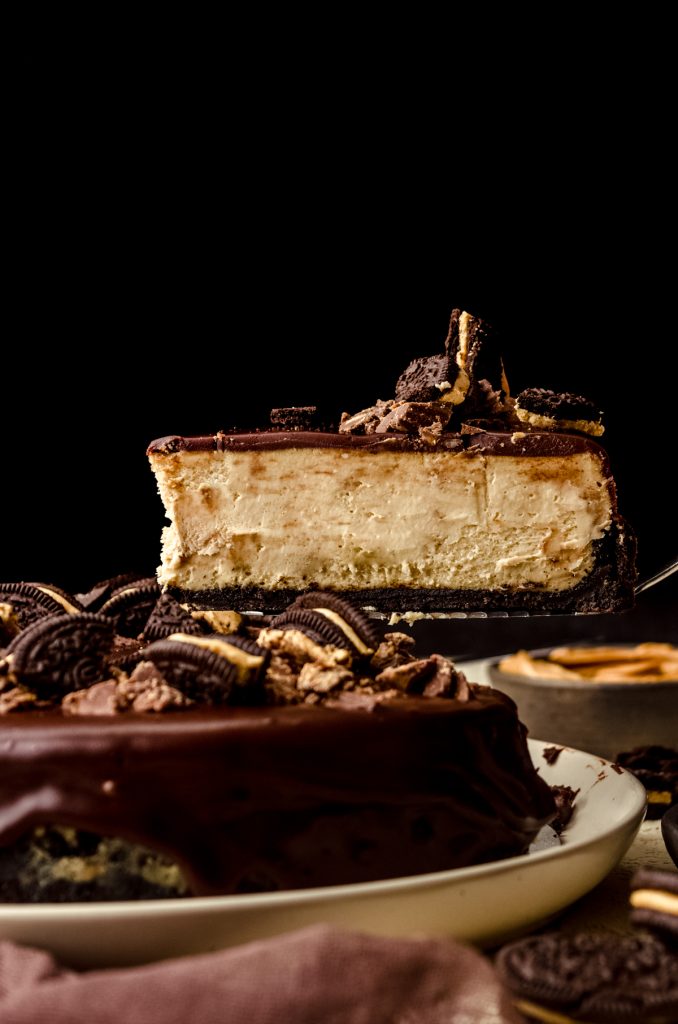
Below you’ll find thorough and clear instructions for exactly how to make this peanut butter chocolate cheesecake recipe, so be sure you’re paying attention. Preparing the ingredients is the first key to success, treating the batter with care follows right after, and baking and cooling the cheesecake is the last strategic move. If you do these things, you’ll be rewarded with an ultra creamy, evenly baked, and crack-free peanut butter cheesecake that’s enrobed in a silky smooth chocolate ganache.
This cheesecake is fit for any chocolate + peanut butter lover with plenty of room for peanut butter cups, peanut butter Oreos, a peanut butter drizzle, chocolate chips, peanut butter chips, chopped peanuts… Go wild. There is no shortage of chocolate peanut butter love in this decadent dessert!
Peanut Butter Cheesecake Recipe Ingredients
This peanut butter cup cheesecake delivers mega flavor, but simple ingredients only! You’ll see that this cheesecake is almost identical to my classic cheesecake recipe, but the addition of peanut butter and a strategic crust and topping make it something really epic.
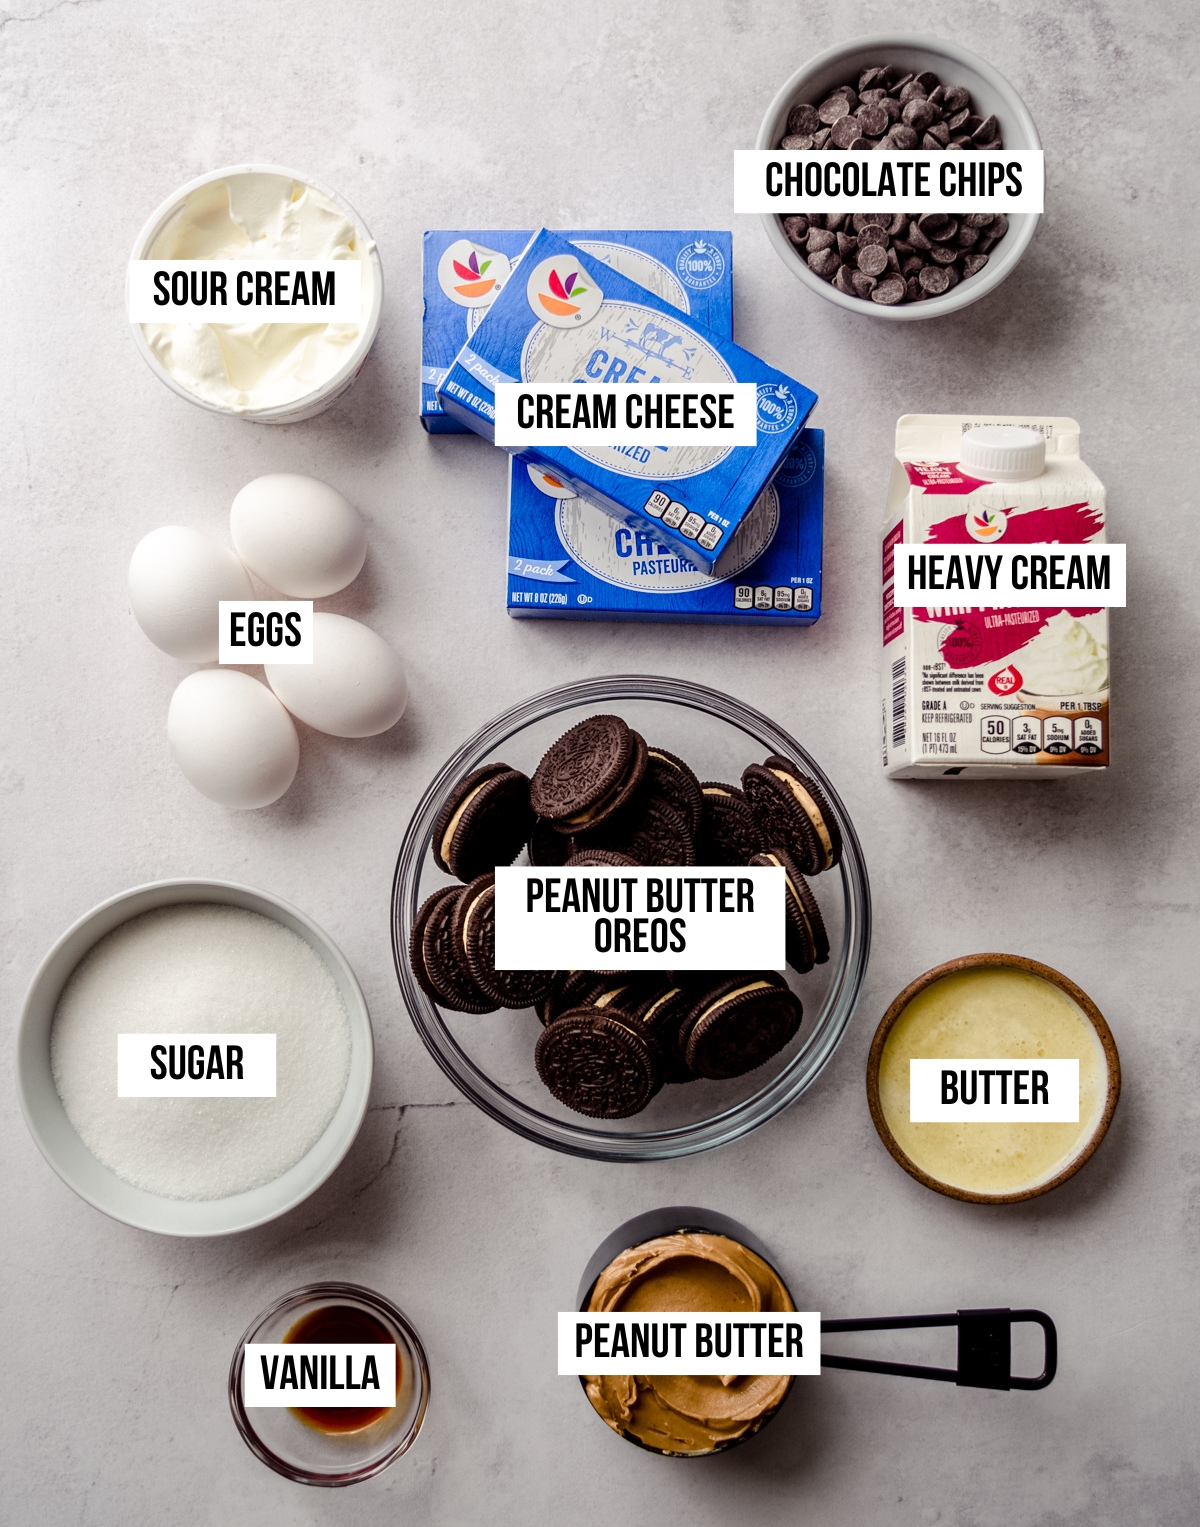
Here’s what you’ll need:
FULL FAT BLOCK CREAM CHEESE: we’re using one fewer brick of cream cheese in this cheesecake recipe as compared to my other recipes and replacing that fourth brick with peanut butter (one whole delicious cup!). You will want to make sure these are full fat blocks/bricks and nothing “whipped” or anything that comes in a tub (no spreads).
GRANULATED SUGAR: just 1 cup is the perfect amount of sweetness to balance the tanginess and peanut butter flavor.
SOUR CREAM: you’ll want to be sure you’re using full fat sour cream here which will ensure a sturdy, rich, and luxurious filling.
VANILLA EXTRACT: despite the peanut butter-forward peanut butter filling, vanilla is still necessary for balance and complement of flavor. Yes, a whole Tablespoon.
CREAMY PEANUT BUTTER: you’ll want to make sure you’re using commercial peanut butter and not a a natural style. If you want to use natural peanut butter, be sure you’re using the “no stir” kind. I have not tested this recipe with crunchy peanut butter, but it should work just fine if you’re looking for extra texture!
EGGS: I eliminated the additional 2 egg yolks from my previous cheesecake recipes because it felt unnecessary once I increased the sour cream. The eggs, however, may be the most crucial ingredient as overmixing them into the batter is the best way to add too much air, resulting in a cracked and/or deflated cheesecake. More on this in a bit.
IMPORTANT INGREDIENT NOTE
ALL INGREDIENTS AT ROOM TEMPERATURE: I cannot stress enough how important it is that you have room temperature ingredients. This will allow your batter to blend together easily, staying nice and smooth, so there is no need to overbeat the mixture. I usually let my ingredients sit out for at least 1 hour but closer to 2 hours to insure they are absolutely at room temperature with zero chill. Using cold ingredients WILL yield a lumpy cheesecake. Creamy cheesecake only, please. Let those ingredients sit out!
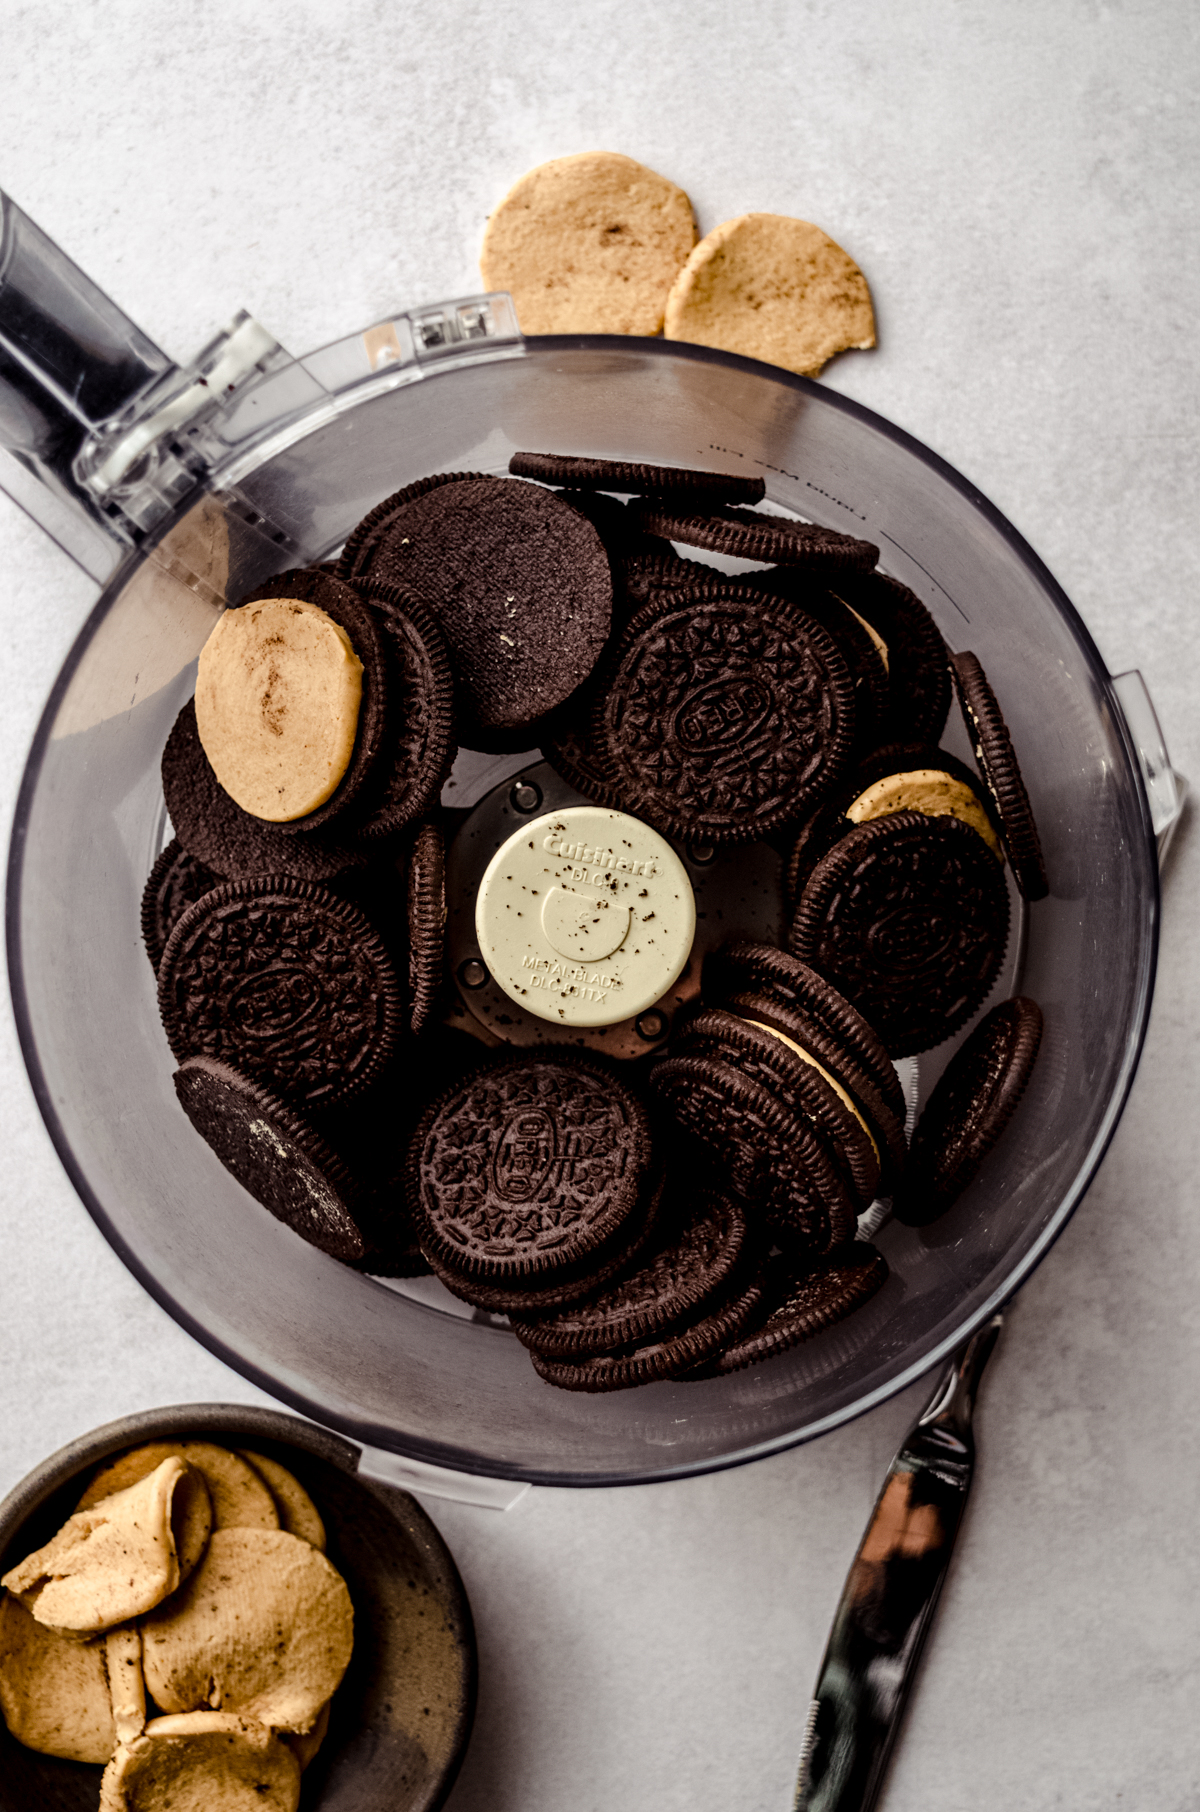
USE A PEANUT BUTTER OREO COOKIE CRUST
We’re ditching the traditional graham cracker crust for this cheesecake since we’re focusing on chocolate + peanut butter. Using peanut butter Oreos is a fun way to incorporate both flavors into yet another element of the cheesecake.
We’ll use the formulation for my traditional Oreo crust, but here’s the kicker: since peanut butter Oreos have more filling than regular Oreos, you’ll want to remove the filling from about half of the Oreos to avoid excess oil.
When I use a flavored Oreo or one that is “Double Stuf” or larger, removing some of the filling prevents an overly-oily feeling and avoids an excessively weepy crust in the oven.
Here’s what you need for the crust:
OREO CRUMBS: you can use regular Oreos or peanut butter flavor. Bonus: if you want to use gluten free Oreos, this cheesecake will stay gluten free!
MELTED BUTTER: butter helps “glue” the whole crust together and brings a deliciously buttery flavor to every bite of cheesecake.
CHOCOLATE GANACHE TOPPING
This is the same simple chocolate ganache that tops my beloved mint chocolate cheesecake and my s’mores cheesecake. It’s a basic topping that delivers big on flavor and texture. Of course, you can leave it off if you prefer.
SEMI-SWEET CHOCOLATE CHIPS: despite the fancy sounding word “ganache,” no need to use special chocolate to make it. Of course, you can use chopped chocolate if you wish, but ganache works perfectly with chips.
HEAVY CREAM: heated cream will melt the chocolate chips to a smooth consistency perfect for topping cheesecakes.
HOW TO MAKE CHOCOLATE PEANUT BUTTER CHEESECAKE
STEP #1
Start by making your Oreo crust, then pre-baking the crust so it’s nice and sturdy for the filling.
STEP #2
While the crust bakes and cools, prepare the filling by beating the cream cheese on medium high speed until smooth, about 2 minutes. Next, add the granulated sugar then beat again until combined, about another 2 minutes.
STEP #3
Reduce the mixer speed to low (very important step— remember we don’t want to incorporate extra air!), then add the sour cream and vanilla and mix until completely combined.
STEP #4
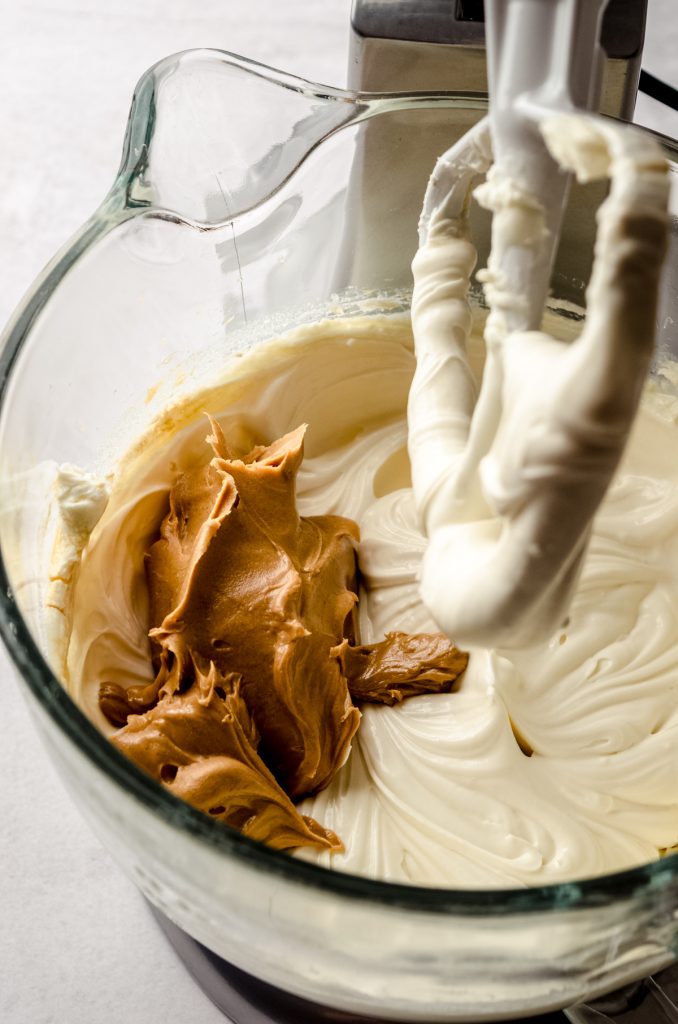
Add the peanut butter, then beat again on low until completely combined.

STEP #5
Add the eggs one at a time, mixing after the addition of each egg and adding the next just after the previous egg starts to incorporate, and continue mixing on low (again, emphasis in low) until there are no more yellow yolk streaks.
STEP #6
Use a large spatula to carefully fold the batter together, scraping the bottom of the bowl and the sides to gather any extra batter that may not be fully incorporated. Sometimes I need to use the mixer again, but be sure to keep it on low. Your batter should be smooth and creamy without lumps. Some small lumps are fine (like the ones you see below).
STEP #7
Pour the batter into the prepared pan then create your water bath for baking.
BAKE THE CHEESECAKE LOW AND SLOW: NO FOIL WATER BATH
Since there is nothing in a cheesecake to make it rise like baked goods, we rely on a humid environment to to create steam to lift the cheesecake. You’ll see the baking time is somewhere near an hour and a half, which means this is a low and slow process. Using a water bath insures your cheesecake bakes evenly, reducing the risk of surface cracks on the top of the cheesecake as well as deflation.
Create a water bath by placing the 9″ springform pan in a slightly larger round pan (I like to use a 10″ cake pan) and then place that pan into an even larger round pan (I like to use a 12″ cake pan) or roasting pan.
Fill the outer pan with hot water halfway up the sides of the middle pan, then carefully transfer the whole thing to the oven. You can also assemble the pans in the oven, but work quickly so as not to let too much hot air out of the oven.
Here is a cake pan bundle that includes both of the larger size pans I use for my water bath.
ADD THE GANACHE
STEP #8
Remove the cheesecake from the fridge and use a spatula or butter knife to gently loosen the crust from the side of the pan, then release the outer ring of the springform pan.
STEP #9
Pour the chocolate chips into a medium-size bowl.
STEP #10
Heat the heavy cream in a microwave-safe measuring cup or in a saucepan over medium-high heat on the stove, and heat until it just starts to bubble before boiling.
STEP #11
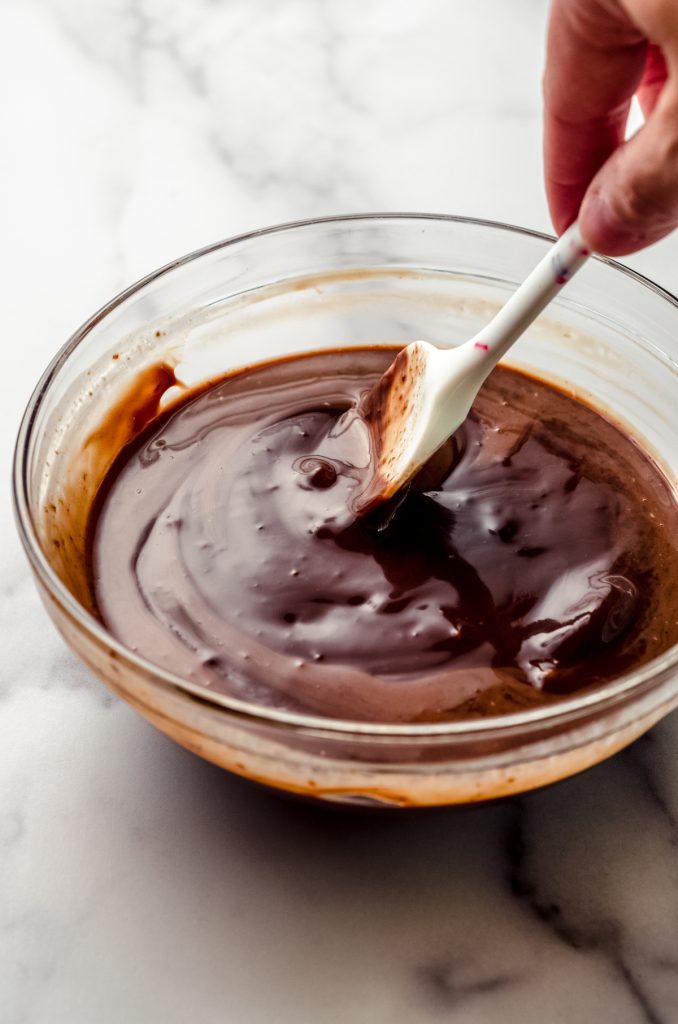
Carefully pour the hot cream over the chocolate chips, then allow to sit for 1 minute.
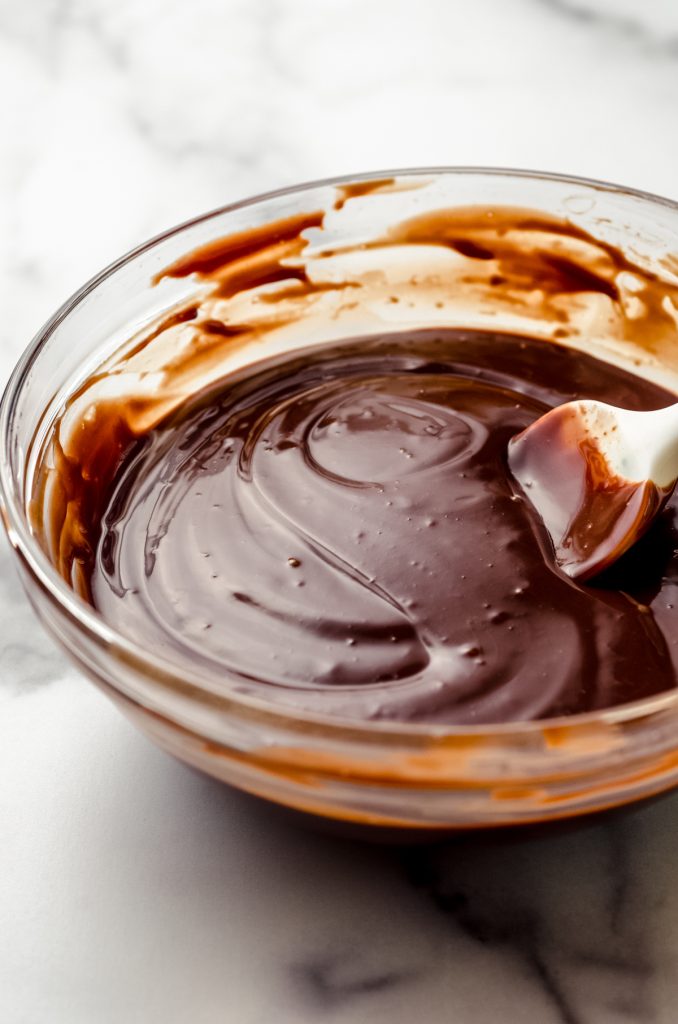
STEP #12
Using a large spatula, gently stir the chocolate chips (which have started to melt significantly) and the cream to mix. Continue mixing until you have a smooth and glossy mixture. Allow the ganache to cool for about 5 minutes before adding it to the cheesecake.

STEP #13
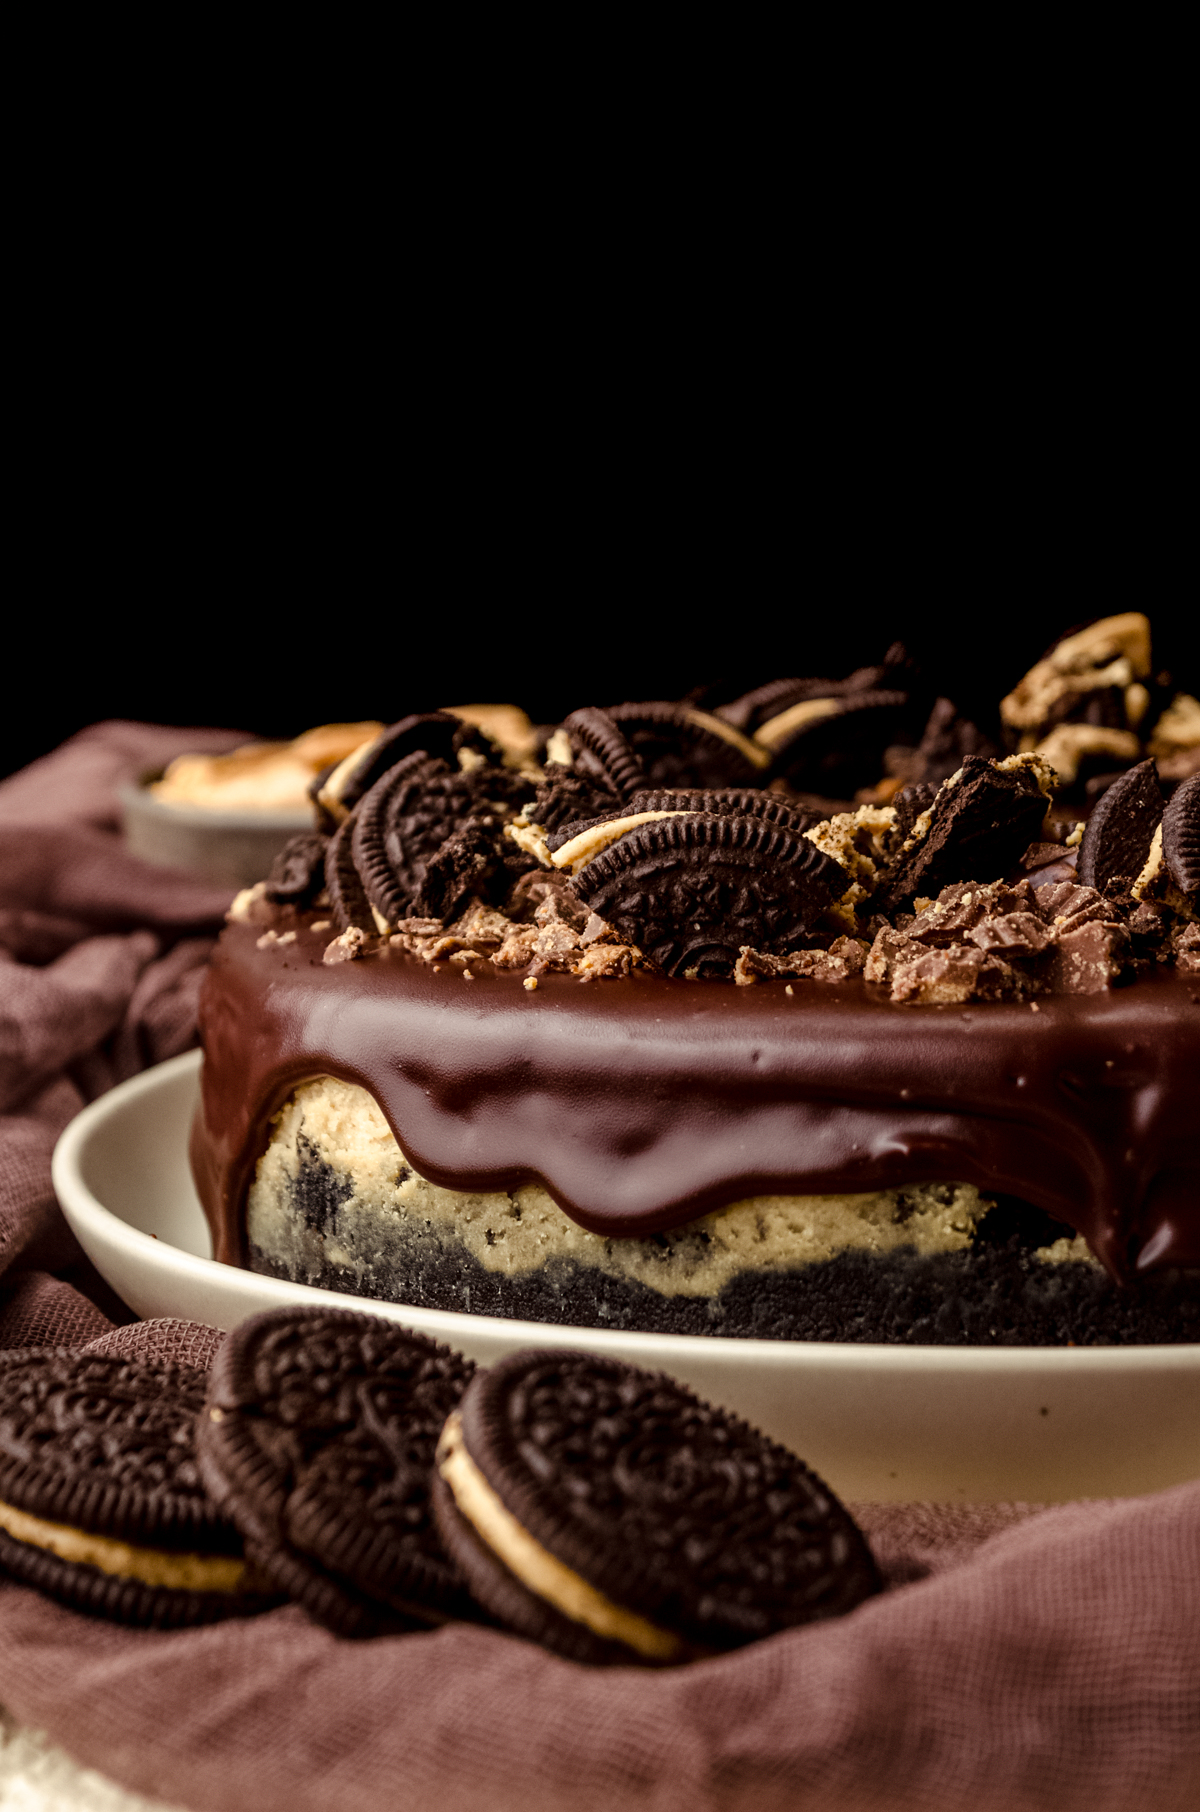
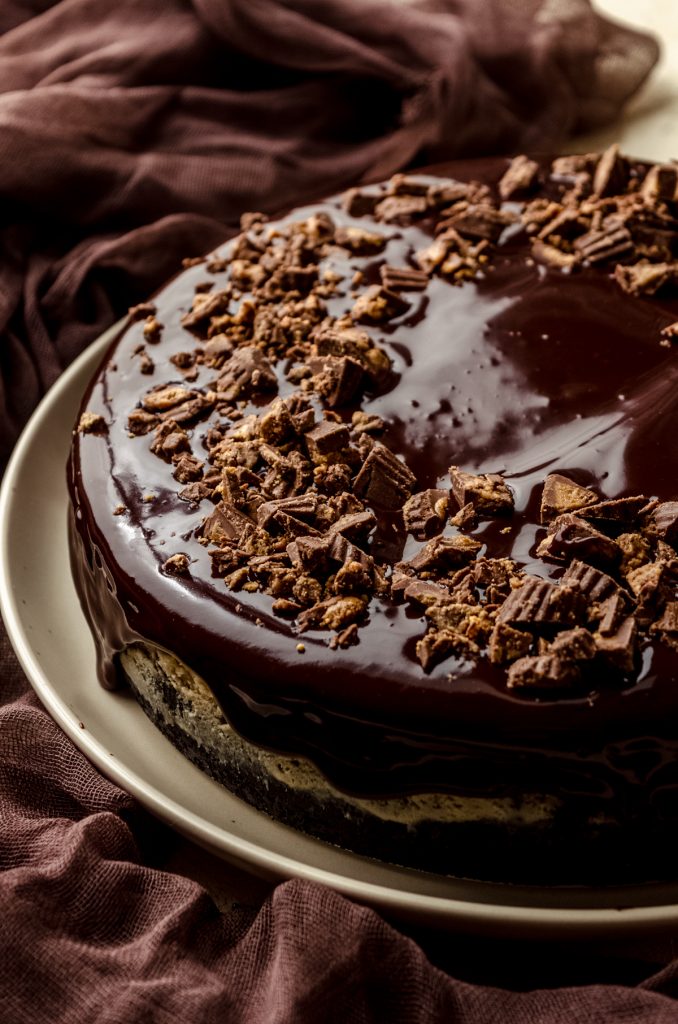
When your ganache has cooled a bit, carefully pour it onto the top of your cheesecake. Use an offset spatula or the back of a spoon to spread the ganache evenly over the top of the cheesecake. You can let it drip down the sides for aesthetics or let it all stay on the top to create a thick layer of ganache. Add chopped peanut butter cups and/or more Oreos, or feel free to just leave the ganache solo.
I prefer to add the peanut butter cups while the ganache is still wet and the Oreo chunks after it has set.
Peanut Butter Chocolate Cheesecake Tips
Be sure you’ve read through my instructions thoroughly before beginning your cheesecake journey. To summarize the key points, try to remember these 5 success tips for the perfect cheesecake while you’re working through the recipe.
DO NOT OVERMIX THE BATTER: after adding the sour cream and vanilla, stick to the “low” setting on your mixer. There is no need to rush this process.
BAKE IN A WATER BATH: at the very minimum, place a large roasting pan with hot water in it on the rack below the one that has your cheesecake on it. For best results, create a no-foil water bath like I outlined in the recipe.
DO NOT OPEN THE OVEN DOOR: I know. It’s very tempting to check in on your cheesecake. Try to resist that temptation and use your oven light to see how it’s doing. Allowing the hot air to escape can drastically change the temperature inside your oven, resulting in uneven baking of your cheesecake.
COOL IN THE OVEN INITIALLY: allowing the cheesecake to cool alongside the gradually cooling oven will insure a slow and even settling of the cheesecake filling.
COOL AT ROOM TEMPERATURE BEFORE CHILLING: do not go from the slightly warm oven to the refrigerator. Remember, we want gradual temperature changes for our baked cheesecake.
How to store Peanut Butter Cheesecake
Store this cheesecake covered tightly in the refrigerator, taking extra care to cover any exposed edges as this will dry out the filling.
CAN I FREEZE CHEESECAKE?
Yes, you can freeze cheesecake up to 3 months. I recommend leaving off any cookie topping as it will get soggy. Thaw your frozen cheesecake in the refrigerator overnight.
Here are some tips for freezing your cheesecake.
COUNTER TO FREEZER: there is no need to chill your cheesecake in the refrigerator before freezing it. Just wrap it tightly from the counter and pop it in the freezer.
PLATFORM OR NO PLATFORM: it doesn’t matter if you freeze your cheesecake still on the springform pan platform or off of it. Just keep in mind… If you only have one cheesecake pan, make sure you won’t need it before you’re ready to thaw your cheesecake!
CAN I USE THIS RECIPE TO MAKE A SMALLER CHEESECAKE?
You can make this exact cheesecake recipe in a 6″ springform pan or 7.5″ springform pan. Simply halve the recipe (for the crust and the filling). Bake time will be about 60-70 minutes. You can reduce the sizes of the water bath pans to 8″ round and 10″ round sizes or use the same ones I have linked here.
If you’d like to make this cheesecake in the Instant Pot, use my Instant Pot cheesecake recipe.

Chocolate Peanut Butter Cheesecake Recipe
Ingredients
OREO CRUST
- 20 peanut butter Oreos1 regular are fine (see note1)
- ¼ cup (57g) unsalted butter melted
PEANUT BUTTER CHEESECAKE
- 32 ounces (900g) full fat block cream cheese completely softened to room temperature2
- 1 cup (200g) granulated sugar
- 8 ounces (226g) full fat sour cream about 1 scant cup; at room temperature2
- 1 Tablespoon vanilla extract
- 1 cup (256g) creamy peanut butter not natural3
- 4 large eggs at room temperature2
CHOCOLATE GANACHE
- 1 cup (170g) semi-sweet chocolate chips
- ½ cup (120mL) heavy whipping cream
- peanut butter cups coarsely chopped; optional
- peanut butter Oreos coarsely chopped; optional
Instructions
OREO CRUST
- Preheat the oven to 325ºF (162ºC). Spray a 9" springform pan or my very favorite Fat Daddio's cheesecake pan with nonstick spray. Set aside.
- In a food processor, crush the Oreos until they become a fine crumb. Pour the Oreo crumbs into a large bowl, then drizzle the melted butter over the cookies and stir until everything is evenly saturated with butter.20 peanut butter Oreos1, ¼ cup (57g) unsalted butter
- Press the Oreo mixture into the bottom of the prepared springform pan, then bake the crust for 10 minutes. Remove from the oven and allow to cool while you prepare the filling.
PEANUT BUTTER CHEESECAKE
- In a large bowl with a handheld mixer or the bowl of a stand mixer fitted with the paddle attachment, beat the cream cheese on medium high speed until smooth, about 2 minutes. Add the granulated sugar then beat again until combined, about another 2 minutes.32 ounces (900g) full fat block cream cheese, 1 cup (200g) granulated sugar
- Reduce the mixer speed to low4, then add the sour cream and vanilla and mix until completely combined.8 ounces (226g) full fat sour cream, 1 Tablespoon vanilla extract
- Add the peanut butter, then beat again on low until completely combined.1 cup (256g) creamy peanut butter
- Add the eggs one at a time, mixing on low after the addition of each egg and adding the next just after the previous egg starts to incorporate, and continue mixing until there are no more yellow yolk streaks.4 large eggs
- Use a large spatula to carefully fold the batter together, scraping the bottom of the bowl and the sides to gather any extra batter that may not be fully incorporated. Sometimes I need to use the mixer again, but be sure to keep it on low. Your batter should be smooth and creamy without lumps.
- Pour the batter into the prepared pan. Create a water bath5 by placing the 9" springform pan in a slightly larger round pan (I like to use a 10" cake pan) and then place that pan into an even larger round pan (I like to use a 12" cake pan) or roasting pan.
- Fill the outer pan with hot water halfway up the sides of the middle pan, then carefully transfer the whole thing to the oven. You can also assemble the pans in the oven, but work quickly so as not to let too much hot air out of the oven.
- Bake the cheesecake for 1 hour 20 minutes to 1 hour 45 minutes. The middle of the cheesecake (a center approximately 2" wide) should jiggle just a little bit. I use my digital instant-read thermometer to check the internal temperature has reached 145ºF (63ºC). Turn the oven off6 and allow the cheesecake to cool in the oven for 1 hour. After 1 hour, remove the springform pan from all of the other pans and allow to cool on a cooling rack for another 2 hours. When the cheesecake is completely cool, cover or wrap tightly and allow to chill in the refrigerator for at least 6 hours, ideally overnight.
CHOCOLATE GANACHE
- Remove the cheesecake from the fridge and use a spatula or butter knife to gently loosen the crust from the side of the pan, then release the outer ring of the springform pan.
- Pour the chocolate chips into a medium-size bowl and set aside.1 cup (170g) semi-sweet chocolate chips
- Heat the heavy cream in a microwave-safe measuring cup or in a saucepan over medium-high heat on the stove, and heat until it just starts to bubble before boiling.½ cup (120mL) heavy whipping cream
- Carefully pour the hot cream over the chocolate chips, then allow to sit for 1 minute.
- Using a large spatula, gently stir the chocolate chips (which have started to melt significantly) and the cream to mix. Continue mixing until you have a smooth and glossy mixture. Allow the ganache to cool for about 5 minutes before adding it to the cheesecake.
- When your ganache has cooled a bit, carefully pour it onto the top of your cheesecake. Use an offset spatula or the back of a spoon to spread the ganache evenly over the top of the cheesecake. You can let it drip down the sides for aesthetics or let it all stay on the top to create a thick layer of ganache.
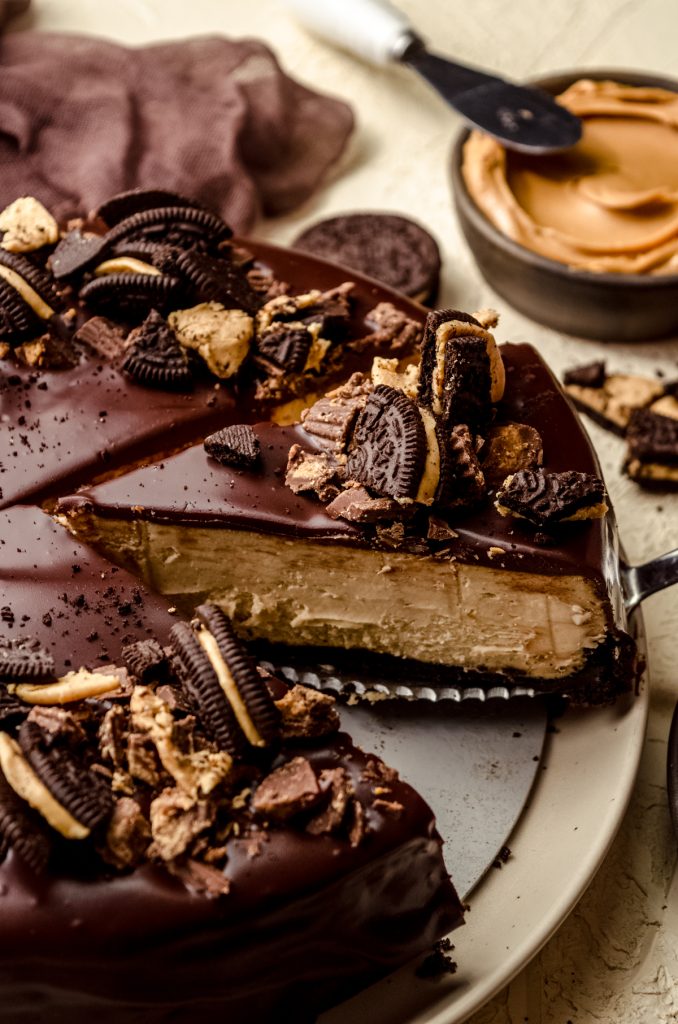
- Top with chopped peanut butter cups and/or peanut butter Oreos, if desired. I prefer to add the peanut butter cups while the ganache is still wet and the Oreo chunks after it has set. Allow ganache to set for at least 15 minutes before serving. Store leftovers covered tightly in the refrigerator up to 5 days. Cheesecake freezes well, up to 3 months. Wrap tightly and thaw in the refrigerator overnight.peanut butter cups, peanut butter Oreos
Notes
- Oreos: peanut butter Oreos have more stuffing than standard Oreos, and extra filling means extra oil. To prevent weeping from melting in the oven, remove and discard the filling from half of the Oreos. If you are using standard size Oreos, you can leave all of the filling intact.
- Room temperature: I cannot stress enough how important it is to have completely room temperature ingredients. This will insure you have the smoothest batter possible. I like to let my ingredients sit out at least 1 hour and sometimes closer to 2 hours before starting my recipe.
- Creamy peanut butter: do not use natural style peanut butter unless it is the “no stir” kind. Too much oil will cause your cheesecake to bake improperly. You can use chunky peanut butter if you want some texture in your cheesecake.
- Mixer speed: it’s important not to go above low (or low-medium) speed after you’ve beaten the cream cheese. Incorporating too much air will create bubbles and potential cracks in your finished cheesecake.
- Water bath pans: here is a bundle that includes all the pans I use. Using this method eliminates the need to wrap anything in foil.
- Cool the cheesecake: I like to prop the oven door open with a wooden spoon or spatula.
- Make a smaller cheesecake: you can make this exact cheesecake recipe in a 6″ springform pan or 7.5″ springform pan. Simply halve the recipe (for the crust and the filling). Bake time will be about 60-70 minutes. You can reduce the sizes of the water bath pans to 8″ round and 10″ round sizes or use the same ones I have linked here.
- Make in the Instant Pot: you can make this exact cheesecake in a smaller size with my Instant Pot cheesecake recipe.
Nutrition Disclosure
All nutritional values are approximate and provided to the reader as a courtesy. Changing ingredients and/or quantities will alter the estimated nutritional calculations.
This cheesecake was DIVINE. I never make cheesecake so I was a little worried I would fail, however it turned out BEAUTIFUL!
Thank you so much, Sarah! I’m so glad it was a success 🙂 and I agree, your photo was BEAUTIFUL! I appreciate you sharing it on Instagram.
I am looking for a Chocolate Peanut Butter Pie Recipe.
Could I use your Chocolate Peanut Butter Cheesecake Recipe to make a Pie?
How would I adjust it to change from Cheesecake to Pie?
Thank You in advance.
I Love Your Fun & Inspiring Site!
Hi, Sandra– I have a no bake peanut butter pie recipe if you’re interested in that one.