
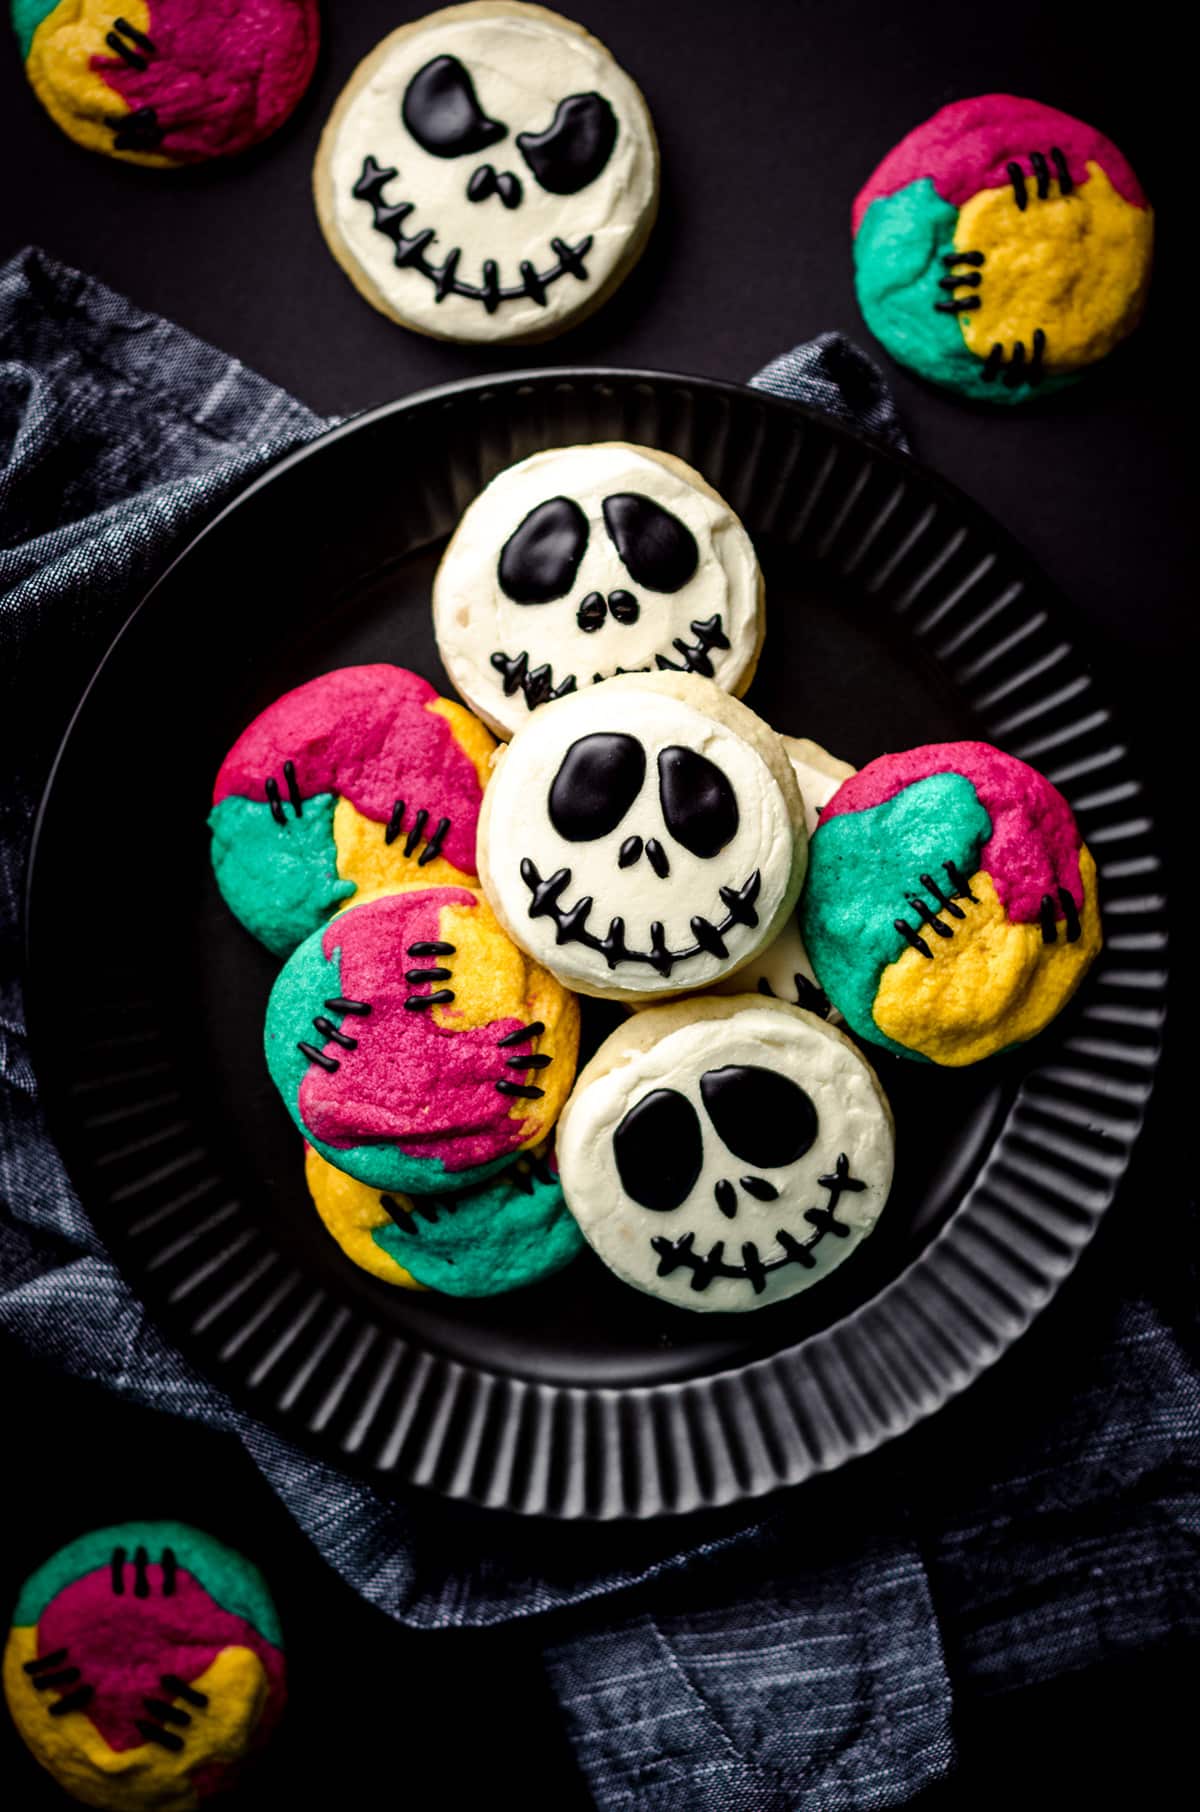
Jack & Sally Sugar Cookies

As an Amazon Associate, I earn from qualifying purchases. Read the full disclosure here.
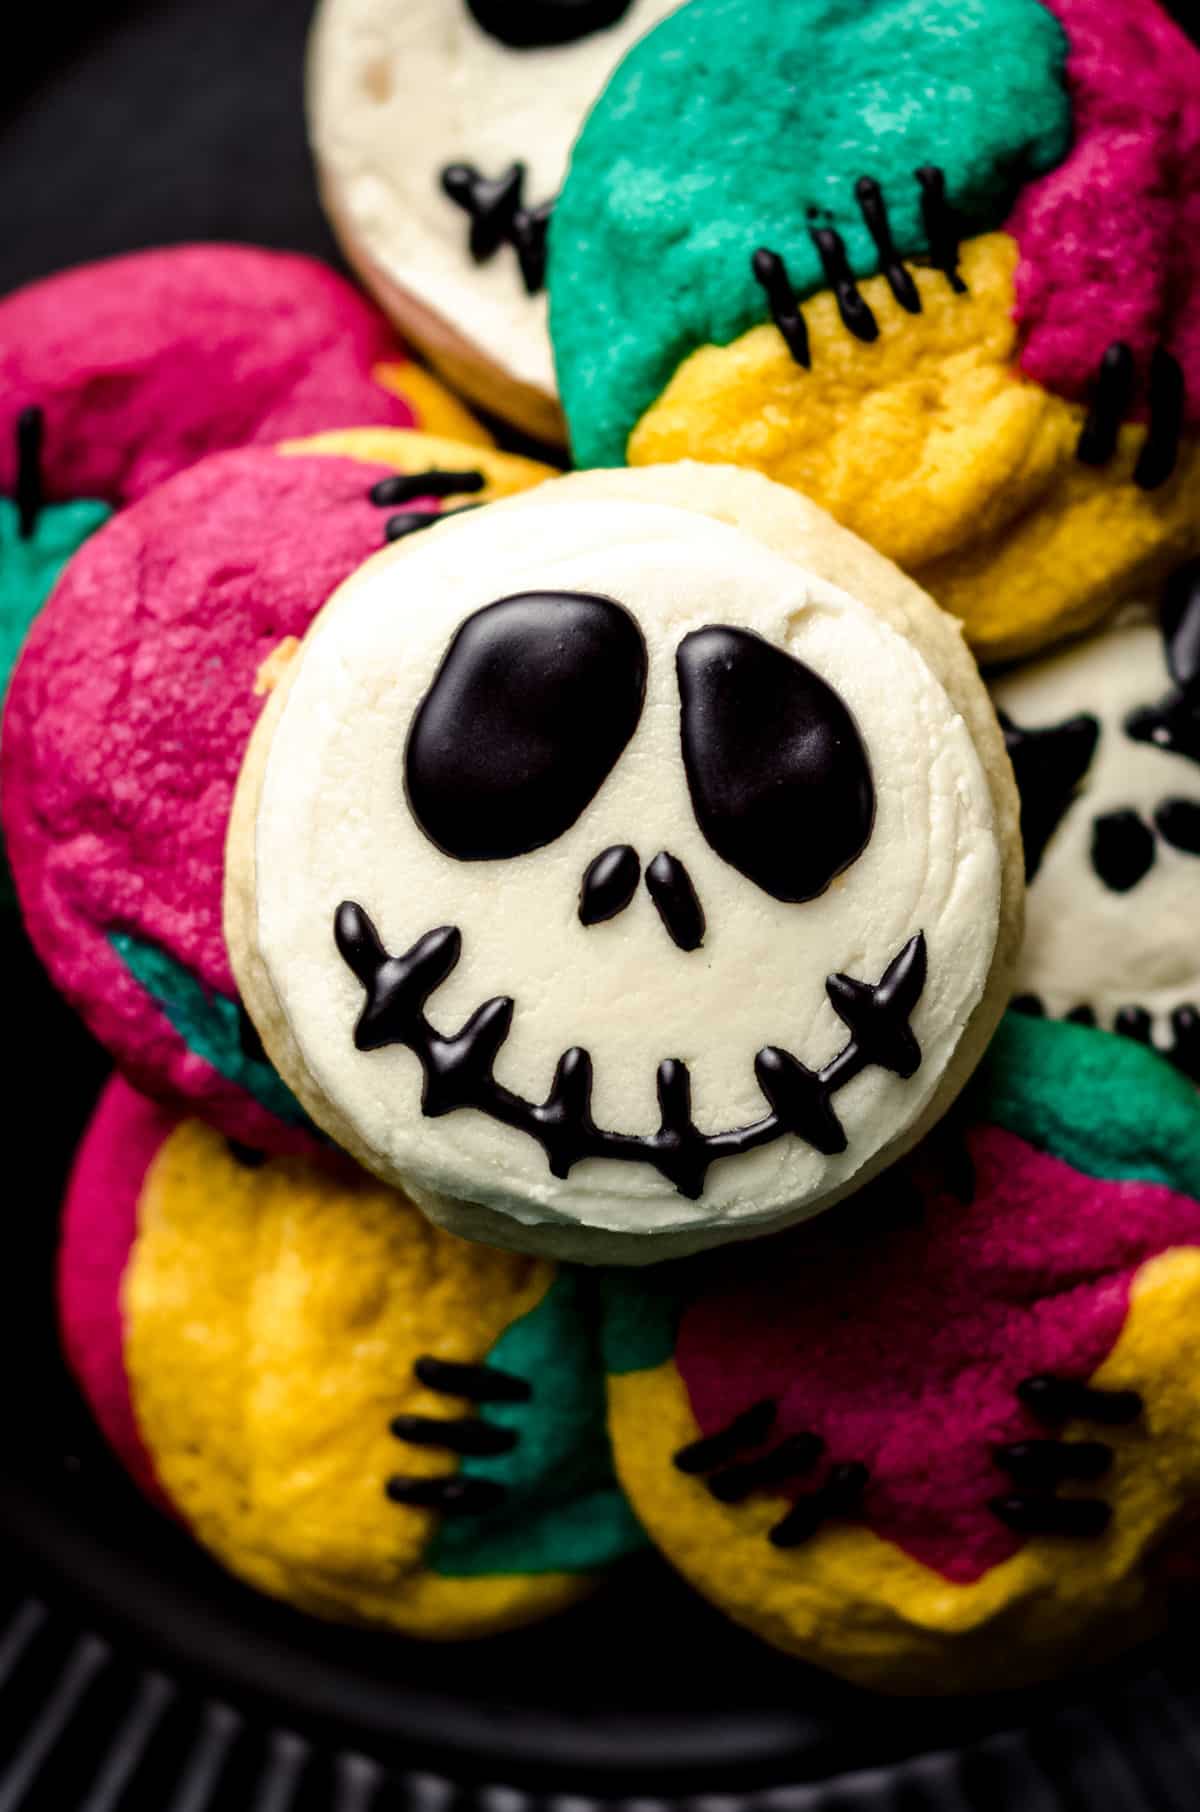
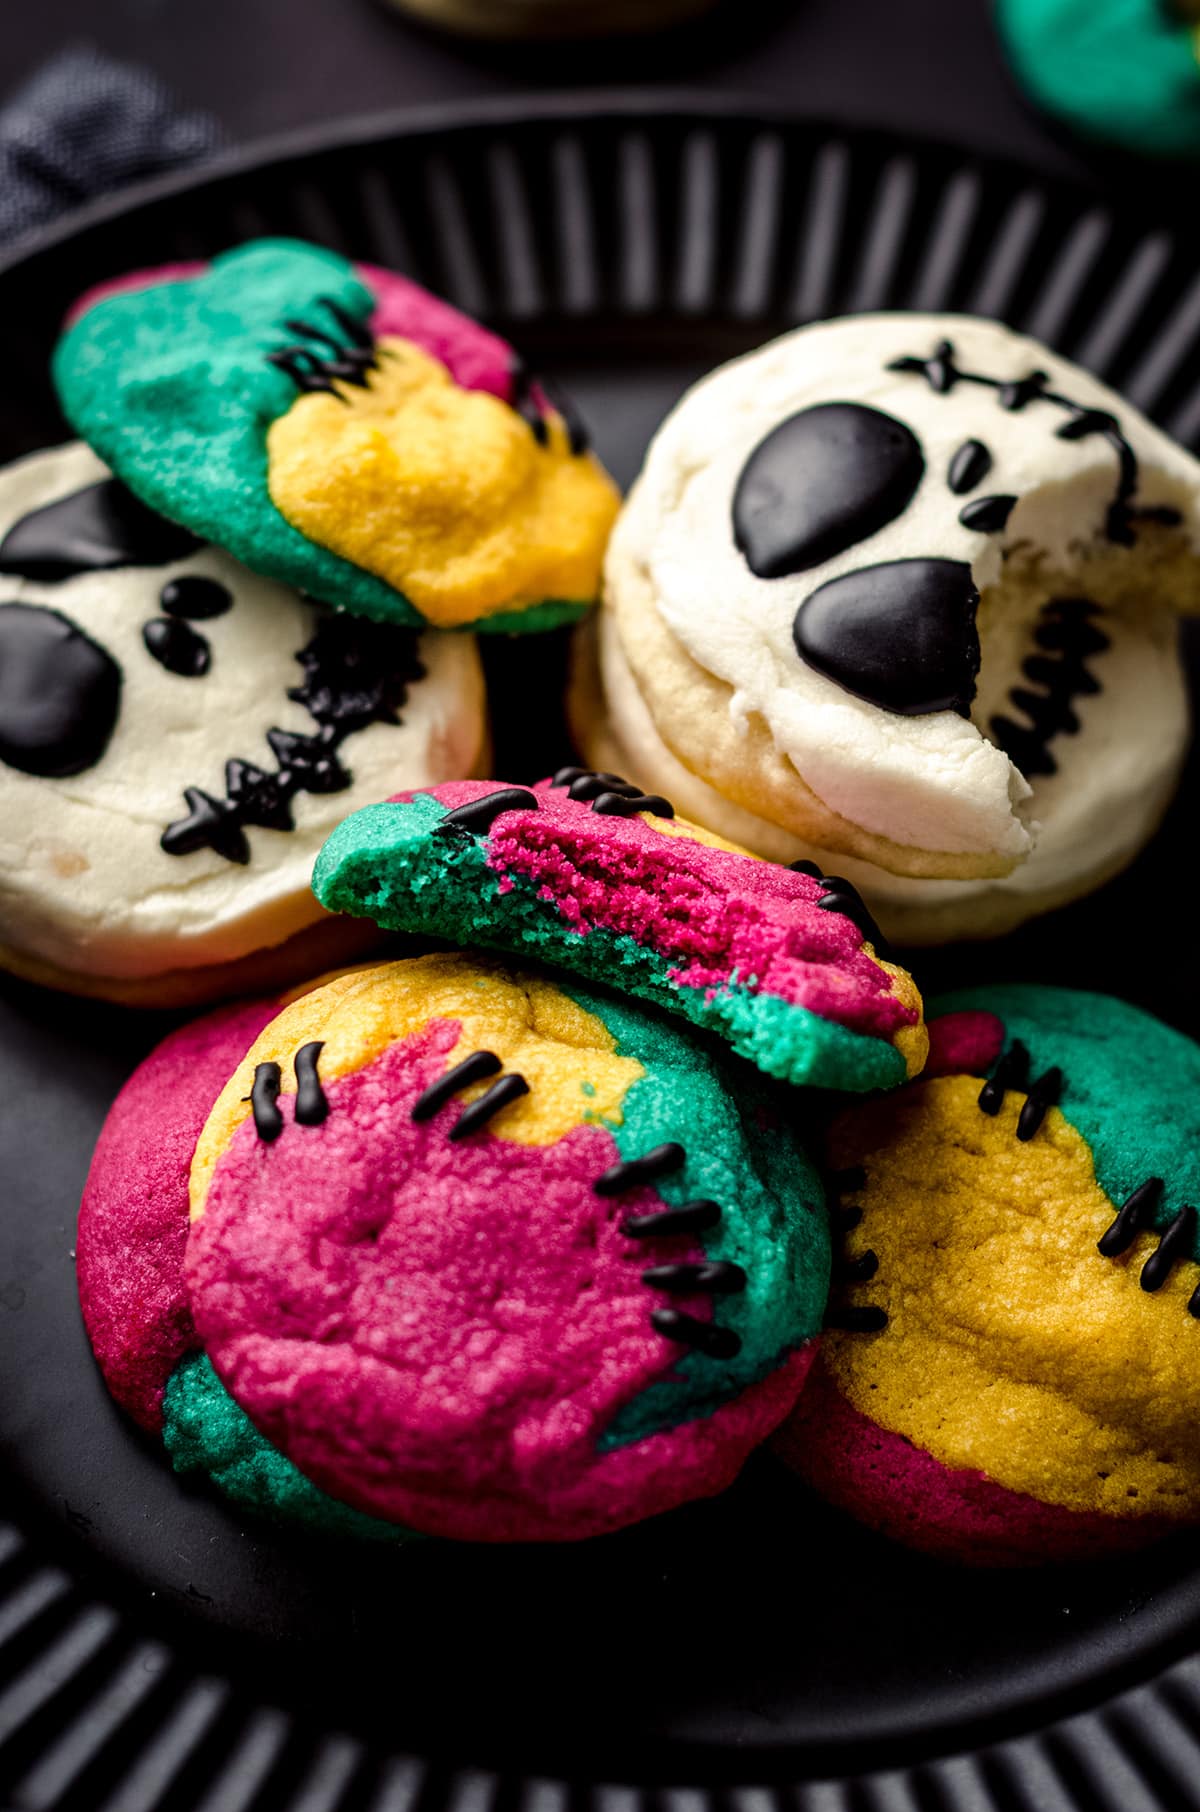
You only need to split ONE batch of cookie dough in half to get both of these adorable Nightmare Before Christmas cookies. Keep the dough as is for the Jack Skellington cookies, then tint the other half three different colors for Sally’s stitched up cookies.
Welcome to 2022’s #HalloweenTreatsWeek, a yearly Halloween blogging event hosted by Angie from Big Bear’s Wife. This event is an online, week-long event that is filled with some amazingly wicked Halloween treats and recipes from some fantastic Halloween-loving bloggers!

For this year’s 5th annual #HalloweenTreatsWeek event we have 20 hauntingly talented bloggers that are sharing their favorite Halloween recipes throughout the week. You can following the hashtag #HalloweenTreatsWeek on social media to collect all of these frightful recipes to use at your own Halloween parties and events!
Be sure to check out all of the fun Halloween recipes that we’re sharing this week down by the recipe card!
I could not let another Halloween season go by without creating some Halloween cookies in the theme of my kids’ favorite Halloween and Christmas movie, The Nightmare Before Christmas.

I will be honest and say that as a kid, I never really watched this movie, but as an adult and parent of kids who love Halloween, I was subjected to multiple showings of it when our older son was 3 and we all fell in love and turned a viewing into an annual Halloween tradition in our house.
The Jack and Sally love story is so sweet and I love how Sally’s subtle ways of showing Jack she cares are just as much gestures of friendship as they are of love, and I like to believe that gives Jack and Sally a solid ground to stand on for their love story to continue.
Am I overthinking this one? Possibly. But I think the story is so charming and these Jack and Sally cookies are the perfect nod to our favorite Halloween and Christmas pair.
INGREDIENTS
This cookie recipe is one you have seen more than once here at FAF. I originally shared it in my super popular (and Insta famous!) vanilla bean sugar cookies and then again with my snickerdoodles (without cream of tartar).
It is a REALLY simple recipe, it requires no chilling of any dough, and the result is perfectly soft and pillowy cookies that are just unreal delish and this will not be the last time you see this recipe as a cookie base.
COOKIE BASE
For these Jack and Sally sugar cookies, you’ll need all-purpose flour, baking powder, baking soda, salt, unsalted butter, powdered sugar, an egg, vegetable oil, and vanilla extract.

You’ll also want some granulated sugar handy because you’ll be touching the cookie dough with your hands, and the sugar will help prevent your fingers from sticking to the dough.
We’ll get to the specifics of that part in a bit.
WHY POWDERED SUGAR?
You might be wondering why I use powdered sugar as the base for these cookies as opposed to granulated sugar. This is the same thing that I do in my cut-out sugar cookies.
Powdered sugar gives the cookie dough a softer texture and leaves the dough far less sticky. It’s a great trick for sugar cookies and it lends well to making these soft vanilla sugar cookies even softer.
SALLY’S COLORS
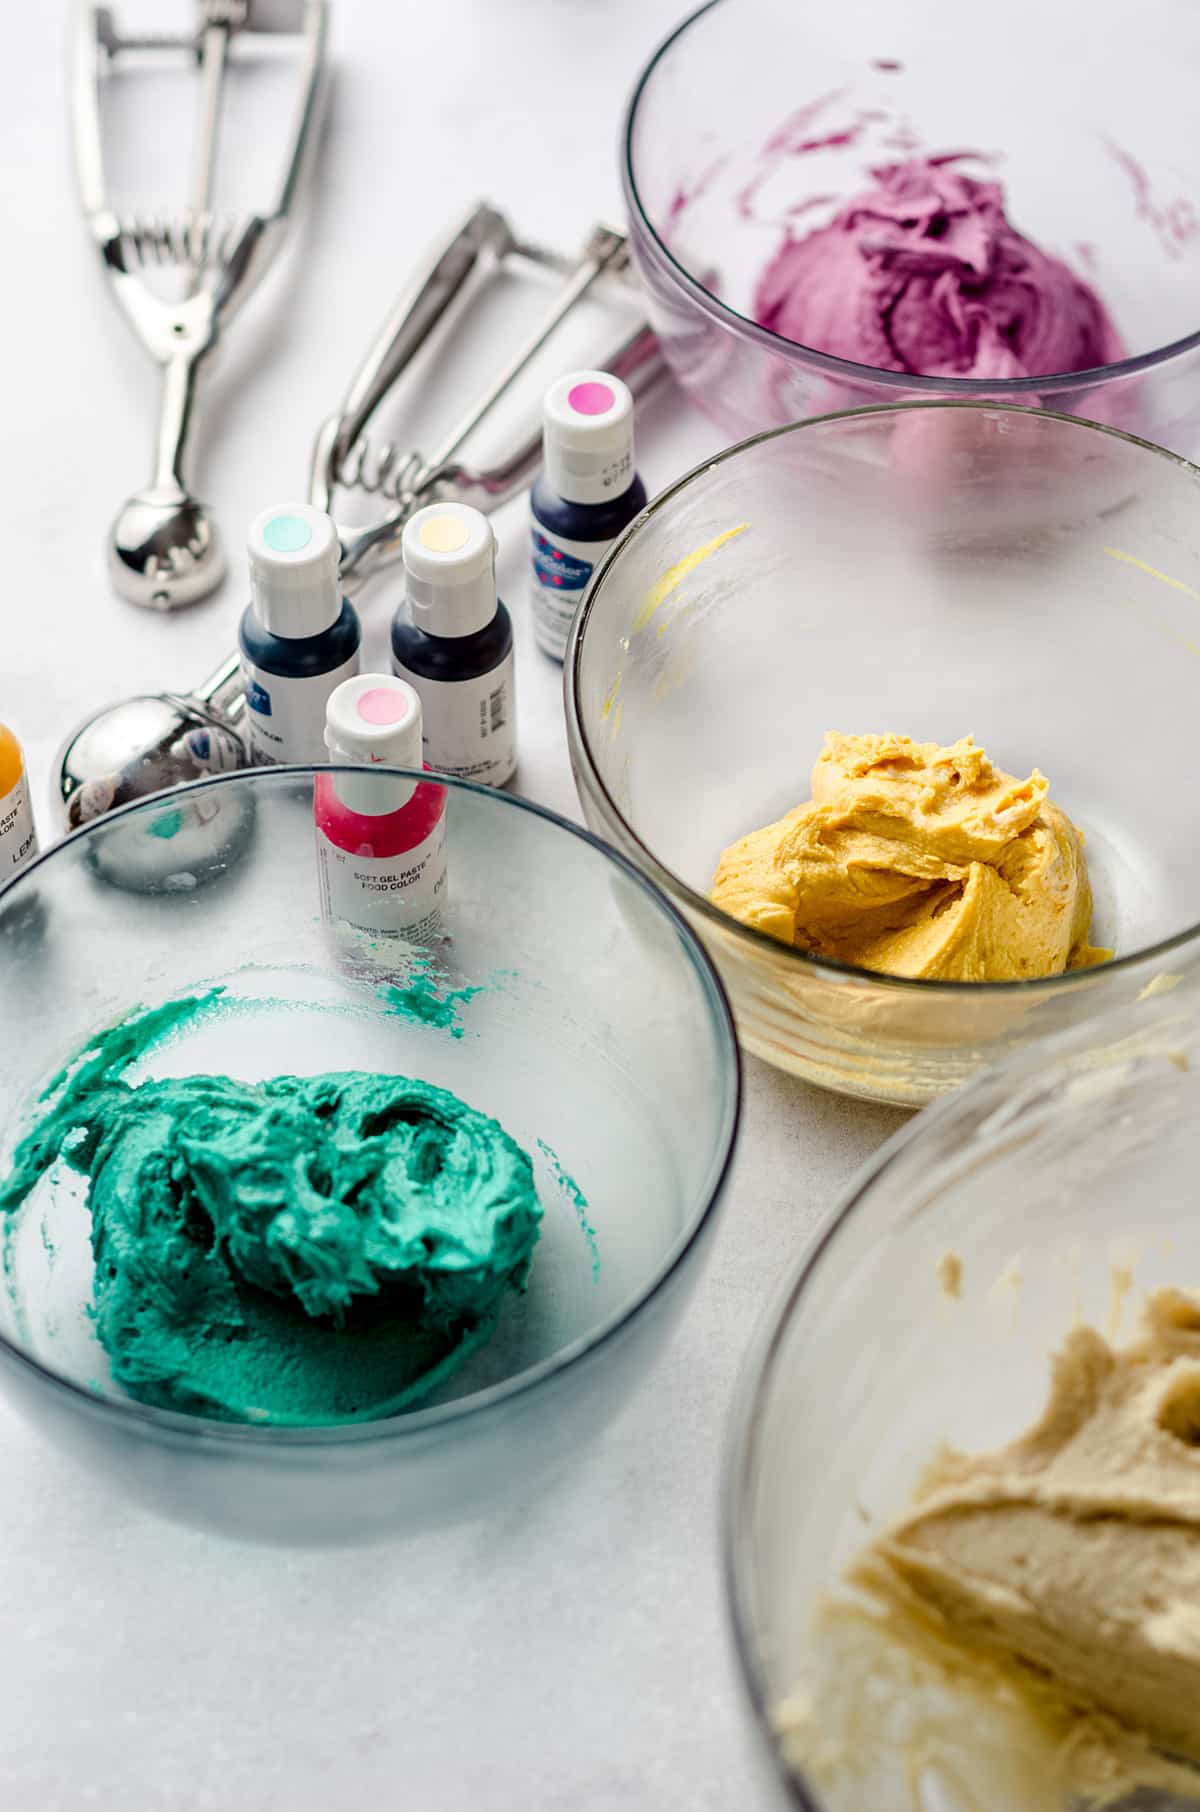
In order to tint the dough for Sally’s stitched up cookies, you’ll need some fun colors.
I prefer gel food coloring, as it has the richest colors and doesn’t water down cookie dough. My preferred brand is AmeriColor, and I have the large 50-count box.
For Sally’s pieces, I used electric purple + deep pink, turquoise, and gold + lemon yellow. You can achieve these colors any way you desire with whatever food coloring you prefer. See notes in the recipe card for more details on coloring the dough.

JACK’S FACE
The base for the Jack Skellington face is simply my vanilla buttercream recipe. I’ve used it dozens and dozens of times around my site, and in the recipe card you’ll find specific instructions for making it nice and smooth.
You’ll need butter, powdered sugar, milk or cream, vanilla extract, and a bit of salt for the frosting.
JACK AND SALLY DETAILS
For the details of Jack’s face and the stitches for Sally, I used pre-made black cookie icing, which I always get in the baking aisle of my grocery store or in the cake decorating section of my local craft store.
You can also use black candy melts or melted semi-sweet chocolate to get those details done, but it’s entirely up to you what you use. I like the ease of the pre-made icing!
MAKE AND SPLIT THE COOKIE DOUGH
The method for bringing the cookie dough together is very simple. Since we have a lot to discuss here regarding decorating the cookies, you can head over to the vanilla bean sugar cookie recipe to read all about the details of bringing the dough together (but seriously, I promise it’s way easy).
Using a spatula, gently press all of the dough into the bottom of the bowl so it’s evenly dispersed and easy to divide. Using a spatula or a knife to draw lines into the dough, split the dough in half. Leave one half of the batter untouched, and split the other half into 3 fairly equal portions.
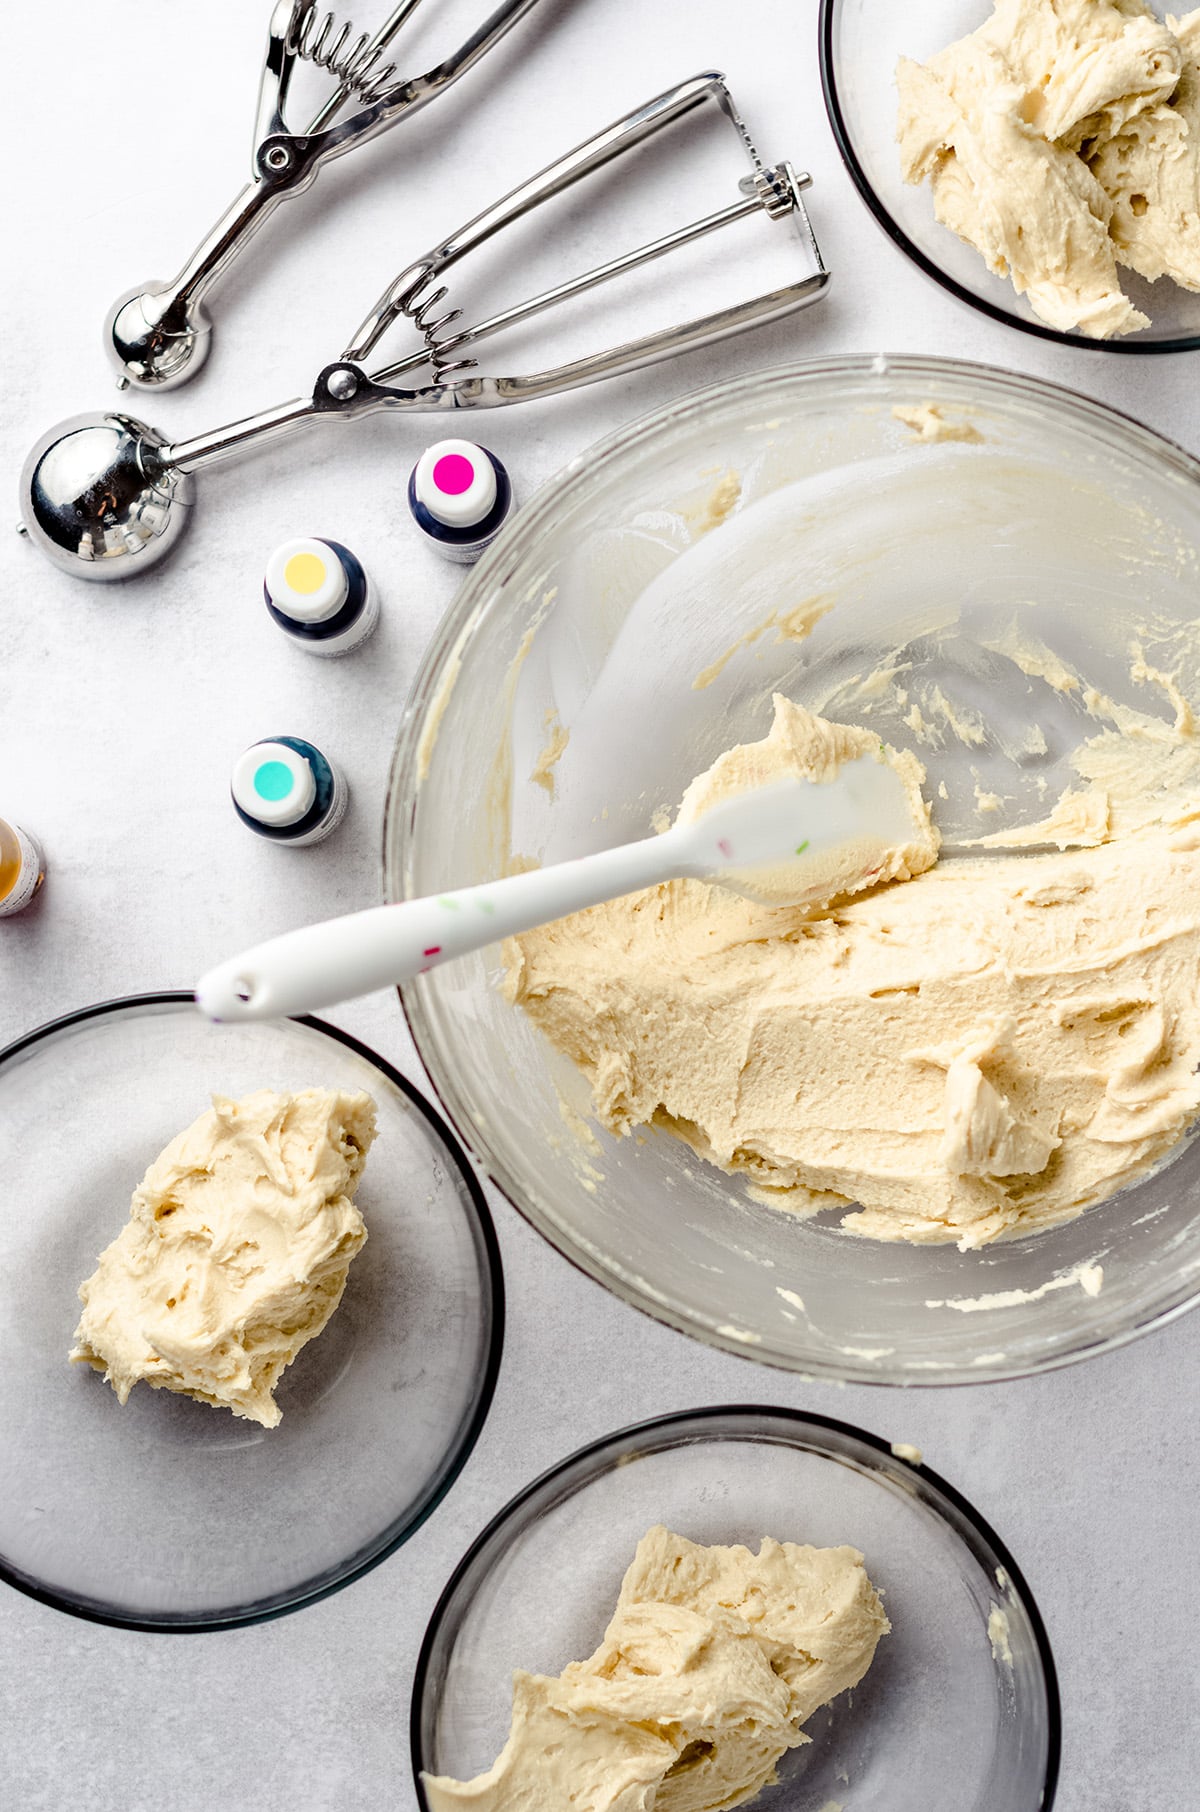
Scoop out each of the 3 portions of dough into 3 smaller separate bowls. This does not have to be perfect, but you can use a digital kitchen scale to insure equal portions, if desired.
Set the 3 smaller bowls aside for now and work with the larger portion of dough (the half you did not split).
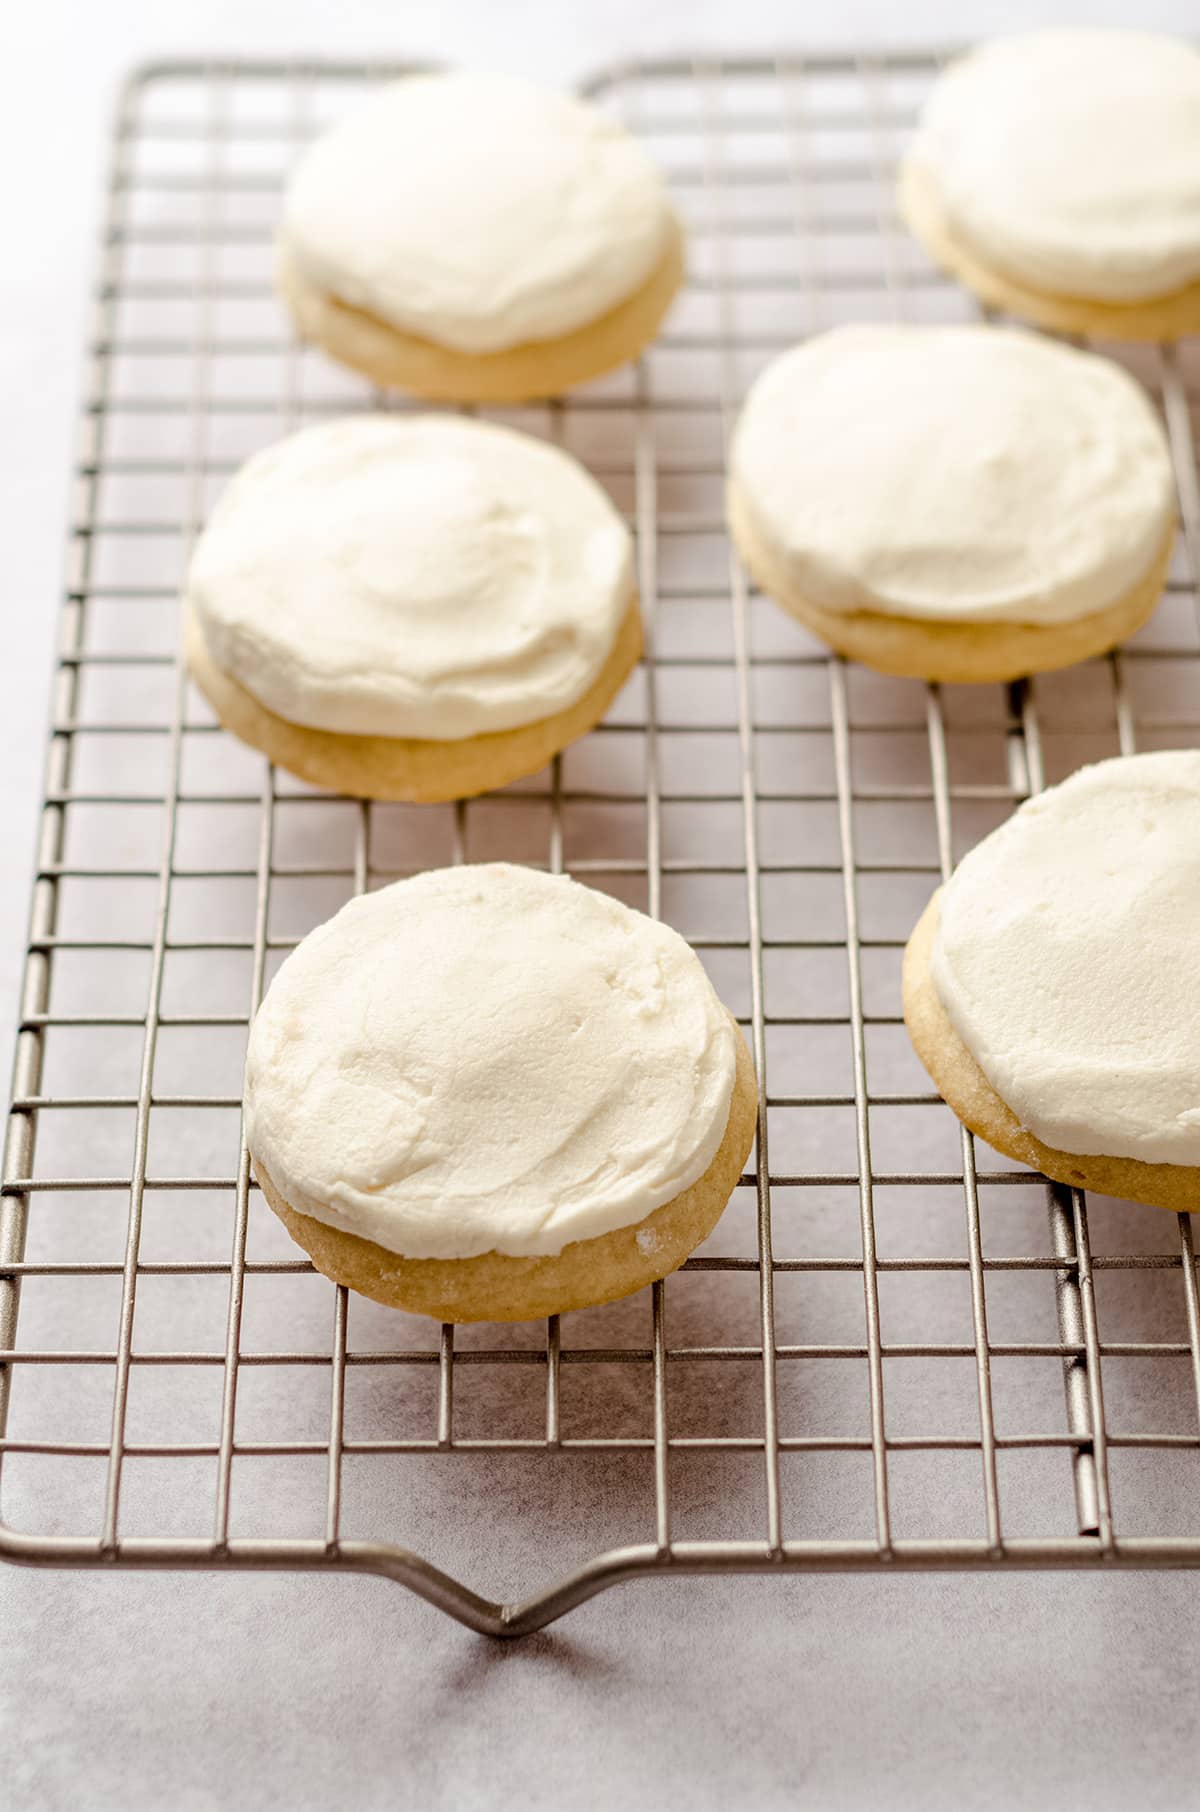
BAKE THE JACK COOKIES
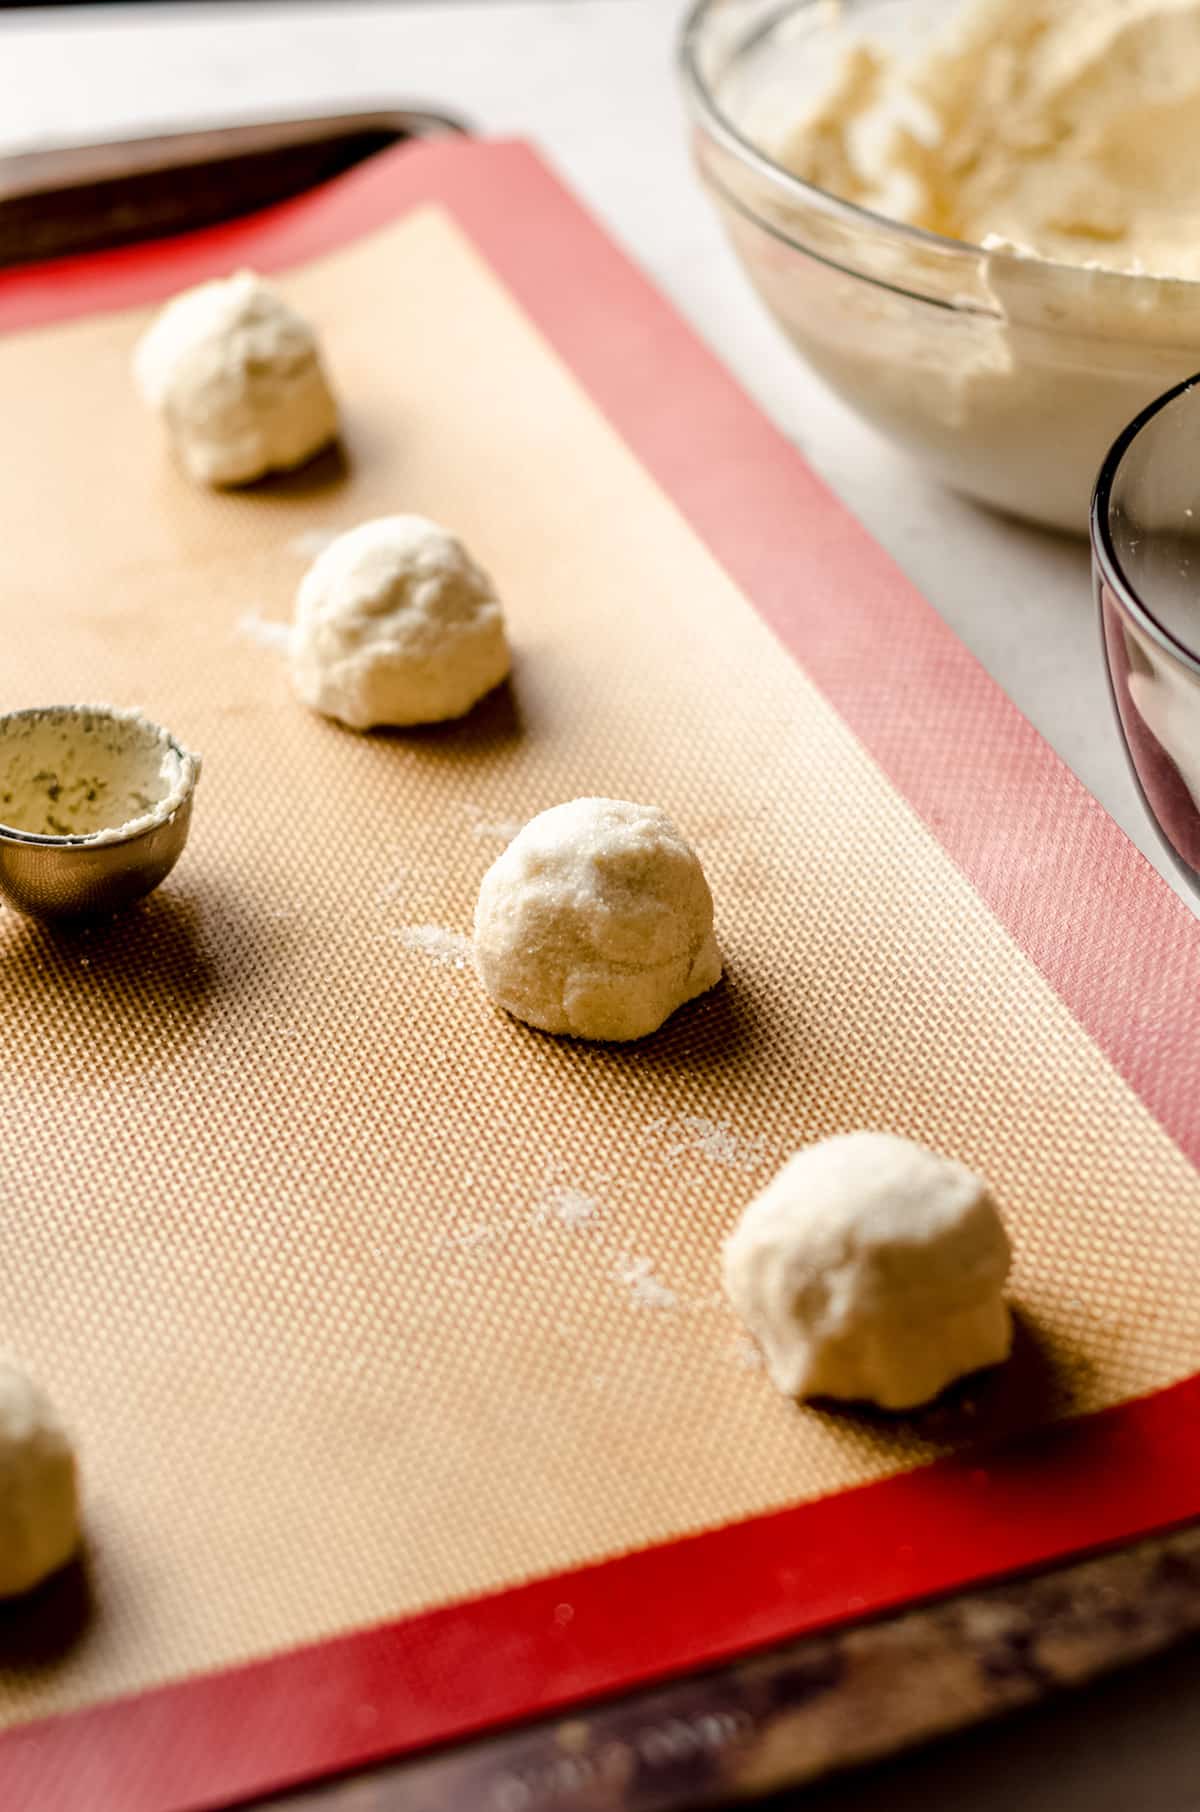
Jack’s base cookies are simple. You’re going to drop scoops of dough onto a prepared baking sheet and bake them. That’s it.
The balls of dough will be jaggy, which will equate to jaggy cookies after they’re baked. If you want your cookies to have smooth tops, you can press the wrinkles out with your sugar-coated fingers.
I did not smooth my tops, since I was putting frosting on top of them anyway (these photos are from my vanilla bean sugar cookies— these tops are smoothed).
You do you!
Bake the cookies for 8-9 minutes and then allow them to cool completely. We’ll decorate them when they’re totally cool.
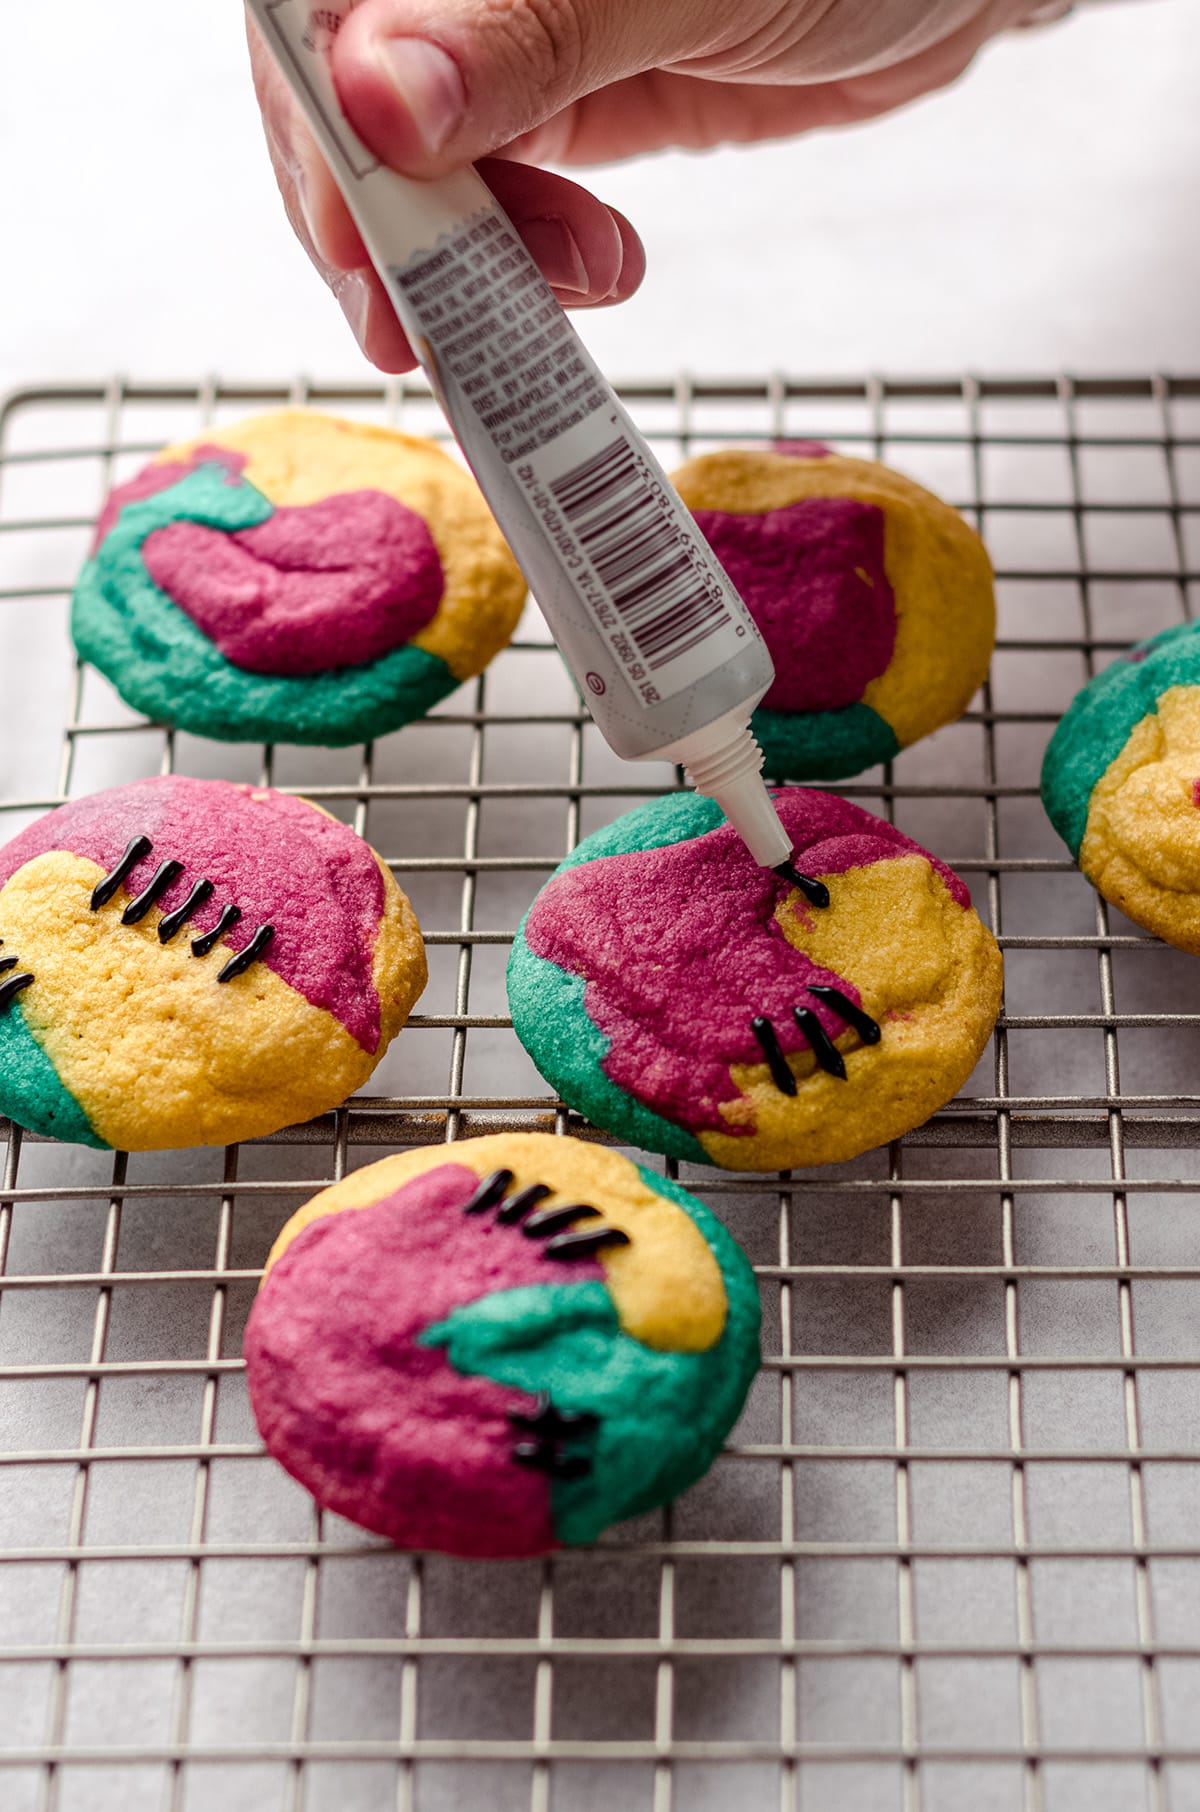
TINT AND BAKE THE SALLY COOKIES
Tint each bowl of cookie dough one of Sally’s colors (see note #3 in the recipe card about these colors).
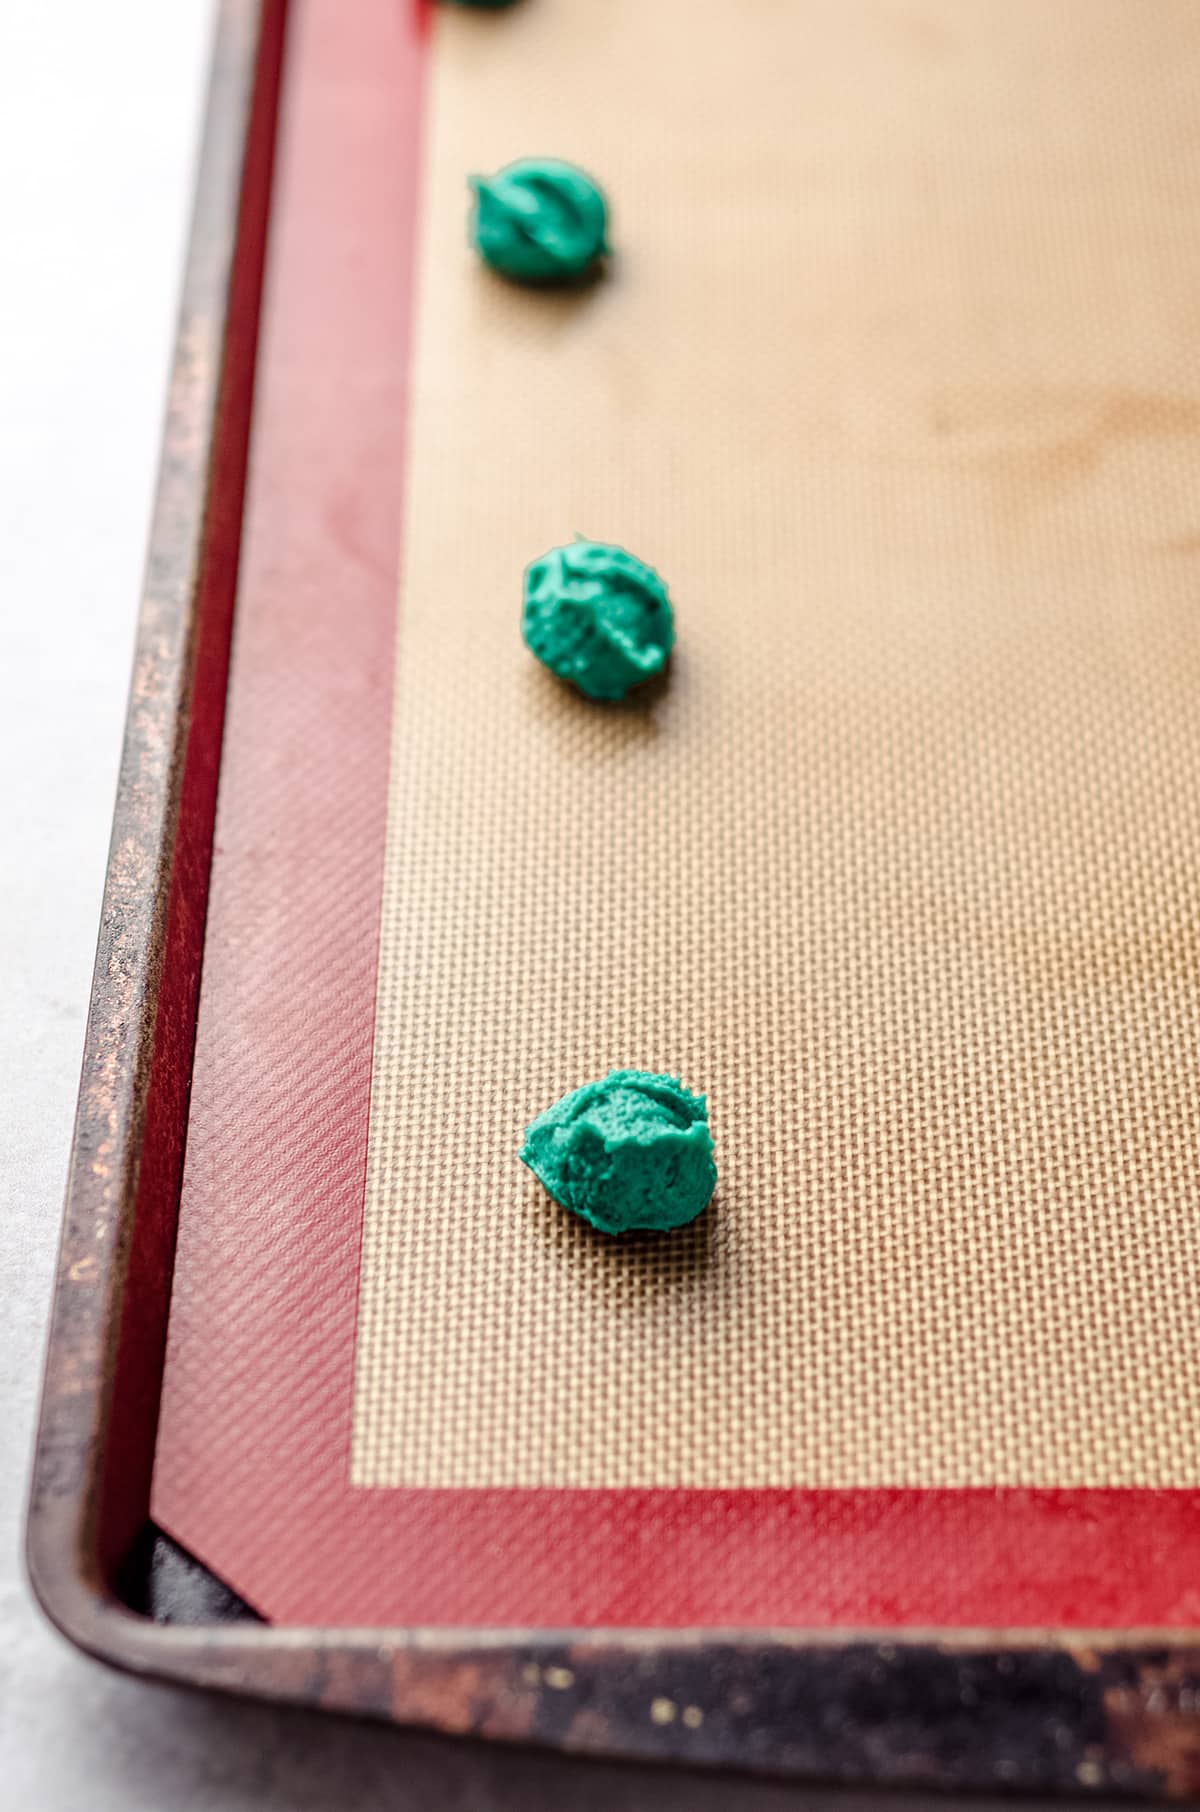
Working with one color of dough at a time, use a ½ teaspoon measure or mini cookie scoop with a trigger, drop 8 balls of one color of dough spaced out evenly on another of the prepared baking sheets.
When you have filled the baking sheet, wash the cookie scoop and move to a second color, dropping the next ball of dough right onto or next to the first ball of dough. This does not need to be perfect.
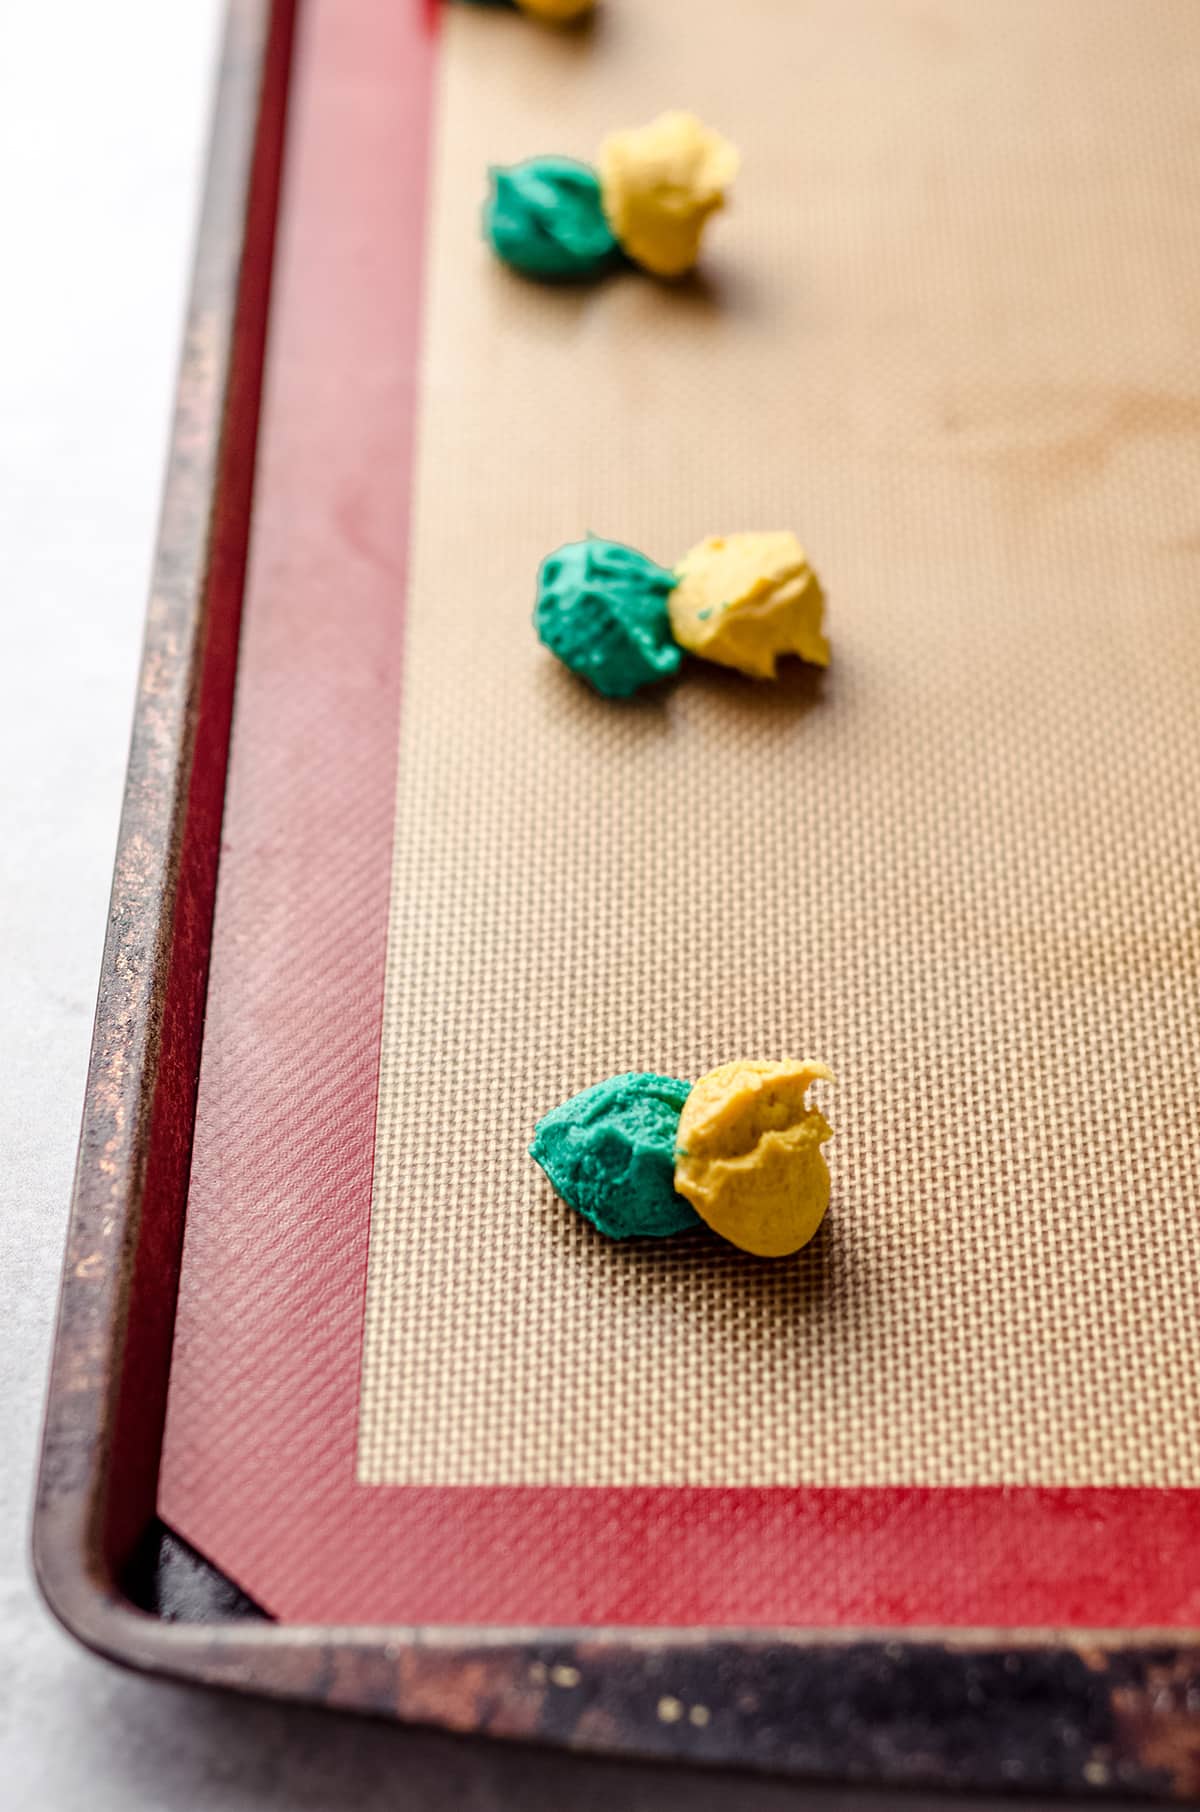
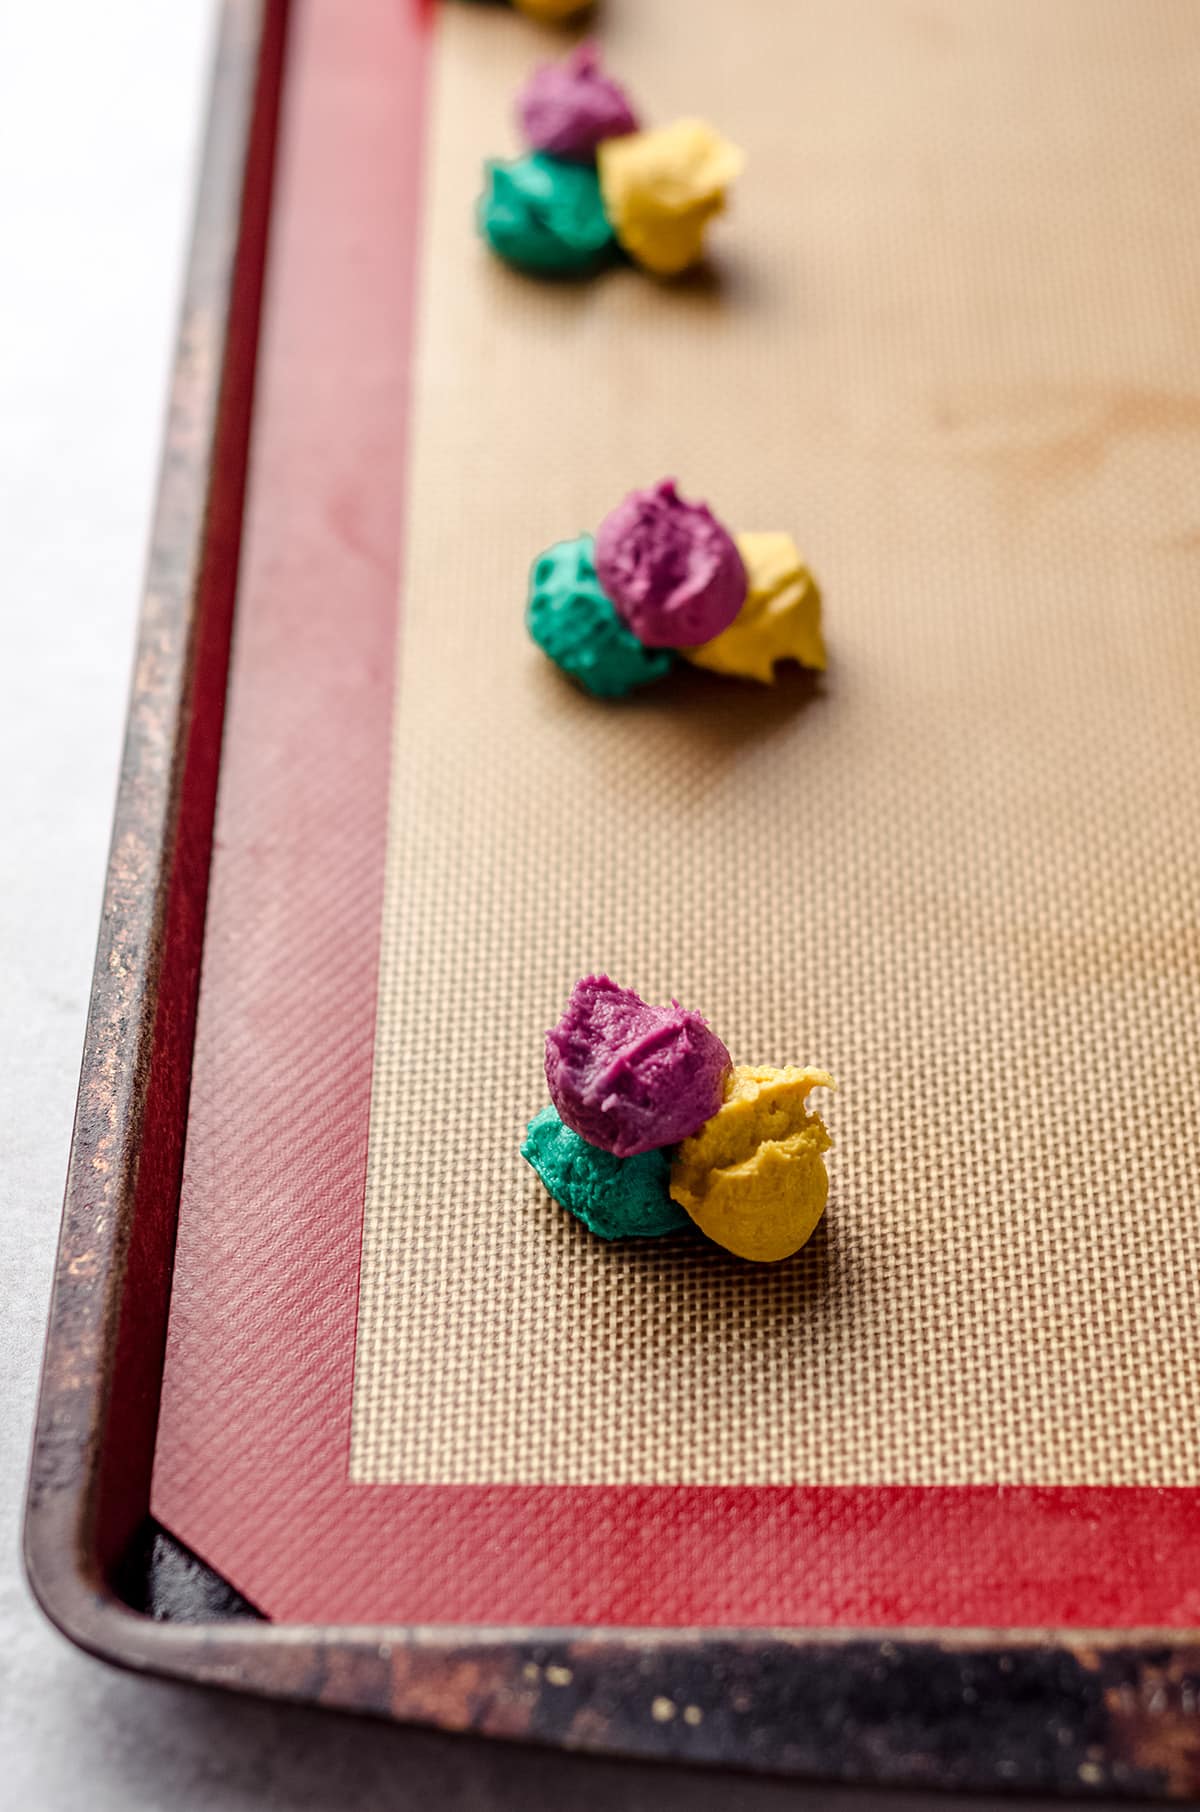
Repeat with the third color.

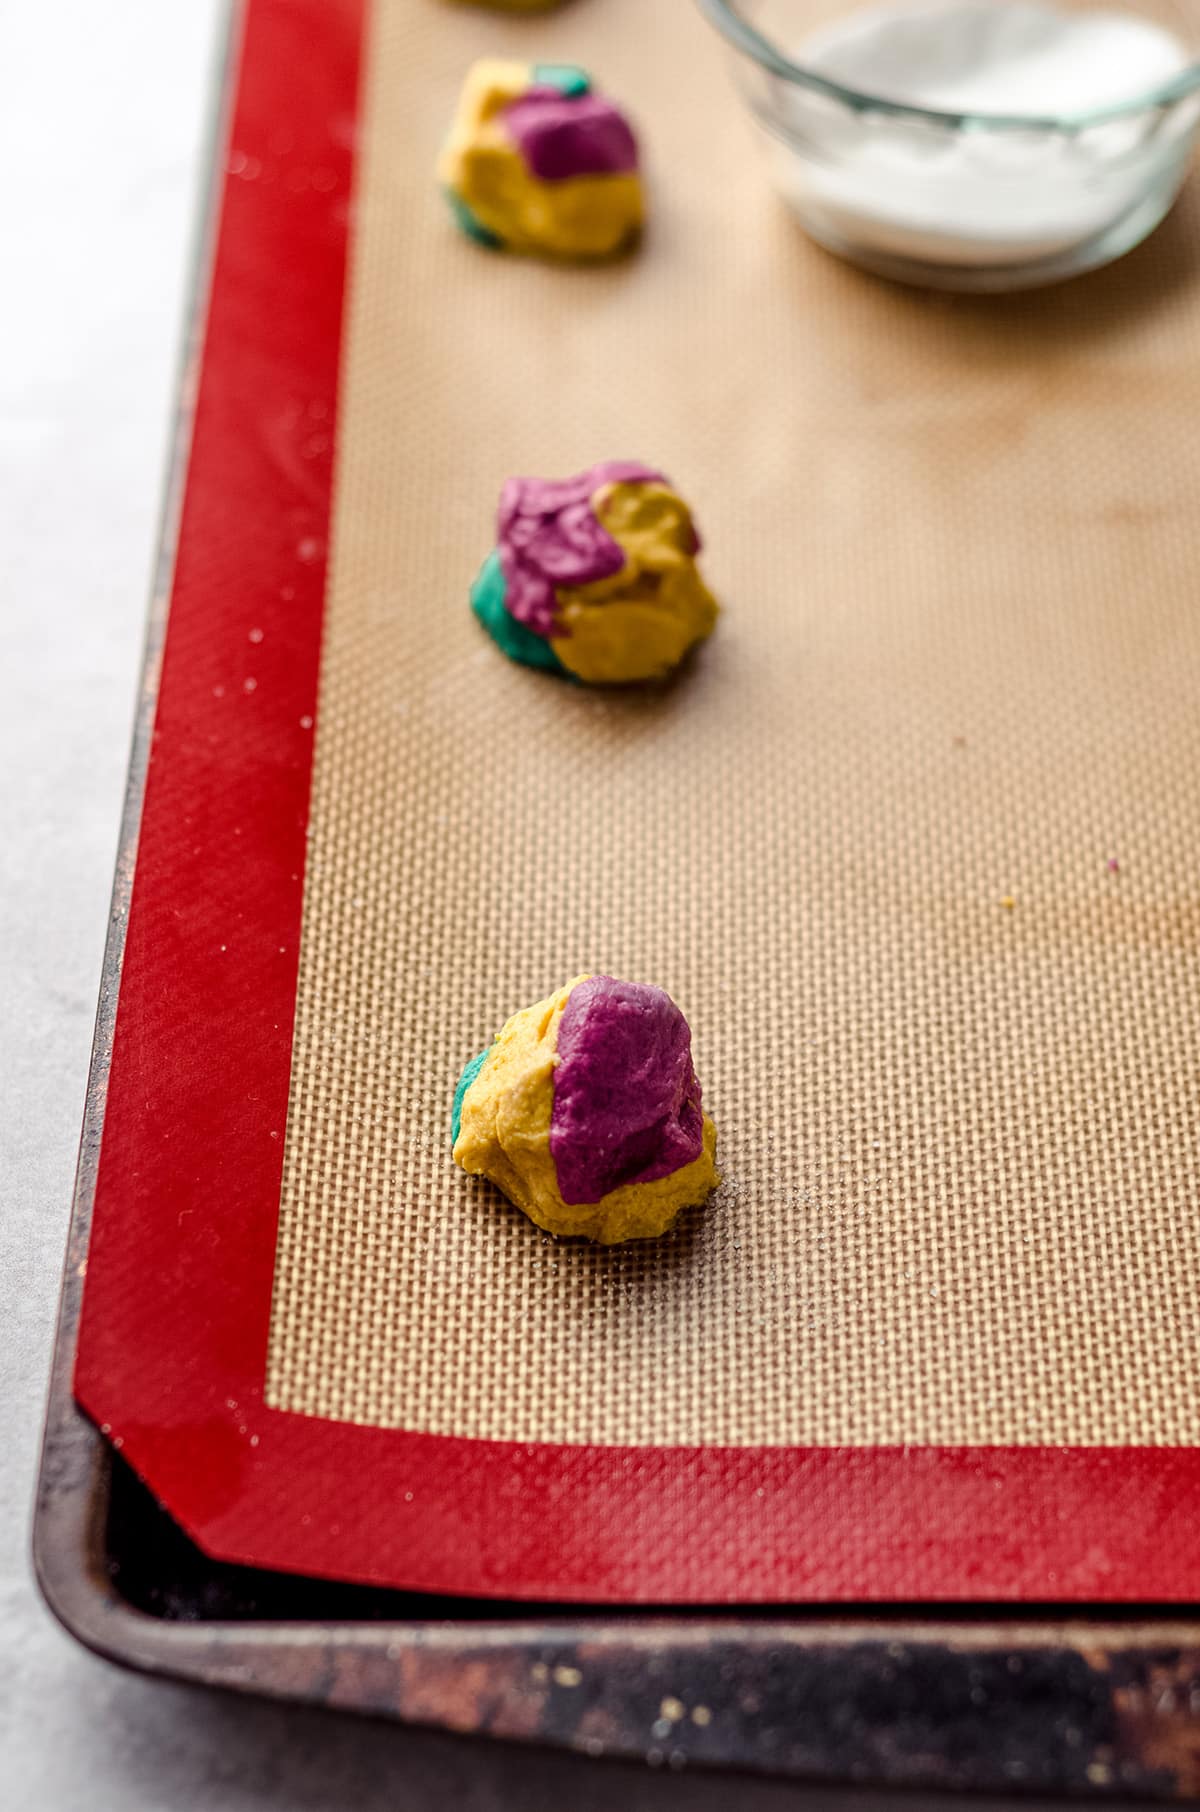
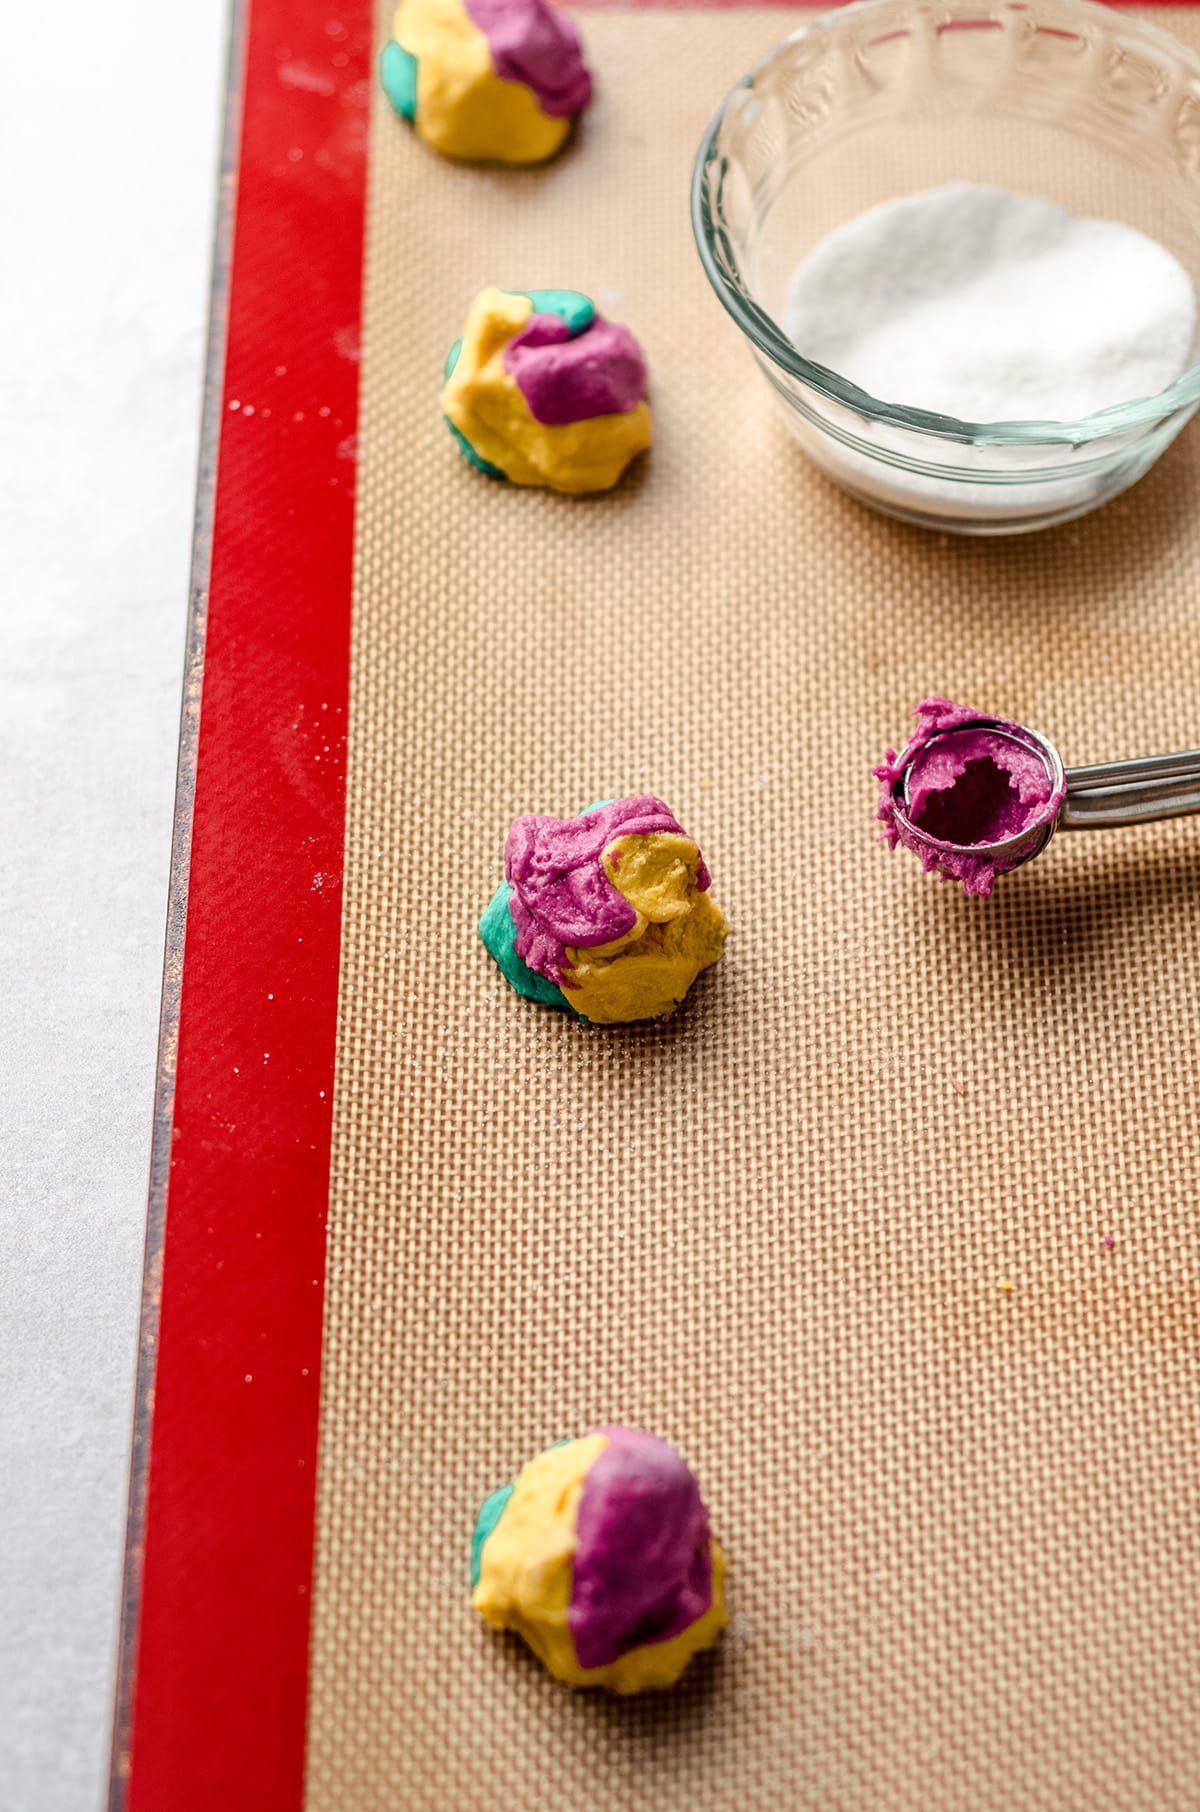
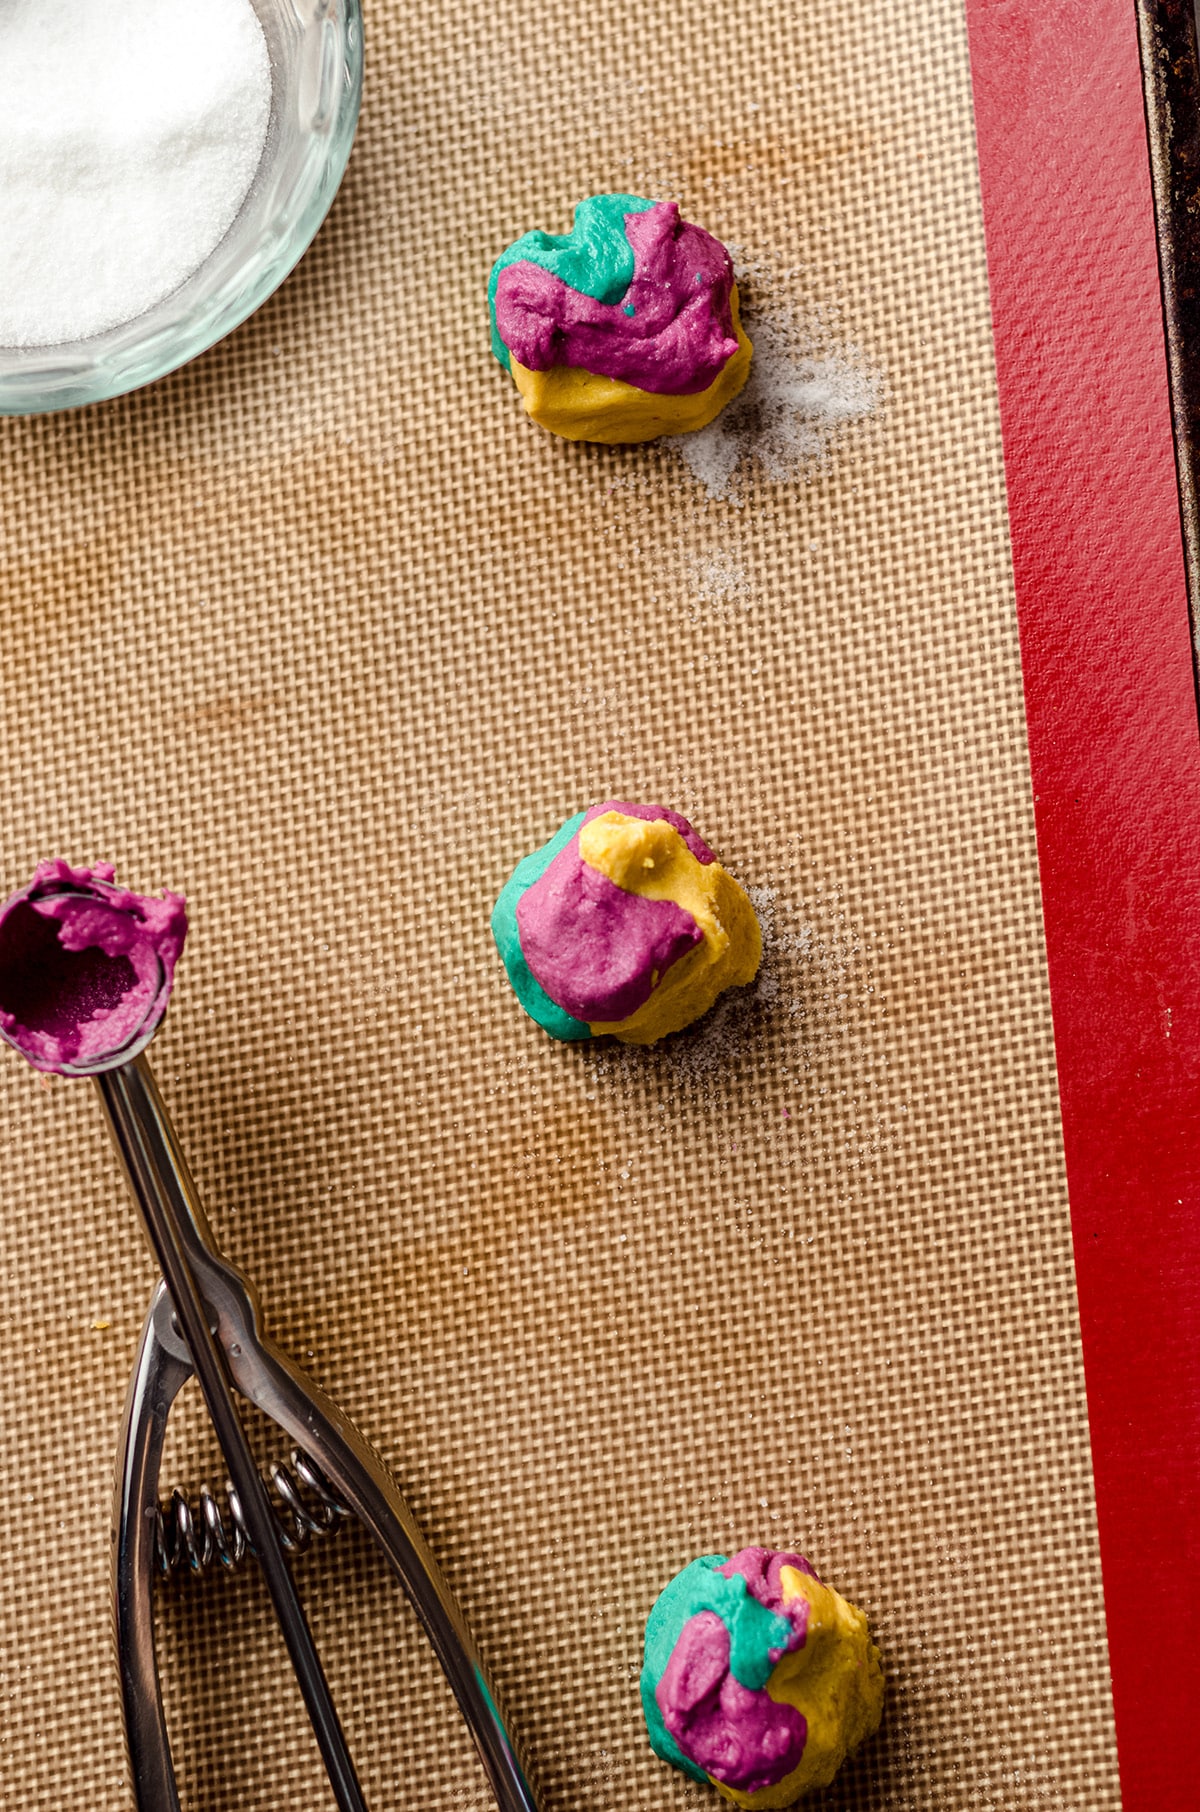
When you have 3 balls of dough per space, dip your fingers into some granulated sugar, then gently press the 3 balls of dough together, giving a small “twirl” to the ball of dough to encourage swirling of the colors.
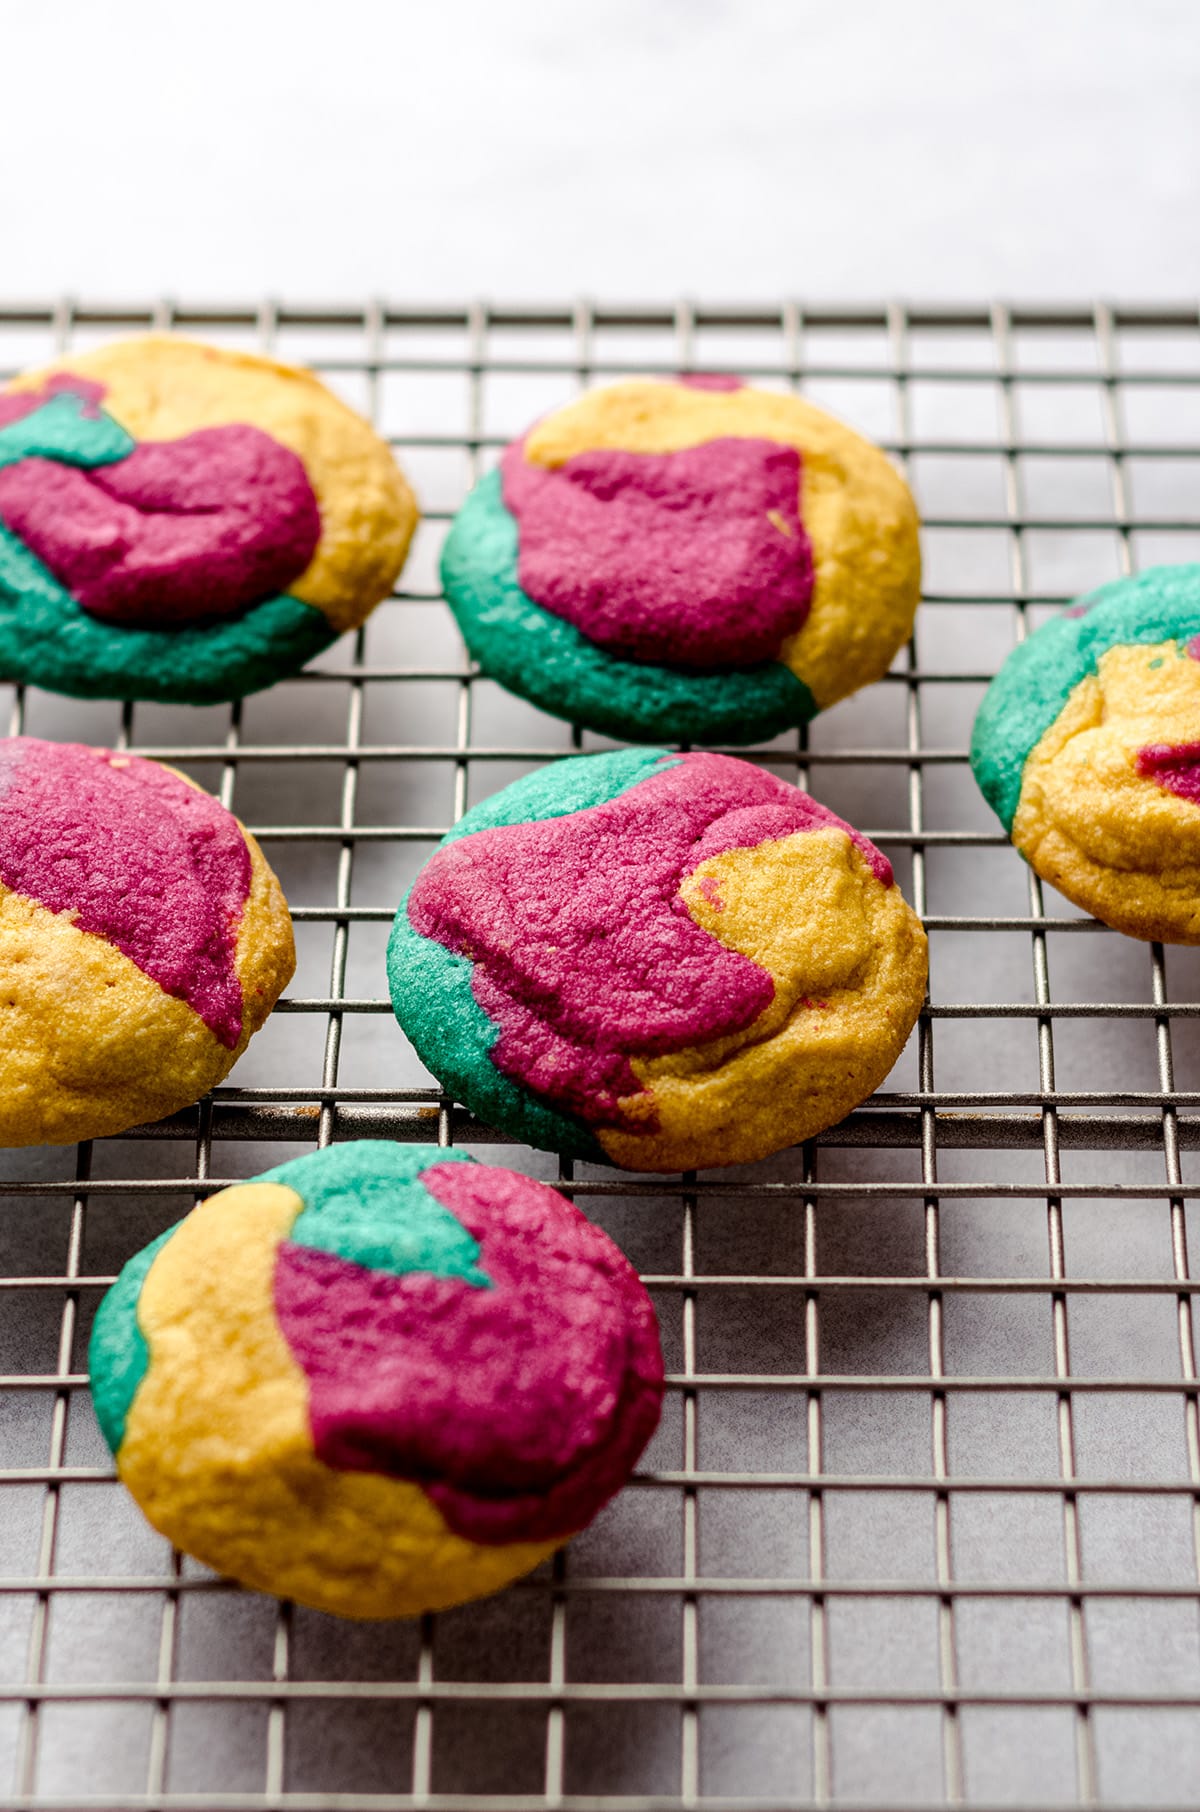
Bake the cookies for 8-9 minutes and allow them to cool completely. We’ll decorate them when they’re totally cool.
DECORATE THE COOKIES
When the cookies are completely cool, they are ready for decorations.
Jack’s cookies will take a little more time to decorate, so I started with those ones before moving onto Sally’s cookies.
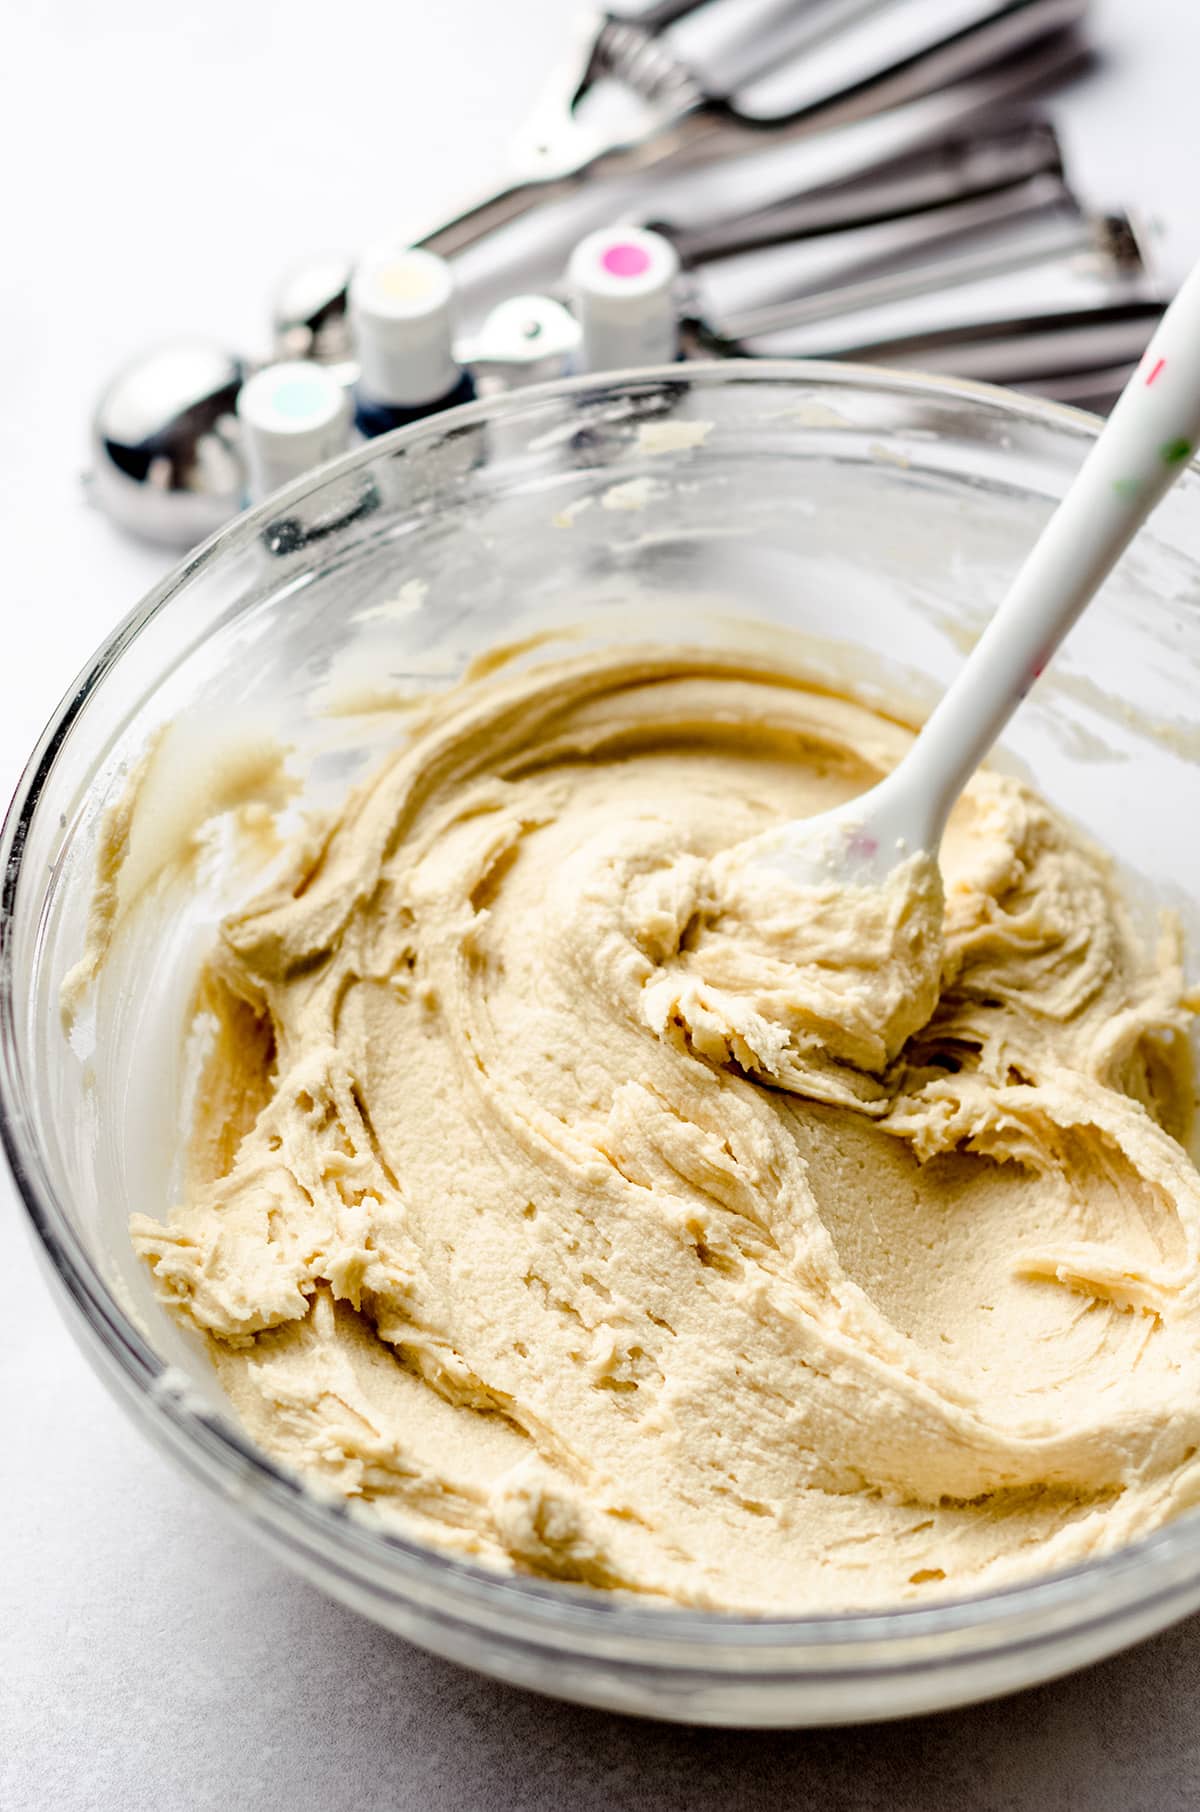
MAKE THE BUTTERCREAM
Making the vanilla buttercream is simple, and you’ve probably done this many times before.
One thing you’ll want to be sure you do is make the frosting nice and smooth.
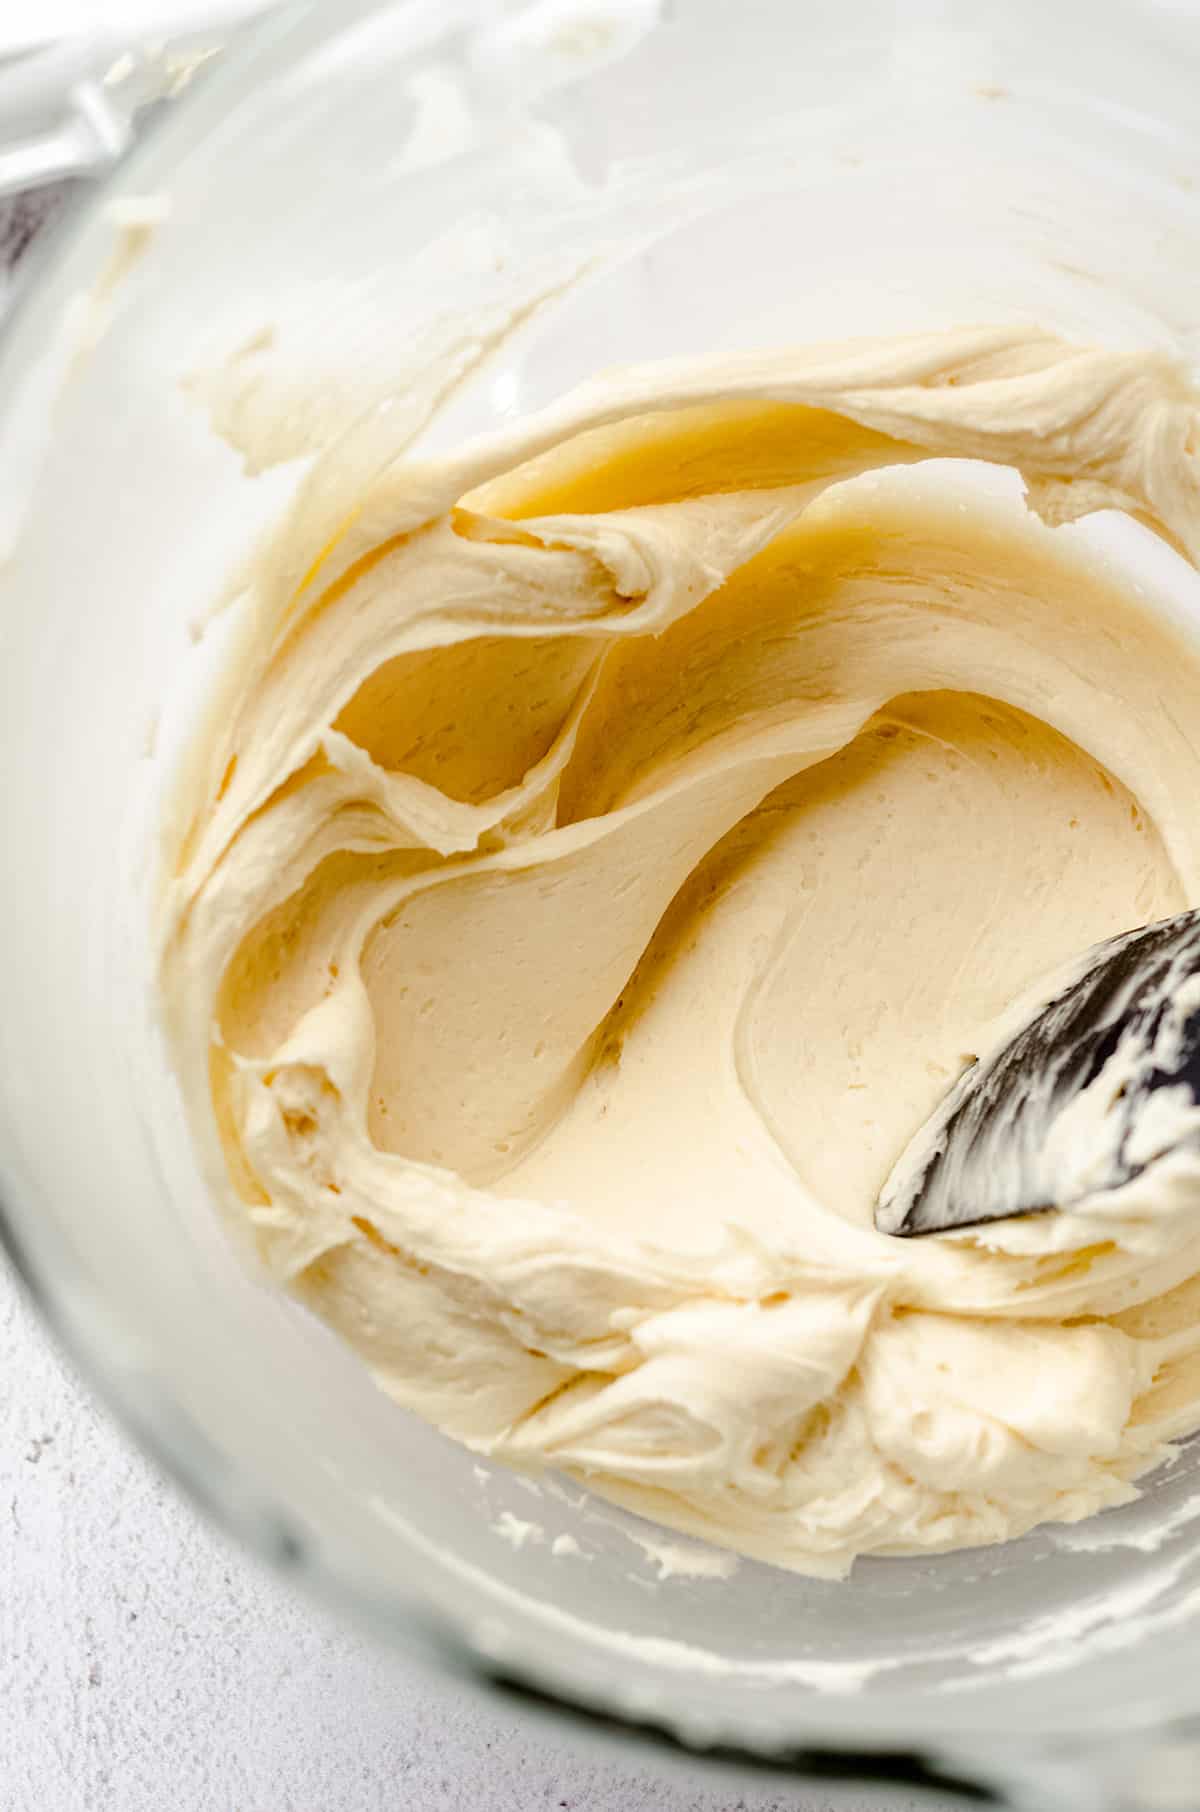
Since we’re looking for a very smooth base to pipe Jack’s face onto, we want to make sure the frosting base is silky and free of air bubbles. You’ll press out the air by hand by stirring the frosting gently with a spatula for a few minutes until it is super silky.
This is my favorite way to get perfect buttercream, and you’re going to love the result!
DECORATE THE COOKIES
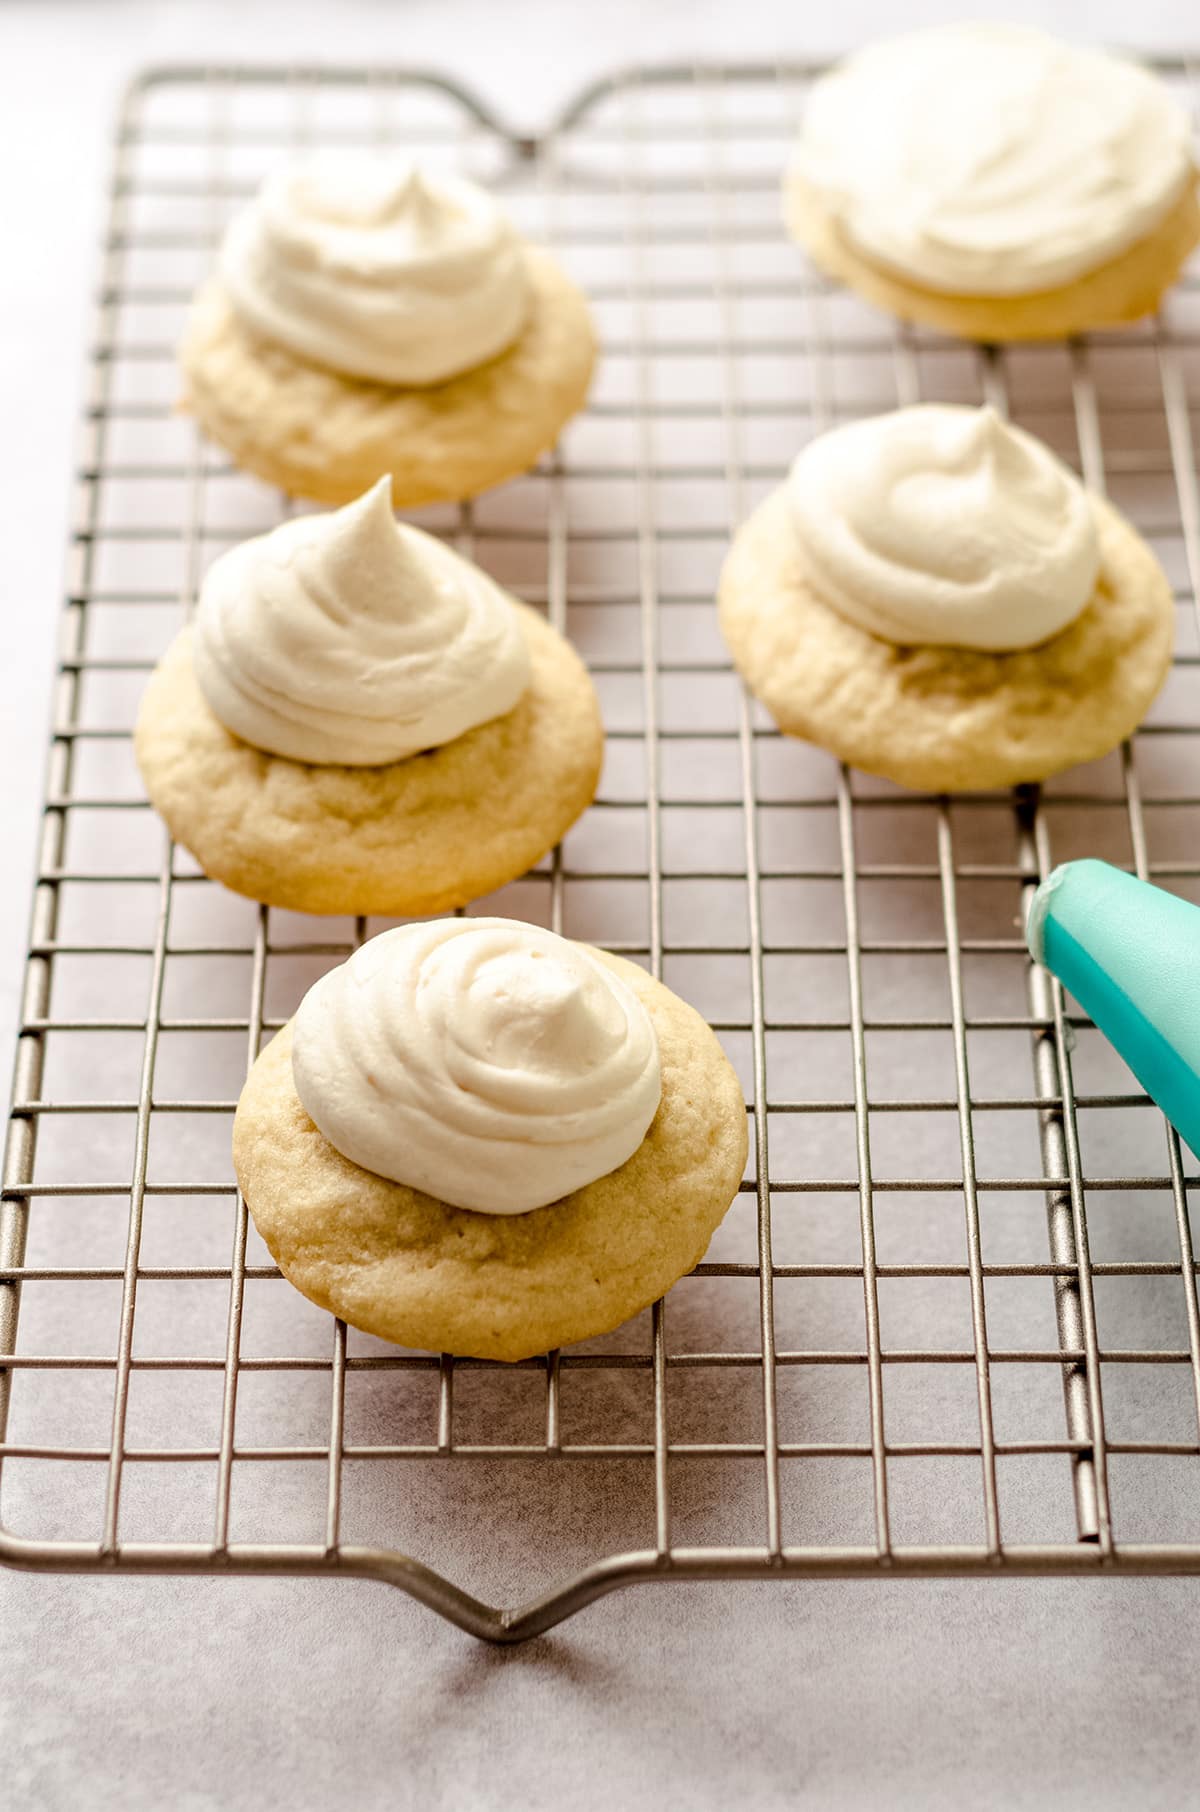
Pipe a mound of buttercream onto each of the Jack cookies, then use a small offset spatula or knife to smooth out the frosting evenly over the top of each cookie. Allow icing to set completely before piping on the Jack face (this will take about 1 hour).
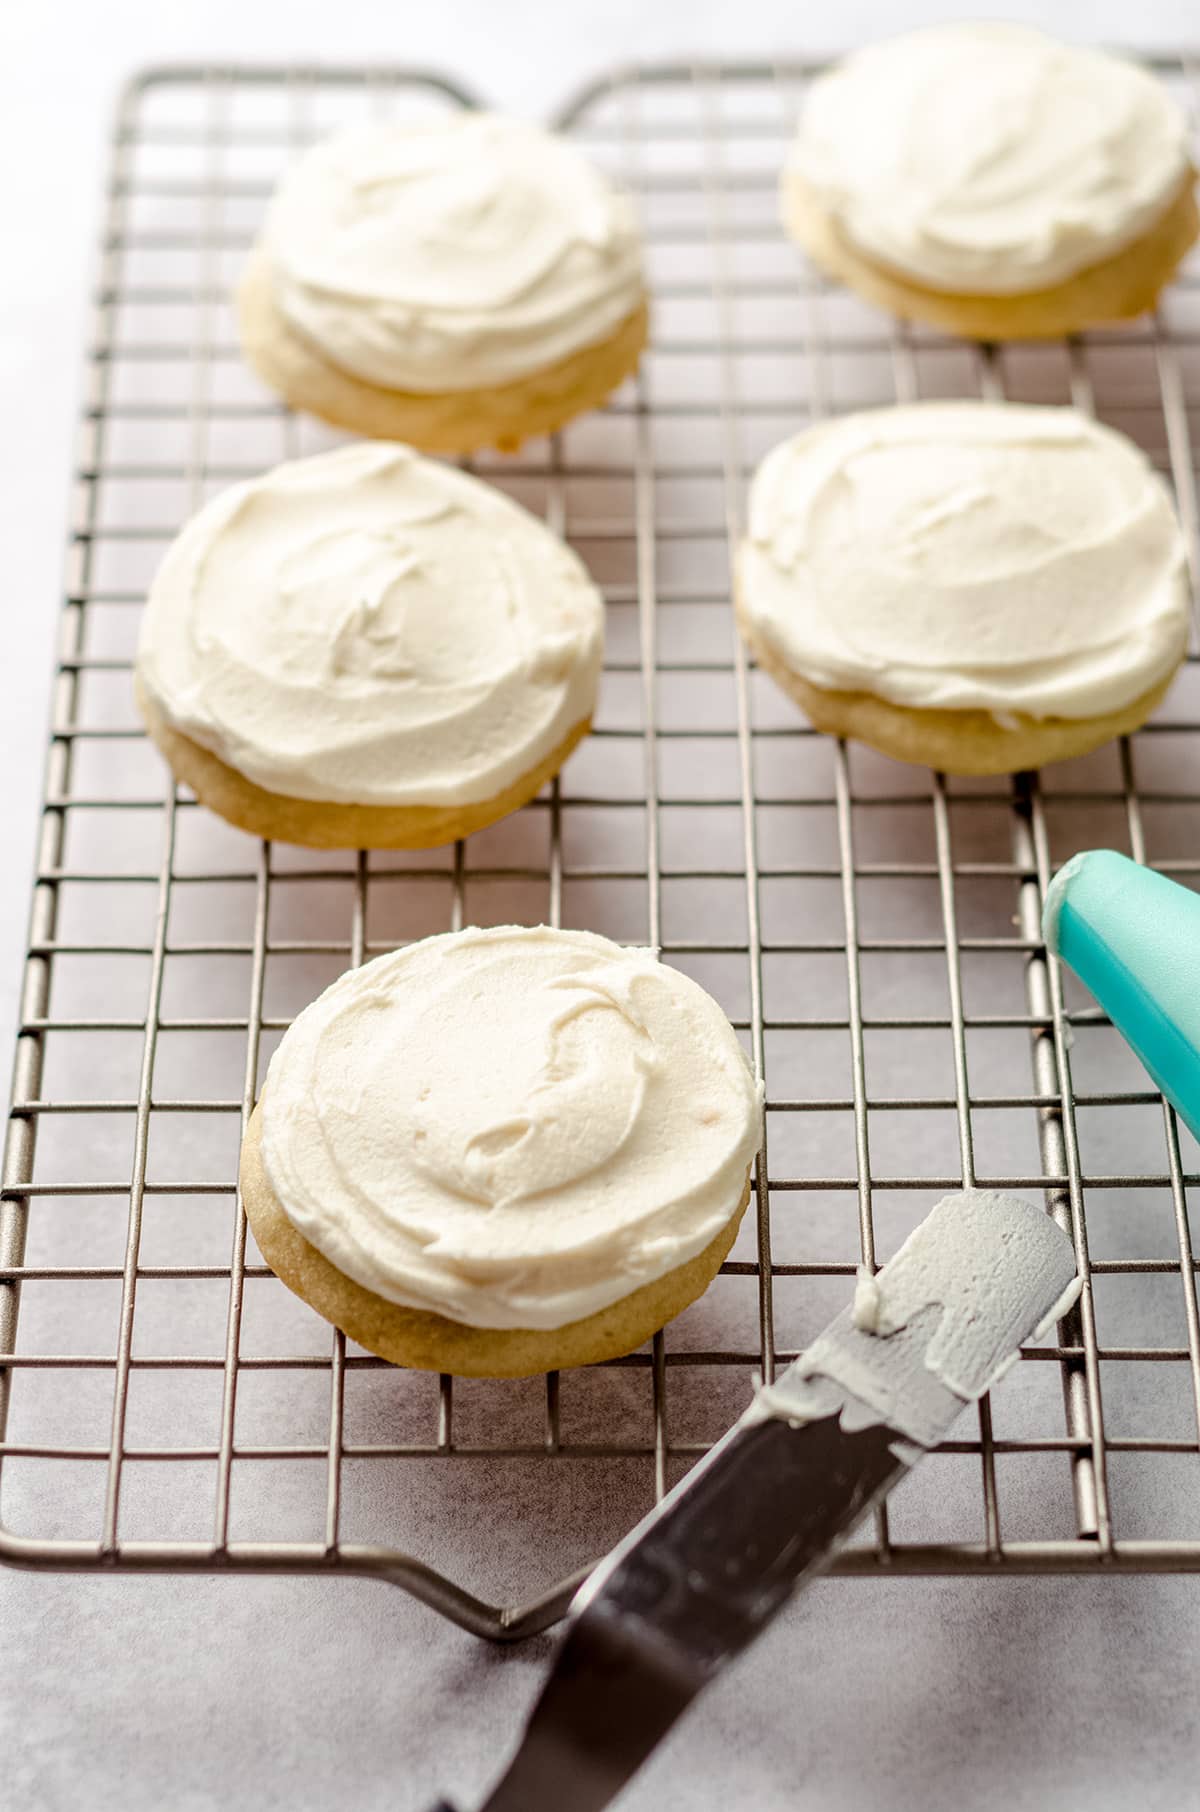
When the white icing is set, smooth out any bumps with a piece of parchment or wax paper and your fingers. This is a totally optional step, but I like to make the white canvas as smooth as possible.
Working with one cookie at a time, use the black icing or semi-sweet chocolate in a piping bag or cookie icing bottle to pipe a Jack face onto each white cookie. Use the same icing or chocolate to pipe small stitches onto Sally’s cookies.

After these cookies were set, I shared them with our gym friends, and we got RAVE reviews of them. Not only were people excited about the Jack & Sally Nightmare Before Christmas cookies, they loved the texture, the tastes, and the fluffy frosting on top of the cookies got extra commentary.
Our boys were so excited to see these cookies after school and we had 4 thumbs up from the cookie + Nightmare fans.
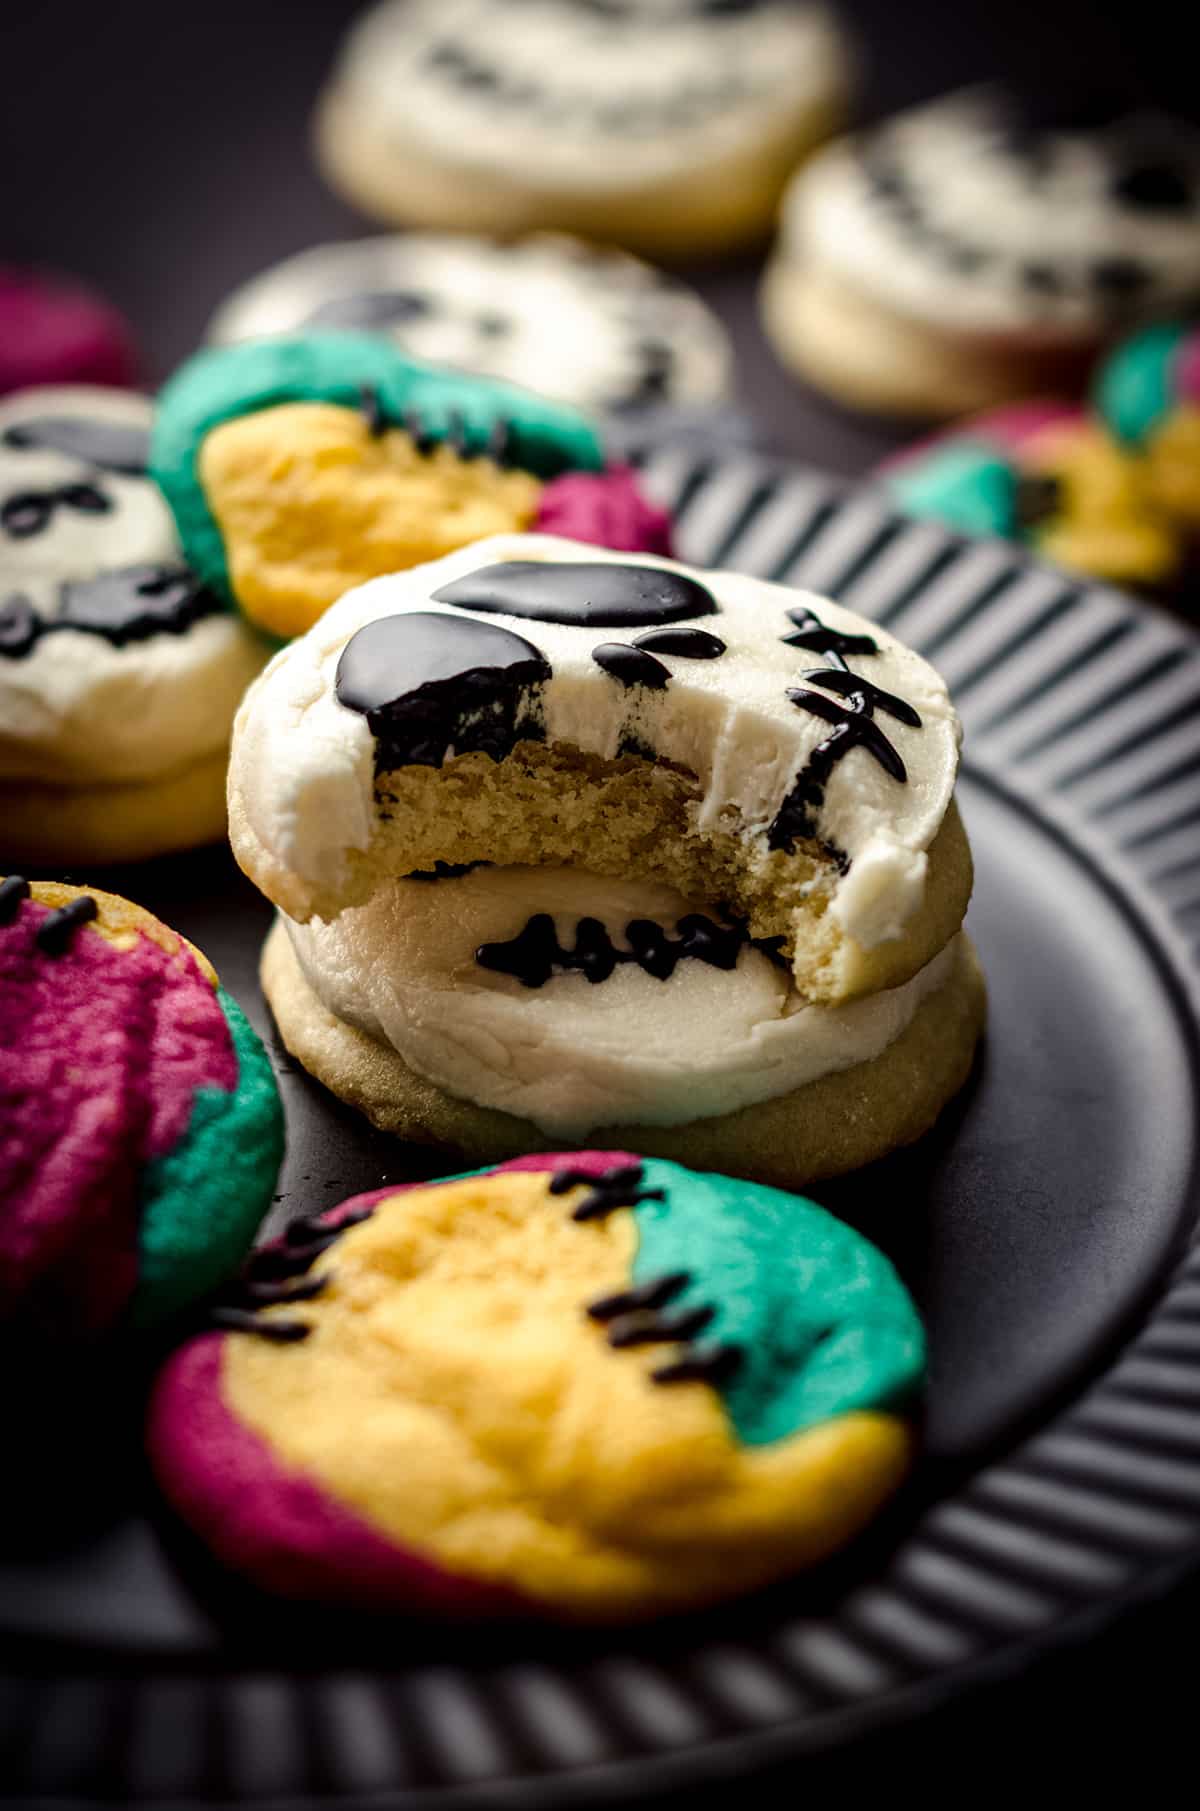
If you have an annual Nightmare Before Christmas viewing like we do, you’re absolutely going to have to make these cookies. I can’t wait for you to try them!
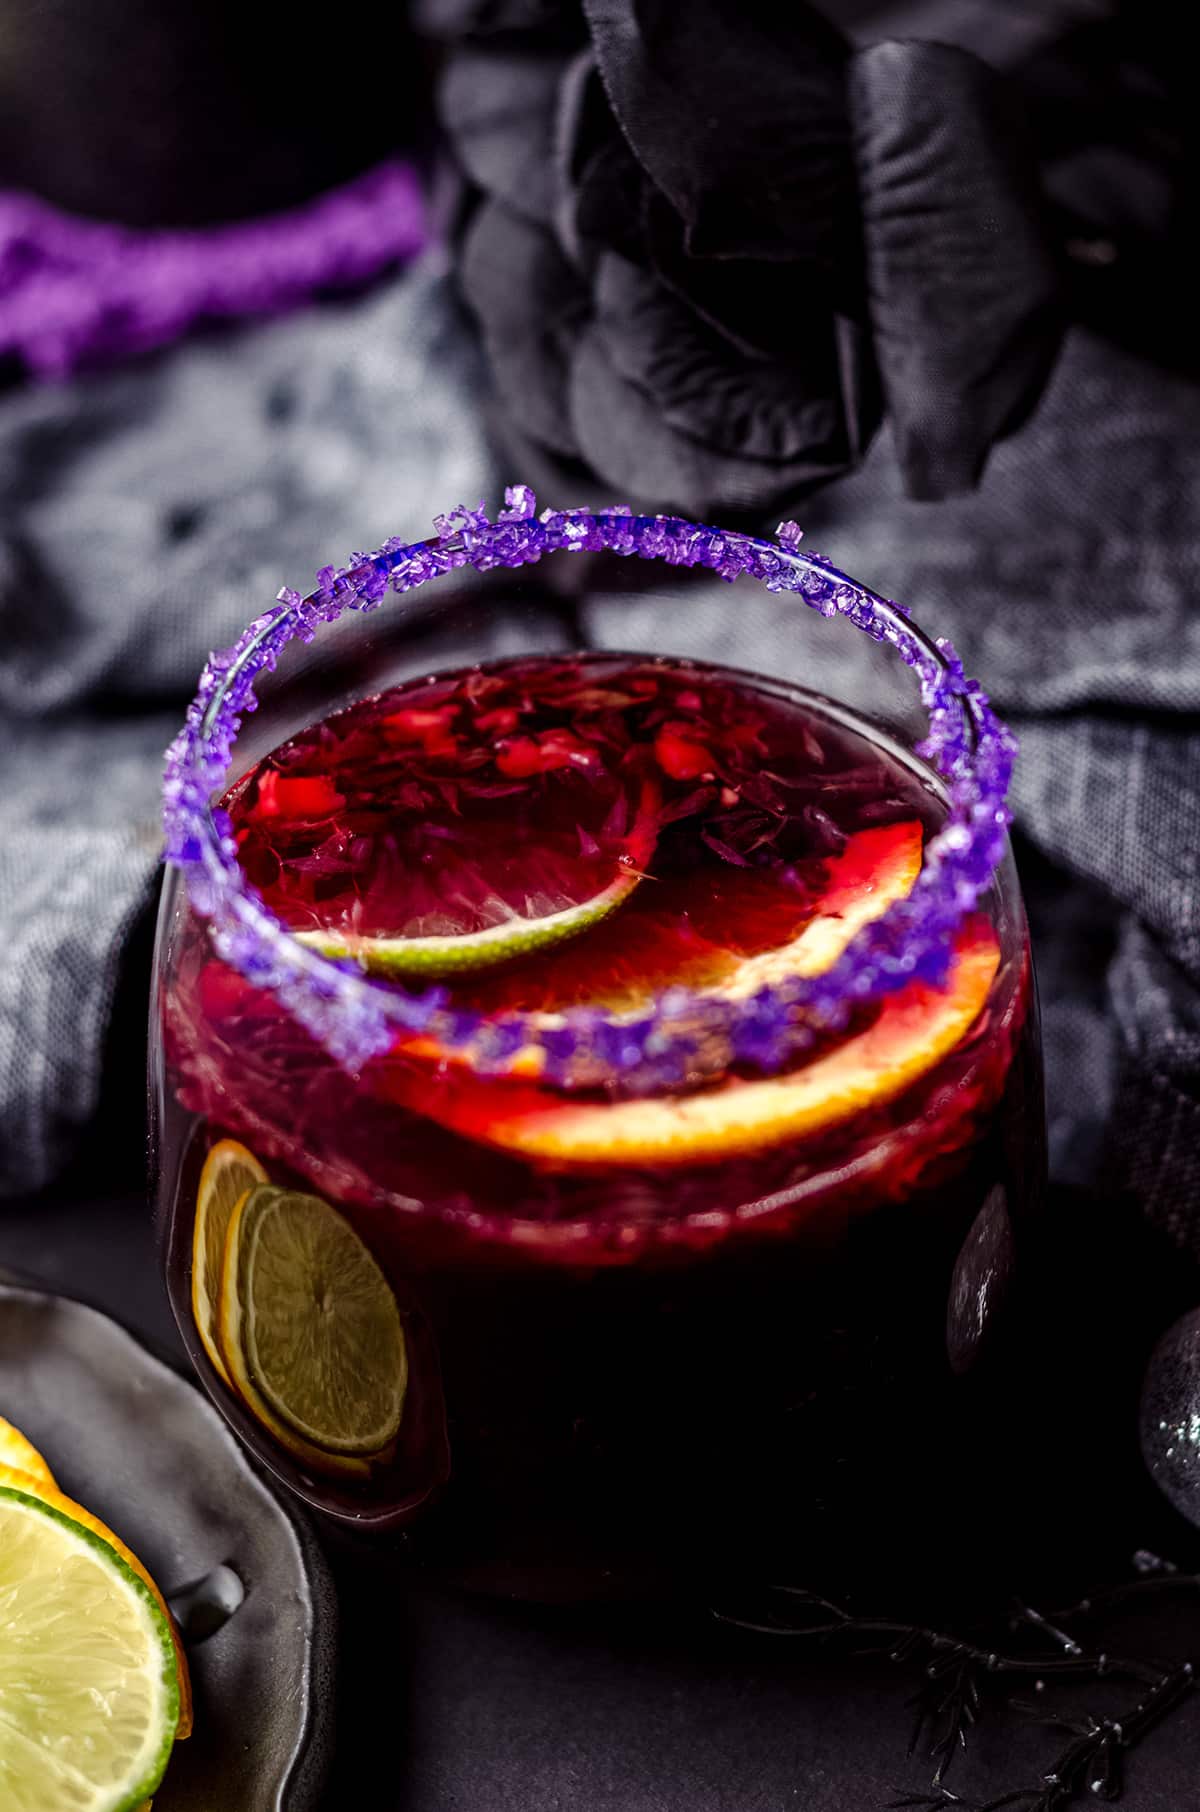
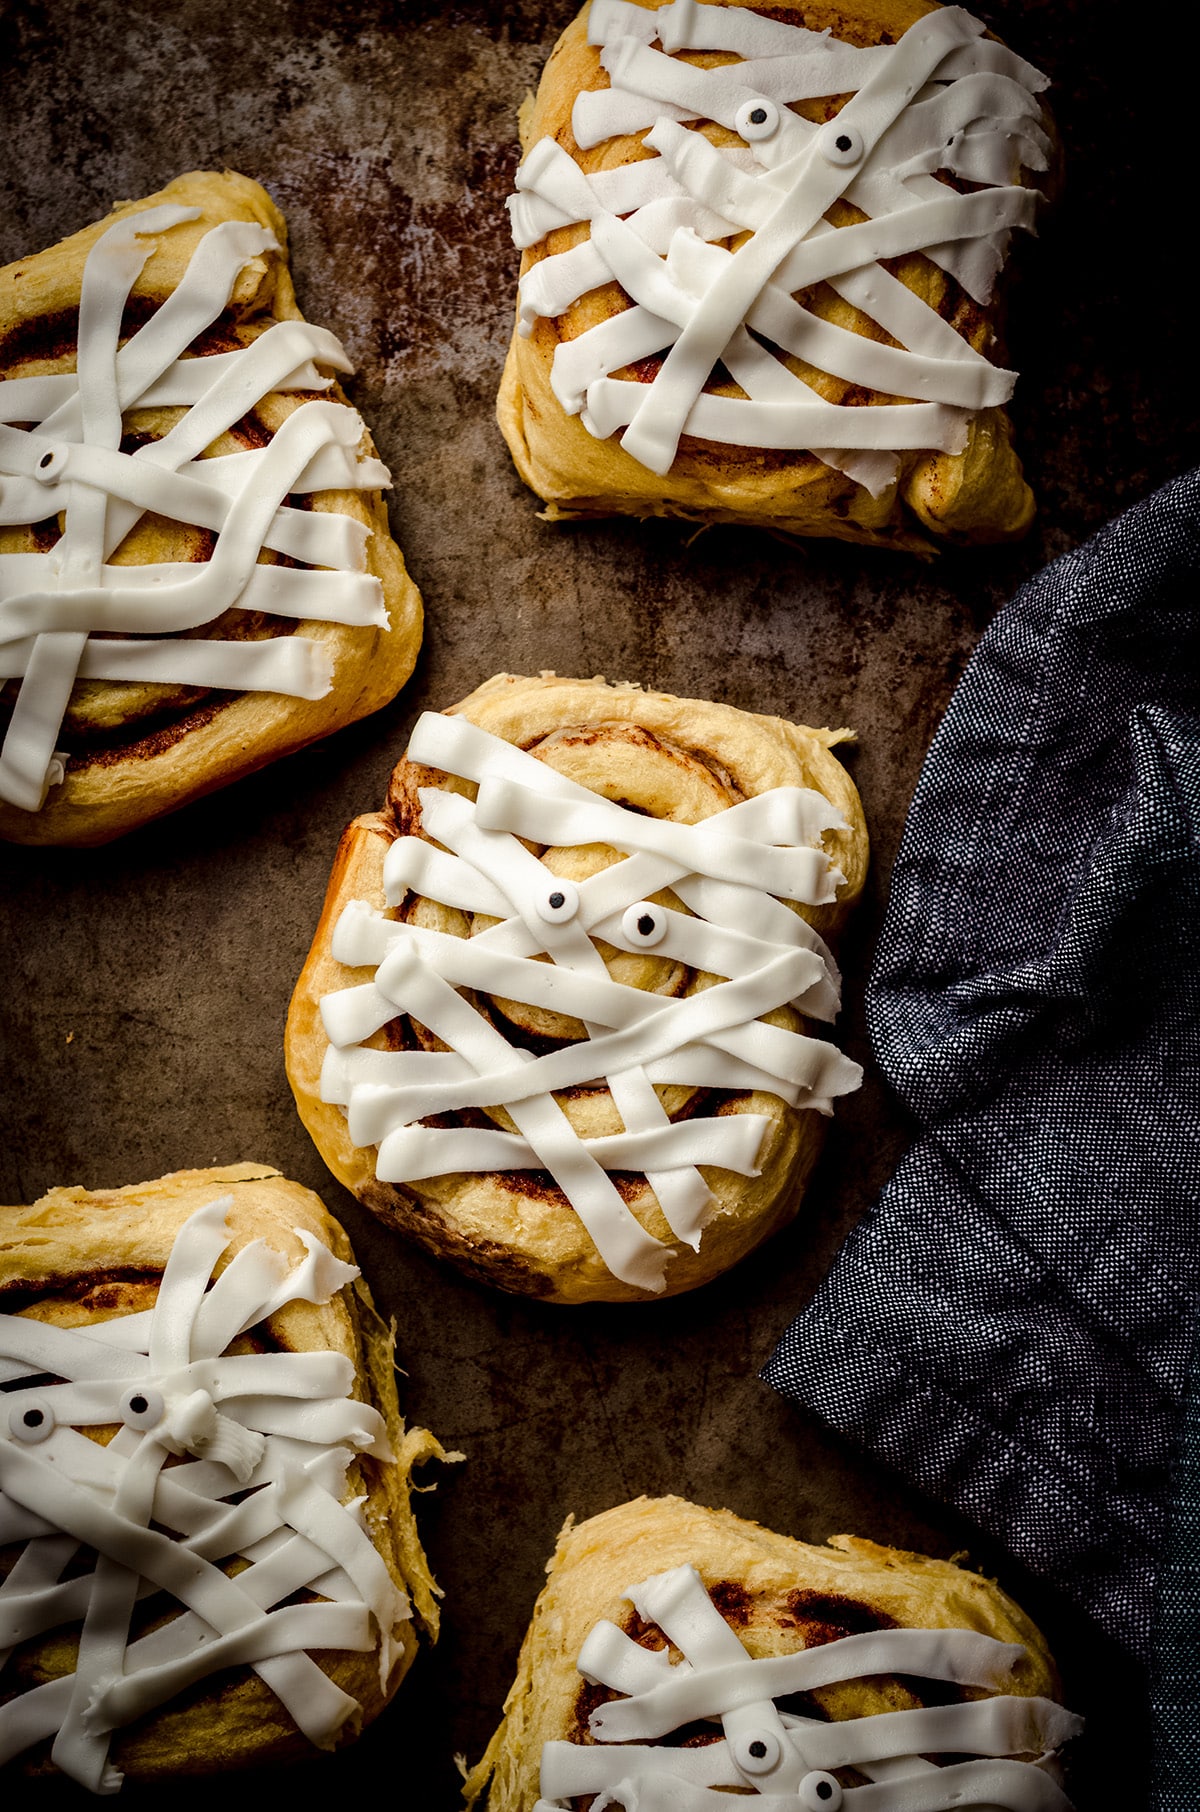
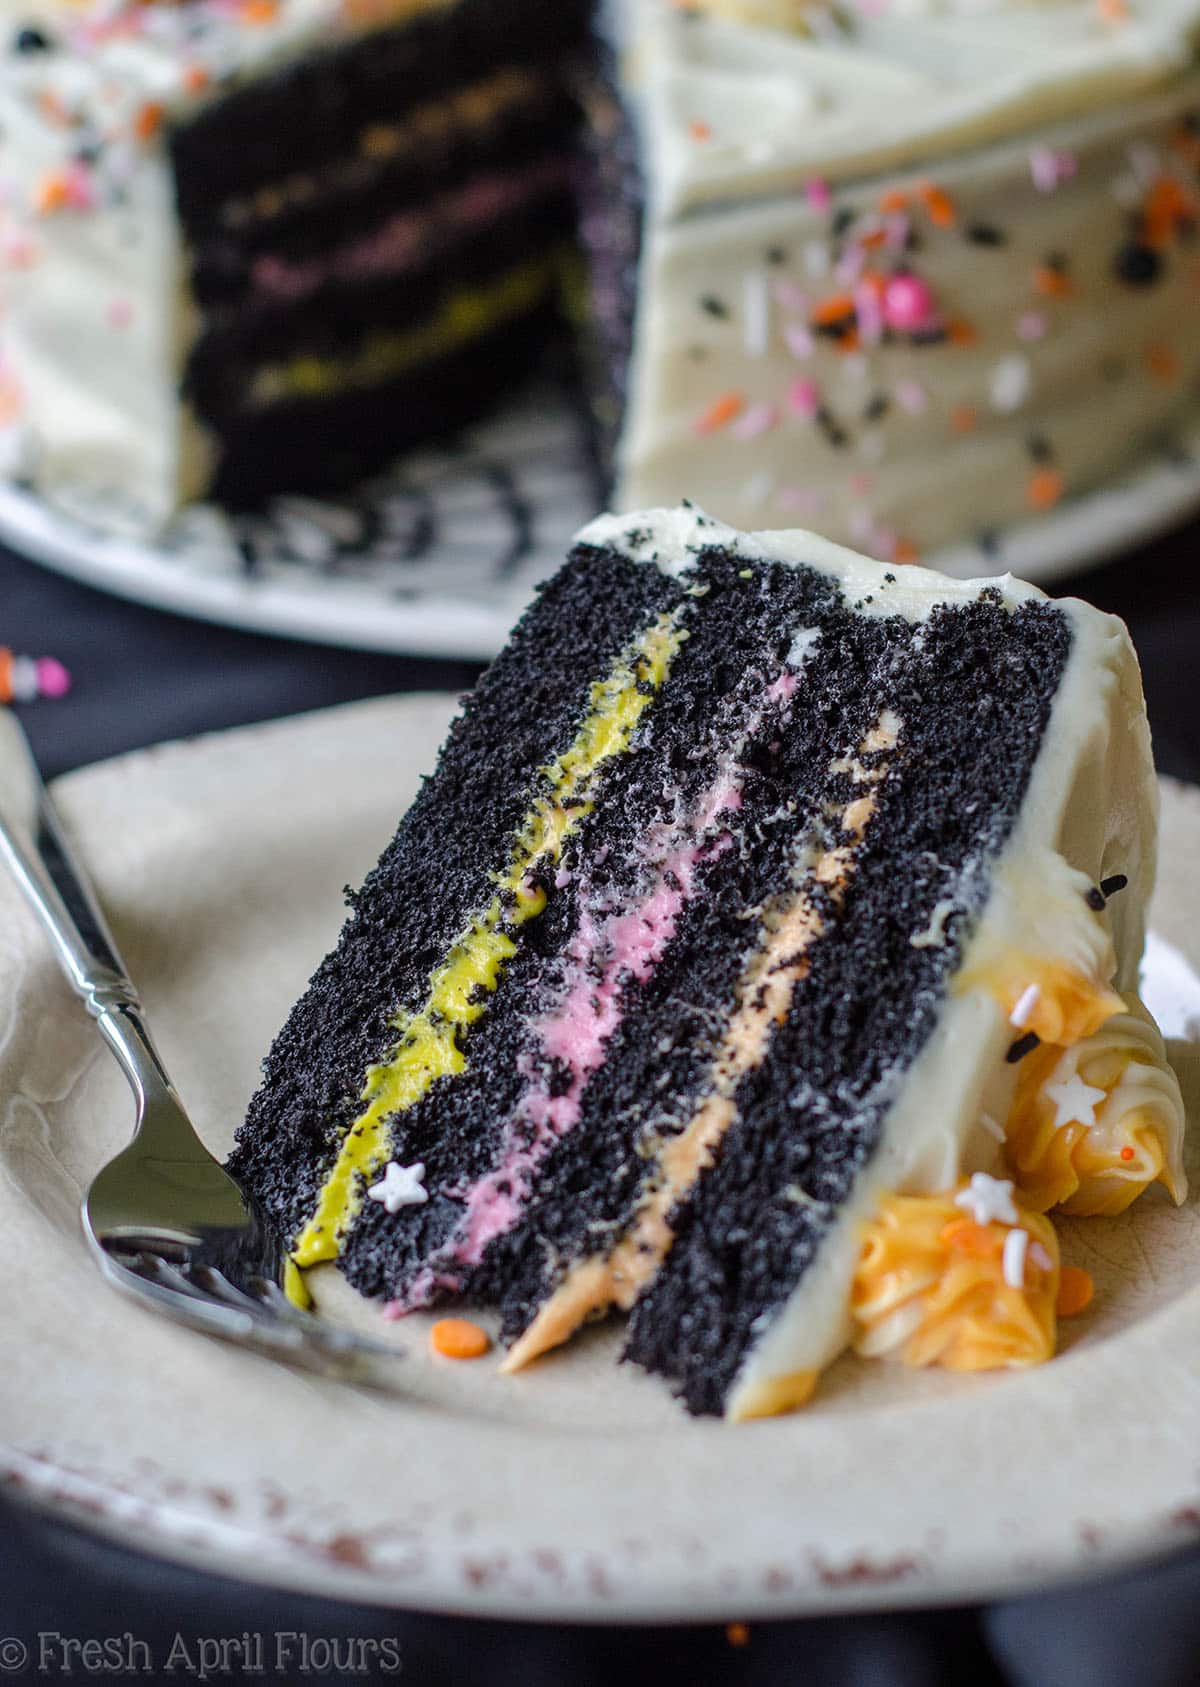
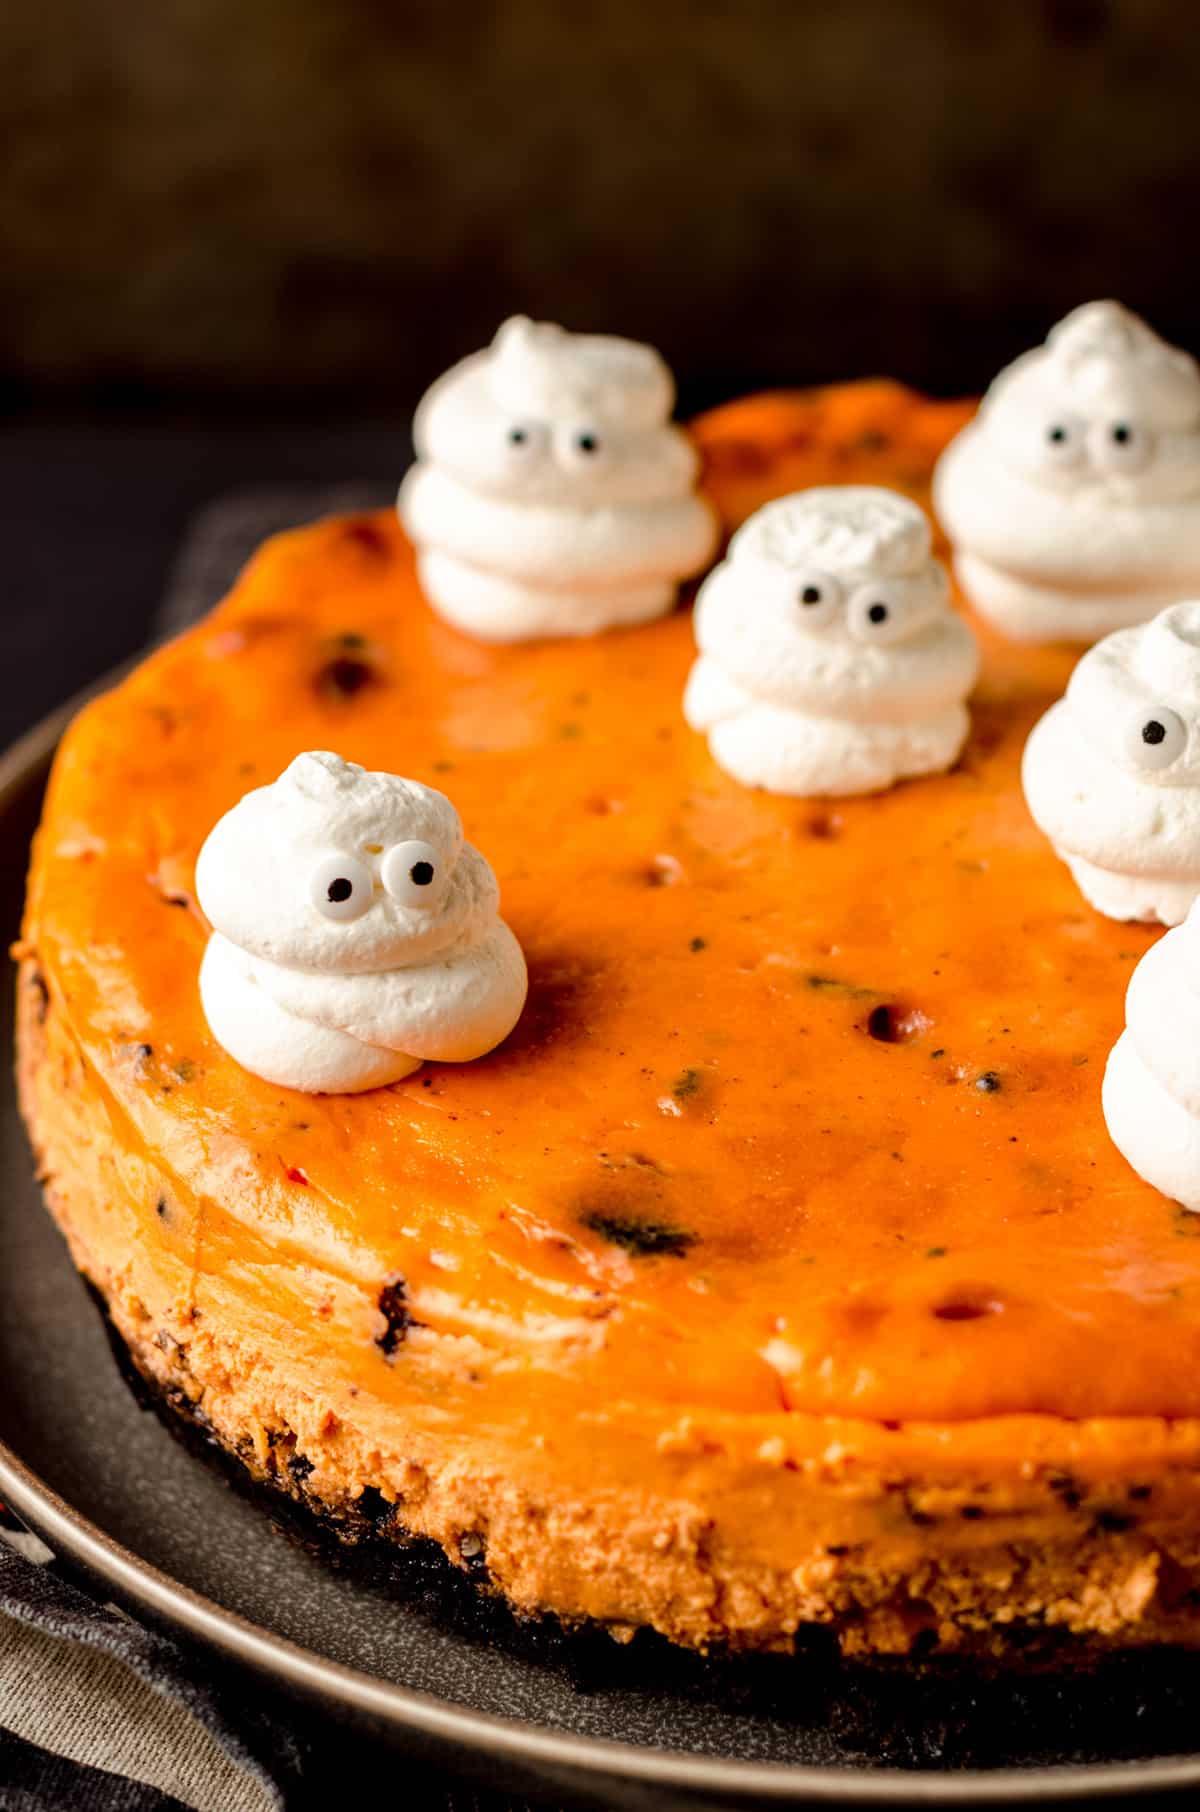
Looking for more Halloween goodies? Check out some of my favorites: Halloween sangria, mummy cinnamon rolls, black velvet cake, and Halloween cheesecake.

Jack & Sally Sugar Cookies
Ingredients
COOKIE BASE
- 2 cups (240g) all-purpose flour1
- ¾ teaspoon baking powder
- ½ teaspoon baking soda
- ½ teaspoon salt
- ½ cup (113g) unsalted butter softened to room temperature
- 1 cup (120g) powdered sugar
- 1 large egg room temperature preferred2
- ¼ cup (56mL) vegetable oil
- 1 Tablespoon vanilla extract
- 2 Tablespoons (25g) granulated sugar separate and in a small bowl
- food coloring in desired colors3
- black cookie icing or melted semi-sweet or dark chocolate4
VANILLA BUTTERCREAM
- 6 Tablespoons (85g) unsalted butter softened to room temperature
- 1 and ½ cups (180g) powdered sugar
- ¾ teaspoon vanilla extract
- ½ to 1 Tablespoon (8-15mL) milk or cream
- pinch of salt
Instructions
COOKIE BASE
- Preheat the oven to 350ºF (177ºC). Line two large baking sheets with parchment paper or a silicone baking mat. Set aside.
- In a medium size bowl, whisk together the flour, baking powder, baking soda, and salt. Set aside.2 cups (240g) all-purpose flour1, ¾ teaspoon baking powder, ½ teaspoon baking soda, ½ teaspoon salt
- In a large bowl with a handheld mixer, or the bowl of a stand mixer fitted with the paddle attachment, cream the butter and powdered sugar on medium-high speed until light and fluffy, about 2-3 minutes.½ cup (113g) unsalted butter, 1 cup (120g) powdered sugar
- Stop the mixer, add the egg, vegetable oil, and vanilla extract, then beat again on medium speed until everything is combined, stopping the mixer to scrape down the sides of the bowl as necessary.1 large egg, ¼ cup (56mL) vegetable oil, 1 Tablespoon vanilla extract
- Reduce the mixer speed to low, then add the dry ingredients in two additions, insuring the first addition is mostly incorporated before adding the second. Continue to beat on low until just combined. Dough will be soft but not too sticky. If it is too sticky, allow it to rest for 10 minutes at room temperature.
SPLIT THE DOUGH
- Using a spatula, gently press all of the dough into the bottom of the bowl so it's evenly dispersed and easy to divide. Using a spatula or a knife to draw lines into the dough, split the dough in half. Leave one half of the batter untouched, and split the other half into 3 fairly equal portions.
- Scoop out each of the 3 portions of dough into 3 smaller separate bowls. This does not have to be perfect, but you can use a digital kitchen scale to insure equal portions, if desired. Set the 3 smaller bowls aside for now and work with the larger portion of dough (the half you did not split).
BAKE THE JACK COOKIES
- Using a cookie scoop (I use this #50 cookie scoop for all of my standard size cookies), drop balls of dough onto one of the prepared baking sheets. The balls of dough will be jaggy on the top which will equate to jaggy cookie tops after they're baked. Since you're covering these cookies in icing to make a Jack face, you don't have to worry about it. If you'd like cookies that have smoother looking tops, simply dip your fingers into some granulated sugar and gently press the lines together to smooth out the cookie dough ball.
- Bake the cookies for 8-9 minutes, just until edges are set. Allow to cool on the baking sheet for 2-3 minutes before transferring to a wire rack to cool completely.
BAKE THE SALLY COOKIES
- Tint each bowl of cookie dough one of Sally's colors (see note #3 about these colors).food coloring in desired colors3
- Working with one color of dough at a time, use a ½ teaspoon measure or mini cookie scoop with a trigger, drop 8 balls of one color of dough spaced out evenly on another of the prepared baking sheets. When you have filled the baking sheet, wash the cookie scoop and move to a second color, dropping the next ball of dough right onto or next to the first ball of dough. This does not need to be perfect. Repeat with the third color.
- When you have 3 balls of dough per space, dip your fingers into some granulated sugar, then gently press the 3 balls of dough together, giving a small "twirl" to the ball of dough to encourage swirling of the colors.2 Tablespoons (25g) granulated sugar
- Bake the cookies for 8-9 minutes, just until edges are set. Allow to cool on the baking sheet for 2-3 minutes before transferring to a wire rack to cool completely.
MAKE THE BUTTERCREAM
- When the cookies are completely cool, they are ready for decorations. In a medium size bowl with a handheld mixer or a stand mixer fitted with the paddle attachment, beat the the butter on medium-high until smooth.6 Tablespoons (85g) unsalted butter
- Turn the mixer to low, then slowly add the powdered sugar and mix until everything is combined. Add the vanilla extract, milk or cream, and salt, increase the mixer speed to medium and beat until combined. Turn off the mixer and use a spatula to stir the buttercream by hand to remove air bubbles and make it smooth and creamy. This usually takes about 3-5 minutes.1 and ½ cups (180g) powdered sugar, ¾ teaspoon vanilla extract, ½ to 1 Tablespoon (8-15mL) milk or cream, pinch of salt
DECORATE THE COOKIES
- When your buttercream is smooth, fit a piping bag or a large zip top bag with the corner snipped off with the buttercream. Pipe a mound of buttercream onto each of the Jack cookies, then use a small offset spatula or knife to smooth out the frosting evenly over the top of each cookie. Allow icing to set completely before piping on the Jack face (this will take about 1 hour).
- When the white icing is set, smooth out any bumps with a piece of parchment or wax paper and your fingers. This is a totally optional step, but I like to make the white canvas as smooth as possible.
- Working with one cookie at a time, use the black icing or semi-sweet chocolate in a piping bag or cookie icing bottle to pipe a Jack face onto each white cookie. Use the same icing or chocolate to pipe small stitches onto Sally's cookies. Allow everything to set before serving.black cookie icing or melted semi-sweet or dark chocolate4
- Store cookies covered tightly at room temperature up to 1 week. Cookies freeze well, up to 3 months. Unbaked dough balls also freeze well, up to 3 months. Bake frozen and add 1-2 minutes to the baking time.
Video
Notes
- Flour: it is imperative that you either fluff/spoon/level your flour or ideally, weigh it in grams. Two cups of all-purpose flour is 240g. Too much flour will result in a dense cookie.
- Room temperature egg: it is always a good idea to use room temperature eggs when using room temperature butter, as it incorporates into batter much more easily. It is not required, just encouraged.
- Food coloring: I prefer gel food coloring, as it has the richest colors and doesn’t water down cookie dough. My preferred brand is AmeriColor, and I have the large 50-count box. For Sally’s pieces, I used electric purple + deep pink, turquoise, and gold + lemon yellow. You can achieve these colors any way you desire with whatever food coloring you prefer. You can get very close shades using combinations of colors in AmeriColor’s basic 12-count box.
- Black icing: I like to use pre-made cookie icing whenever I need black icing. It’s convenient and easier than getting a true dark shade of black. You can find this in your local grocery store or craft store in the baking/cake decorating aisle.
Nutrition Disclosure
All nutritional values are approximate and provided to the reader as a courtesy. Changing ingredients and/or quantities will alter the estimated nutritional calculations.
These are so fun! I love how bright the Sally cookies are.
Thanks so much!
Love the colors in the Sally cookies, and the Jack ones are super adorable! These are perfect for a movie night, especially with kids.
Thanks so much, Amy!
Oh my gosh these are too fun! Love the design!
Thank you so much!
Thank you so much, Sally!
When you say you used electric purple and deep pink, did you mix these 2 colours?
I don’t see any purple on the cookie
Hi, Sandy– yes, I mixed the colors. Electric purple is more magenta than purple. You can use whatever color pink works best for you.
Hi Lynn.
It’s me again asking another question. I’m going to make these on Friday but was hoping to make the dough on Thursday then continue with dying and baking on the Friday. Do you think the dough will refrigerate well over night?
Hi, Sandy– I do! Just be sure it’s back to room temperature before you work with it. You’ll also want to be sure it’s covered super tightly. Enjoy!