
Sheet Pan Quesadilla Recipe
As an Amazon Associate, I earn from qualifying purchases. Read the full disclosure here.
Turn your favorite homemade quesadillas into an easy dinner by making them entirely on a sheet pan. Fill with your choice of meat and favorite veggies to change it up or cater to your crowd’s tastes.
While I tend to focus mostly on the sweet side of life (like cookies, cakes, and all things funfetti), I love sharing some of my favorite savory recipes here too! I mean, one of my most popular recipes is tortilla pizza and it’s savory, saucy, and shockingly easy to make.
A trend you’ll see is that when I share a savory dinner or breakfast recipe, I like to keep things simple. That’s because these recipes are for everyday life. Cooking dinner is a thing I do pretty much every day, and so I want those recipes to be simple, family-friendly, and totally delicious.
Enter in this crazy easy (and crazy delicious) recipe for sheet pan quesadillas. Like sheet pan pizza and sheet pan pancakes, this recipe is a hit in my house! Not only because it’s easy to prepare, but because everyone can choose their favorite toppings and fillings.
This is a sure way to make sure everyone is happy at the dinner table, and the cook isn’t driven to the brink of insanity in the process. Is that too much to ask for? I don’t think so!
Oh! And if you’re looking for more easy dinner ideas, I urge you to try some of my family-tested recipes like these comforting baked turkey and cheese sliders, gluten free meatballs, or a bowl of my cozy sausage tortellini soup.
Sheet Pan Quesadilla Ingredients
The list of ingredients that go into these easy sheet pan quesadillas are pretty simple. I don’t know about you, but I tend to have the ingredients on hand pretty much at all times. In fact, that’s what I love so much about this easy meal– it’s so simple to pull together!
GROUND BEEF: for the meat I chose to use a cooked ground beef that’s been seasoned with my homemade taco seasoning, but you could totally use shredded rotisserie chicken if you wanted to make things even easier. In fact, you could skip the meat all together and do a cheese or veggie-packed version. Or you could go totally crazy and divide the sheet pan into quadrants and make 4 different options. The possibilities are truly endless.
WATER: this is just for helping turn the taco seasoning into a sauce.
TACO SEASONING: I use my homemade taco seasoning whenever I can, but you can use store-bought, too!
YELLOW ONION: feel free to use a sweet onion or a red one, if you have different onion preferences.
BELL PEPPER: any color will do. I usually choose a green one with taco-style meals.
BLACK BEANS: another place you can change up the beans or leave them out entirely.
SHREDDED CHEESE: I like to pick a Mexican blend, but any will do here. You can use pre-shredded or shred it yourself.
SALSA: this is a great place for a fun kind of salsa like strawberry salsa or peach salsa! Store-bought or homemade salsa both work here.
FLOUR TORTILLAS: you’ll want the burrito size tortillas.
QUESADILLA SAUCE: I highly, highly recommend making up a batch of my homemade quesadilla sauce, which we’ll get to in a bit.
But keep in mind that sheet pan quesadilla recipe is a guideline, and you can customize it to your tastes.
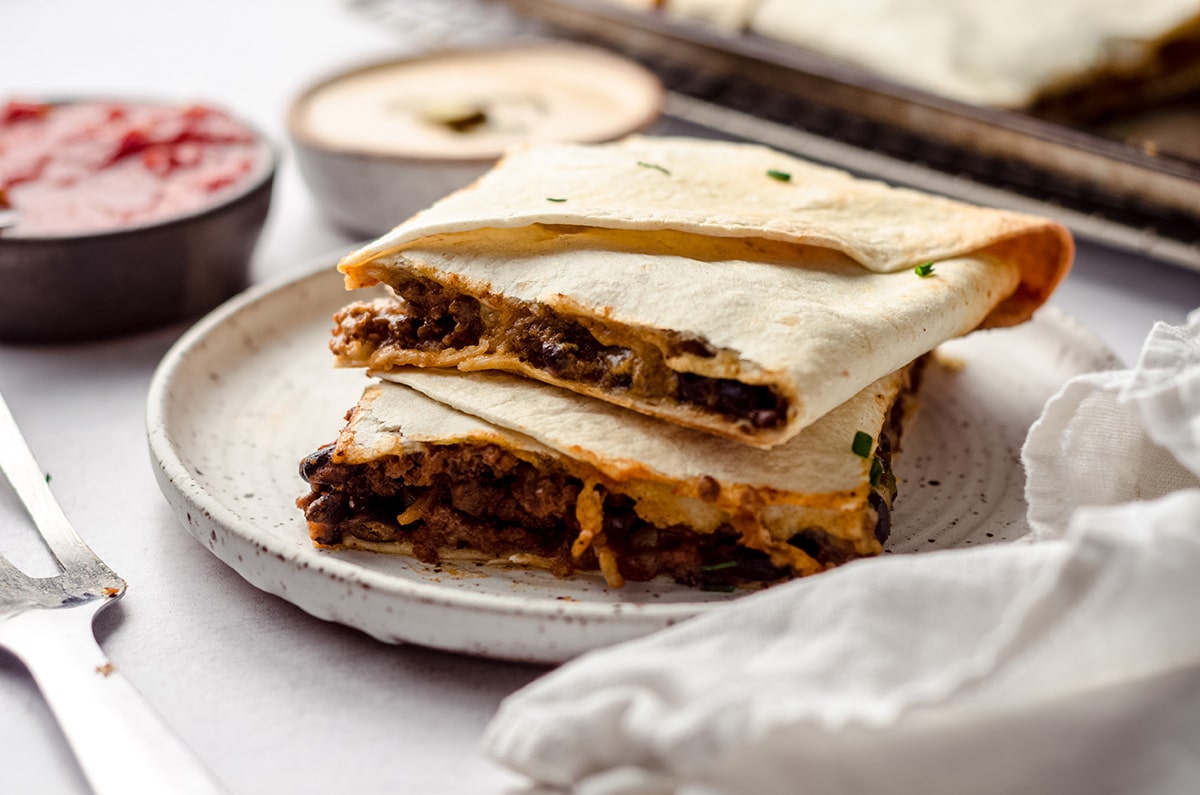
My tastes though? Yeah they are ALL about that yummy bean and beef combo with LOTS of cheese. I’m drooling just thinking about it!
THE HOMEMADE TACO SEASONING
Now you could totally go for store-bought taco seasoning over homemade, but why would you? I mean, if you have a stocked spice drawer and a few extra minutes, it’s so easy to make your own.
My homemade taco seasoning is made with a blend of spices you probably have in your spice drawer right now! All you need to do is give them a quick stir together and BOOM: you’ve got taco seasoning.
And bonus points? The seasoning is gluten and dairy free (which this quesadilla recipe is not, but for future reference…). Woot!
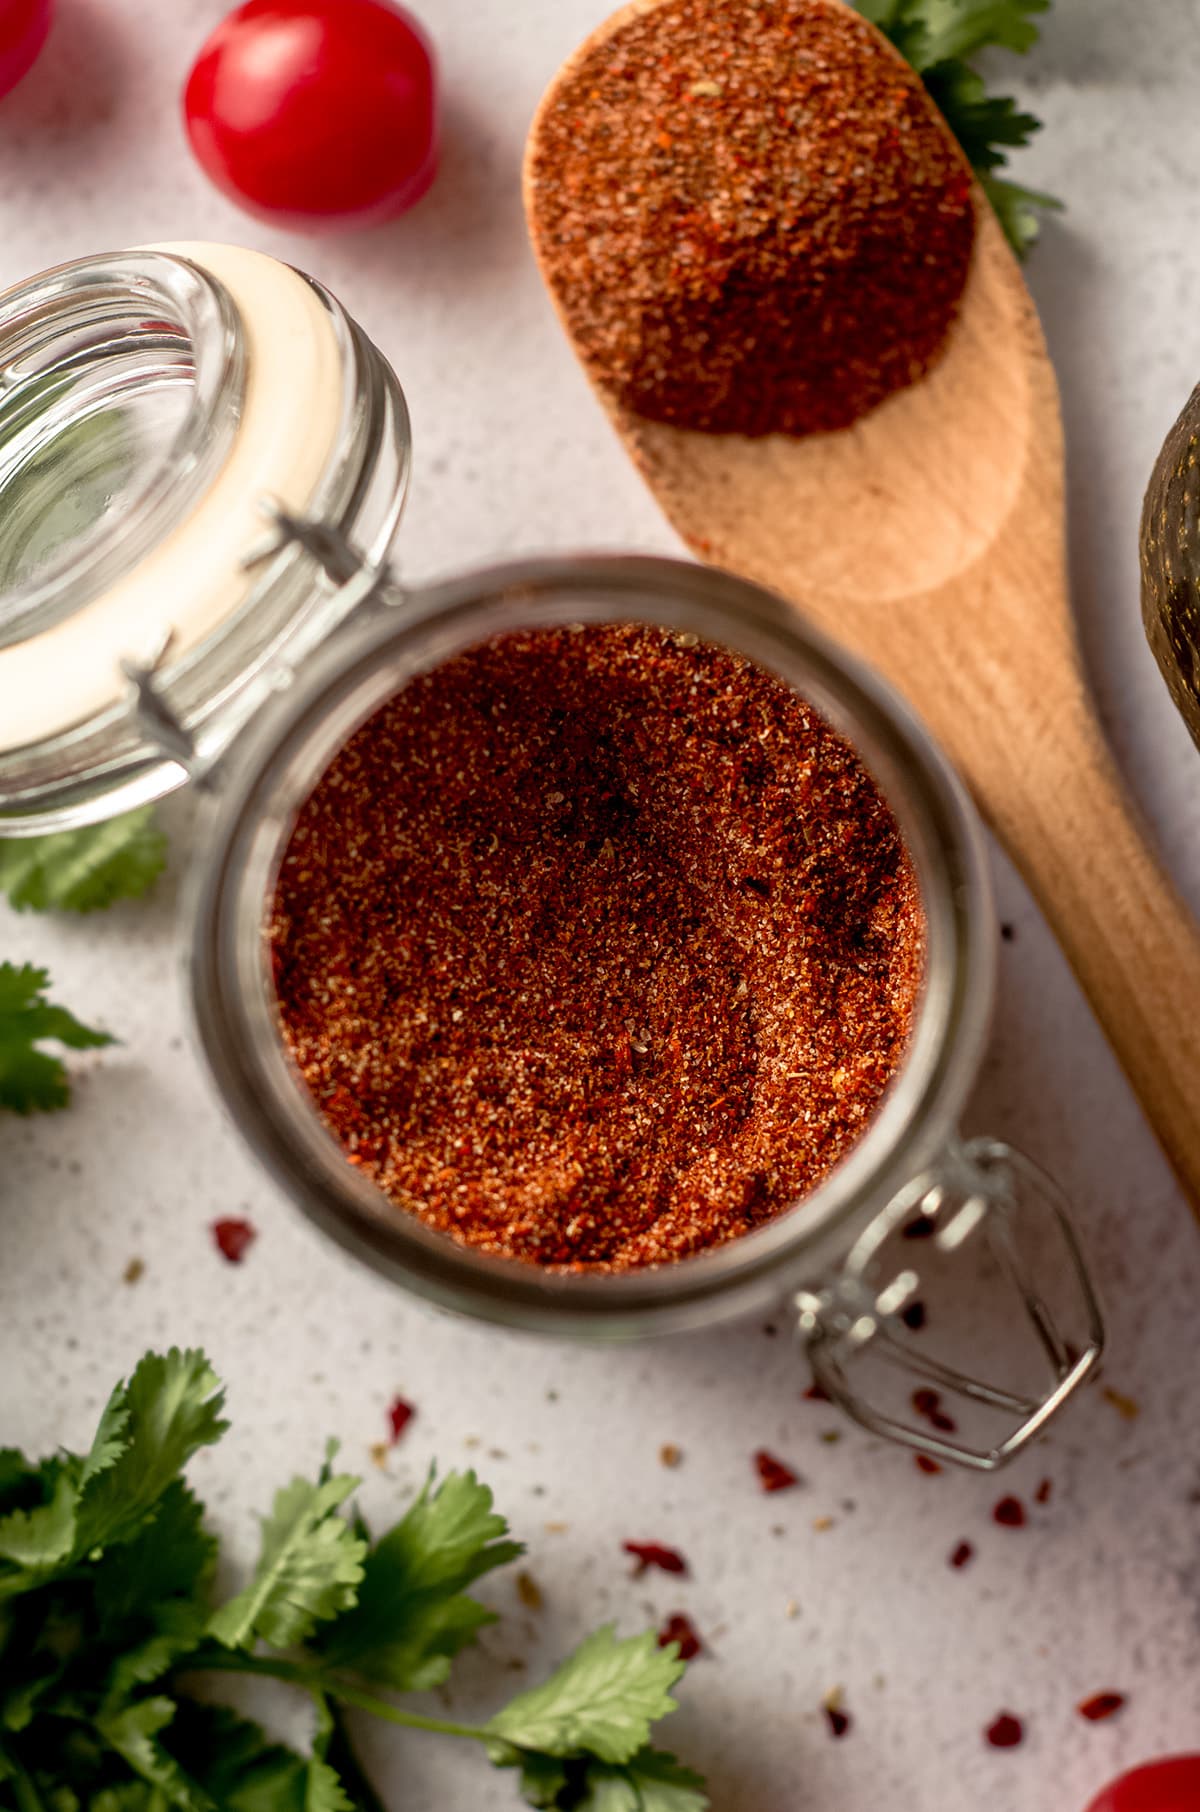
The best part is really that it tastes so much better than any packet I’ve ever purchased. The flavors are bright, fresh, and it’s way less expensive than buying it from the store. Trust me, you’ll love it!
THE QUESADILLA SAUCE
This ingredient is totally optional, but when I say my husband and I are obsessed, I mean it. It’s just a little bit spicy, creamy, and packed with flavor. It can be a little too spicy for little ones, but since it’s balanced with creaminess from sour cream and mayo it’s more “zingy” than “spicy.”
I like to incorporate my homemade quesadilla sauce right in with the ground beef mixture and fillings, AND serve some for dipping, that’s how much I love this stuff.
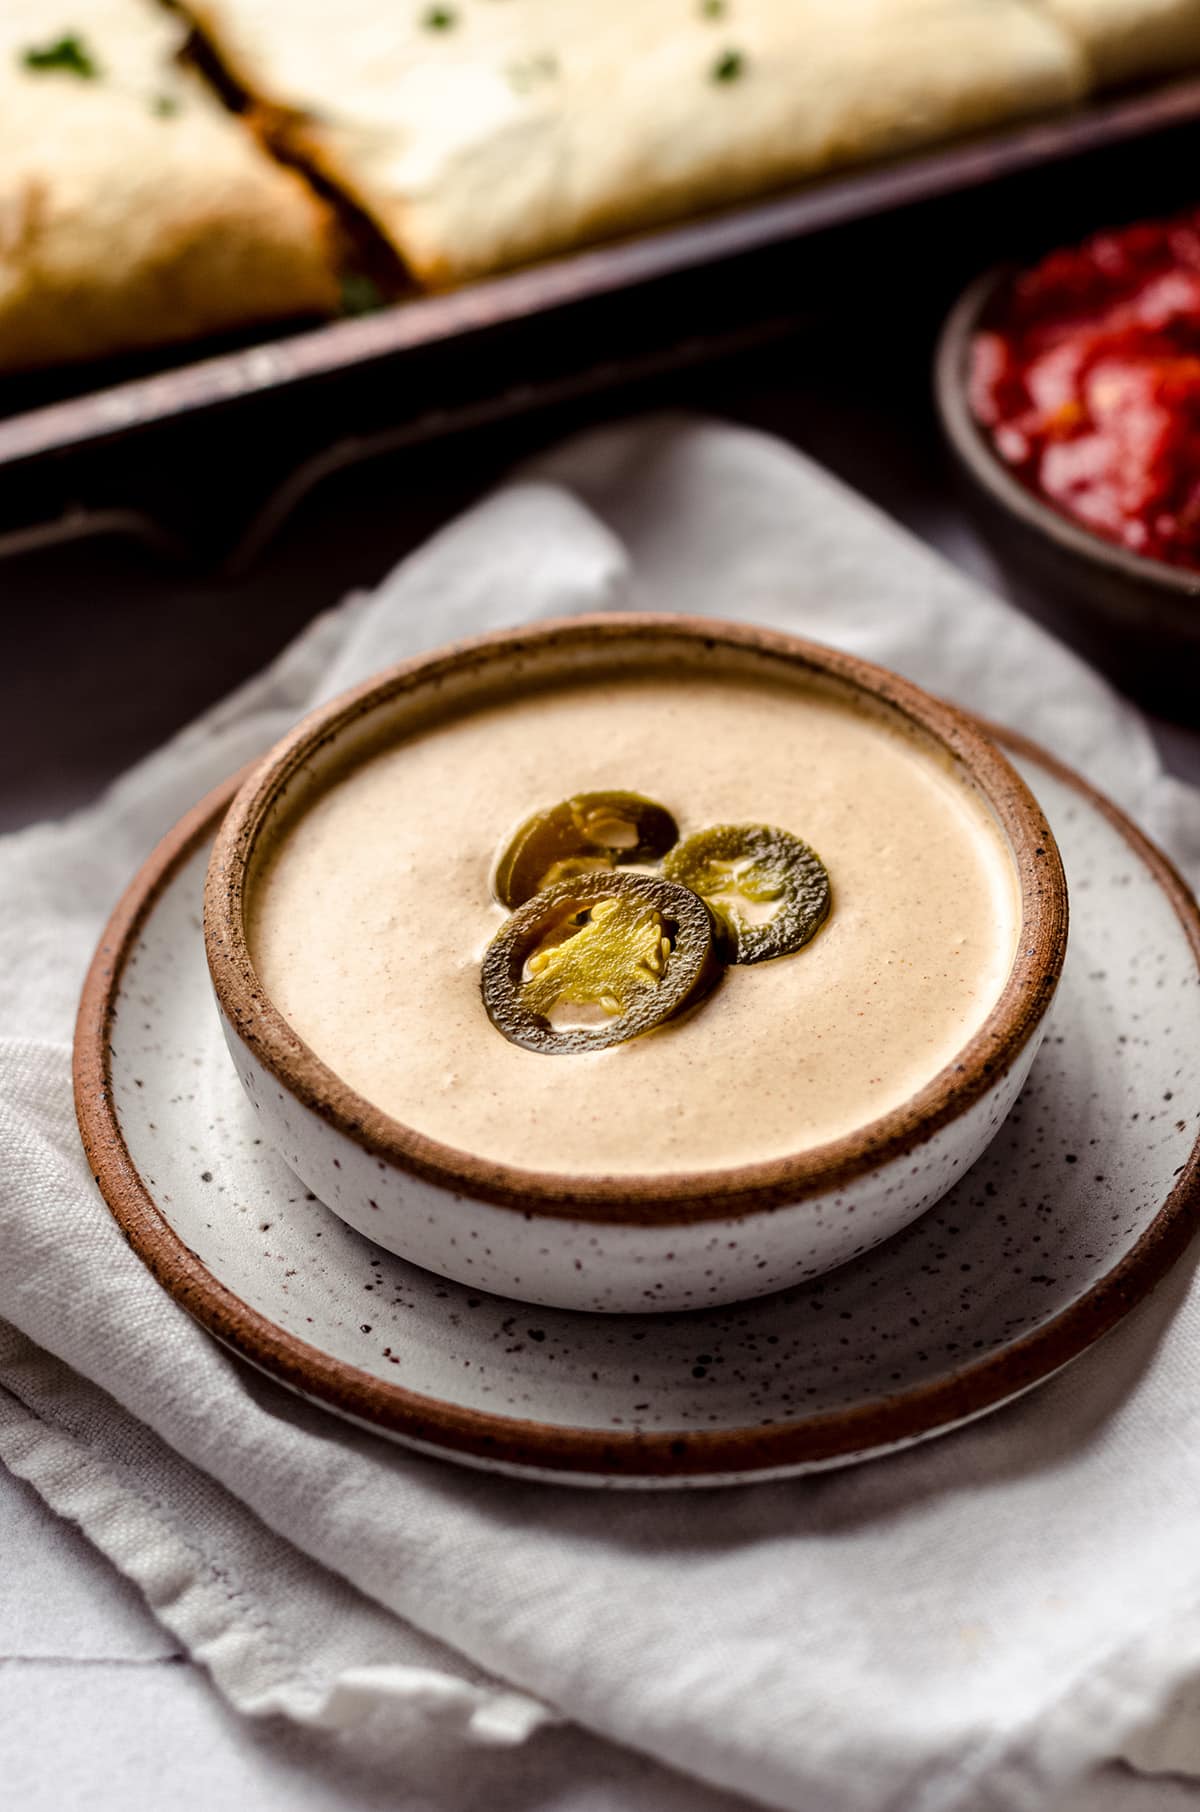
But you know what makes me love it even more? It can be made entirely in a blender. That means easy clean up and it takes less than a few minutes to pull together. When it comes to meals I’m all about easy and this one checks all the boxes.
HOW TO MAKE SHEET PAN QUESADILLAS
Before you jump right in and get started with this easy recipe, remember to preheat your oven to 425ºF (218ºC) and spray a large baking sheet with non-stick cooking spray (or line with parchment paper). Set the sheet aside and let’s get started!
STEP #1: BROWN THE MEAT
First you’re going to want to brown the ground beef. Do this by heating a skillet over medium heat and adding the beef as soon as the skillet is hot.
Cook the meat until completely browned, crushing it with a wooden spoon as you go. Don’t drain the ground beef– we need that fat to cook the vegetables.
Once the ground beef is cooked through and no longer pink, add in a third of a cup of water and the taco seasoning. Mix everything until completely combined, and then cook for another 2-3 minutes or so. This will help thicken up the “sauce” that forms with the liquid and taco seasoning mixture.
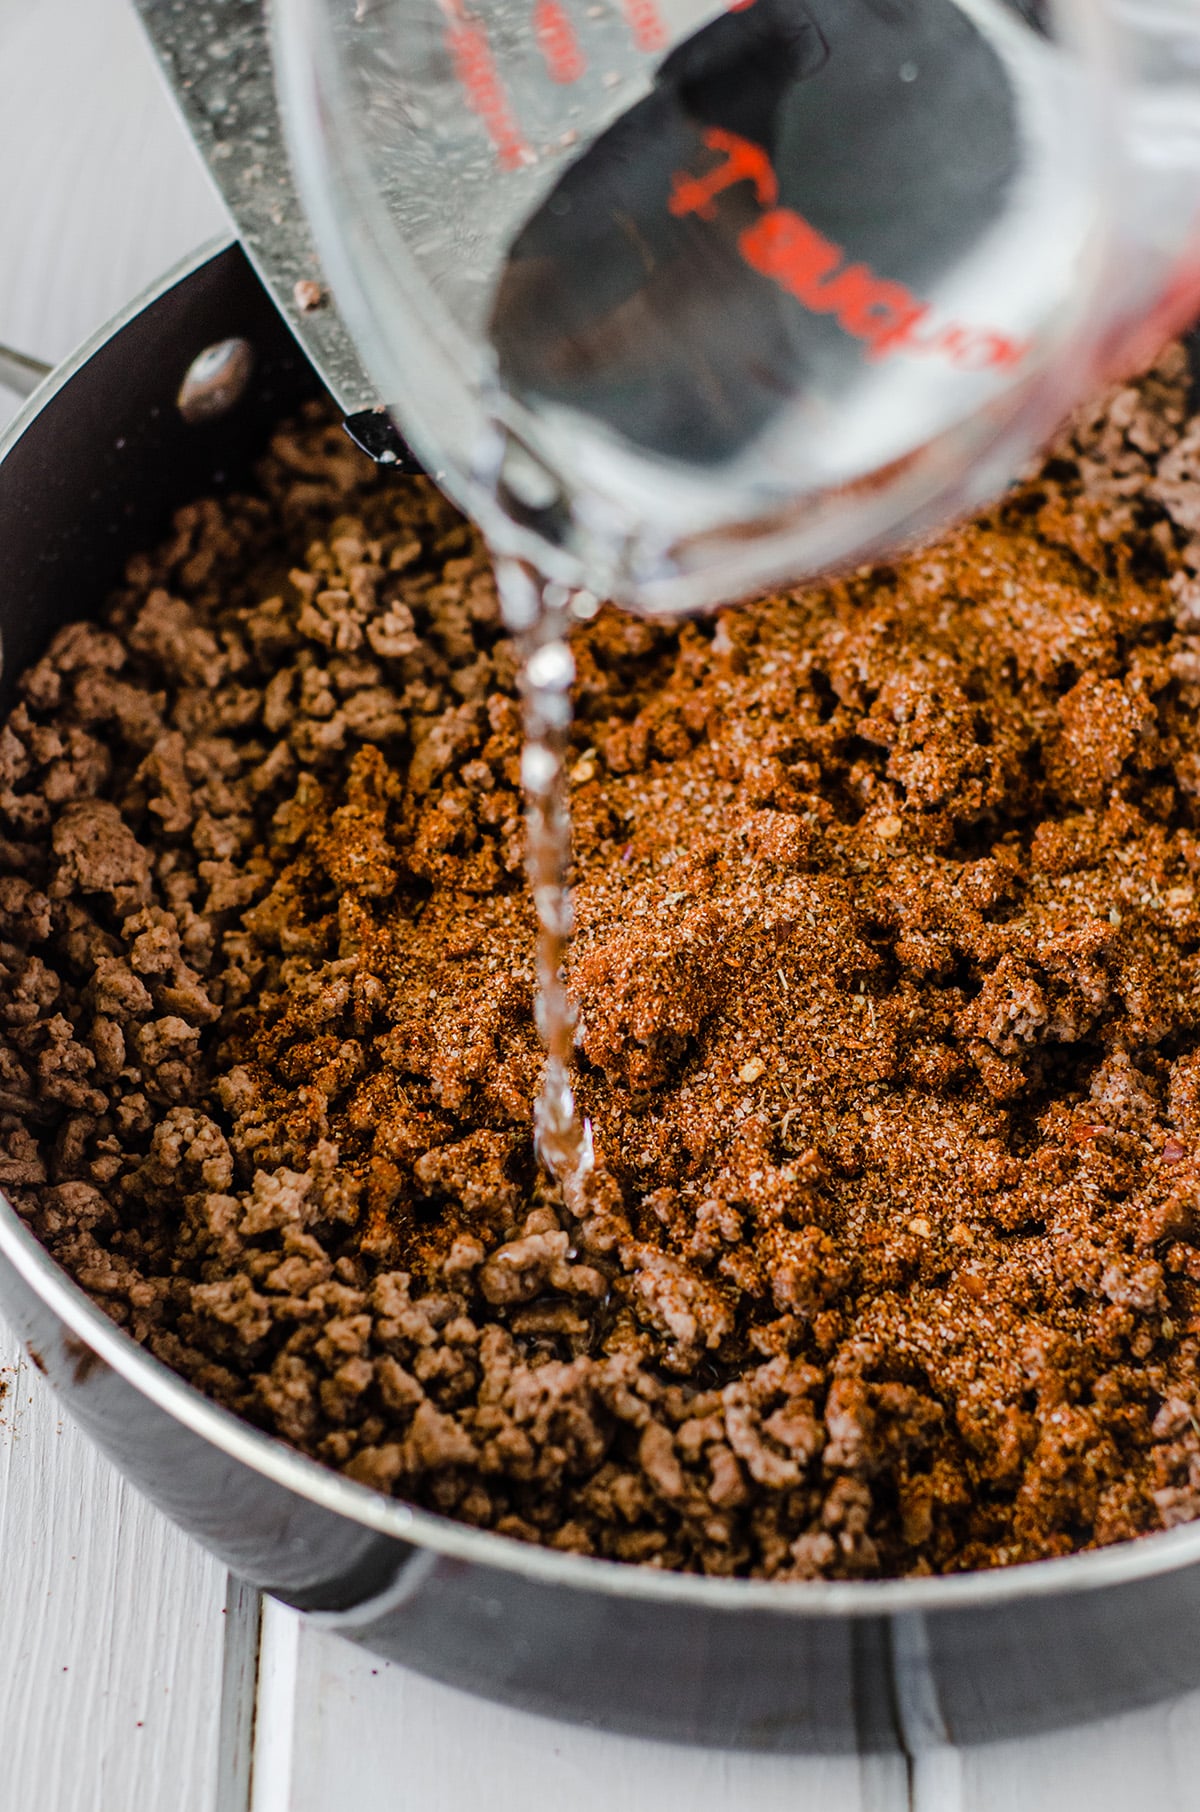
Spoon just the meat (leave behind the fat) into a medium sized bowl and set aside. Next up? The veggies!
STEP #2: COOK THE VEGETABLES
In the same skillet we just cooked the meat in, add the bell peppers and onion. If there wasn’t a lot of reserved fat from the ground beef (or you chose to drain it) add a bit of olive oil to the pan first.
Cook the onion and pepper for about 5 minutes, or until soft. Make sure to stir frequently so everything cooks evenly.
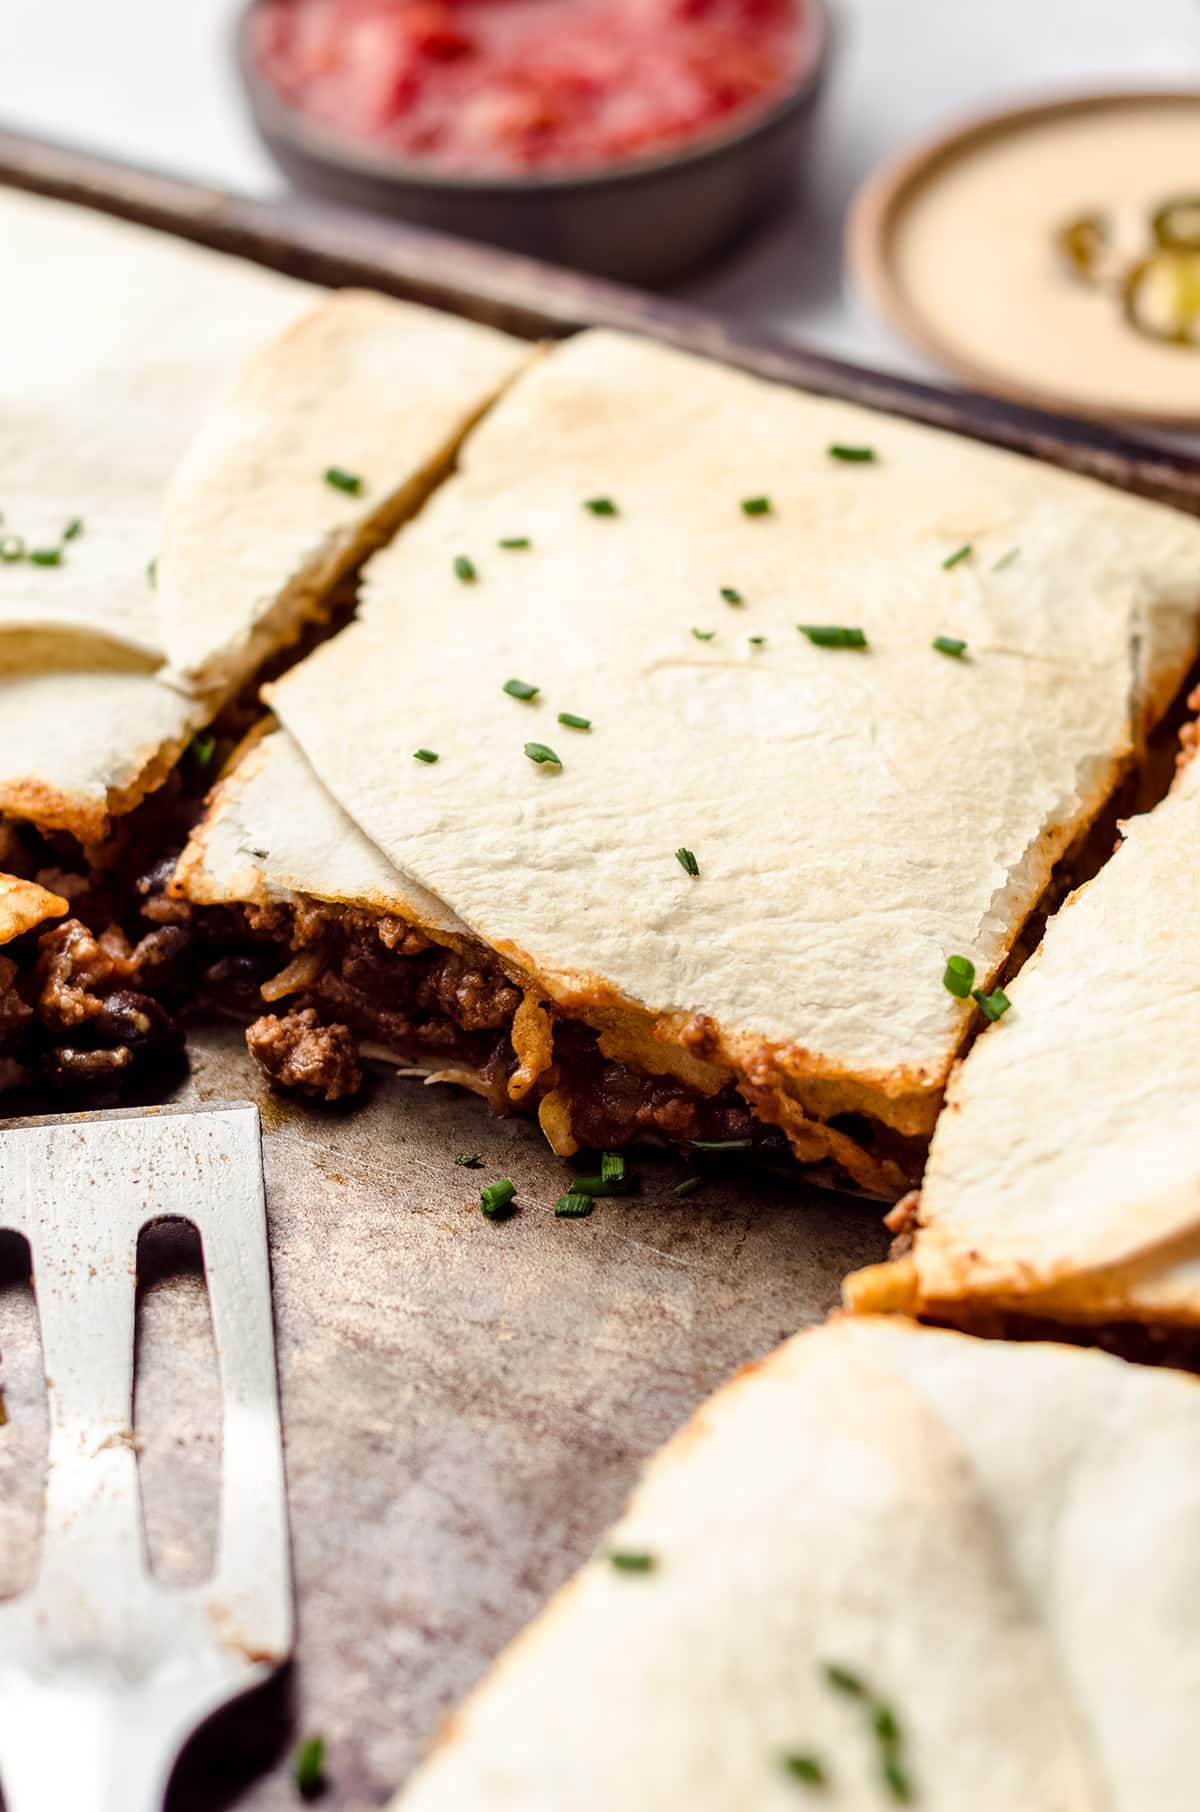
One the vegetables are soft, add the cooked meat back into the skillet and stir to coat the vegetables in the seasoning blend. Then go ahead and add in the salsa and the can of drained black beans. Give it a good stir.
Once everything is thoroughly combined remove it from the heat and set aside. Now you’re ready to prepare your tortillas and layer in the fillings!

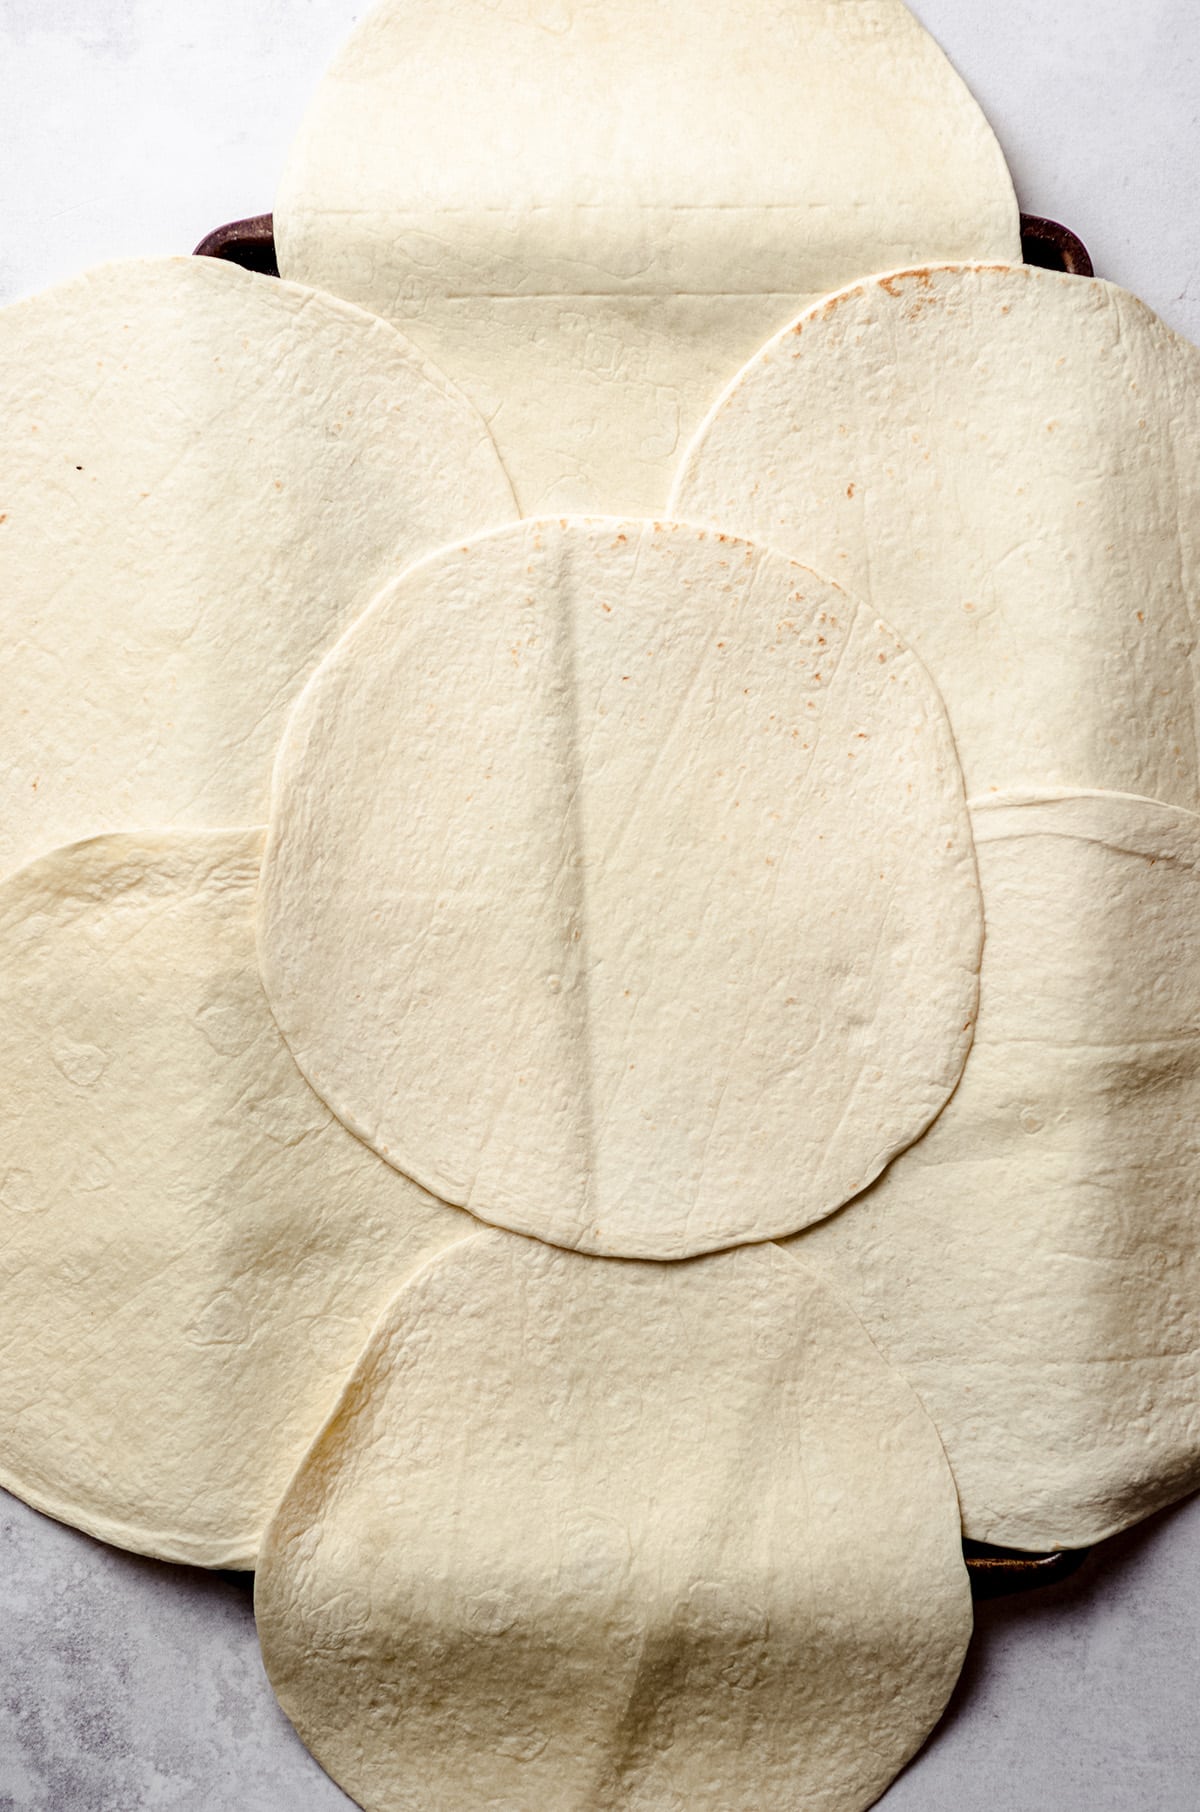
STEP #3: PLACE THE TORTILLAS
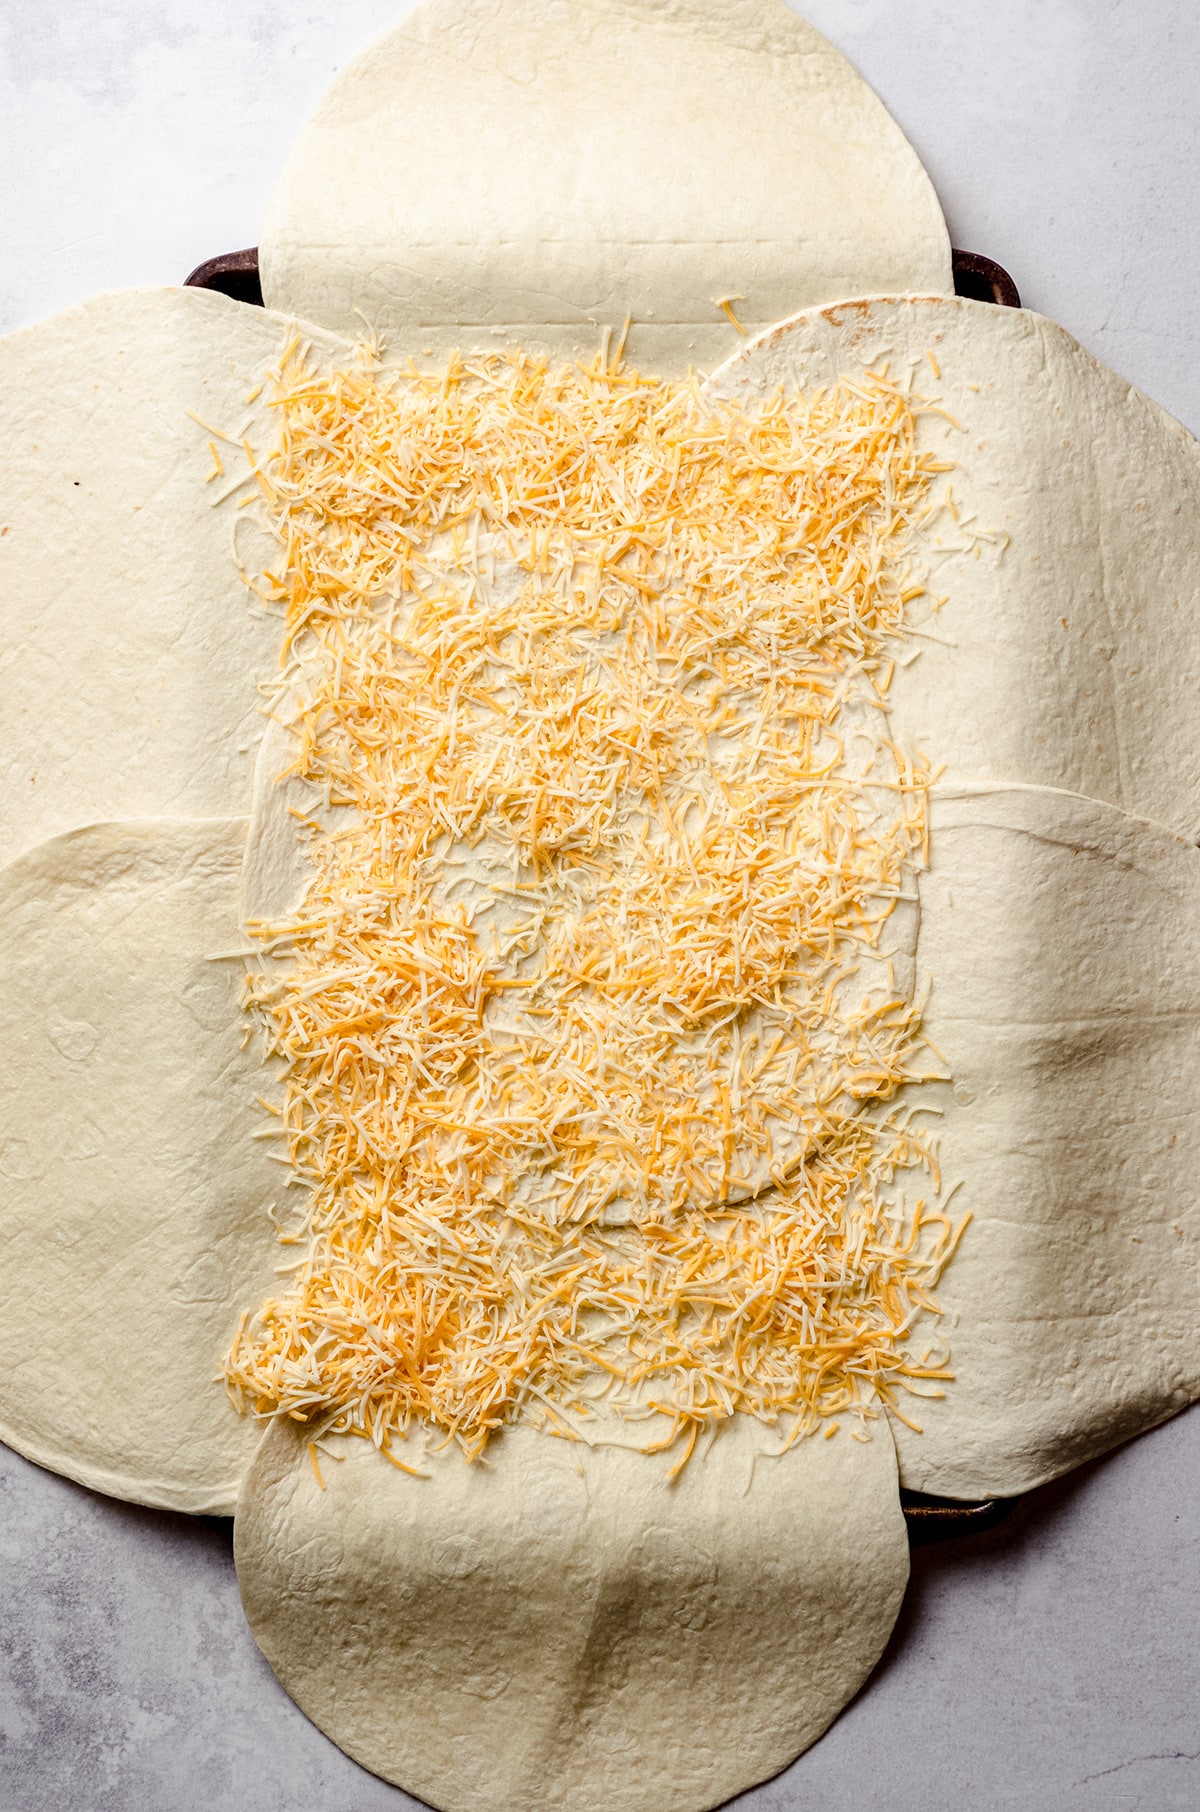
Get out the sheet pan you prepped with cooking spray (or parchment paper) and place 6 flour tortillas around the edges of the baking sheet, overlapping where needed in order to completely cover the baking sheet.
Then, add a single tortilla in the middle to cover the center of the pan. You will definitely have some hanging over the edges, but that’s a good thing! That overlap is going to come into play in just a minute to act as a top layer, giving the classic “folded over” quesadilla effect.
STEP #4: LAYER THE FILLING
Now that the tortillas are in place, you’re ready to start laying in the delicious fillings!
I like to start by sprinkling about half of the shredded cheese (around 1 cup) evenly over the surface of the flour tortillas (just the part that is inside of the pan, not the edges).
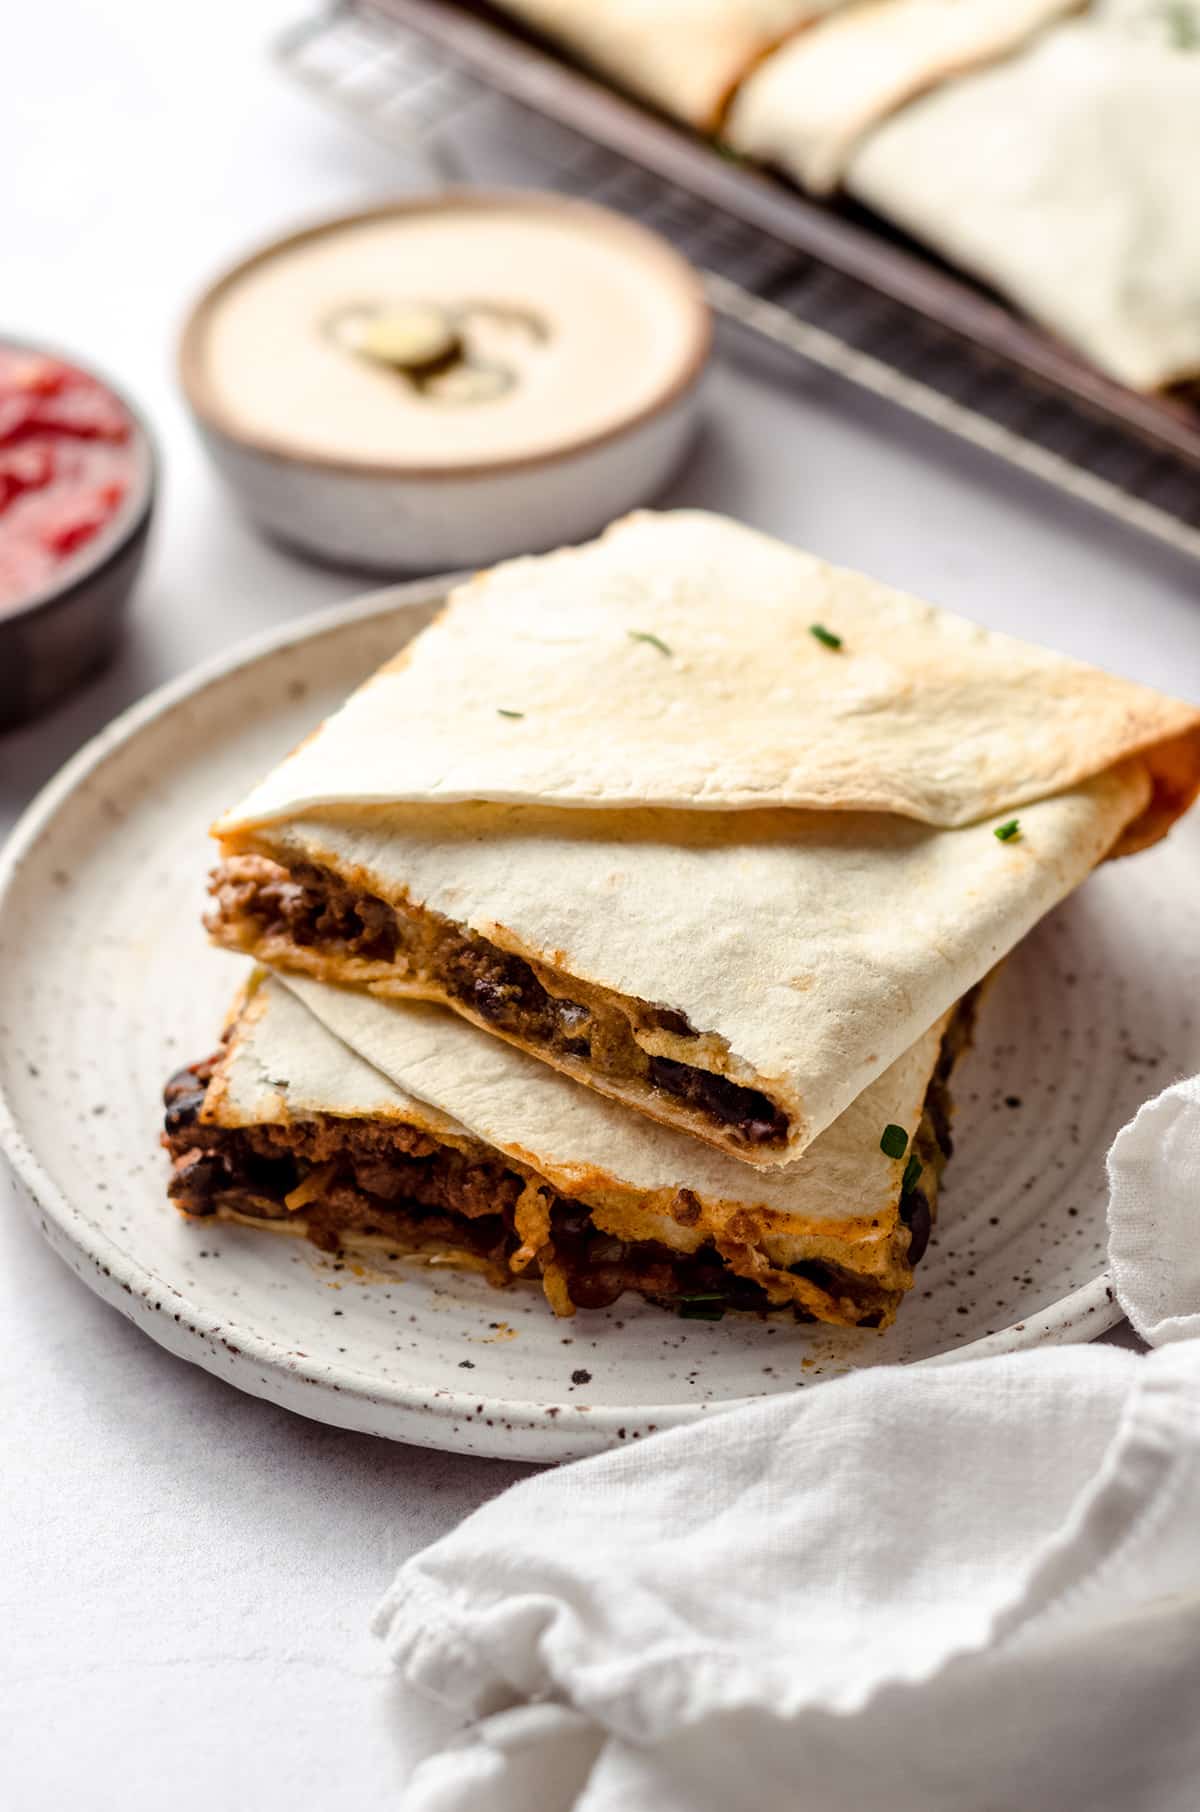
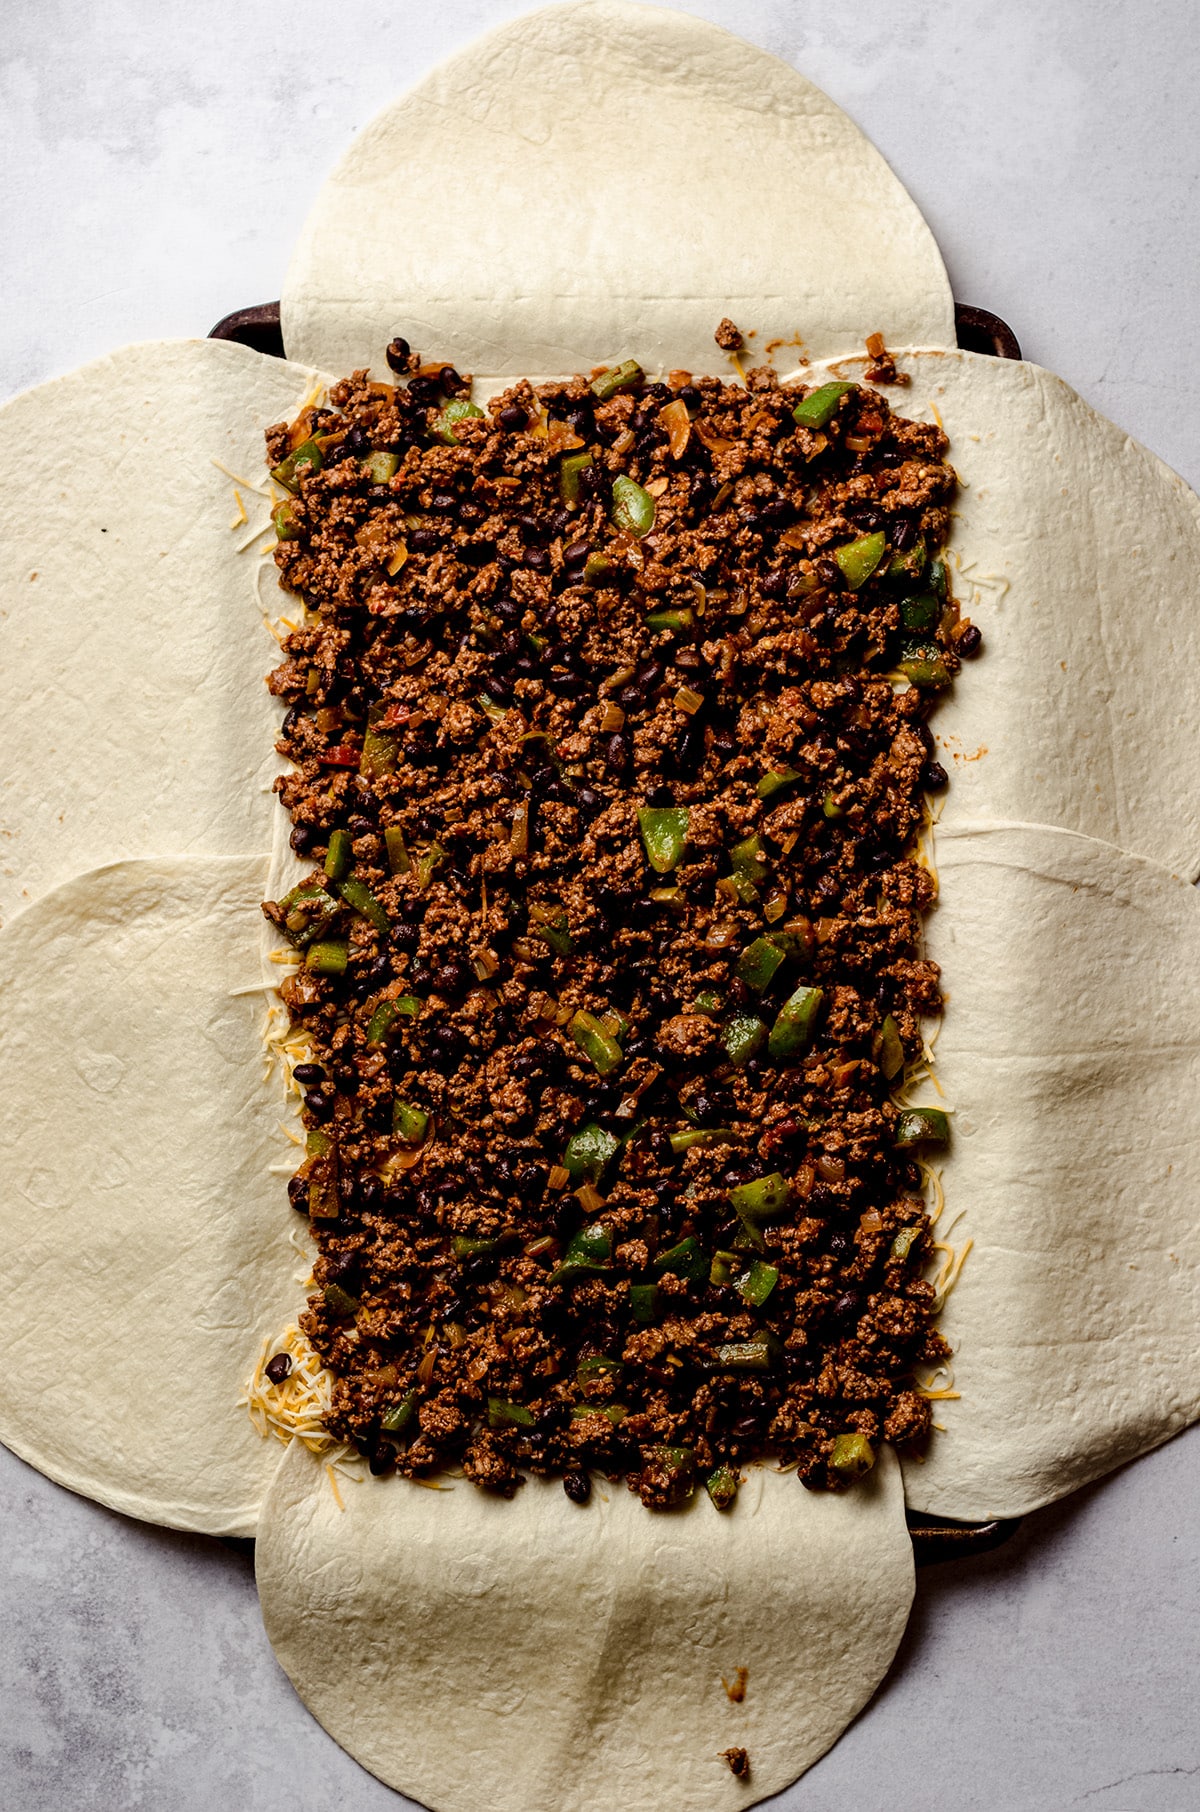
Then spread the meat and vegetable mixture on top of the cheese, smoothing it into an even layer and right up to the edges of the baking sheet.
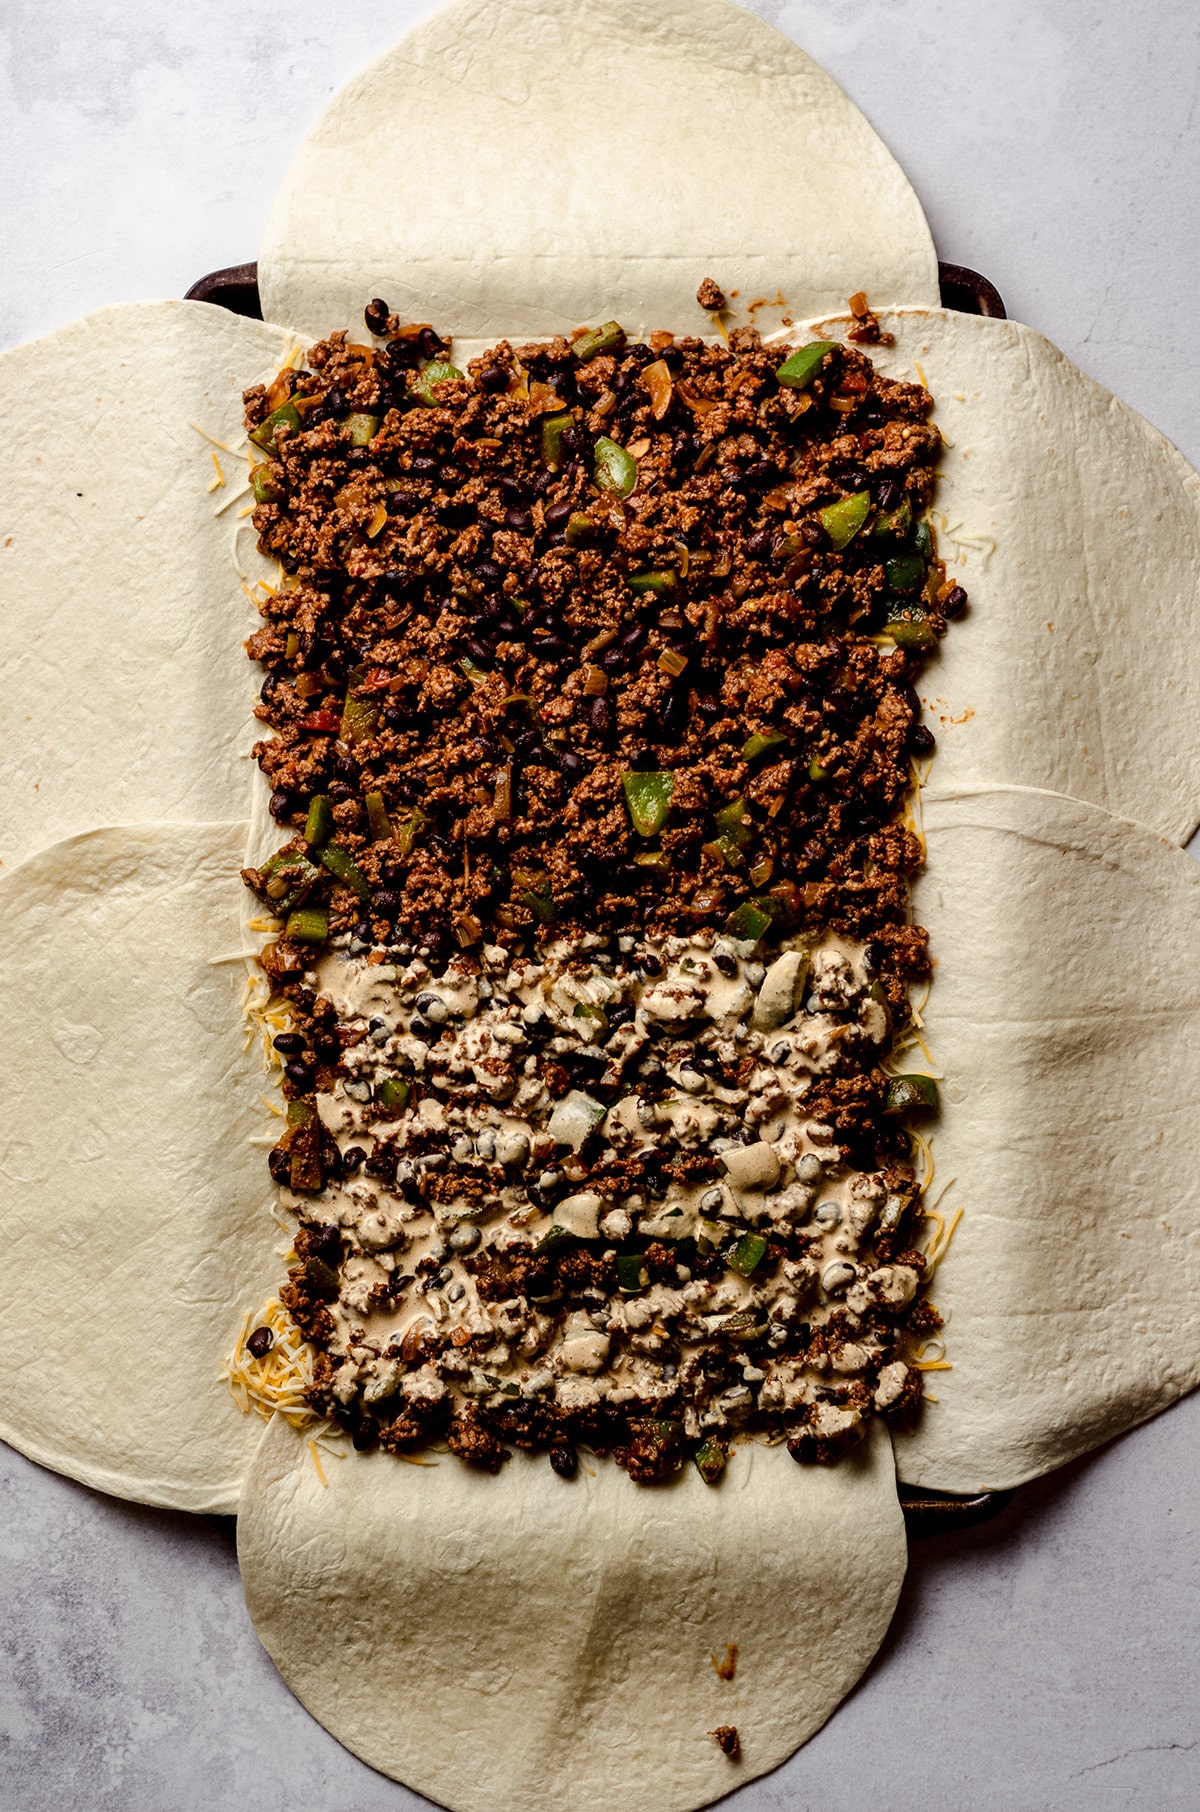
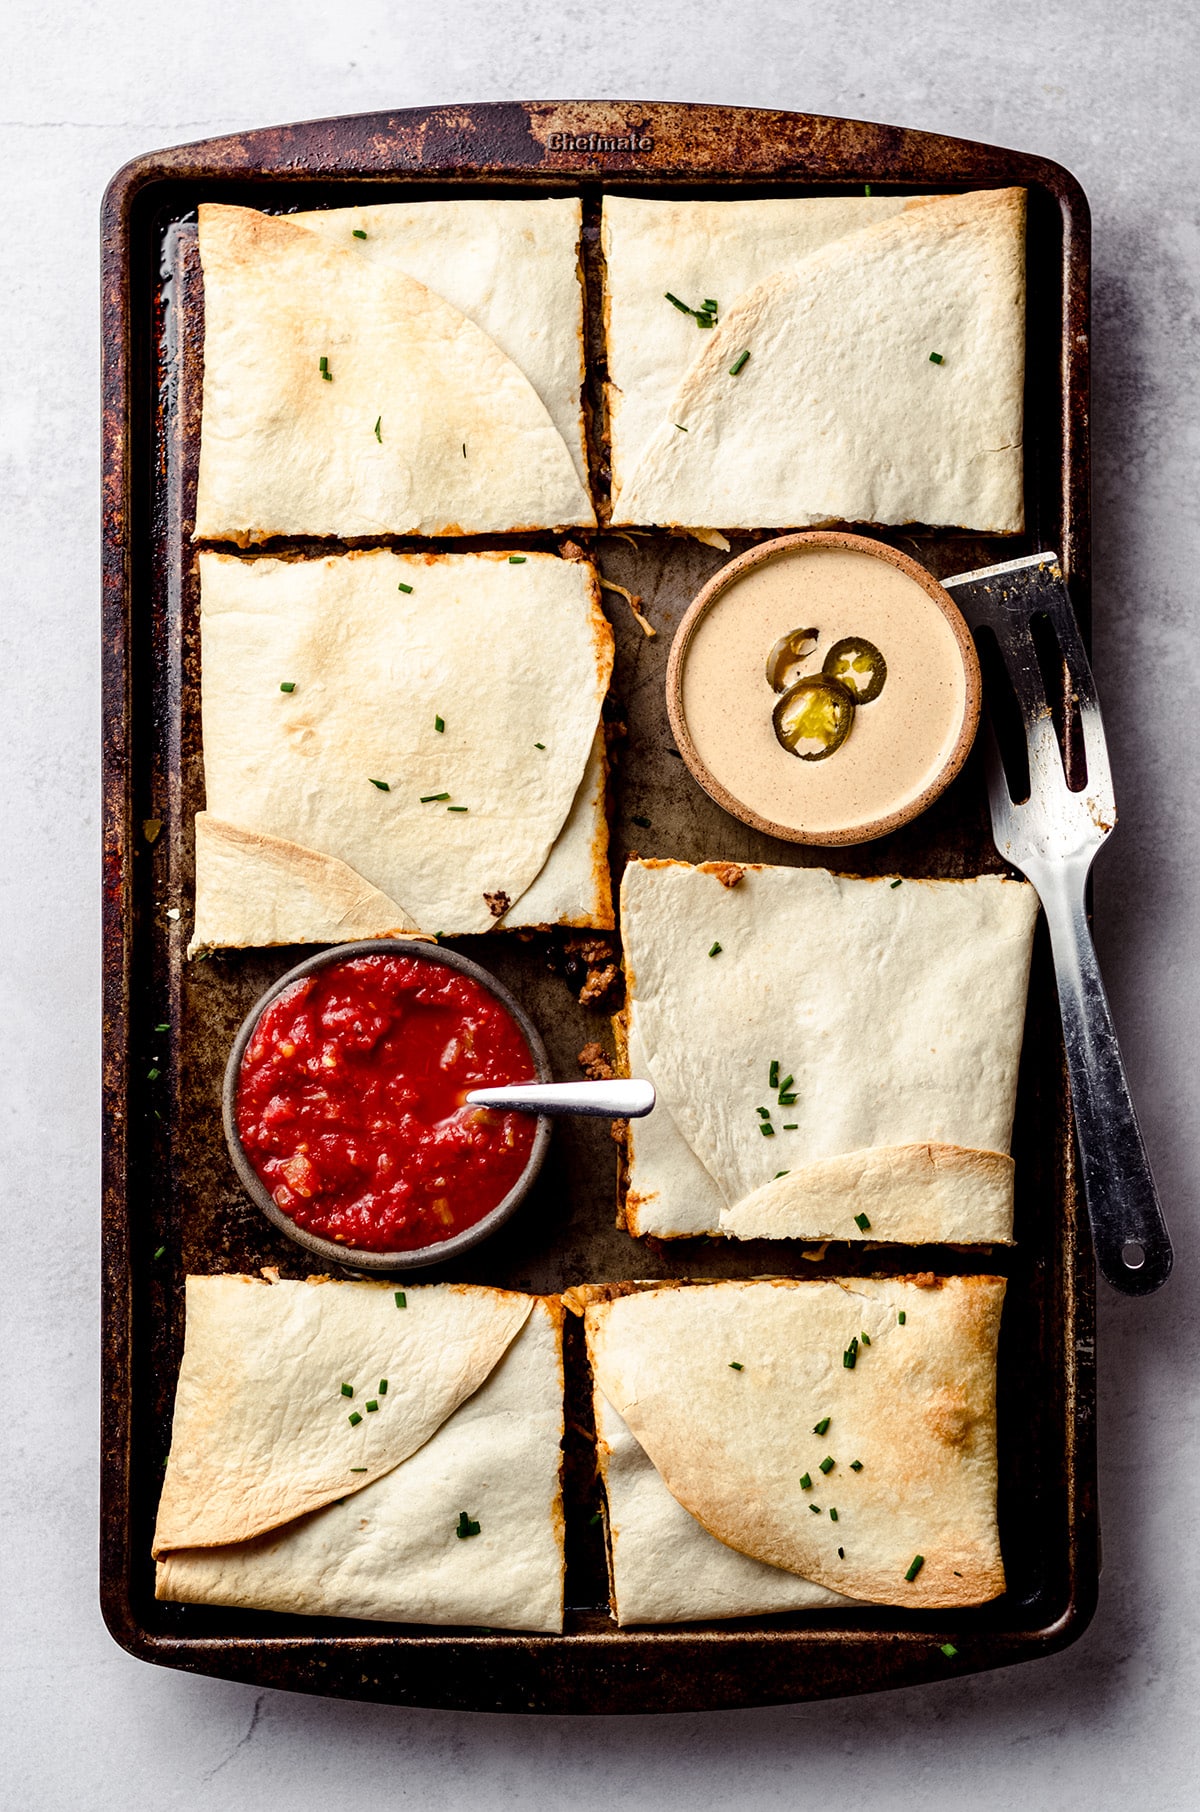
Finally, pour some of the quesadilla sauce over the meat and vegetable layer. I like to put it on half of the sheet pan since it can be too spicy for the kids. That way they have their quesadillas, and we have ours. Fair, right?
Also, if you want to add in any other fillings or favorite taco toppings, you can totally do that right now. The beauty of making your quesadillas like this is that you can customize them, and every family member can get their favorite combination of filling.
You could even do one half cheese and one half meat and cheese… Whatever works for you! This is why these quesadillas can so easily become a family favorite.
Once you have added all of the fillings, top it off with the remaining shredded cheese.
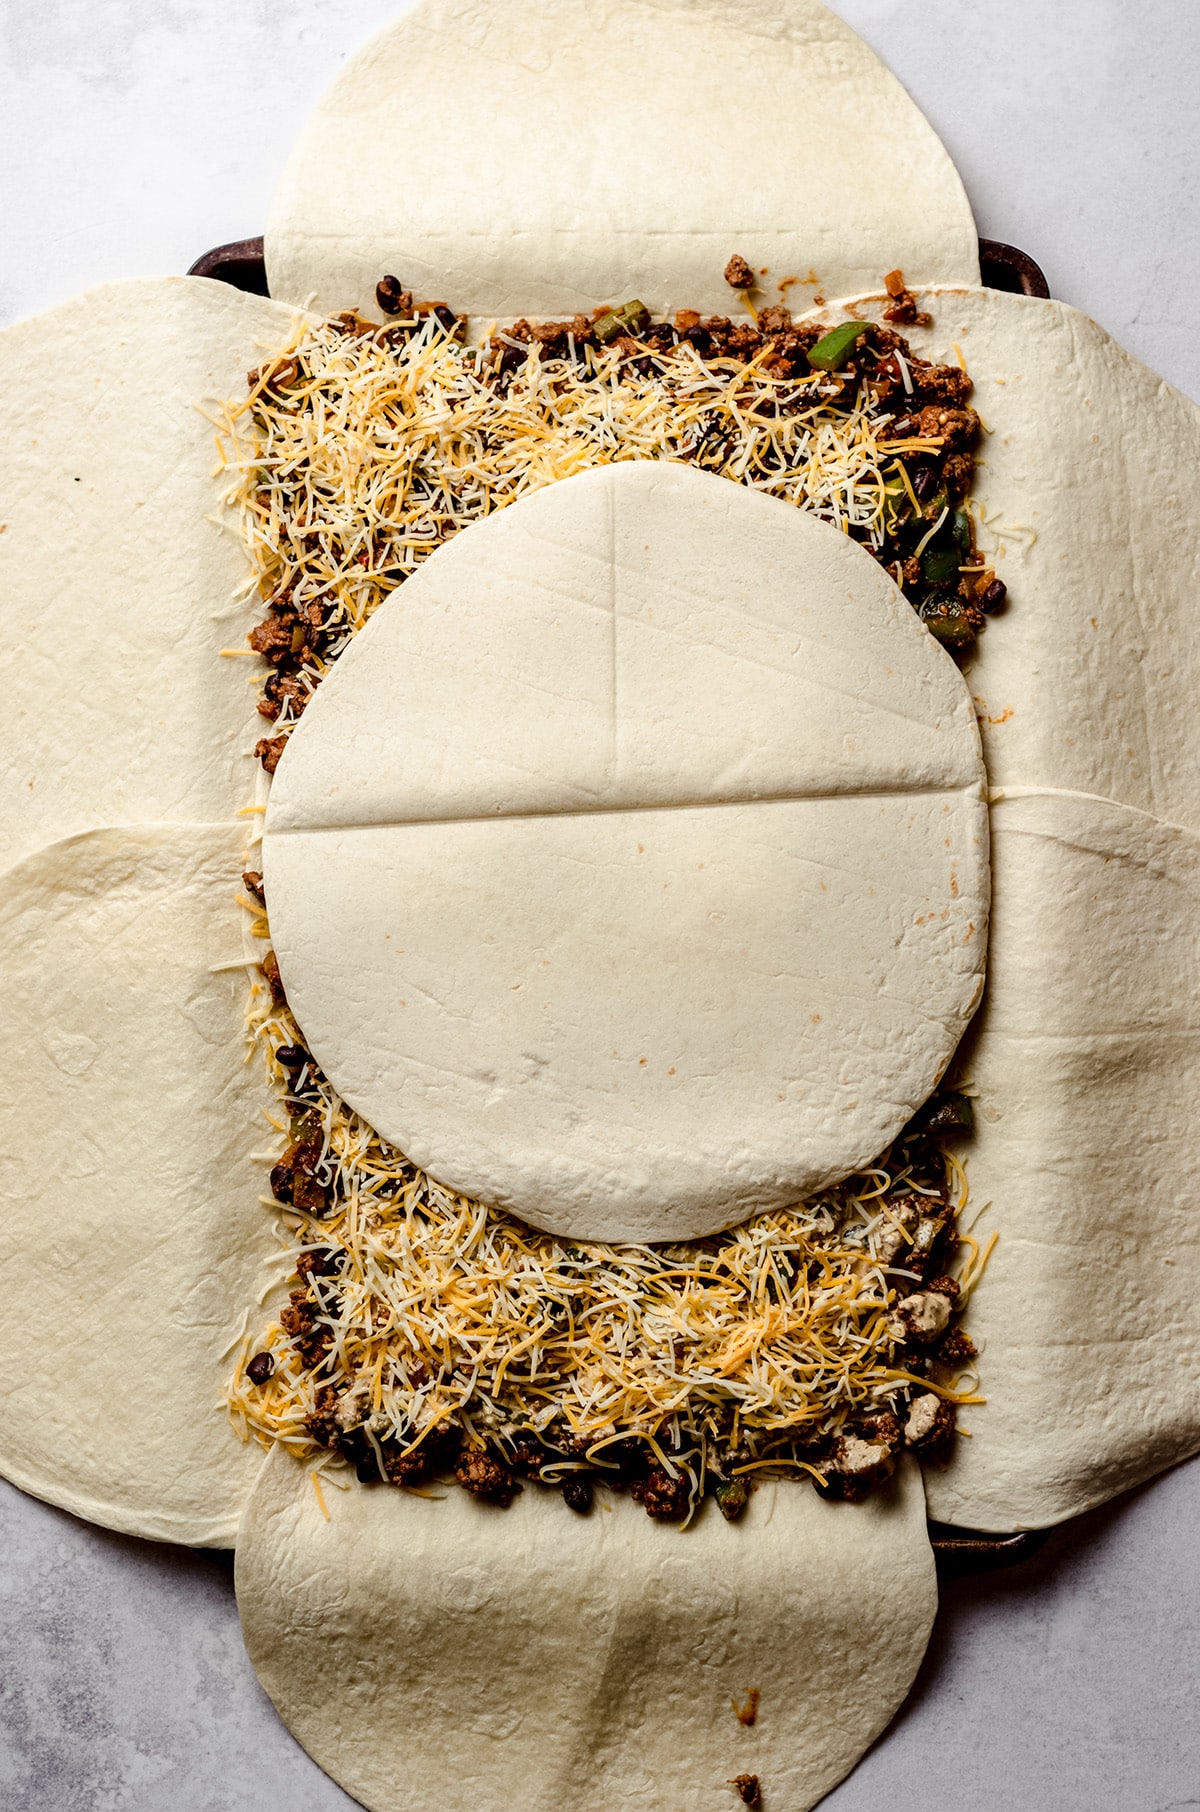
Place a tortilla in the very center, on top of the filling. Then bring up the edges and fold them over the toppings, towards the middle of the baking sheet. Your quesadilla filling should be completely encased in the tortillas now.

STEP #5: BAKE QUESADILLAS
Place a second baking sheet on top of the baking sheet you just prepped with the quesadillas. This will help keep the edges together and compress the quesadillas so they stay intact.
Place both baking sheets in the oven and bake for 20 minutes. Once the initial time is up, remove the top baking sheet and return the quesadillas to the oven. Bake for another 5 minutes– this will give them a chance to brown a bit on top and give you some nice crispy quesadillas.
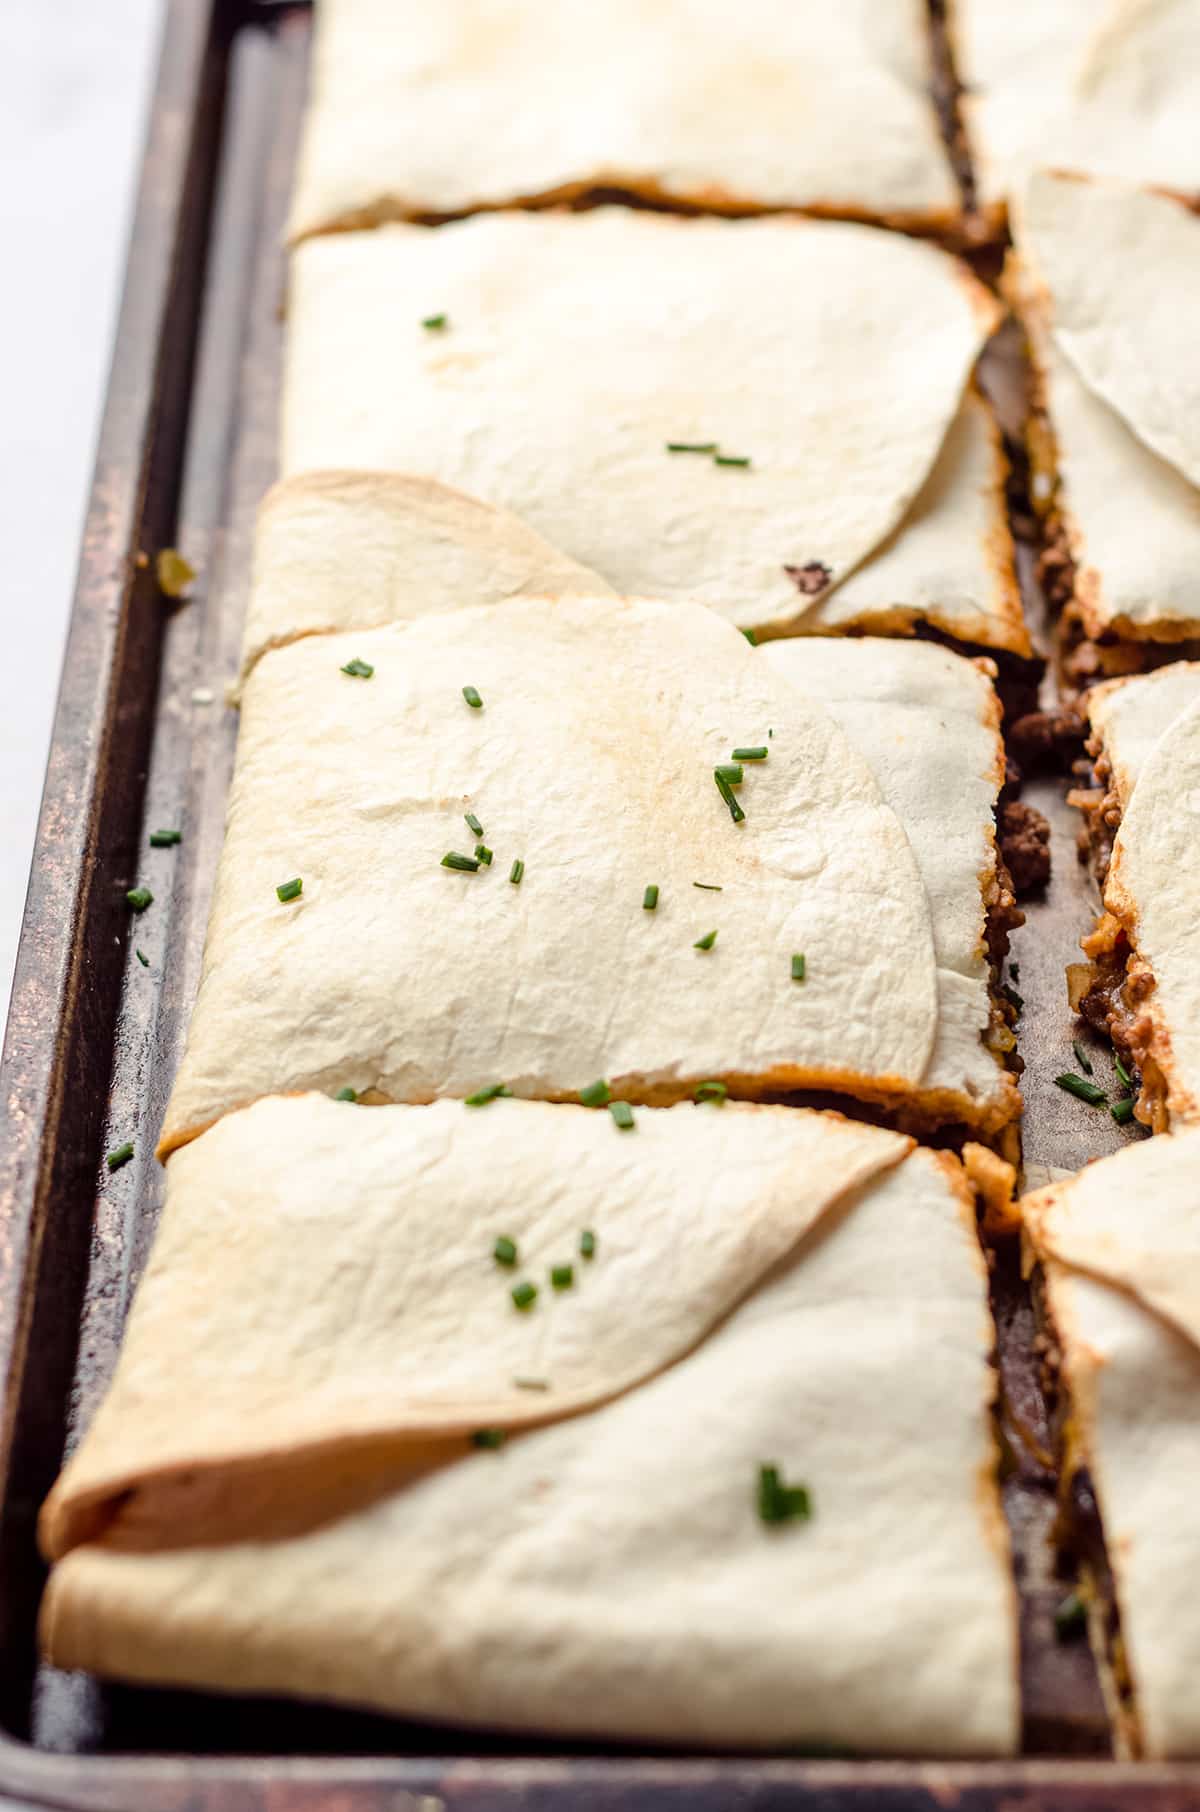
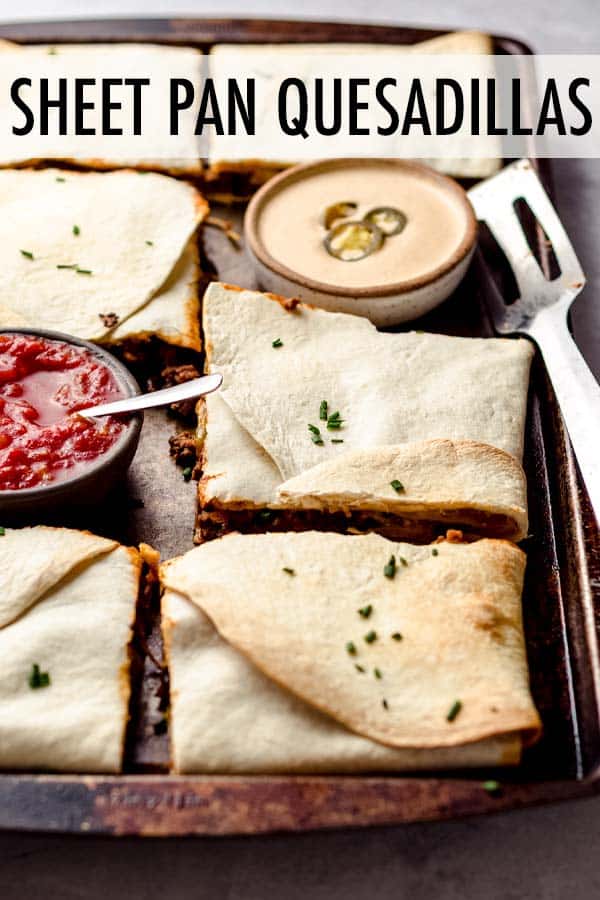
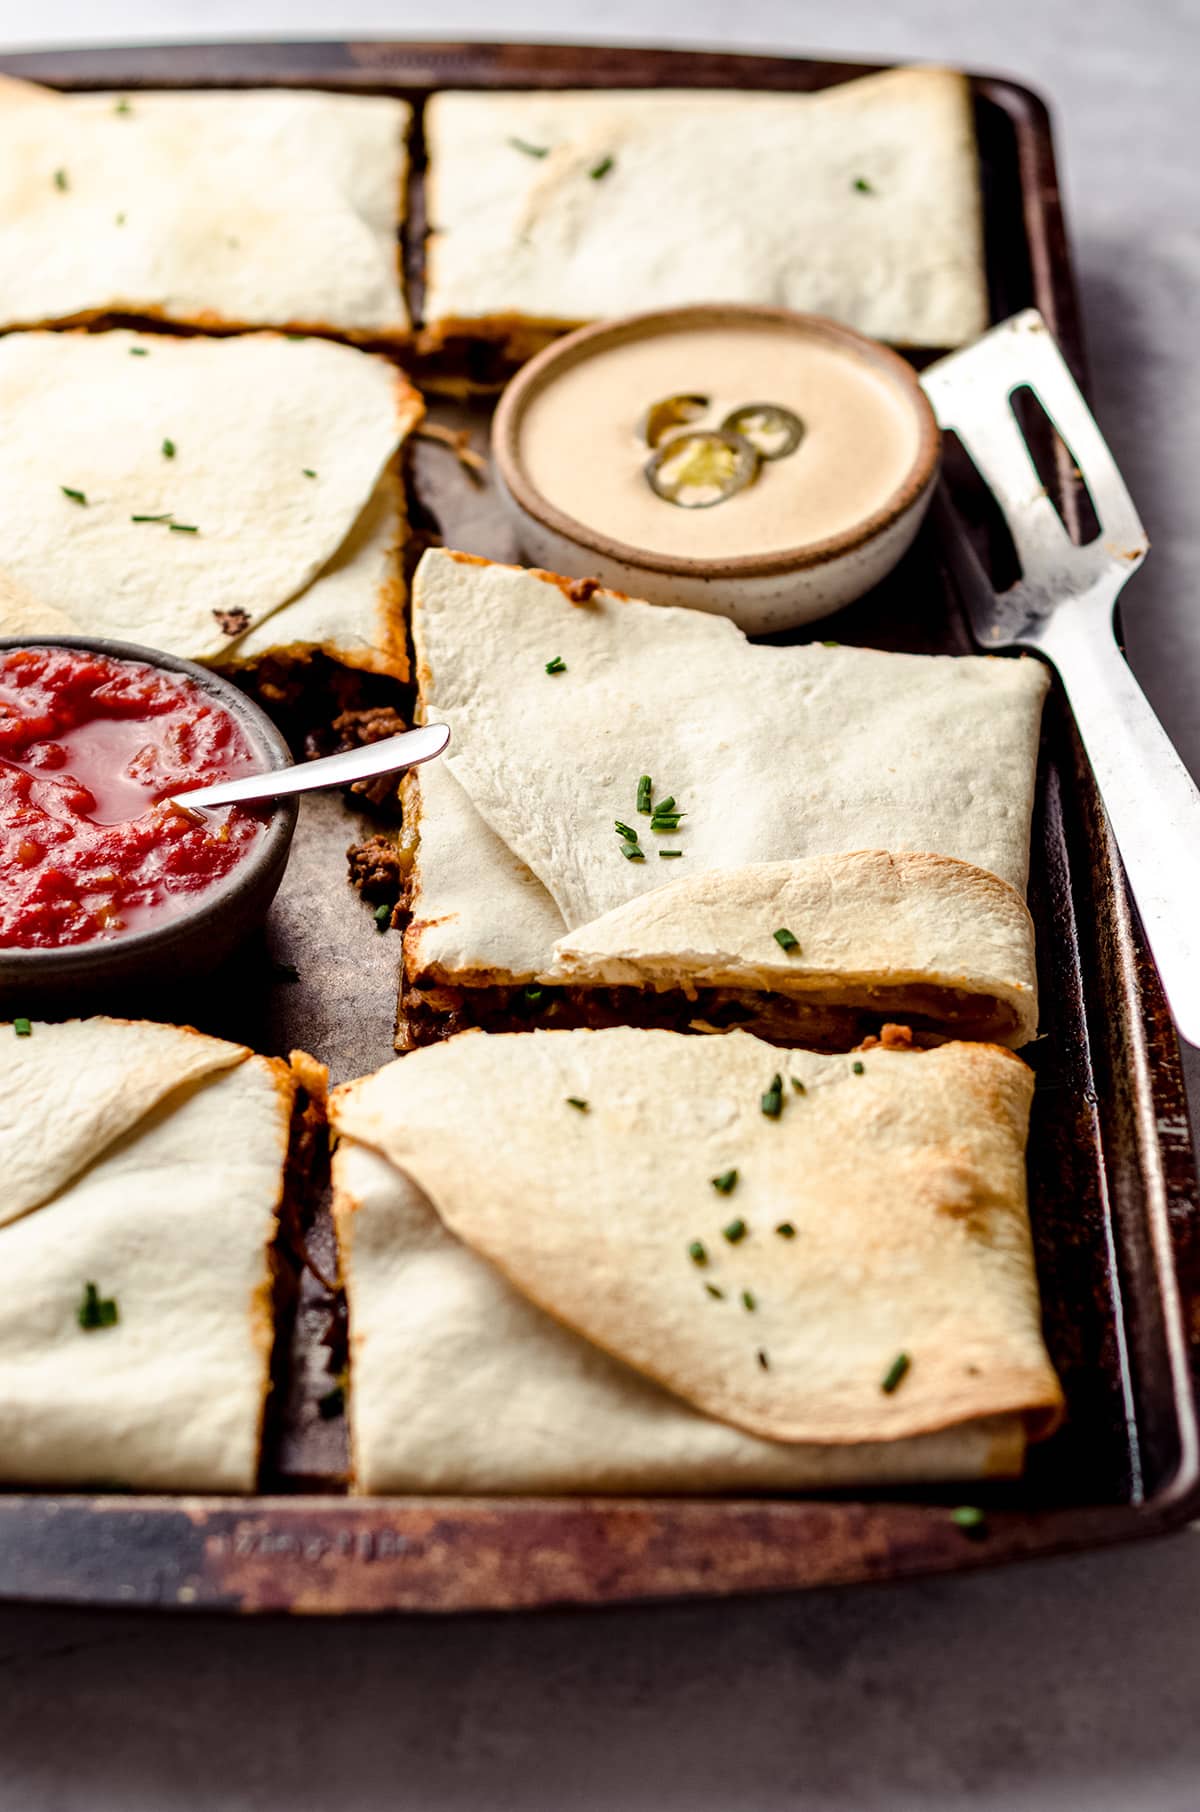
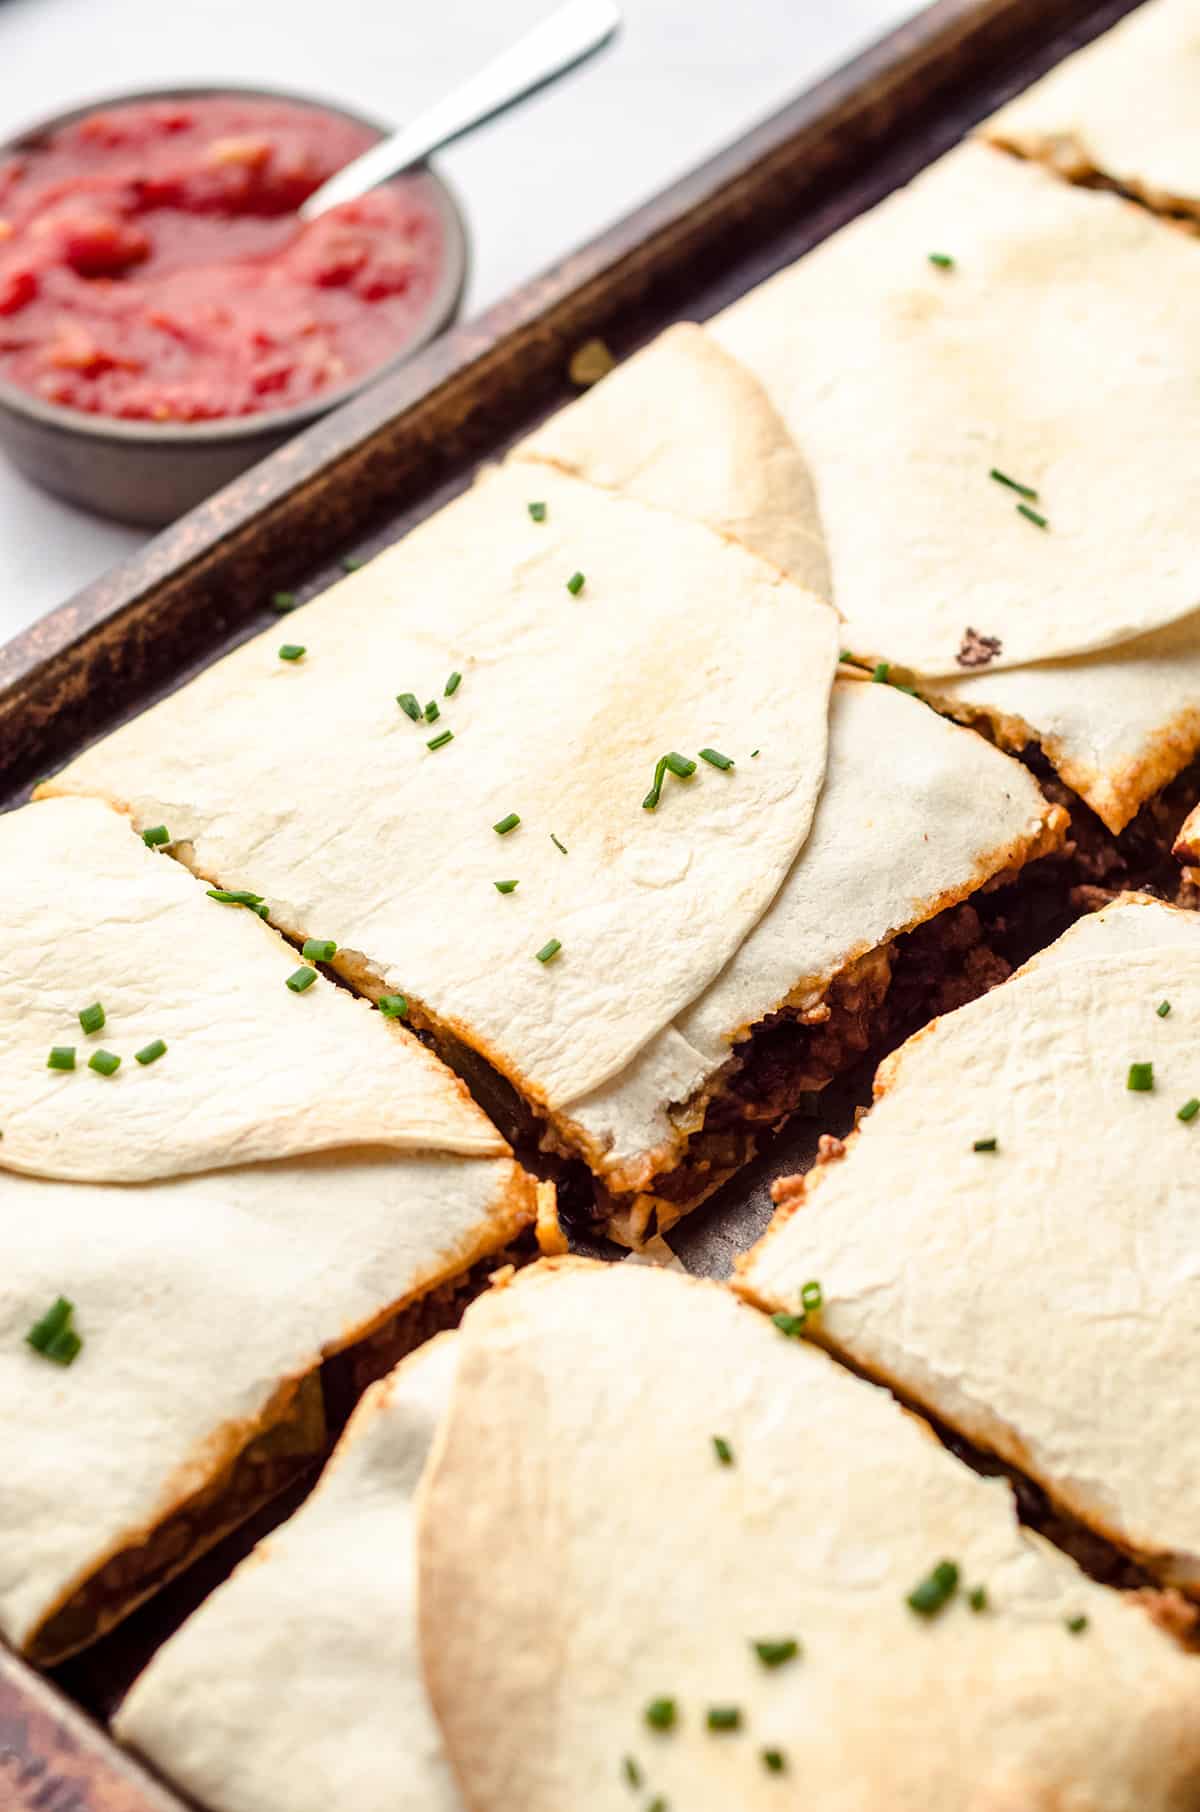
Remove the pan from the oven and allow the quesadillas to cool for a few minutes. Then go ahead and slice into squares and serve.
We like to serve ours with additional quesadilla sauce, sour cream, salsa, or whatever we are craving at the moment. You could even add some shredded lettuce, chopped tomatoes, or guacamole if you don’t mind getting a little messy!
If you have any leftovers (and that’s a big if), you can cover them tightly (wrap in plastic wrap OR store in an airtight container) and store them for up to 3 days.
They reheat really well in an air fryer (who else loves these things for reheating pretty much everything?) or in the oven. Just stick them in for a few minutes and they should be warmed through quickly enough.
CAN I MAKE SHEET PAN QUESADILLAS AHEAD OF TIME?
If you want to make your sheet pan quesadillas ahead of time, you can totally do that! You have the option of making them up to 12 hours in advance or you can freeze and reheat.
To make them in advance, just complete the steps up until assembly and store in the fridge until you’re ready to bake. Then just follow the cooking instructions, serve and enjoy!
Pan Quesadilla Variations
Feel free to get creative with your fillings, as this recipe is certainly not a “set in stone” one. You can make this recipe even faster by using pre-shredded chicken, a rotisserie chicken, or leftover meat that you can flavor easily with some seasoning.
This recipe also works with whole wheat tortillas as well as corn tortillas.
How to store leftovers
Store leftovers covered or wrapped tightly in the refrigerator.
If you want to freeze your quesadillas, first allow them to cool completely, then wrap for freezing (I like to wrap them individually and then place in a freezer bag) and freeze for up to 3 months.
When it’s time to serve your quesadillas you can thaw them in the refrigerator OR heat them directly from frozen. To reheat from frozen, add individual quesadillas to an air fryer that has been preheated to 400ºF. They should cook in about 10-15 minutes, and I recommend flipping them at the halfway point to allow for even browning.
How to serve Baked Quesadillas
We like to serve these quesadillas with the quesadilla sauce I linked in this post and in the recipe card, but you can eat them however you like: with your favorite sauces and toppings (or just plain, because they are truly delicious just as-is).
We’ve also used this recipe to make a “quesadilla bar” with lots of toppings that folks can choose for themselves. With this method, we usually fill the quesadillas with meat only and let guests add everything else as they wish.
I think you’ll love using this sheet pan quesadillas recipe on busy weeknights, as an easy lunch, or a great way to use up leftover meat or sad refrigerator veggies. I know we love all of those things in our house!
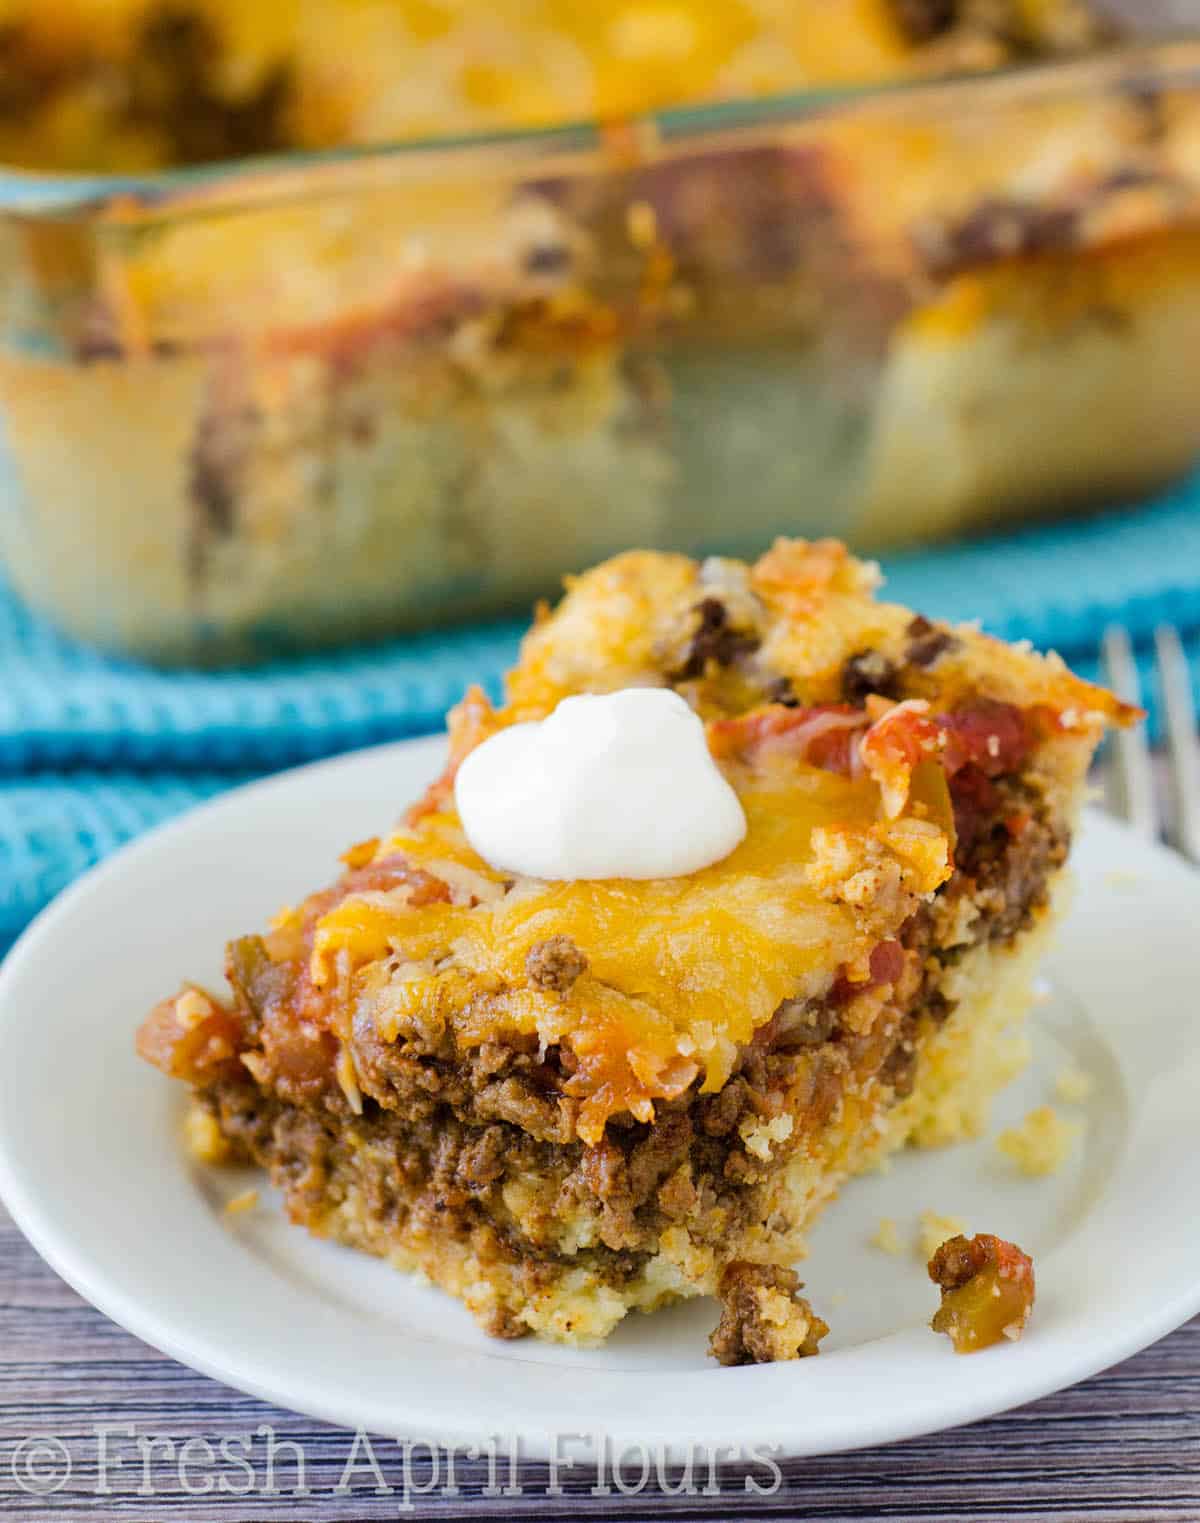
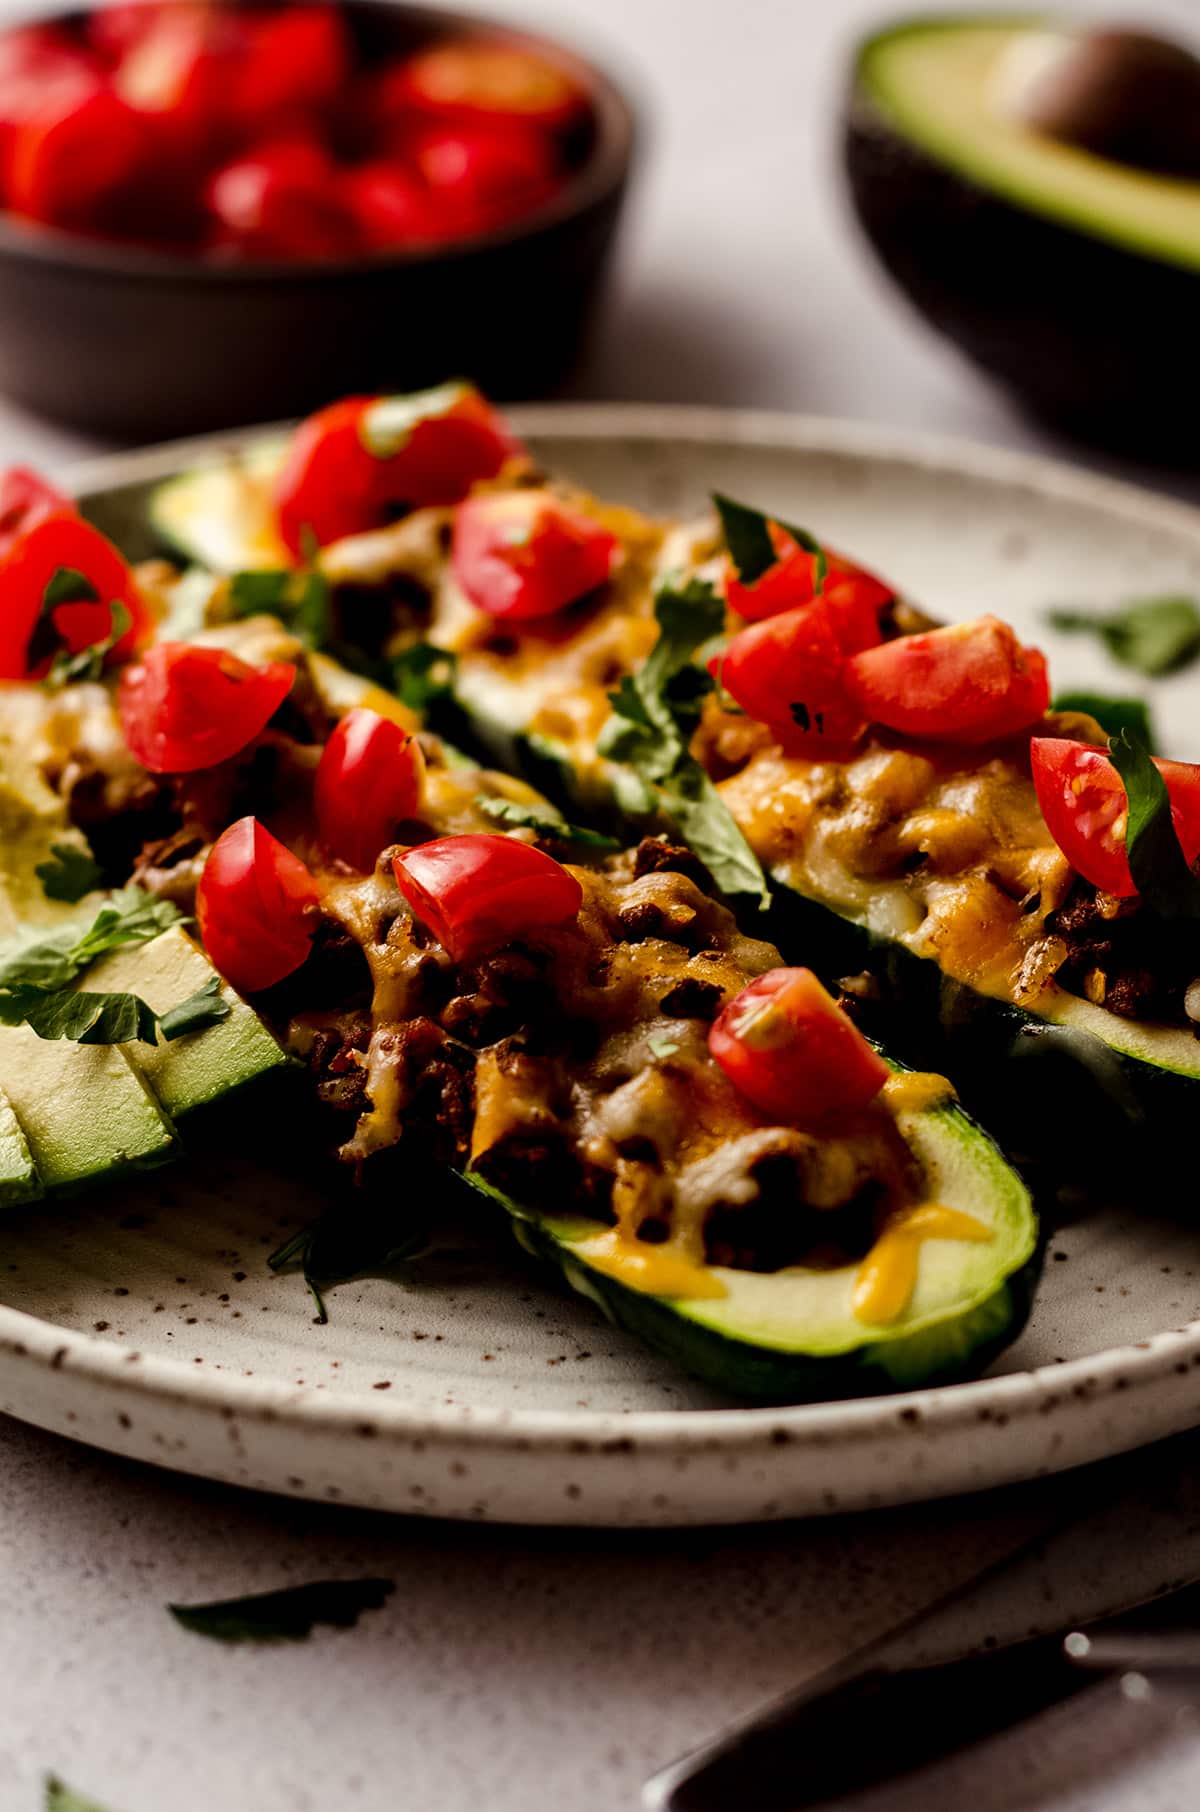
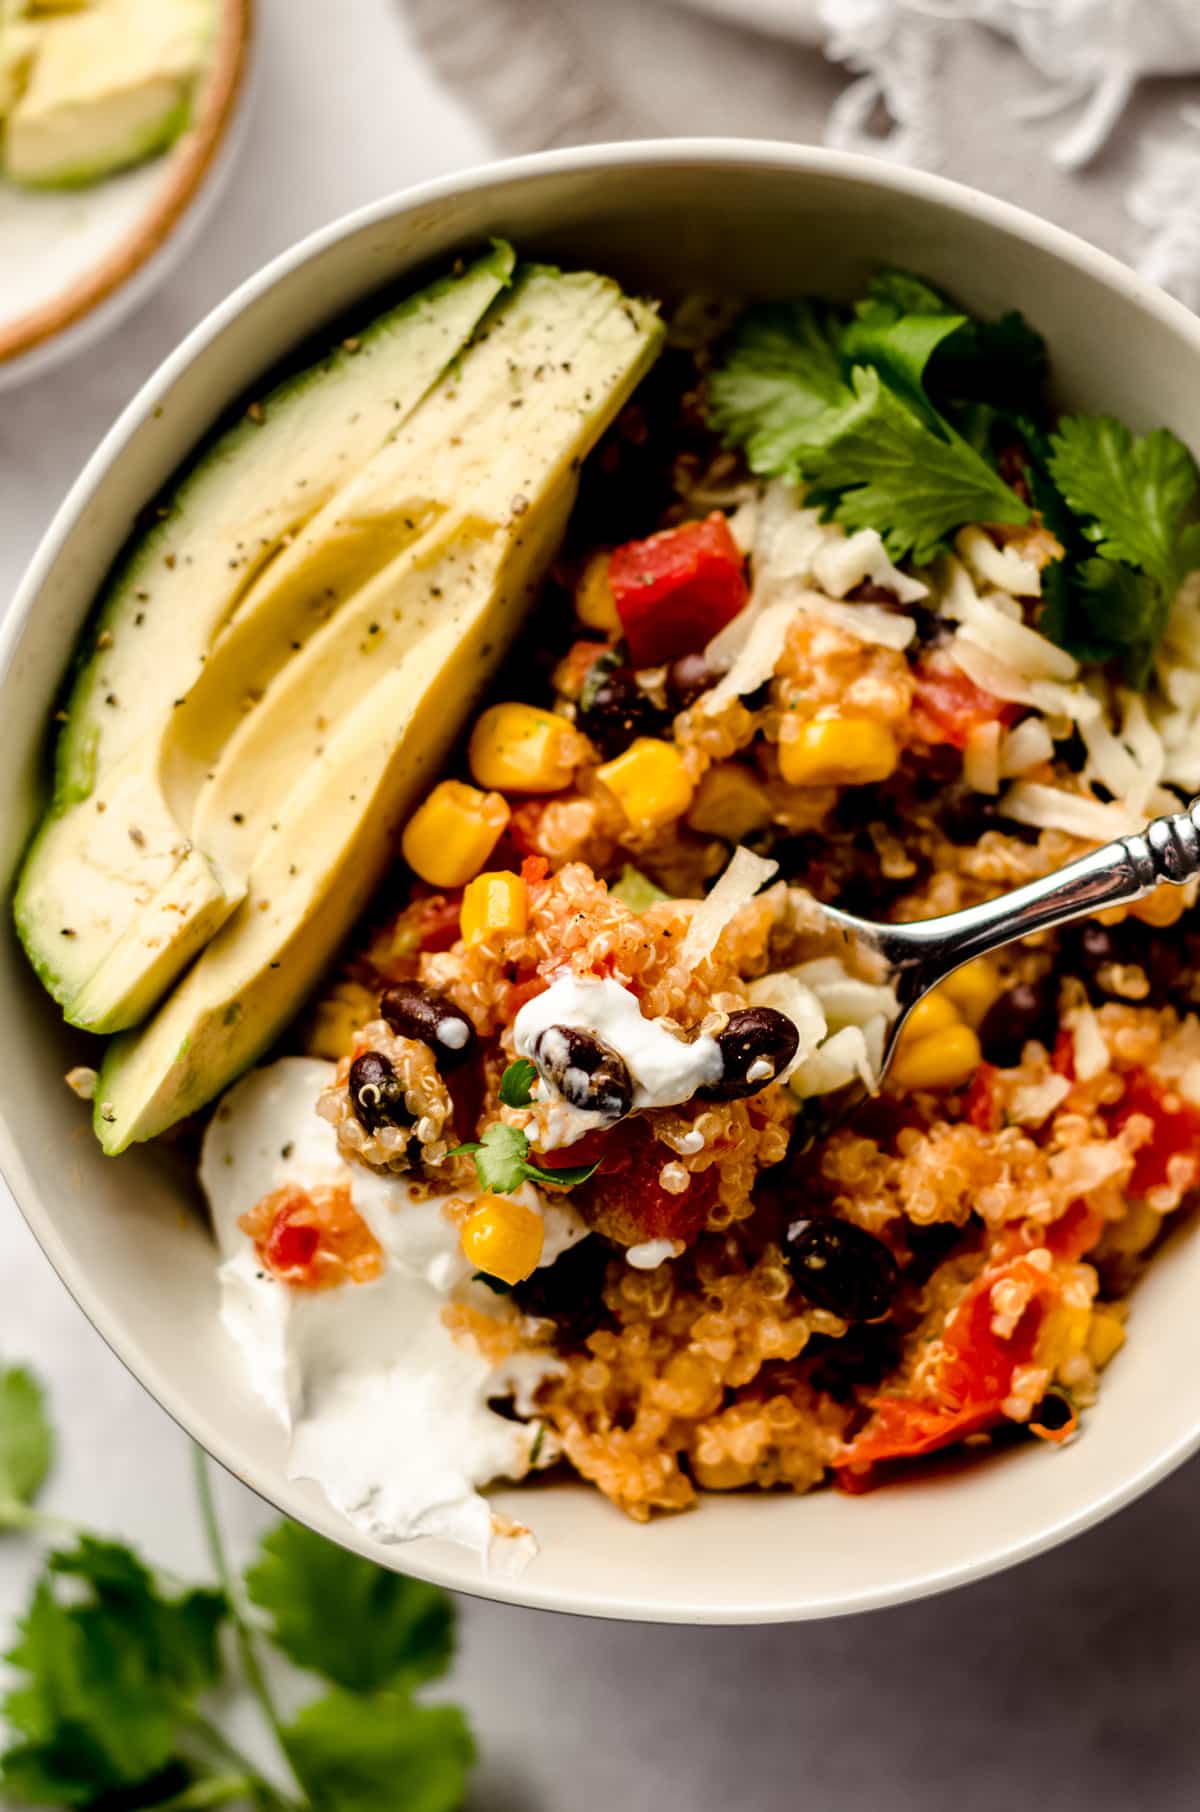
Now that you’ve been bitten by the quesadilla bug, I’m sure you’re craving ALL of the Tex-Mex flavors. A few of my favorites include a comforting baked taco casserole, these flavorful taco zucchini boats, and a satisfying enchilada quinoa casserole. So much delicious, so little time!

Oven Baked Quesadillas
Ingredients
- 1 pound (454g) ground beef1
- ⅓ cup (80mL) water
- 3 Tablespoons (30g) homemade taco seasoning2
- 1 yellow onion diced
- 1 bell pepper any color; diced
- 1 15-ounce can (425g) black beans drained and rinsed
- 2 cups (227g) shredded cheese3 divided
- ½ cup (120g) salsa
- 8 large flour tortillas burrito size
- ½ to 1 cup (120-240mL) quesadilla sauce optional
Instructions
- Preheat the oven to 425ºF (218ºC). Spray a large baking sheet with non-stick spray. Set aside.
- In a large skillet over medium heat, cook the meat until completely browned (don't drain it), then add the water and taco seasoning. Mix until completely combined, cook for another 2-3 minutes, then spoon the meat into a medium size bowl. Set aside.1 pound (454g) ground beef1, ⅓ cup (80mL) water, 3 Tablespoons (30g) homemade taco seasoning2
- In the same large skillet still over medium heat, use the leftover fat from the meat4 to cook the bell pepper and onion, stirring frequently, for about 5 minutes. Add the cooked meat and black beans and stir to combine. Remove from heat and set aside.1 yellow onion, 1 bell pepper, 1 15-ounce can (425g) black beans
- Place 6 of the flour tortillas around the edges of the baking sheet, making sure the tortillas overlap and are hanging over the edge of the pan. Place 1 tortilla over the gap in the center of the baking sheet.8 large flour tortillas
- Sprinkle ½ of the cheese mixture (about 1 cup) evenly into the flour tortillas.2 cups (227g) shredded cheese3
- Spread the meat/vegetable/bean mixture evenly over the tortillas, making sure to go to the edges of the baking sheet. Pour the quesadilla sauce, if using, over the meat/vegetables/beans, then sprinkle the remaining cheese evenly over everything.½ to 1 cup (120-240mL) quesadilla sauce
- Place the final tortilla over the top center of the mixture, then fold the edges of the tortillas that are hanging over the edges toward the middle of the baking sheet.
- Place another baking sheet on top of the folded tortillas to insure edges stay together, then place the stacked baking sheets in the oven. Bake for 20 minutes, then remove the top baking sheet and bake for an additional 5 minutes.
- Remove the quesadillas from the oven and allow to cool slightly before cutting and serving. Serve with additional quesadilla sauce, salsa, sour cream, or other favorite sauces. Store leftovers covered tightly in the refrigerator up to 3 days. Quesadillas freeze well, up to 3 months. Thaw in the refrigerator or heat up individual frozen quesadillas in an air fryer (400ºF for 10-15 minutes depending on size of quesadilla).½ cup (120g) salsa
Notes
- Ground beef: use any kind of meat you enjoy here. Shredded or ground chicken would also work well.
- Homemade taco seasoning: you can also use a pack of store-bought taco seasoning. Follow the instructions on the package.
- Shredded cheese: any variety works here.
- Leftover fat: if saving the fat makes you uncomfortable, drain the fat then use some olive oil to cook the vegetables.
- Make ahead: prepare quesadillas up to 12 hours in advance, then bake when you are ready to eat them. To freeze: unbaked sheet pan quesadillas freeze well, up to 3 months. Thaw in the refrigerator, then bake as directed.
Nutrition Disclosure
All nutritional values are approximate and provided to the reader as a courtesy. Changing ingredients and/or quantities will alter the estimated nutritional calculations.
Hi! I’m not sure if I’m missing where the black beans go! Do they get layered in with the meat/veggies/cheese? Thanks! Looking forward to making this!
Ooooh, good catch, Liz! They’ll go in with the cooked veggies and meat. I just fixed the recipe card. Thanks for the heads up!
Always a plus when that happens! Thanks, Julie!
What a great recipe for making quesadillas for a crowd! The flavorful filling is soooo tasty.
We love it for entertaining!
Made these on our ski trip, so easy, so delicious and that sauce! MMMMMM!
Right? I could swim in the sauce, haha.