
Marble Pound Cake
As an Amazon Associate, I earn from qualifying purchases. Read the full disclosure here.
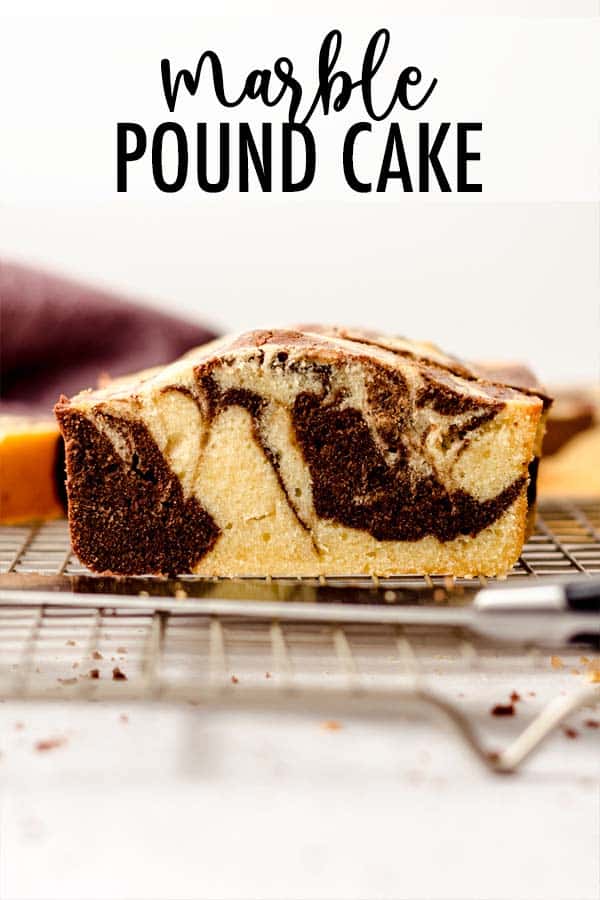
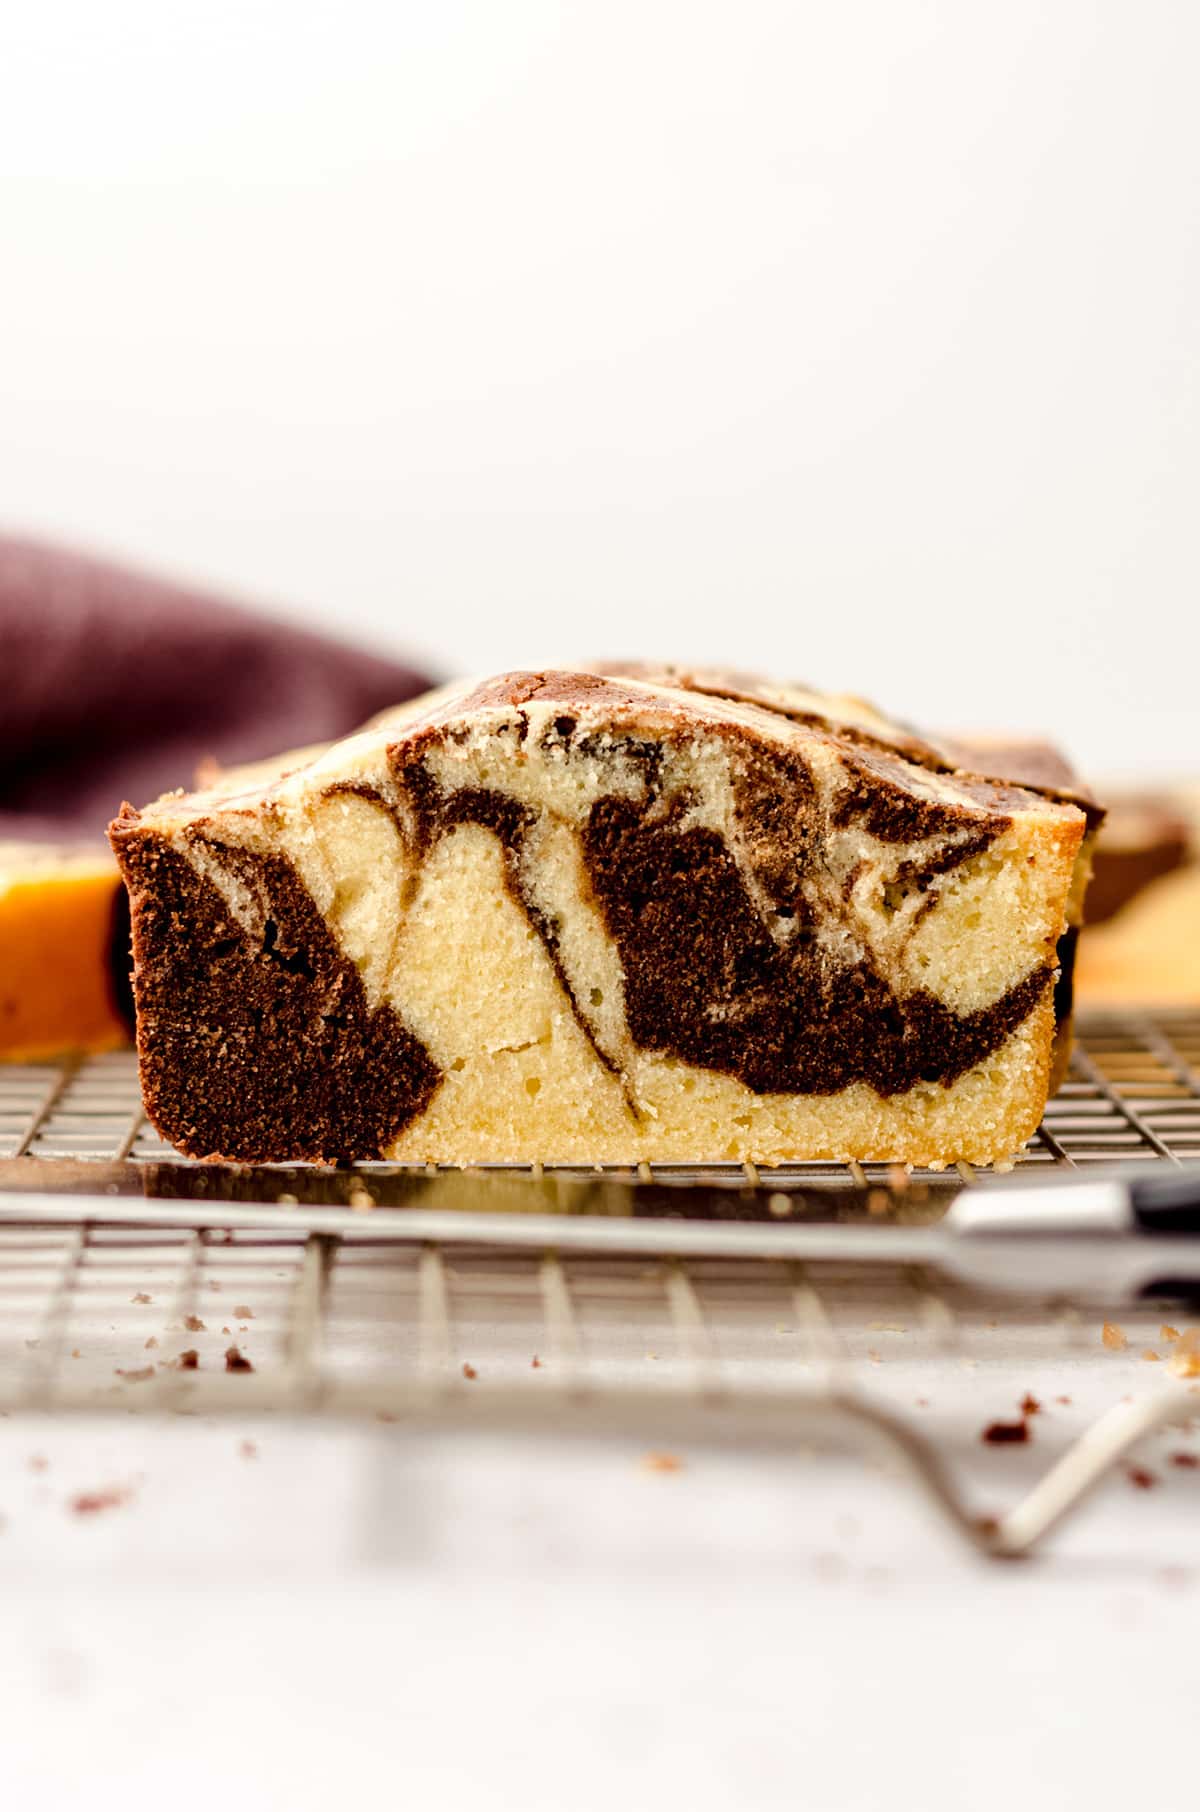
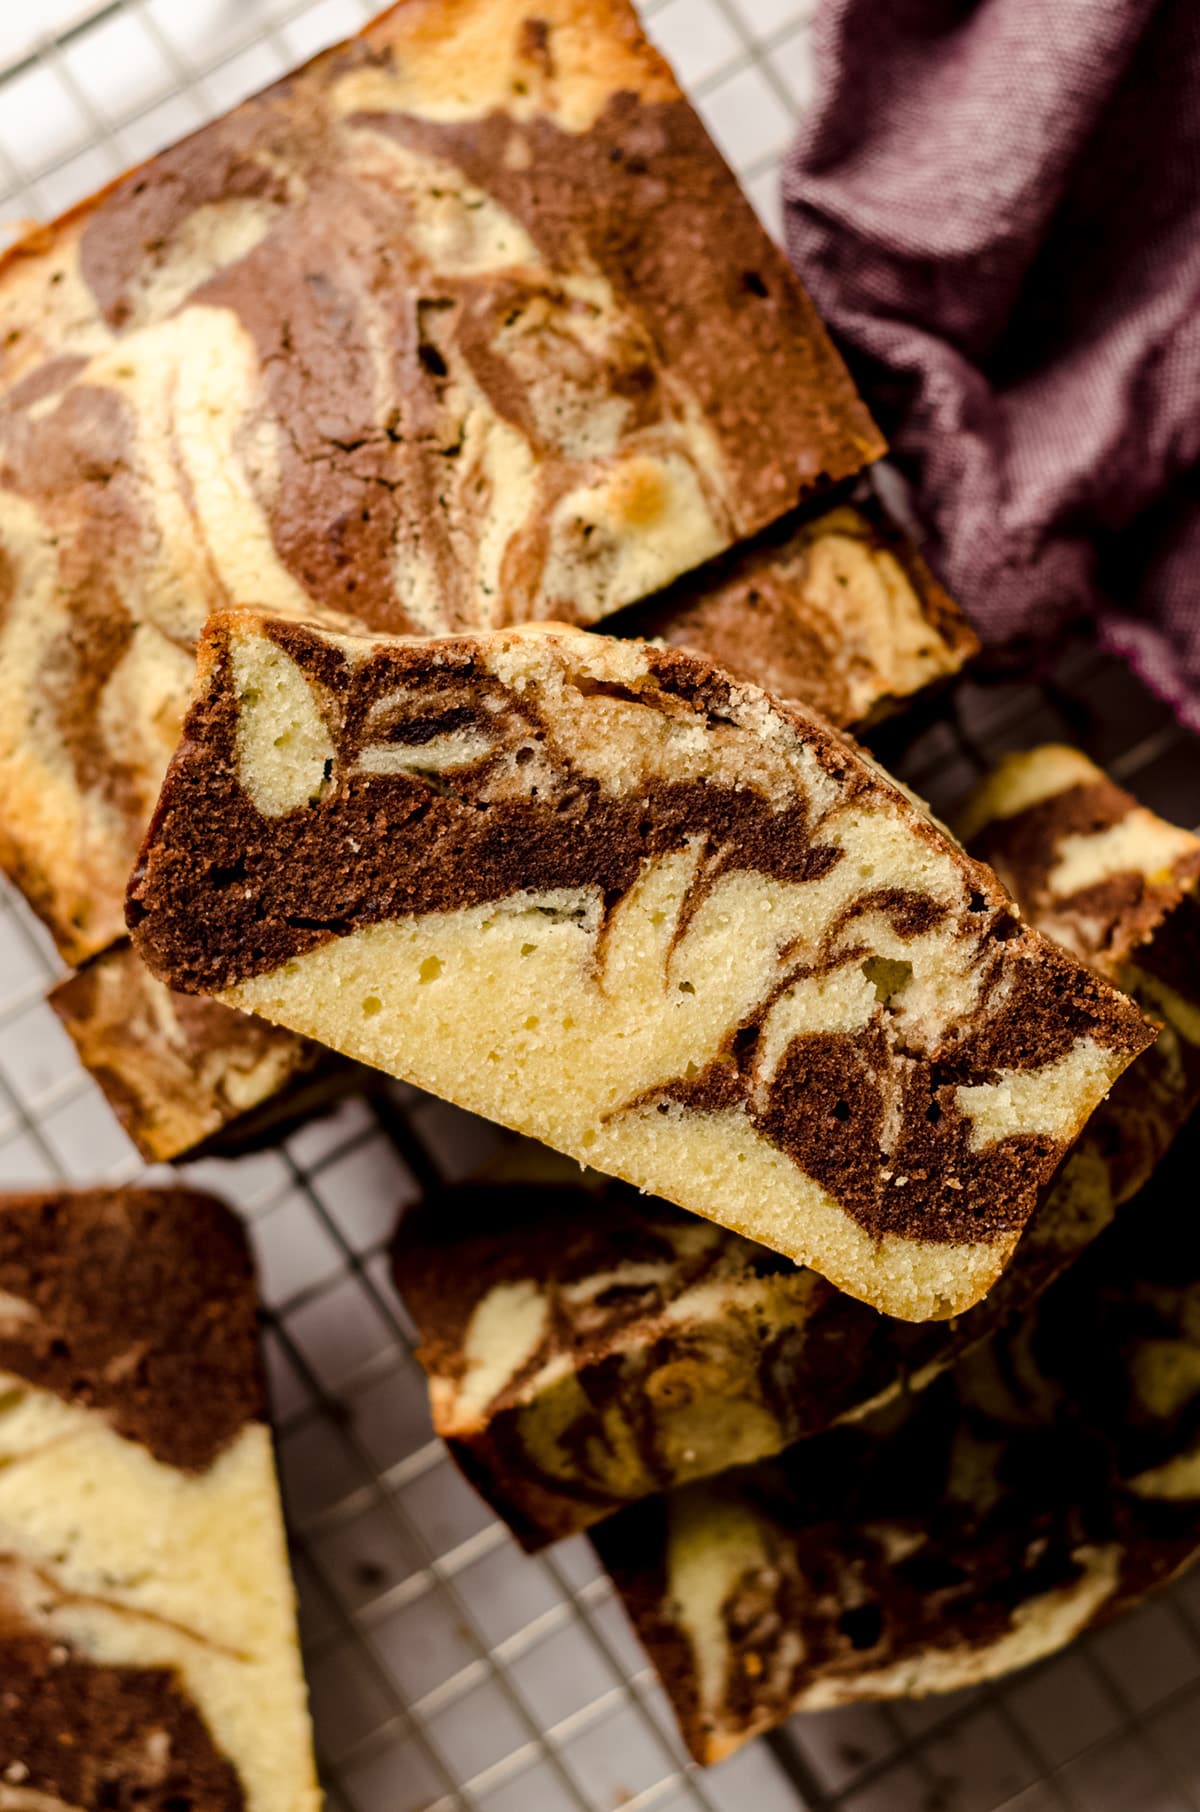
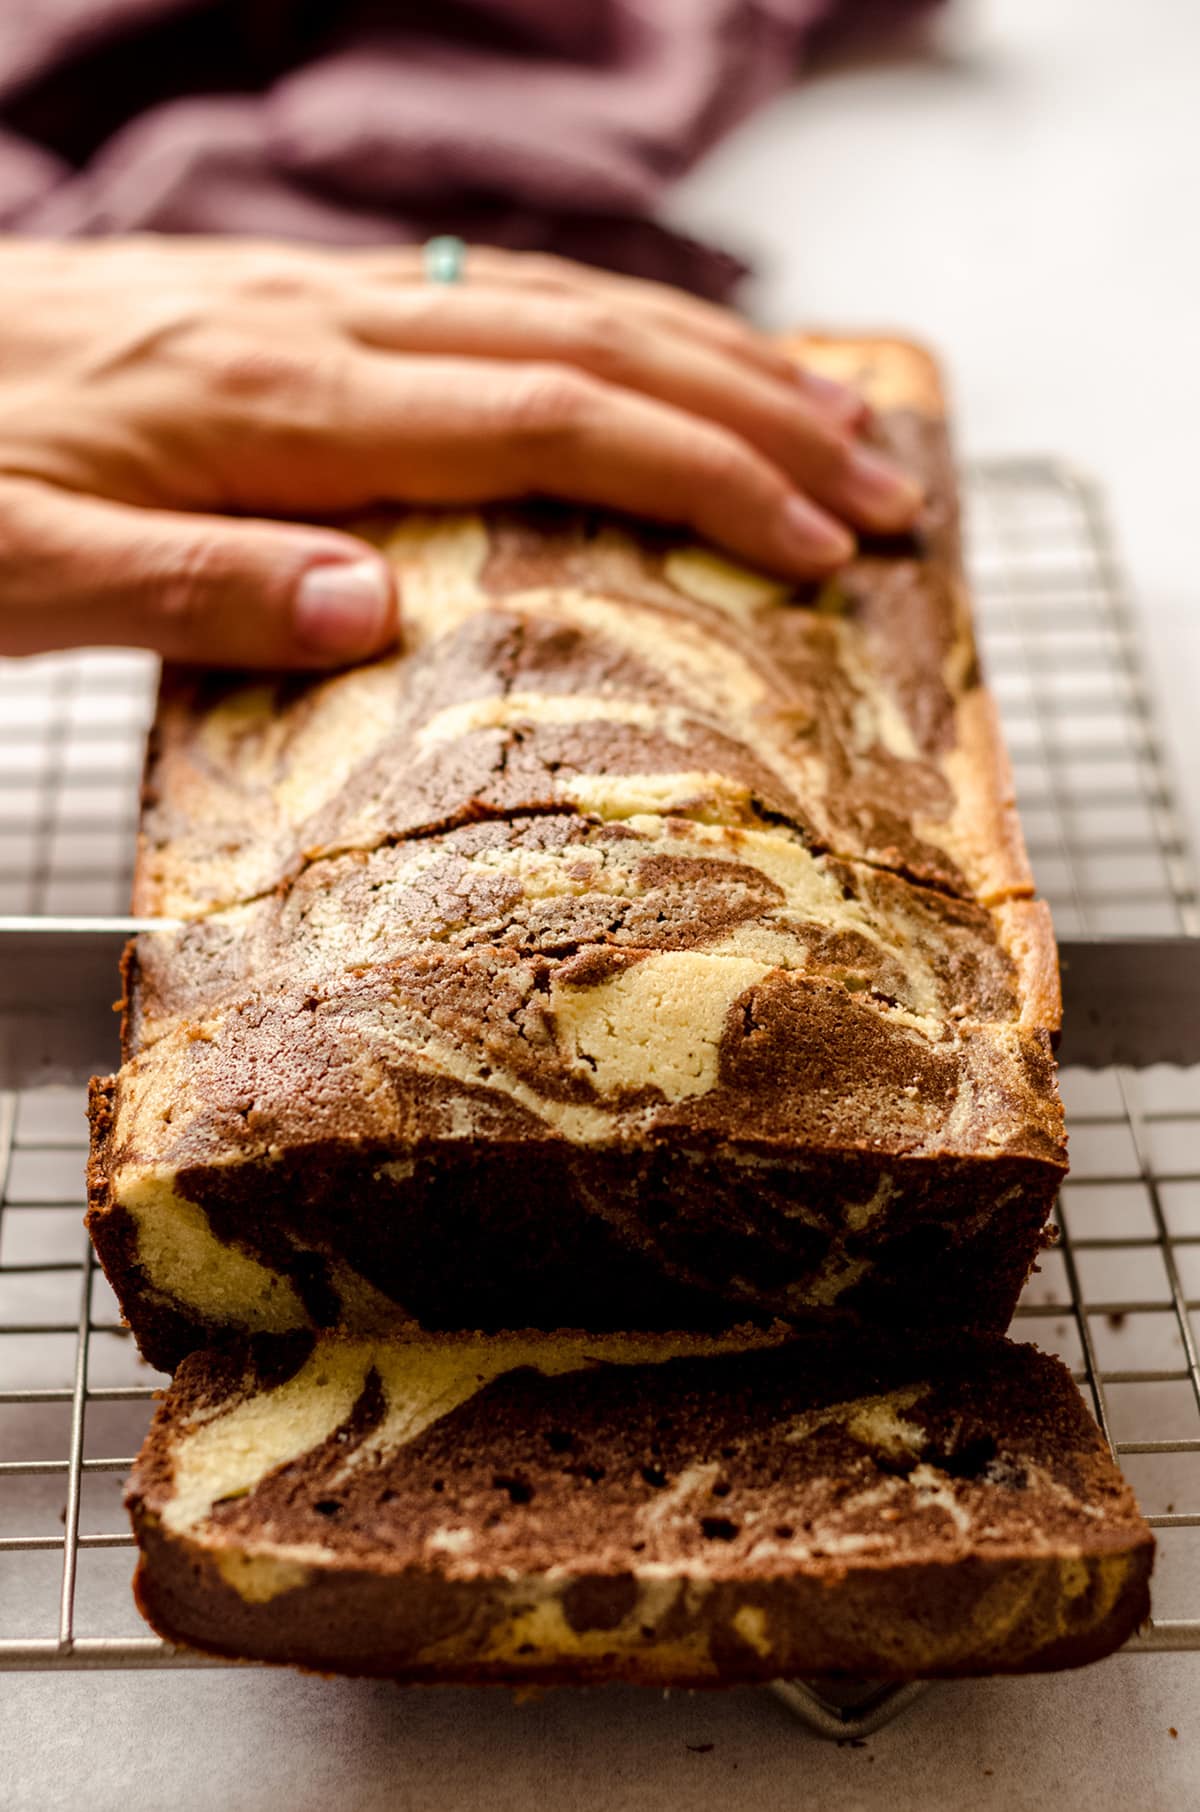
This marble pound cake is buttery and rich with a very tight crumb. The simple base flavor of butter and vanilla is an excellent complementary taste to the slightly bitter chocolate swirled into every bite.
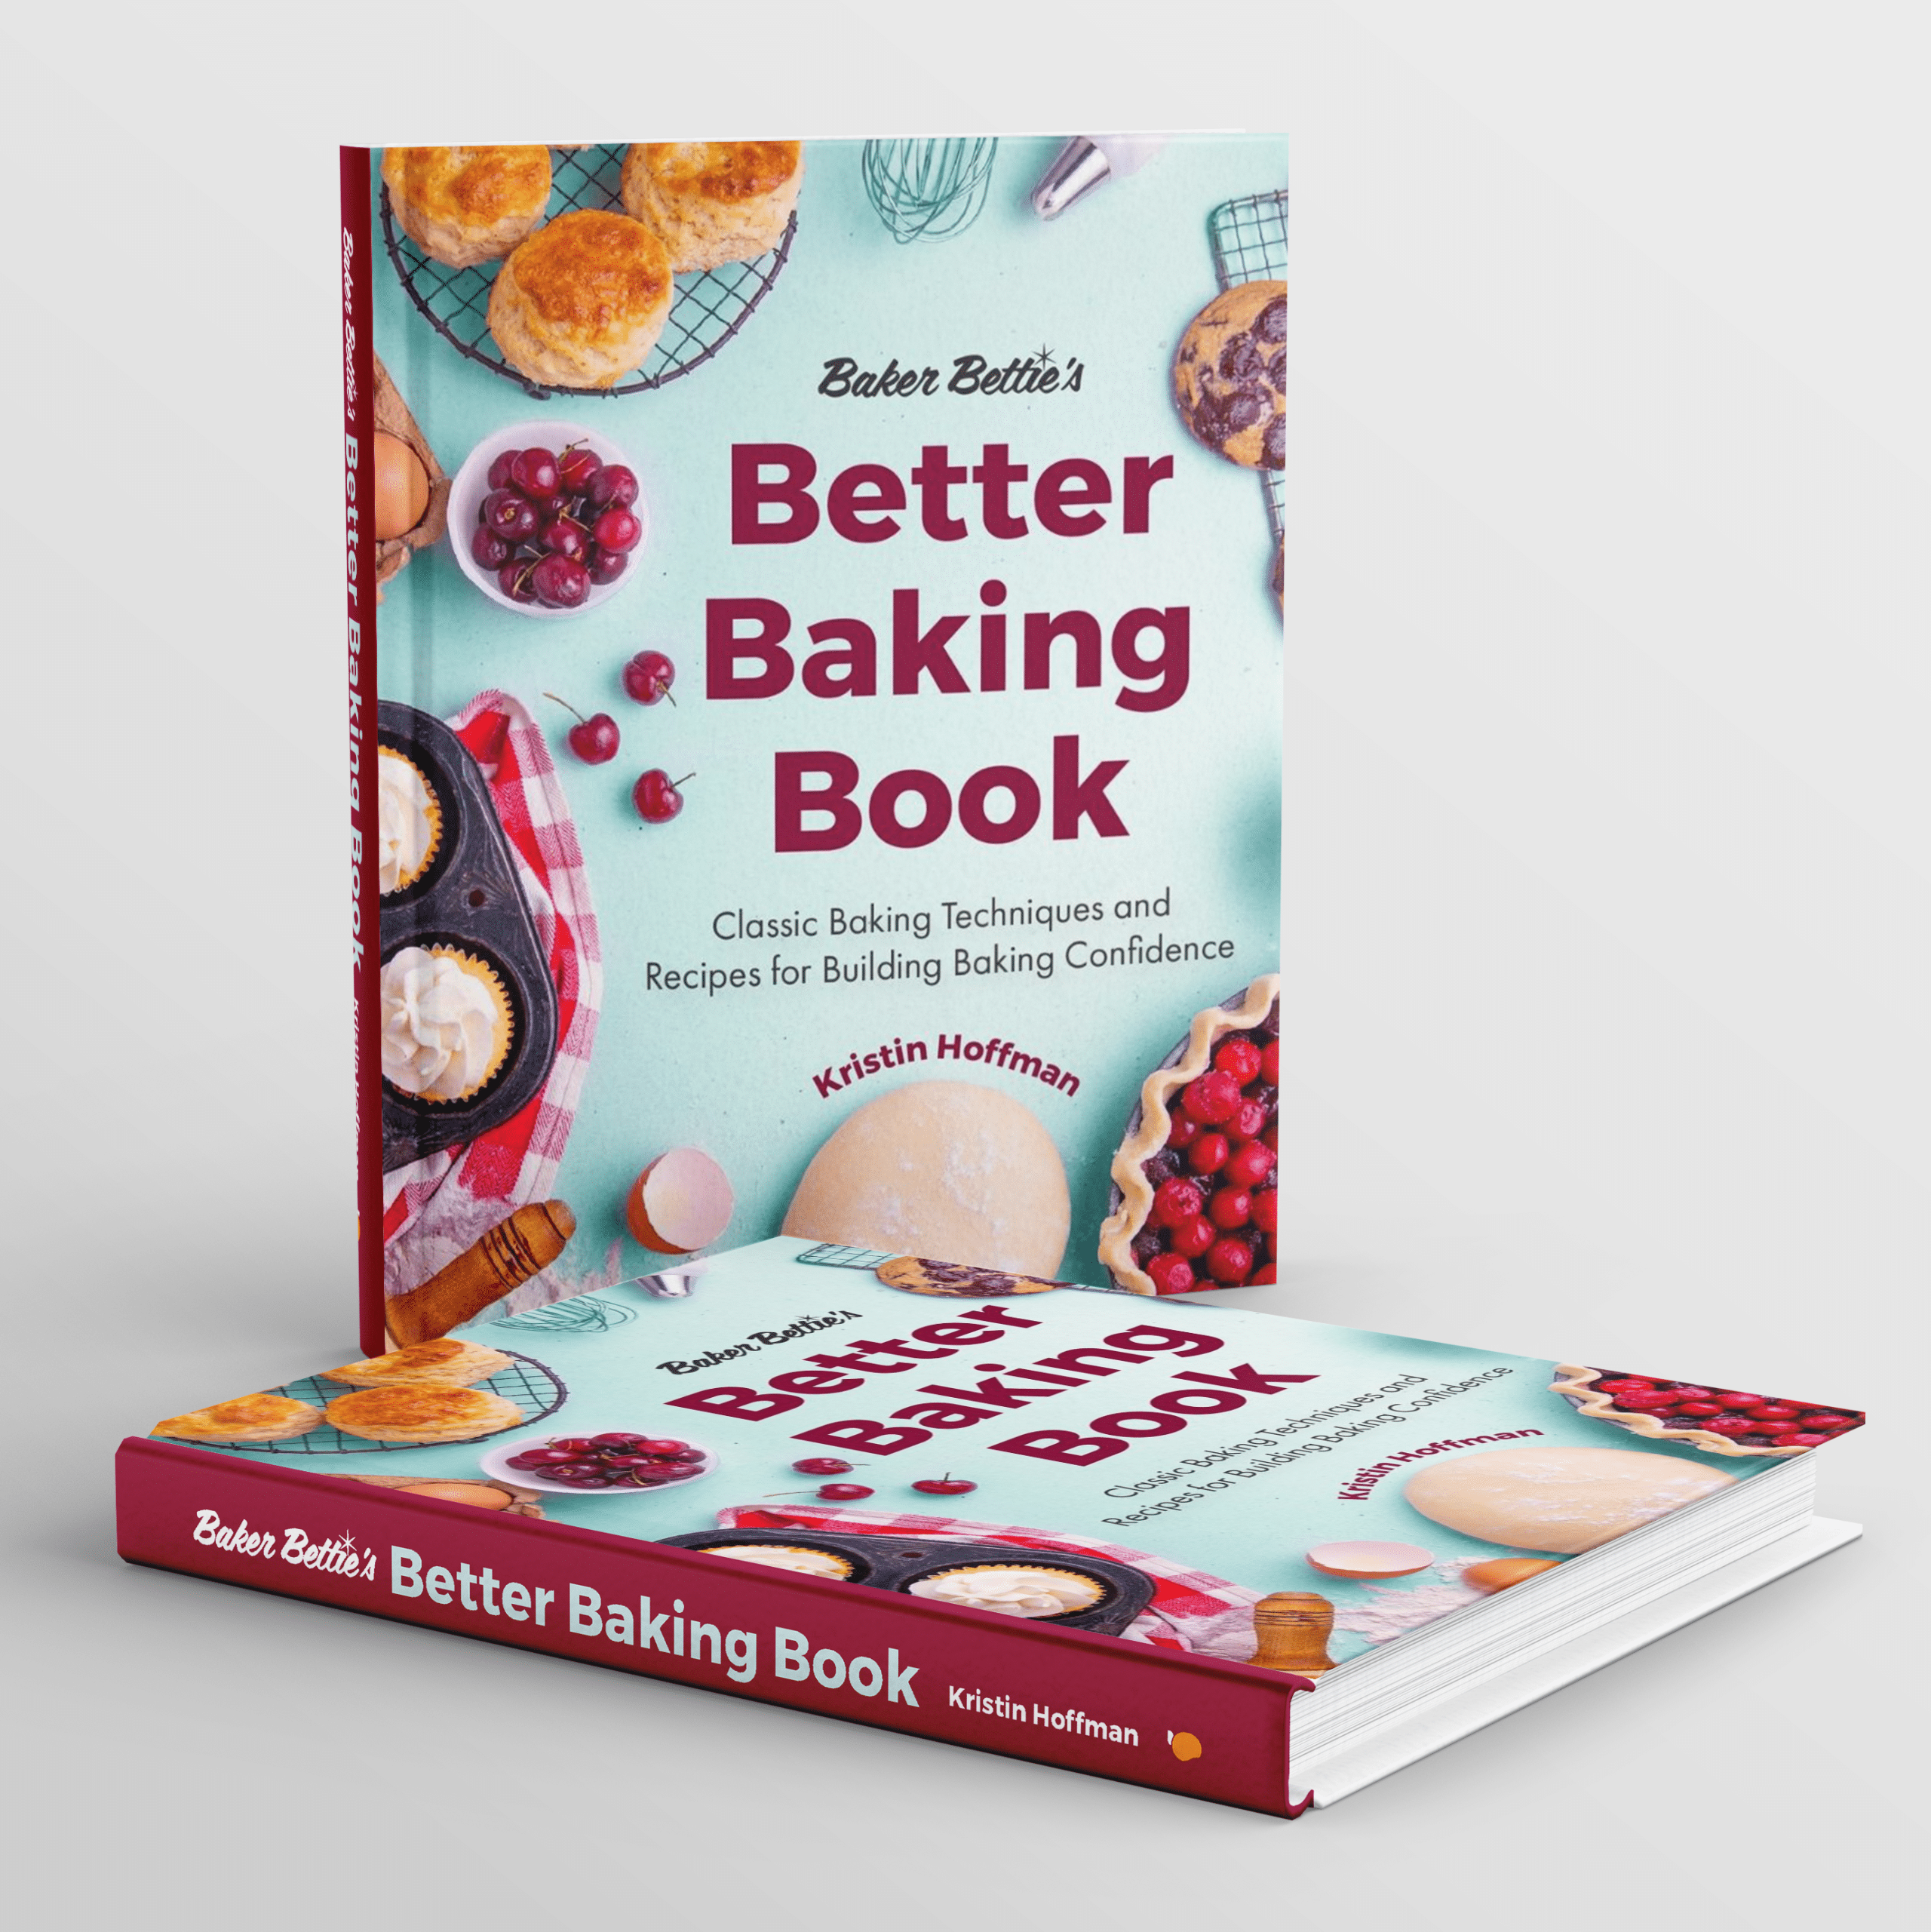
This stunning marble pound cake is based on a master recipe from Baker Bettie’s Better Baking Book, written by my friend and fellow baking educator Kristin “Baker Bettie” Hoffman. As a trained chef and expert in foundational baking techniques, Kristin brings professional insight to the home kitchen– something I deeply admire as a self-taught baker who’s spent over a decade creating and testing reliable, from-scratch recipes for home bakers just like you.
Kristin and I met at a blogging conference in 2019, and since then, we’ve traded countless baking questions, ideas, and recipe tests (I even referenced her sourdough knowledge in my sourdough English muffins and easy yeast rolls posts). I watched her book come to life behind the scenes, and it’s an incredible resource for bakers of all levels.
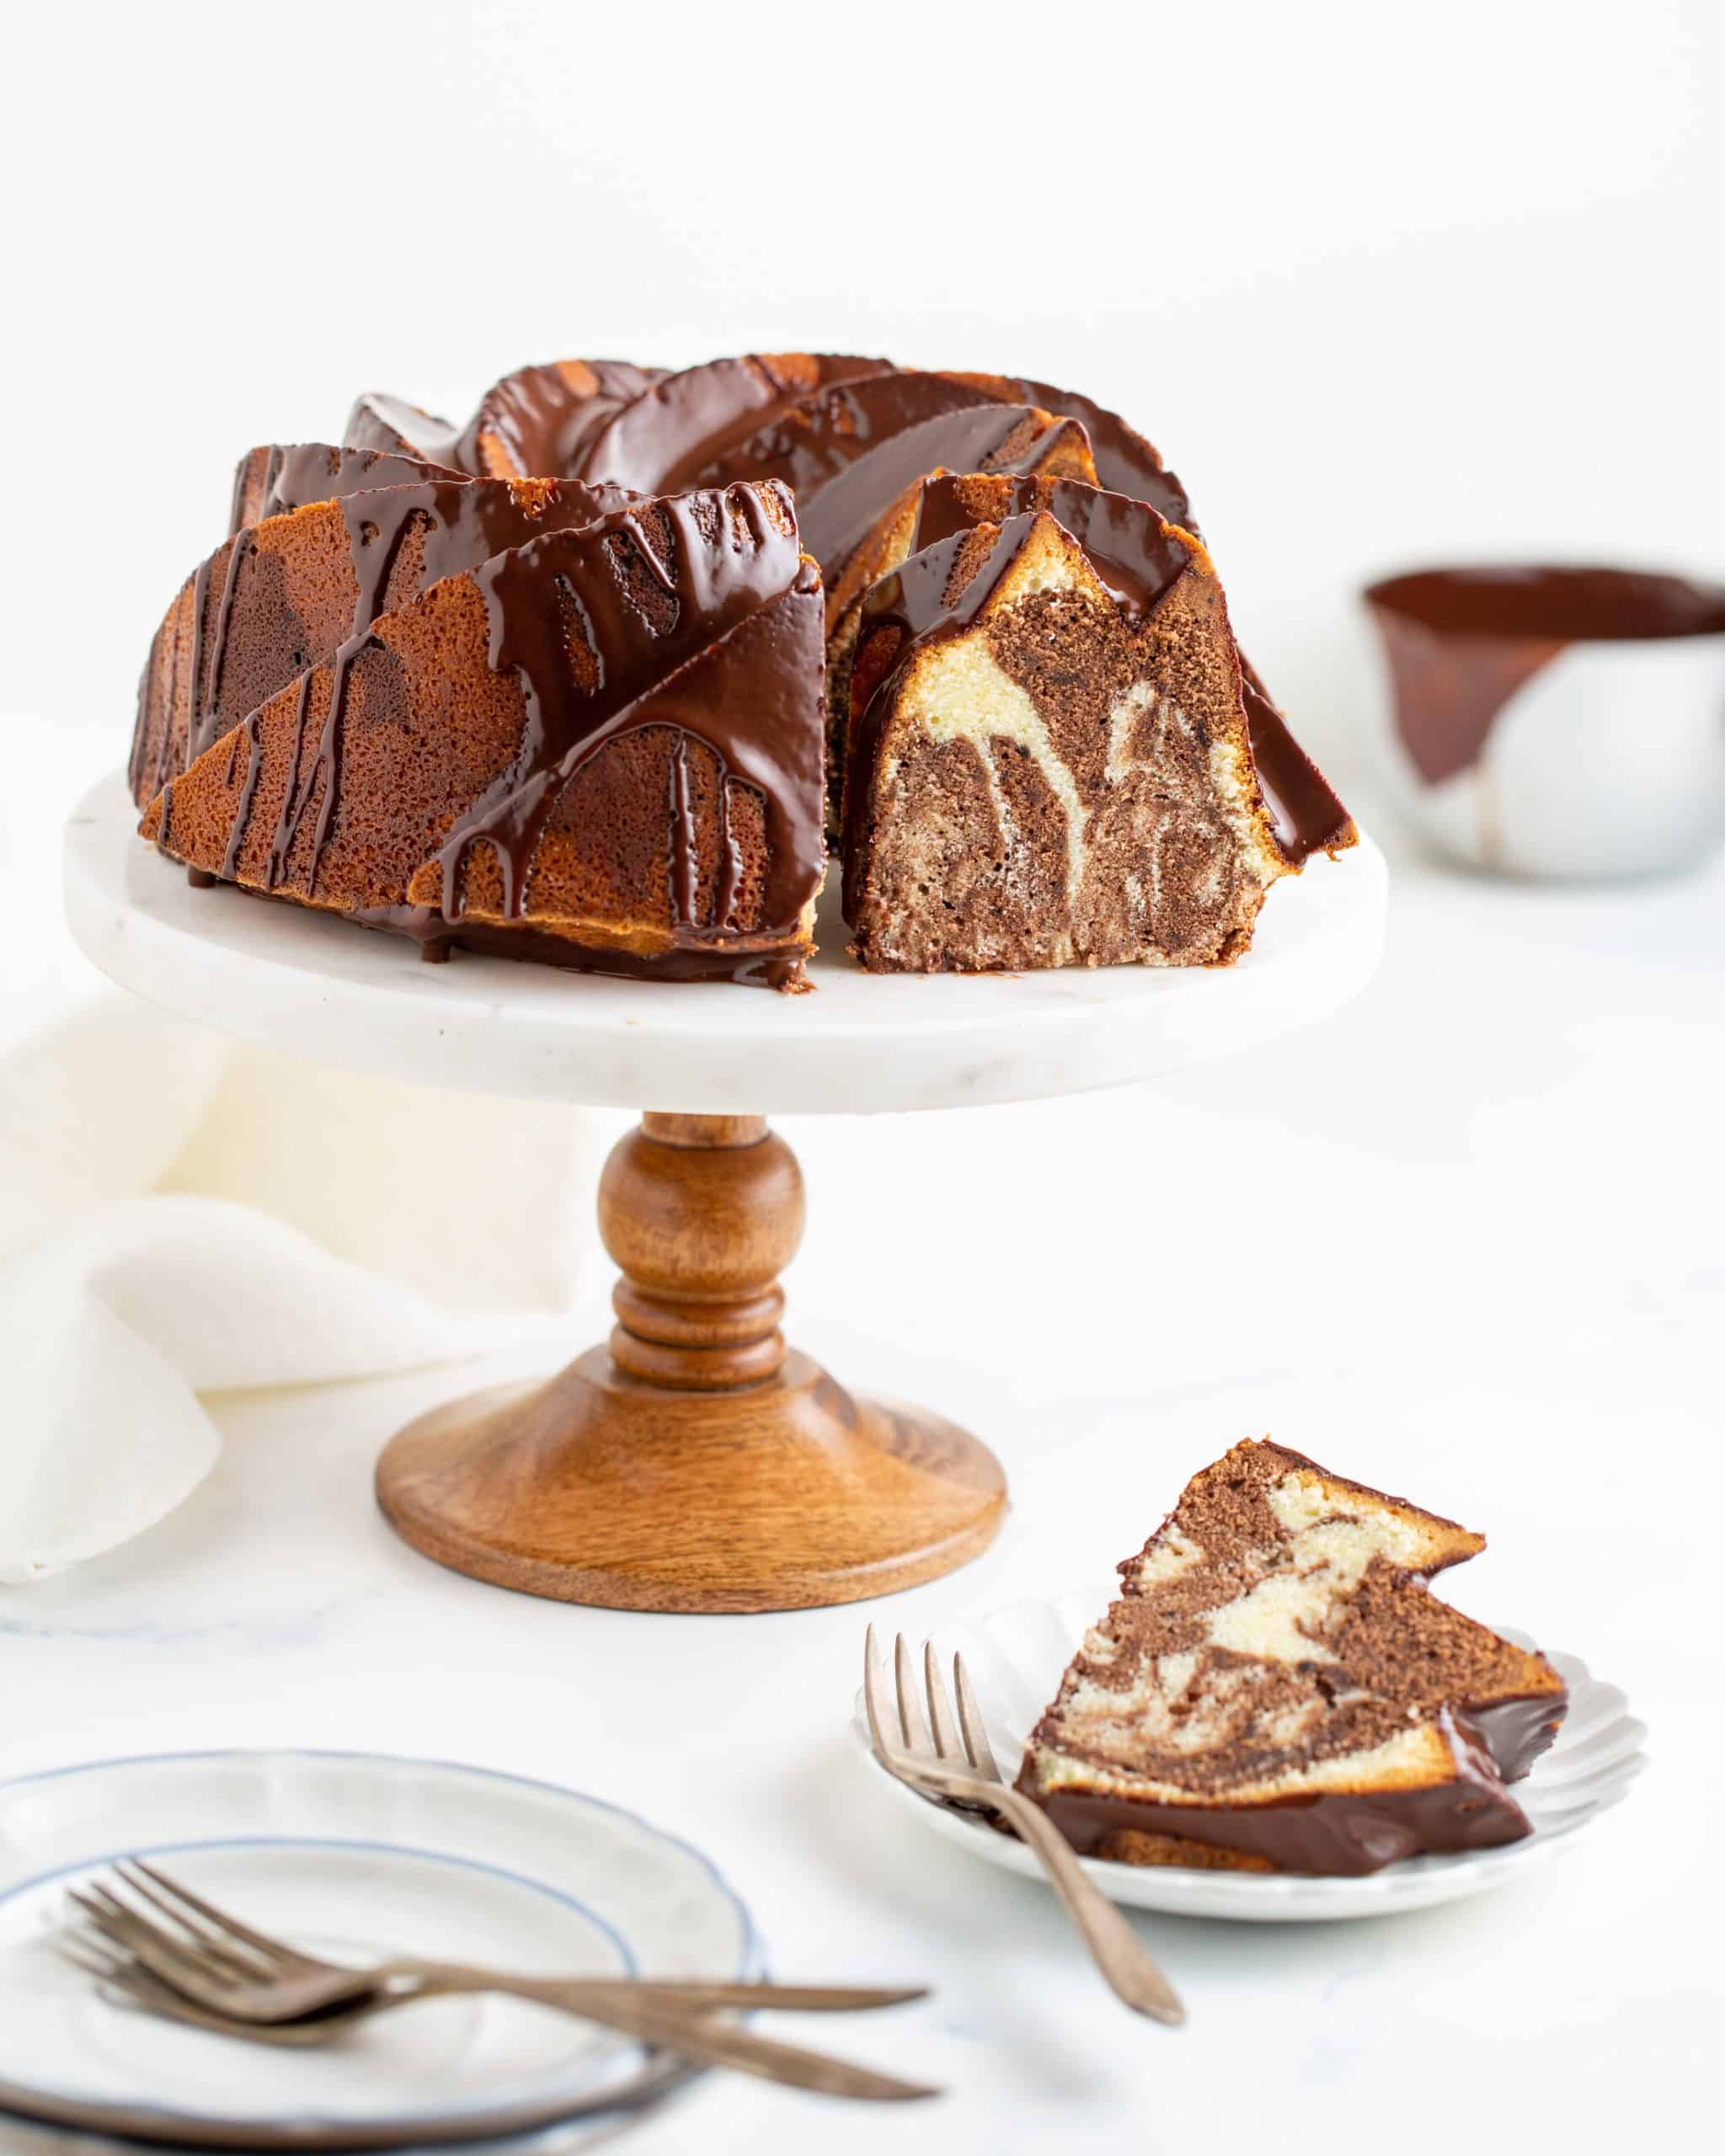
Photo by Kristin herself. And yes, this can be made into a Bundt cake. See notes in the recipe.
In this post, I’ve taken Kristin’s classic pound cake master recipe and turned it into a marbled version– using my own tested method for combining two batters into one beautifully swirled cake. Like all my recipes, you’ll find clear instructions, tips for success, and weight + volume measurements to help you feel confident in your kitchen. My readers know I don’t publish anything I haven’t tested rigorously… And this one passed the test with flying (and swirled!) colors.
Whether you’re just getting started or expanding your baking skills, Baker Bettie’s Better Baking Book is a gem. You can read more about it on Kristin’s website— it’s one I personally reach for often.
Marbled Pound Cake Ingredients
While we will get to the cake flour portion of the ingredient list, which I think is the most important ingredient to touch on in major detail, I will mention that this recipe is actually quite simple.
Here’s what you’ll need:
BUTTER, EGGS, & SOUR CREAM: the fat base for this marble loaf cake is butter, and we’re also using 4 whole eggs and sour cream. It is imperative that all three of these ingredients are at room temperature to insure that first of all, we can cream the butter properly, and second, that the remainder of the batter comes together properly.
ROOM TEMPERATURE INGREDIENTS ARE A MUST
Cold or cooler temperature ingredients do not blend together as smoothly as room temperature ingredients do, so do take care and time to prepare your ingredients before diving right into this marbled pound cake.
CAKE FLOUR
This particular marble loaf cake recipe calls for cake flour, which is much lighter than all-purpose flour, and it actually has weakened proteins which prevent it from creating a strong gluten structure. While we do want a strong gluten structure in something like yeast bread, we don’t want as much of that structure in cakes.
COCOA POWDER: you’ll need unsweetened cocoa powder to turn some of the loaf batter chocolate to swirl with the vanilla pound cake base.
SALT & VANILLA EXTRACT: we’ll use both of these for flavor.
How to Make Marble Pound Cake
Bringing this batter together is quite simple. Let’s touch on some key steps that will ensure your pound cake’s success!
STEP #1: CREAMING METHOD
Remember when I said Kristin’s book is broken into two major parts? In that first part, she discusses different methods for combining ingredients and creating batters.
The two methods she discusses when it comes to cakes are the blending method (which is what we typically refer to as the one-bowl method where we just stir together the ingredients) and the creaming method.
I’m also a fan of the reverse creaming method, and if you’re interested in learning about that one, visit my white layer cake recipe to read all about it.
The creaming method is the one we’ll use for this chocolate marble pound cake recipe, and you can see in this page spread what I mean about all those process shots Kristin provides.
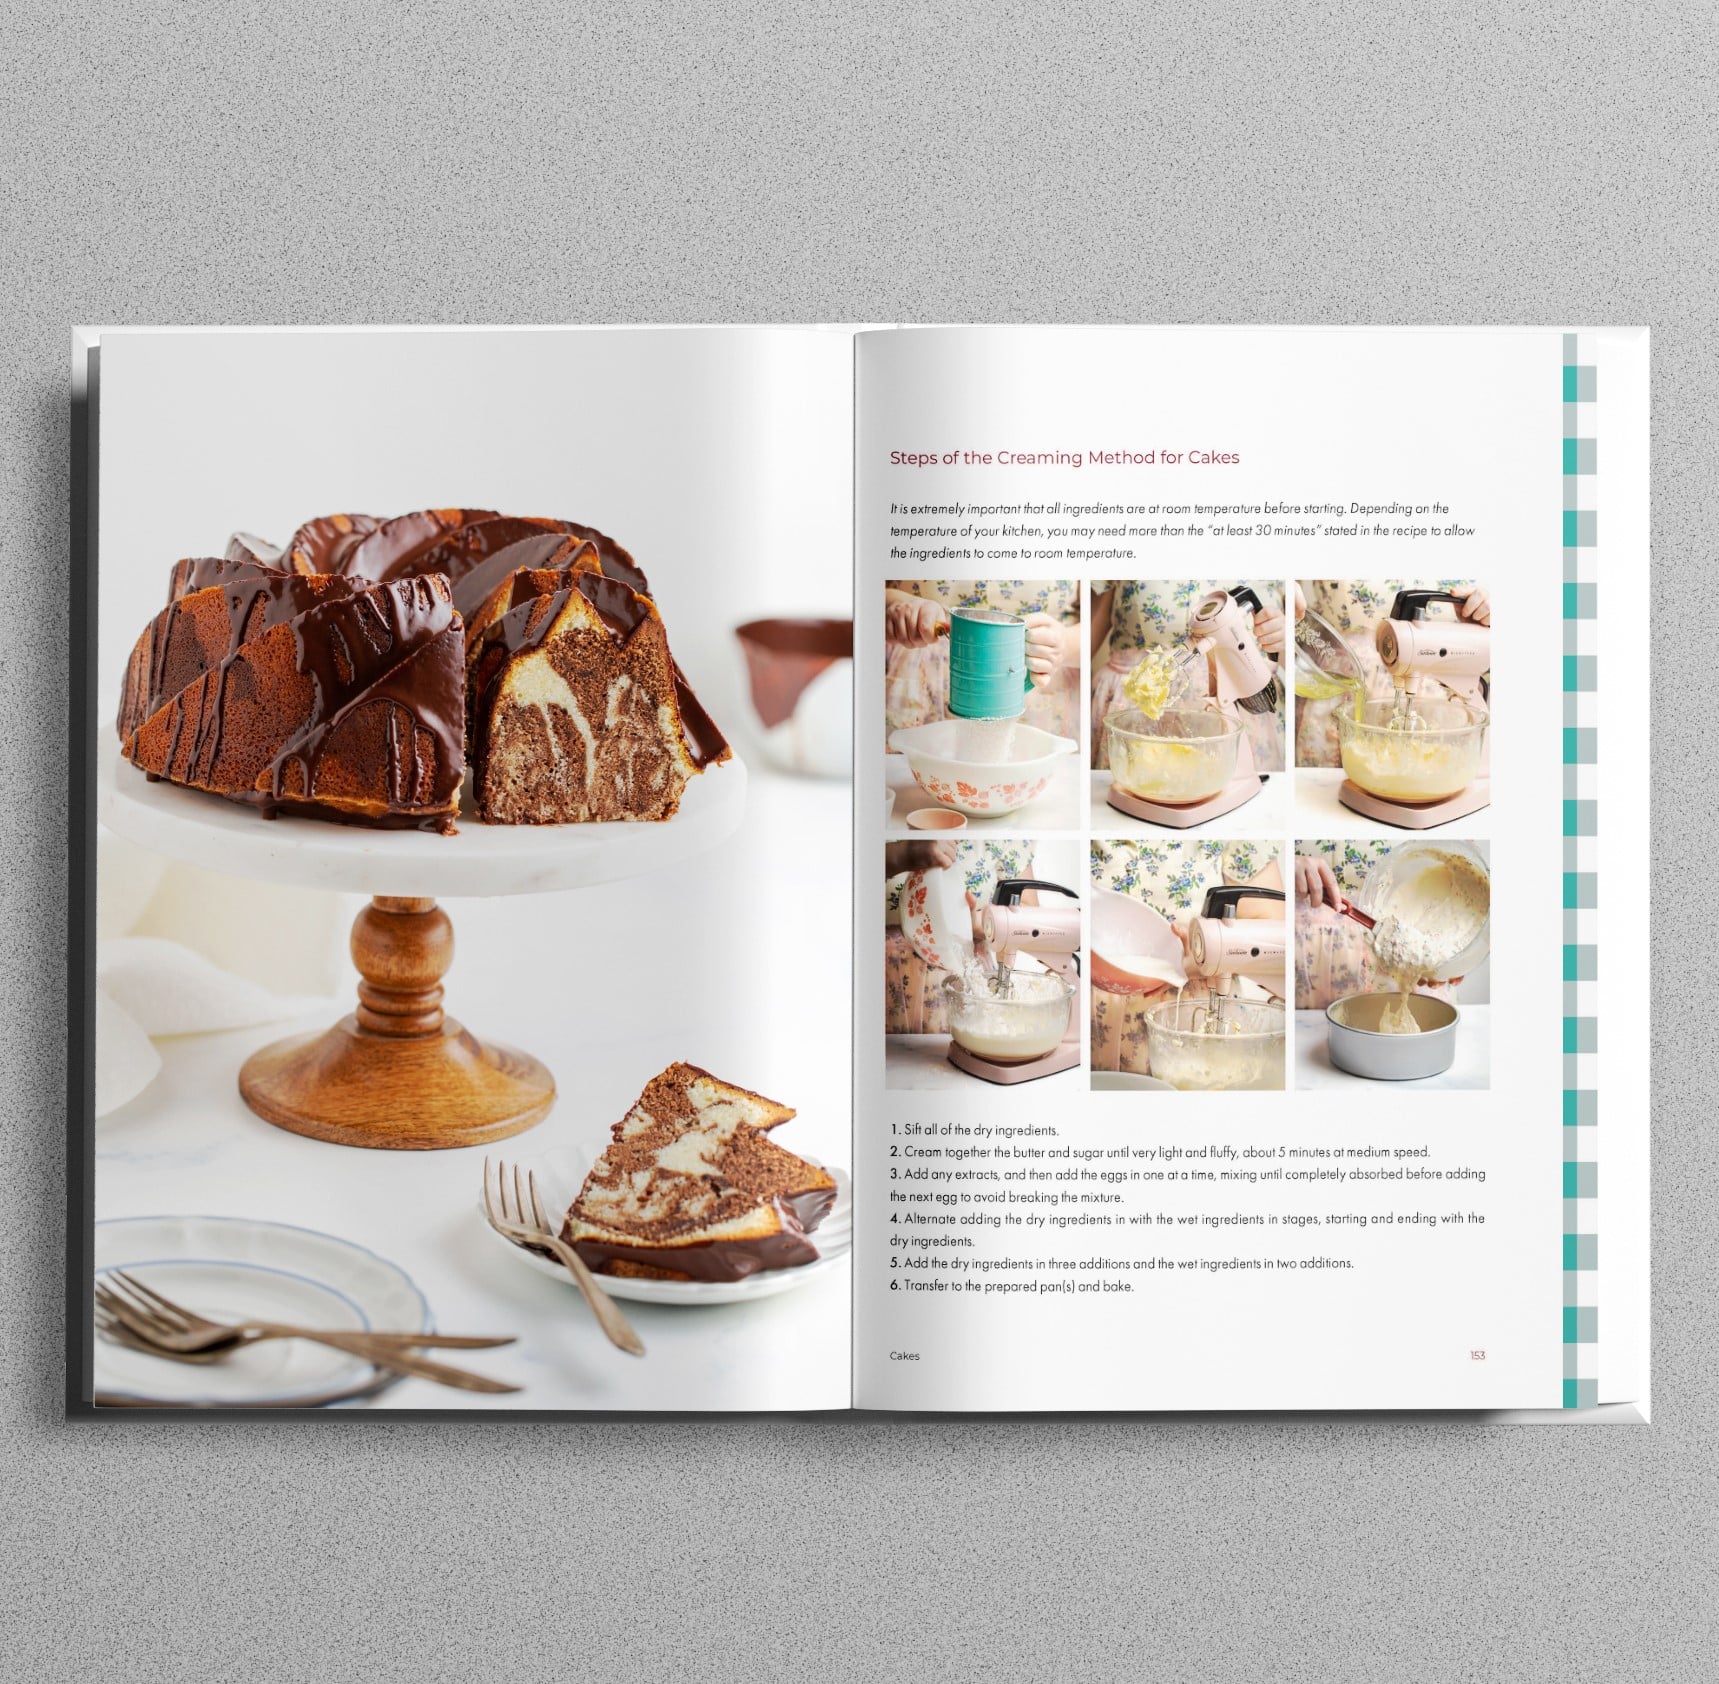
You’ll start this marble pound cake batter by creaming together the butter and sugar. We’re creaming for quite some time, and we’re looking for a very light and fluffy mixture that has paled in color to indicate its readiness.
The creaming method helps keep this marble pound cake moist and light, but the downside is that these types of cakes don’t stay moist for as long as oil-based cakes (like my chocolate cake) do.
Don’t worry– this chocolate marble loaf won’t last long enough for you to find that out. I guarantee it (says the woman whose loaf lasted just a few hours longer than 2 days).
STEP #2: ALTERNATE WET & DRY
In order to maintain the integrity of this beautiful creamed base, it is imperative to incorporate the flour mixture and the sour cream properly so we don’t break the base. This would result in a denser cake, which we definitely don’t want in this marble pound cake loaf.
The dry ingredients will go into the creamed mixture in 3 additions, and the sour cream will go in 2 additions, starting and ending with the flour. Congrats! You’ve successfully conquered the creaming method.
STEP #3: SEPARATE THE BATTER
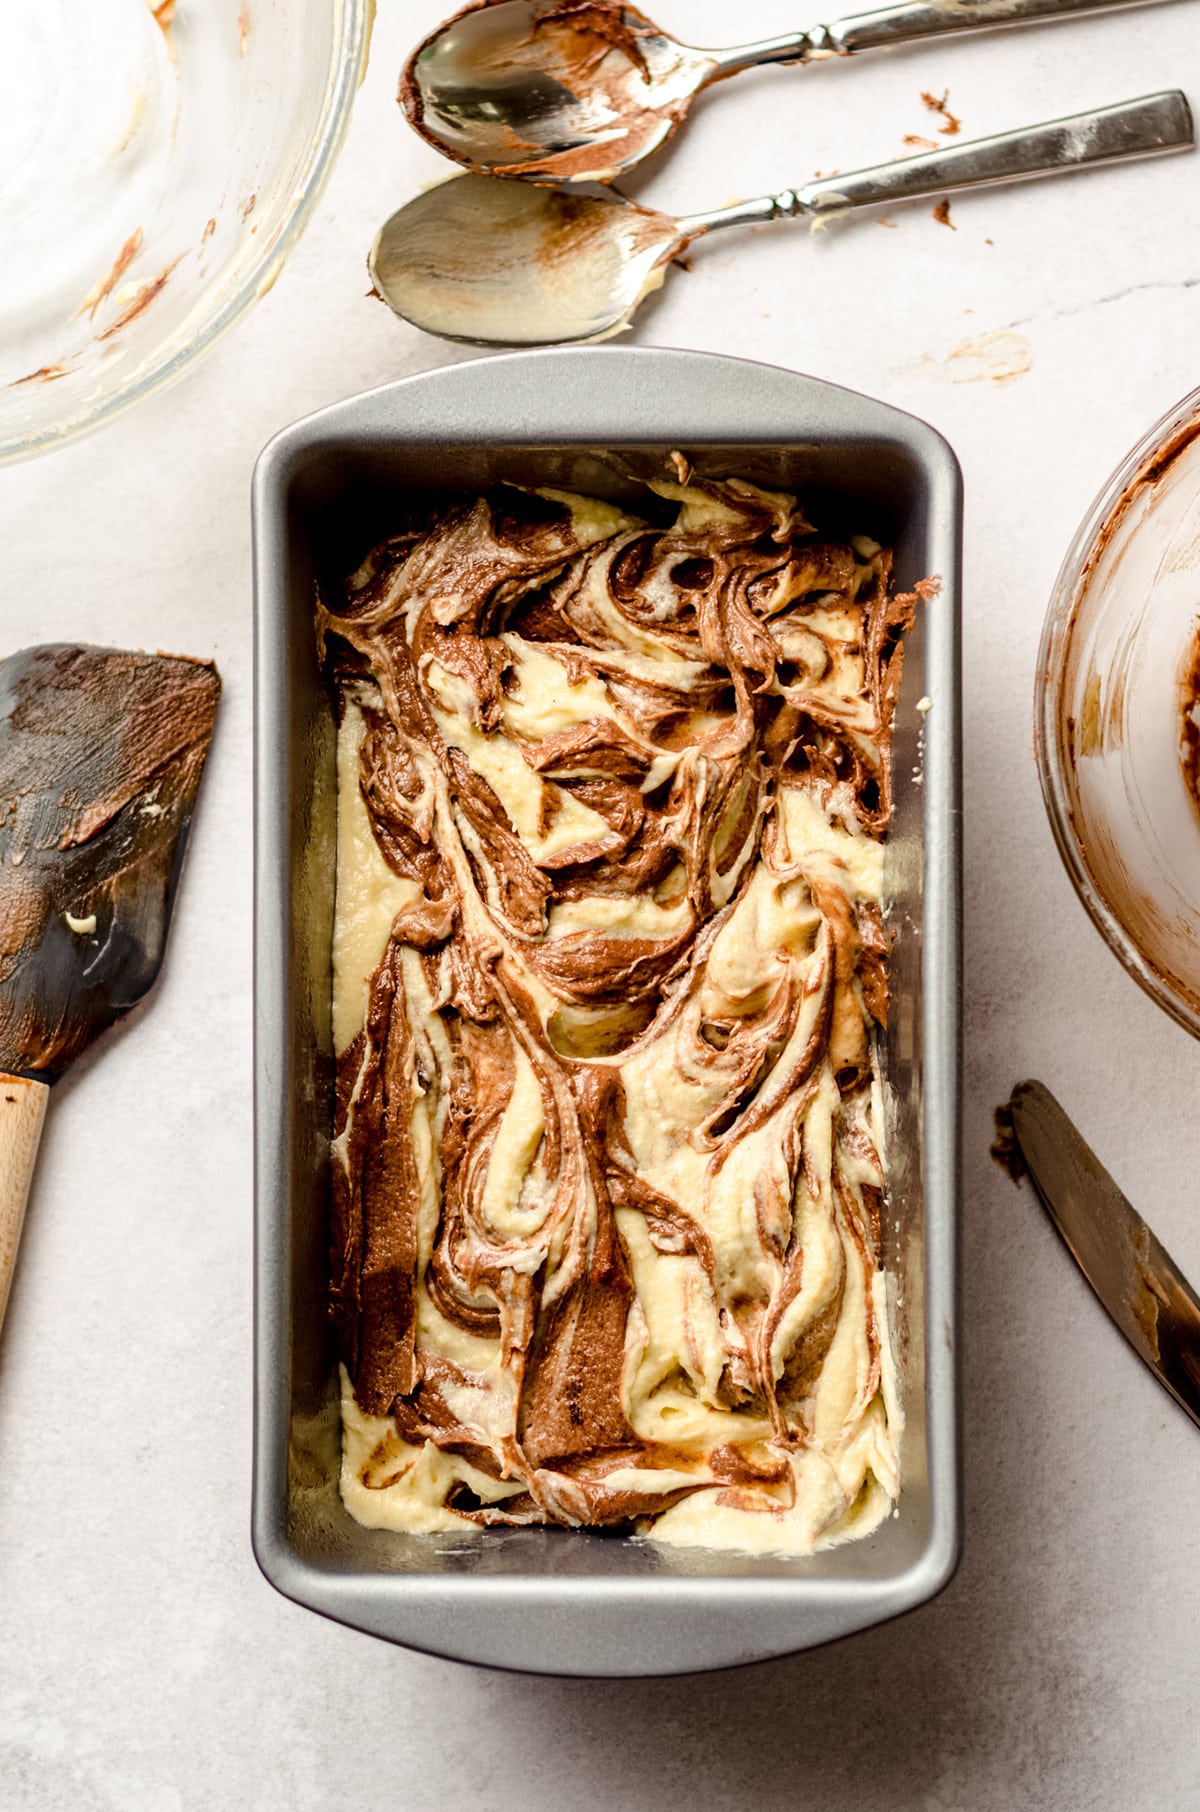
To create that marbled effect, you’ll then split the batter in half and turn one half chocolate.
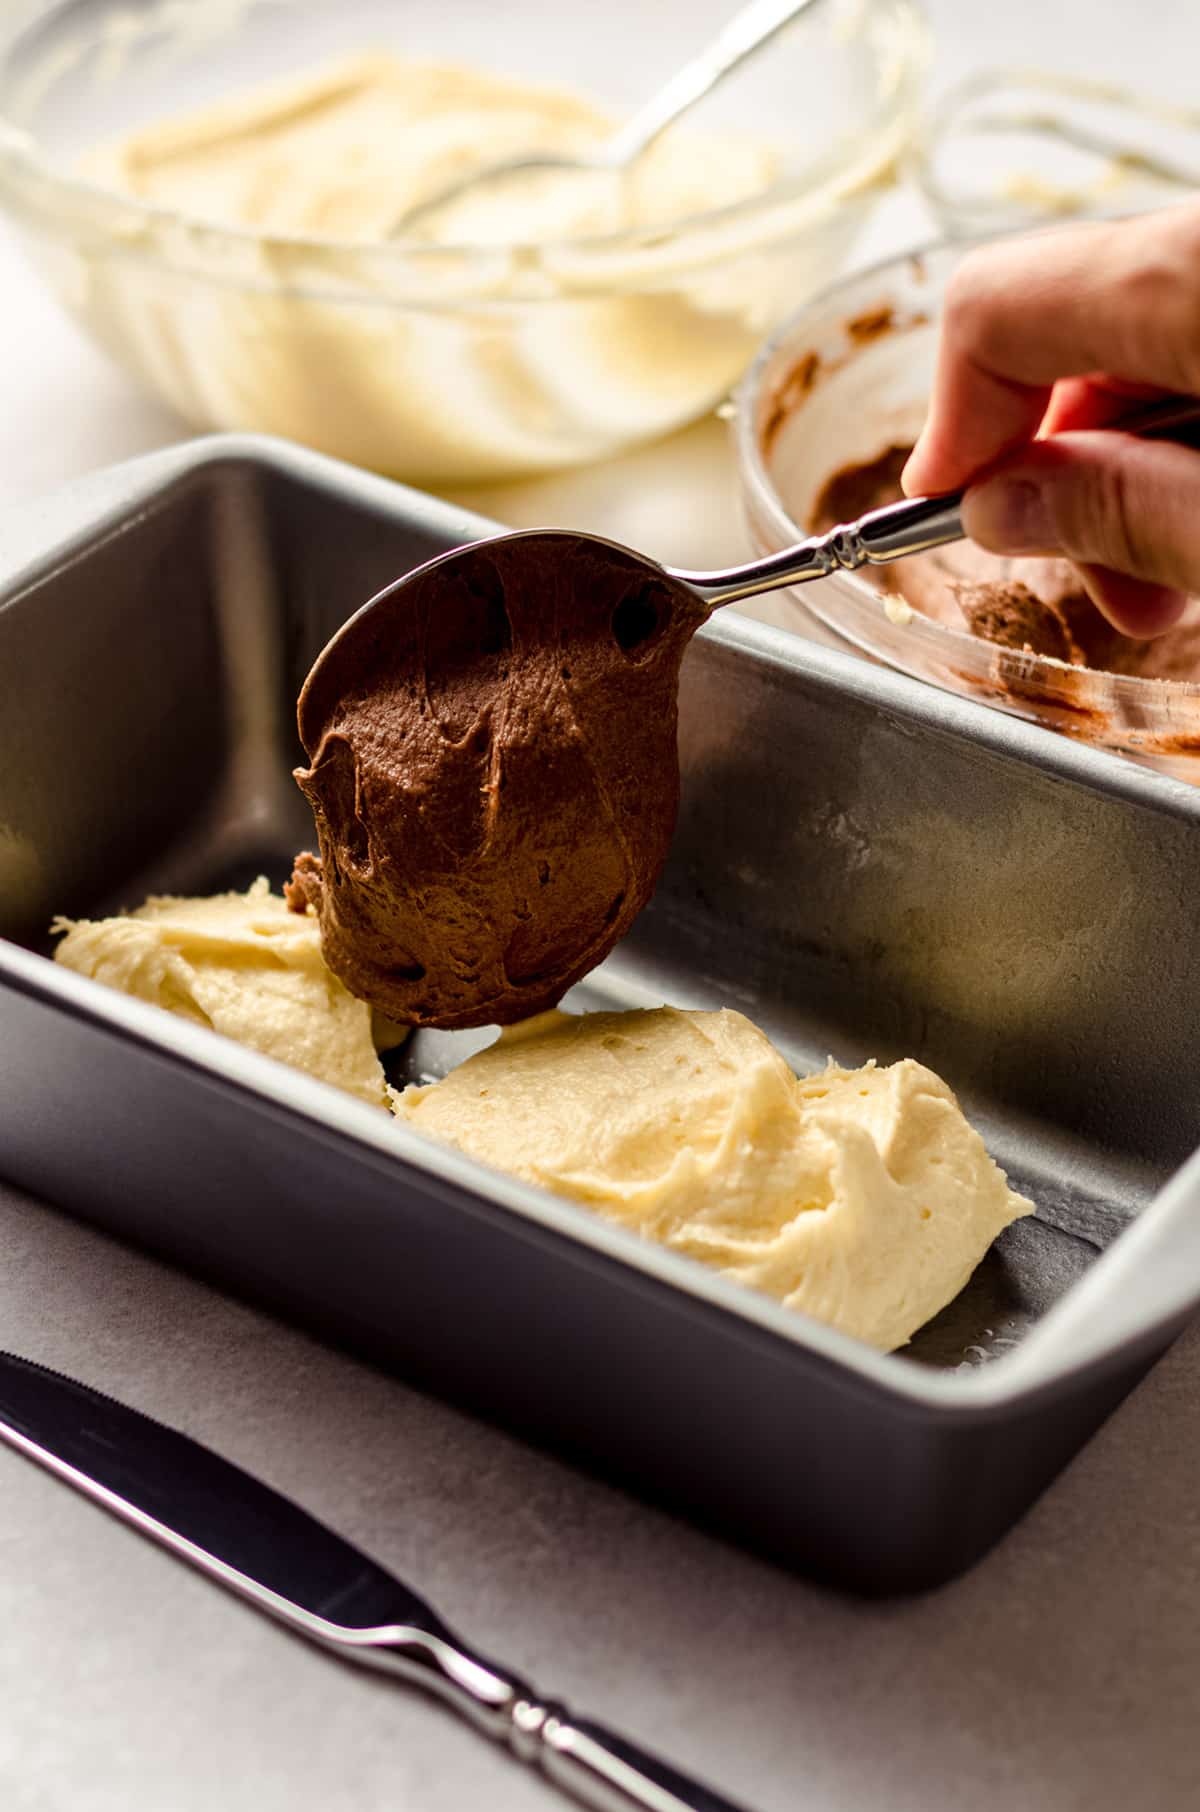
No sweat here– you’re just adding 2 Tablespoons of cocoa powder to the already mixed batter. Gently stir it in, and you’ve got your chocolate swirl batter.
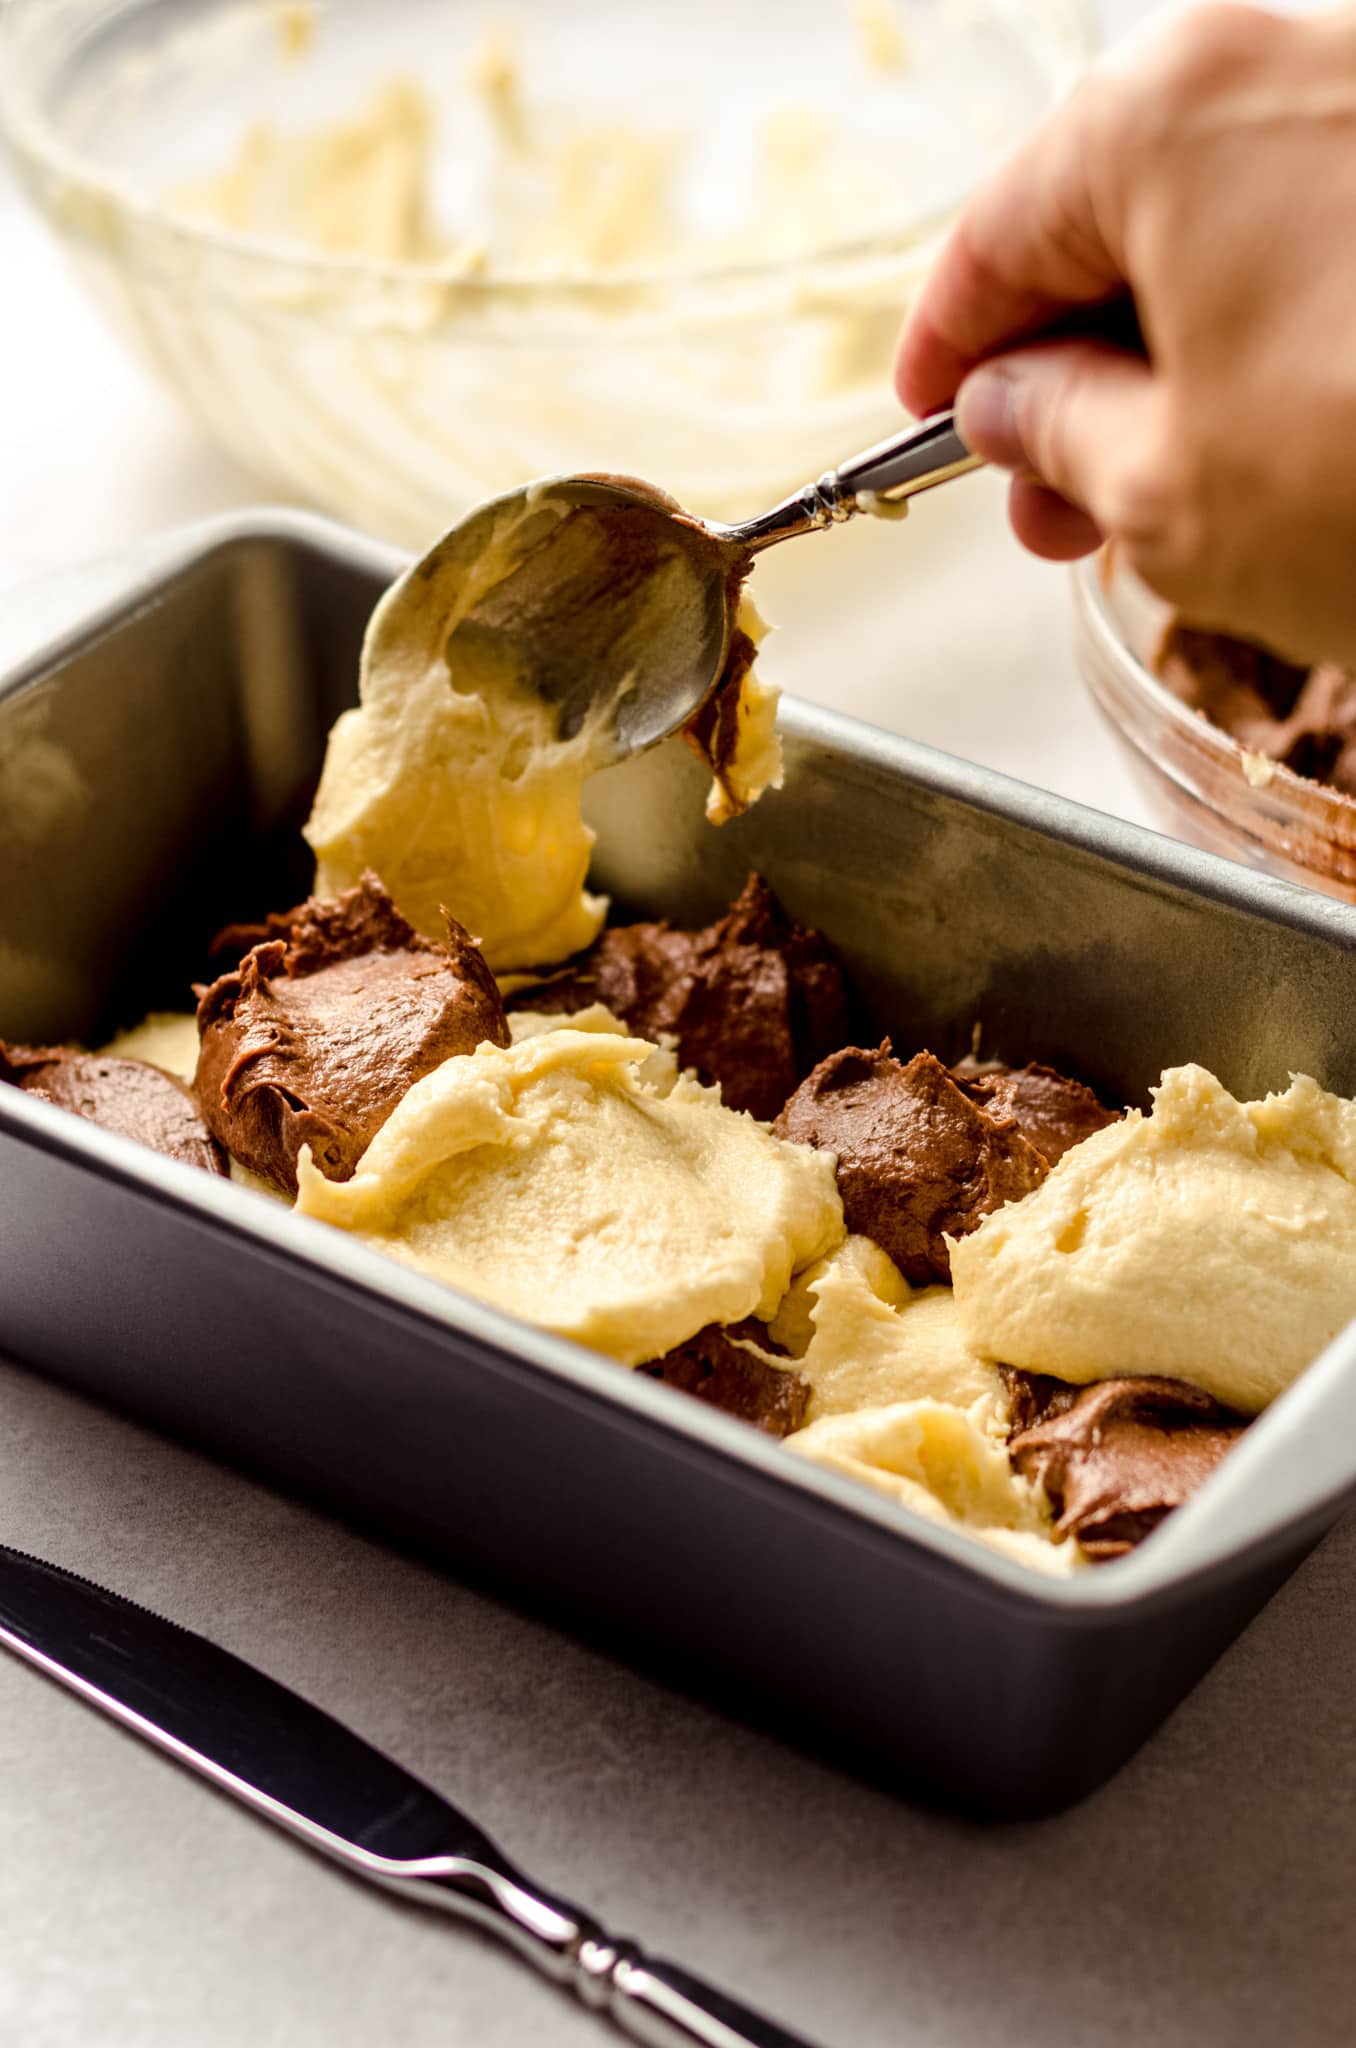
STEP #4: SPOON THE BATTER INTO THE PAN
The last step for this marbled pound cake recipe is to get the batter into the pan. Simple drop spoonfuls of the vanilla and chocolate batter into the pan, alternating as best as you can. There is no right or wrong way to do this, just try to spoon equal sized dollops in as you go.
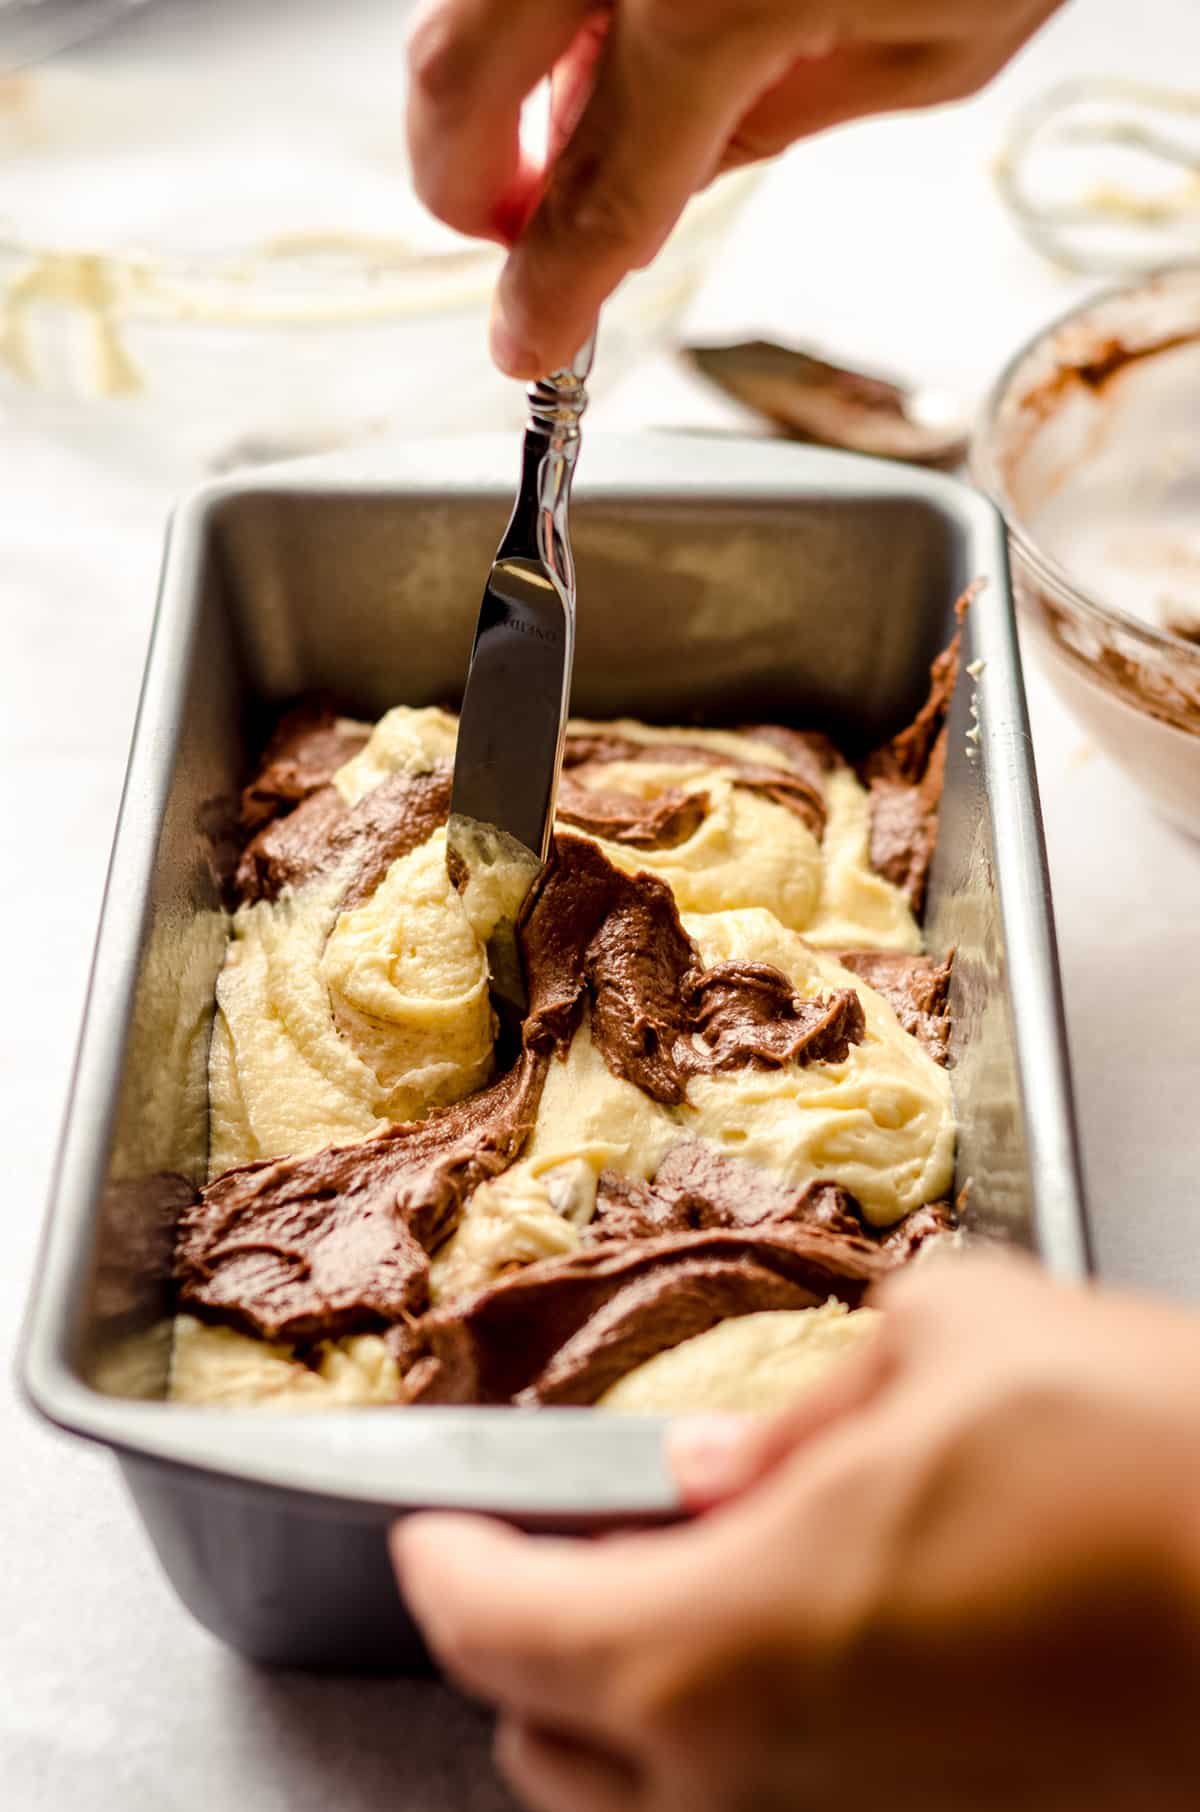
Lastly, swirl with a butter knife, then bake! This step creates all those gorgeous swirls.
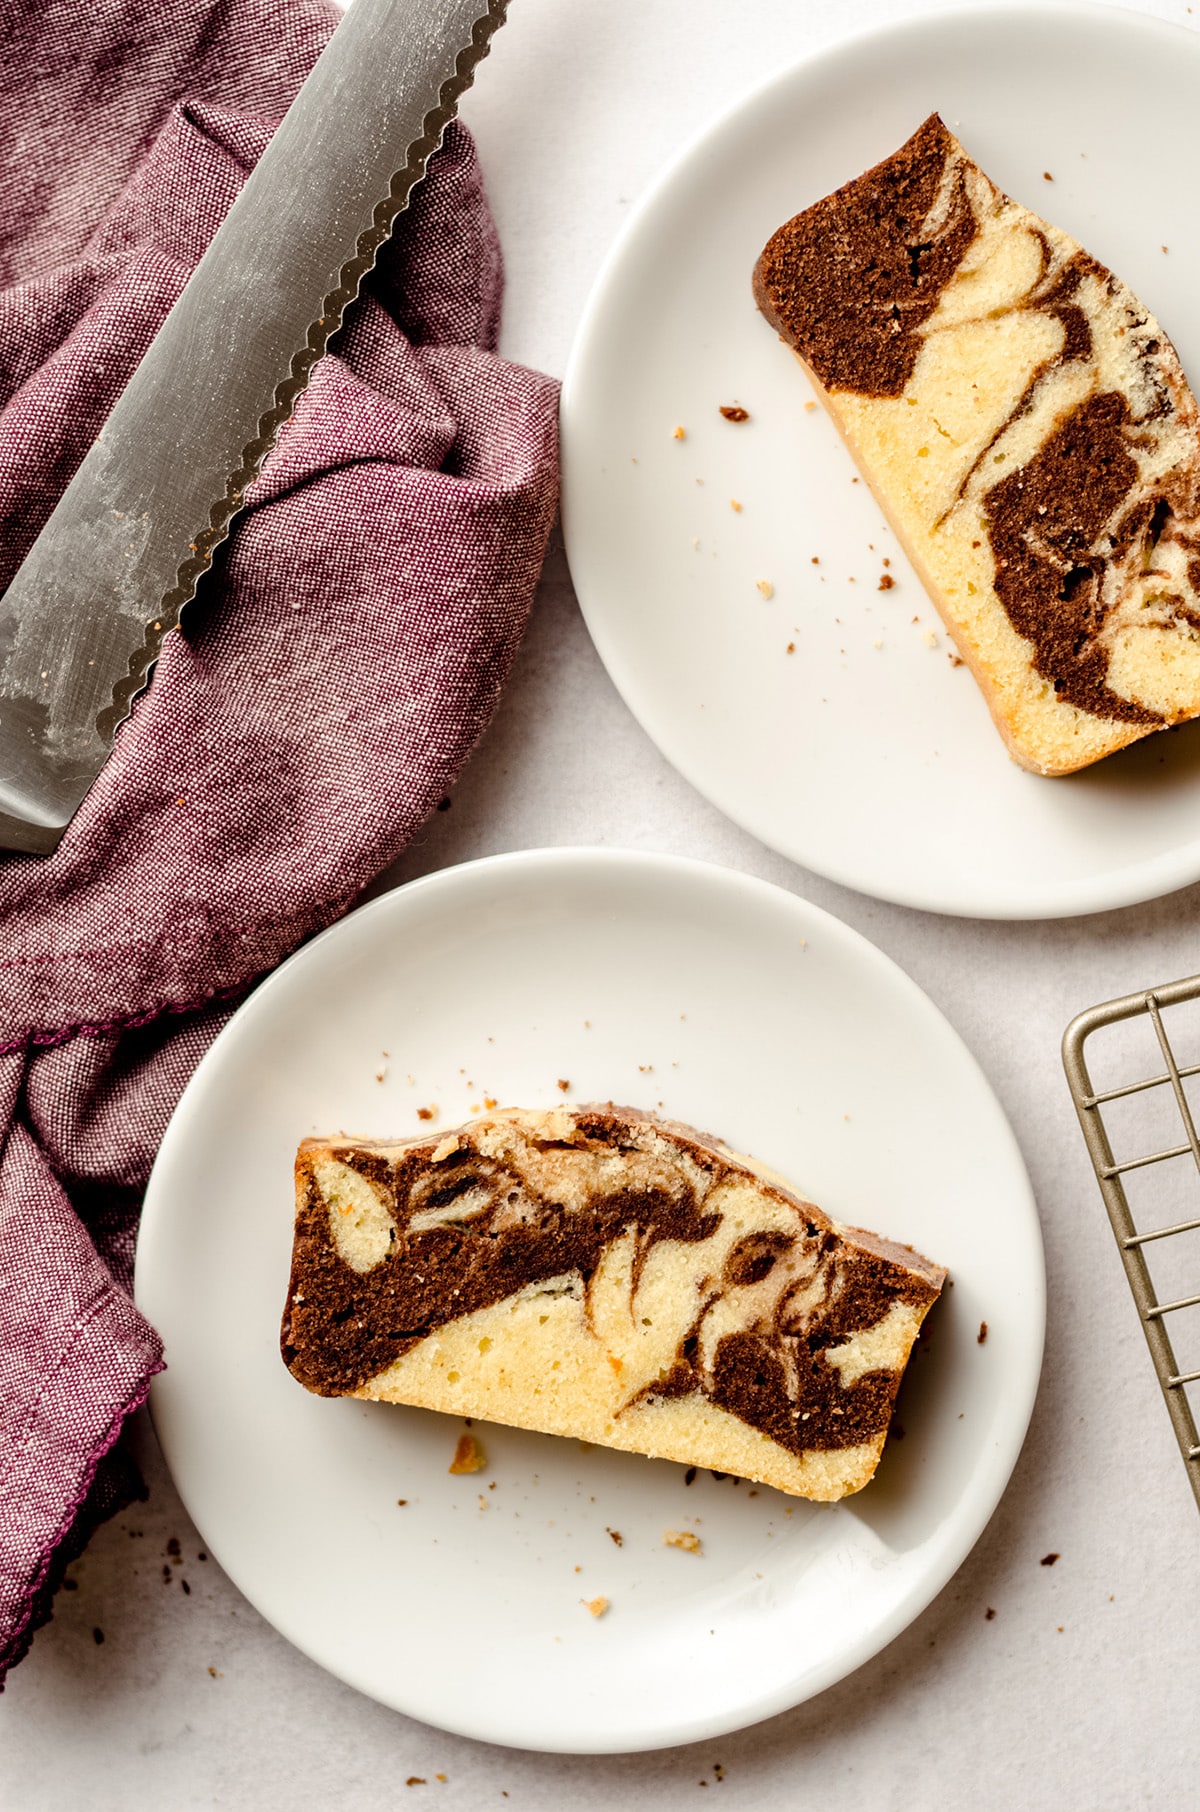
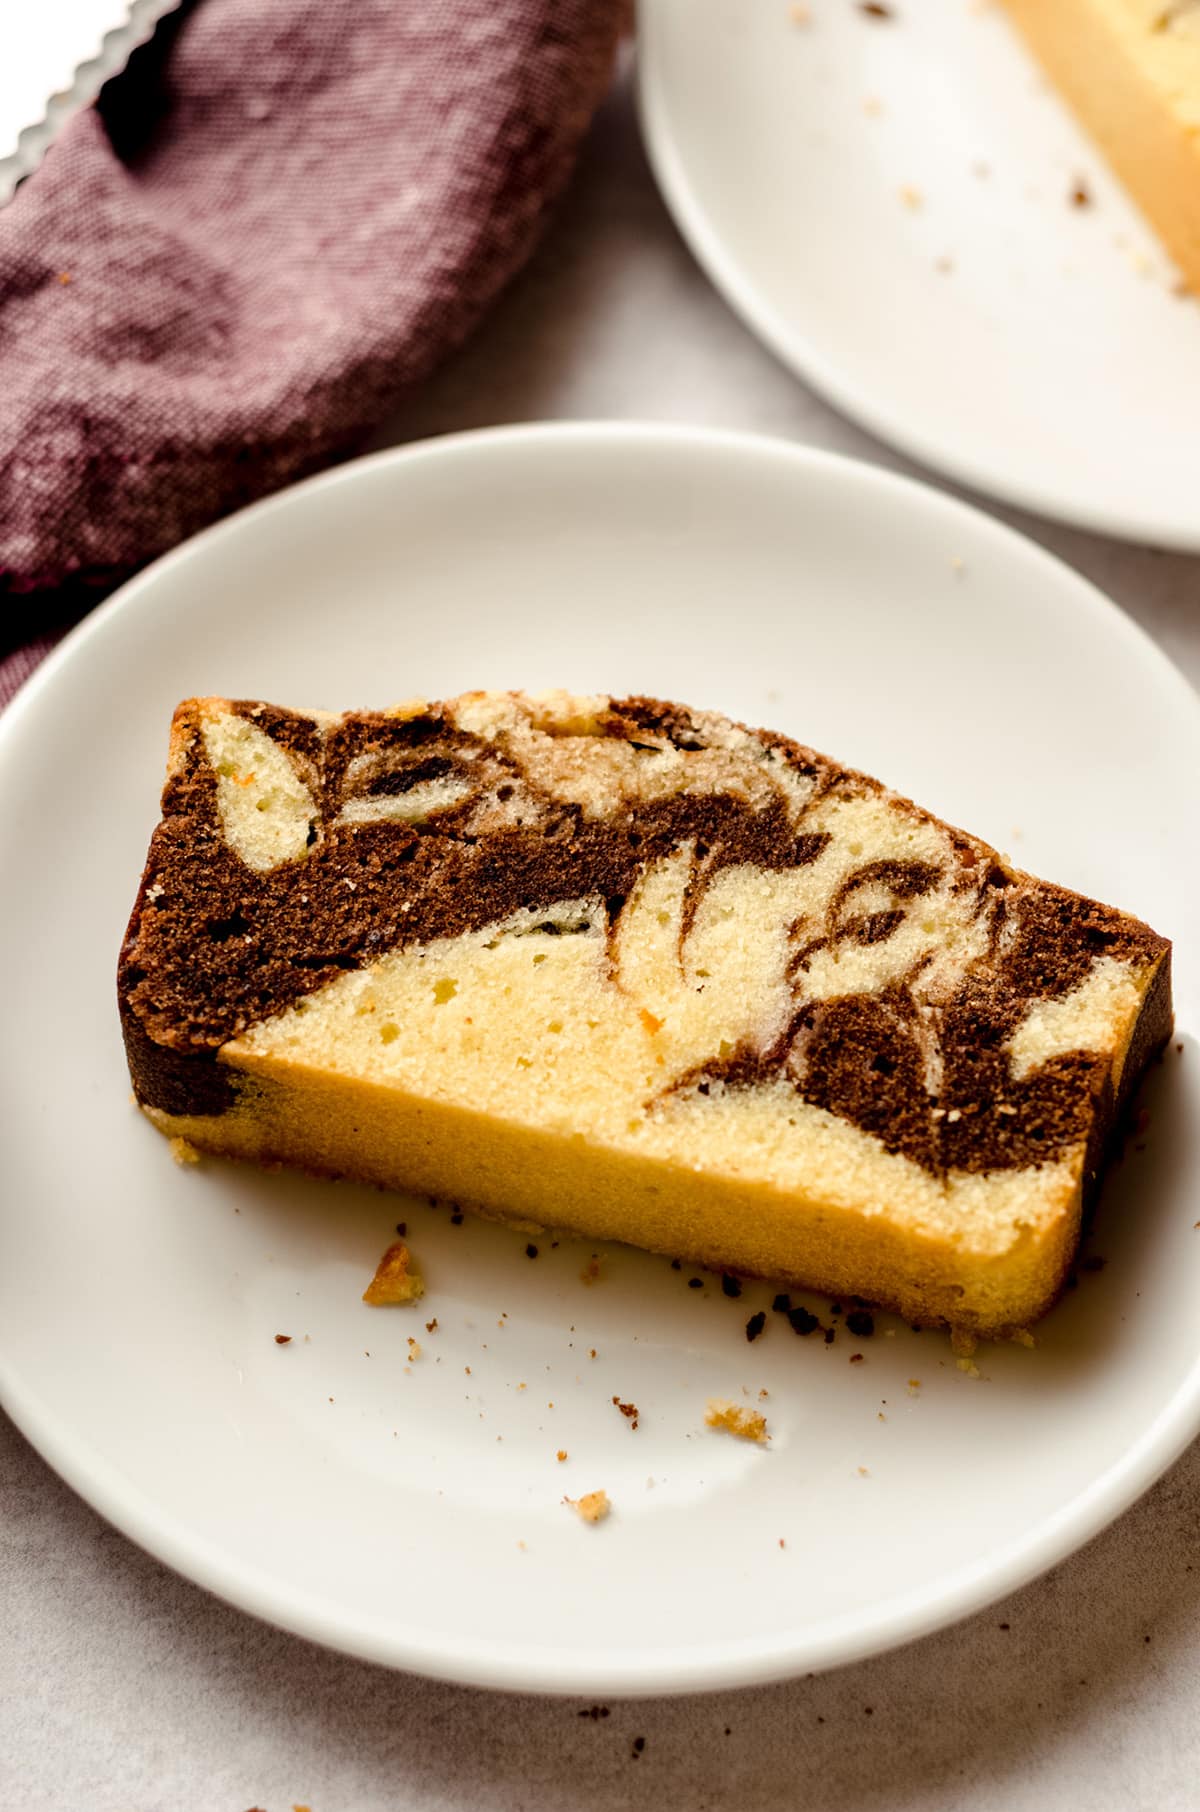
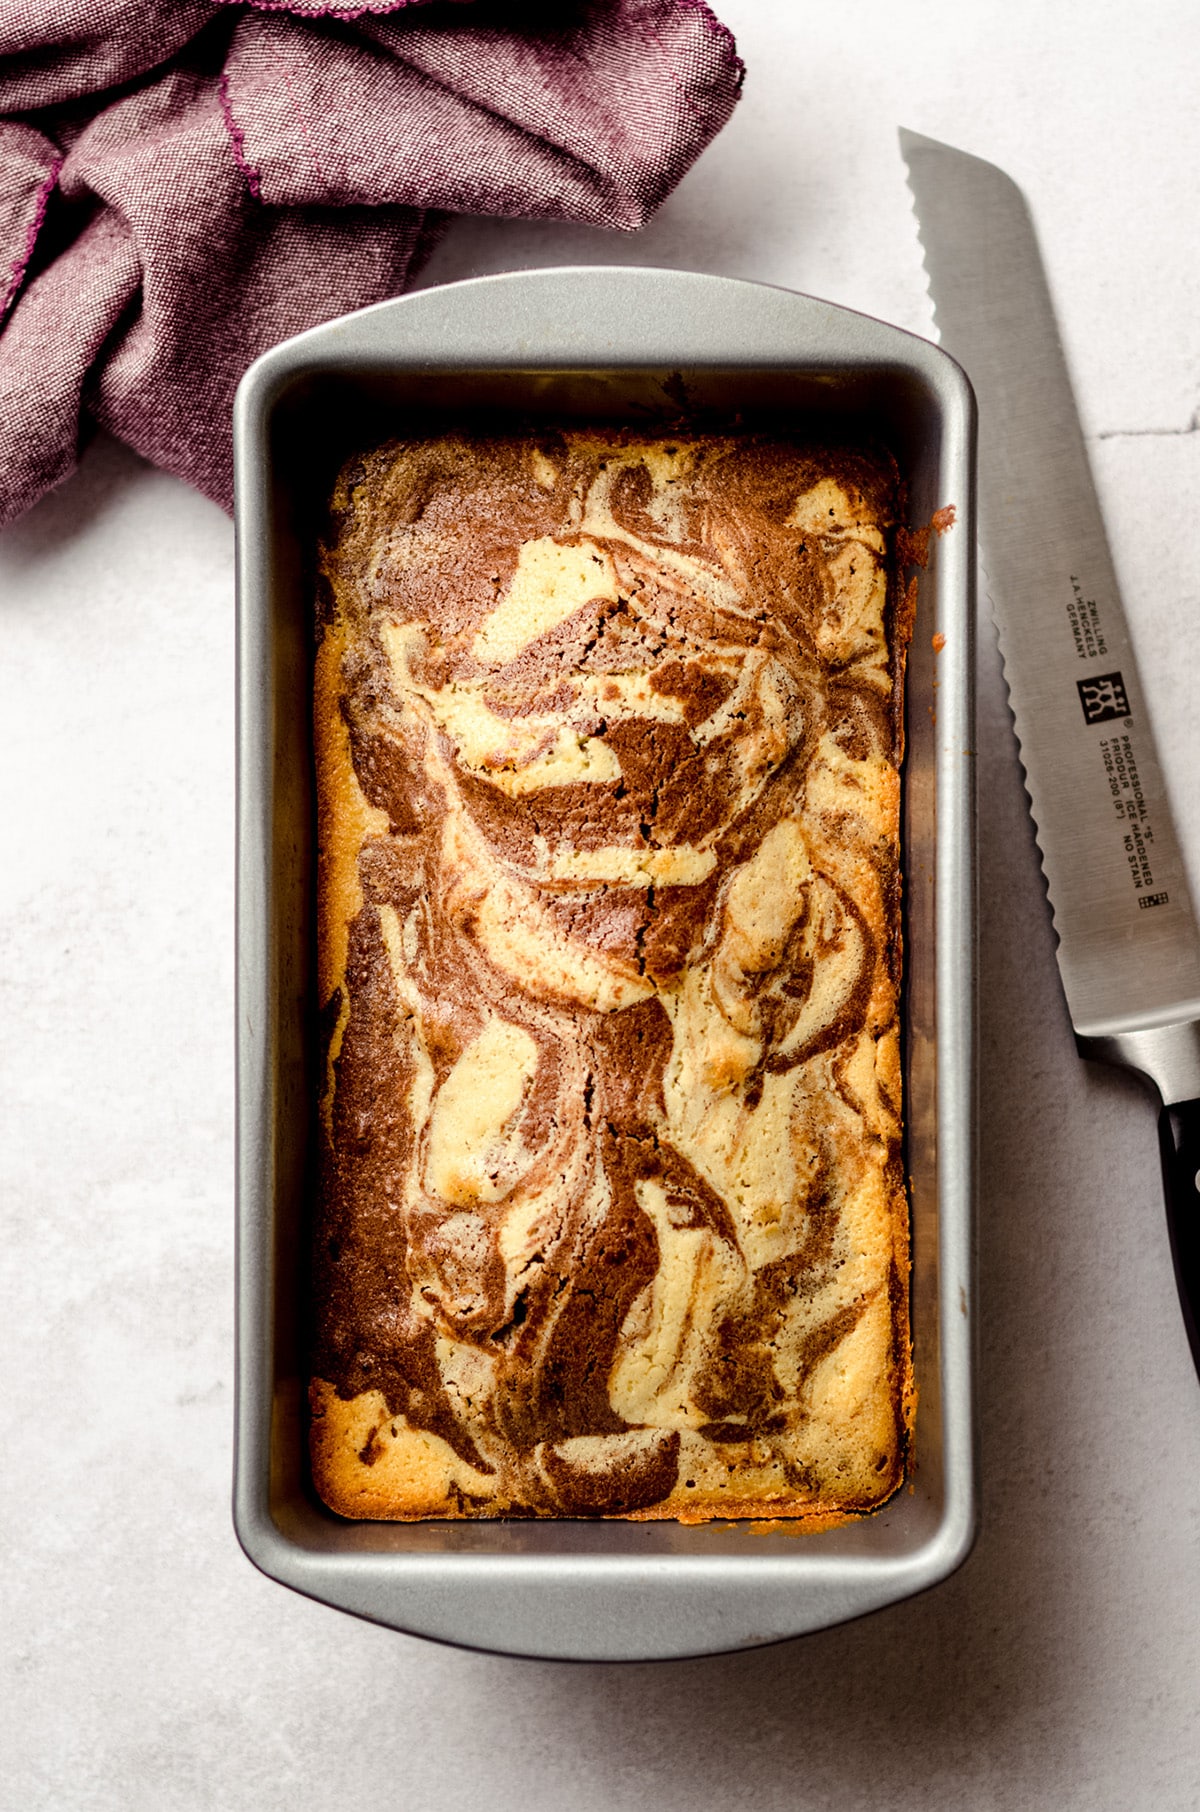
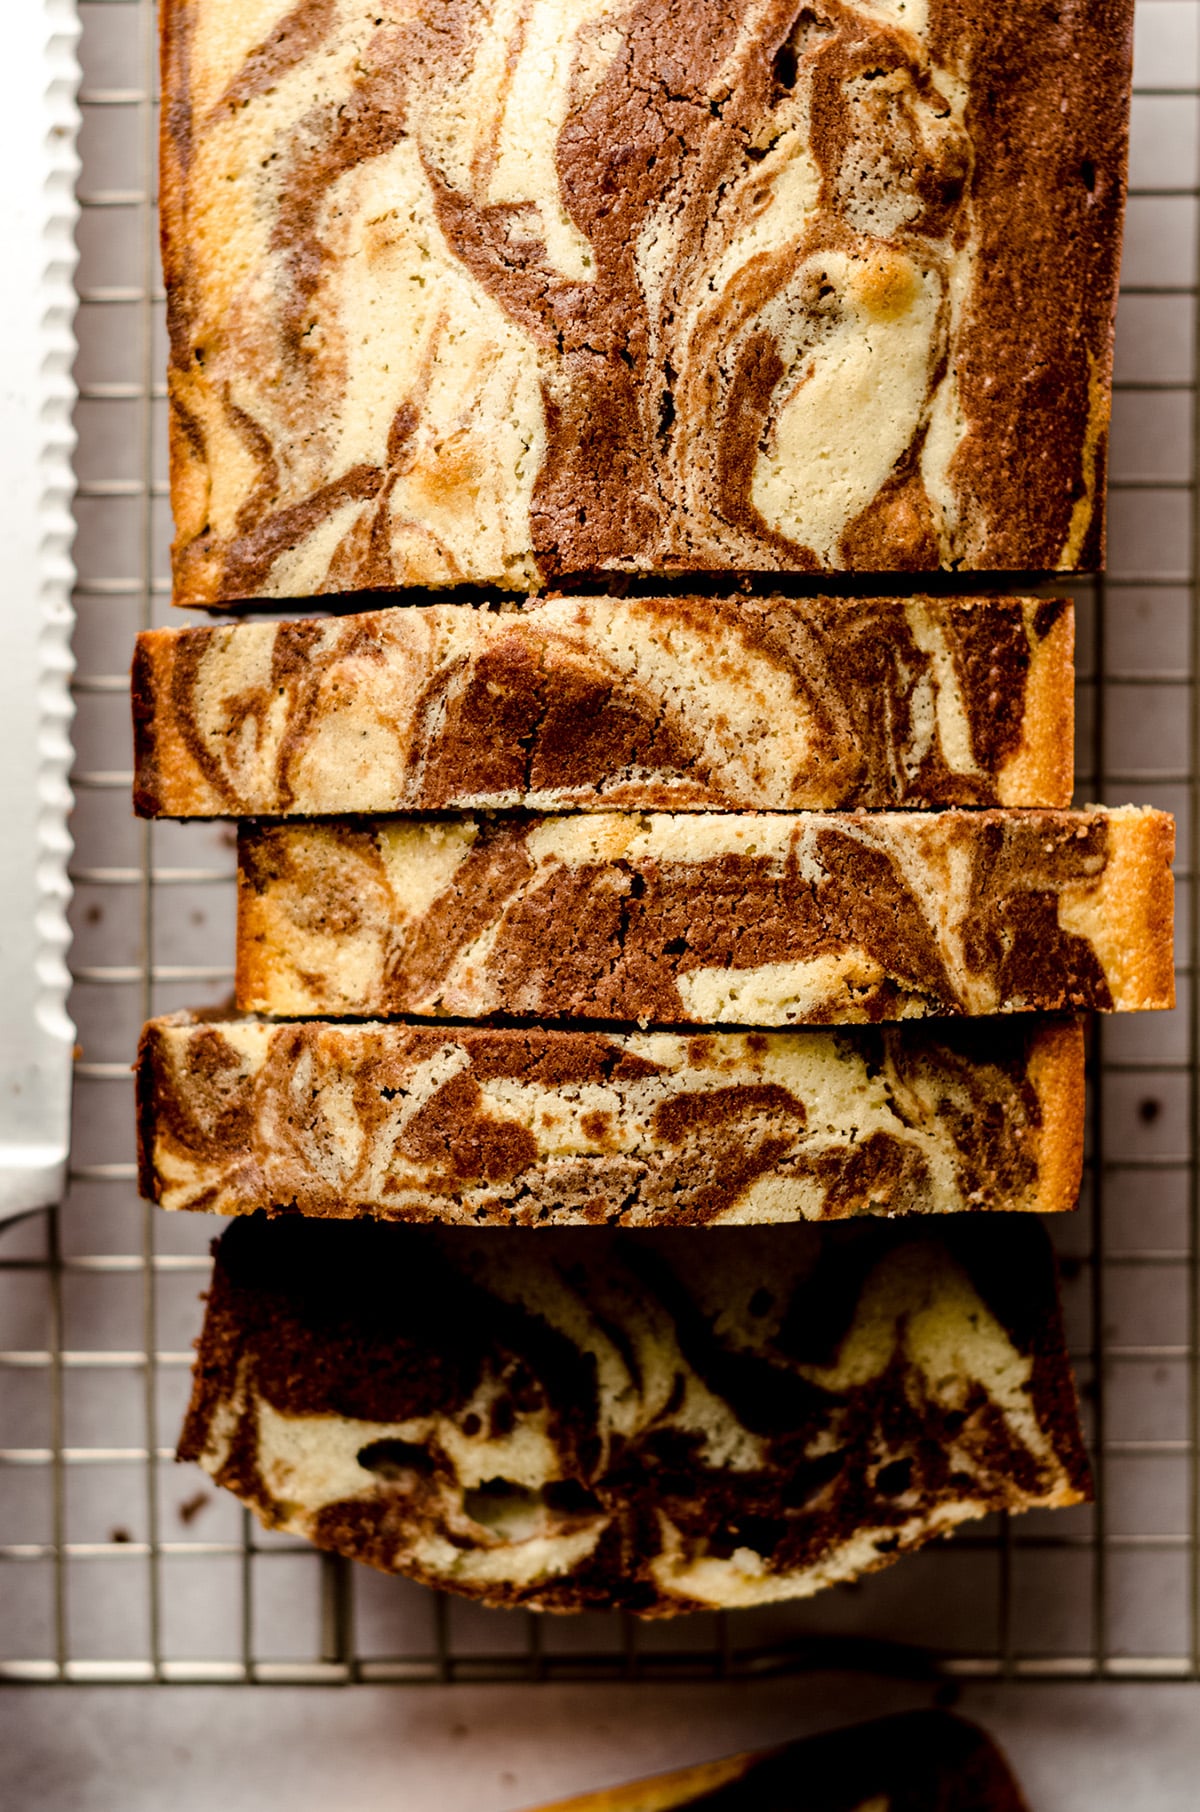
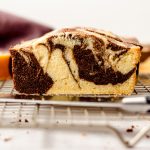
Once your loaf is completely cool, you can slice into it and dive right in.
You will be met with an incredibly light and moist marble cake loaf that you are seriously going to love. I could not stop eating it and I barely shared any with my kids (I gave them each a slice and then hid the rest for myself!).
I was such a fan of this sour cream marble pound cake and it has made its way to my oven twice since photographing it for my site. I can’t wait to make even more recipes from Kristin’s book, and I am so grateful to her for letting me share this one with you.
I know you’ll enjoy it as much as I did!
Marble Cake Recipe (Chocolate Swirl Pound Cake)
Ingredients
- 2 cups minus 2 Tablespoons (215g) cake flour1 be sure to measure properly
- ¼ teaspoon salt
- 1 cup (227g) unsalted butter softened to room temperature2
- 1 and ½ cups (300g) granulated sugar
- 1 teaspoon vanilla extract
- 4 large eggs at room temperature2
- ¼ cup (60g) sour cream at room temperature2
- 2 Tablespoons (10g) unsweetened cocoa powder
Instructions
- Preheat the oven to 350°F (177°C). Spray a 9" x 5" loaf pan with non-stick spray. Set aside.
- Sift the cake flour, add the salt, whisk everything together, and set aside.2 cups minus 2 Tablespoons (215g) cake flour1, ¼ teaspoon salt
- In the bowl of a stand mixer fitted with the paddle attachment, or in a large bowl with an electric hand mixer, cream together the butter and sugar on medium speed until very light and fluffy, about 5 minutes. Stop the mixer and scrape down the sides of the bowl several times during mixing. The mixture should be very pale yellow after mixing.1 cup (227g) unsalted butter, 1 and ½ cups (300g) granulated sugar
- With the mixer running, add the vanilla. Next, add in one egg at a time, mixing on medium speed and allowing each egg to fully incorporate before adding the next. Scrape down the sides of the bowl frequently. Do not rush this process.1 teaspoon vanilla extract, 4 large eggs
- Again with the mixer running, add the dry ingredients to the bowl in three additions, alternating with the sour cream in two additions, starting and stopping with the dry ingredients. Continue to mix on medium speed in between each addition until fully incorporated.¼ cup (60g) sour cream
- Divide the batter in half and gently stir the cocoa powder into one half of the batter. Spoon each batter into the prepared pan, alternating between plain and chocolate. Use a butter knife to swirl the batter to make a marble pattern.2 Tablespoons (10g) unsweetened cocoa powder
- Bake the pound cake for 50-65 minutes until a cake tester inserted into the center of the cake comes out with moist crumbs.
- Remove from oven and place on a cooling rack. Allow the cake to cool for 20 minutes before turning out of the pan to cool completely before slicing. Store leftovers at room temperature up to 3 days. Loaf freezes well, up to 3 months. Thaw at room temperature.
Notes
- Cake flour: if you don’t have cake flour, you can use a mixture of all-purpose flour and cornstarch. To do this: measure 2 cups (240g) of all-purpose flour into a bowl. Remove ¼ cup (30g) of the flour and put back into your flour container. To the bowl, add in ¼ cup (32g) of cornstarch and whisk everything together. You now have 2 cups of cake flour, so lastly, you’ll want to remove some as per the recipe instructions. To do this: remove 2 Tablespoons of your makeshift cake flour, and you’re ready to use it in your recipe.
- Room temperature ingredients: it is imperative your ingredients are at room temperature in order for them to incorporate properly into the batter.
- To make into a bundt cake: prepare a 12 cup bundt pan or a 10 inch (25cm) tube pan with non-stick spray. Add a few tablespoons of flour to the pan and tap it all around, dumping out any excess. Make a double batch of the batter (note, this will be a very large quantity and will require a mixing bowl at least 5 quarts in size). Bake at 350°F (177°C) for 1 hour 10 minutes to 1 hour 20 minutes, until a cake tester inserted into the middle of the cake comes out with moist crumbs.
Nutrition Disclosure
All nutritional values are approximate and provided to the reader as a courtesy. Changing ingredients and/or quantities will alter the estimated nutritional calculations.
This was SO good! The crumb was excellent and the flavor was so buttery. Will make again!
Thanks, Cheryl!
I would like to try this in a small batch. So I am using half amount of the ingredients as listed. Do I still need to bake for 1 hour at 350F . I feel like the top layer will be more crunchy and over baked. Any suggestion?
Hi, Pragna– I would bake for 25-30 minutes and see where that gets you. Keep me posted!
Absolutely delicious, and I loved learning more about the creaming method! I will definitely be making this again.
Thanks so much, Samantha!
Awful texture my ingredients were wasted.
Bummer! I know Bettie tested this recipe dozens of times, and I myself made it twice, so I know it works. If you followed the recipe and proper creaming instructions, it should have turned out beautifully!
Beautiful batter! So light, fluffy and moist. Followed instructions as is and doubled for bundt cake. Top Notch Cake! Thanks to You and Betty!
So glad you enjoyed it, April! Thank you!
WHat size loaf pan?
That should be 9×5– I updated the recipe! Thanks for catching that. Enjoy!
This pound cake turned out so well, it’s very good!
Thank you, Bryanna!