
Graveyard Pudding Cups
As an Amazon Associate, I earn from qualifying purchases. Read the full disclosure here.
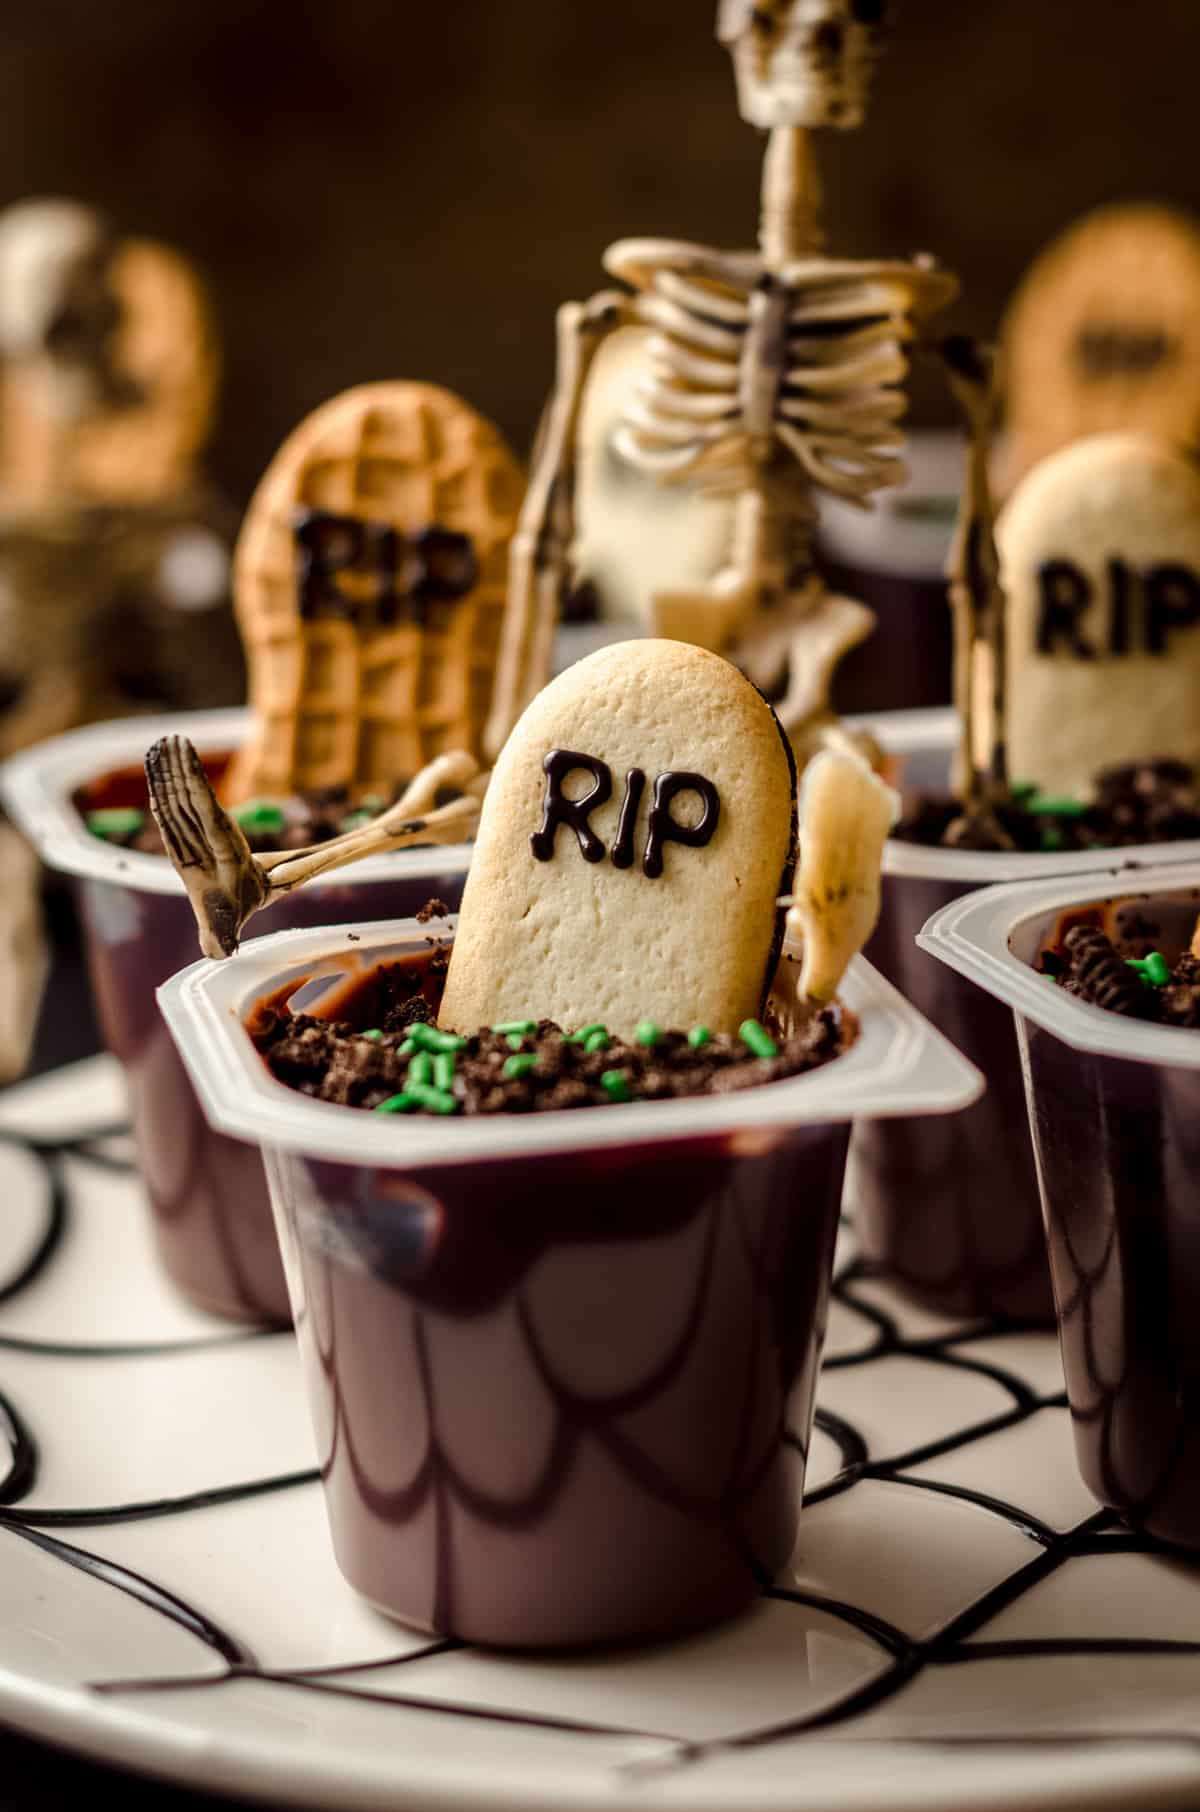
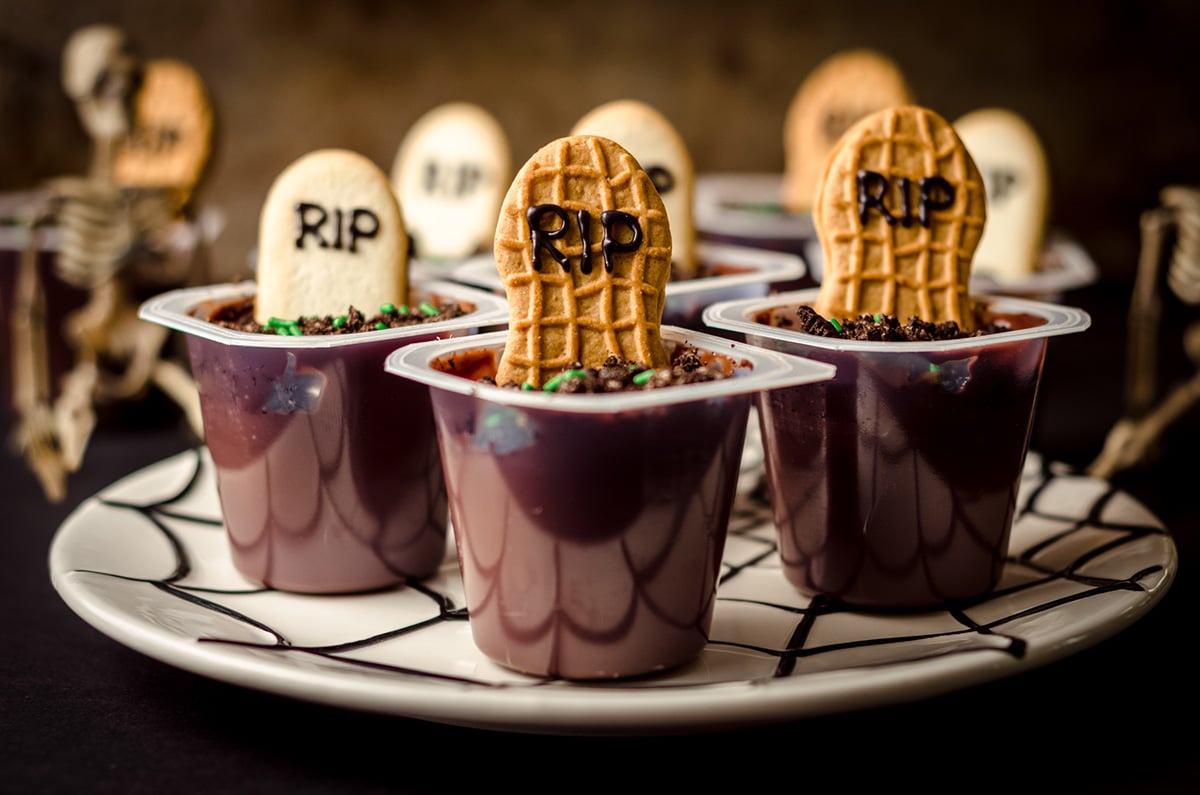
Turn pre-made pudding cups and cookies into cute no-bake Halloween treats fit for any ghost, ghoul, or zombie. Great for kids to make and eat and perfect for your Halloween party spread!
Welcome to the 4th annual #HalloweenTreatsWeek! This is a yearly Halloween blogging event that is hosted by Angie from Big Bear’s Wife. It’s a creepy and haunting week-long event filled with some amazingly wicked Halloween treats, recipes, and some frightfully fun giveaways.
You know what I love? Baking (duh). But you know what else I love? Occasionally using pre-made ingredients to get something done, usually something with a major cuteness factor.
Take my birthday cake ice cream for example. No need to make ice cream from scratch when I already made the cake and frosting and just want to repurpose those leftovers.
That’s exactly what’s happening in today’s no-bake, ultra cute, ultra Halloweeny, perfect-for-the-kids treat that is just begging for a spot at your spooky party this year.
To go along with my witch finger pretzels, which use 4 simple ingredients, these graveyard pudding cups also use 4 simple ingredients, and we can up that to 5 if we count sprinkles, which are totally optional (but always encouraged).
I will preface this pudding cups recipe with the statement that this is hardly a “recipe” and more or less just a guide for how to assemble a bunch of pre-made items into something charming.
And although I don’t actually have a recipe for homemade chocolate pudding on my site, if by some chance you do and you’d prefer to go that route and use little dessert cups– be my guest! But if you don’t, those Snack Packs are gold today.
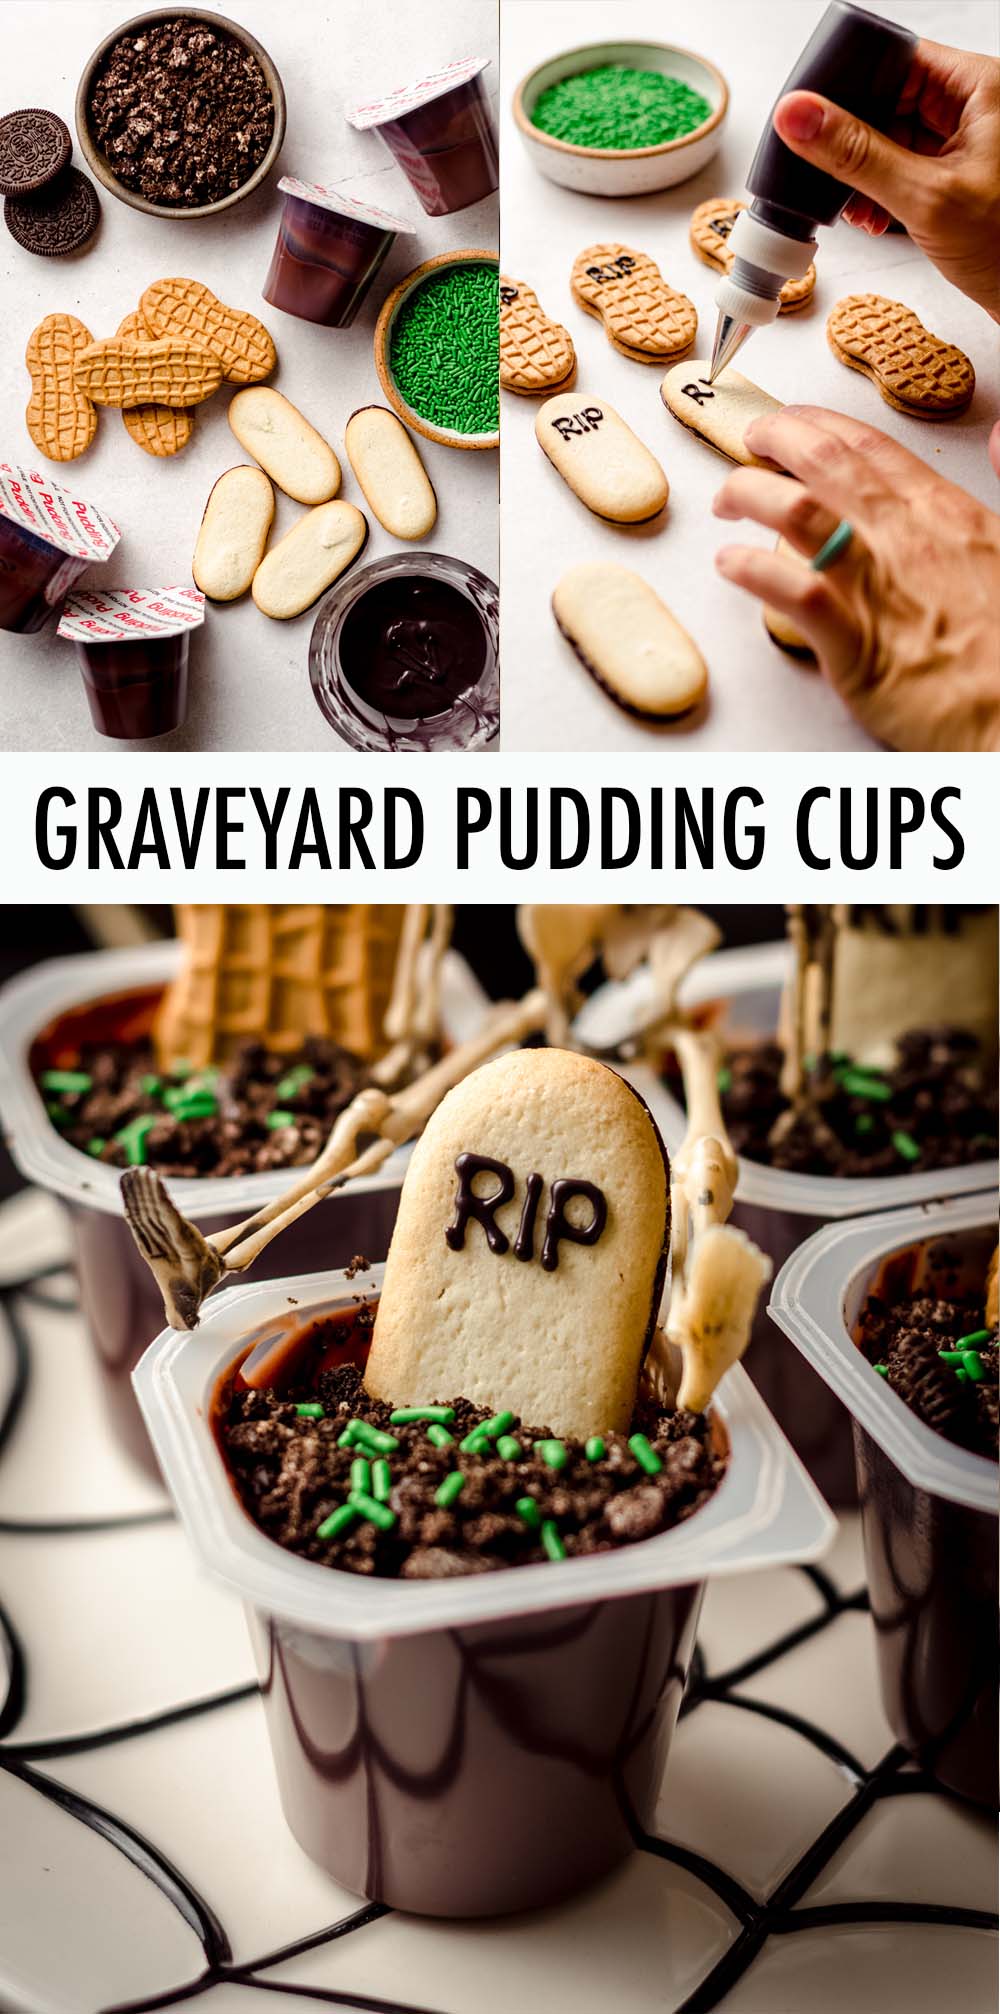
INGREDIENTS FOR THIS GRAVEYARD DESSERT
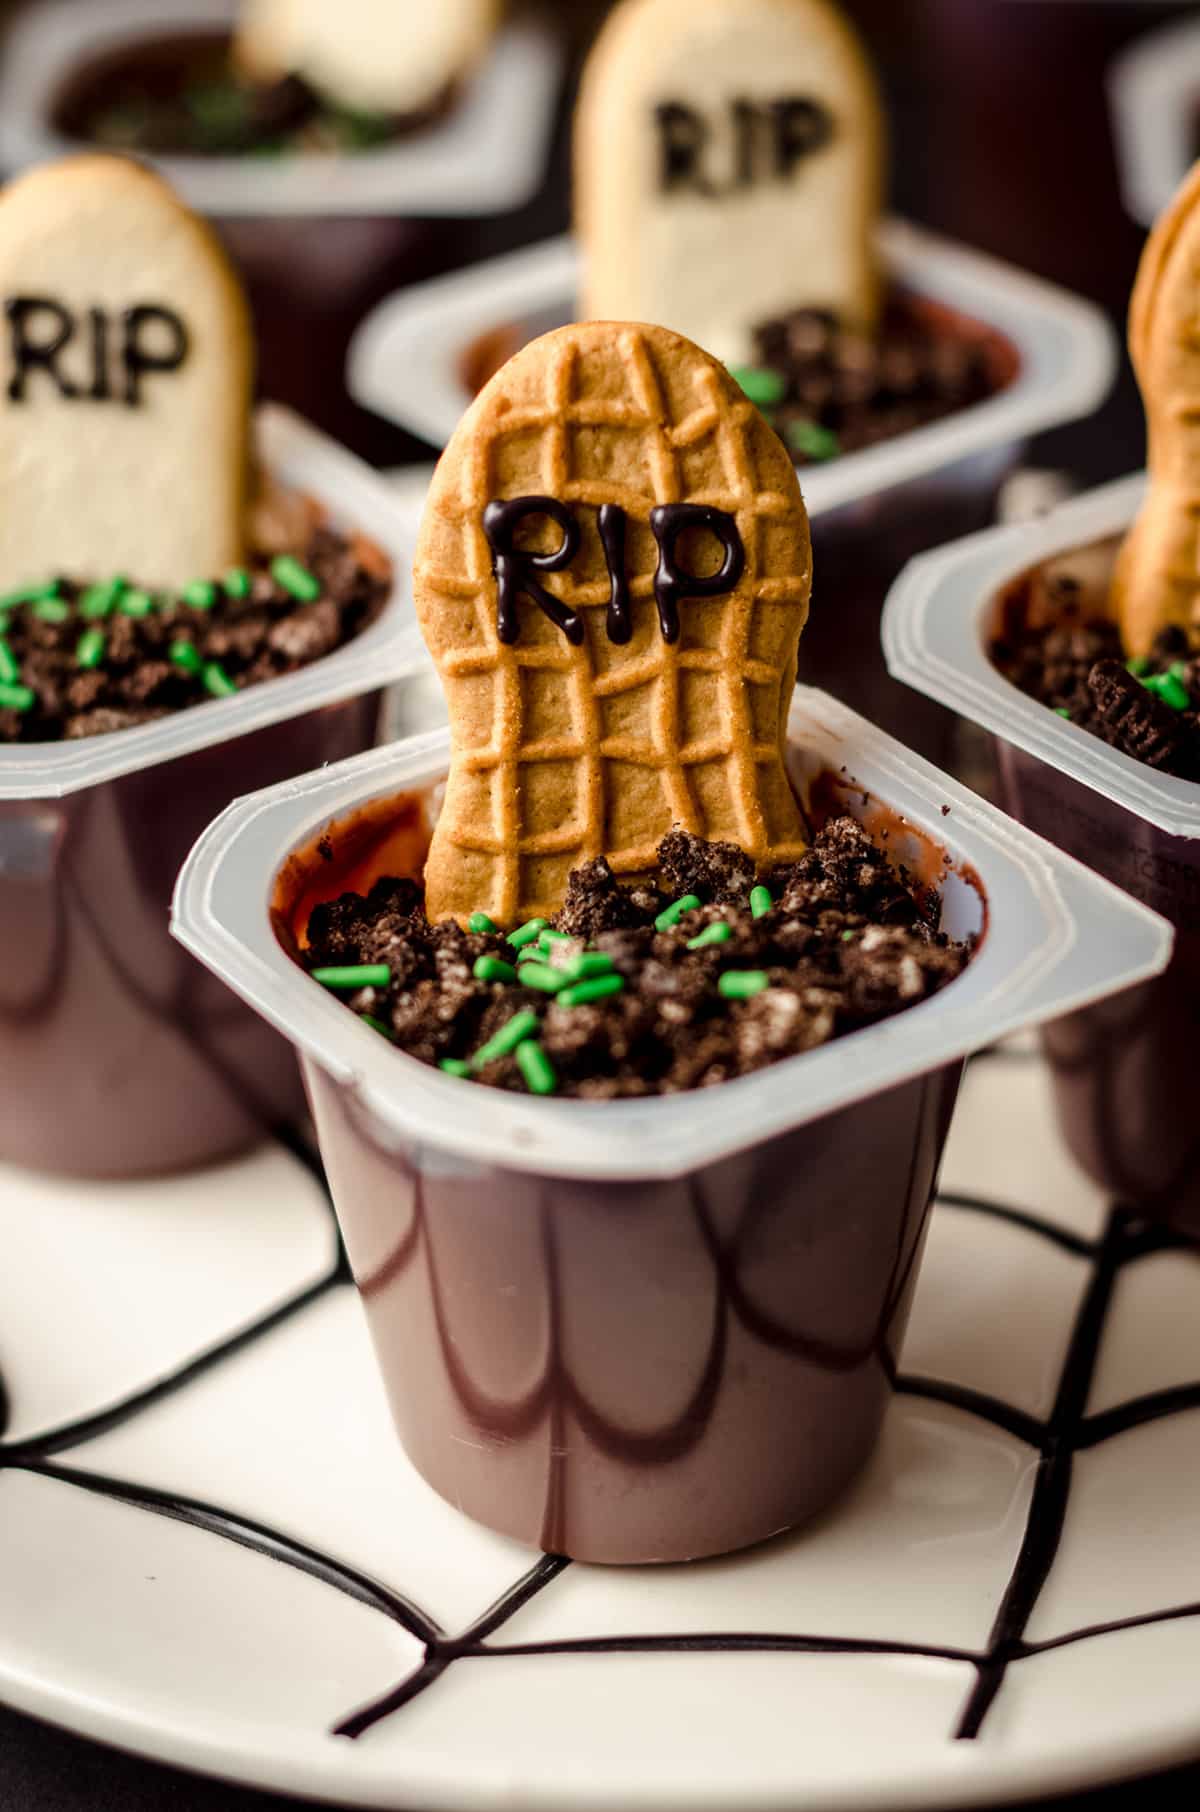
First, you’ll need some headstone cookies. I made these with both Nutter Butters as well as Milano cookies to show you that you have other non-peanut options. If you have any other kind of cookie you like that is oblong/oval, feel free to use those, too!
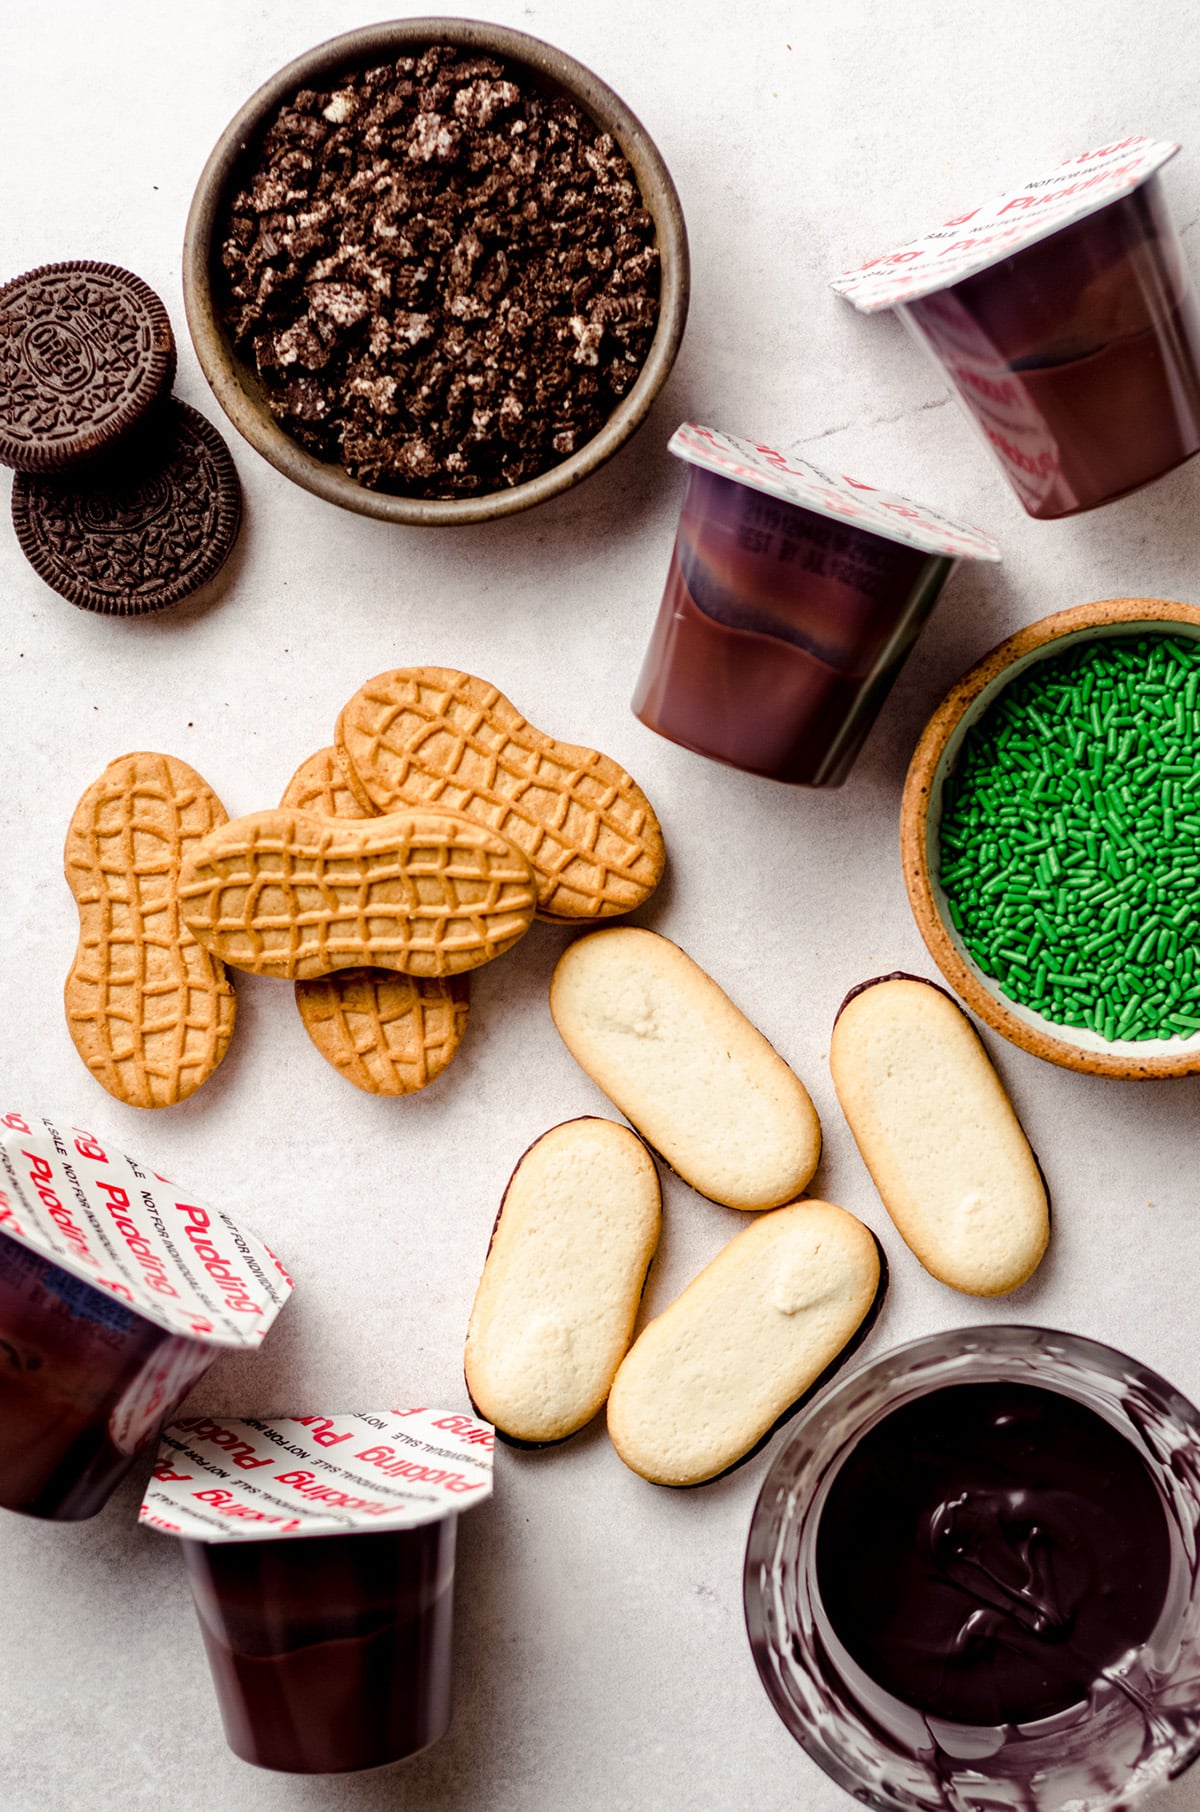
Black melting candies or melted semi-sweet chocolate does the trick to add those letters. You can use a piping bag with a tinyyyy bit of the corner snipped off, or you can use what I used, which are small cookie icing piping bottles. I’ve linked to those in the recipe.
We’ll also need some pudding cups. As I mentioned, feel free to use your own homemade pudding. I’ve also linked some cute mini glass dessert cups in the recipe if you want to go the reusable route for the Halloween pudding vessels.
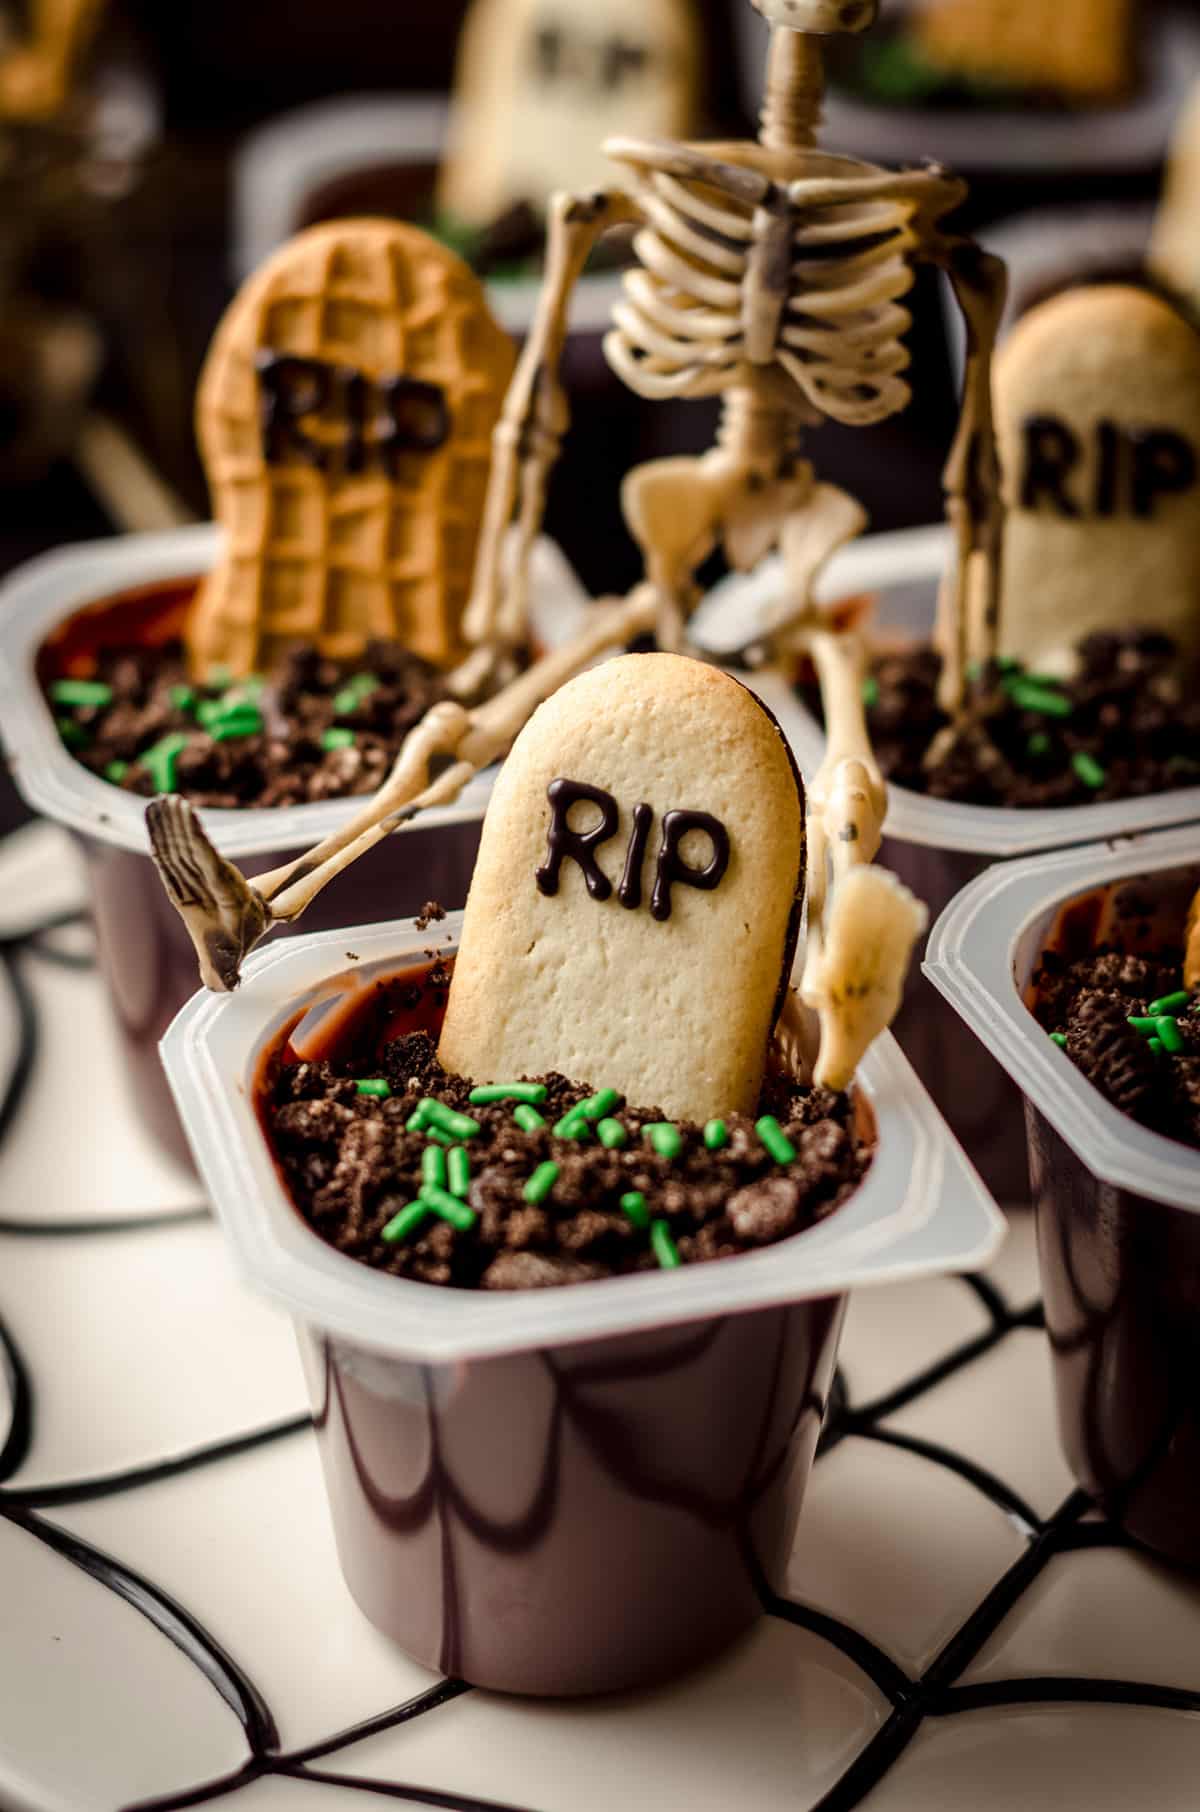
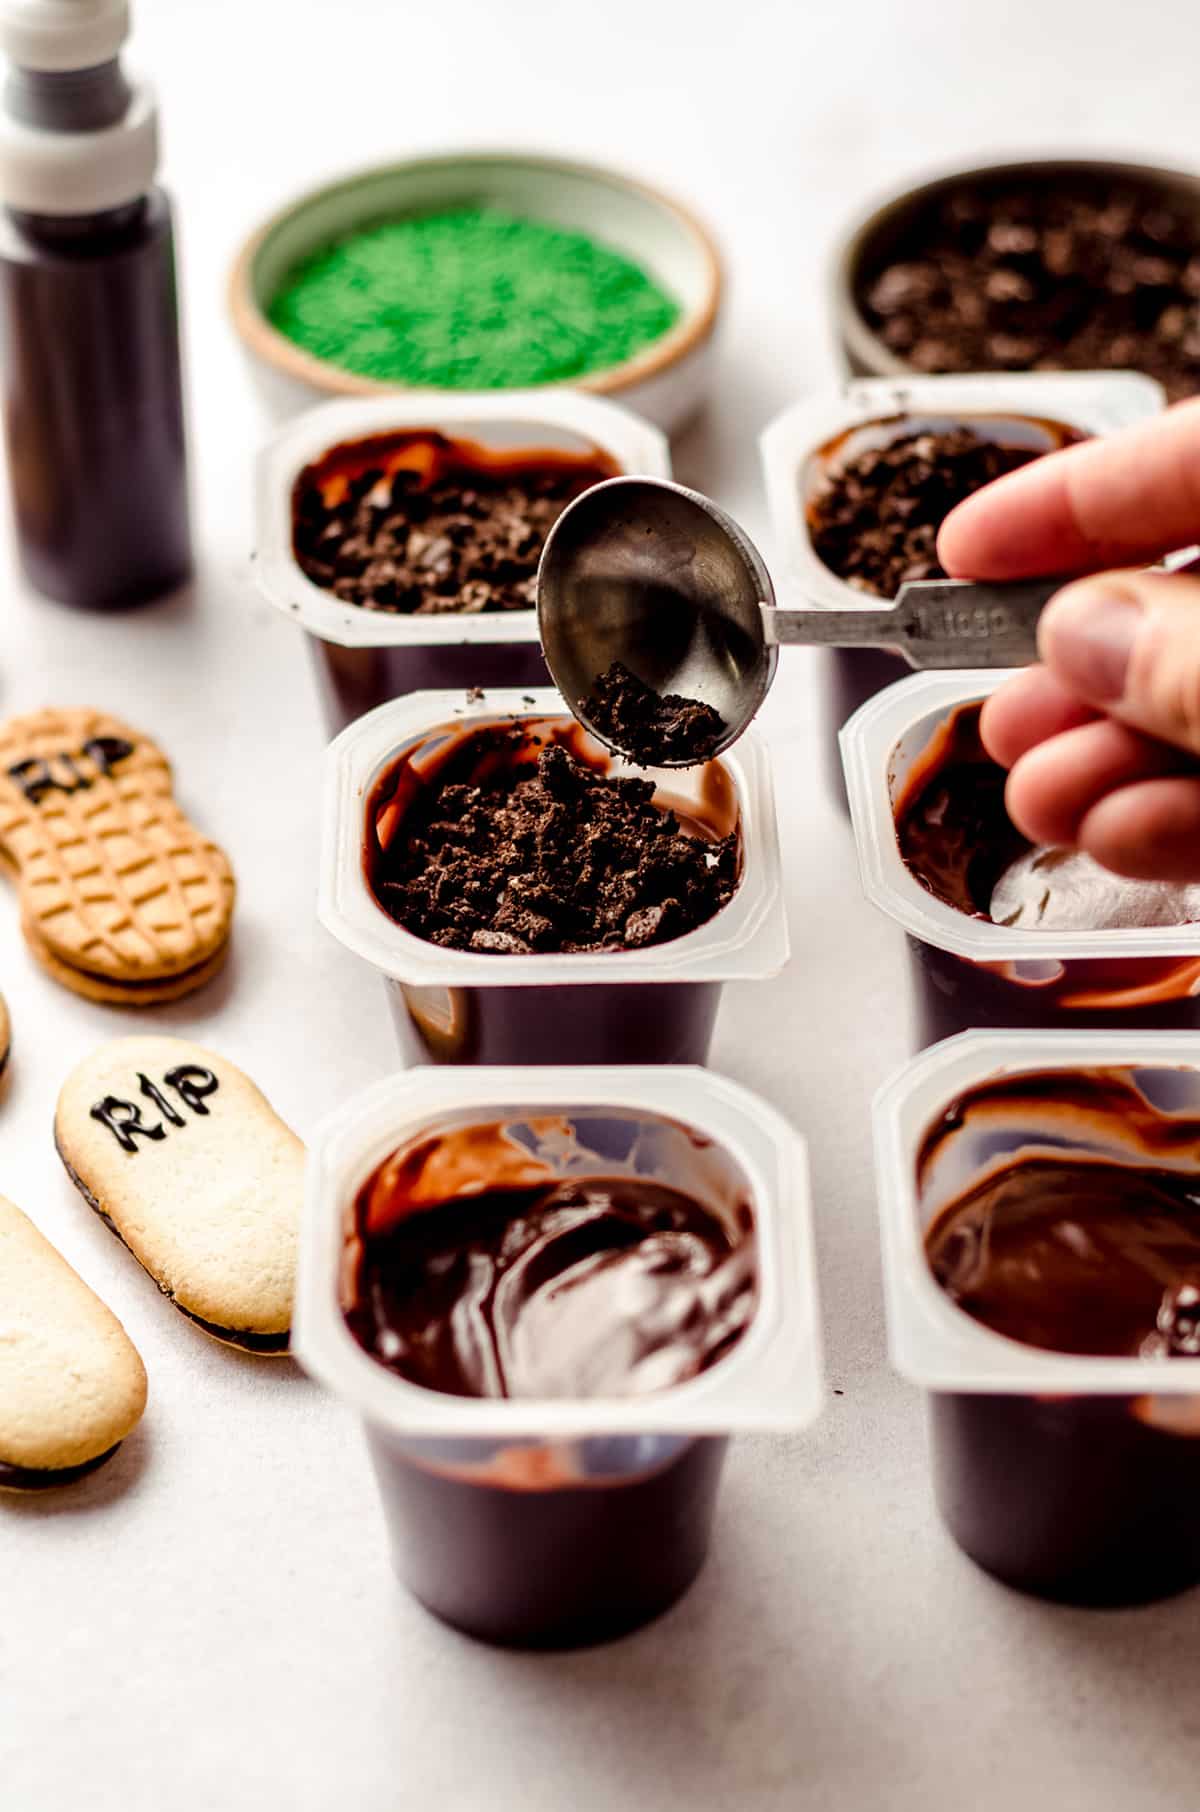
Next, some Oreos for the “dirt” component. You’ll use approximately 1 Oreo per cup, but sometimes the level of pudding doesn’t come up all that high in the pre-made cups, so you’ll want anywhere from 8 to 12 per 8 graveyard cups. You’ll be using 1 heaping Tablespoon per cup, but if you find that’s not the right amount for your cups, adjust as necessary.
Lastly, and totally optional, I added some green sprinkles to look like grass. If you don’t have any, can’t find any, or don’t particularly care, feel free to just omit. You’ll get the whole Halloween graveyard dessert point across without grass!
You should also feel welcome, though, to add anything you think might add to the look of a Halloween graveyard like gummy worms, pumpkin mellowcremes, gummy skulls, whipped cream ghosts, or any other fun Halloween candies. I would love to see what you come up with, so don’t forget to tag me on Instagram with the hashtag #freshaprilflours. I’ll be sure to share your spooky bakes on my stories!
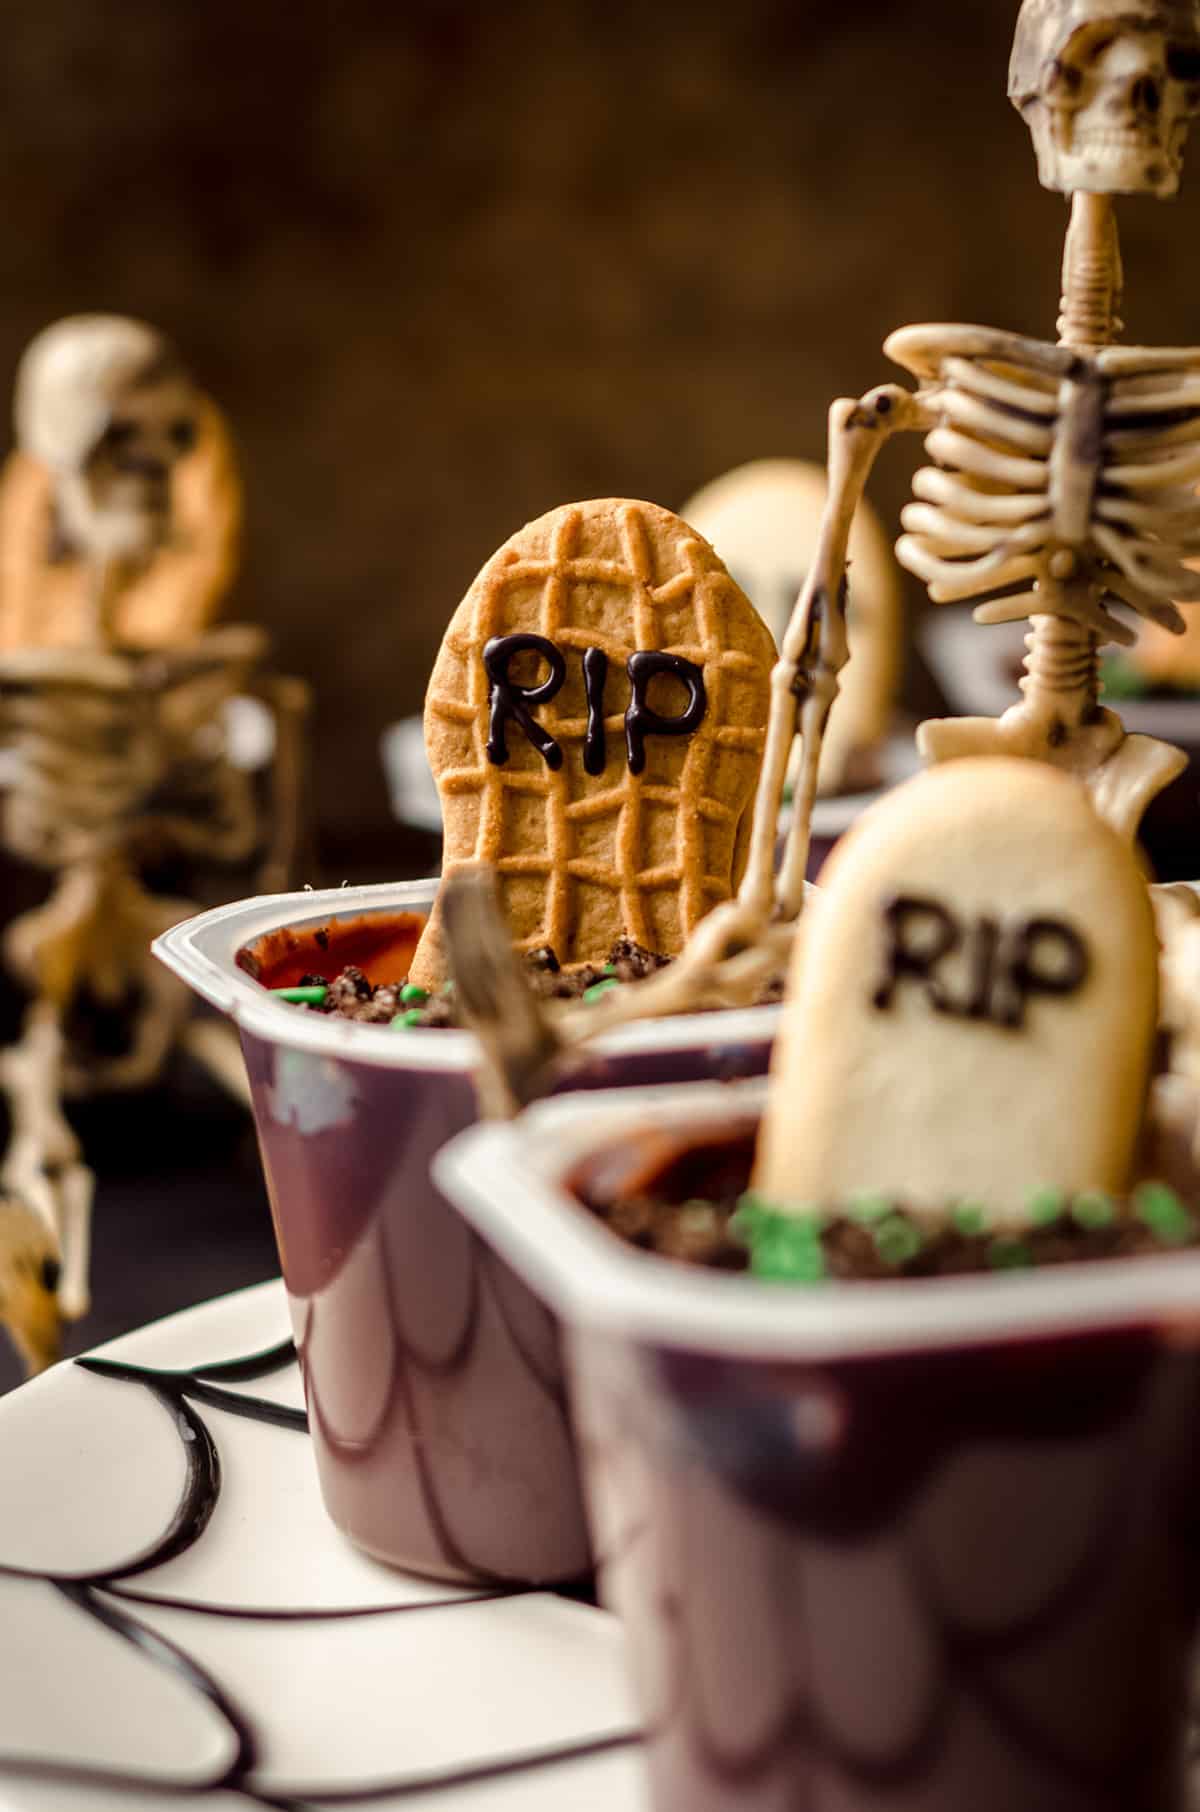
HOW TO ASSEMBLE GRAVEYARD CUPS
You’ll start by piping the R.I.P. letters onto the cookies. You’ve only got a small space to work with, so if you’re using a piping bag with the end snipped off, be mindful of how large that opening is. I used a size 2 piping tip, which is the second smallest size there is (size 1 is super tiny).
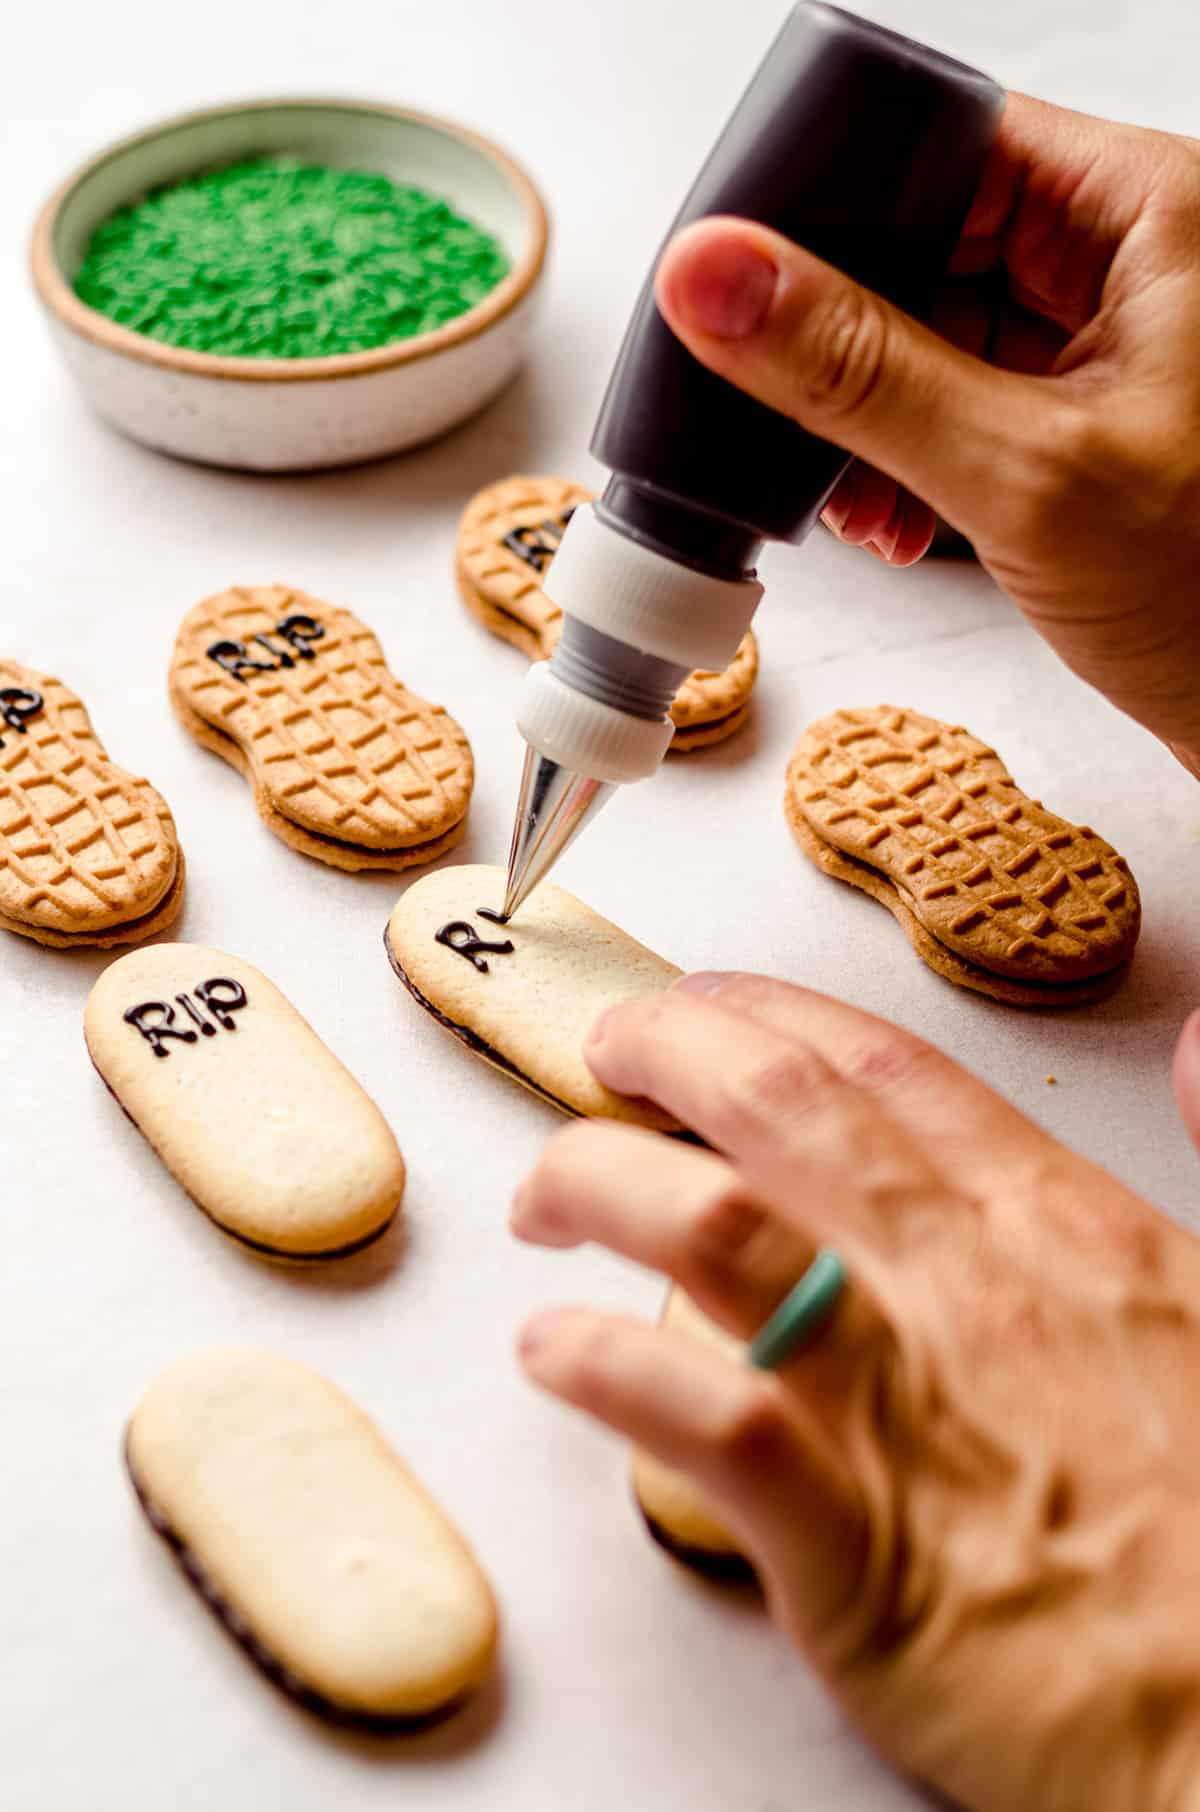
Allow those to harden while you prepare the rest of the cups.
Remove the lids from the pudding cups, then stir them up and even out the surface, if you’d like (I highly recommend this step).
Next, add the heaping Tablespoon of crushed Oreos, adding more or less to your best judgement of how full you want them, keeping in mind you’re about to jam a cookie into it, too.
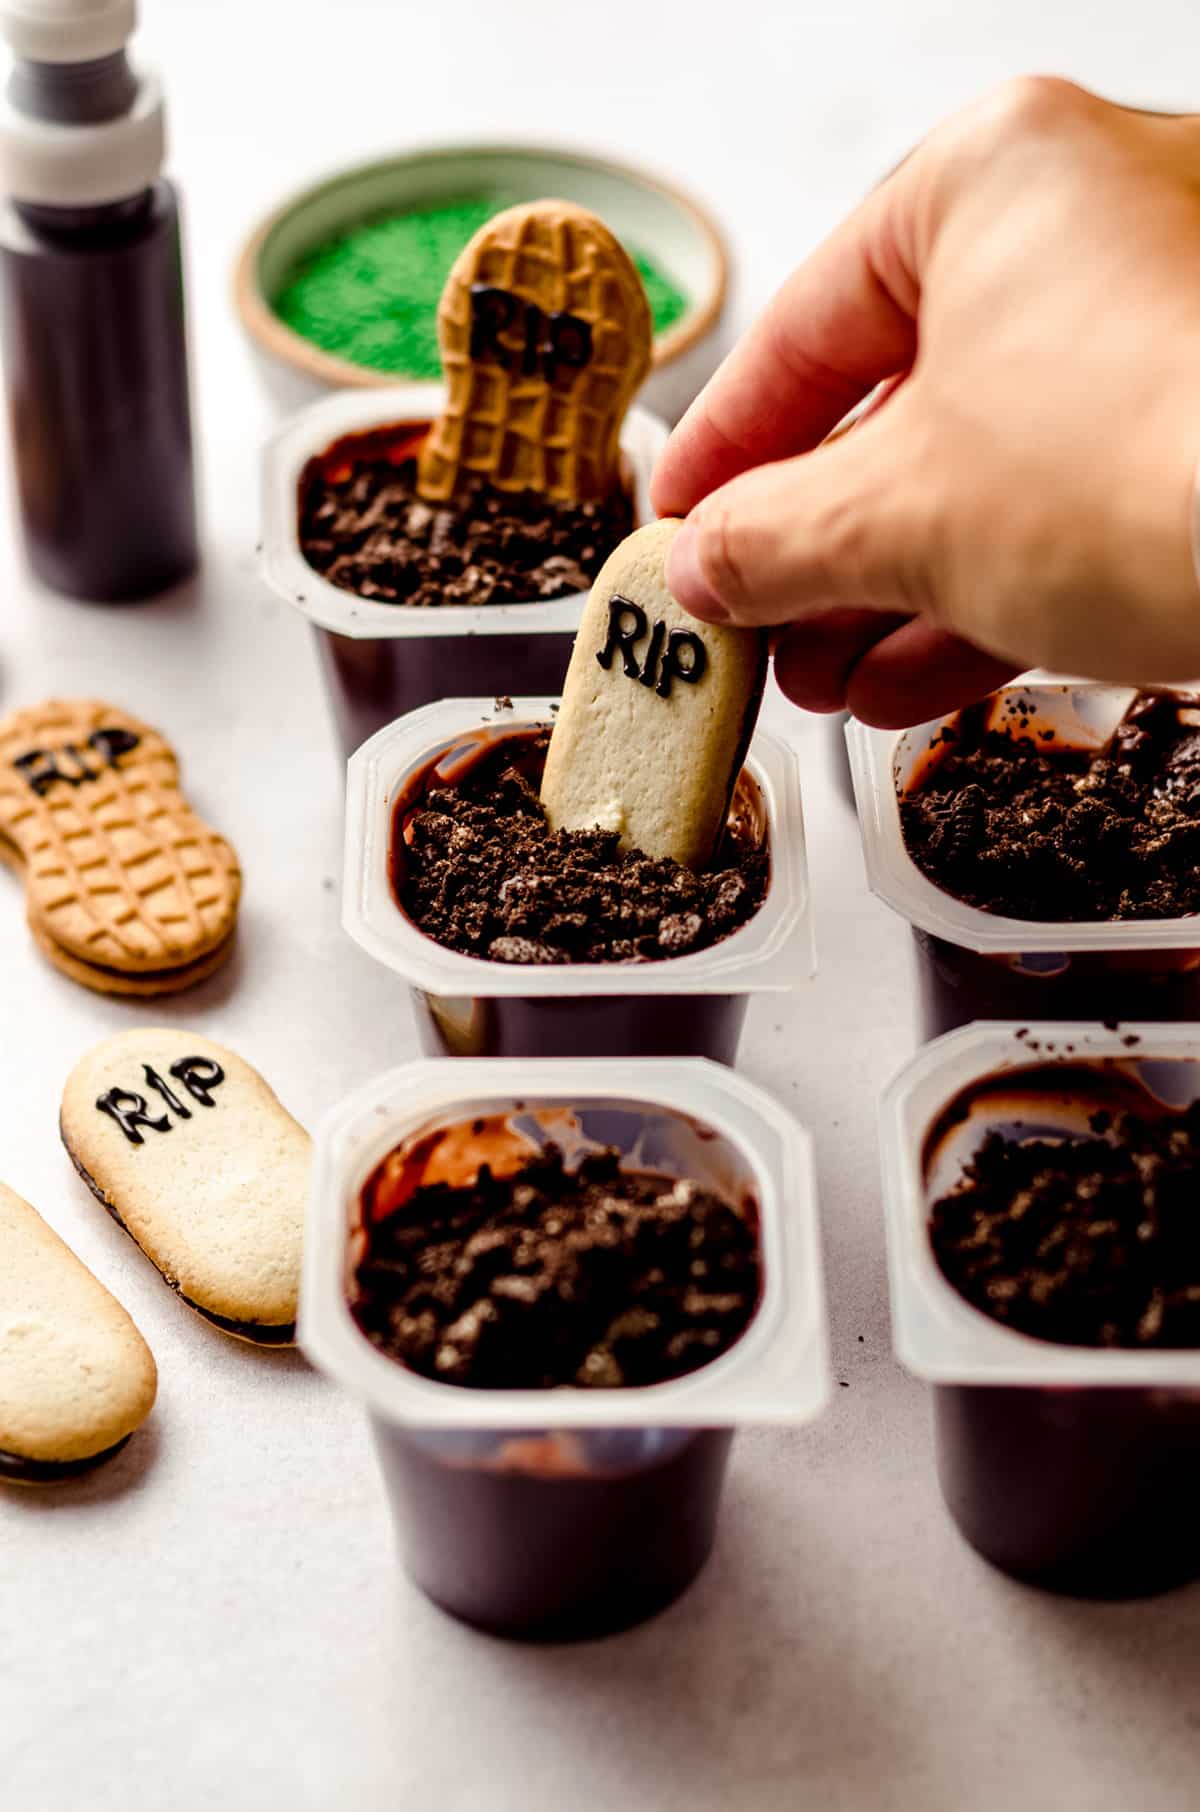
If the letters on your cookies aren’t dry yet, no worries! Just be careful not to disturb them if you’re going to go ahead and press them into the pudding cups now. You can also wait until they’re completely set to assemble the pudding graveyard setting.
Press the cookies into the tops of the Halloween pudding cups gently, then add the sprinkles, if you’re using them. This is also where you’d add any other spooky elements you’ve chosen to decorate your graveyard.
Look at that! You’re all set!
HOW FAR IN ADVANCE CAN I PREPARE THESE PUDDING CUPS?
I will send you off with this one warning: these are best prepared right before serving. The cookies get soft quickly, so while you’re totally fine to add them to a party spread, I wouldn’t assemble them, say, the morning before an evening party. A couple hours is fine, but the longer those cookies sit in the Halloween pudding desserts, the soggier they get.
This also means they don’t make great leftovers. Bummer, I know.
But that didn’t stop us from removing the cookies and saving the actual cups with pudding and crushed Oreos. The Oreos just weren’t as crunchy as they could be. No big!
Our kids loved these little graveyard dirt cups, and although they don’t lend well to packing in lunches, they were a great surprise at dinner time.
Perfect for parties, great for getting little hands to help, and a possible great peanut-free option for those who need it. I’m looking forward to seeing them in your spooky spreads this year!
Happy spooky no-baking!

Graveyard Pudding Cups
Ingredients
- 8 Milano cookies, Nutter Butter cookies, or other oblong/oval shaped cookies
- 2 ounces black melting candies or semi-sweet chocolate
- 8 pre-made chocolate pudding cups1
- 8 to 12 Oreos2 crushed
- green sprinkles optional
Instructions
- Place the Milano, Nutter Butter, or other oblong/oval shaped cookies onto a large baking sheet. Set aside.8 Milano cookies, Nutter Butter cookies, or other oblong/oval shaped cookies
- In a small microwave safe bowl, melt the candies or chocolate in the microwave in 20 second increments, stirring after each time, until smooth.2 ounces black melting candies or semi-sweet chocolate
- Add the melted candies or chocolate to a piping bag with just a very tiny bit of the corner snipped off, a piping bag fitted with a size 1 or size 2 piping tip, or my favorite option, a small cookie decorating bottle fitted with a size 2 piping tip.
- Pipe the letters "R.I.P." onto each cookie then allow letters to set and harden.
- While the cookies rest, remove the lids of the pudding cups and discard. Stir cups with a spoon or spatula to even out the surface of the pudding.8 pre-made chocolate pudding cups1
- Spoon 1 heaping Tablespoon of crushed Oreos evenly onto the surface of each pudding cup. If you want to make more than the 8 cups in the recipe, you will need 1 Oreo2 per cup. Feel free to add more crushed Oreos, if desired.8 to 12 Oreos2
- Place one R.I.P. cookie into each pudding cup, pushing it down gently until it is securely in place. If the chocolate isn't completely hardened yet, that's ok. Just be careful not to disturb the letters.
- If using, add some green sprinkles to the dirt. You may also consider adding pumpkin mellowcremes, gummy worms, or gummy skulls. Pudding cups are best served immediately, as cookies start to get soggy quickly. If traveling to a party, prepare the cups as much or as little as you wish, but save the headstones for last and add them right before serving.green sprinkles
Notes
- Pudding cups: you can opt to make your own pudding and put it into dessert cups. Here are 8 mini glass dessert cups.
- Oreos: 1 Oreo will give you approximately 1 Tablespoon of crushed Oreo crumbs. If you need more than this because the level of your pudding cups is lower than you’d like, aim for 12 Oreos per 8 pudding cups.
Nutrition Disclosure
All nutritional values are approximate and provided to the reader as a courtesy. Changing ingredients and/or quantities will alter the estimated nutritional calculations.
Disclaimer: These posts and recipes are part of the week-long event (#HalloweenTreatsWeek) but all opinions are 100% mine. We would like to thank our amazing brand sponsor, Dixie Crystals, who provided a prize pack for our giveaways and also sent some samples and products to the #HalloweenTreatsWeek bloggers to use in their recipes.
These are so fun and easy to make!
This looks so delicious!
Thanks, Jennifer!
My kids would absolutely love these for a Halloween dessert or snack! They are adorable.
These are so cute for a kids Halloween party, and they can even help make their own! Love it!
Thanks so much, Mikayla!
I love how easy these are and how cute they are! My kids ate them so fast! A perfect Halloween treat!