
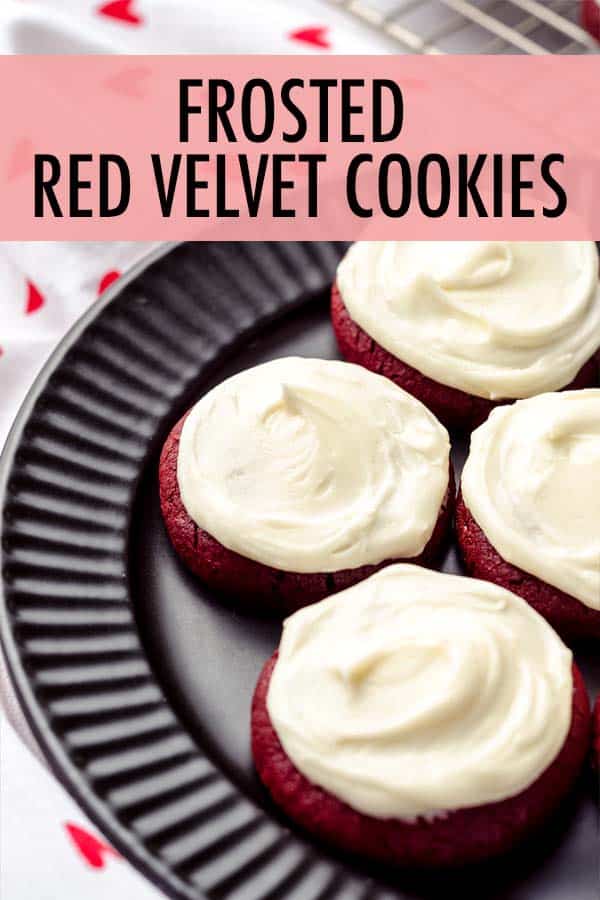
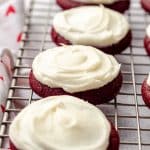
Red Velvet Cookies with Cream Cheese Frosting
As an Amazon Associate, I earn from qualifying purchases. Read the full disclosure here.
These chewy red velvet cookies are a no chill cookie recipe made completely from scratch and topped with a silky smooth cream cheese frosting. Don’t miss this cookie as a red velvet chocolate chip cookie.
Whenever I plan my monthly baking series recipes (this year it’s gourmet cookies), I try to create recipes that make my taste testers’ eyes roll back with an “oh my gosh” or something of the like. These frosted red velvet cookies did exactly that, and I’m confident that even if you struggle with cookie recipes and/or getting frosting just right, you can make these cookies perfectly in your own kitchen.
Not only that, but just as I mentioned in my pilot post for this gourmet cookie series (frosted sugar cookies), you can save yourself $5-7 per cookie at the fancy cookie store. If that’s not enough to convince you to make these cookies, perhaps knowing that this no chill cookie recipe is made completely from scratch and without red velvet cake mix will.
THE PROBLEM WITH MOST RED VELVET COOKIE RECIPES
Don’t get me wrong, there is a time and place for red velvet cake mix. I have used it in my red velvet Rice Krispies treats, red velvet pancakes, and red velvet puppy chow. But too many red velvet cookie recipes use the crutch of a cake mix to bring that iconic color and flavor to cookies, resulting in cakey cookies lacking rich red velvet flavor.
I can say with confidence that if you can mix ingredients together, you can make this soft and chewy red velvet cookie recipe with cream cheese frosting perfectly. You may even have to convince your taste testers that they aren’t from a specialty bakery, but rather you (perhaps in your jammies) and your very own kitchen (and in under 1 hour, no less).
Red Velvet Cookie Ingredients
You only need a handful of ingredients to whip up these perfectly chewy red velvet cookies. If you are even a “special occasion” or “sometimes” baker, it’s highly likely most of the ingredients (if not all of them) will already be in your pantry, which makes these cookies a great choice when you want cookies to eat right away.
We have a scratch red velvet cookie base and a creamy cream cheese frosting on top.
RED VELVET COOKIES
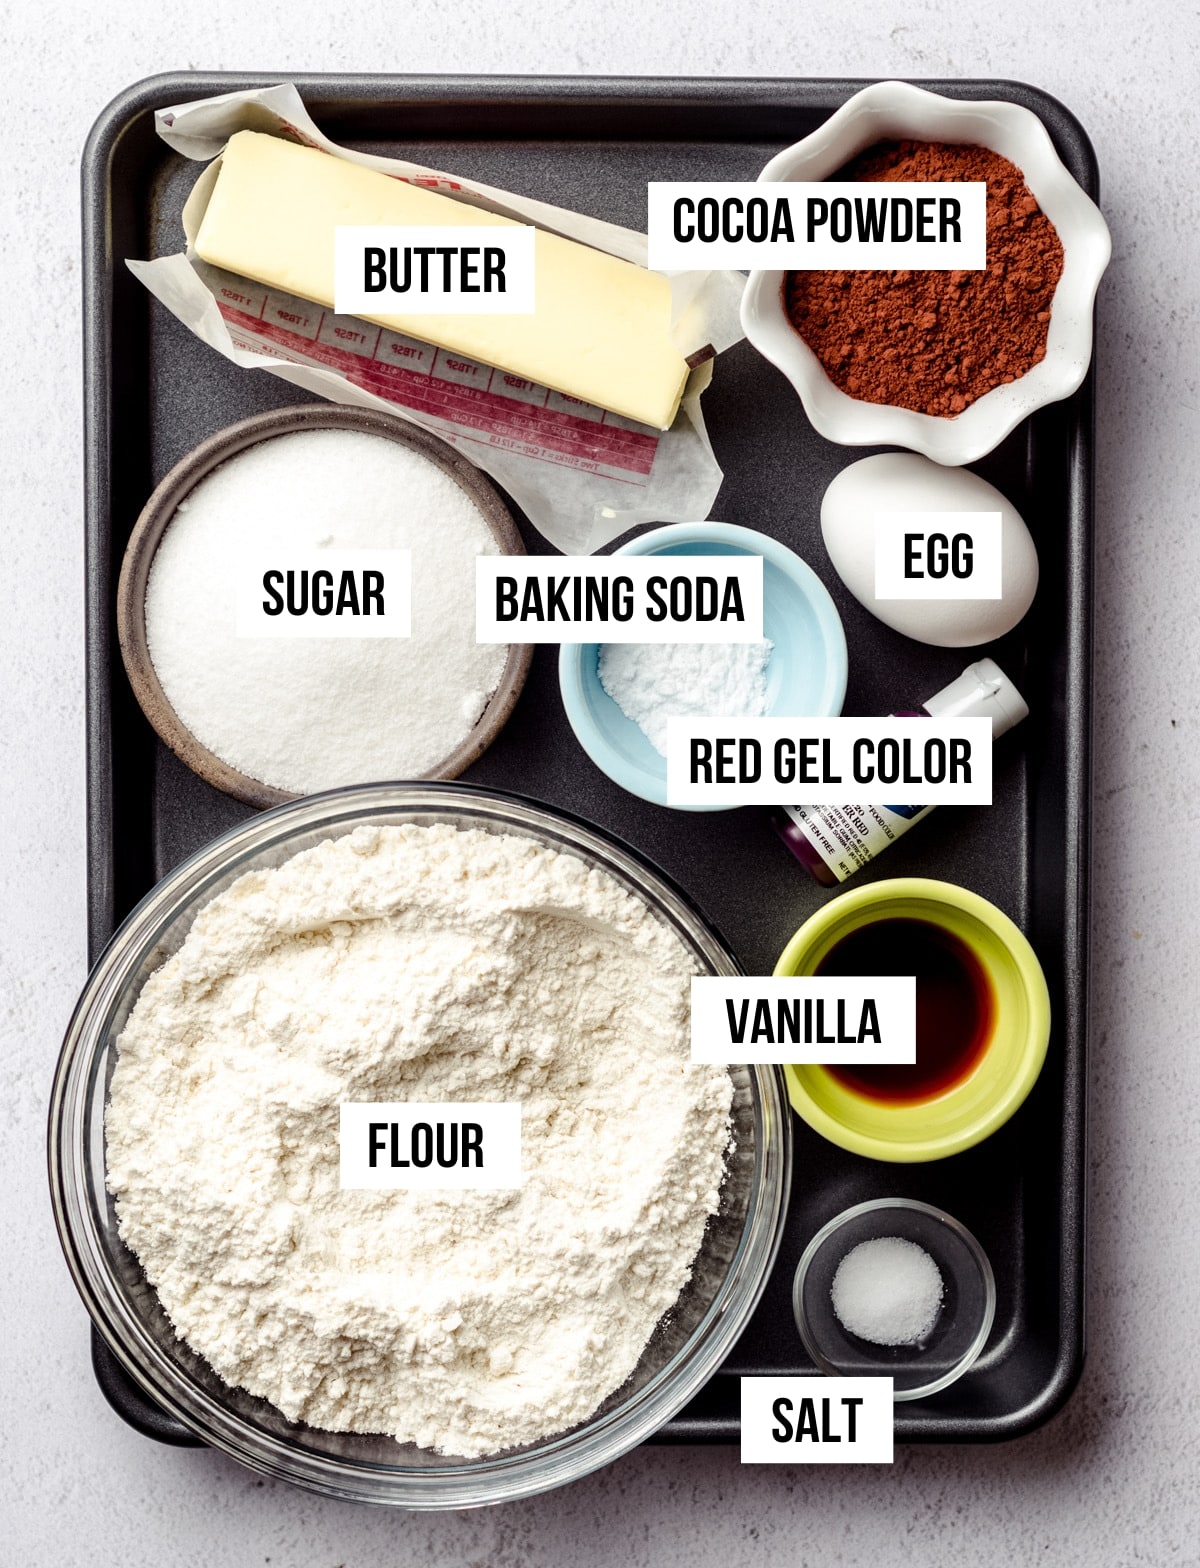
For the red velvet cookie base, you will need:
• all-purpose flour
• unsweetened cocoa powder
• baking soda
• salt
• unsalted butter
• granulated sugar
• an egg
• vanilla extract
• red food coloring (I prefer gel coloring– see the recipe notes for my favorite kind)
CREAM CHEESE FROSTING
This cream cheese frosting recipe is out of this world and it is my absolute favorite. It’s an extra creamy treat on top of an already incredibly chewy and rich cookie. While you don’t have to coat it in the frosting… Why wouldn’t you?
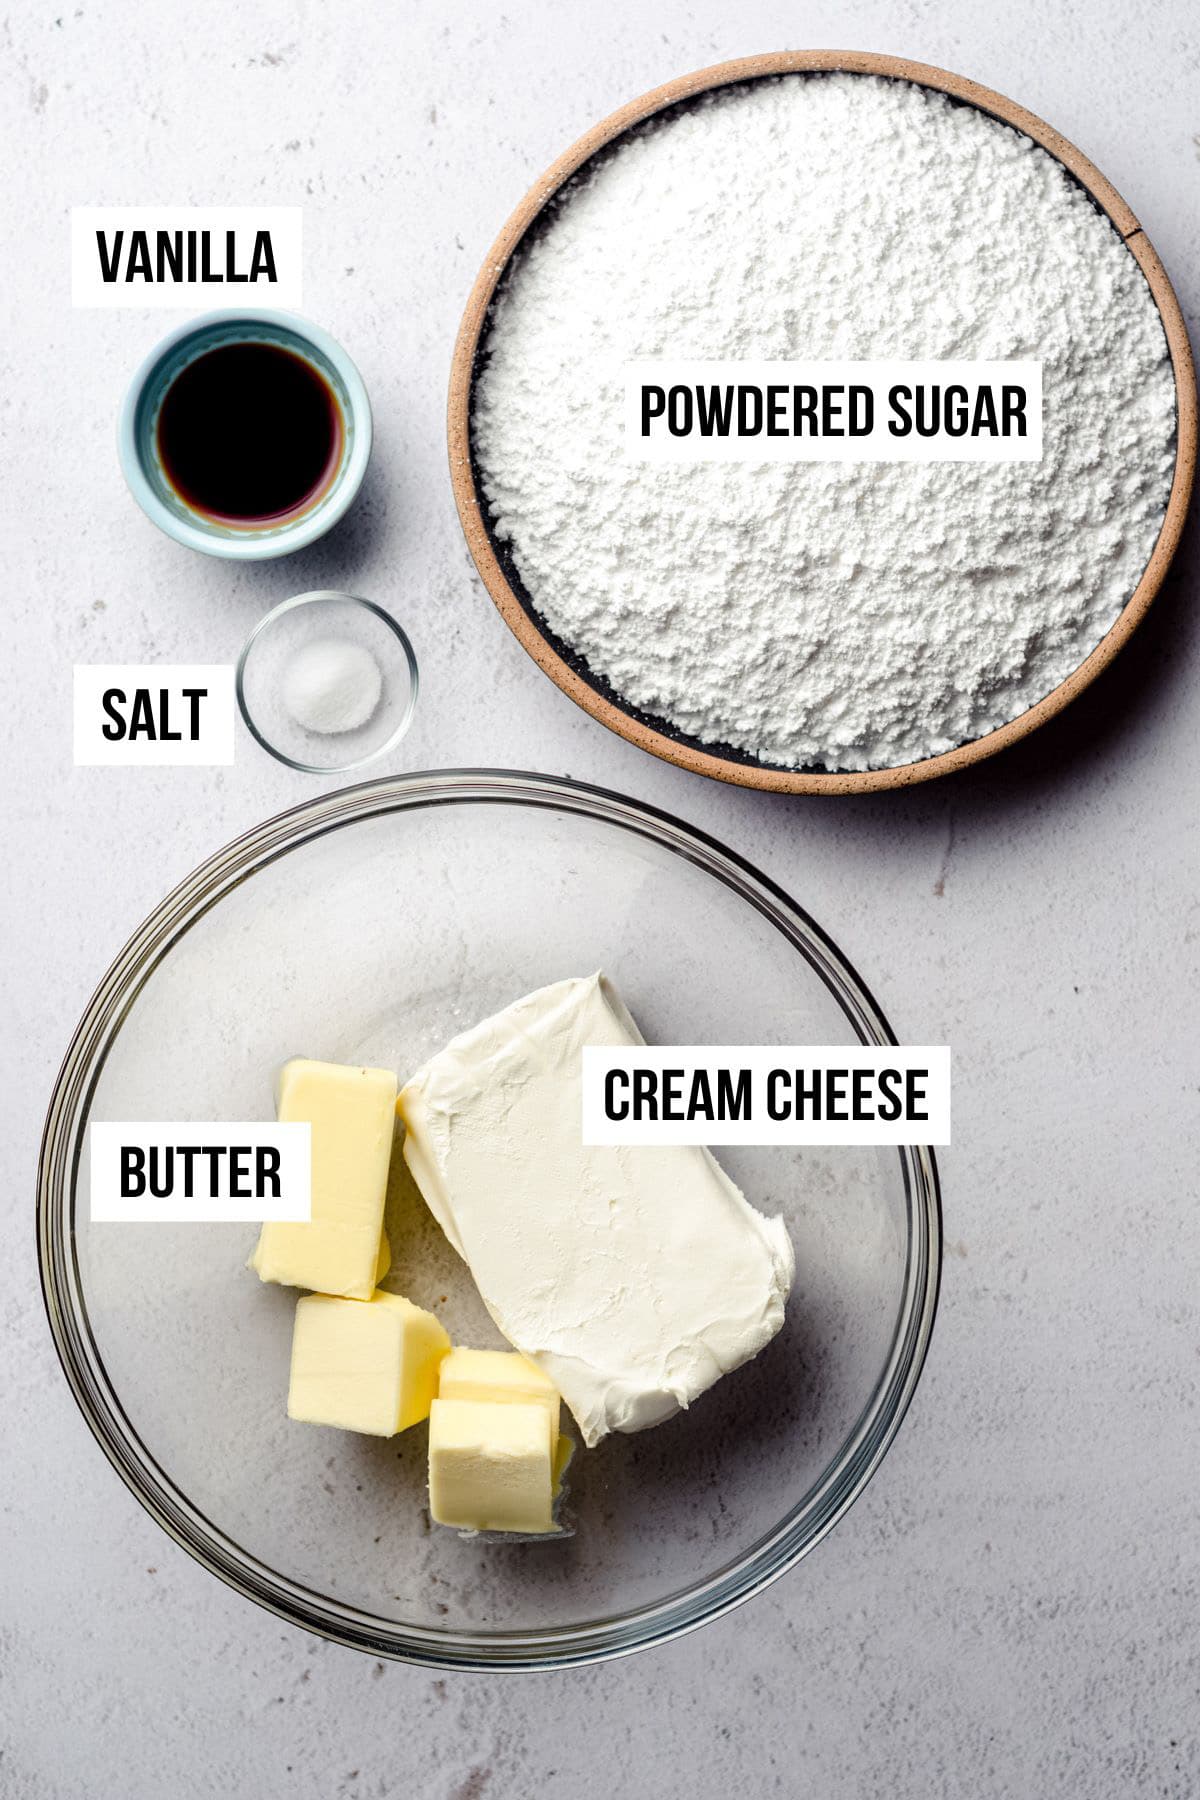
For the cream cheese frosting, you will need:
• full fat cream cheese
• unsalted butter
• powdered sugar
• vanilla extract
• salt
Fair warning: whatever you do, do not leave out the salt.
I think where a lot of home bakers go wrong is fearing salt in sweet things like frostings. But just trust me. I am the (self-proclaimed) Buttercream Queen, after all. Salt will pull all the flavors together and help enhance and complement the sweetness and the creamy vanilla flavor.
Just a pinch, but it works wonders!
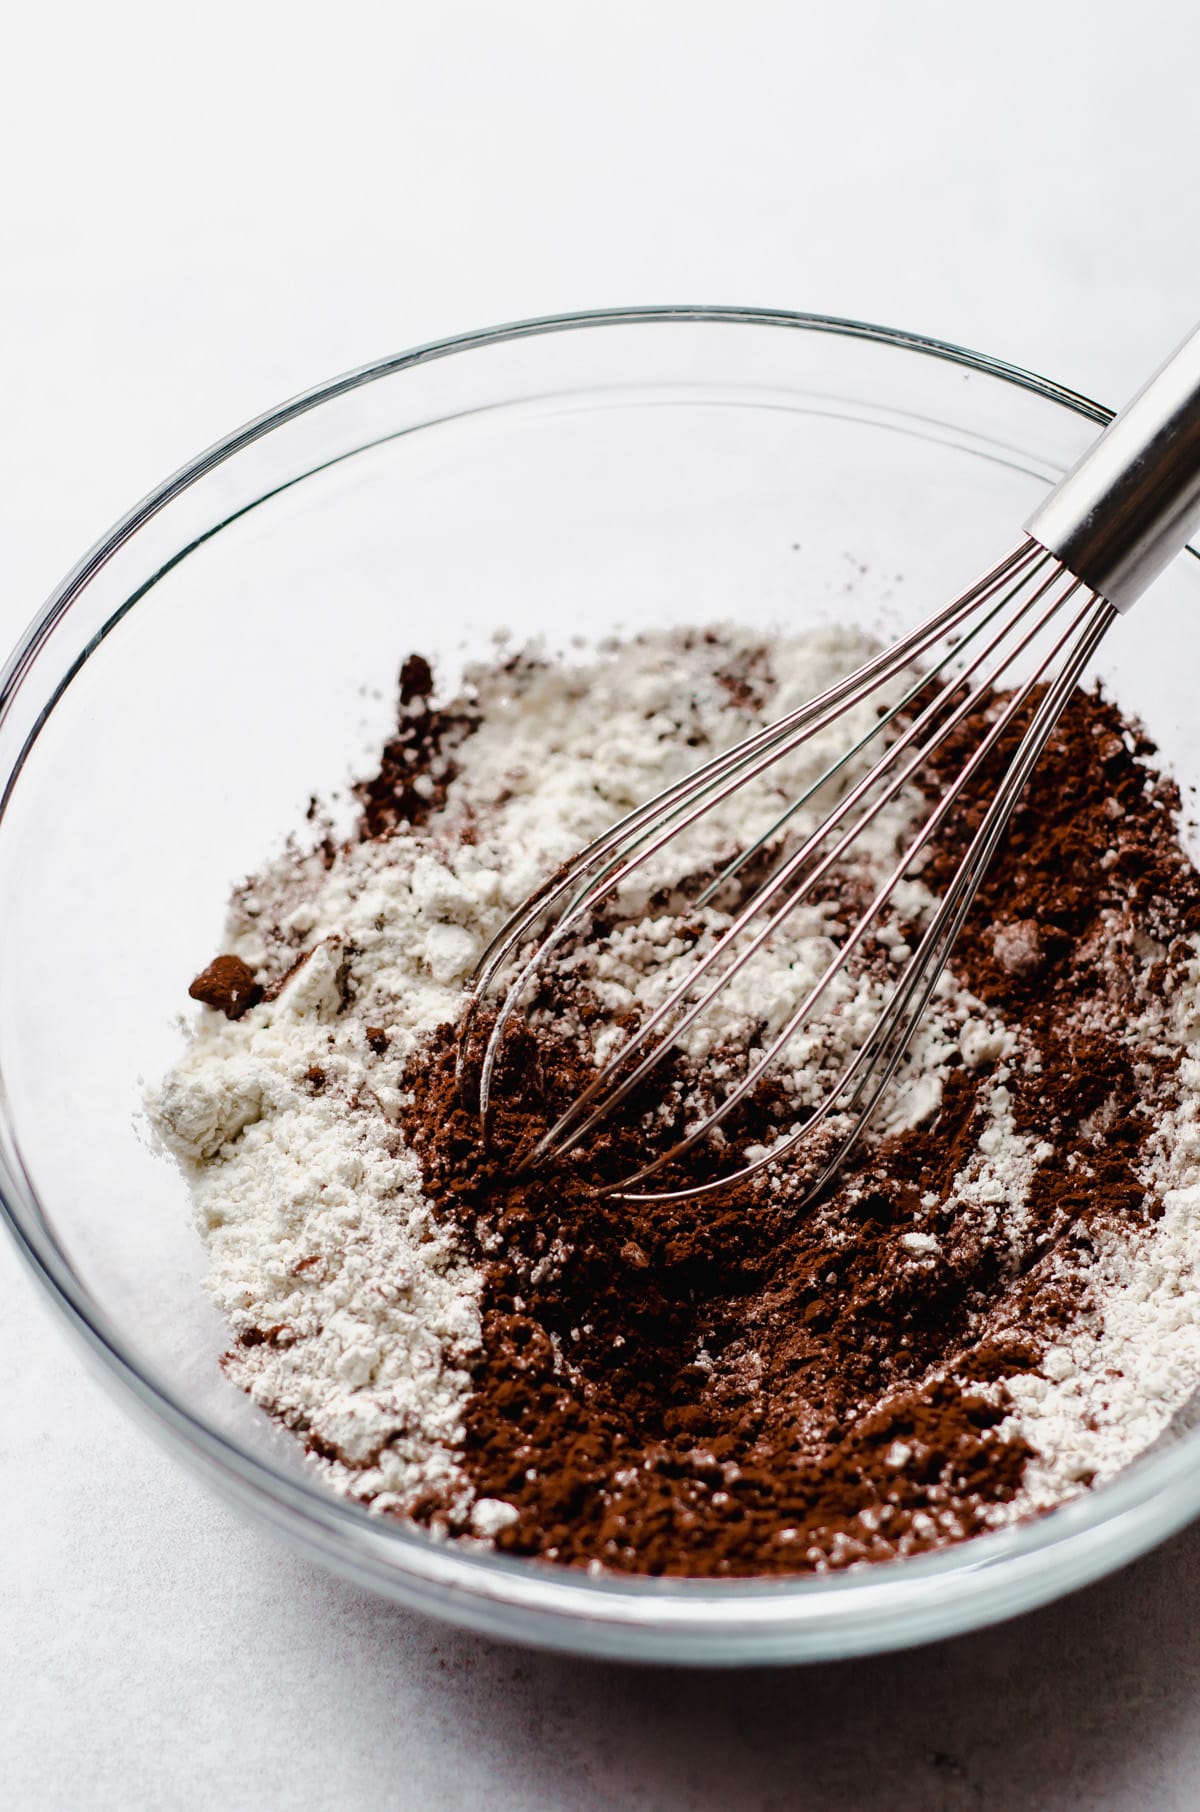
MAKE THE RED VELVET COOKIE DOUGH
Now when I said these cookies were easy to make, I promise I wasn’t lying. Follow my simple steps and you will have a batch of soft and chewy red velvet cookies cooling on a wire rack while you prepare the cream cheese frosting in no time.
STEP #1
First, whisk all your dry ingredients together. That’s the flour, baking soda, cocoa, and salt. Set this aside.
STEP #2
Then, use a mixer (stand or handheld) to beat the butter and sugar until it’s nice and fluffy. Add the egg and continue to beat until combined.
Make sure to keep scraping down the sides of the bowl to make sure the ingredients are all incorporated.
STEP #3
Once the egg is fully incorporated, add the red food coloring and vanilla extract and keep beating until all the dough is a uniform red color.
Now that our wet ingredients are ready, it’s time to add the dry ones.
STEP #4
Grab the flour mixture we set aside earlier, and add it to the wet base. Beat this slowly, as you want to make sure we’re not over-mixing the cookie dough or incorporating too much air. Remember, we don’t want these cookies to be cakey at all.
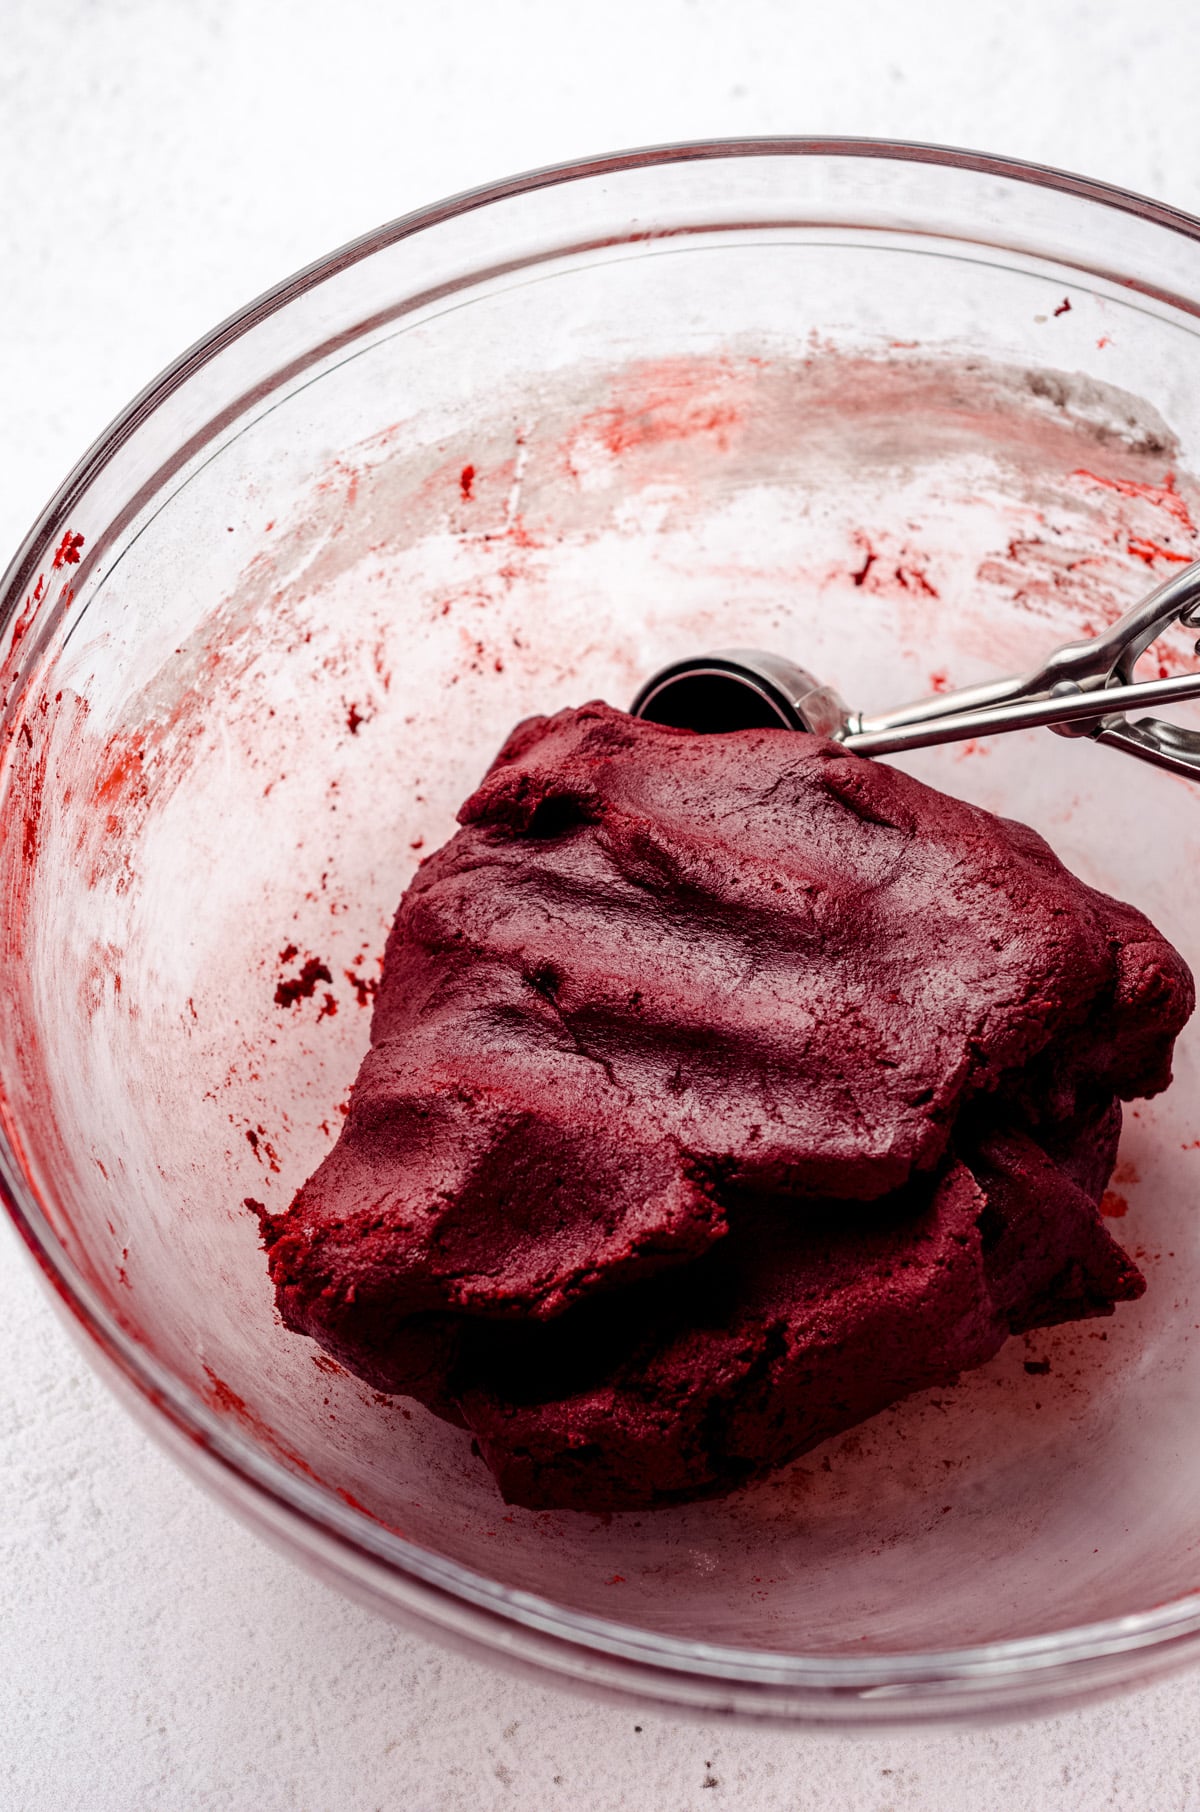
Once the dough has been formed, I like to get my hands involved and press the dough together that way. It’s a bit messier but let’s be honest, way more fun. I won’t tell if you sneak a taste of the dough…
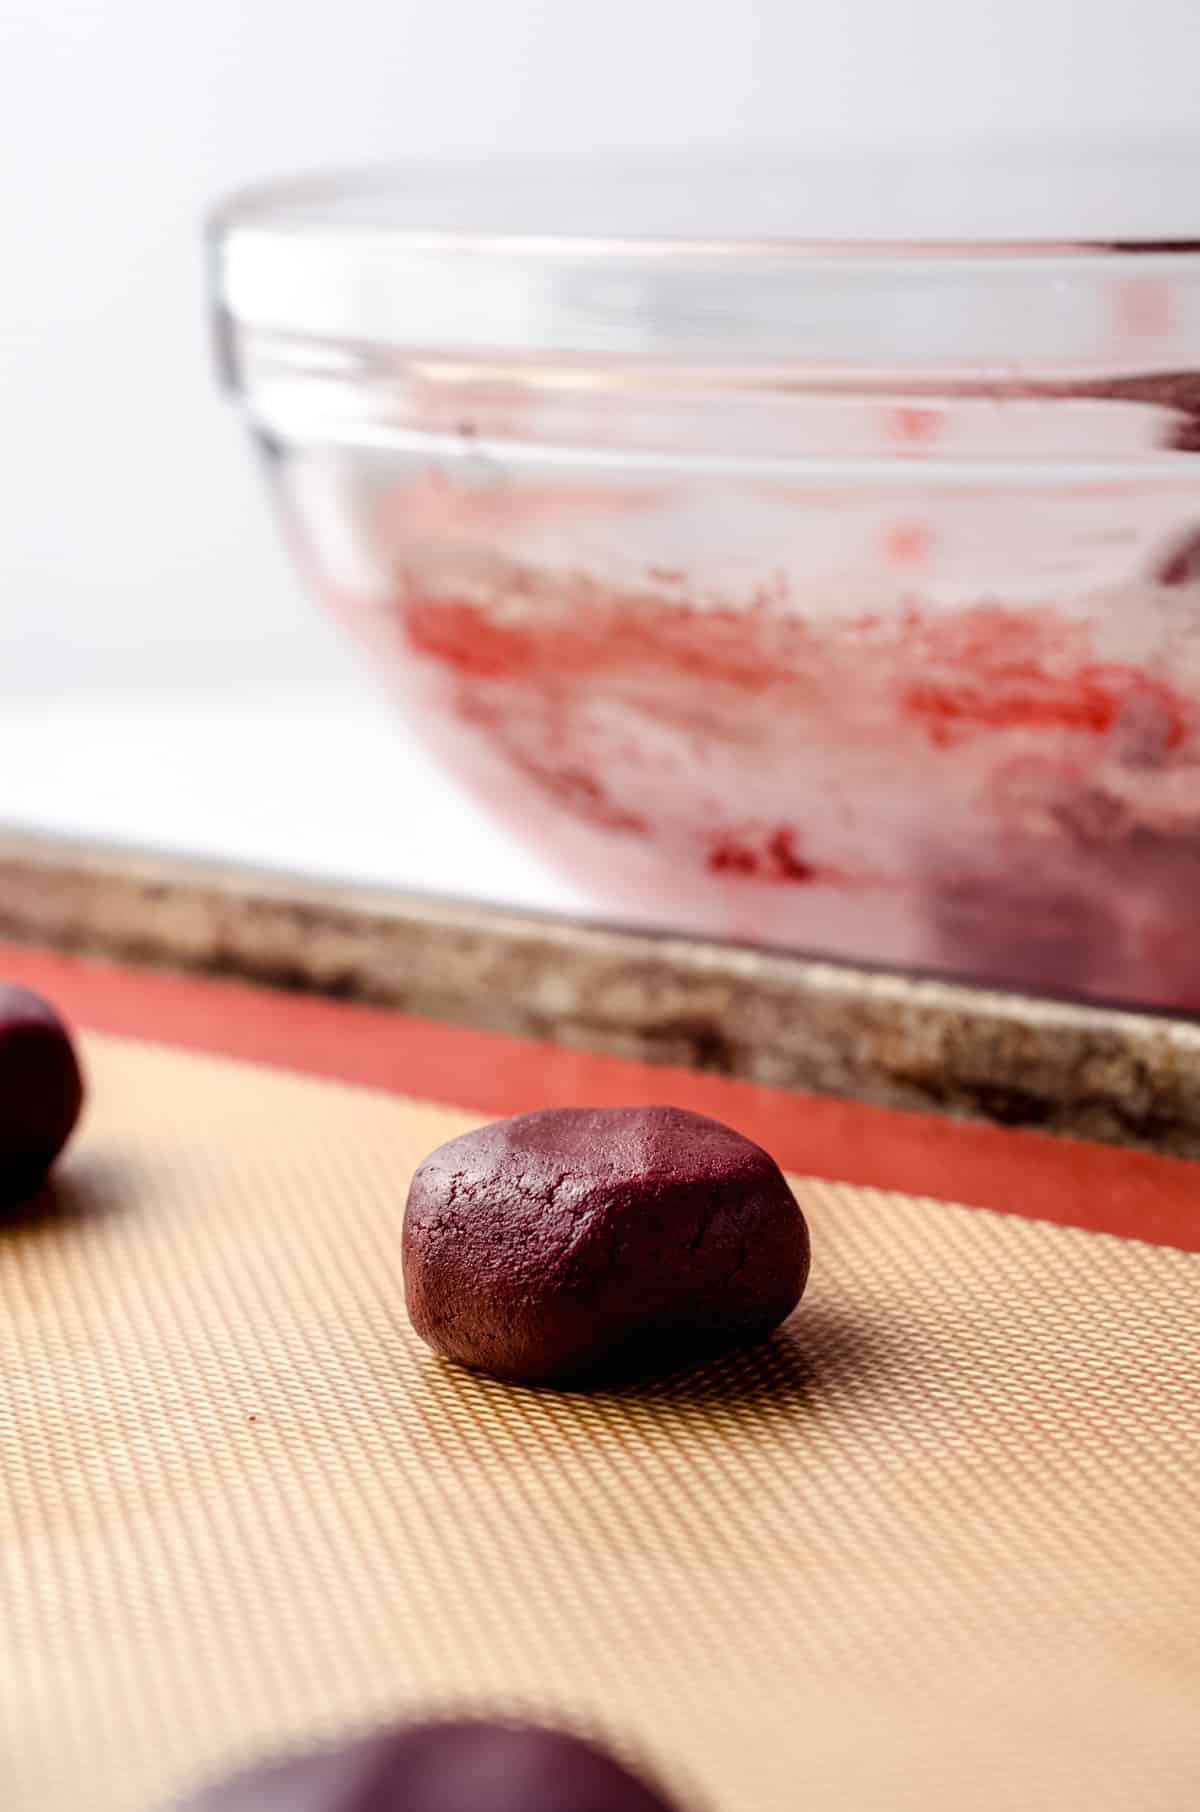
STEP #5
Once you have your scoop of dough, roll it in your hands and then place it on a baking tray that’s lined with a silicone mat or baking paper.
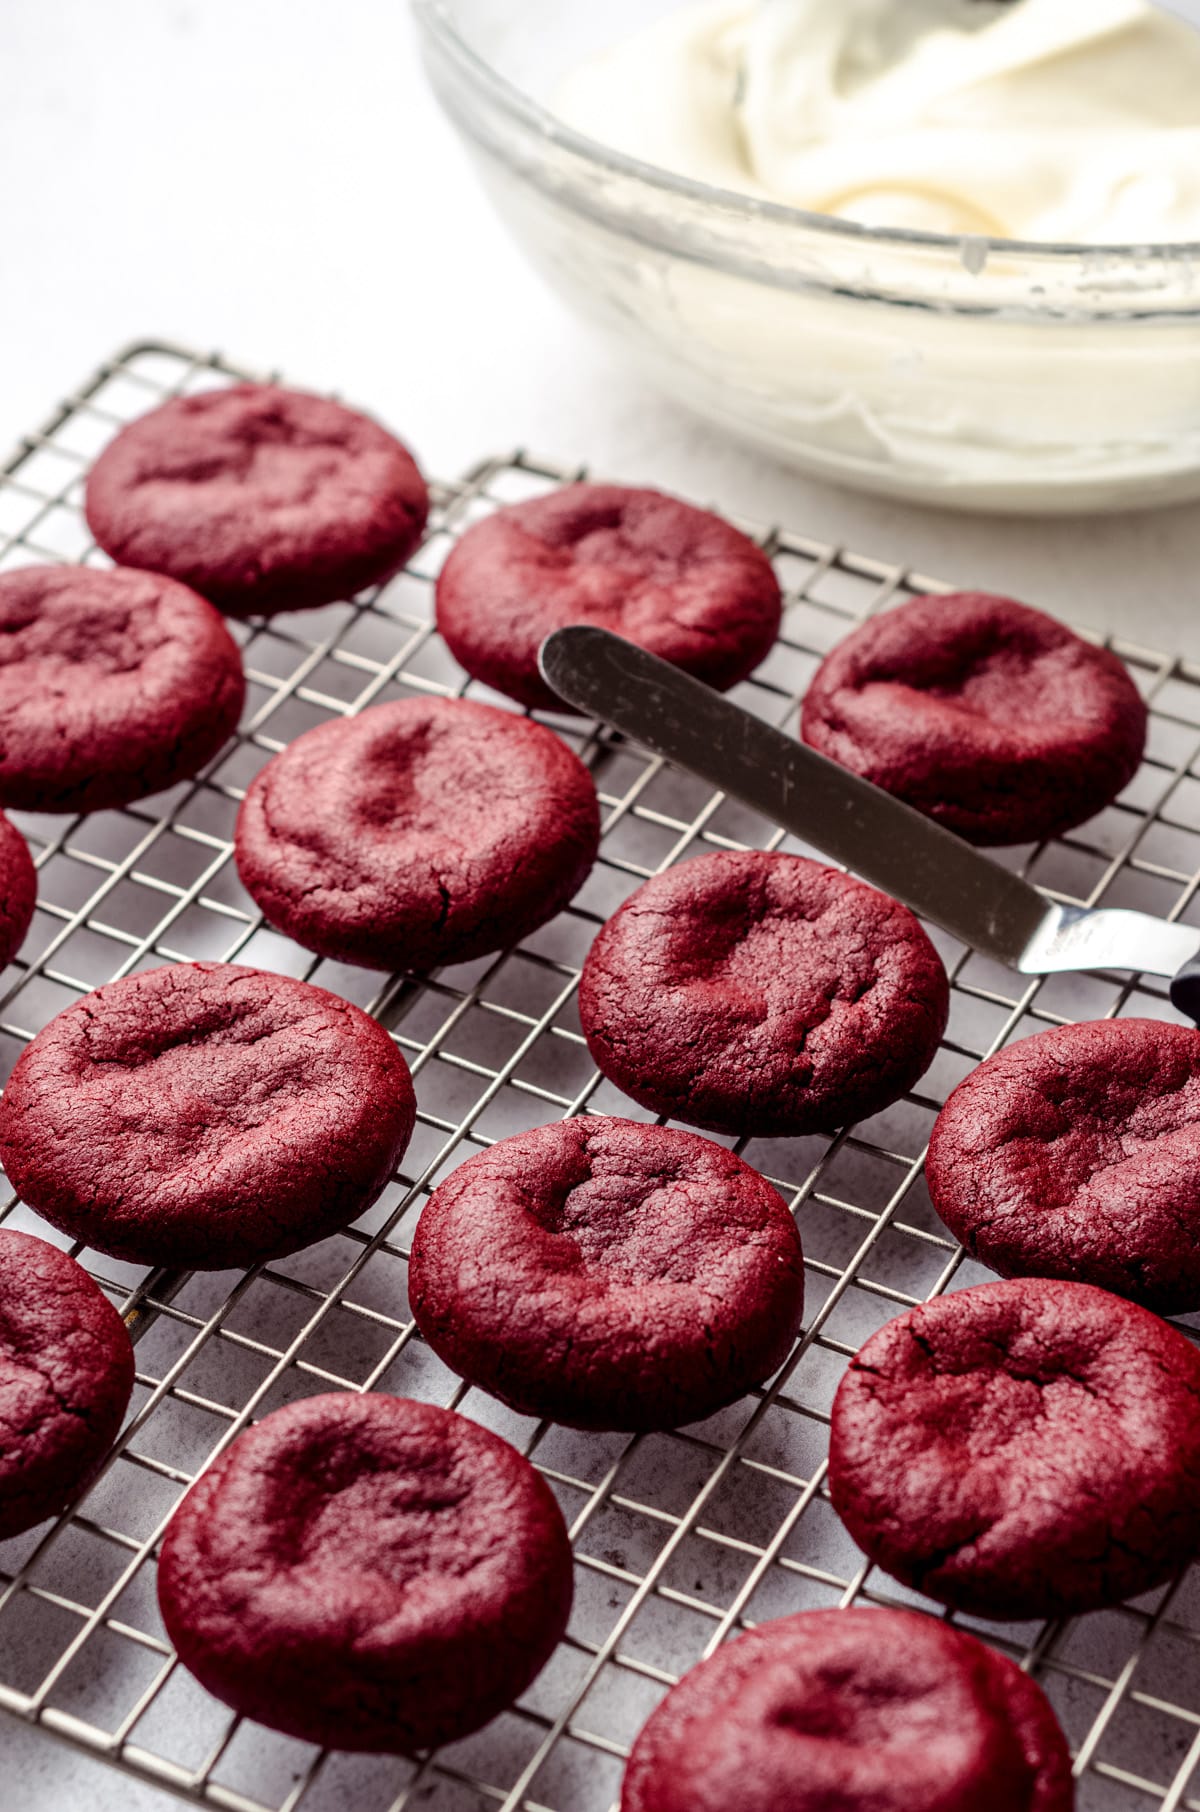
STEP #6
To flatten the cookies, all you need to do is press it ever so slightly (you can use your hands or the back of a spoon). Then bake!
WHY ARE WE FLATTENING THE COOKIE DOUGH BALLS?
Since we are planning on frosting the top of these cookies with the smoothest cream cheese frosting, flattening them slightly before they go into the oven will help keep the top flat during the baking.
They will still be slightly uneven on the surface, but giving them that initial press before you bake them helps a bit!
I like to use a #50 cookie scoop to portion out my dough. This is how I make sure my cookies are all the exact same size and I use this technique with every batch of cookies I make.
ALLOW THE COOKIES TO COOL
It is imperative that you let your cookies cool. I know it can be hard staring at a perfect batch fresh from the oven, but you will thank me for reminding you to WAIT later.
Allow the cookies to cool on the baking sheet for about 5 minutes, then transfer them to a wire rack to cool completely, which will take about 30 minutes.
Since we are about to top each cookie with a most delicious cream cheese frosting, we want to make sure that frosting won’t melt right off.
You can make the frosting while you wait for the cookies to cool.
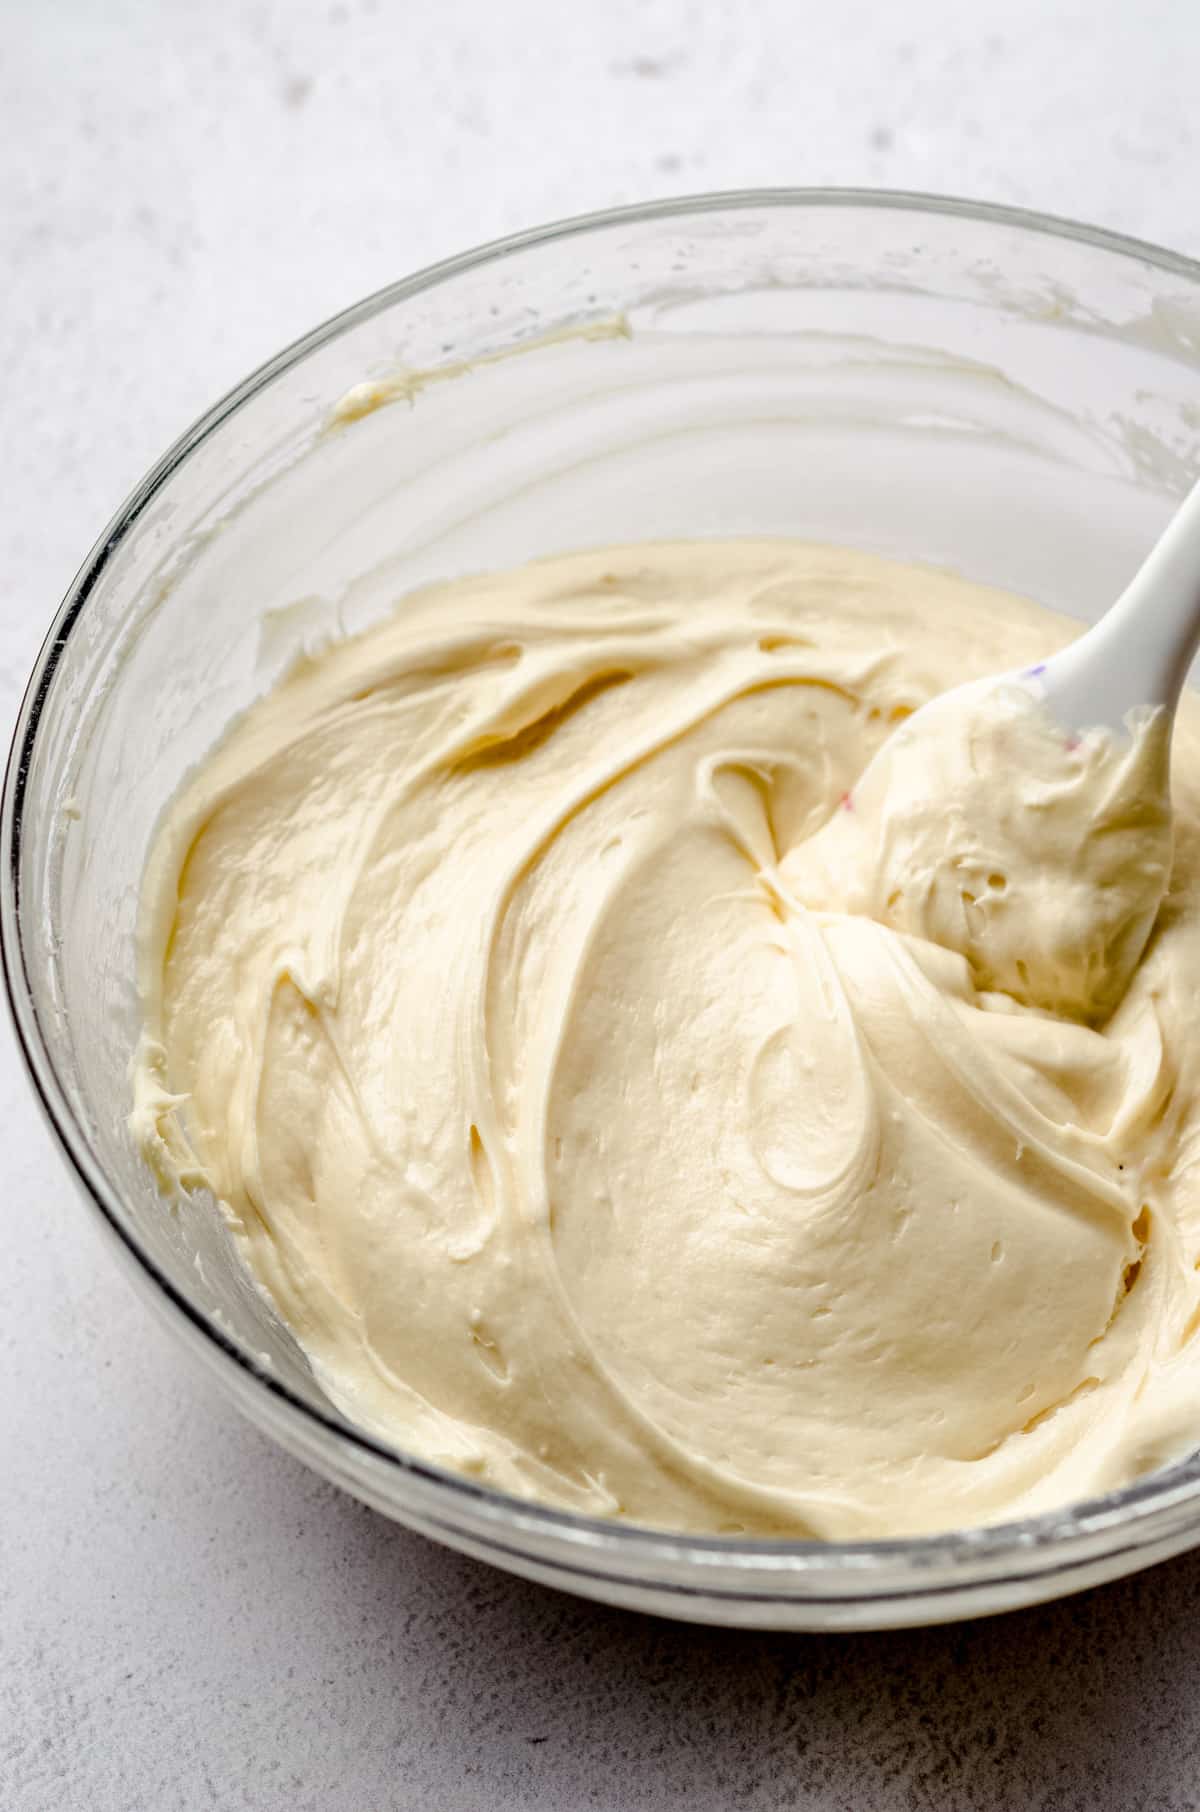
MAKE THE CREAM CHEESE FROSTING
Making the cream cheese frosting is the easiest part!
STEP #8
In your stand mixer or bowl with an electric mixer, beat the butter and cream cheese until smooth and creamy.
STEP #9
Then, add the powdered sugar, vanilla, and salt. Keep beating the mixture until it is super smooth and glossy.
Now all that is left to do is to frost your cookies (and try not to make the batch disappear with your taste tests!).
FROST THE COOKIES
STEP #10
The last stage of making these cookies before you can devour them is to add the delicious cream cheese frosting right on top.
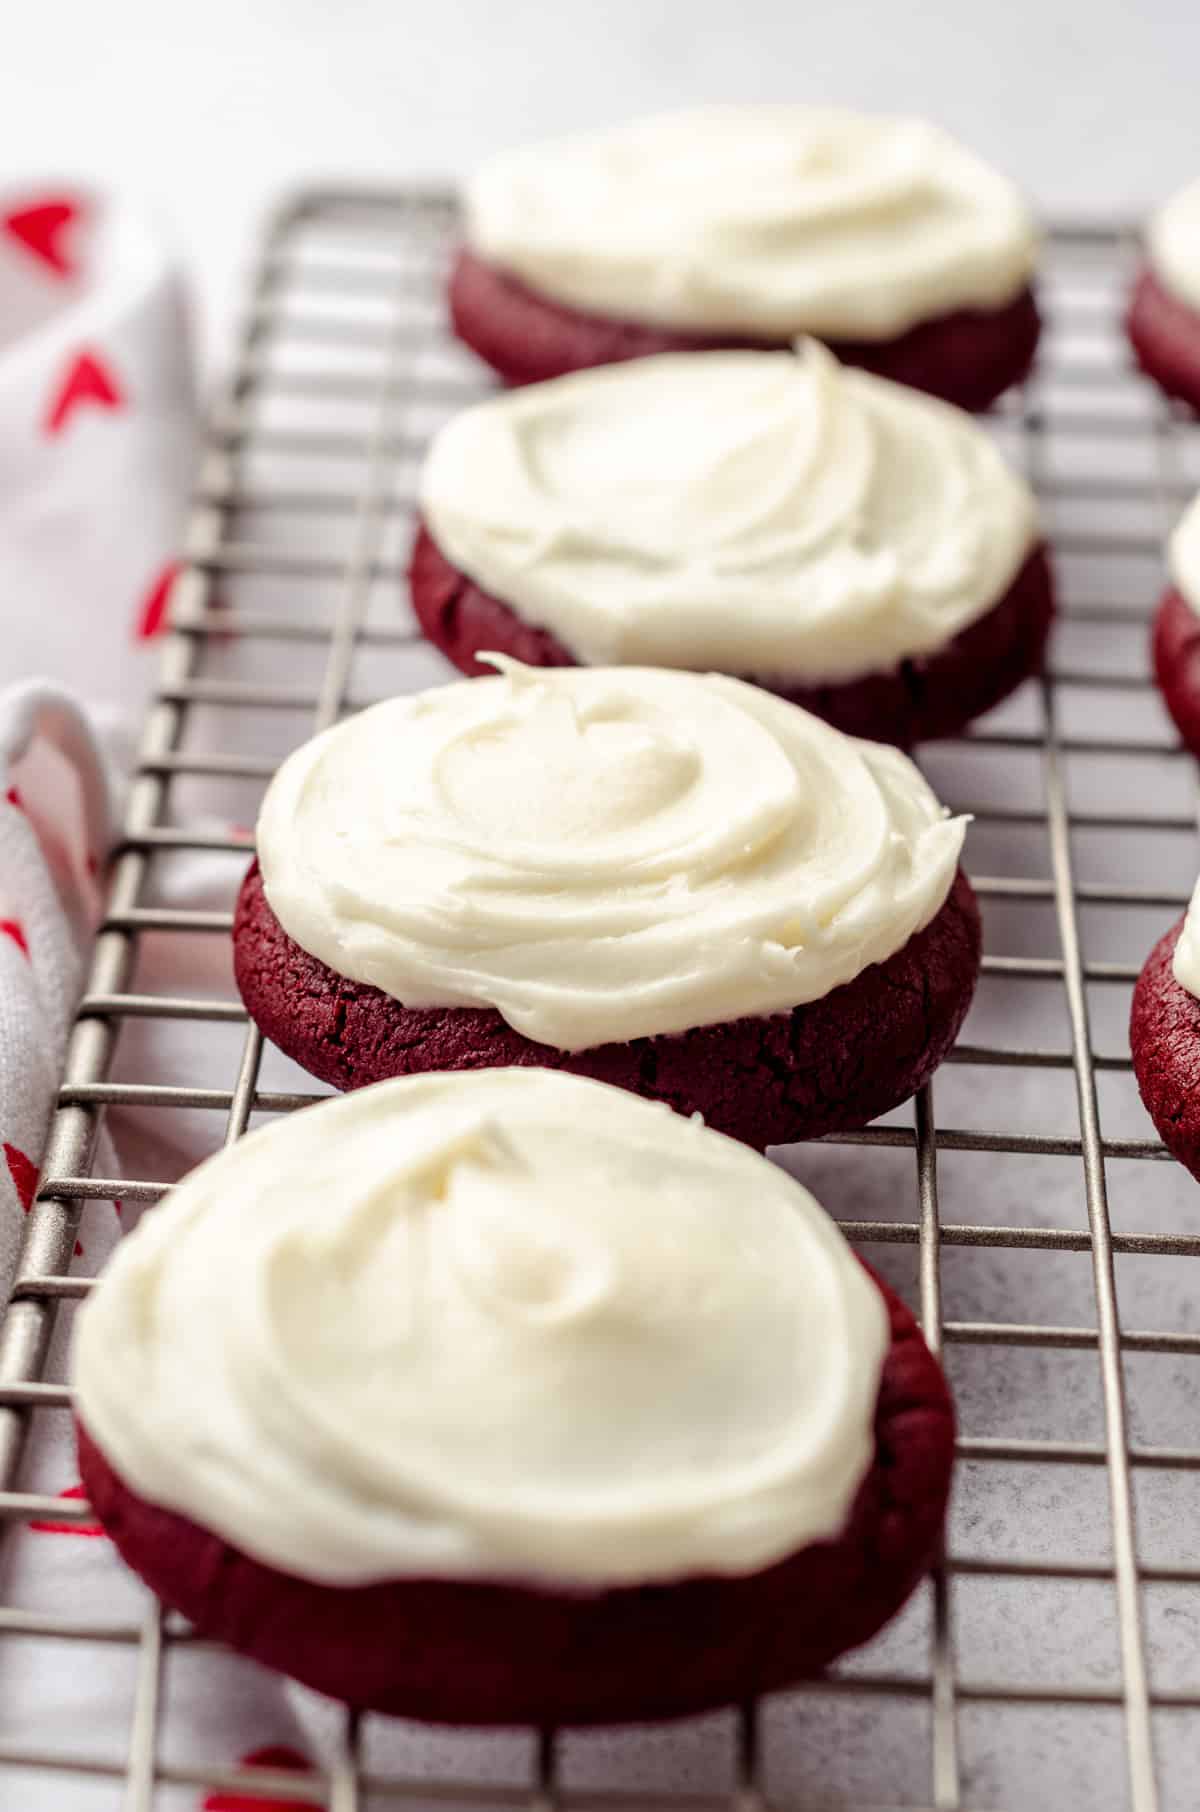
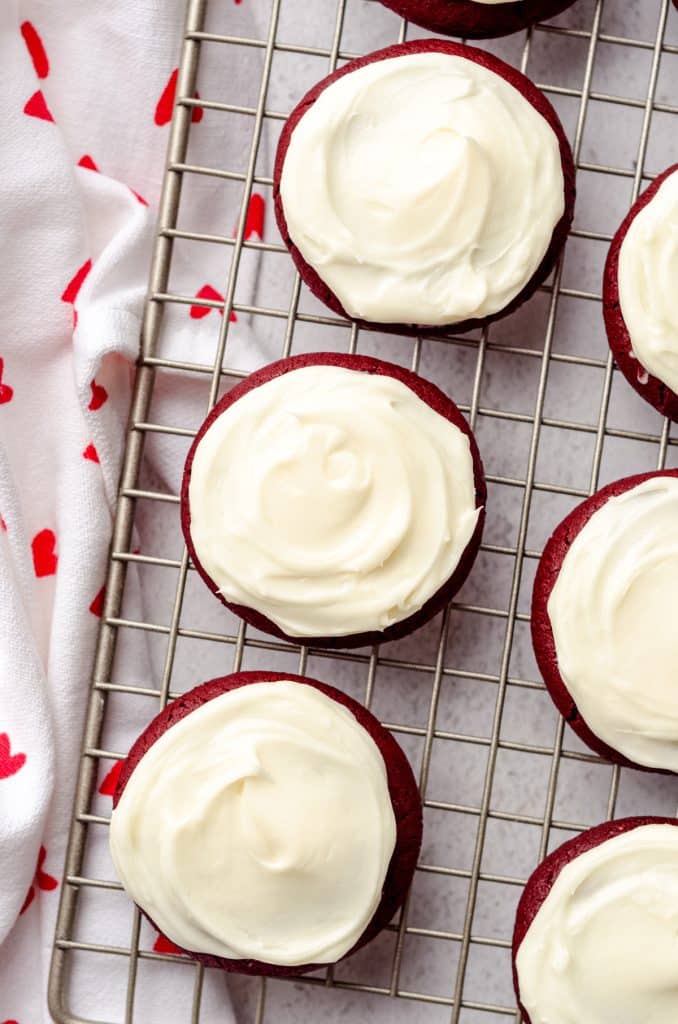
Grab an offset spatula and spread the frosting all over the top of each red velvet cookie.
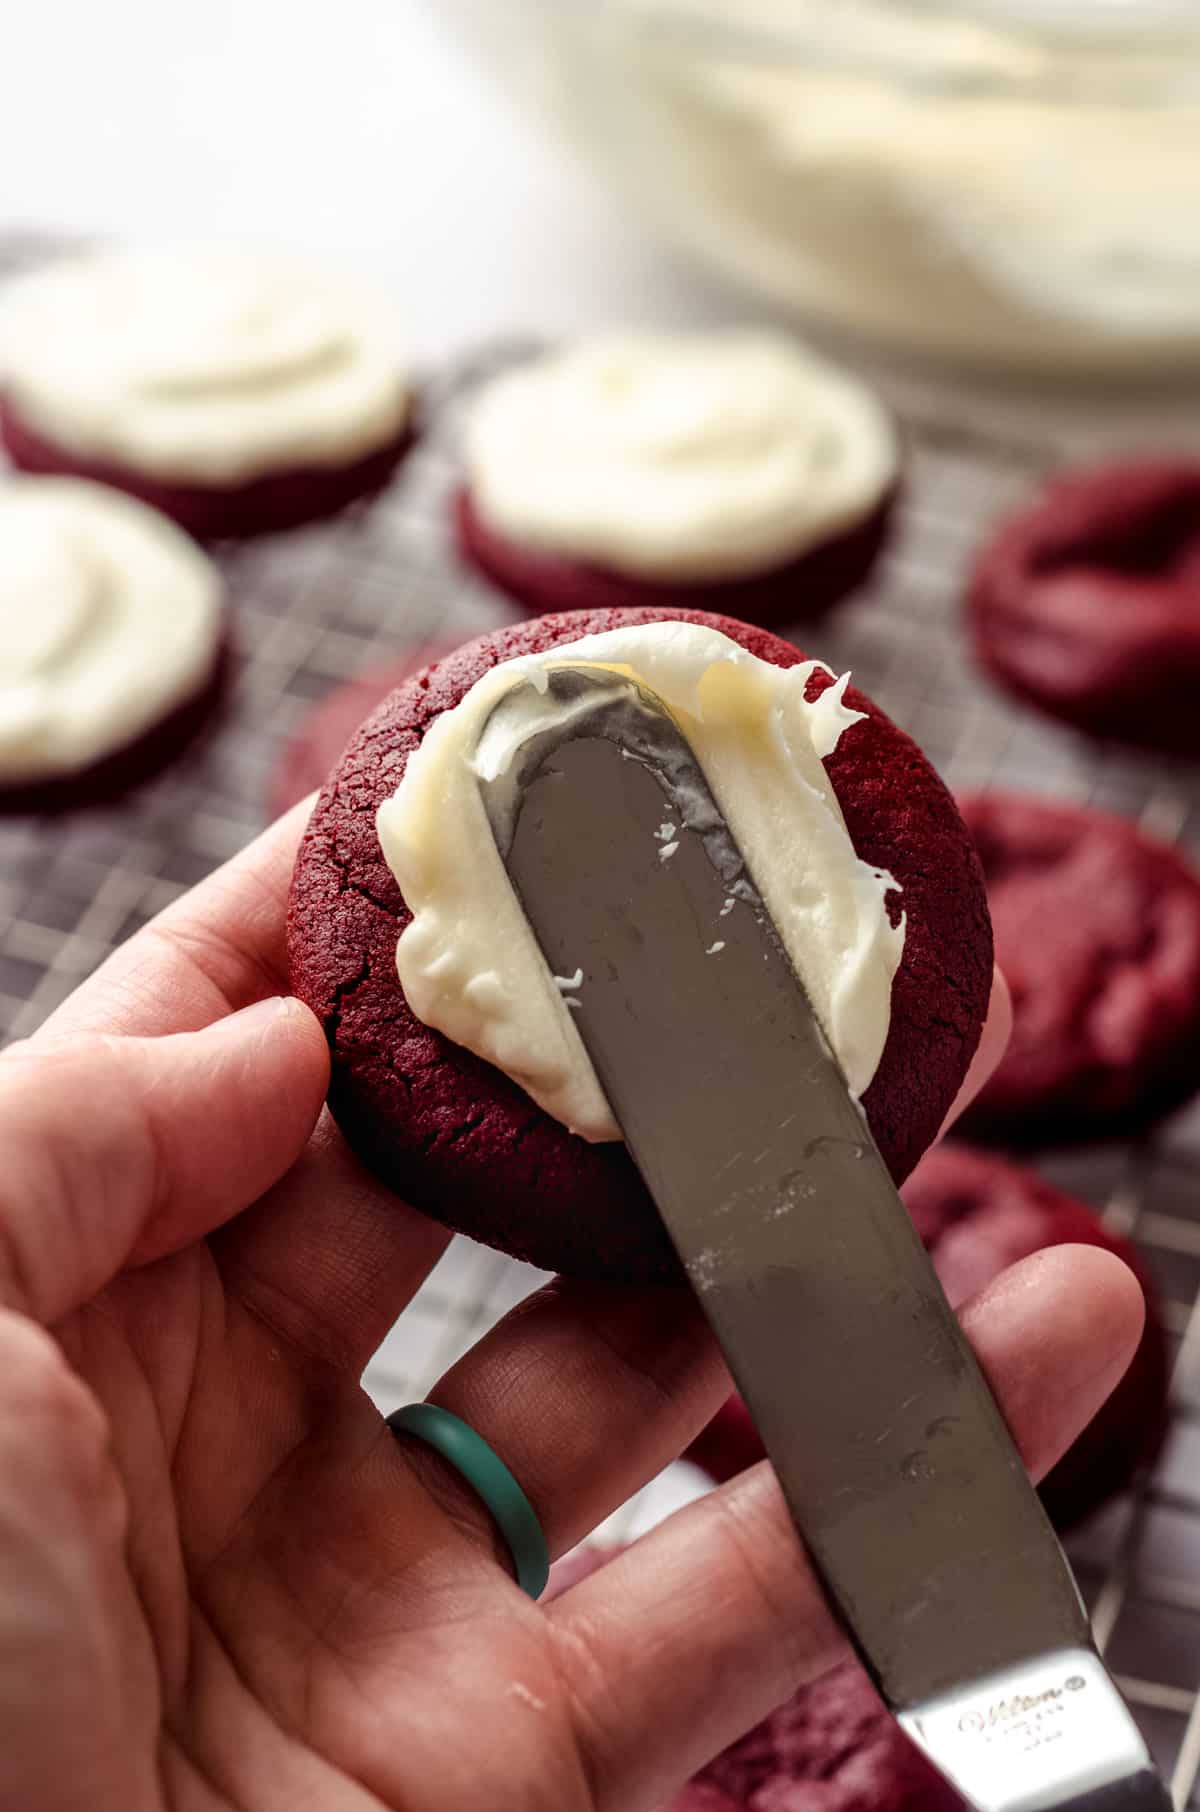
If you want to add any sprinkle or decoration, make sure you do so while the frosting is still wet, that way it has something to stick to.
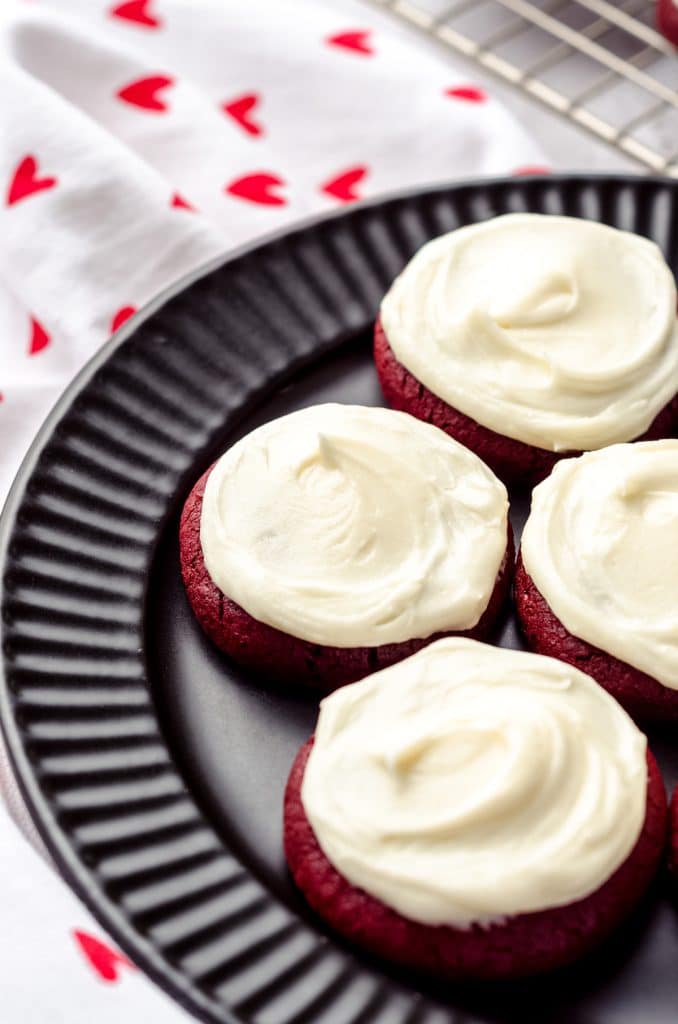
I personally like my red velvet cookies topped with plain white cream cheese icing. The contrast of the red cookie and white frosting are quite the show-stopper.
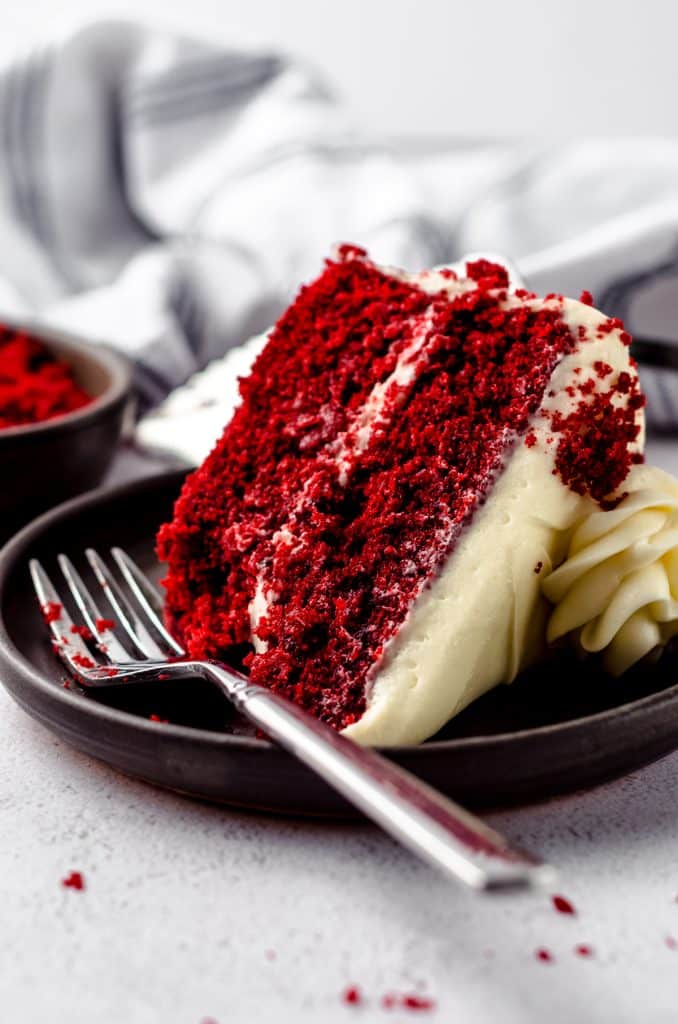
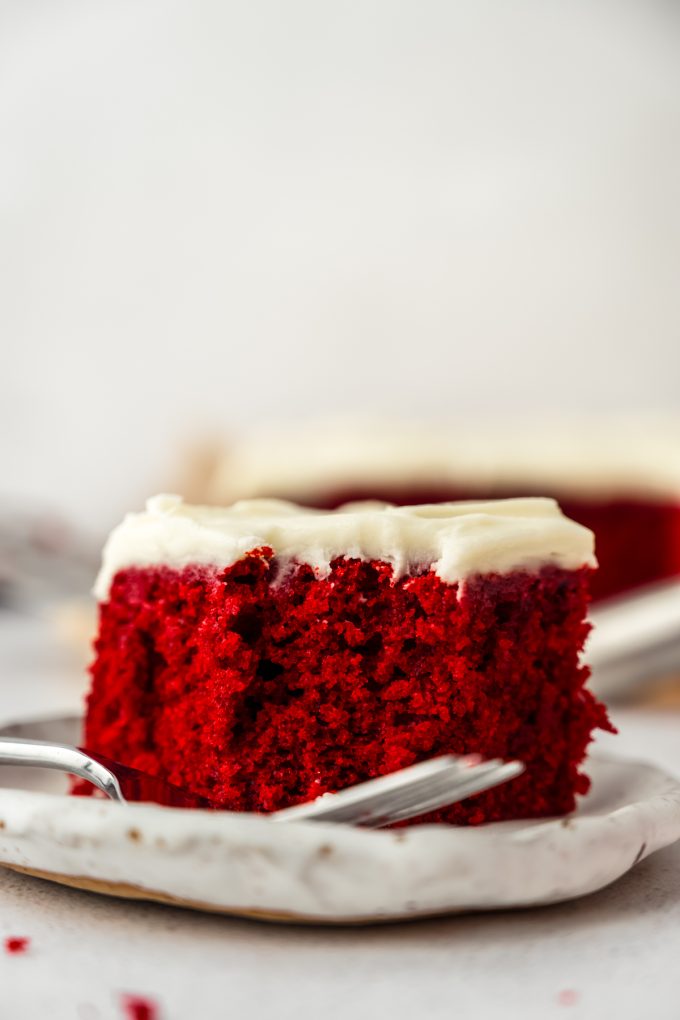
Speaking of show stoppers in the red velvet department, don’t miss my classic red velvet cake recipe, red velvet cupcakes, or red velvet sheet cake.
How to store Red Velvet Cookies
These cookies will stay fresh at room temperature for up to 3 days. For longer storage and preservation of the cream cheese frosting, you can keep them in the fridge for about a week. In fact, I like them cold for a special touch!

My favorite thing about these cookies is how rich the flavor of the cookie is. Remember when I said those fancy cookies can be way too sweet? That’s not happening here.
We have plenty of sweetness in the cream cheese frosting, and it complements the deep red velvet flavor in the cookies so nicely.
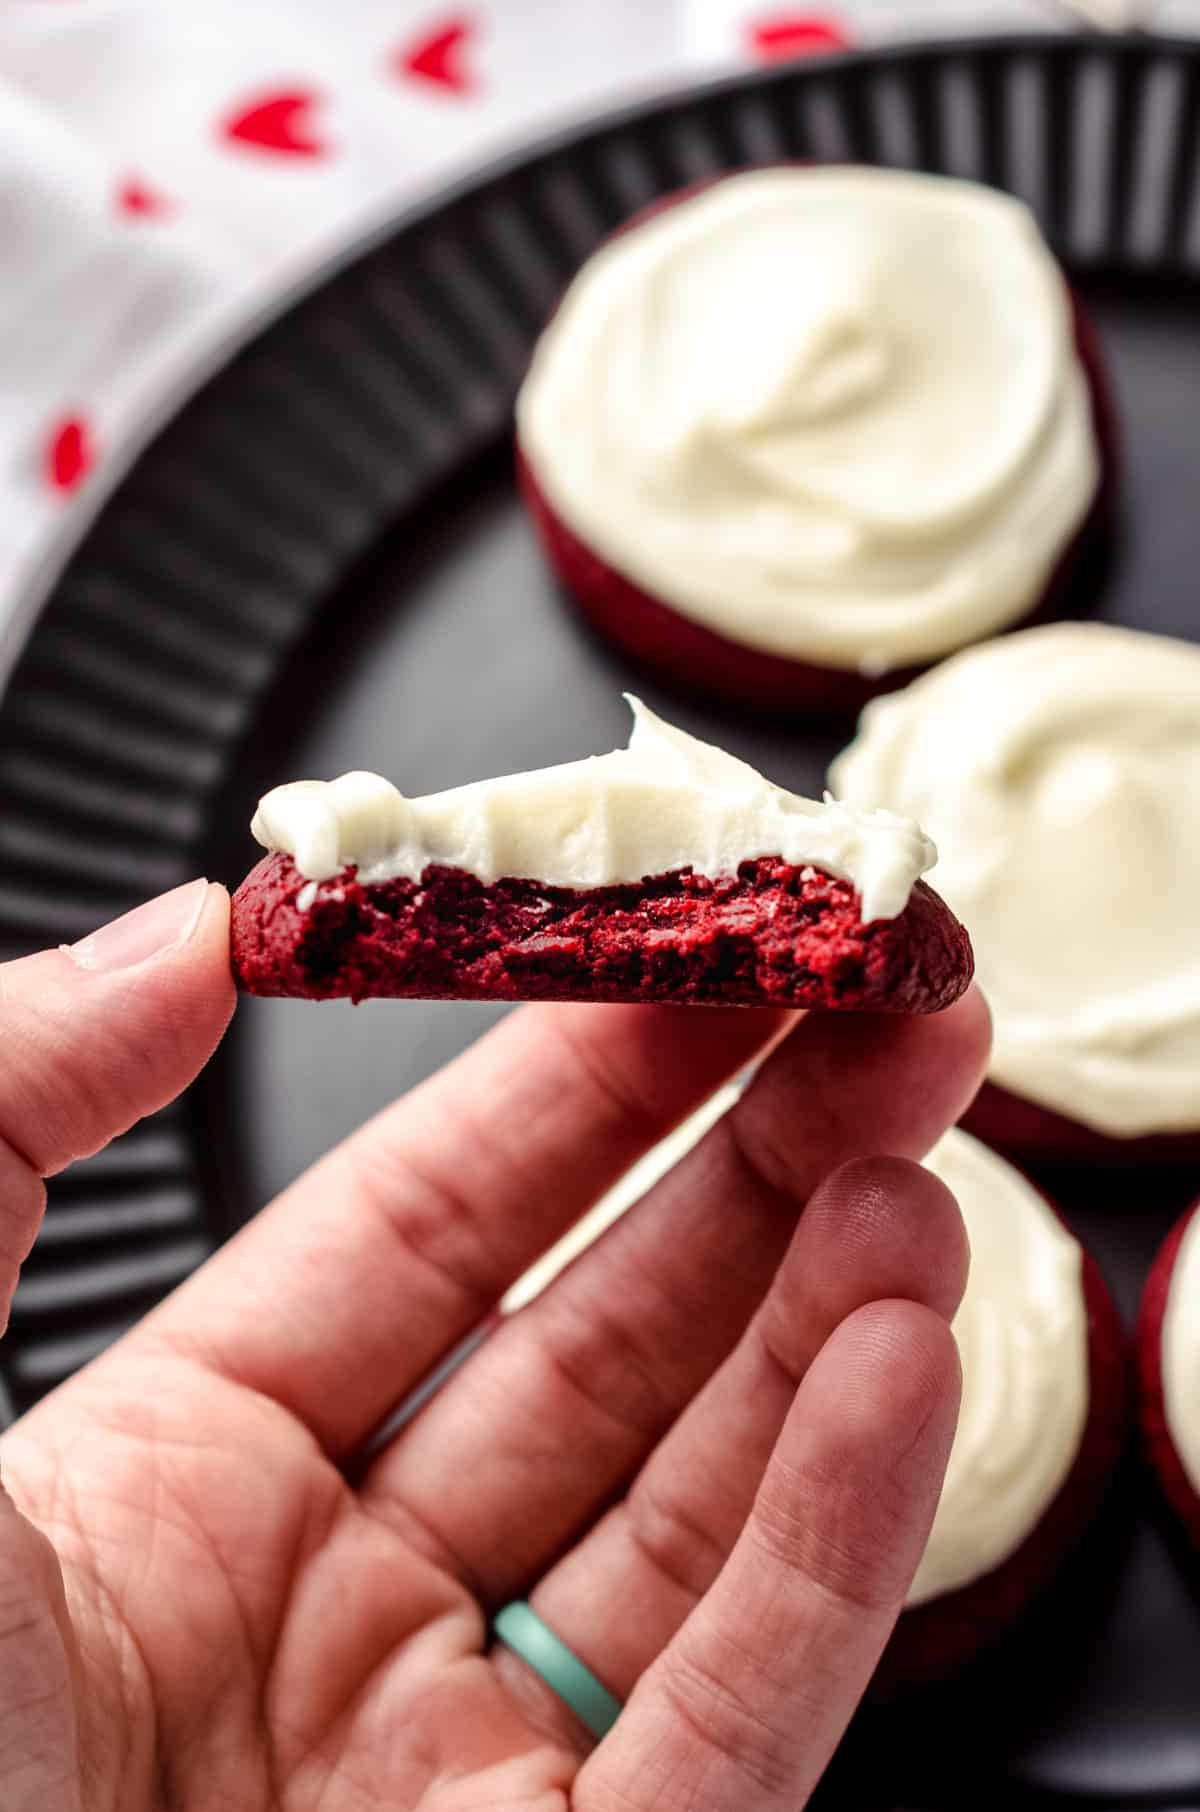
The cookies by themselves are absolutely delicious, but top them with that simple frosting? A match made in cookie heaven.
Did you love this recipe? Are you looking for more quick, no-chill cookie recipes? Try any of these no chill cookie recipes next: dulce de leche cookies, hot cocoa cookies, ultimate peanut butter cookies, or Lucky Charms cookies.
More Favorites from Fresh April Flours
Red Velvet Cookies with Cream Cheese Frosting
Ingredients
RED VELVET COOKIES
- 2 cups (240g) all-purpose flour be sure to measure properly
- ¼ cup (24g) unsweetened cocoa powder
- 1 teaspoon baking soda
- ½ teaspoon salt
- ½ cup (113g) unsalted butter softened to room temperature
- 1 cup (200g) granulated sugar
- 1 large egg at room temperature
- 2 teaspoons vanilla extract
- 1 Tablespoon (15mL) red food coloring1
CREAM CHEESE FROSTING
- 4 ounces (113g) full fat block cream cheese softened to room temperature
- ¼ cup (57g) unsalted butter softened to room temperature
- 1 and ¾ cup (210g) powdered sugar
- 1 teaspoon vanilla extract
- pinch of salt
Instructions
RED VELVET COOKIES
- Preheat the oven to 350ºF (177ªC). Line a large baking sheet with parchment paper or a silicone baking mat. Set aside.
- In a medium size bowl, whisk together the flour, baking soda, salt, and cocoa powder. Set aside.2 cups (240g) all-purpose flour, ¼ cup (24g) unsweetened cocoa powder, 1 teaspoon baking soda, ½ teaspoon salt
- In a large bowl with a handheld electric mixer or the bowl of a stand mixer fitted with the paddle attachment, cream the butter and granulated sugar until light and fluffy, approximately 2-3 minutes. Add the egg, beat again, and scrape down the sides of the bowl as necessary.½ cup (113g) unsalted butter, 1 cup (200g) granulated sugar, 1 large egg
- Add the vanilla and red food coloring and beat on medium speed until combined. Using a spatula, scrape down the sides and all along the bottom of your bowl to ensure coloring is distributed evenly. Beat again on medium speed until everything is incorporated.2 teaspoons vanilla extract, 1 Tablespoon (15mL) red food coloring1
- Decrease the mixer speed to low and slowly add the flour mixture. Mix on low until dough has formed. It will be crumbly– this is ok. Use your hands to bring the cookie dough together.
- Using a medium size cookie scoop (I use this #50 cookie scoop for all of my standard size cookies), drop balls of cookie dough onto the prepared baking sheet. Use your hands to roll the mounds of dough into smooth balls, then press down gently to flatten slightly. Bake the cookies for 10-11 minutes, just until puffed and the edges are set. Allow to cool on baking sheet for 5 minutes, then transfer to wire rack to cool completely before frosting (about 30 minutes).
CREAM CHEESE FROSTING
- In a large bowl with a handheld or the bowl of a stand mixer fitted with a paddle attachment, beat the cream cheese and butter together on high speed until smooth and creamy.4 ounces (113g) full fat block cream cheese, ¼ cup (57g) unsalted butter
- Decrease the mixer speed to low, then add the powdered sugar, vanilla, and salt. Increase mixer speed to medium-high and beat for 2 minutes or until smooth.1 and ¾ cup (210g) powdered sugar, 1 teaspoon vanilla extract, pinch of salt
- Use a small offset spatula to spread frosting onto each cookie. If you want to add embellishments like sprinkles, do so before the frosting sets. Store leftovers covered tightly at room temperature up to 5 days. Cookies freeze well, up to 3 months. Thaw at room temperature.
Notes
- Food coloring: I prefer gel food coloring, and my favorite brand is AmeriColor. You can use traditional food coloring. The amount is the same.
Nutrition Disclosure
All nutritional values are approximate and provided to the reader as a courtesy. Changing ingredients and/or quantities will alter the estimated nutritional calculations.
Came out wonderfully! I used BRM gf baking flour and they were still perfect!
I’m so glad to hear this, Jane! Thank you for letting me know!
I’m a beginner at baking and this recipe was so easy to follow for me! Me and my partner enjoyed a lot thank you!
So glad you enjoyed it, Alex! Thank you for your review!
This was an amazing an easy recipe i used for valentines day.
Thanks, Annie! I’m glad you enjoyed it 🙂
Delish!
Thanks, Sarah!
Love these cookies and do go my coworkers and friends!!
Thank you so much, Kim!
Amazing recipe,only made 13 but tasted delicious
Thanks so much, Jess!
This recipe was the best cookies. Everyone that eats this cookies says the are best cookies. Thank you for all of your recipes.
Thanks so much, Stacy!
Wow! These are simple but so very tasty. Also no weird ingredients that I will only use once. Not over powering sweetness as I sometimes find dessert to be. New to your website but will be trying out more of your dessert recipes in the near future.
Also glad you provide grams for dry ingredients. For others if you find your recipes aren’t turning out right- getting a food scale as it has been a game changer for me.
Thank you so much, Linsey! I appreciate a lot about this comment.
Would resting the dough in the fridge for a day or two have any adverse effects on the dough before baking?
Hi, Azul– it will not. Just be sure it comes back to room temperature before scooping/baking. Enjoy!
Hi there, thank you for sharing this recipe! I haven’t tried baking this recipe yet but I’m very excited to start! I’m still a little new to baking! I am going to try making these cookies for some friends and family for Christmas coming up. After assembling the cookies together, can I freeze the cookies? If so, is there a process I have to follow for prepping them for freezing and defrosting so they can retain their moistness and chewy texture? Thank you in advance!
Hi, Abby– you can freeze them wrapped tightly and they’ll be just fine. I recommend freezing them without frosting, but there’s no issue with freezing them with it on either.
Hi Lynn, thank you so much for the advice! They turned out perfect, not too sweet and very delectable!
So happy to hear this, Abby! Thanks for coming back to let me know 🙂
Love these cookies! I’ve made these cookies twice and I am thinking about making them for the holidays this year. I was wondering if anyone had tried freezing the doughballs to bake later, and if so, how did the cookies turn out?
Hi, Emily– they freeze very well! Just be sure they’re wrapped or contained tightly so they retain their moisture. You’ll want them to come back to room temperature before baking.
Can I substitute the egg out for another ingredient due to an allergy?
Hi, Alisa– I’ve never made these with an egg substitute, but if you are comfortable and familiar with that swap, I’d love to hear how it goes!
I made these last year and they were a hit. They freeze well. I do not remember if this recipe makes a lot of cookies. I wasn’t sure if I should double it or not. Do you know approximately how many cookies one batch makes? Thanks
Glad you found the answer and that you like them so much 🙂
I am sorry I looked back and saw it makes 21 cookies.
How many does this make??
Hi, Brendan– 21, as stated in the recipe yield.
I added chocolate chips and did a cream cheese drizzle on top… OMG!!
Yum! Thanks for sharing, Alexandria!
This way so much fun to make! I had a project for my English class and everyone loved it.
Thank you so much, Anni!