
A Guide To Measuring and Weighing Ingredients
As an Amazon Associate, I earn from qualifying purchases. Read the full disclosure here.
A comprehensive guide to measuring wet and dry ingredients properly in baking and why it’s important.
As I get deeper into this food blogging world, I’ve noticed a lot of bloggers stress how important it is to measure ingredients properly. I’ve mentioned it a couple times, but I’ve not gotten as in-depth about it as I sometimes want to.
It can be very overwhelming to read about the “proper” way to measure and it can also get kind of confusing. But sometimes, it’s imperative to the success or failure of your recipe.
So I’m going to break it down for you in a way that is easy to understand and that I hope will help you achieve the best results possible when you tackle your next recipe.
WARNING: this post is lengthy (better grab a snack). But I promise, if you make it through to the end, you’ll learn some valuable baking lessons.
Baking is a science. That’s why I’m good at it. Cooking is a lot less science-y, and that’s probably why I’m not so good at it. There are actual chemical reactions going on in your oven when something is baking in it, and if your ingredients are off, that can be detrimental to your finished product.
I can’t tell you how much better my cakes turned out once I figured out how to measure properly, even before we got a kitchen scale. They’ve only gotten better since then.
GET A KITCHEN SCALE
Before we dive into the nitty gritty, if you don’t have a digital kitchen scale, I highly suggest you get one. This is the one we have. It’s affordable, reliable, versatile (mL, grams, ounces, fluid ounces, etc.), and despite using it every single day for every single meal for 7 months, we have yet to replace the batteries.
We originally bought it to aid us in tracking what we eat/portion control, but I have adopted it as my baking scale as well. I love this thing so much! Most of the information I’ve laid out here is applicable without a scale, but if you’re looking for as accurate as you can get, this is the way to go.
WHY YOU SHOULD READ A RECIPE TWICE BEFORE STARTING
Although this isn’t exactly a measurement tip, I feel it requires mentioning.
The first thing you should always do before you start making a recipe is read it the whole way through. Twice. Maybe more if it has a lot of steps, especially steps you might not be familiar with.
If you read it, you lessen the chance of coming up on an unexpected step or something you’re supposed to do quickly, or slowly, or at the same time as something else. It also helps you visualize what you’re doing and helps you prepare the necessary ingredients and tools you’ll need through the end of the recipe.
Basically, prepare yourself, whatever that means for you.
For me, being prepared means getting out every single ingredient and tool and placing it on the counter in the order in which I will need it. Seems a little obsessive, doesn’t it? But it helps– a lot.
Fun fact: did you know that recipes list the ingredients in the order you’ll need them? The preparation is done for you!
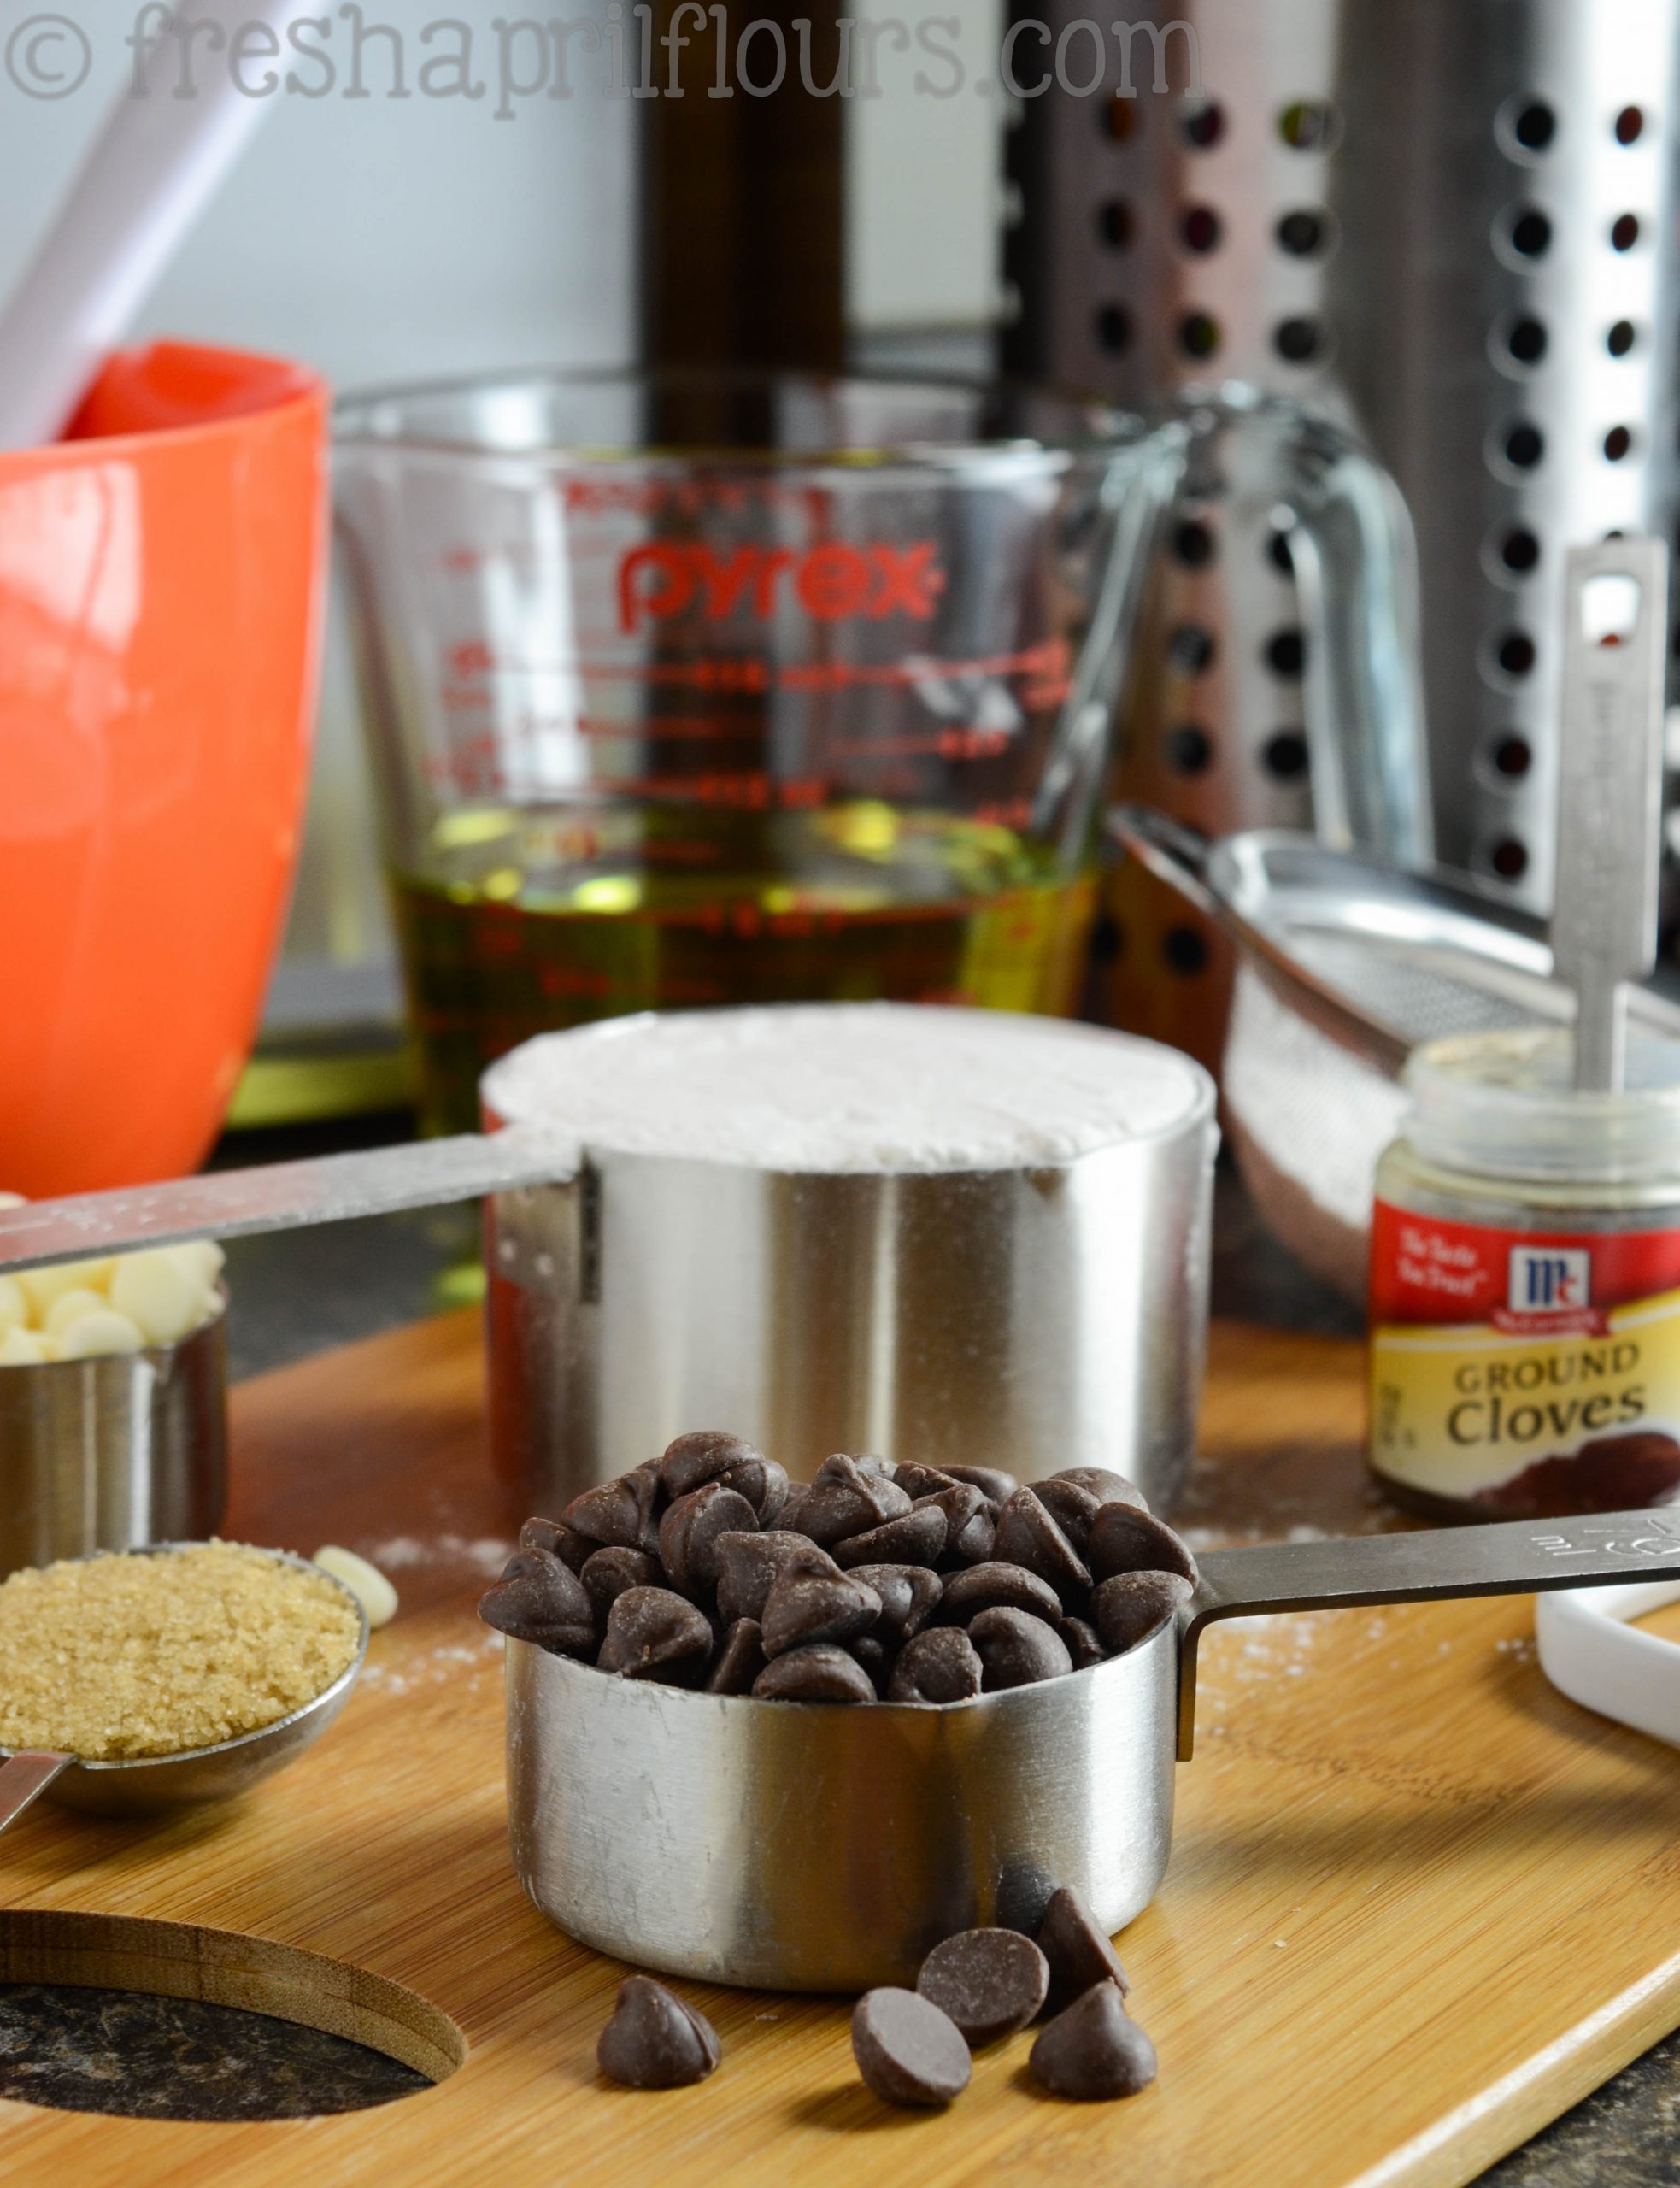
USE A WEIGHT CHART
As a reference, I always use King Arthur Flour’s weight chart for my measurements. Some bakers use different cups to ounces to grams conversions, but I use KAF because I love their products and I use their flour. Feel free to refer to this list for other ingredients I have not listed here.
If you’re ever using an ingredient not listed here or on the KAF chart, check the label on the ingredient and use the manufacturer’s measurement to figure out how much you’ll need.
FLOUR
The proper way to measure flour is the spoon and level method.
You should not use your measuring cup to scoop the flour out of the bag or container that it is in. You’ll be tempted to tap or shake the cup to level it, which will cause your flour to settle into the cup, leaving you with much more flour than your recipe calls for.
Instead, use a large spoon to stir or “fluff” up the flour in its container (this will aerate the flour). Use that same spoon to scoop the flour out of the container and into your measuring cup. Fill it up and then use the back of a knife to level it off with the top of the measuring cup.
For a very long time, I did the tap method. I would have told you my recipes turned out just fine! The first time I measured properly for my dark chocolate cake (which I had made dozens of times before that), I was blown away at how much better it was.
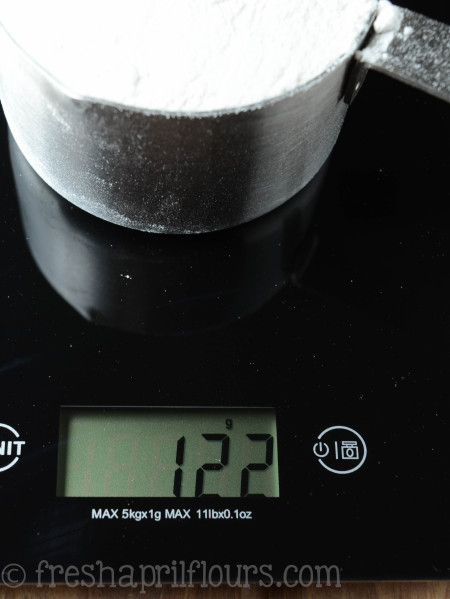
SEE THE DIFFERENCE IN WEIGHING VS SCOOPING
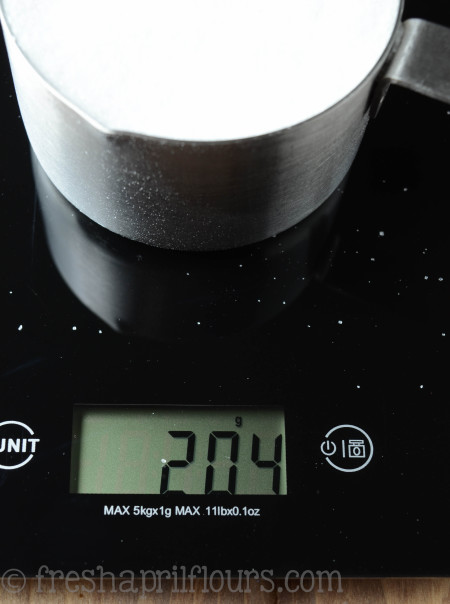
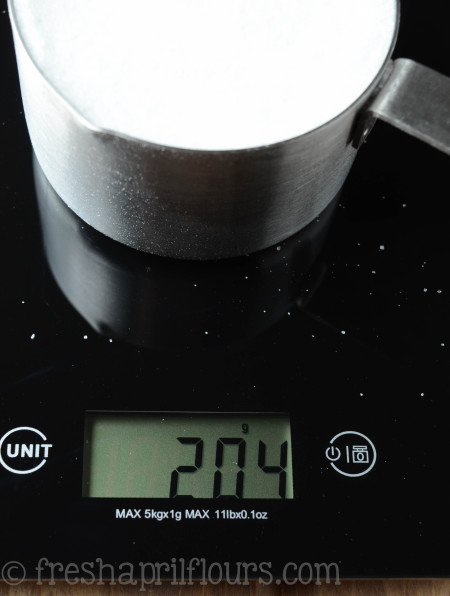
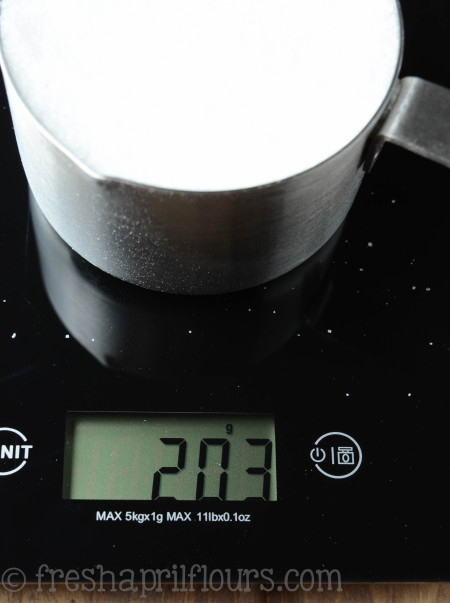
To give you a visual, I measured and took pictures of 3 different examples of each method. First, I did the scoop and tap method. This is what I came up with:

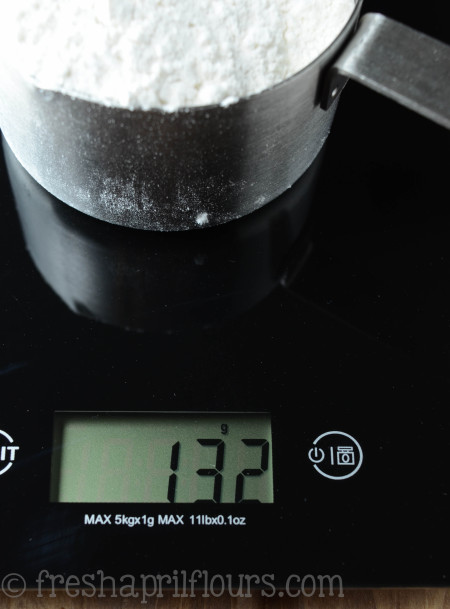
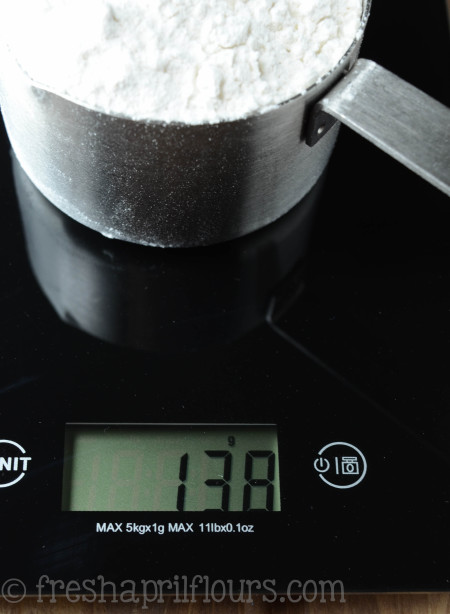
As you can see, I ended up with 3 different measurements. Not very accurate, and not that consistent either.
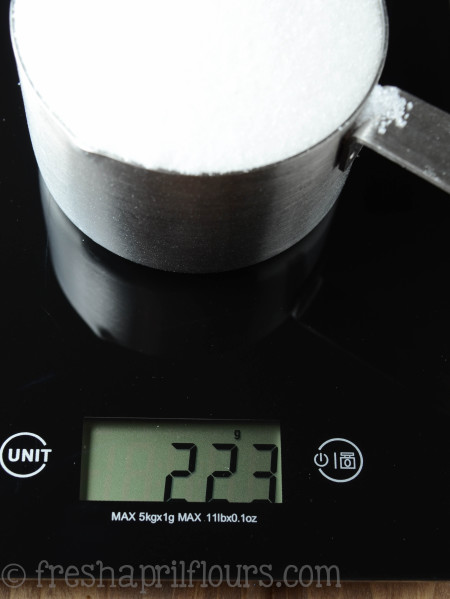
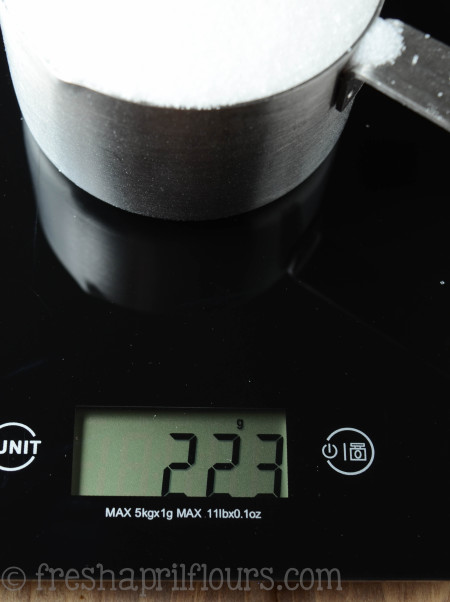
Next, I did the fluff, spoon, and level method. The results were:
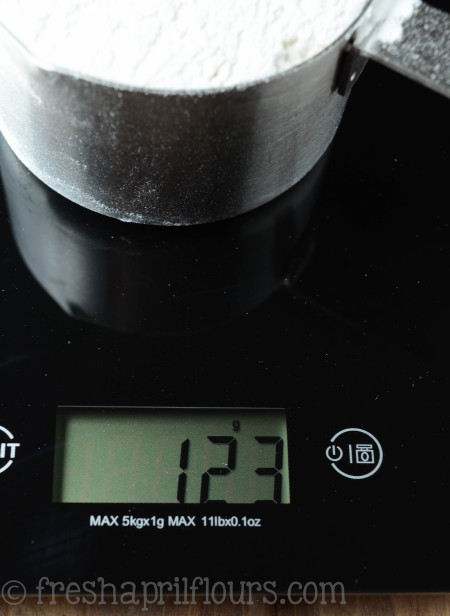
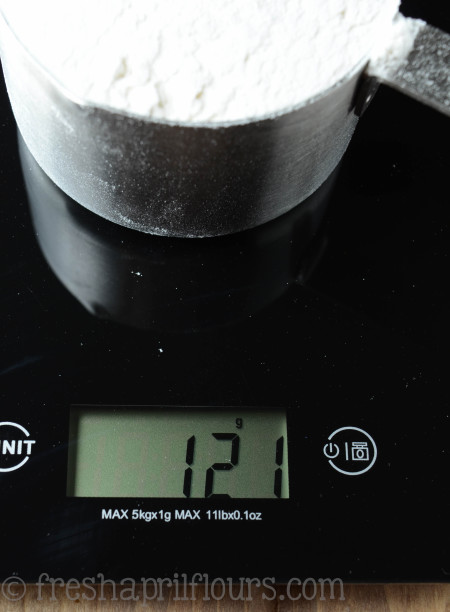
As you can see here, not only did I get much more consistent measurements, I also got 3 quite accurate measurements.
1 cup of all-purpose flour = 4.25oz = 120 grams
Yes, my measurements varied by 2-3 grams, but in the grand scheme of things, that’s not much variation at all.
With the scoop and tap method, I was ending up with almost 20% more flour per scoop than I wanted. By the time you’ve measured 2 or 3 cups of flour that way, you can end up with close to one and a half times the amount of flour your recipe calls for. That’s ridiculous!
GRANULATED (WHITE) SUGAR
Sugar is a bit more forgiving than flour, although it is still imperative you measure it accurately. Use your measuring cup to scoop out of the container, overfilling the cup, and using the back of a knife to level with the top of the measuring cup. Again, tapping or shaking will cause your sugar to settle.
I did the same thing with my sugar that I did with my flour (the scoop and tap method and the scoop and level method). First up, the scoop and tap:
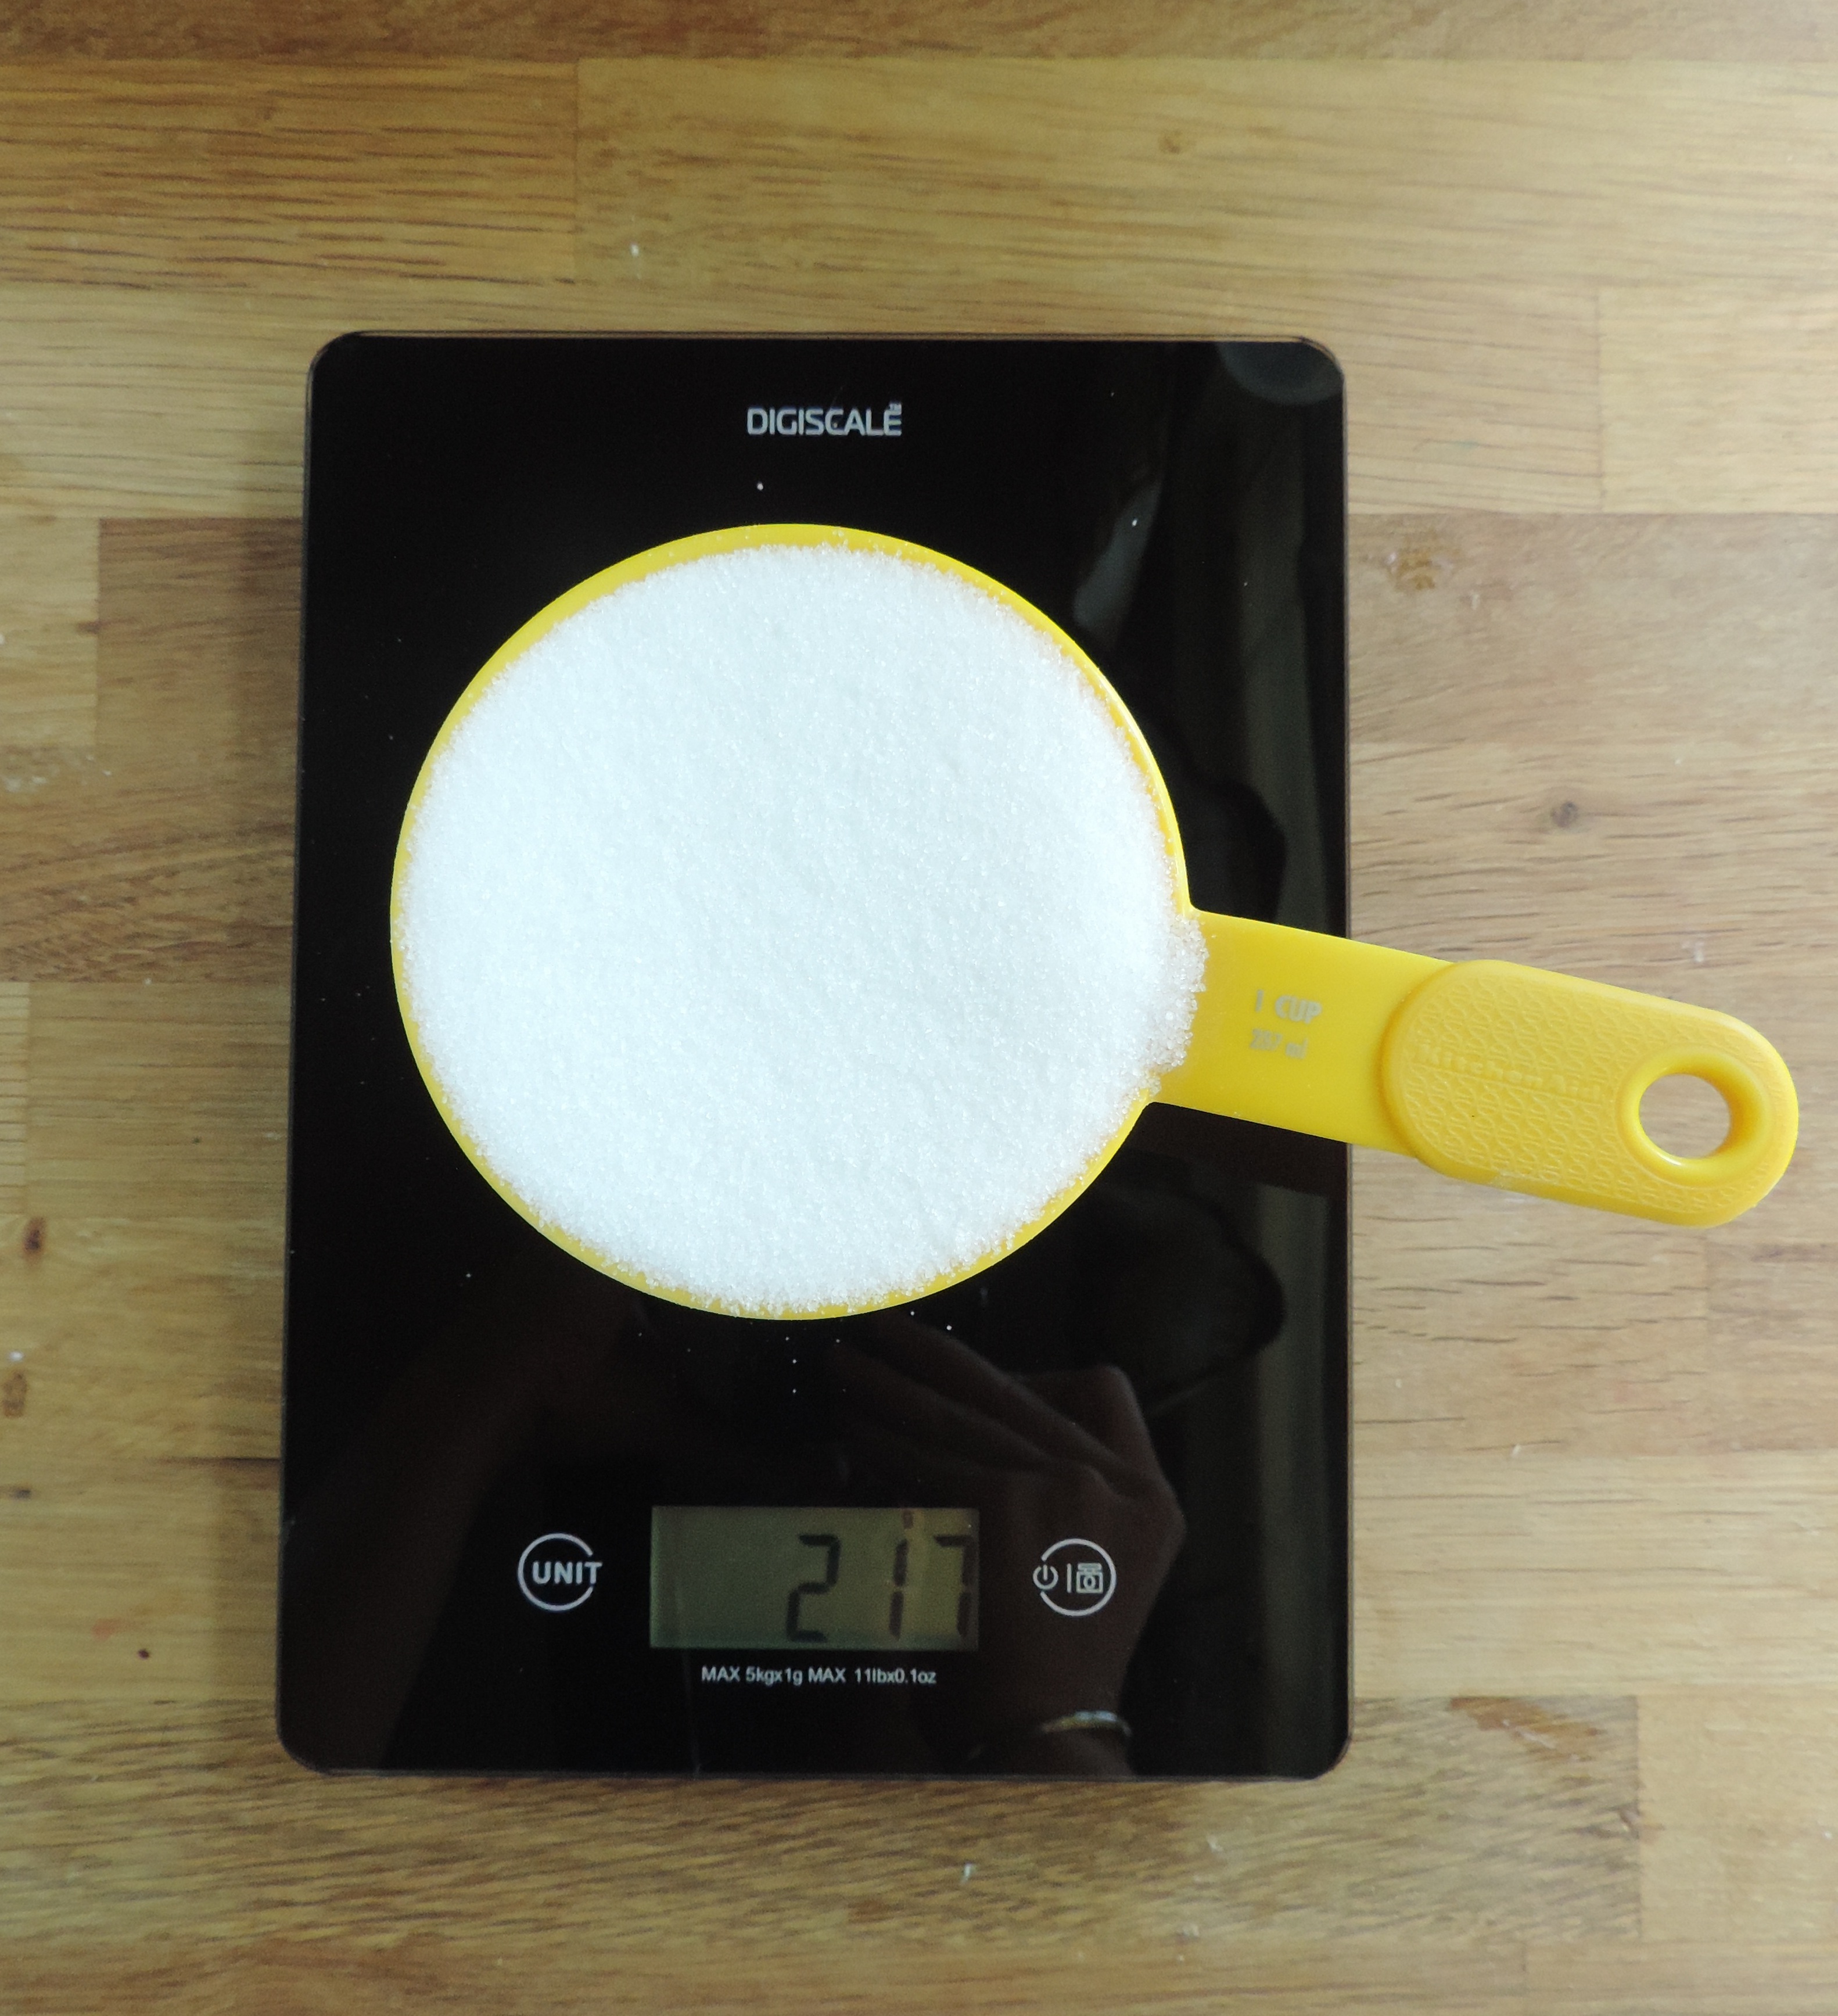
Although my measurements were super consistent (I promise, these are 3 different measurements!), they were not accurate. Consistency doesn’t matter when accuracy adds up per cup.
The scoop and level method gave me these results:
Accuracy (combined with consistency) wins again.
1 cup granulated sugar = 7oz = 200 grams
BROWN SUGAR
Unless your recipe states otherwise, brown sugar should be packed into your measuring cup. Why?
Brown sugar is white sugar with molasses added into it (light brown sugar has less molasses than dark brown sugar). Because it’s such a moist and dense mixture, it creates lots of air pockets when it gets scooped into a measuring cup. If we pack it, we eliminate those air pockets to get a more accurate measurement.
What is molasses?
Molasses is the other half of the result of taking unrefined sugar and stripping it down to its bare bones. The other half? Granulated sugar. Pretty cool, huh?
Woah, the scientist in me just got super carried away. This is why I love baking so much!
Anyway… Back to the brown sugar!
This is one of those ingredients that can really screw you up.
How packed does “lightly packed” mean? What if the recipe just says “packed” with no adjective? This is definitely where a kitchen scale comes in handy.
1 cup packed brown sugar = 7.5oz = 213 grams
If you don’t have a kitchen scale, not to worry. Use a spoon to scoop brown sugar into your measuring cup, using the back of the spoon and medium pressure to press out any air pockets.
Pack brown sugar until it is flush with the top of your measuring cup. When you dump out your measured brown sugar into your bowl, it should hold its shape for a few moments. That’s a quality measurement!
POWDERED SUGAR (ALSO KNOWN AS CONFECTIONERS’ OR 10X SUGAR)
Powdered sugar yields the best frosting when it is sifted. Although powdered sugar is just granulated sugar that has been sifted 10 times (hence the 10x) and combined with cornstarch to prevent caking, it can still create lumps once it has had time to settle in the bag.
Lumpy confectioner’s sugar dumped into creamed fat = lumpy, ugly frosting. I always measure my powdered sugar by weight for frostings, so I measure it and then sift it. Powdered sugar that is just going into a recipe does not need to be sifted, so if you are not sifting it, you will measure it like granulated sugar.
1 cup unsifted powdered sugar = 120 grams
BAKING SODA
First things first, baking soda is different from baking powder. Furthermore, they are not interchangeable.
Baking soda is sodium bicarbonate, which creates the rise or the “fluff” in baked goods once it meets up with heat (via the production of carbon dioxide gas).
If you’ve ever added too much baking soda to a recipe, or sometimes even if you’ve tasted batter before it’s baked, you can detect a sort of metallic taste. That taste will go away (if you’ve added the correct amount, of course) after baking, since the reaction has yet to occur in the batter.
Normally, baking soda is paired with some sort of acidic ingredient like citrus juice, sour cream, natural cocoa, vinegar, or buttermilk. More on measuring baking soda accurately below…
BAKING POWDER
Although I mentioned that baking powder and baking soda are not interchangeable, baking powder is actually a mixture of baking soda, an acid in powder form, and cornstarch. Most baking powders are labeled as “double-acting,” meaning they react as soon as they’re incorporated into a batter, and then again when introduced to heat.
Baking powder is typically paired with less acidic ingredients like regular milk and Dutch-processed cocoa.
To measure baking soda and baking powder, use your measuring spoon to stir it up or simply shake the container. Lightly scoop out of the container and use the edge provided (or the back of a knife) to level off with the top of the scoop.
ANOTHER NOTE ON MEASURING LEAVENING AGENTS
Baking powder and baking soda only last about 6 months. I always write the date I opened my containers and discard them after 6 months, even if I haven’t used them up. They’re incredibly cheap, and old soda or powder will really take a toll on the fluffiness of your baked goods. Suck up the few cents you’re losing and move on to new ones!
COCOA POWDER
If you’re using cocoa powder for a frosting, you really should sift it. It is so incredibly lumpy in that container, it’s not even worth it to end up with a ton of pockets of concentrated cocoa.
Before I started sifting my cocoa, I would end up with so many lumps in my chocolate cake. That doesn’t taste so great. Sift your cocoa and measure like you would flour (spoon and level).
SOLID FATS
I’ll be honest, I don’t weigh my butter or shortening. To me, it seems a little excessive, especially when butter comes packaged by weight in sticks.
For butter, I simply use the graduations on the wrapper.
For shortening, I use an offset spatula to scrape shortening into my measuring cup, level it off, and then use a rubber spatula to scrape out the excess.
1 stick of butter = ½ cup = 8 Tablespoons = 113 grams
LIQUID INGREDIENTS
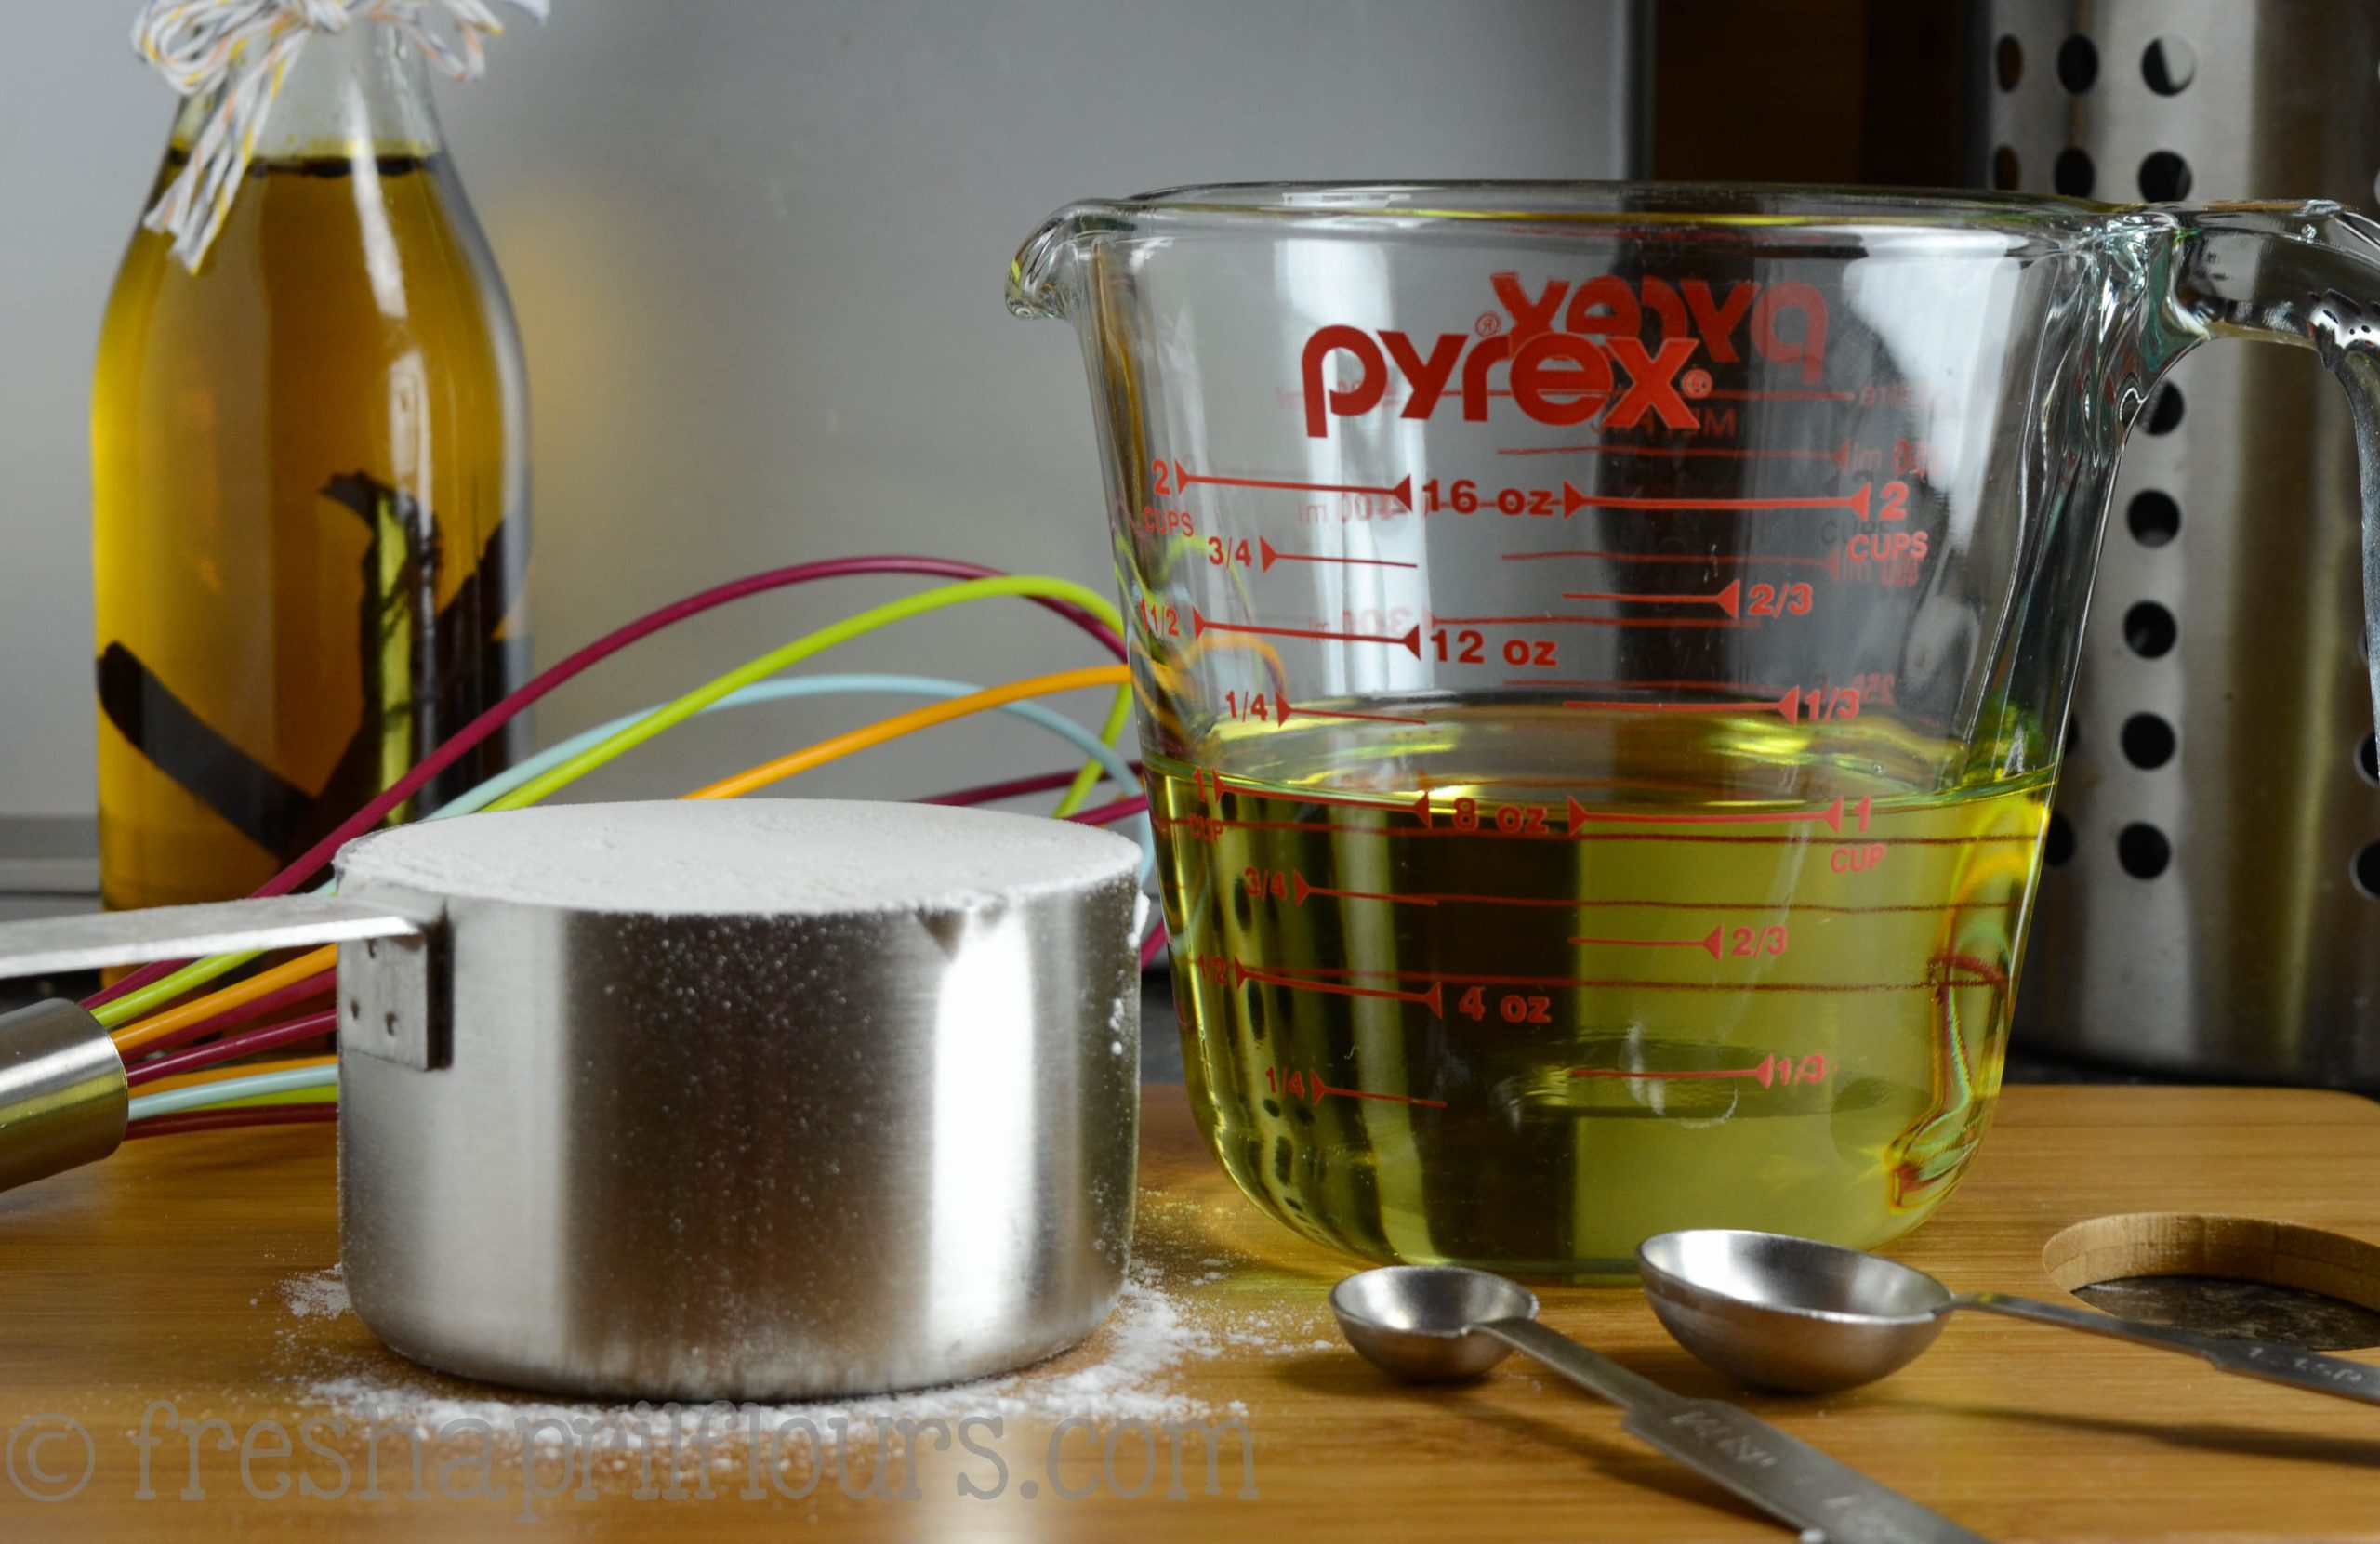
Water and oil must be measured at eye level. My favorite liquid measuring cup is from Pyrex. Pour the liquid into the cup, bend over to eye level, and make sure liquid is at exactly the right graduation.
SEMI-LIQUID INGREDIENTS/LIQUID SWEETENERS
This would include things like yogurt, applesauce, and peanut butter and agave, honey, and maple syrup.
Measure these ingredients directly into a dry measuring cup, using a knife to level off with the top of the cup.
For peanut butter, I often forego the measuring cup. I place my bowl on my digital kitchen scale, tare it, and measure directly into the bowl.
If you’re going to use a measuring cup for peanut butter, spray the inside of it with a little non-stick spray or wipe it with a paper towel dabbed with oil (I also do this with the liquid sweeteners). This will prevent the peanut butter from completely sticking to the sides of the measuring cup.
For peanut butter… 1 Tablespoon = 16 grams / 1 cup = 237 grams
ADD-INS
For things like chocolate chips, chopped nuts, chopped candy, etc., I have gone almost exclusively by weight. Since packaging for things like chips give such small serving sizes, I rely on the link I shared above this step.
I would also like to add one more very important thing regarding measuring your ingredients.
Please, please, PLEASE do not measure ingredients directly over your bowl (“but Lynn, you just told us you measure your peanut butter directly into your bowl!” Peanut butter is a little easier to control than the ingredients I’m going to warn you about!).
Picture this… You’ve got this beautiful batter going, you have your flour and sugar measured perfectly, your baking soda and baking powder are nicely fluffed, and you measure your salt over the bowl because it has a spout, so, why not?
Oh, but the spout falls off. And now you have a cup of salt in all that wonderful batter. And there is absolutely nothing you can do about it.
Also, eggs should never be cracked directly into your bowl. You run the risk of not only getting shell in your batter, but also, what if one of those eggs happens to be rotten and you just didn’t know it? You now have contaminated batter. And that’s just no good for anyone.
Crack them into the Pyrex you have dirtied or are going to dirty soon (it’s all going to the same place). So please, take the extra time to clean up the mess on your countertop and don’t gamble with your batter.
Now that my mini public service announcement is out of the way, for more conversions, subscribe to my email list and you’ll receive a copy of my baking and measuring conversions cheat sheet instantly!
This post made me laugh, because I don’t do any of these things. I use my kitchen scale for cooking in terms of portion control, but I never weigh out ingredients. I use measurements as a “guideline” — I bake by feel and ratio, and if I post a recipe online, I have to go back and measure how much I wound up using, since I don’t even use measuring cups. I never sift anything – I don’t even own a sifter or a mesh sieve. And since I bake by eyeballed ratio, I always pour from my canister directly into the bowl – if I add too much of one thing, I can go back and add more of everything else. I definitely subscribe to the old-recipes-from-grandma style of baking: a pinch of this, about a handful of that, and if it doesn’t feel quite right, add a little more flour!
Hahaha, oh my gosh, Julie, your entire comment made me laugh!! I admit, on occasion, I will eyeball things. But only if it’s for me and I’m not planning to share the recipe. And I have definitely adapted the “if something doesn’t feel right, something is wrong” sense… But pouring from the canister? Oh goodness… That makes the neurotic Lynn twitch.
66 years old, baked a ton (that went on my hips) and a few more tons on others hips—and I never read such a concise and helpful set of baking instructions! Guilty as charged! And now, after all these years, I am on Social Security, so it comes down to not being able to afford mistakes!! Love, love!
Hahaha, thanks so much, Ruth! I really appreciate that!
Good! And you’re welcome! We all need humor and warmth from unexpected corners!
AHHHHH I’m writing a report on cooking/baking and this helped me out soooo much thank you x100,000,000,0000
So glad it helped, Alyssa!
This is a wonderful guide, but a quibble: isn’t a quart 32 oz?
3 years, thousands of reads, and no one has ever caught that. Haha! Thanks, Erin! It’s fixed now 🙂
An I use less flour so the brownies are fudgy?
Hi, Sharon– typically, yes. You will want to use a recipe made to produce fudgy brownies, though.