
Tiramisu Brownies
As an Amazon Associate, I earn from qualifying purchases. Read the full disclosure here.
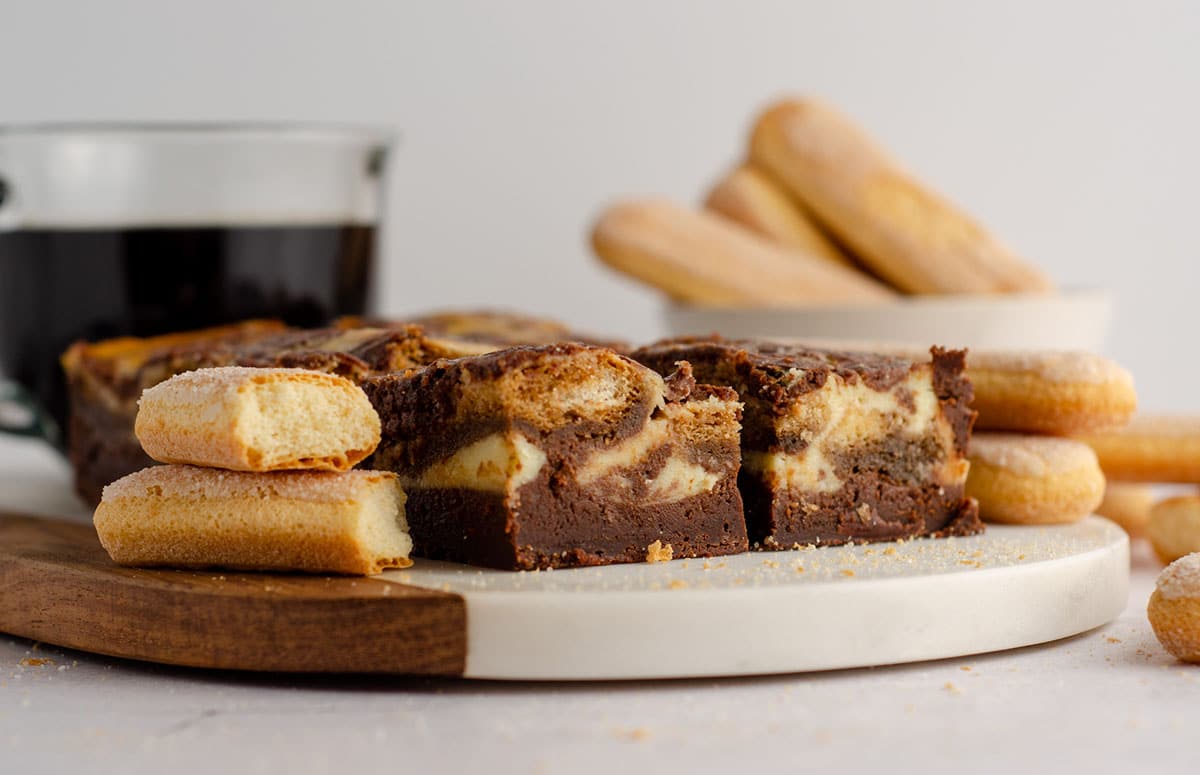
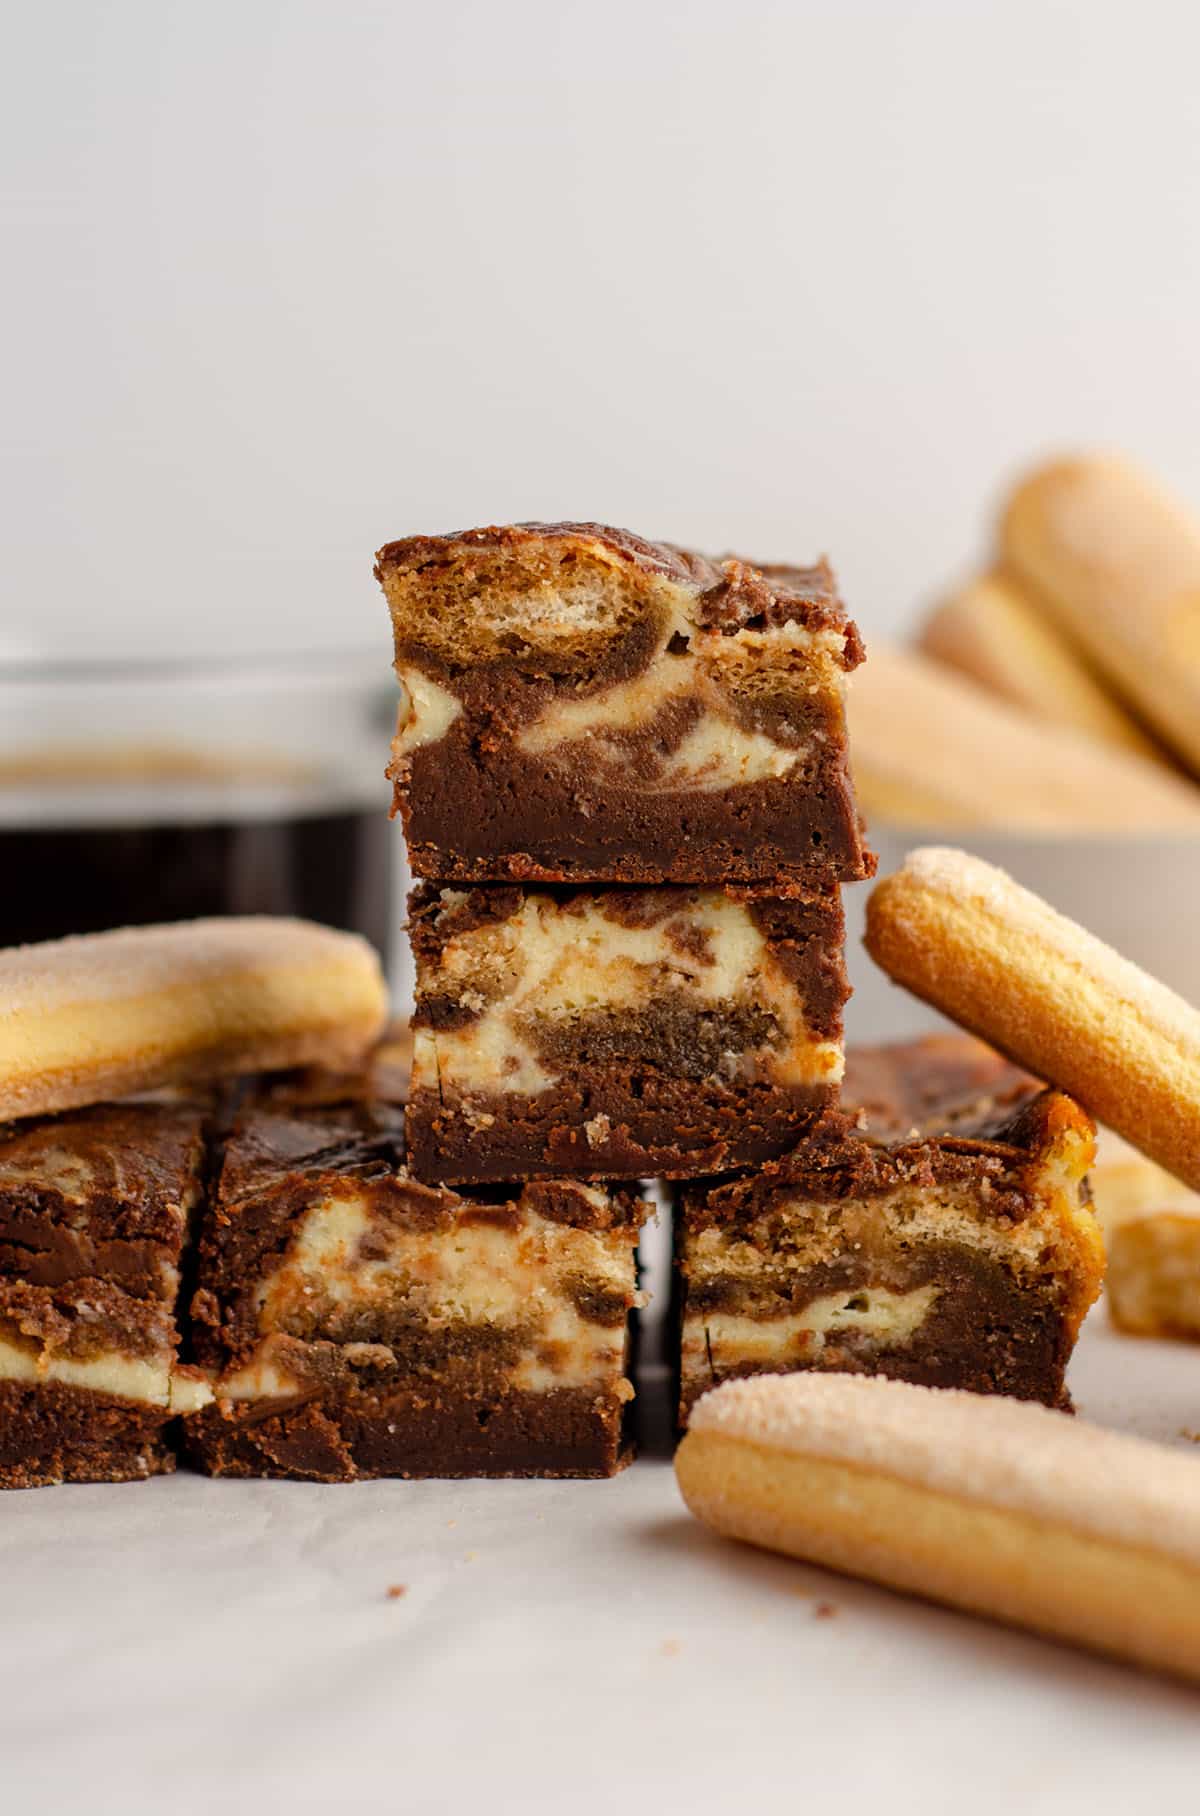
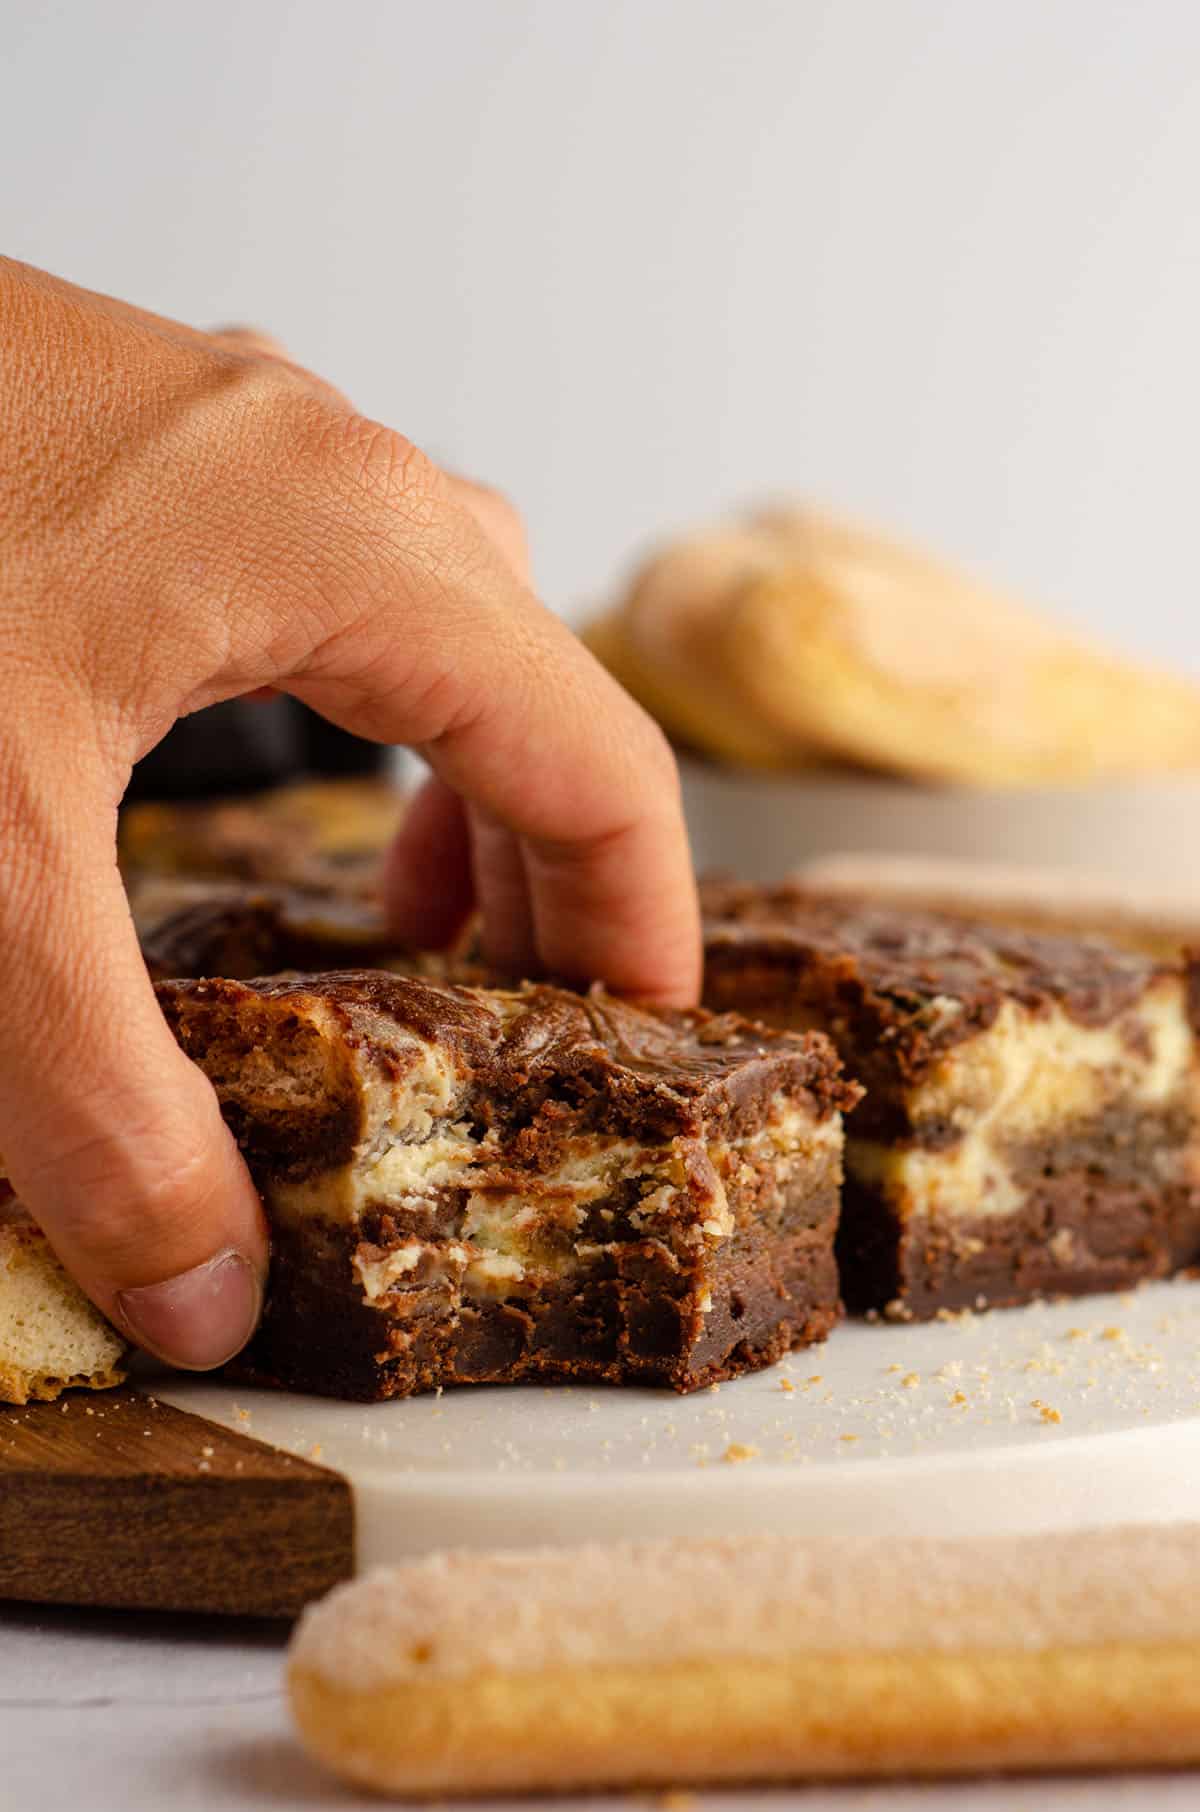
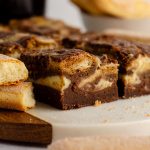
These tiramisu brownies are made with a scratch brownie base, a middle layer of coffee-soaked Ladyfingers, and a top layer of sweetened mascarpone cheese.
It’s that time again, my friends, where I share with you another decadent, chocolatey, gooey, and completely scratch brownie recipe with you, because it’s already mid-July and we’re halfway through 2020’s Brownie of The Month series.
Yet again, 2020 is going at the speed of light yet also slow as molasses because WHAT EVEN IS THIS YEAR and when you measure your months in brownies, things tend to get weird.
Today’s recipe is brought to you by my Italian heritage, because we’re working with a brownie that’s modeled after the classic Italian delicacy tiramisu.
I’ll be honest– tiramisu is not something I will typically go for if it’s on a dessert menu, but I do, however, enjoy everything it’s about.
From the coffee-soaked layers of sponge cake, to the sweetened mascarpone cheese, tiramisu is a heavily coffee flavored dessert, so you know I am ALL about that business (recall I love coffee a whole heck of a lot).
When I set out to make these tiramisu brownies, I didn’t want to lose the backbone of the brownies. I wanted them to have the essence of tiramisu without losing the brownie as the hero.
While I considered using my coffee brownies as a starting point, I decided the best way to get the strongest coffee flavor was to create a layer I could soak in strong coffee.
While traditional tiramisu is made with sponge cake, it is often made with Ladyfingers. But until I actually had a box of Ladyfingers open in my kitchen, I didn’t actually know what they were.
What are Tiramisu Brownies?
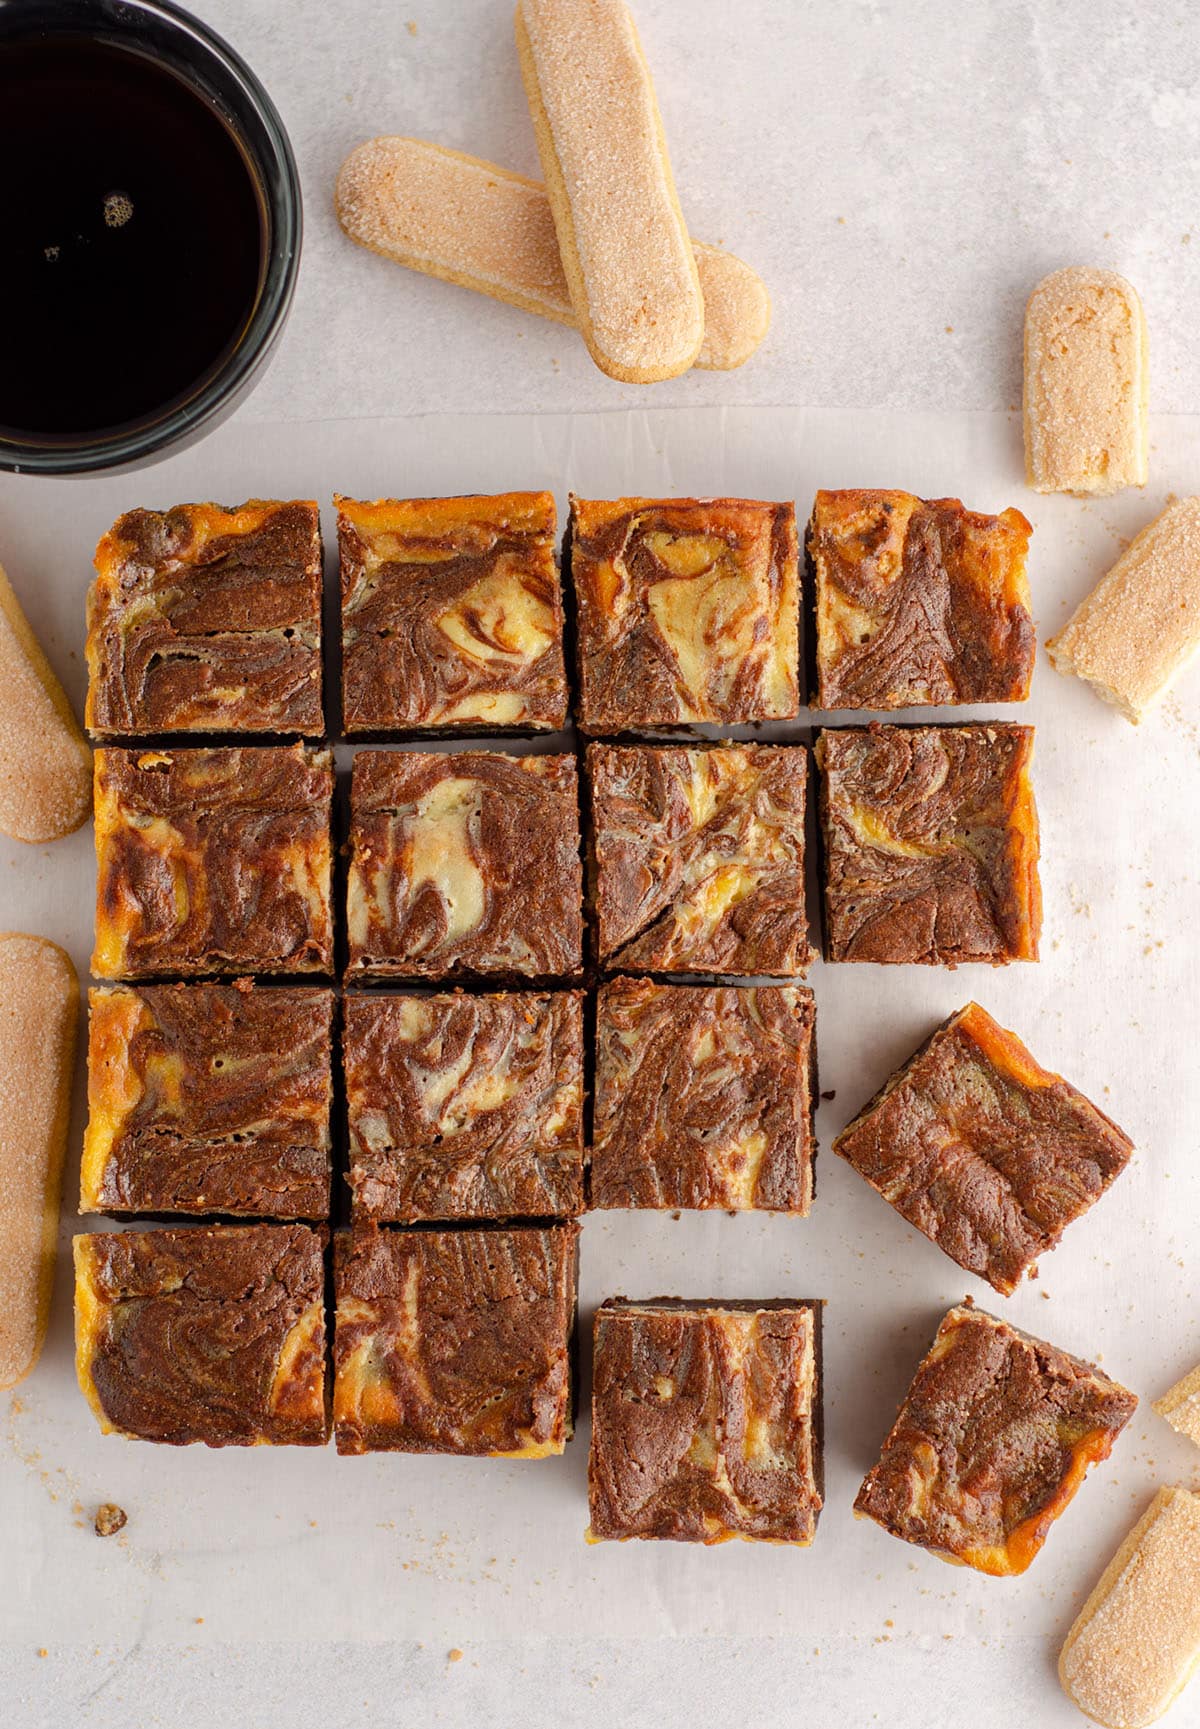
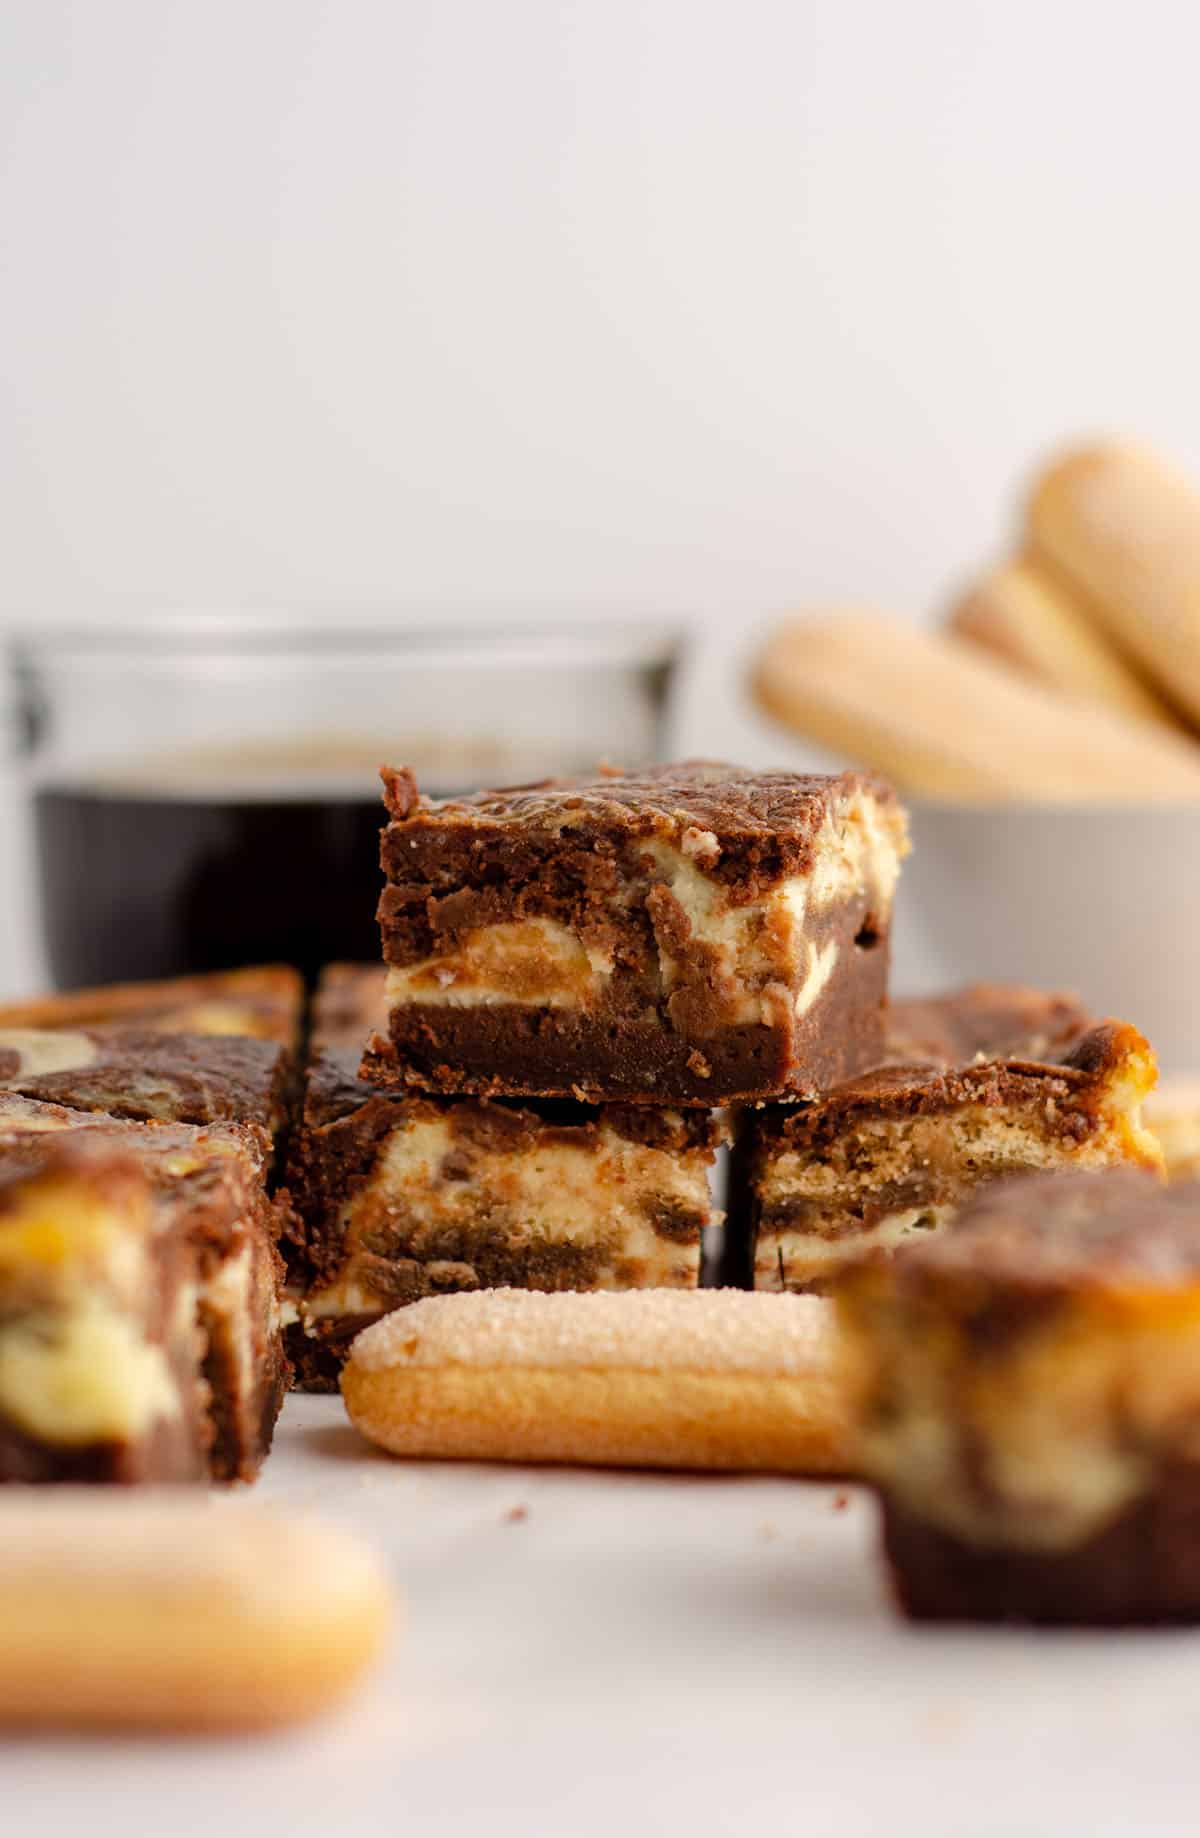
Tiramisu brownies take all the things you love about traditional tiramisu (the coffee, the lady fingers, the mascarpone cheese) and layer them into my favorite brownie base. Think of them as a chocolate-forward version of tiramisu with a thick bite, lots of texture, and the hint of coffee in all the right places.
WHAT ARE LADYFINGERS?
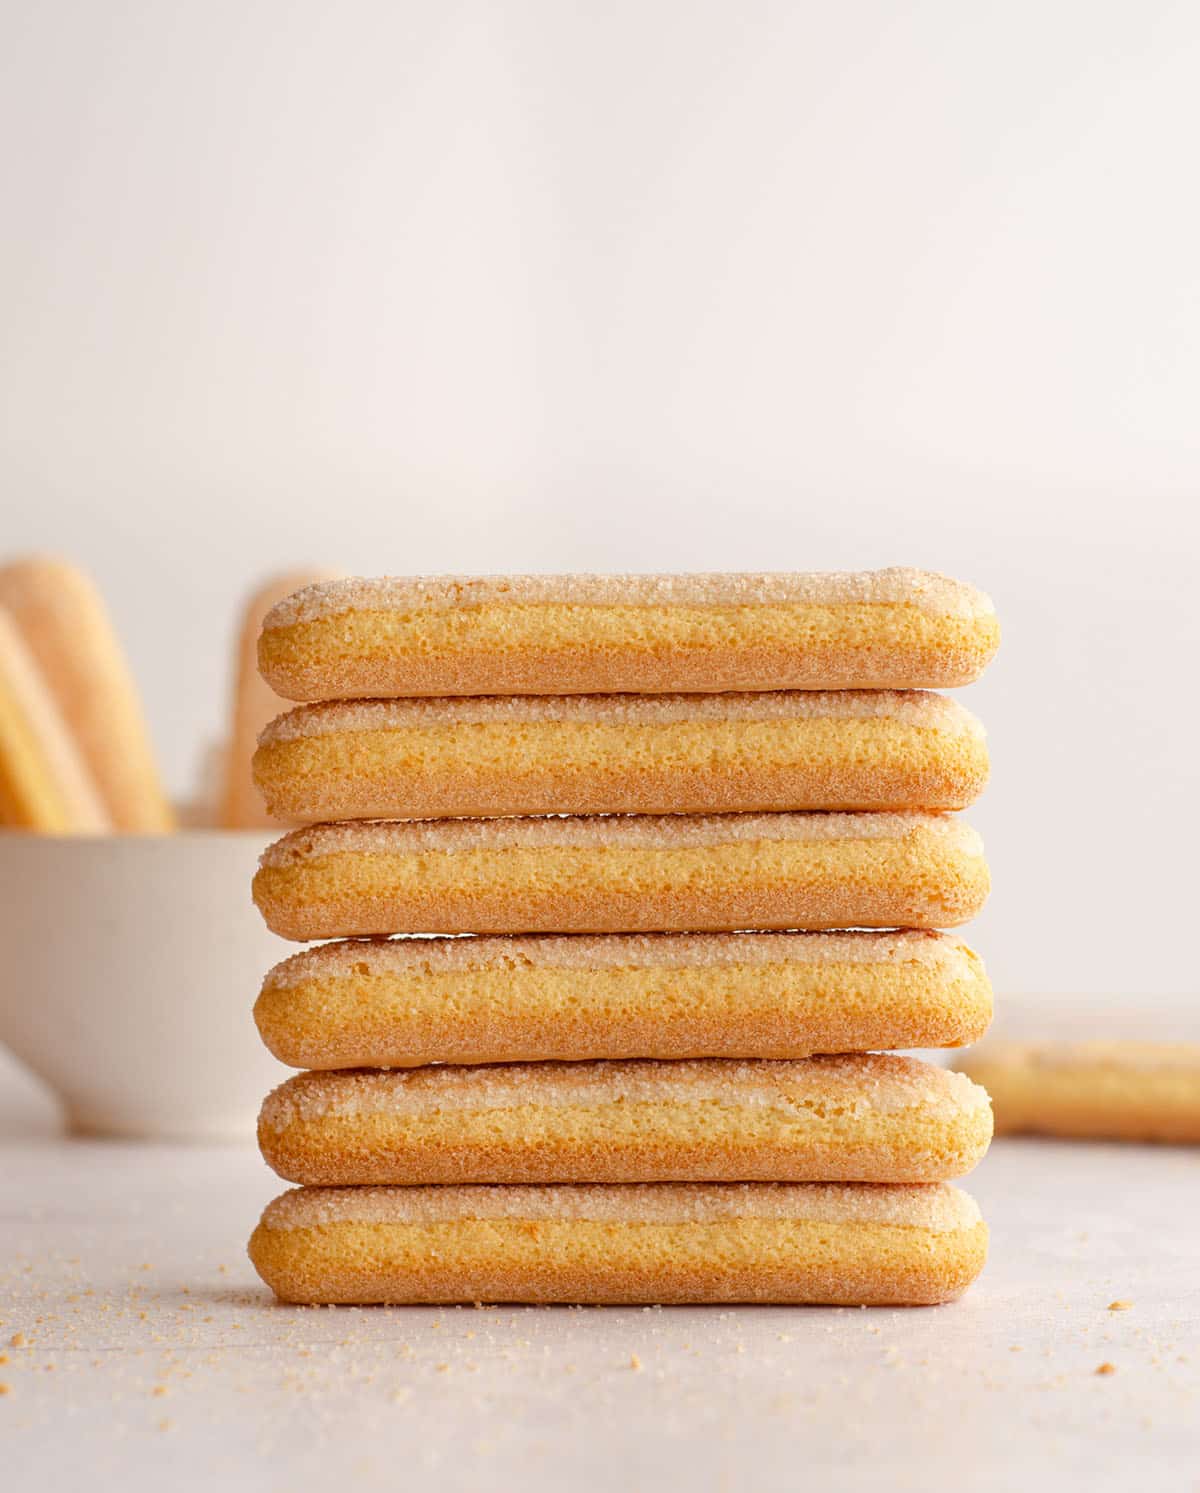
Before I opened the box, I thought that Ladyfingers were a soft, cake-like texture. It turns out they are completely the opposite of that, and they’re actually a hard, crunchy, and very light cookie.
Their ability to soak up liquid is impressive, and they turn to the cake-like texture I thought they already were once they’ve done said soaking.
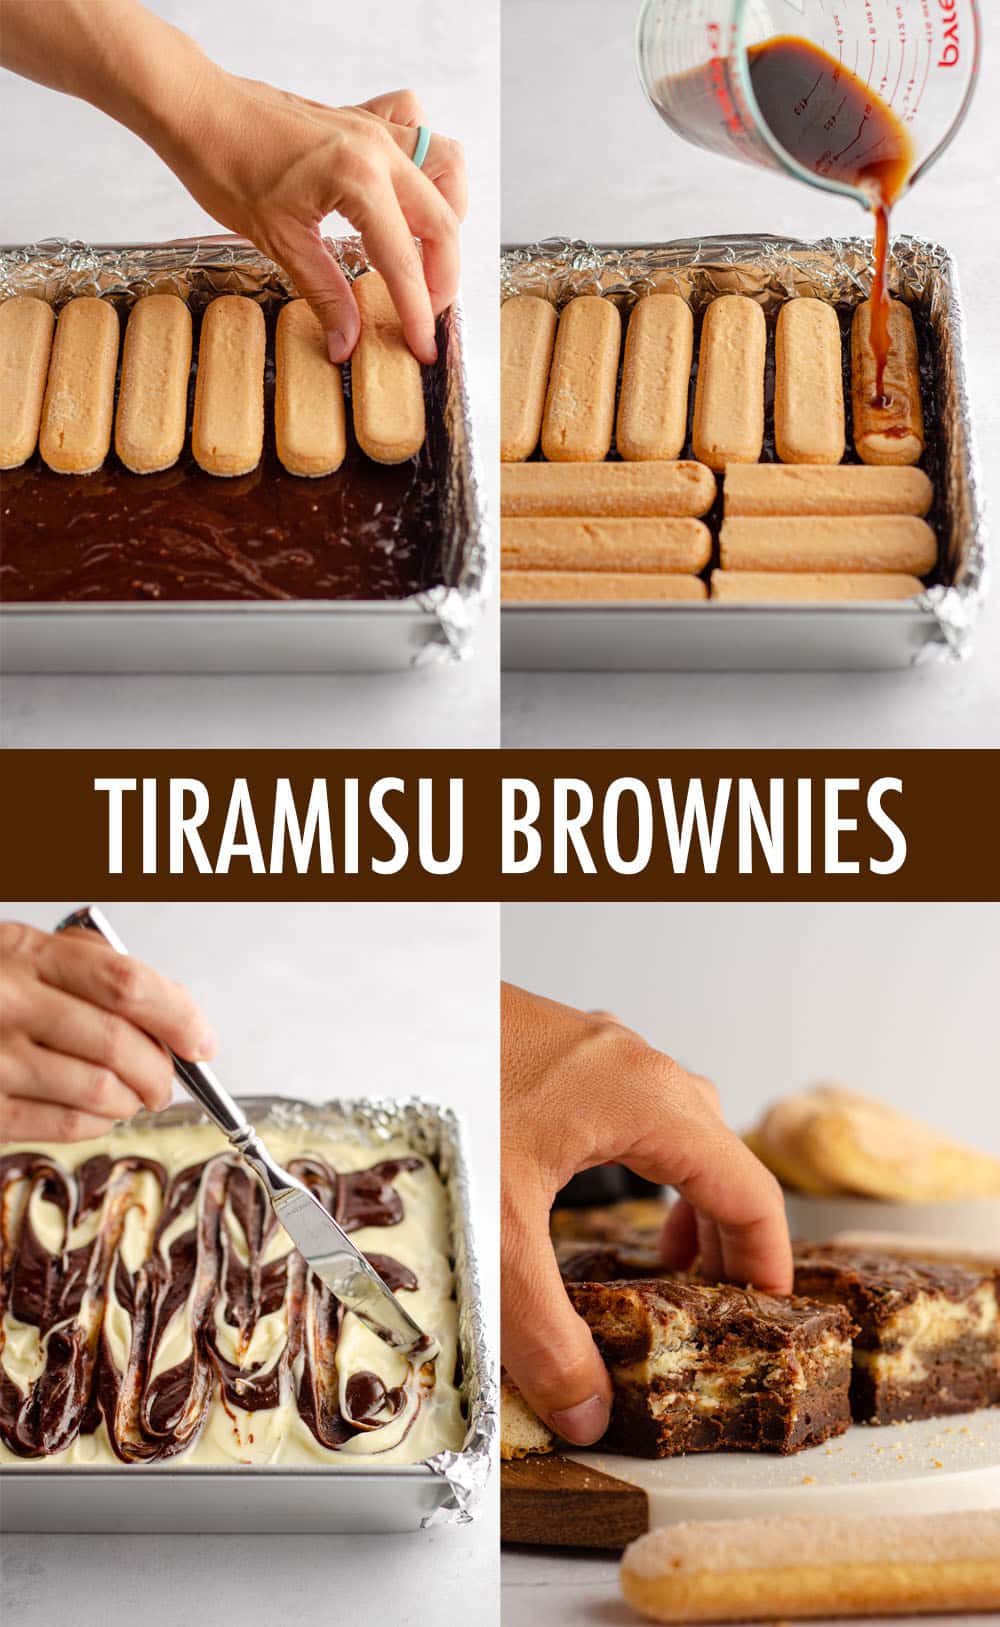
I poured all but ⅓ cup of brownie batter (more on what I did with it in a bit) into my prepared pan, then layered Ladyfingers on top of that, pressing them in ever-so-slightly.
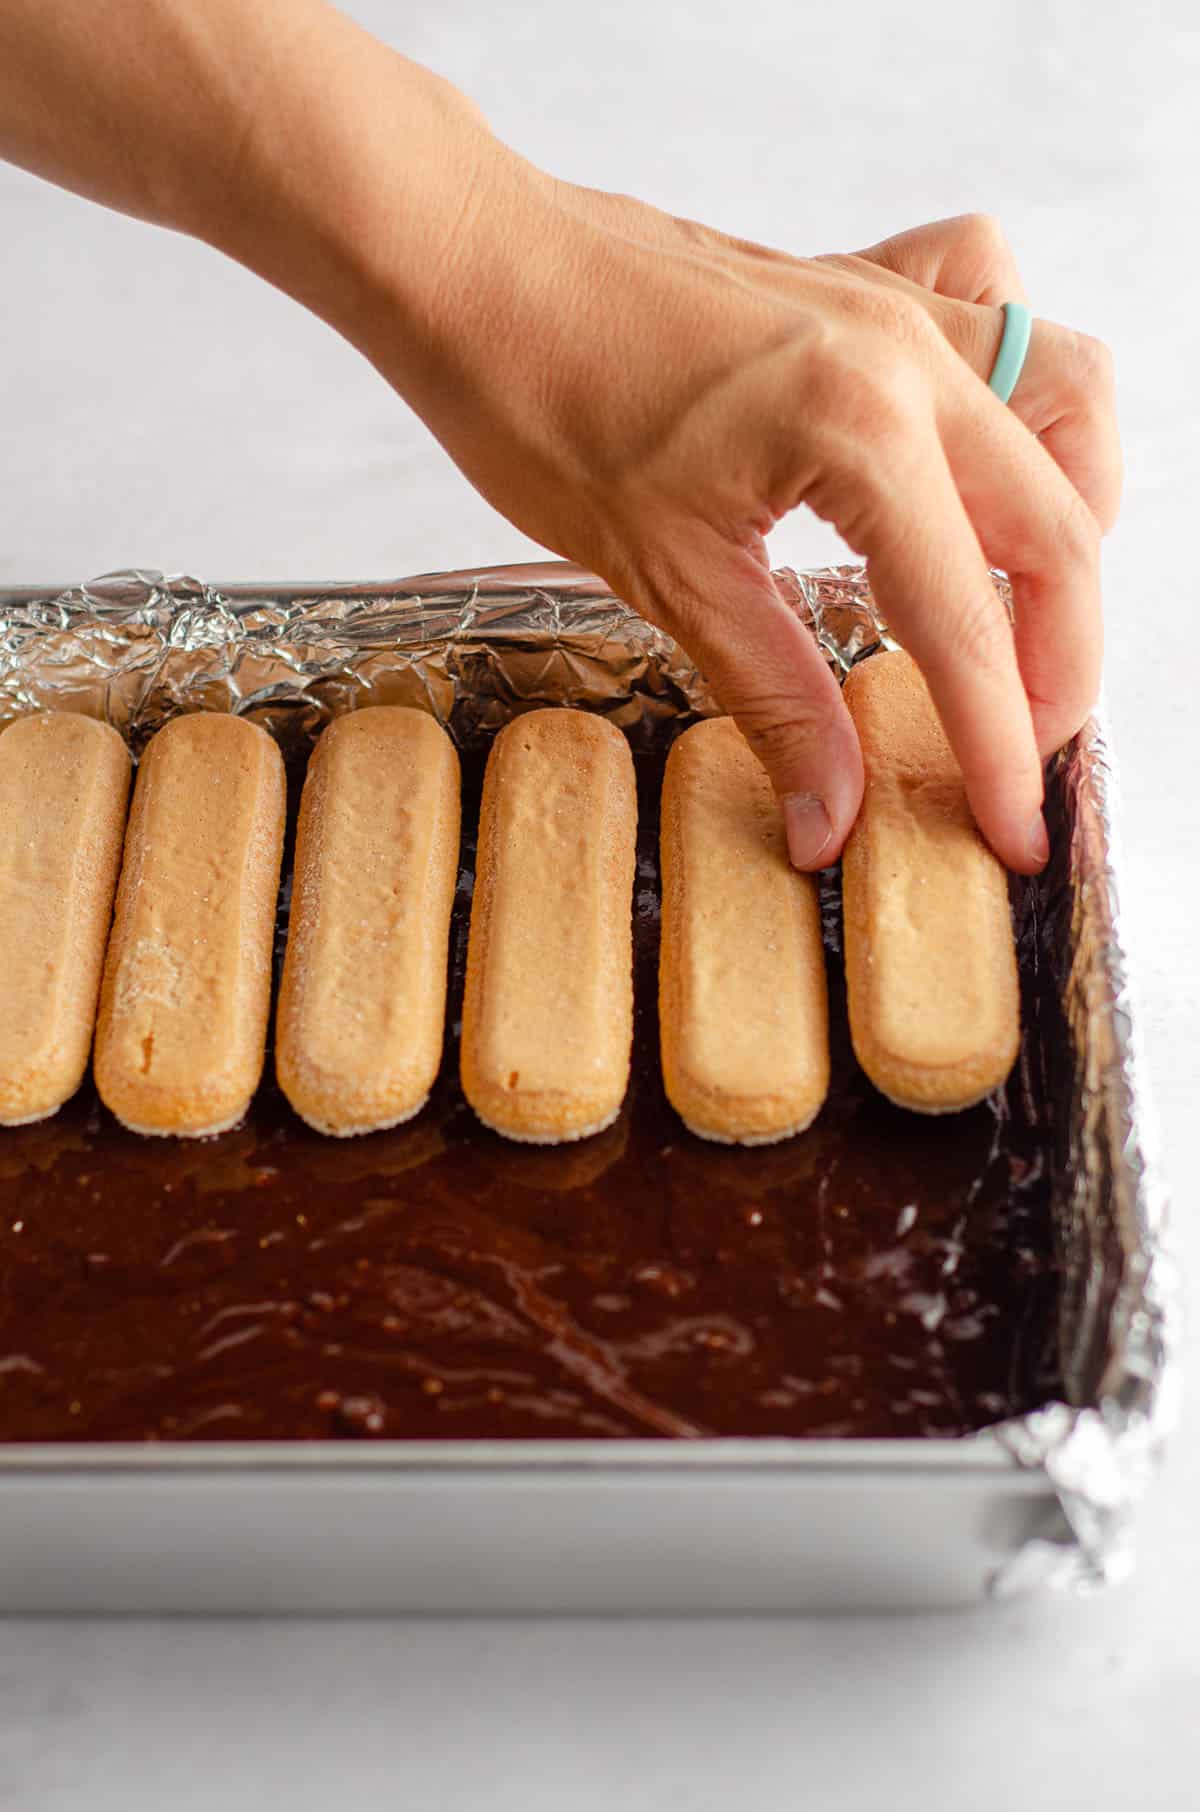
Also, side note, I used one whole sleeve of Ladyfingers (12 cookies). You can see I had to trim off a little bit of three cookies to fit them all, but the arrangement worked out nicely!

I poured ½ cup of strong coffee on top of the Ladyfingers. They soaked it all right up, which prevented any pools of coffee at the bottom of the brownie pan and also put some intense coffee flavor right up in the middle of these tiramisu brownies.
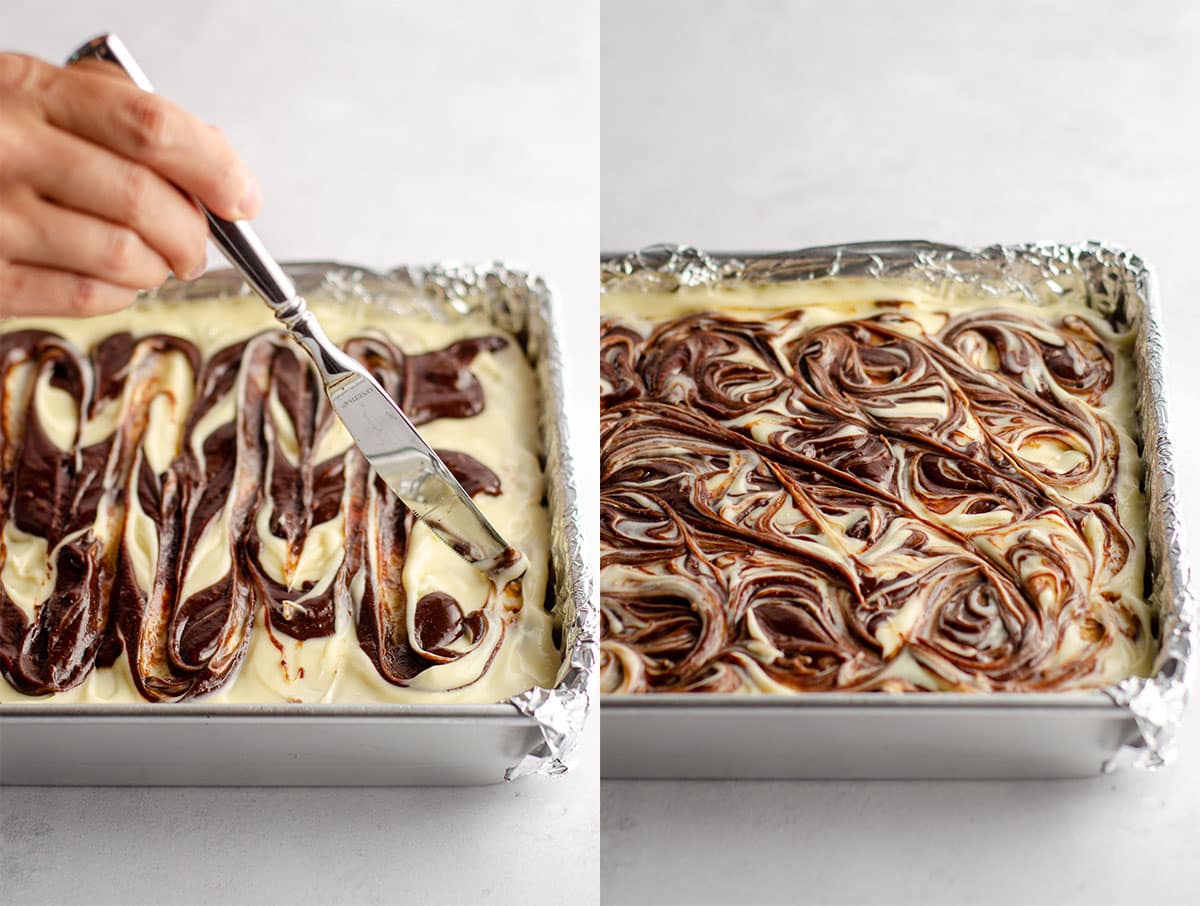
On top of the Ladyfingers, I swirled a layer of sweetened mascarpone cheese with the reserved brownie batter, and the melding of the two batters made the perfect topping for my brownies.
WHAT IS MASCARPONE CHEESE?
At this point, you may be wondering… What in the heck is mascarpone cheese? Believe me, I didn’t know what it was until I ventured into a puppy chow recipe in my cookbook, but once I discovered it, I wanted to make all kinds of desserts with it.
I tend to describe it as a mix between cream cheese and whipped cream. It’s smooth and spreadable like cream cheese, but far less tangy, and has a flavor and texture much like unsweetened whipped cream.
It makes for a delectable and more mild replacement for cream cheese without sacrificing the texture and creaminess you’d get with a cream cheese dessert.
While we did keep these brownies in the fridge because of the mascarpone cheese factor, I let each square that I ate sit out for about 15 minutes to come to room temperature before enjoying, and let me tell you what…
…these may be my new favorite brownies.
There’s no doubt starting with my basic homemade fudgy brownie recipe as a base works in my brownie-loving favor, but the cakey-ness of the Ladyfingers add a whole new dimension to the brownies that are truly a texture lover’s dream.
See my homemade fudgy brownies, which is the trusted base recipe for all of my brownies.
I worried that the Ladyfingers would kind of disappear into the brownie batter, but they absolutely did not. It appears using just ½ cup of coffee lent the perfect amount of coffee flavor without disintegrating the integrity of what became the spongy Ladyfinger layer.
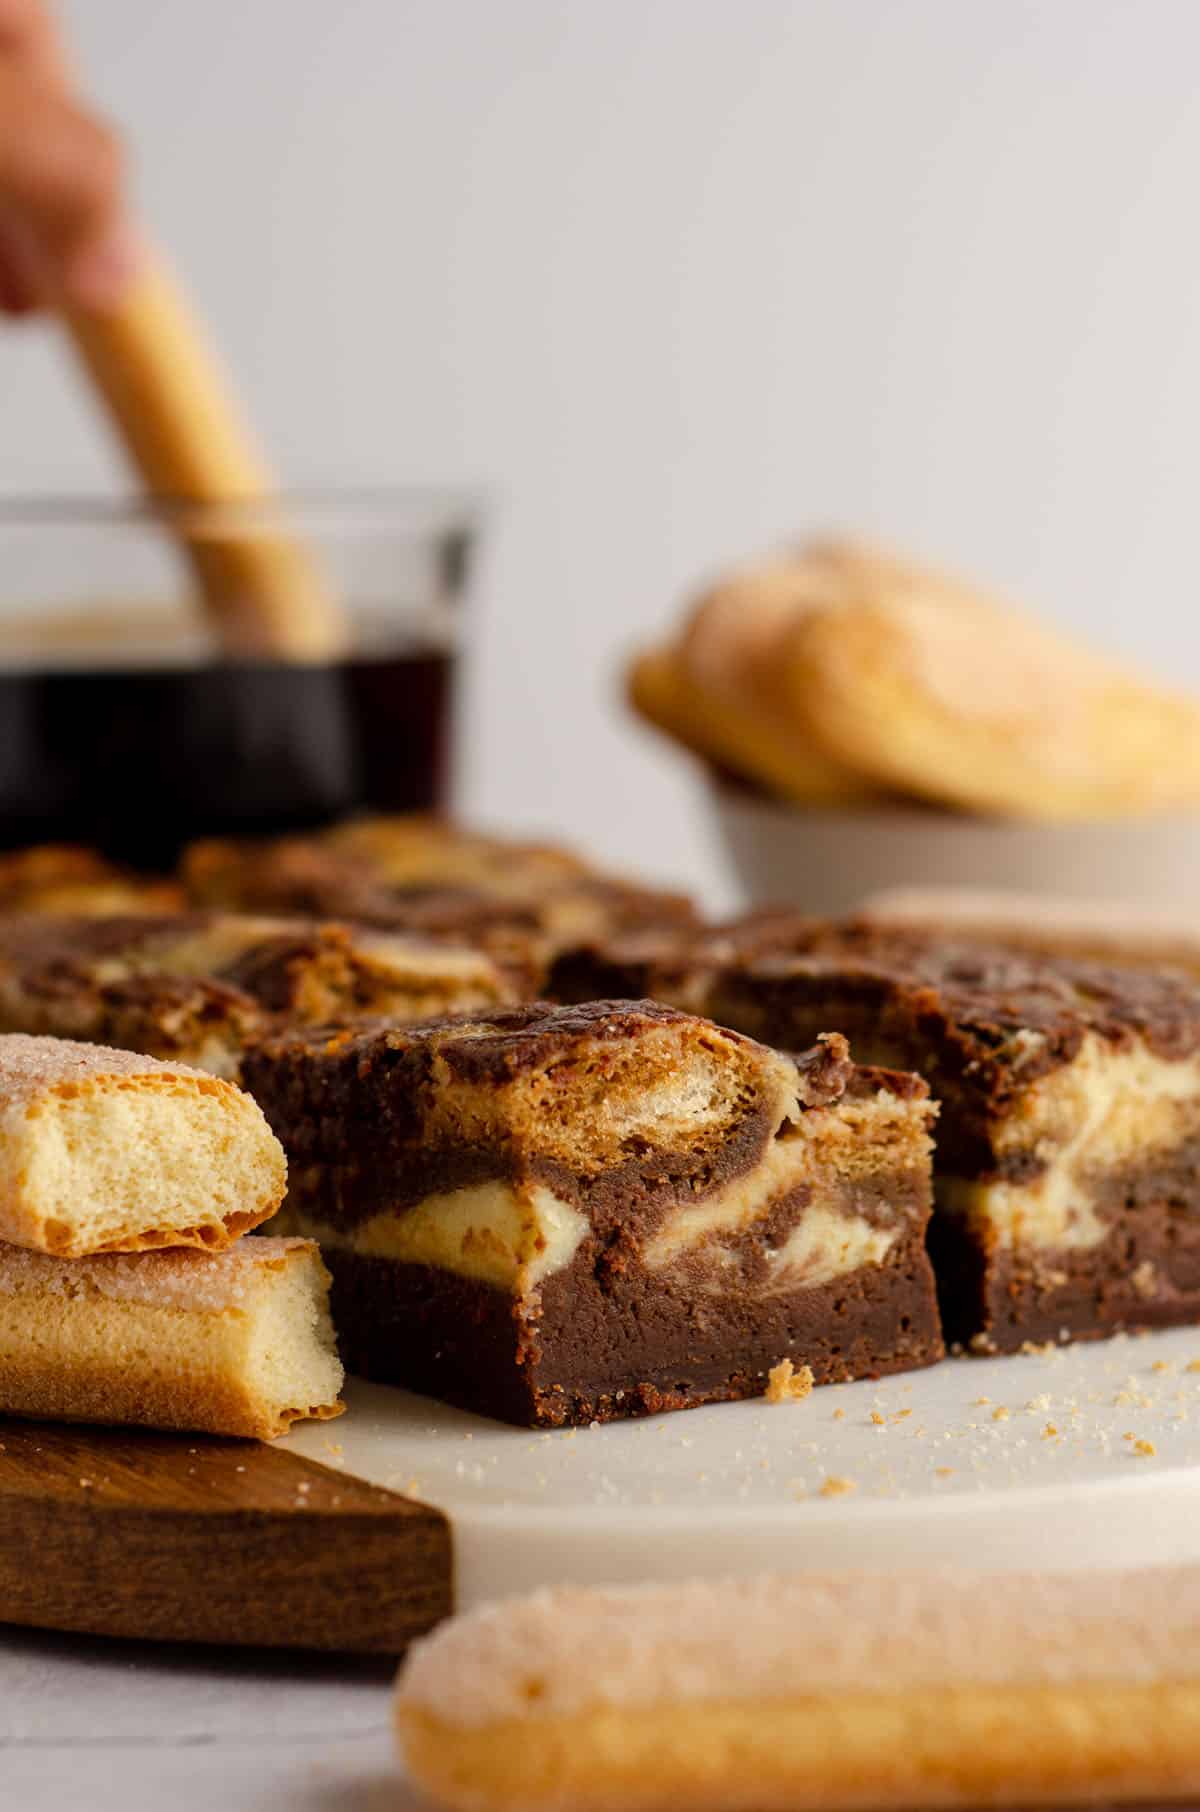
The swirled mascarpone cheese + brownie batter topping brings creaminess and a third dimension to cultivate the perfect brownie to celebrate all the things we love about tiramisu without actually being tiramisu.
It’s almost like a modern tiramisu recipe, like a variation on a theme or a remix. No layering of soaked cookies, no whipping of any creams (not that I have anything against either of these things!)… Just my fav brownies with some extra special layers.
I know it’s hot, but these tiramisu brownies are worth turning on the oven. I promise.
Tiramisu Brownie Ingredients
• unsalted butter
• quality semi-sweet chocolate
• light brown and granulated sugar
• eggs
• vanilla extract
• all-purpose flour
• salt
• mascarpone cheese
• Ladyfingers
• coffee or espresso
How to Make Tiramisu Brownies
There are three layers to these brownies: the brownie batter, the mascarpone layer, and the coffee-soaked Ladyfingers layer. We’ll work in stages to complete the whole recipe.
MAKE THE BROWNIE BATTER
STEP #1: in a medium saucepan over medium heat, melt the butter and chopped chocolate, stirring frequently until completely smooth.
STEP #2: allow the mixture to cool while you move onto the mascarpone layer.
MAKE THE MASCARPONE LAYER
STEP #3: next, beat the softened mascarpone cheese, sugar, egg, and salt until completely smooth. Set this aside.
FINISH THE BROWNIE LAYER
STEP #4: whisk both of the sugars into cooled chocolate mixture until combined. Add the eggs one at a time, whisking after each addition until smooth, then whisk in the vanilla. Add the flour and salt and stir gently until completely combined.
STEP #5: reserve ⅓ cup of the batter and set it aside.
ASSEMBLE THE BROWNIES
STEP #6: pour the remaining brownie batter into the prepared pan.
STEP #7: press each individual Ladyfinger cookie upside down into the brownie batter.
STEP #8: once you have placed all 12 Ladyfinger cookies, pour the brewed coffee evenly over the Ladyfingers.
STEP #9: working quickly, pour the mascarpone layer on top of the Ladyfingers and, using a spatula, carefully spread the layer and cover all exposed cookies.
STEP #10: drop spoonfuls of the reserved brownie batter on top of the mascarpone cheese layer and use a knife to create swirls by dragging it through the batter, then bake.
Tiramisu Mascarpone Brownies FAQs
Tiramisu Brownies
Ingredients
BROWNIES
- ½ cup (113g) unsalted butter cut into 6-8 slices
- 8 ounces (227g) semi-sweet chocolate coarsely chopped
- ¾ cup (150g) firmly packed brown sugar
- ¼ cup (50g) granulated sugar
- 3 large eggs room temperature preferred1
- 1 teaspoon vanilla extract
- ¾ cup (90g) all-purpose flour be sure to measure properly
- ¼ teaspoon salt
MASCARPONE LAYER
- 8 ounces (226g) mascarpone cheese softened to room temperature
- ¼ cup (50g) granulated sugar
- 1 large egg room temperature preferred*
- ¼ teaspoon salt
LADYFINGER LAYER
- 12 Ladyfingers
- ½ cup (120g) strong brewed coffee
Instructions
BROWNIE LAYER
- Preheat the oven to 350ºF (177ºC). Line an 8" square baking pan with foil and spray with nonstick spray. Set aside.
- In a medium saucepan over medium heat, melt the butter and chopped chocolate, stirring frequently until completely smooth. Allow mixture to cool while you move onto the mascarpone layer.½ cup (113g) unsalted butter, 8 ounces (227g) semi-sweet chocolate
MASCARPONE LAYER
- In a medium size bowl with a handheld mixer or the bowl of a stand mixer fitted with the paddle attachment, beat the softened mascarpone cheese, sugar, egg, and salt until completely smooth.8 ounces (226g) mascarpone cheese, ¼ cup (50g) granulated sugar, 1 large egg, ¼ teaspoon salt
- Set aside.
FINISH THE BROWNIE LAYER
- Whisk both sugars into cooled chocolate mixture until combined. Add the eggs one at a time, whisking after each addition until smooth. Whisk in the vanilla. Add the flour and salt and stir gently until completely combined.¾ cup (150g) firmly packed brown sugar, ¼ cup (50g) granulated sugar, 3 large eggs, 1 teaspoon vanilla extract, ¾ cup (90g) all-purpose flour, ¼ teaspoon salt
- Reserve ⅓ cup of the batter and set aside.
ASSEMBLE BROWNIES
- Pour the remaining brownie batter into the prepared pan.
- Press each individual Ladyfinger cookie upside down into the brownie batter. See post narrative for a visual.12 Ladyfingers, ½ cup (120g) strong brewed coffee
- Once you have placed all 12 Ladyfinger cookies, pour the brewed coffee evenly over the Ladyfingers.
- Working quickly because the Ladyfingers will become quite soft, pour the mascarpone layer on top of the Ladyfingers and, using a spatula, carefully spread the layer and cover all exposed cookies.
- Drop spoonfuls of the reserved brownie batter on top of the mascarpone cheese layer and use a knife to create swirls by dragging it through the batter.
- Bake brownies for 38-42 minutes or until a toothpick inserted in the center comes out mostly clean. Allow brownies to cool completely before cutting into squares. Store brownies covered in the refrigerator up to 1 week or in the freezer up to 2 months.
Notes
- Room temperature eggs: these incorporate into batter much more easily than cold eggs, although this is not absolutely necessary.
Nutrition Disclosure
All nutritional values are approximate and provided to the reader as a courtesy. Changing ingredients and/or quantities will alter the estimated nutritional calculations.
These brownies were so delicious! I usually make brownies from a box so it was definitely more difficult than that but for a specialty brownie recipe it wasn’t that bad! The instructions were so detailed and easy to follow, and they turned out so good! Thank you!
I’m so glad you went for it and had success making brownies from scratch!
Where is the rum flavor? Can I sub The rum extract for the vanilla?
Hi, Gail– no rum. You can absolutely add some extract. I would not omit the vanilla, just add some of the rum. Enjoy!
I want to make these for an event. There is no fridge. Can these be served room temp? They will be out of the fridge for about two days. They will be in single serve baggies and made a few days a head of time.
Hi, Michelle– yes, they can! Enjoy!
Can you use boxed brownie mix if feeling lazy for the brownie portion?
Hi, Al– of course! This brownie base will be the equivalent to one standard box mix. Enjoy!
I ended up using Ghirardelli brownie mix and it was super easy and delish! Everyone said my (your) brownies won thanksgiving!
So happy to hear this! Thanks for sharing 🙂