
Peanut Butter Meltaways
As an Amazon Associate, I earn from qualifying purchases. Read the full disclosure here.
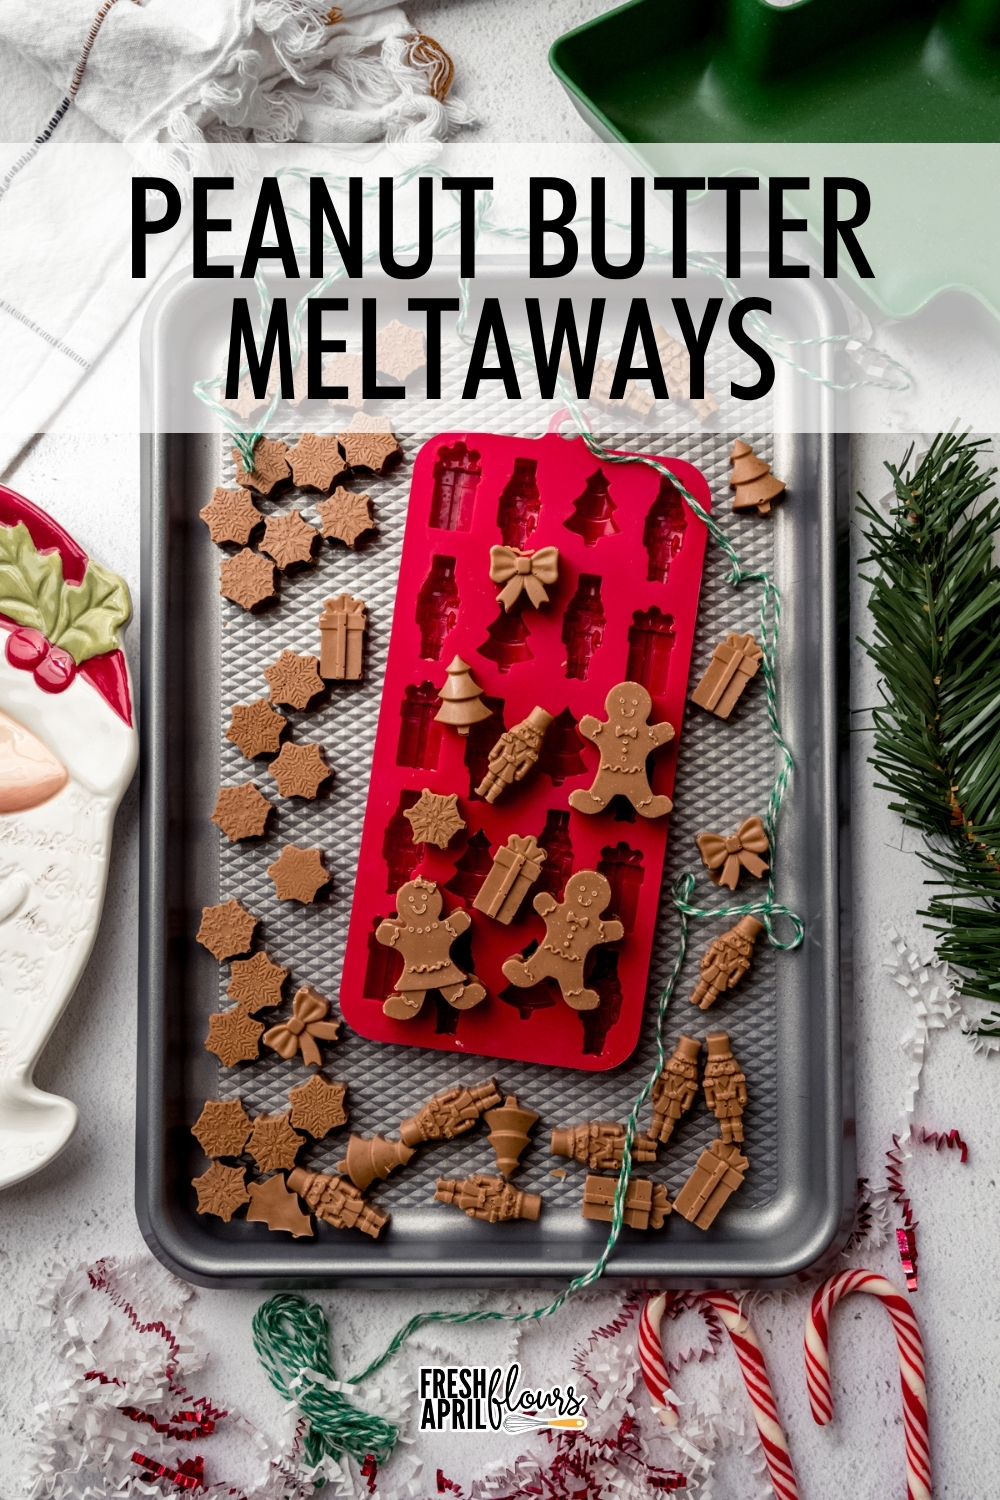
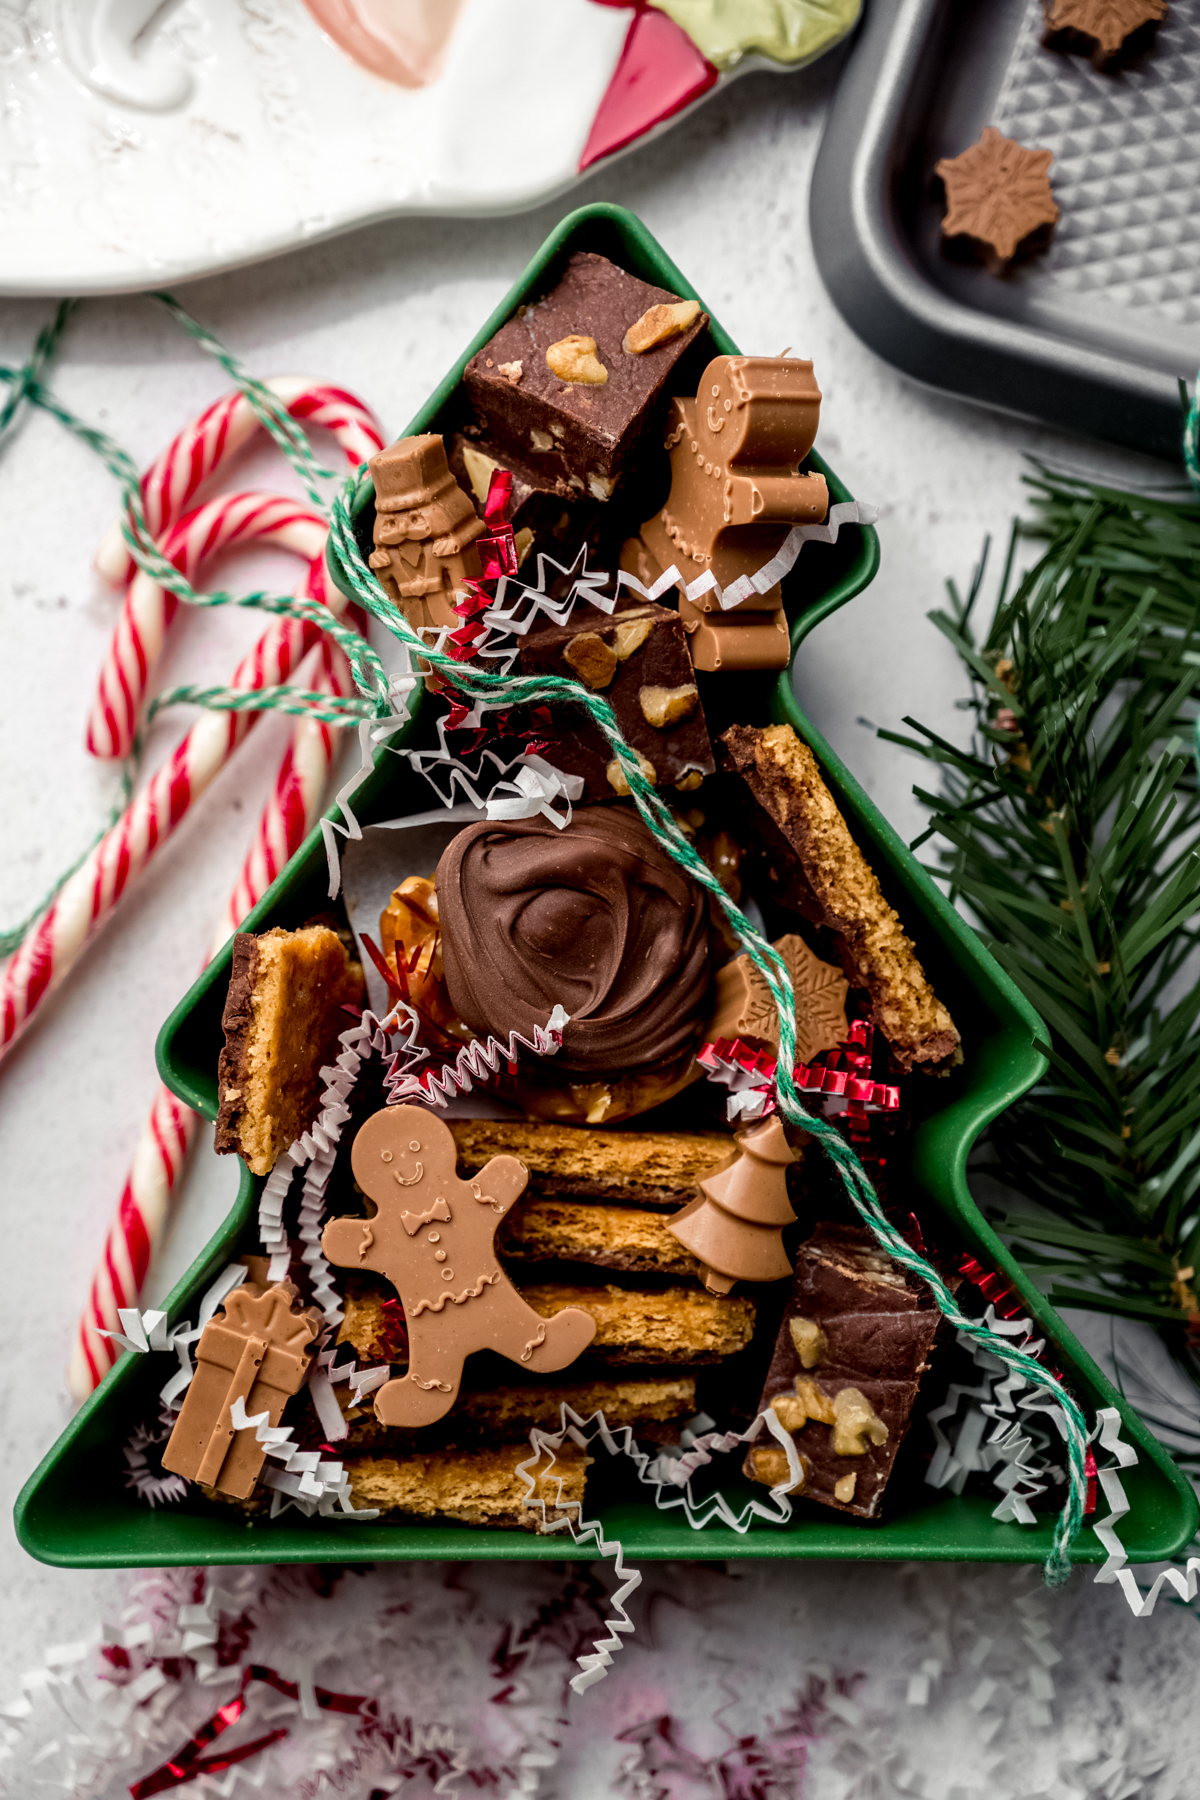
These easy peanut butter meltaways are made from melted chocolate and creamy peanut butter poured into candy molds, and they literally melt in your mouth. They’re great for putting into cookie and candy trays for the holidays!
THE PERFECT ADDITION TO COOKIE & CANDY TRAYS
Whenever I make a cookie tin or cookie tray, I always have those little empty spots that could use something. I’ve resorted to the classic Hershey’s Kiss, colorful m&m’s, and wrapped starlight mints, but these super simple peanut butter meltaways put themselves at the front of the lineup after I decided to try something new.
And when I say these are the simplest thing you could put in those spots, they really are. I mean, using a premade candy like the ones I mentioned is truly the simplest, but if you’re looking to add another homemade item to your empty spots, these peanut butter meltaways are the perfect choice (barring any peanut allergy, of course)!
Ooh, ooh, ooh! And candied almonds— you can actually do these in any nut you prefer. I highly recommend them for spot-fillers, too!
HOMEMADE MELTAWAYS INGREDIENTS
You only need 3 ingredients, and this recipe is easy to scale up or down, depending on the yield you’re looking for. Be sure you’re paying attention to my ingredient notes so that you have the highest chance of success and don’t wind up wasting any ingredients.
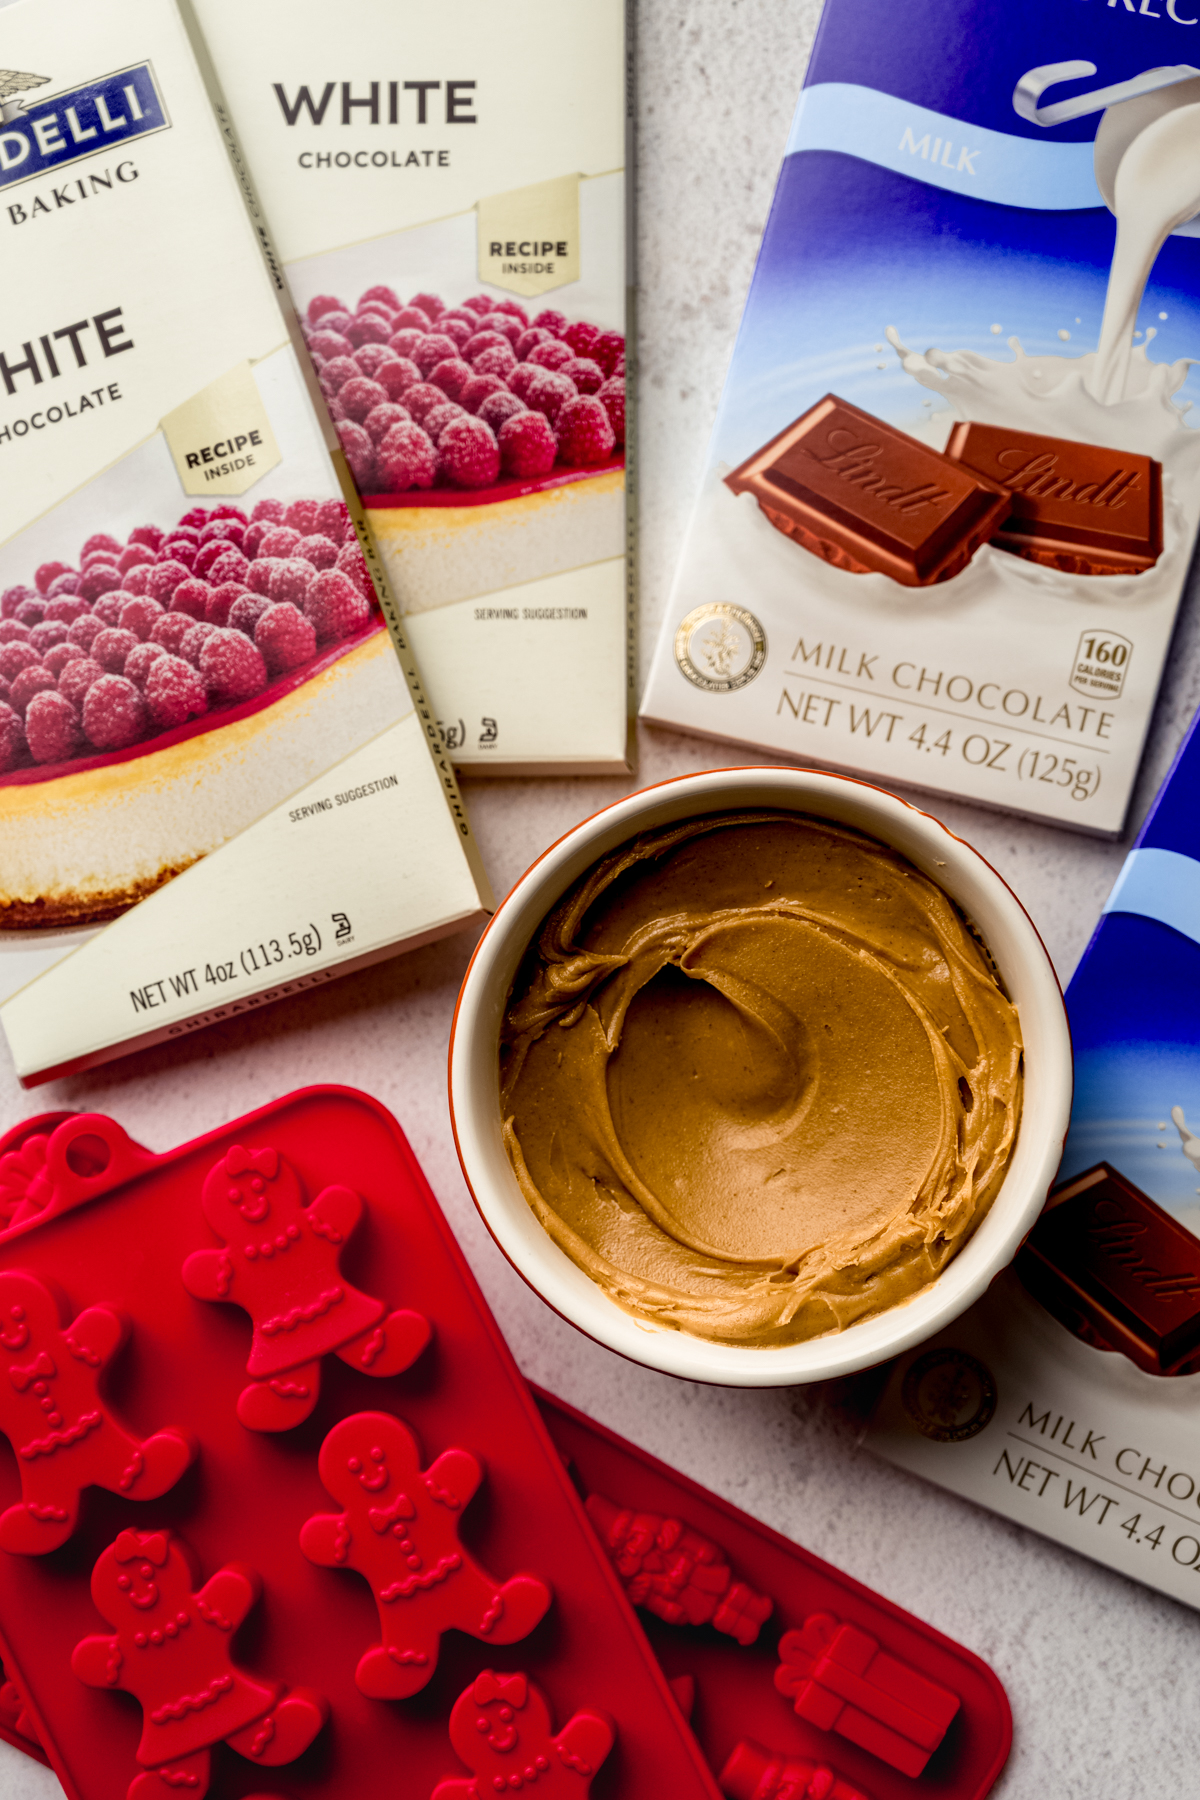
WHITE CHOCOLATE & MILK CHOCOLATE: this is the base of these meltaways. I highly recommend using chopped bar chocolate, but you can use chips in a pinch. Just know that the bar melts more smoothly than chips and they are my preference.
CREAMY PEANUT BUTTER: you want to use commercial peanut butter for this recipe. Do not use natural style peanut butter unless it truly is the no stir kind. The more oily natural style will not work with this mixture.
CAN I USE ANOTHER KIND OF NUT BUTTER?
In theory, yes, you should be able to use another kind of butter, even cookie butter! But, again, be sure you’re using the no stir kind– one that is more of a solid than a liquid when scooped out of its jar.
TOOLS YOU WILL NEED
The equipment you need for these candies is the most involved part of gathering the ingredients and tools to get them done, and you may even have these things in your collection already!
First, you’ll want some kind of candy squeeze bottles. I foolishly though I could pop the mixture into piping bags, but it is definitely way too runny for that. You could also opt for pouring the mixture from something like a measuring cup with a spout, but in my testing, I found that method to be too fast and too much mixture at one time, making a giant mess, more air bubbles, and jaggy edges on my figures.
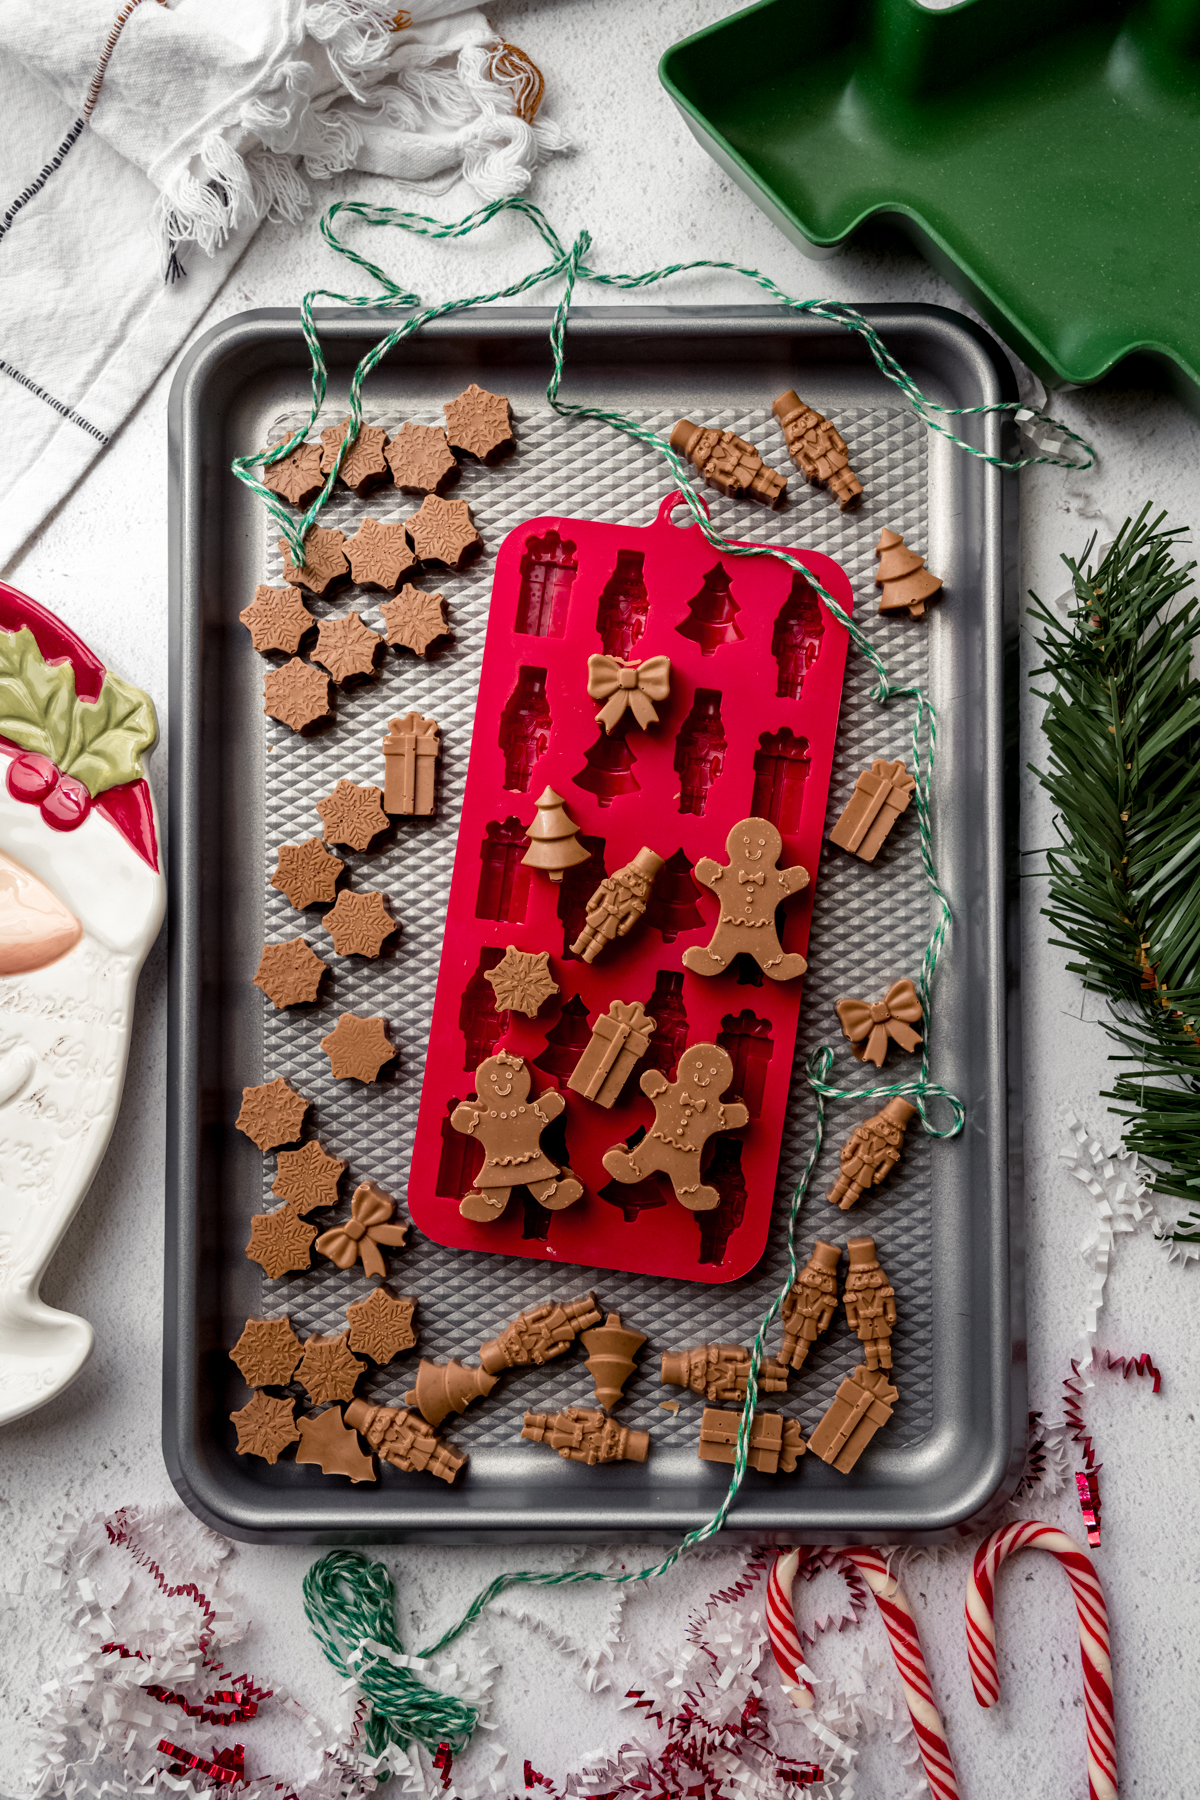
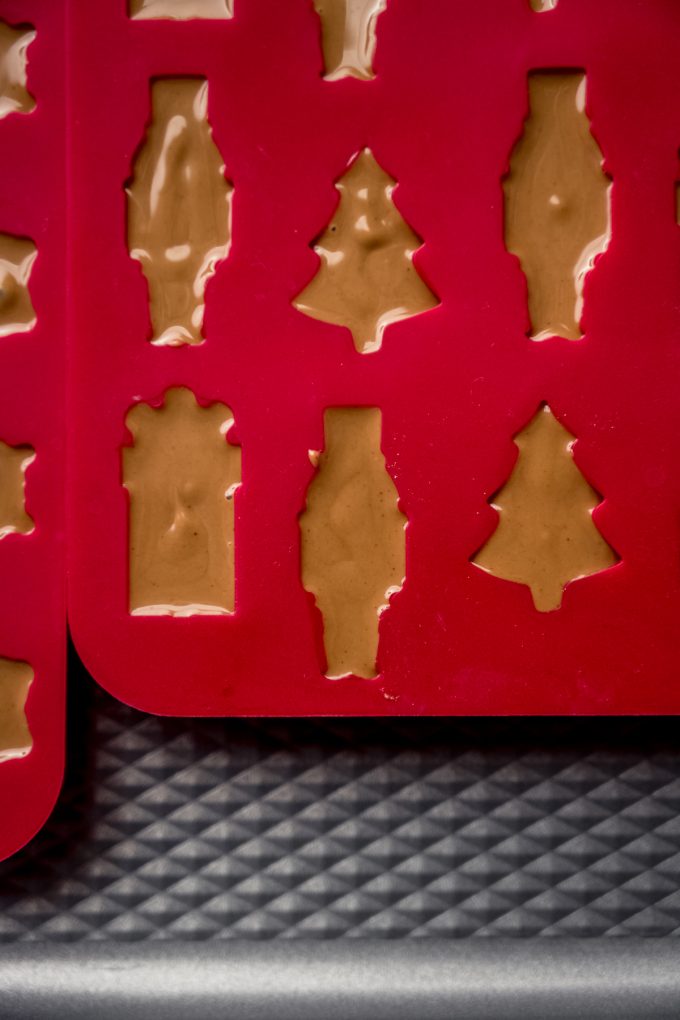
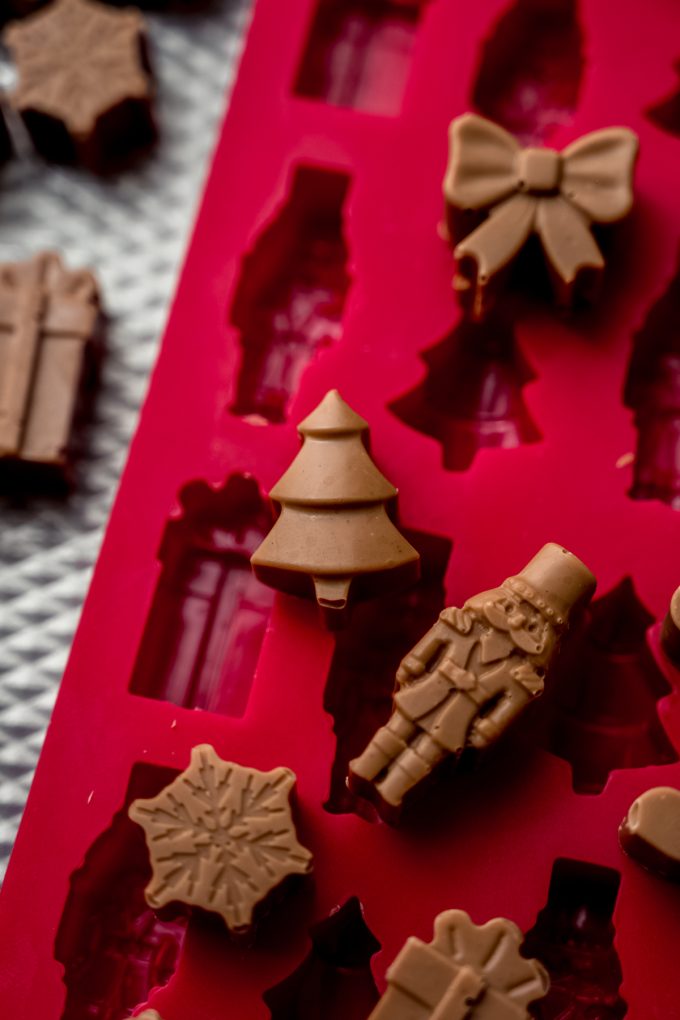
Second, you’ll want some kind of candy molds. I highly recommend silicone over plastic, as the silicone ones make it much easier to remove the candies (we also tested with plastic). I obviously used Christmas shapes, but you can use any shapes you want, especially if you’re making these for another holiday or just because.
This mixture made about 80-1″ candies and 15-2″ candies. I have 4 trays that are the smaller 1″ size and 3 that are the larger 2″ size.
While the links I shared are for online purchase, you may want to head to your local craft store so you can see sizes in person. I got mine at Michael’s– you can find these items in the cake/candy aisle.
HOW TO MAKE PEANUT BUTTER MELTAWAYS
This could not be simpler. Honestly. Prepping your space is the most important part so your molds are ready to go when your mixture is ready.
Set your space: place your molds onto something sturdy like a baking sheet or large flat plate/platter. This will ensure you don’t disturb the molds after filling them.
Melt the chocolate: you can do this in whatever manner you prefer. I like to do mine in a saucepan on the stove, but you can use the microwave or an actual double boiler if you prefer. Melt the chocolate until it is completely smooth (a few small pieces are fine, since you’ll be stirring again).
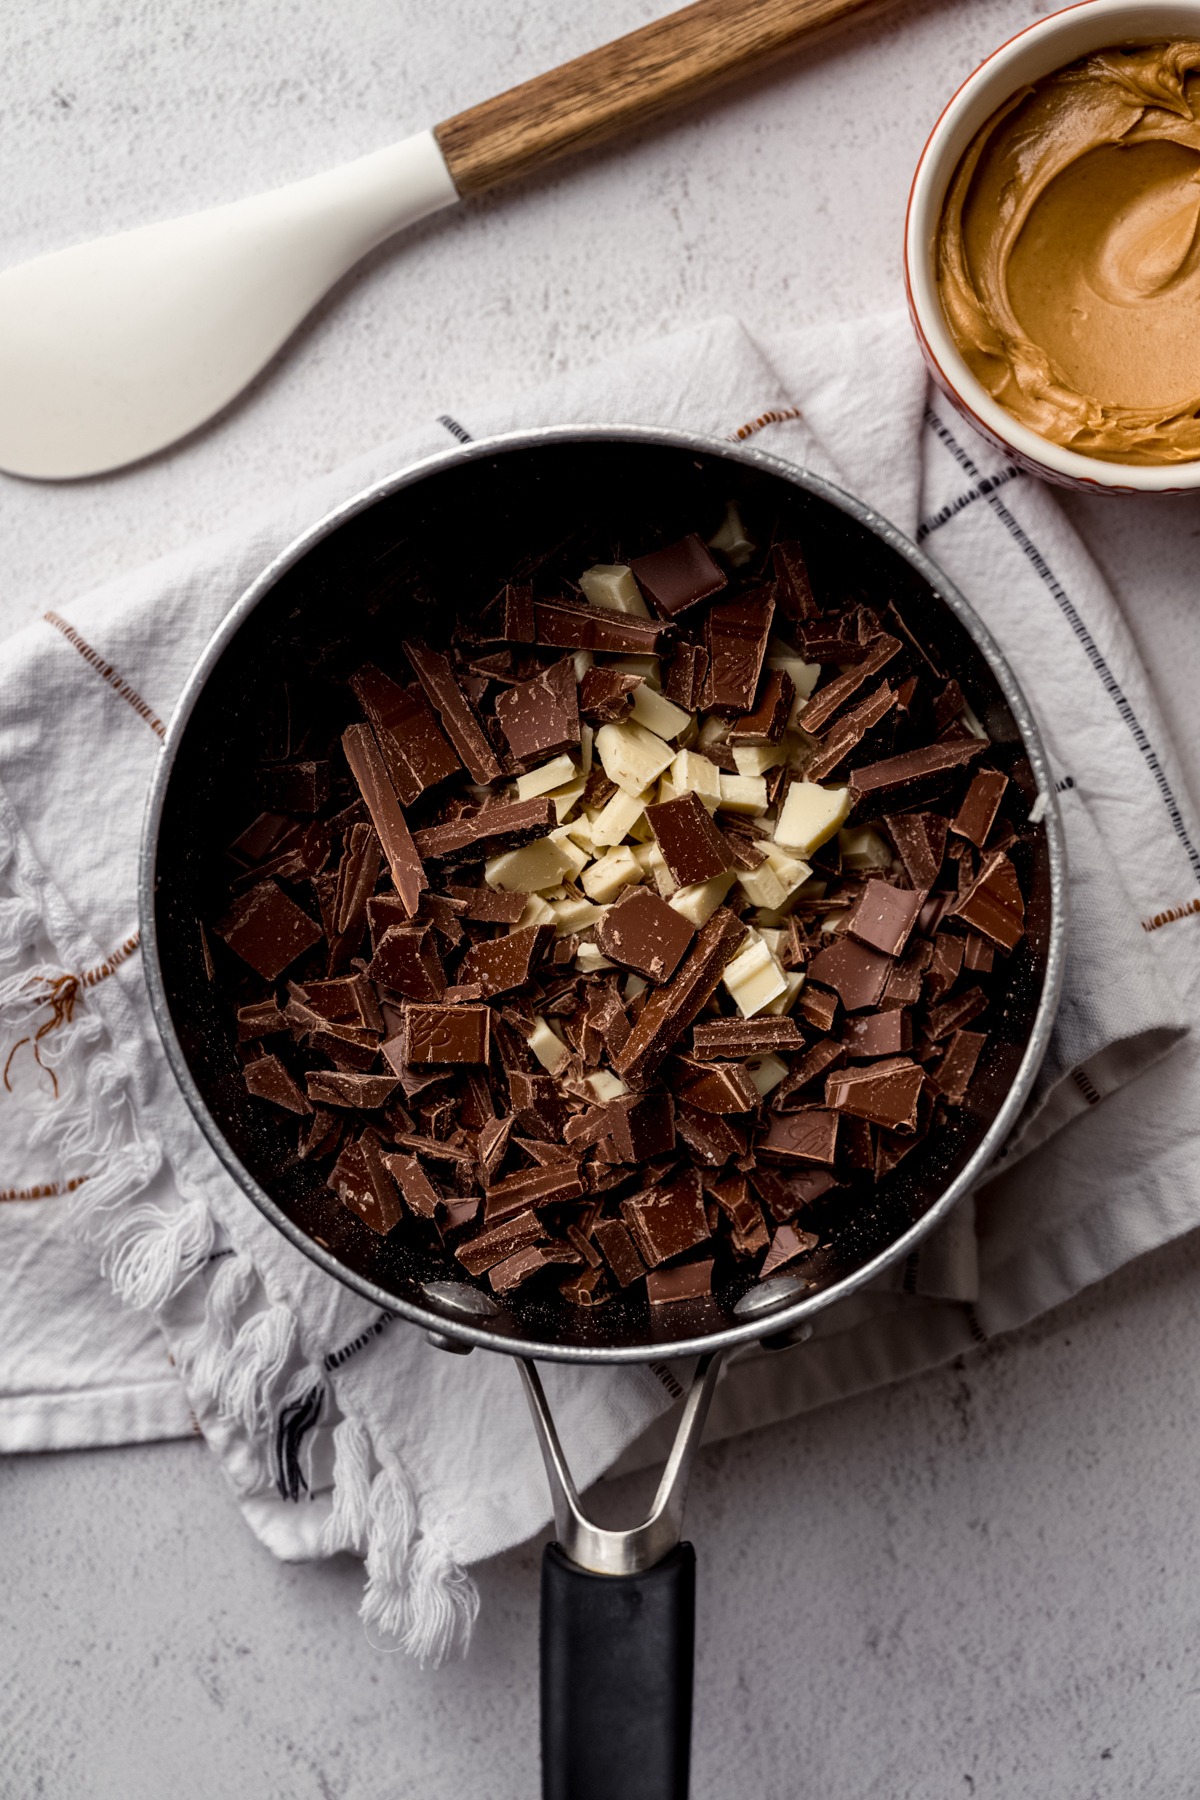
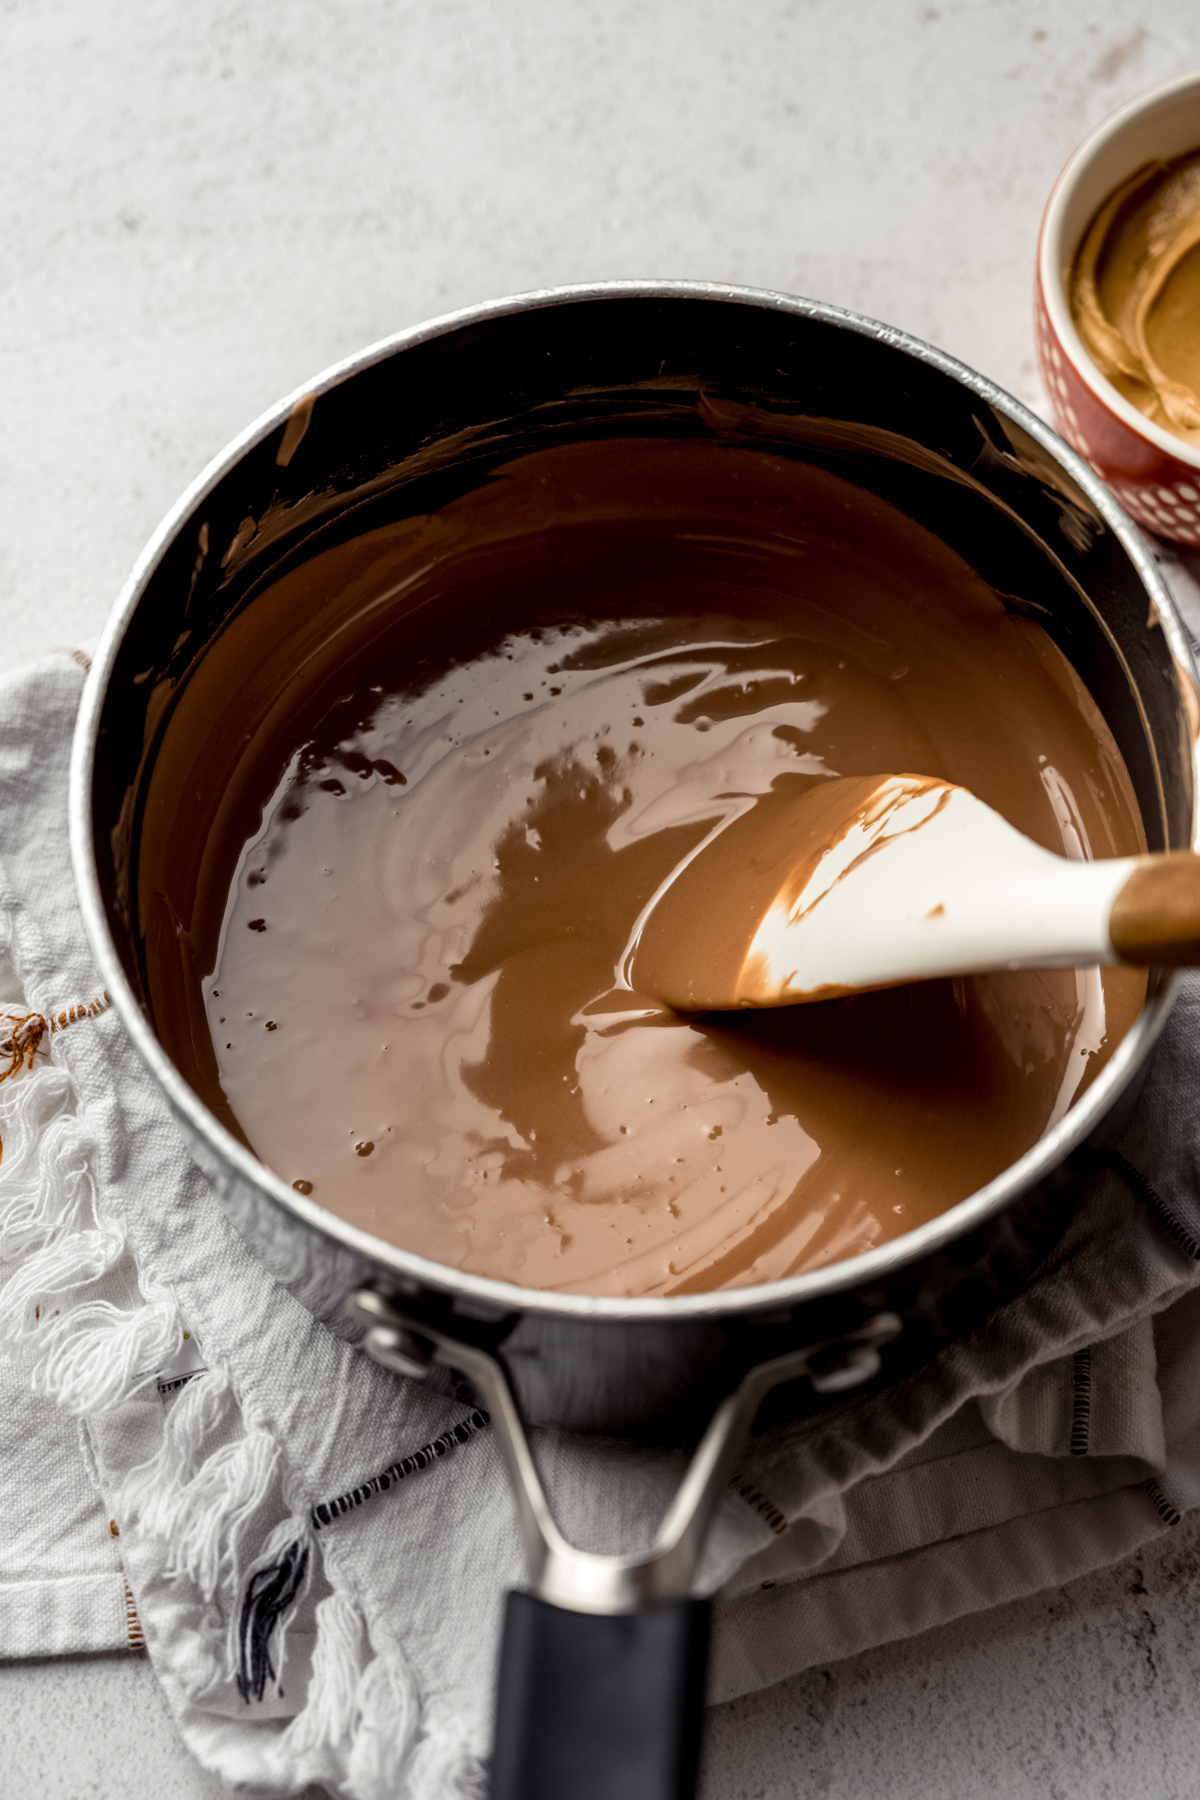
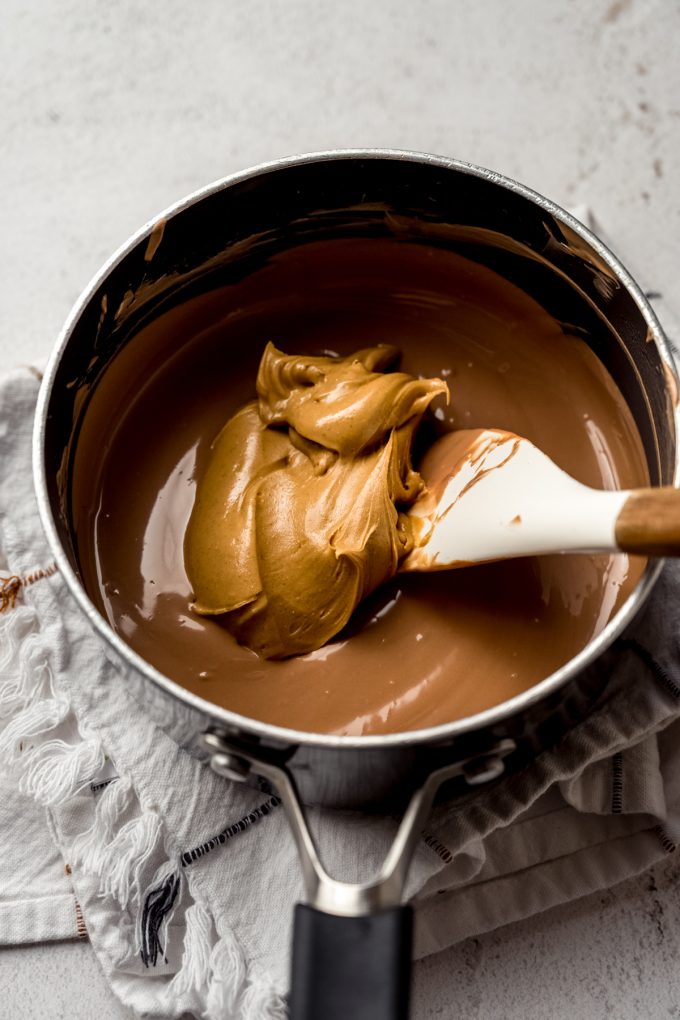
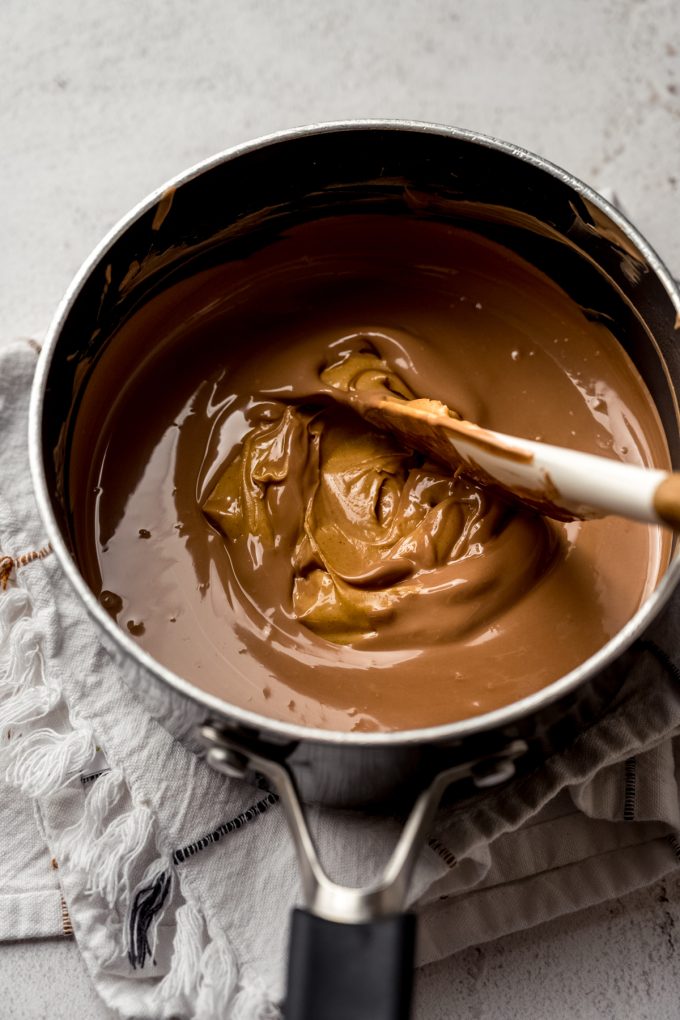
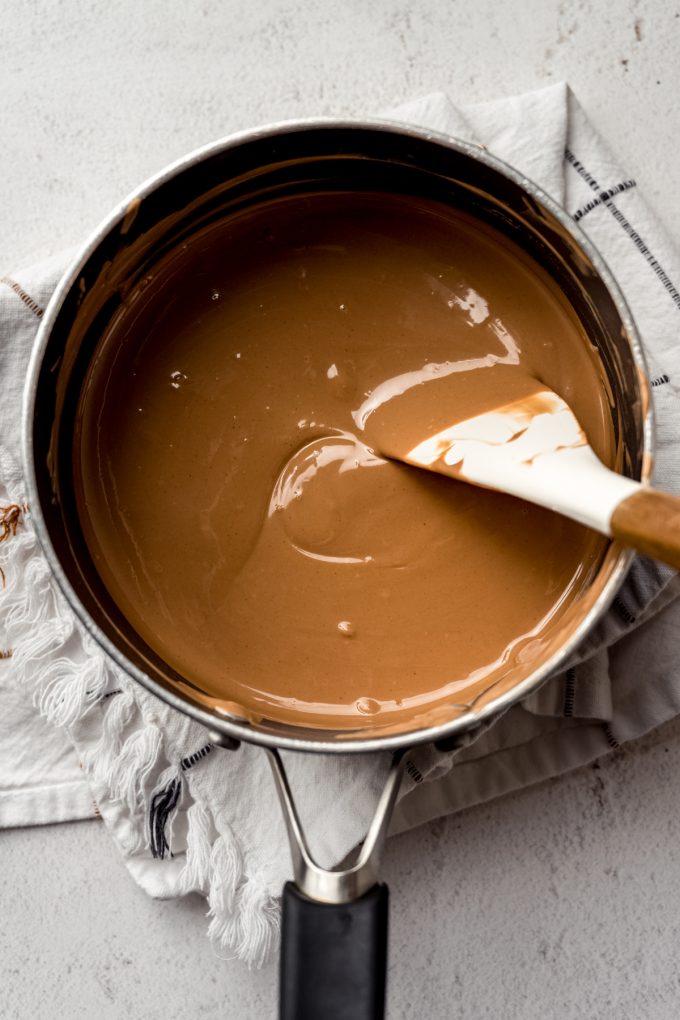
Add the peanut butter: once the peanut butter is in, you’ll have to amp up the stirring a bit, so stir vigorously until all of the peanut butter is incorporate and the mixture is smooth and creamy.
Fill the molds: I suggest filling the molds juuuuuust to the top. If you get overflow, the pieces will have jaggy edges once you pop them out of the molds. There’s nothing wrong with this, of course, as the taste is unaffected, but they just look cleaner with perfect edges.
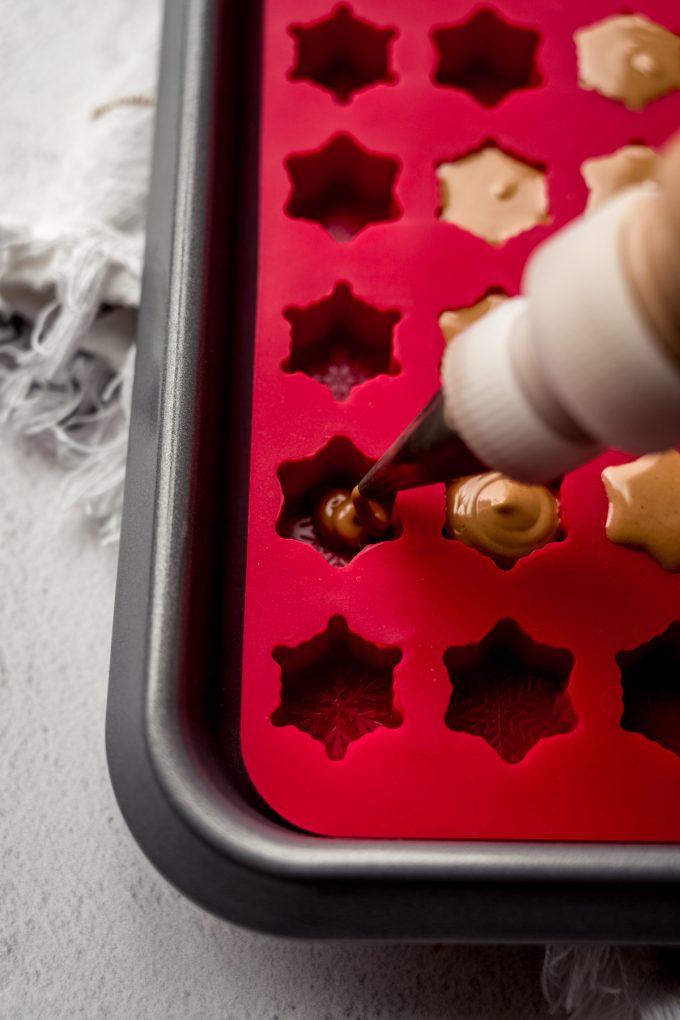
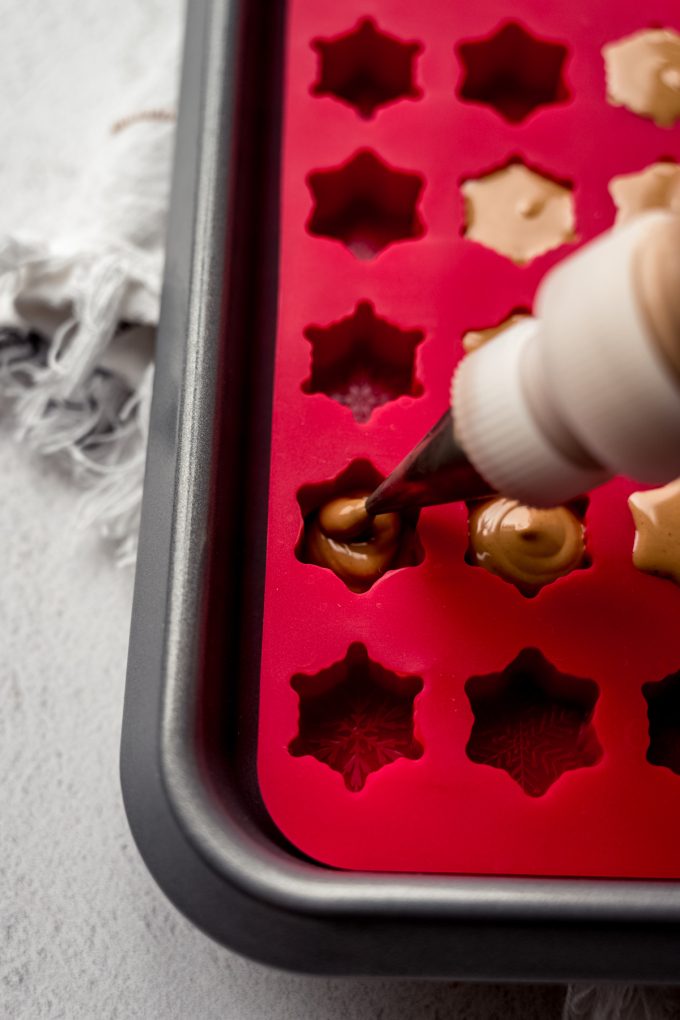
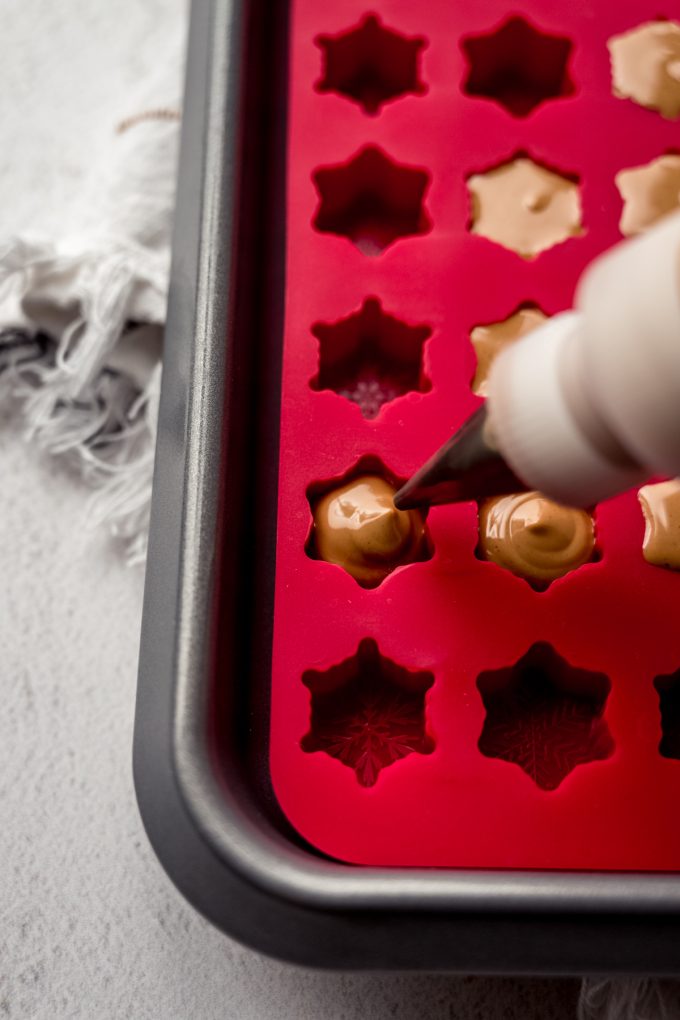
Tap the trays to remove air bubbles: this part is crucial, as you’re going to have air bubbles in your candies if you don’t. Just a few raps on the counter is fine! You may see some air bubbles rise to the surface but don’t worry if you don’t. The air bubble spots will fill themselves in with a little movement.
Chill the candies + remove: we tested these with room temperature, refrigerator, and freezer setting, and we preferred the ones that set in the fridge. The ones at room temperature didn’t harden at all, and the ones in the freezer seemed to be overkill. The refrigerator was just right! The meltaways pop right out after they’re fully set.

HOW TO STORE MELTAWAYS
Peanut butter meltaways can be stored at room temperature or in the refrigerator. They will be softer at room temperature, so take care to layer them into a container carefully. You can store them covered tightly in the refrigerator up to 2 weeks or at room temperature up to 1 week.

Easy Peanut Butter Meltaways Recipe
Ingredients
- 8 ounces (227g) white chocolate1,2 coarsely chopped
- 8 ounces (227g) milk chocolate1.2 coarsely chopped
- 6 ounces (170g) creamy peanut butter3
Instructions
- Place your candy molds onto baking sheets or large platters so they have a sturdy place to set. Set aside.
- Melt both kinds of chopped chocolate with your preferred method. I prefer to use a medium size saucepan over medium heat to control the melting process better, but you can also use the microwave or a double boiler.8 ounces (227g) white chocolate1,2, 8 ounces (227g) milk chocolate1.2
- Stir the chocolate until it is mostly smooth, then add the peanut butter. Continue stirring vigorously until the mixture is silky smooth.6 ounces (170g) creamy peanut butter3
- Pour the mixture into candy squeeze bottles and fill the wells of your candy molds4. This mixture made about 80-1" candies and 15-2" candies. I have 4 trays that are the smaller 1" size and 3 that are the larger 2" size.
- Once all of the wells in the mold are filled, tap the tray a few times to release any air bubbles, then transfer the trays to the refrigerator or freezer to set up. This will take anywhere from 2-4 hours depending on the size of your candies.
- Once the meltaways are fully set and hardened, pop them out of the molds. They can be stored at room temperature or in the refrigerator. They will be softer at room temperature, so take care to layer them into a container carefully. Store covered tightly in the refrigerator up to 2 weeks or at room temperature up to 1 week.
Video
Notes
- Chocolate: I highly recommend chopped bar chocolate for this recipe. While you can use chocolate chips here, they don’t melt nearly as smoothly as chopped bar chocolate does.
- Milk/white chocolate: I get asked a lot if you can use another kind of chocolate, and the answer is theoretically yes. The white and milk chocolates bring a sweetness to the candies, but they aren’t too sweet by any means.
- Creamy peanut butter: do not use natural style peanut butter, unless it is the no-stir kind. You want sticky commercial peanut butter.
- Candy molds: the links in the recipe above are for Amazon products, but the ones I got are from Michael’s. Here are the snowflakes, gingerbread people, bows, and nutcrackers/trees.
Nutrition Disclosure
All nutritional values are approximate and provided to the reader as a courtesy. Changing ingredients and/or quantities will alter the estimated nutritional calculations.
I don’t have that many candy molds. Can I reheat the mixture and use it again when I unmold the first batch?
Hi, Carole– you’ll want to harden the first batch quickly, like in the freezer. This mixture won’t like being reheated, though it can sit for a bit if you stir it every so often so it doesn’t set.
I made these and my family can’t keep their hands off! I used Lily dark and white chocolate (because my store was out of everything else) and they are soooo good!😊 Thank you for posting this recipe!
So glad you liked them, Kate! And thank you for sharing your modifications 🙂
A huge thank you! They are delicious and so easy to make. I had to make them three times because my family ate them before I even had a chance to add them to my cookie boxes !! 😍
Sounds like what happened in our house, too 🙂 thanks so much, Dorianne– so glad everyone enjoyed them so much!
Could you use cookie butter for an alternative for kids with peanut allergy?
Hi, Kait– yes! I just published a comment from someone who said they did that instead. Enjoy!
We made these using sun butter for our nut free friends and coworkers. They’re delicious, easy and a perfect addition to our Christmas gift bags. We also used white and dark chocolate wafer/discs from Winco and added a touch of salt. Thanks for the amazing recipe and easy mold filling idea with the bottles!
This is great! Thank you for sharing your modifications, Laura!
Sooo good!! We’ve made them 4 times now and given them away to everyone we usually give cookies to. Everyone has loved them! Thanks for the recipe, Lynn!
So glad to hear this, Gina! Thank you!
These are a true hit!! I’ve made several times with another batch to be made soon.
I also tweaked it a little and made a batch with Biscoff cookie butter instead of PB. It was my son’s idea! Soooo good too!
Thanks for the all fun recipes, Lynn!
Chocolate chip cookies are next!
Thank you so much, Diane! I’m so glad you liked them– and thank you for sharing your modifications!
Made these a couple of days ago and we love them! I am considering making them with all white chocolate and peanut butter. This is a definite keeper in my opinion!!! Hubby and granddaughter agree!
Thank you so much, Sue!
Love these so much! I made them but they are too soft. they are squishing as soon as I pick them up. Did i do something wrong?
Hi, Jackie– did you chill them to set them? Also, if your hands are really warm, they will melt pretty quickly.
Hello ! These are delicious ! Only problem is was at room temperature they turned to mush 😭😭😭. Had planned on giving for presents . Yes I did chill in frig for 6 hours ..
Hi, Cheryl– is your kitchen particularly warm? We had no problem with these at room temperature during testing but we live in a cold climate.
Hello , no it’s always 65 in my house . I left a small plate on my kitchen table and they got super mushy .
Hmm. Well, they are fat-based which is why they are called meltaways, since they melt in your mouth. We had our several test batches at room temperature, in the freezer, and in the refrigerator, and the ones at room temperature were our preferred texture, though certainly not mushy. We did set some JUST at room temperature, never chilling them, and those ones never hardened, though they also didn’t come out of the molds nicely. Did you chill them to set them up? I’m really not sure what happened other than suggesting they may have gotten warmer than you expected them to or meltaways just perform better in the fridge at your house.
I lost count of how many times I made these. I also used them chopped up in cookies and cheesecakes!
Amazing, Nicol! Thanks for sharing!