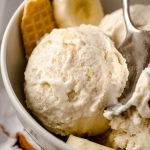
The Best Banana Ice Cream Recipe
This rich and luscious homemade ice cream base blended with roasted banana mash boasts robust banana flavor and creamy texture.
Servings: 8 cups
Ingredients
ROASTED BANANAS
- 4 medium size bananas approximately 6" long
- 2 Tablespoons (25g) firmly packed light brown sugar
ICE CREAM
- 2 cups (480mL) heavy cream
- 1 cup (240mL) whole milk
- ½ cup (100g) granulated sugar1
- 2 teaspoons vanilla extract
- ⅛ teaspoon salt
Need to keep track of your ingredients?Check out my Printable Ingredient List!
Instructions
- Before beginning anything, make sure your ice cream maker is frozen and prepped!
ROASTED BANANAS
- Preheat the oven to 400ºF (204ºC). Prepare a small baking sheet or baking dish. You can line it with parchment paper or a silicone mat to reduce mess if you like. Set aside.
- Situate each banana so that the curved part is on a surface or cutting board and the ends are facing up. Slice each banana in half long ways, then lay the sliced bananas on the pan, exposed banana side up.4 medium size bananas
- Sprinkle the bananas with the brown sugar and then turn each of them over so that the skins now face up and the exposed banana is on the prepared pan.2 Tablespoons (25g) firmly packed light brown sugar
- Roast the bananas for 10 minutes or until the skins are completely black and leaking juices from the sides. You may only need 6-8 minutes for riper bananas.
- Remove the bananas from the oven, carefully remove the skins, and place the roasted bananas and all of the juices and caramelized sugar into a small bowl.
- Mash the bananas in the bowl using a fork and set them aside to cool while you make the rest of the ice cream.
ICE CREAM
- Place prepared ice cream maker attachment onto stand mixer fitted with the dasher.
- In a blender, combine the heavy cream, milk, sugar, vanilla, and salt. Add approximately half of the mashed roasted banana mixture, then blend until most of the larger banana chunks have dissipated.2 cups (480mL) heavy cream, 1 cup (240mL) whole milk, ½ cup (100g) granulated sugar1, 2 teaspoons vanilla extract, ⅛ teaspoon salt
- Taste the mixture: depending on how ripe your bananas were to begin with, your ice cream may vary in sweetness. See note #2 below for details.
- Turn on the mixer so dasher is rotating and slowly pour ice cream mixture into the canister. Process according to manufacturer’s directions (it should take about 20-30 minutes).
- When ice cream is finished churning, remove the ice cream maker from the mixer, add the remaining banana mixture, and stir to distribute evenly.
- Transfer the ice cream to a freezer-safe container and freeze for at least 2 hours. See below3,4 for topping ideas.
Video
Notes
- Granulated sugar: you may need a bit more, but don't add any more just yet. See step # for clarification.
- Taste the mixture: while in our testing we didn't think this ice cream needed any additional sugar, your tastebuds may vary! Taste the mixture and decide for yourself. If you think it needs more sweetness, add 1-2 Tablespoons of granulated sugar, whisk together, and then taste the mixture again. I do not recommend adding more than ¼ cup (50g) total of additional sugar.
- Topping ideas: we enjoyed this ice cream as is, but I'm all about toppings when it comes to ice cream. I recommend making a batch of homemade magic shell if you like bananas + chocolate. If you are a bananas + peanut butter fan, consider swirling this ice cream in the same manner I swirled my no churn peanut butter ripple ice cream. Don't forget about salted caramel sauce or bourbon caramel sauce if you're feeling boozy!
- Homemade whipped cream: use the heavy cream to make fresh whipped cream and add banana slices for an over-the-top bowl of banana ice cream.
Nutrition Disclosure
All nutritional values are approximate and provided to the reader as a courtesy. Changing ingredients and/or quantities will alter the estimated nutritional calculations.
Serving: 1cup | Calories: 336kcal | Carbohydrates: 32g | Protein: 3g | Fat: 23g | Saturated Fat: 14g | Polyunsaturated Fat: 1g | Monounsaturated Fat: 6g | Cholesterol: 71mg | Sodium: 66mg | Potassium: 319mg | Fiber: 2g | Sugar: 26g | Vitamin A: 962IU | Vitamin C: 5mg | Calcium: 82mg | Iron: 0.2mg
