
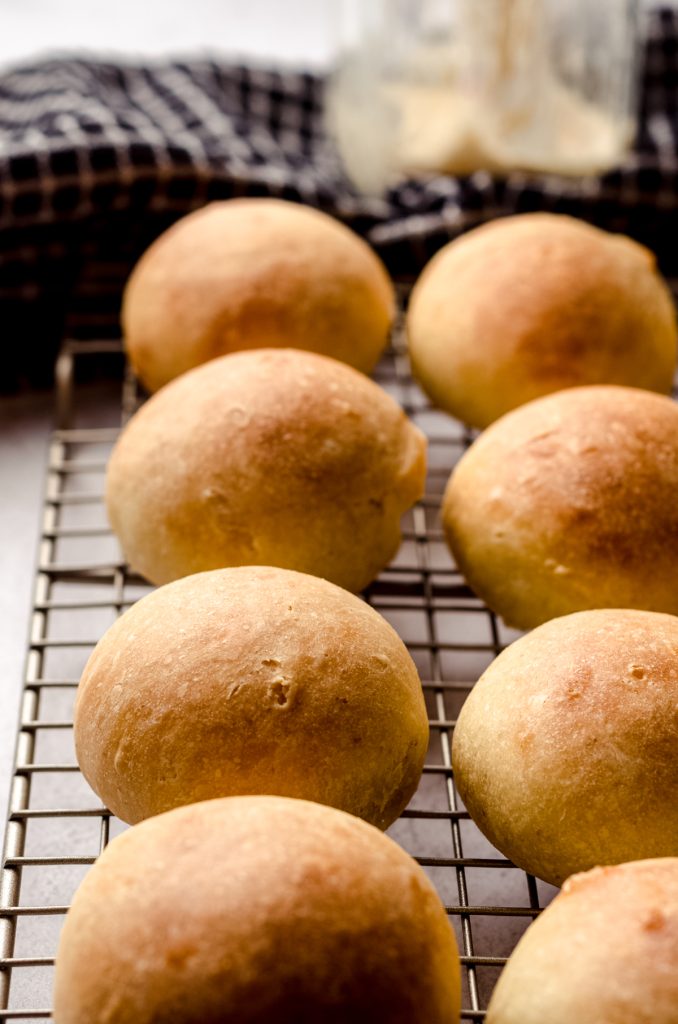
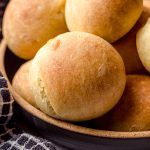
Sourdough Rolls
As an Amazon Associate, I earn from qualifying purchases. Read the full disclosure here.
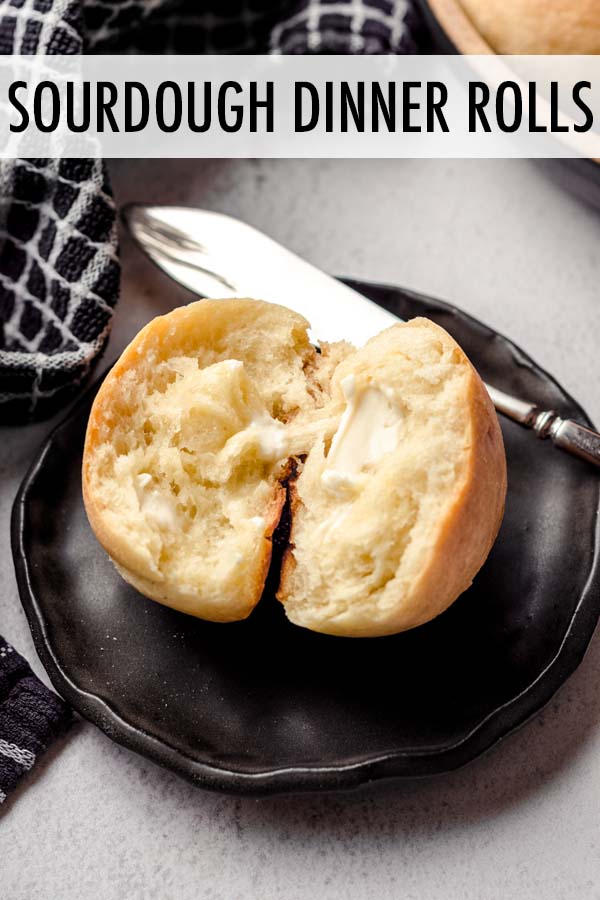
This sourdough dinner roll recipe is made with active starter resulting in soft, fluffy, buttery rolls with that signature sourdough tang.

When I started a sourdough starter, I had so much fun making traditional loaves until I was comfortable branching out into other ways to use it. While I do have a collection of 40+ recipes you can make with sourdough discard, I also have a few recipes for things to make with sourdough starter than aren’t traditional loaves.
These sourdough dinner rolls are my favorite place for someone to start who is ready to branch out of sourdough loaves. They’re simple to make, produce the fluffiest, tastiest rolls, and will give you the confidence to move into the world of using sourdough instead of active dry yeast to make bread.
Once you’ve mastered these rolls, be sure you whip up a batch of sourdough English muffins and sourdough cinnamon rolls next!
WHY YOU’LL LOVE THESE SOURDOUGH ROLLS
Don’t get me wrong, I love a good traditional sourdough loaf when it comes time to use some of my sourdough starter. But did you know there is more to the sourdough world than just a a nice, crusty loaf?
You can use your own sourdough starter to make these soft sourdough dinner rolls any time you’re looking to use your starter, change up your traditional go-to roll recipe, or a rainy day where the smell of sourdough could turn a day inside into a fun kitchen crafting day.
This sourdough rolls recipe produces the fluffiest sourdough rolls, you’ll wonder how the same sourdough starter can make a sturdy, craggy, crusty loaf of sourdough bread. This easy recipe is sure to be a favorite addition to your recipe box and a great way to change up how you use your active home sourdough starter.
YOU MIGHT BE WONDERING…
Why in the world would I want to purposely take more time to leaven my bread when I can get it done in a fraction of the time with commercial yeast?
That’s a great question, and the investment of time to leaven a bread is the return of flavor in the end result.
Because sourdough starters can be made with any number of flours, this can change the flavor profile meaning there are likely no two sourdough starters in the world that taste exactly the same.
Personally, I use a 1:1:1 combination of all-purpose flour, whole wheat flour, and bread flour to feed my starter, so my sourdough rolls won’t taste exactly the same as the sourdough rolls you make in your kitchen, but that’s the true beauty of sourdough baking.
FUN FACT ABOUT SOURDOUGH RECIPES
Because of the nature of sourdough, it is often considered more nutritious and easier for the body to digest than bread made from commercial yeast. It also contains a lower glycemic index and lower gluten content, meaning it can be a better bread option for people who have insulin troubles.
SOURDOUGH ROLL RECIPE INGREDIENTS
This recipe for sourdough rolls contains milk and butter but no eggs, meaning you can easily use a non-dairy milk and non-dairy butter if you want to make these rolls vegan/plant-based.
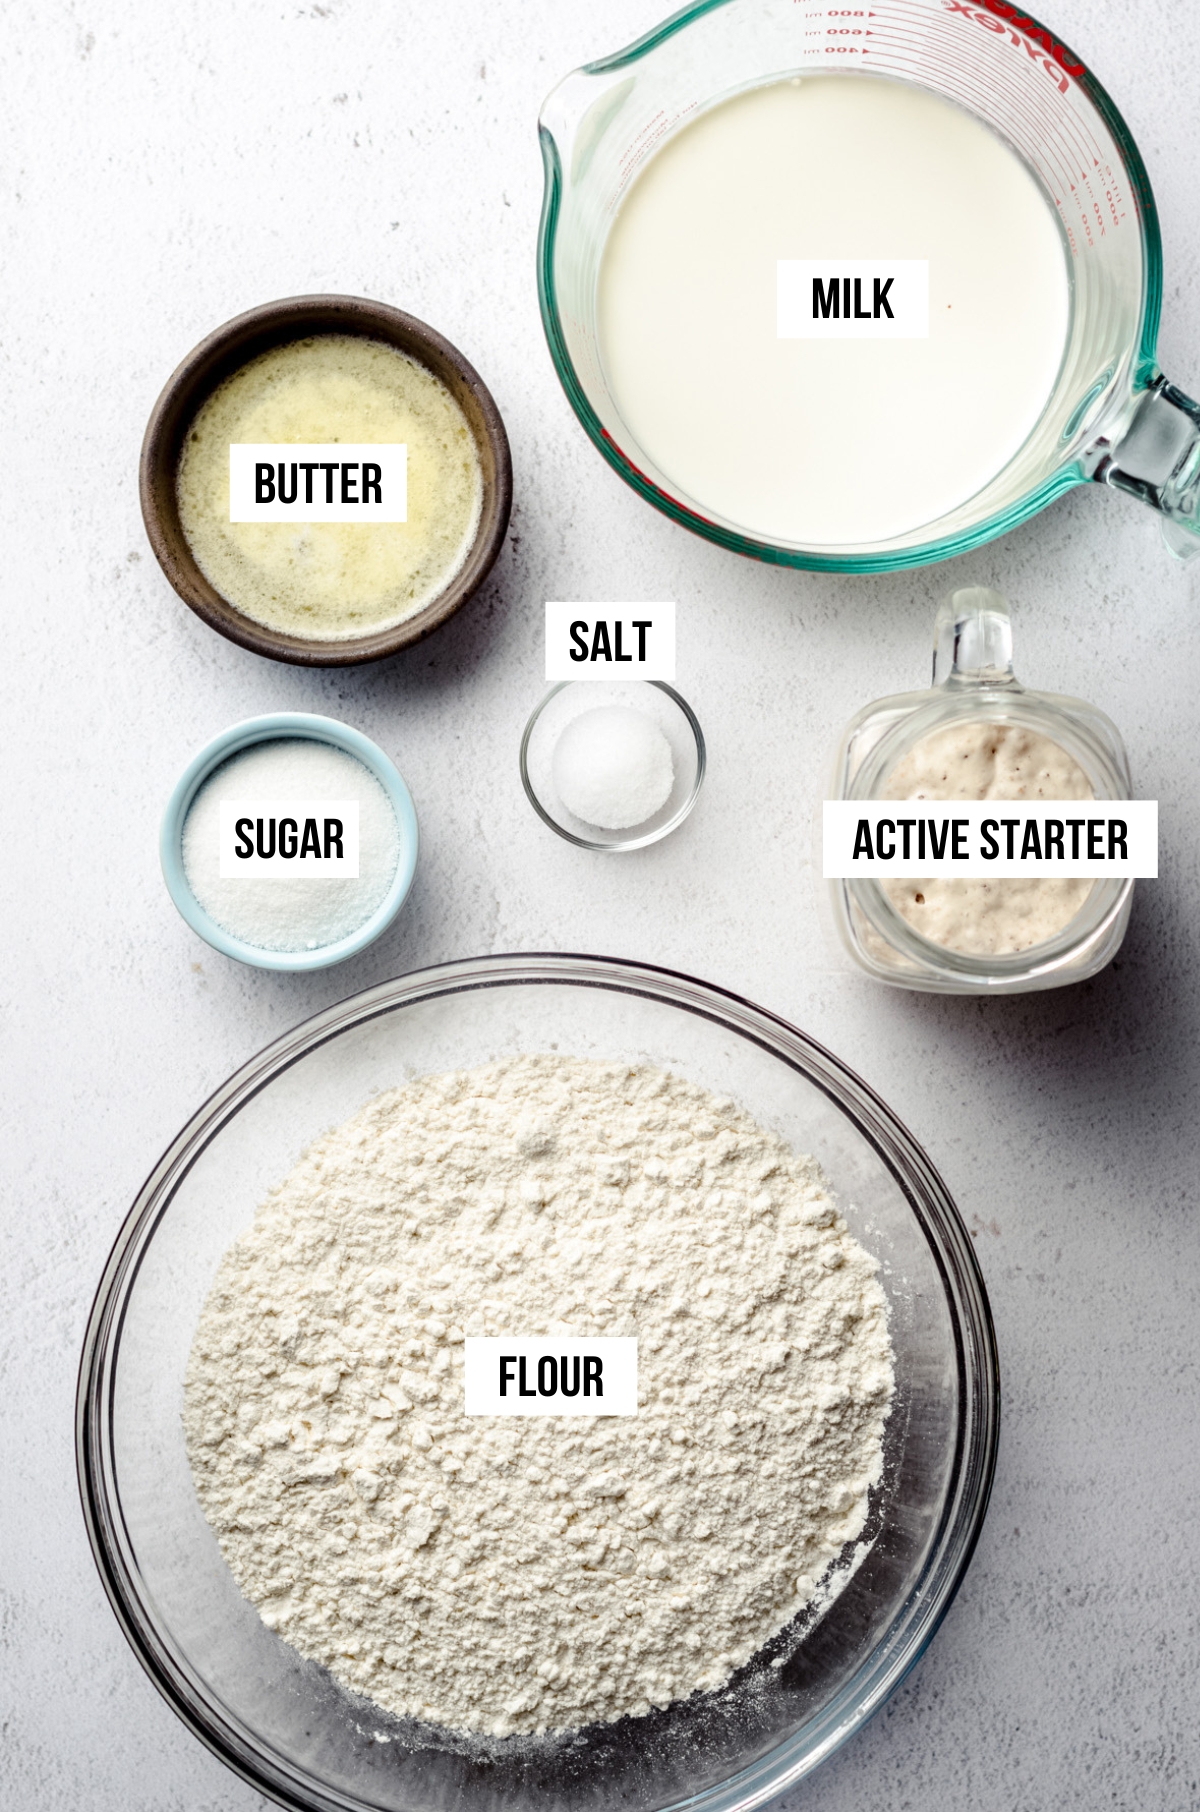
For the sourdough rolls, you will need:
• unsalted butter
• warm milk
• granulated sugar
• salt
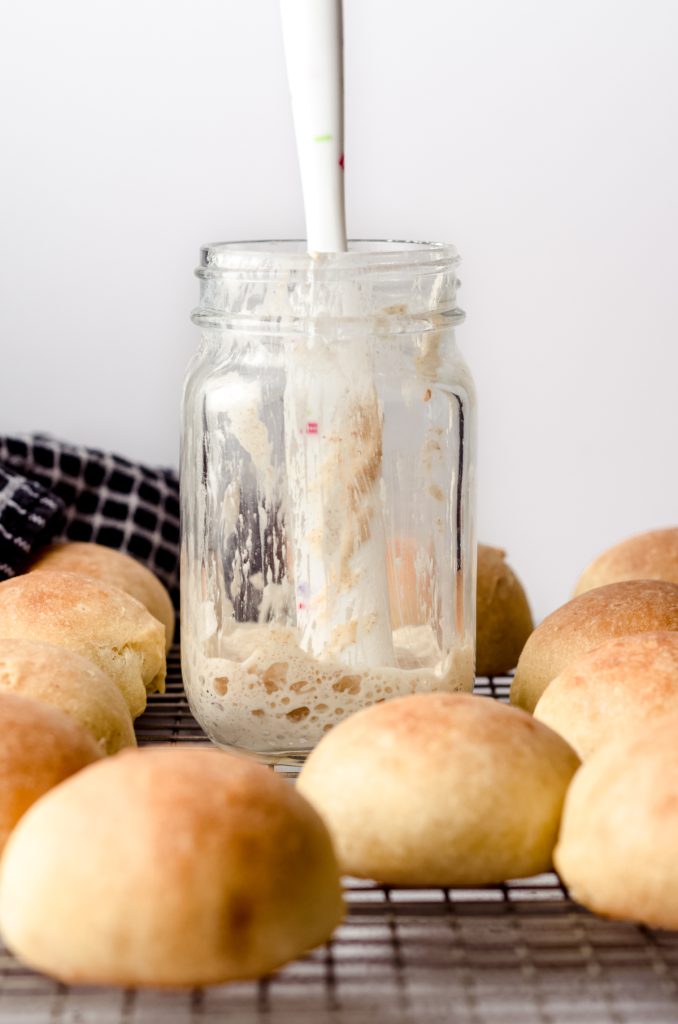
• active sourdough starter
• all-purpose flour
How to make Sourdough Dinner Rolls
Since this recipe for sourdough dinner rolls uses active sourdough starter, you will need to do some planning ahead and work backwards to determine when to start this recipe.
There is a section below (“sourdough buns sample schedule”) that will help you determine when to feed your sourdough starter based on when you would like to bake your sourdough rolls.
FEED YOUR SOURDOUGH STARTER THE NIGHT BEFORE YOU MAKE THE SOURDOUGH BREAD ROLLS
STEP #1
About 12 hours before you plan to start the dough, feed your starter.
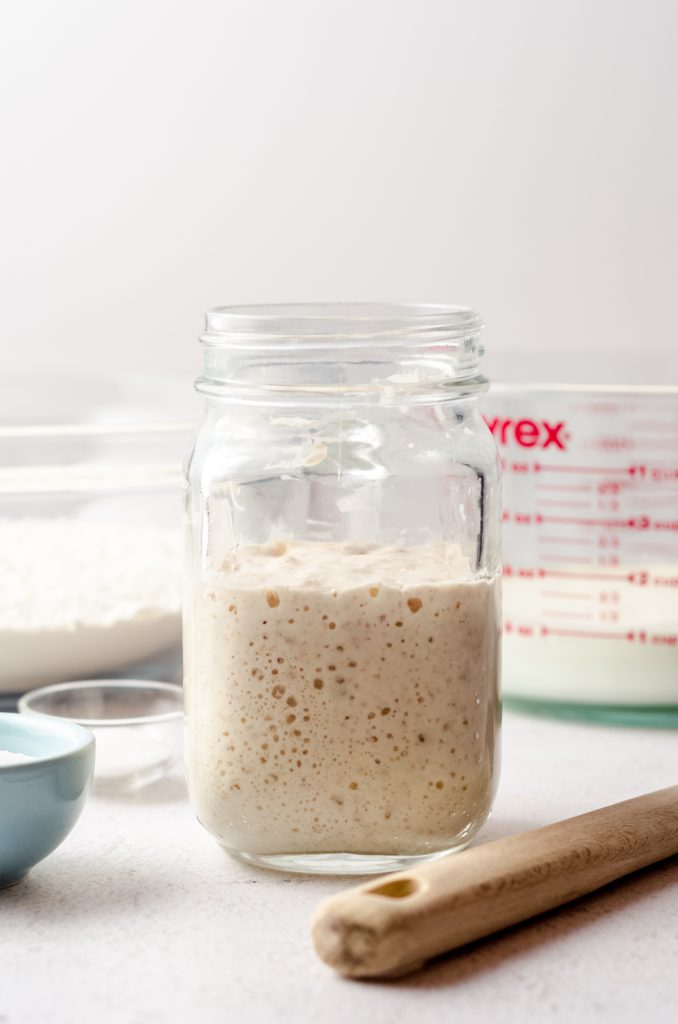
You will need to use 100g of active starter, so make sure you’re doing a feed that will leave you with some discard to continue your starter.
MIX THE SOURDOUGH BREAD ROLLS DOUGH
STEP #2
First, melt 2 Tablespoons of the butter and allow it to cool for a few minutes at room temperature.
STEP #3
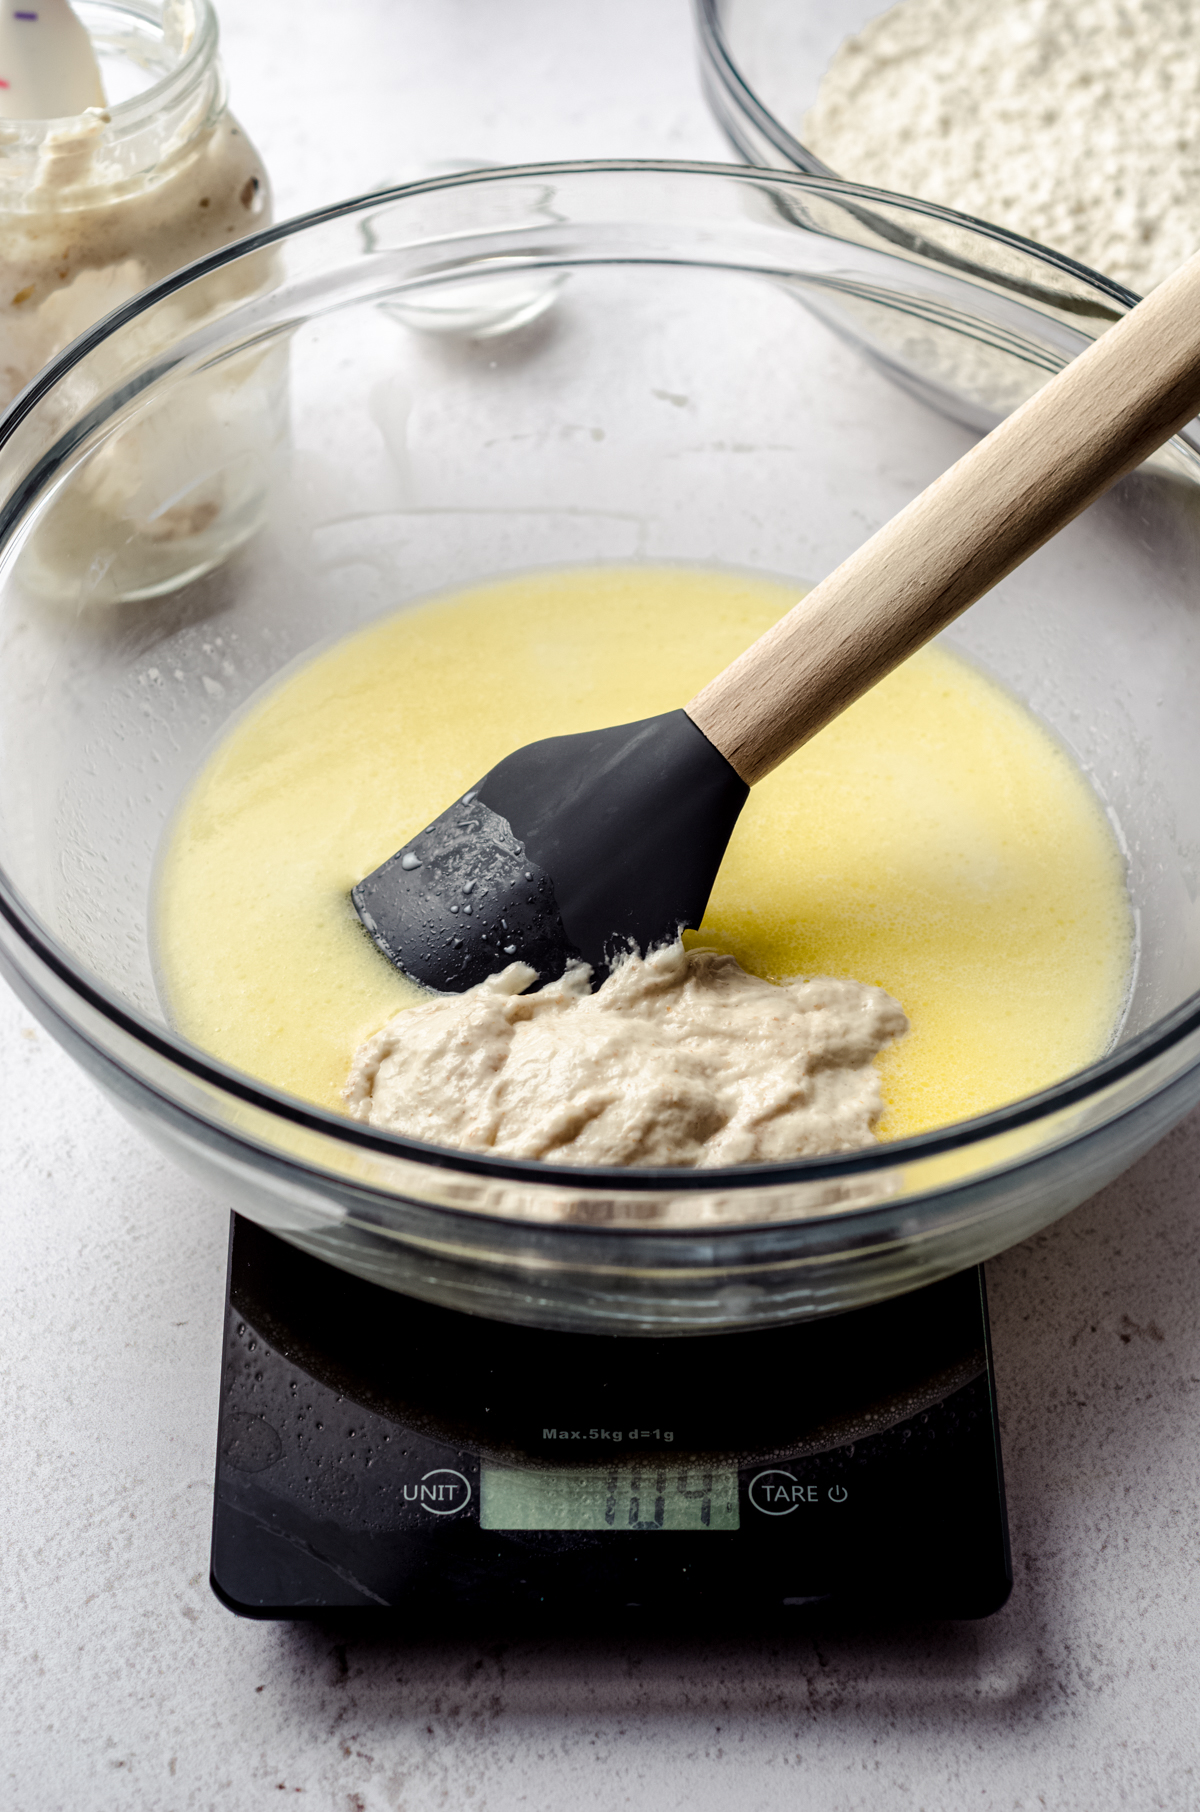
Next, combine the cooled melted butter, milk, sugar, and salt in a large bowl and whisk until combined.
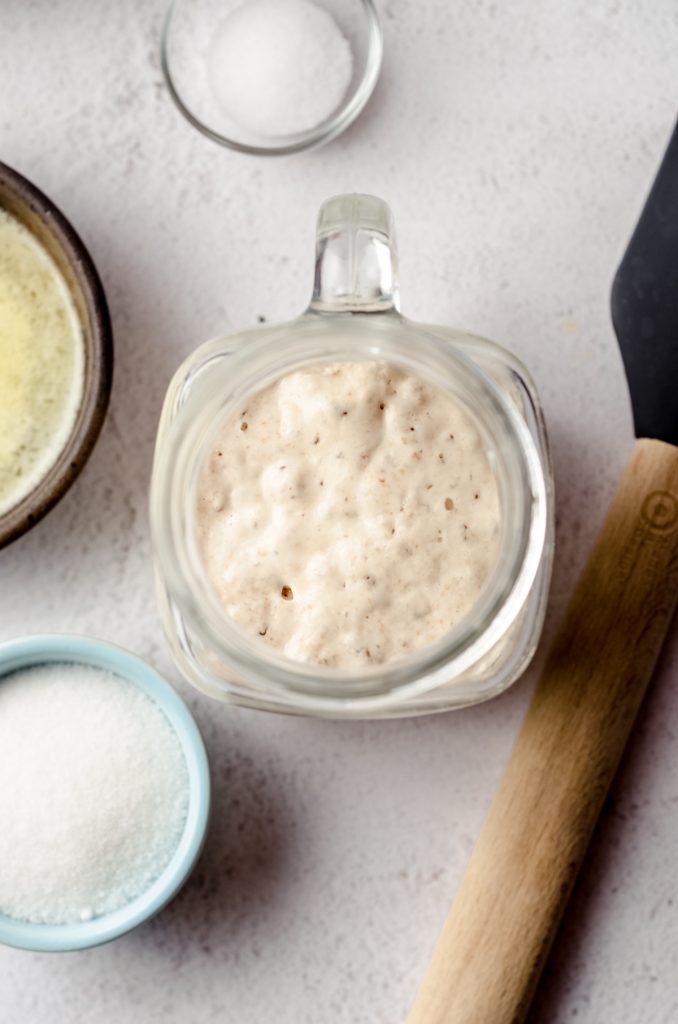
STEP #4
Add 100g of the sourdough starter to the bowl, then whisk again until the mixture is homogenous. You can see here I used 104g of sourdough starter. This is about ½ cup of starter, but I always prefer to use a scale when working with baking recipes, especially sourdough since it is so exact.
STEP #5
Add the flour to the mixture then stir with a spatula or wooden spoon until everything is combined and there are no flour pockets remaining.
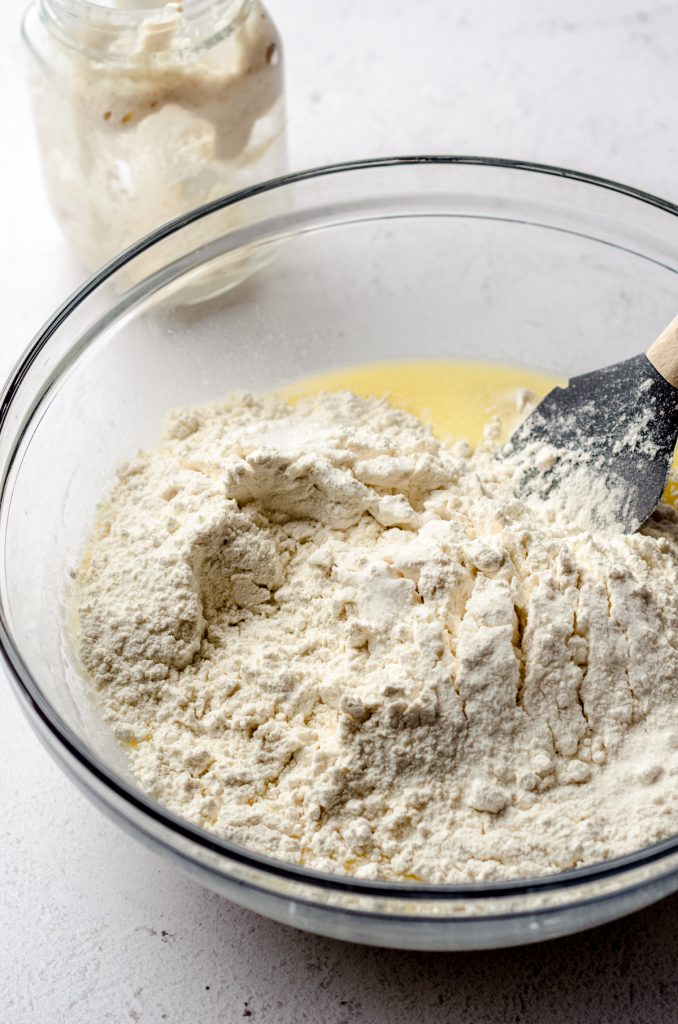

The mixture will look very craggy, uneven, and wet. This is completely ok. Cover the bowl and allow it to rest at room temperature for 1 hour.
PERFORM SOURDOUGH STRETCHES AND FOLDS
STEP #6
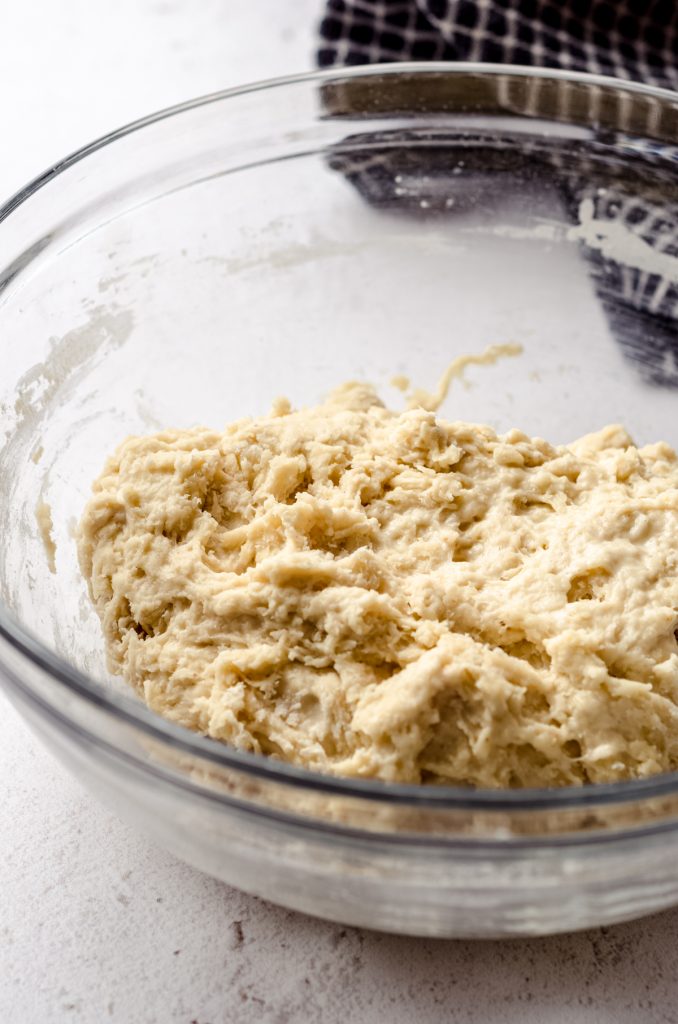
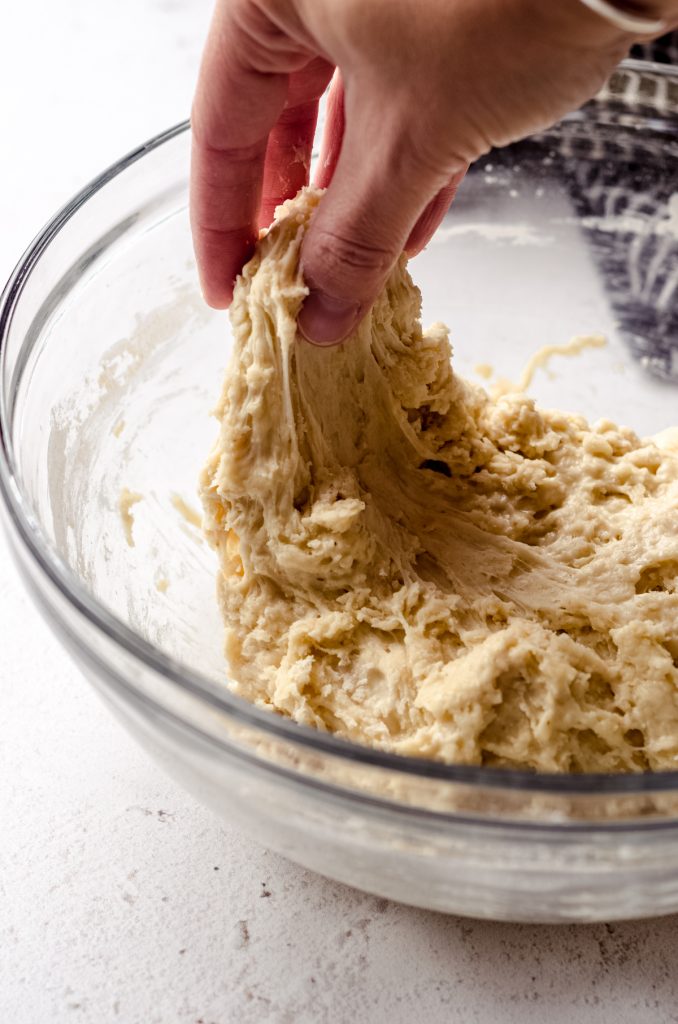
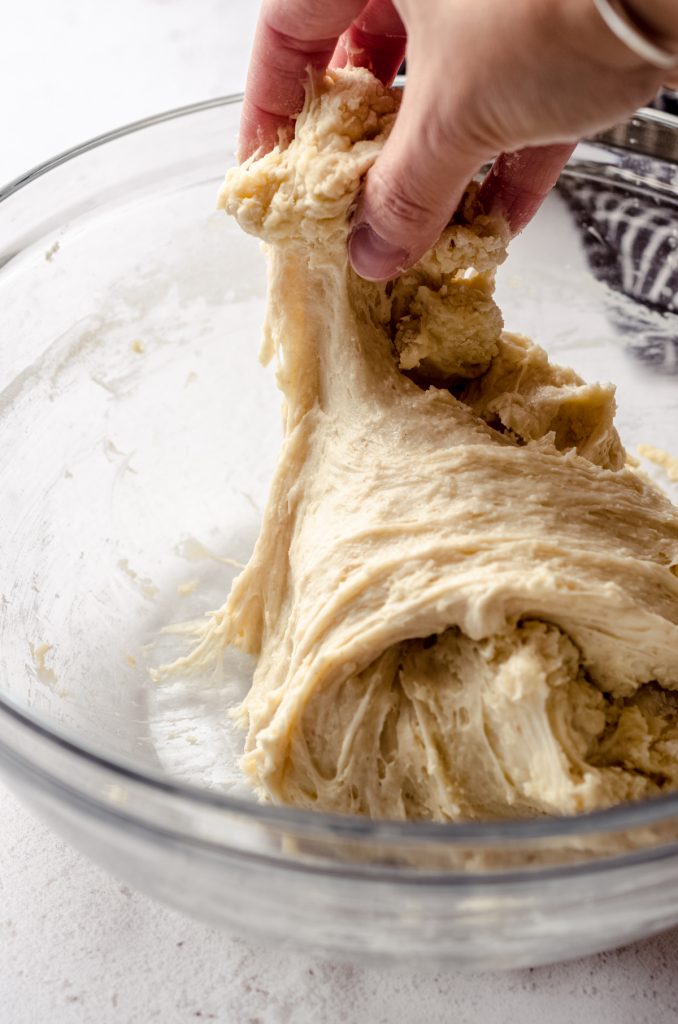
Next, you are going to perform your stretches and folds. This is where we start to develop the gluten and soften the dough. You will perform four total sets of stretch and folds with 30 minutes of rest between each set.
To stretch and fold sourdough dough, use your hand to pick up the dough on one side of the bowl, stretch it by pulling it straight up, then fold it over the ball of dough and gently tuck it into the dough on the opposite side. Turn the bowl ¼ turn and repeat this step until you have turned the bowl one full circle.

STEPs #7-10
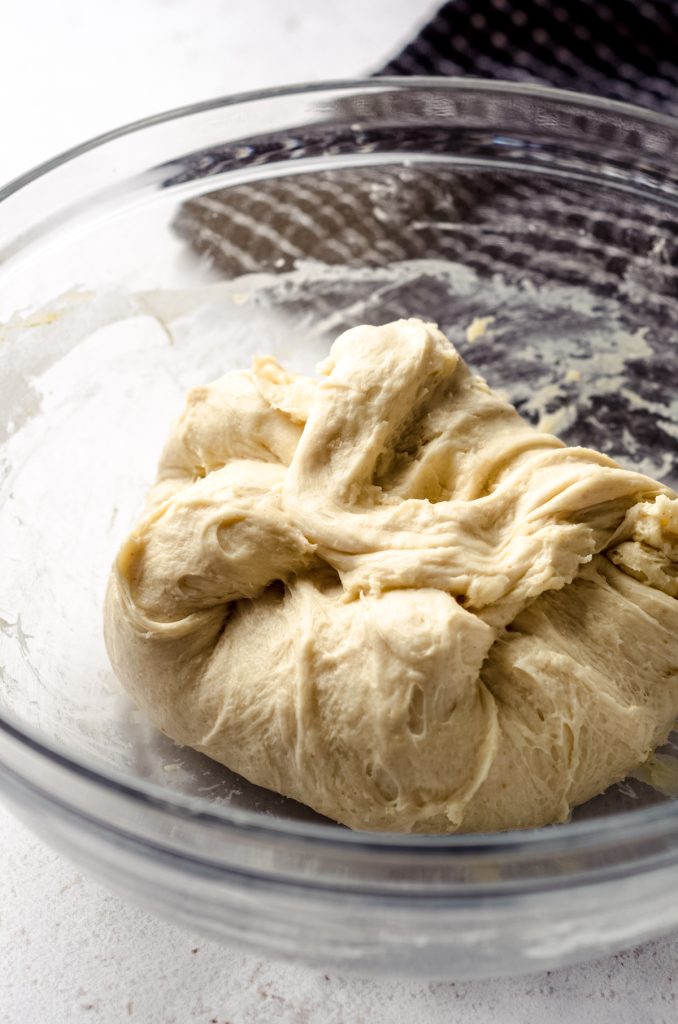
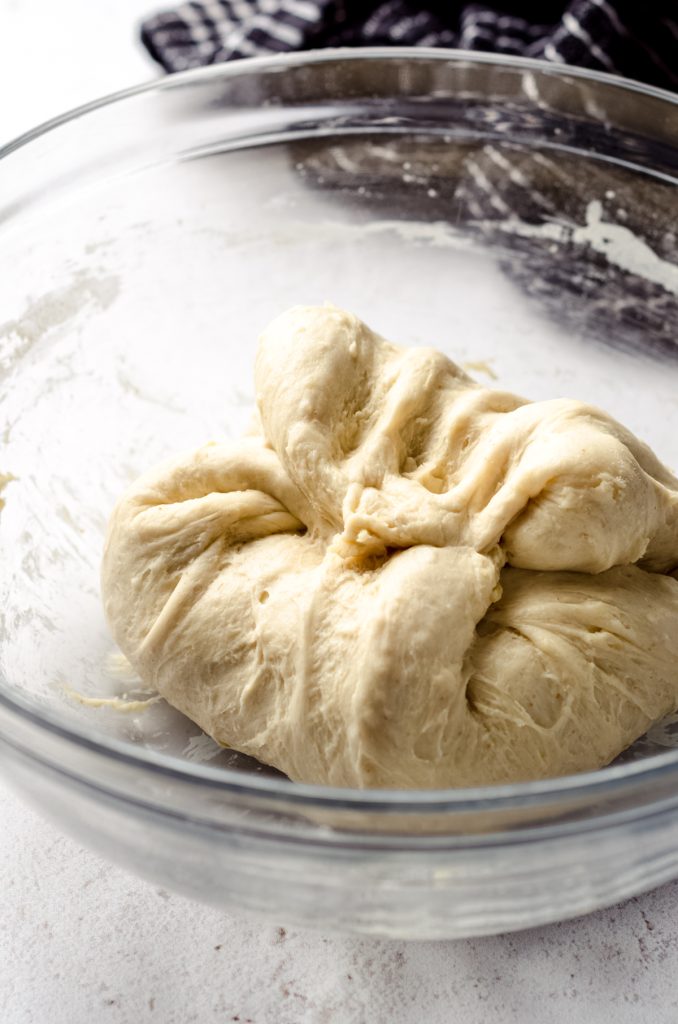
After you have turned the bowl a full circle, cover the bowl, then set a timer for 30 minutes to let the dough rest, then repeat three more times. After each set, you will notice the dough getting smoother and more cohesive.
Once you have performed four total sets of stretches and folds, cover the dough and allow it to rise at room temperature for 1 and ½ hours. This whole process is the bulk fermentation and when your sourdough will begin developing that delicious tangy flavor.
DIVIDE HOMEMADE SOURDOUGH ROLLS DOUGH AND ALLOW TO RISE
STEP #11
Here’s where we get to form our individual rolls. Start by spraying a 9″ x 13″ baking dish with non-stick spray and set it aside.
STEP #12
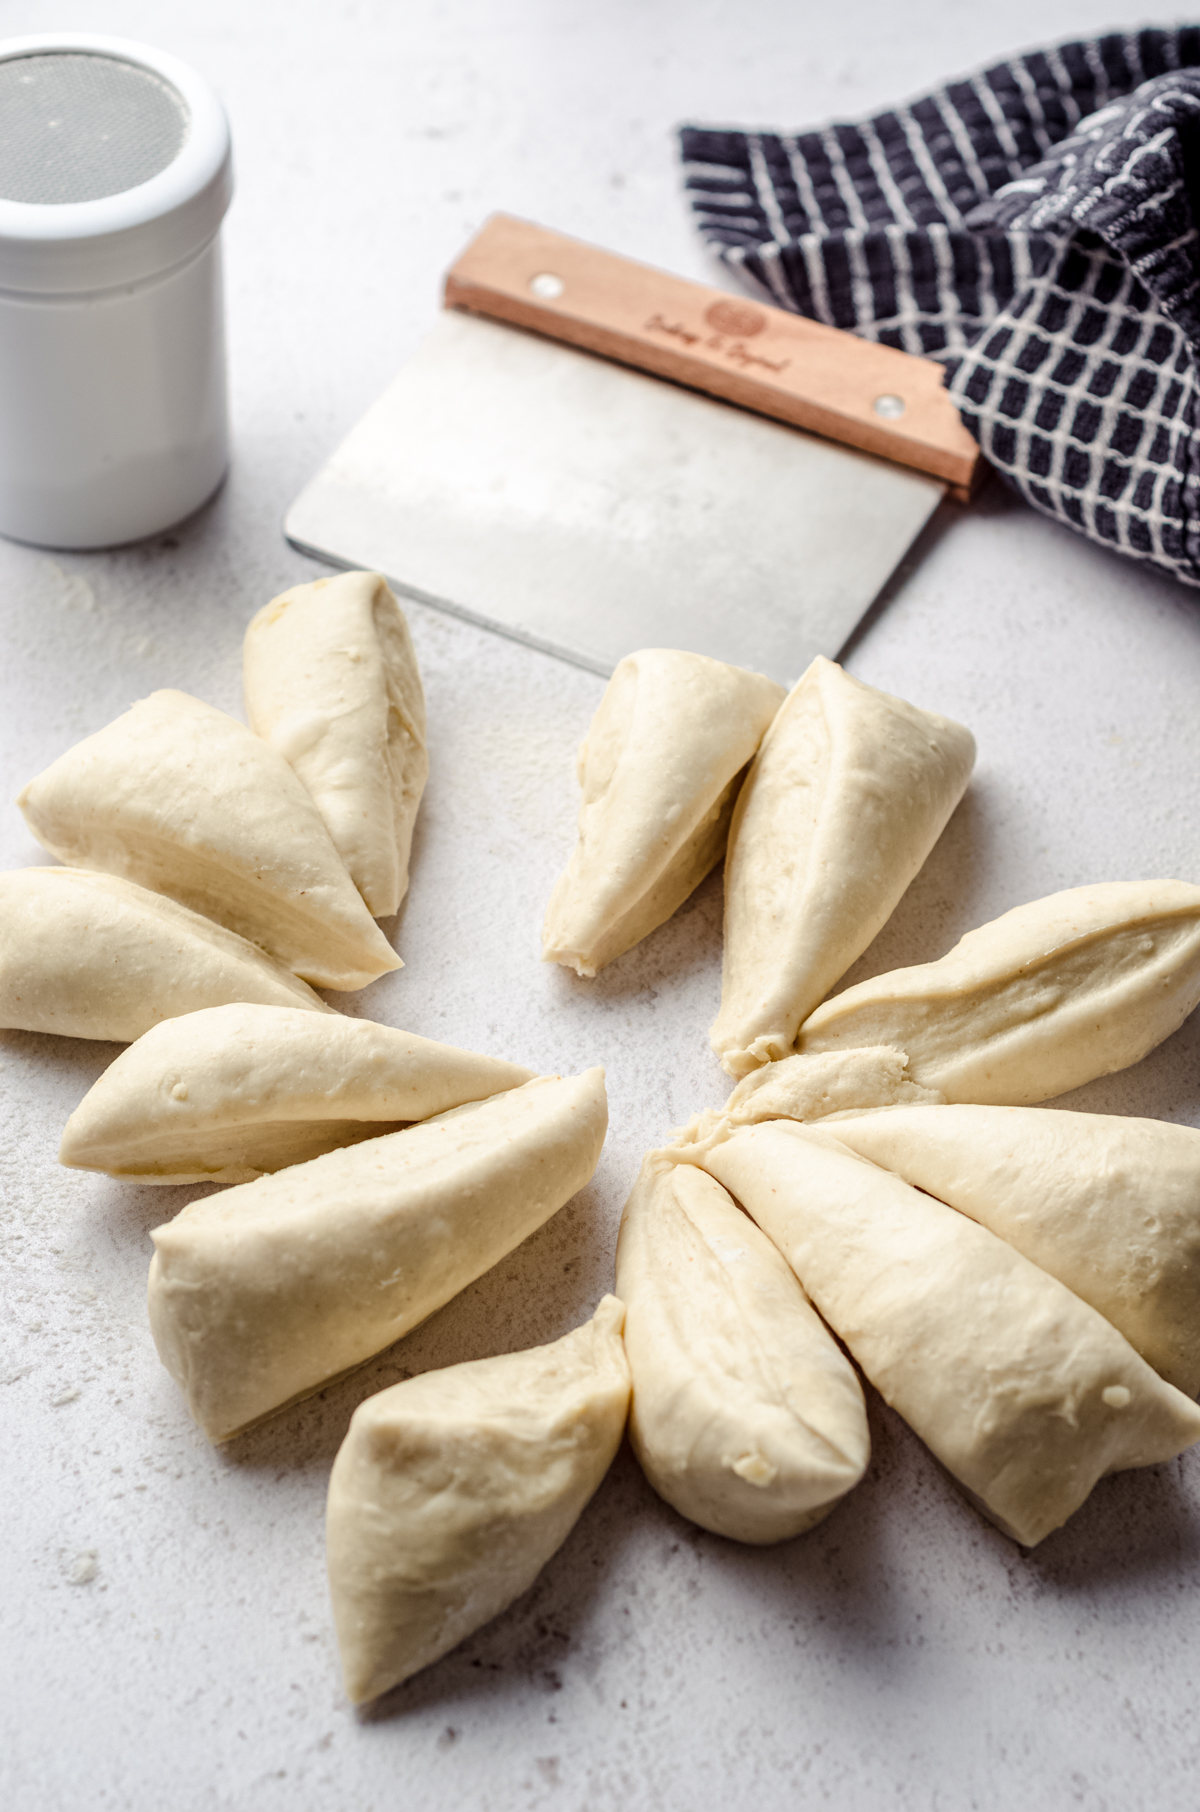
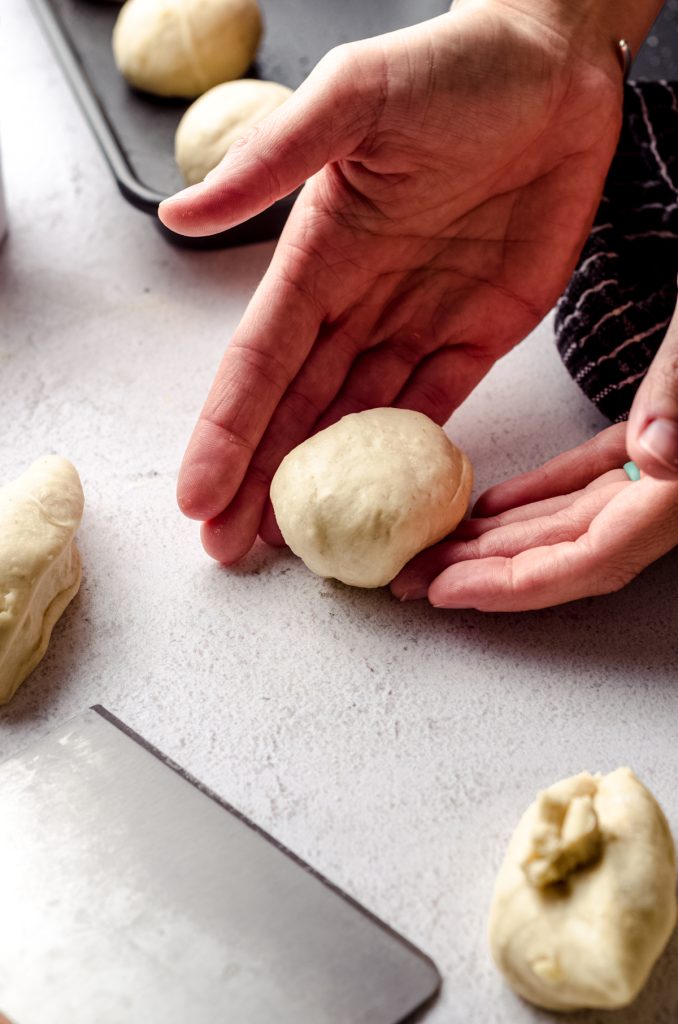
Turn the dough out onto a lightly floured surface and divide it into 12 equal pieces, which will be approximately 65-70g each. Shape each piece of dough into a smooth ball by gently pressing it into a disc, gathering up the sides, and pinching the ends together to make a sort of “pouch.”

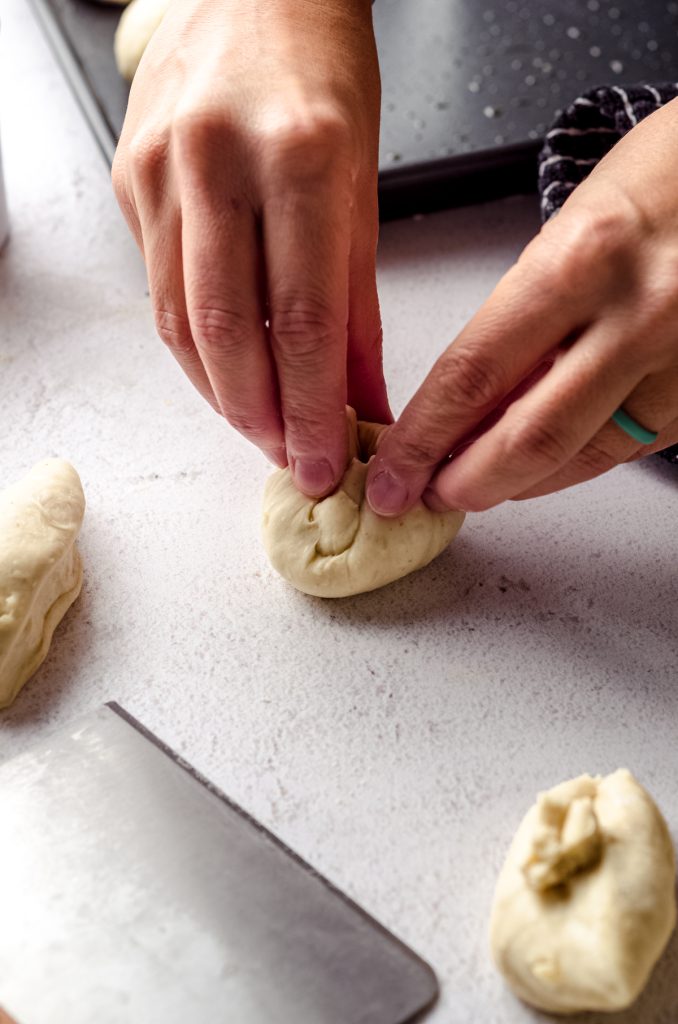
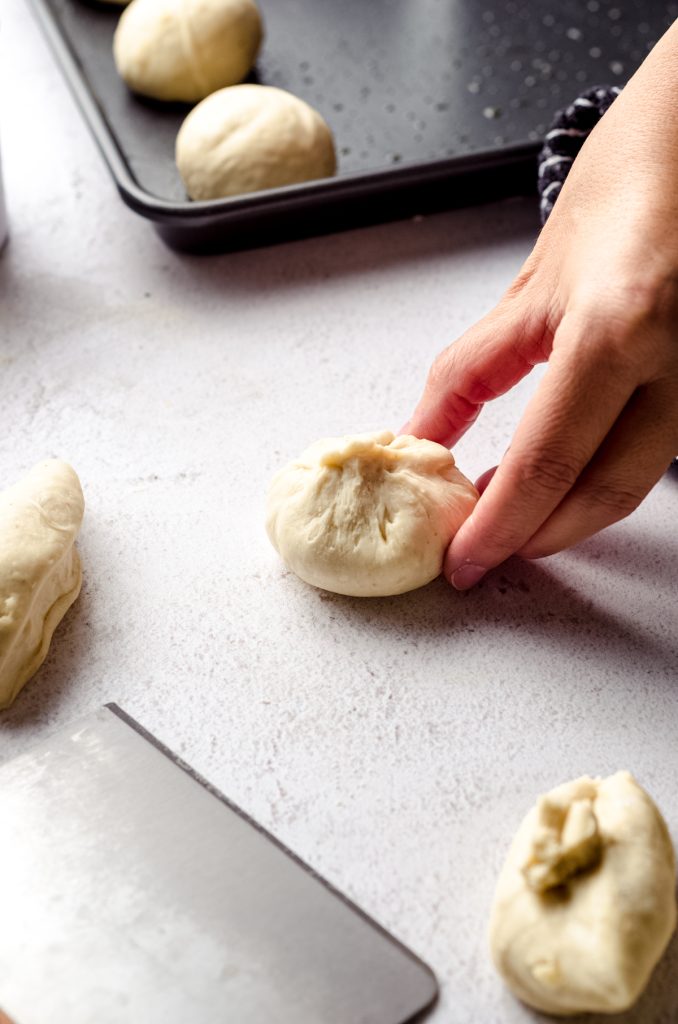
STEP #13
Turn the dough balls over so that the seam side is down on the work surface. Use your hands to gently tuck the bottom under itself while you turn the ball of dough, creating surface tension on the dough. You want the dough to create a tight ball which will lend to really great rolls from the oven.

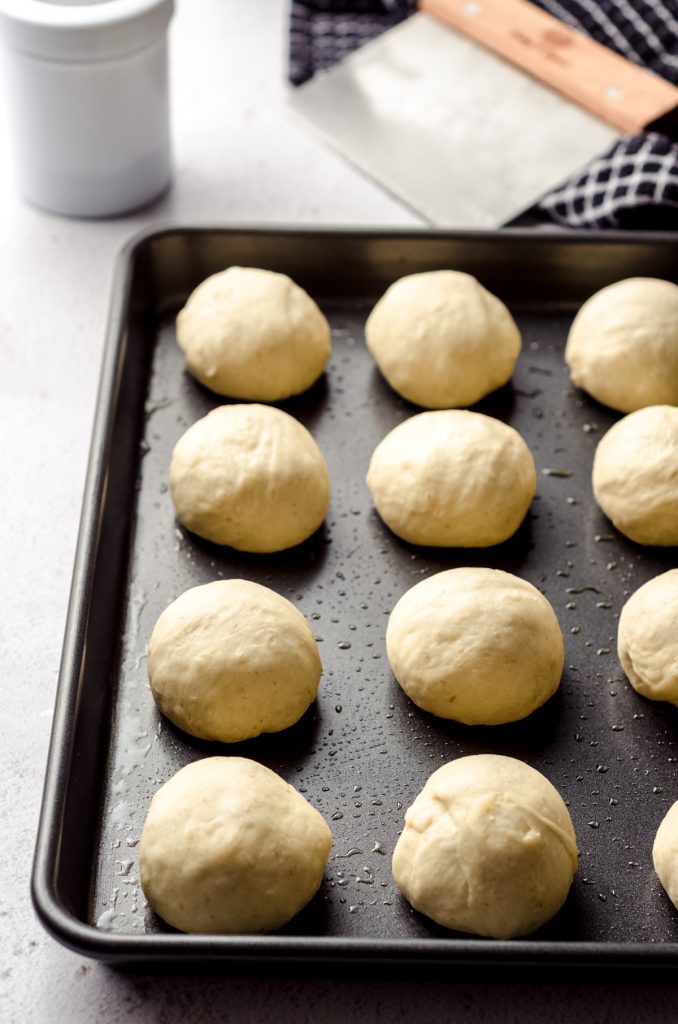
STEP #14
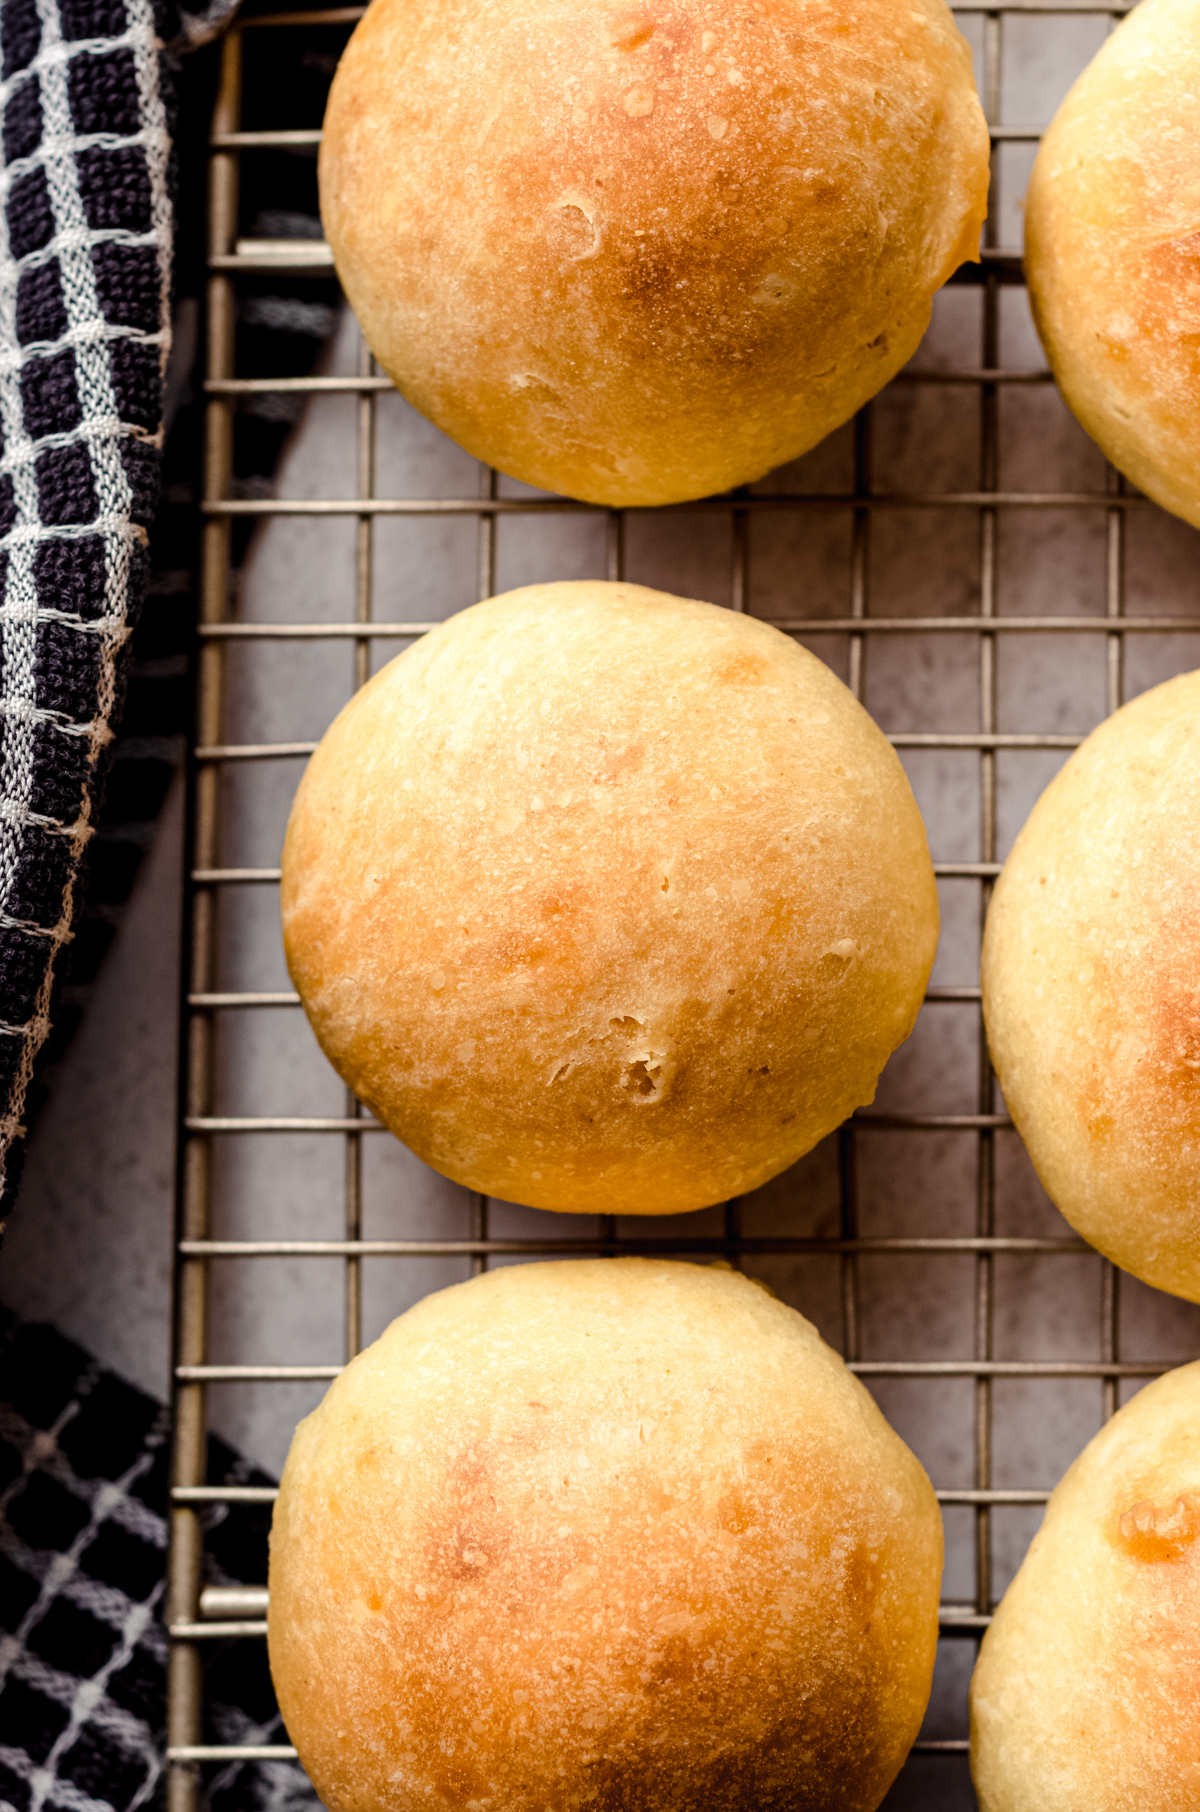
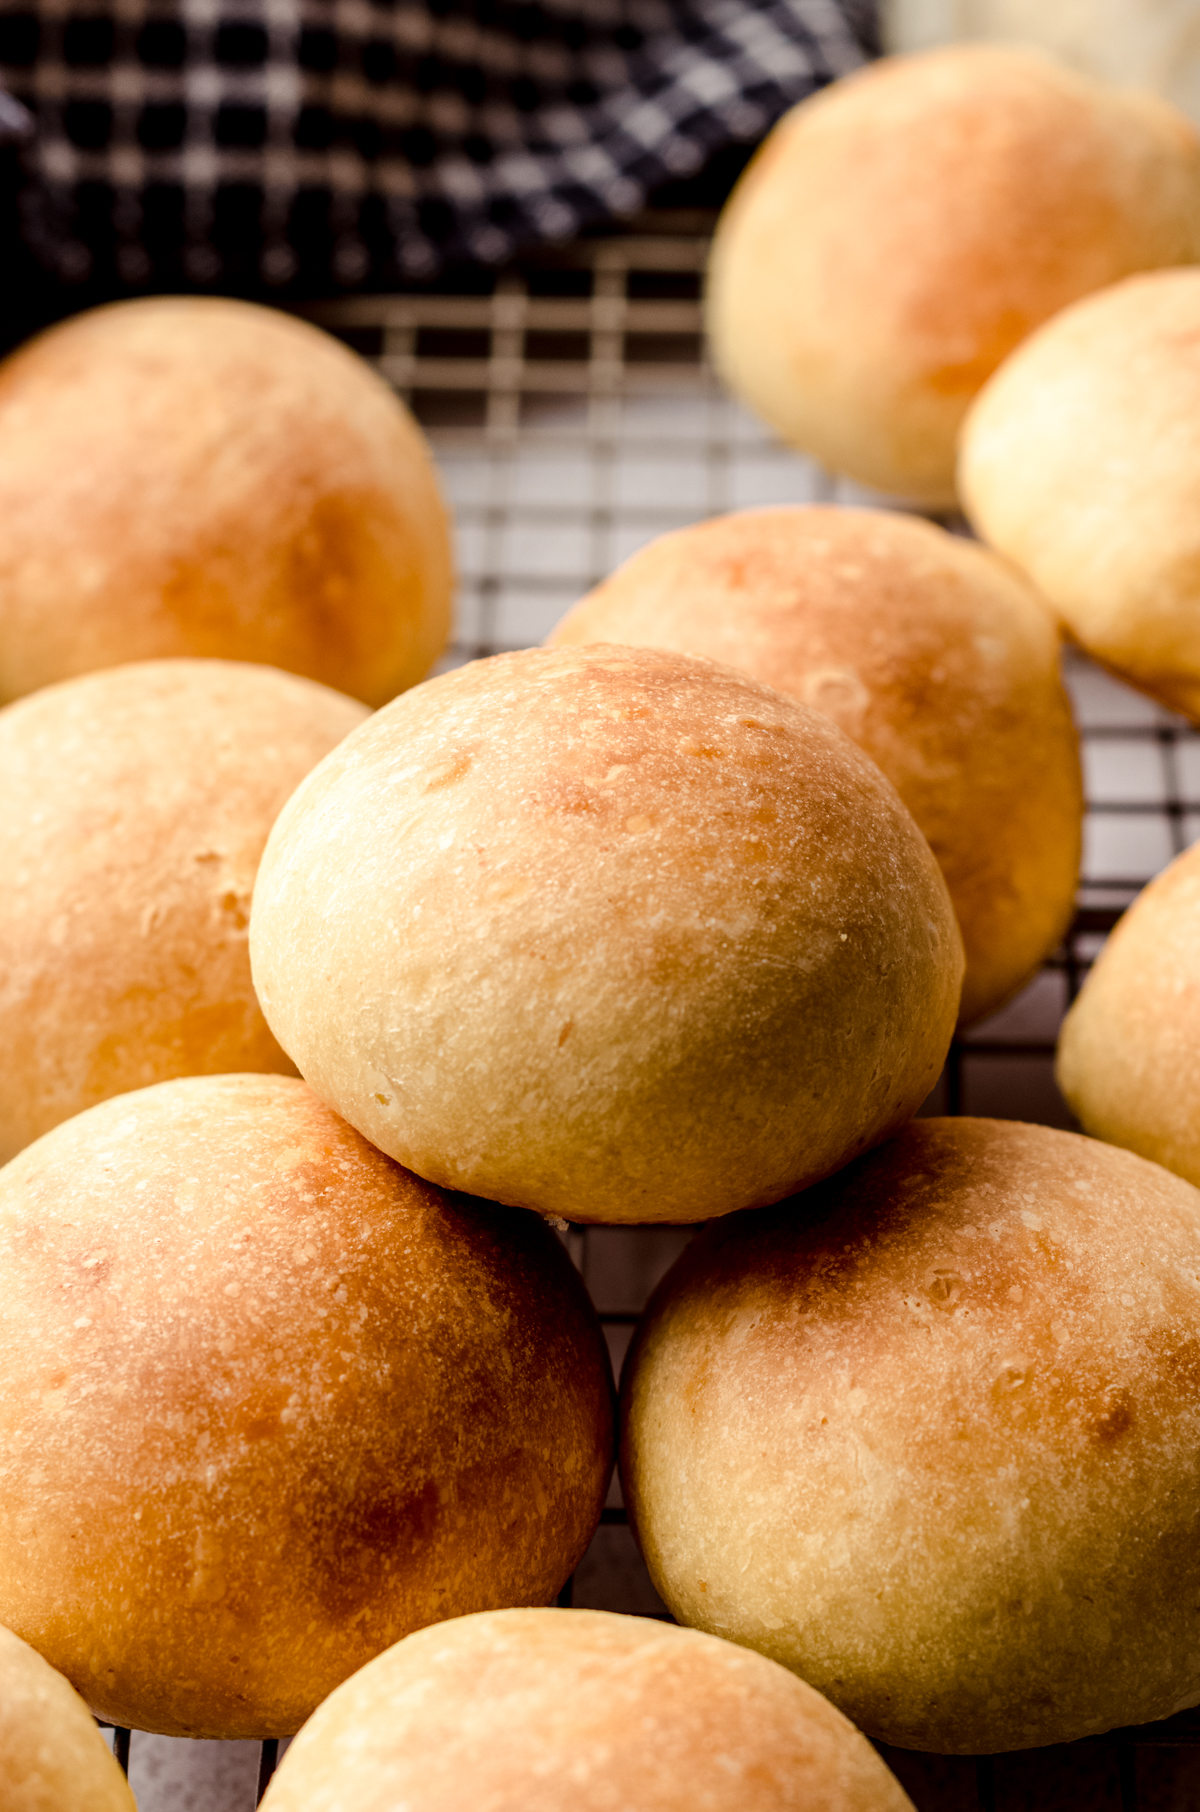
Place shaped rolls into the prepared baking dish (4 rows of 3), then cover the baking dish and allow sourdough dough to have its final rise for 3-4 hours (until slightly puffed).
You could even turn these into pull-apart rolls by baking them in a large iron skillet.
BAKE THE SOURDOUGH ROLLS
STEP #15
Arrange a rack to the middle position in the oven, then preheat it to 375°F (190°C).
STEP #16
Melt 1 more Tablespoon of the butter, add a generous pinch of salt to it, and brush the melted salted butter onto the rolls with a pastry brush.
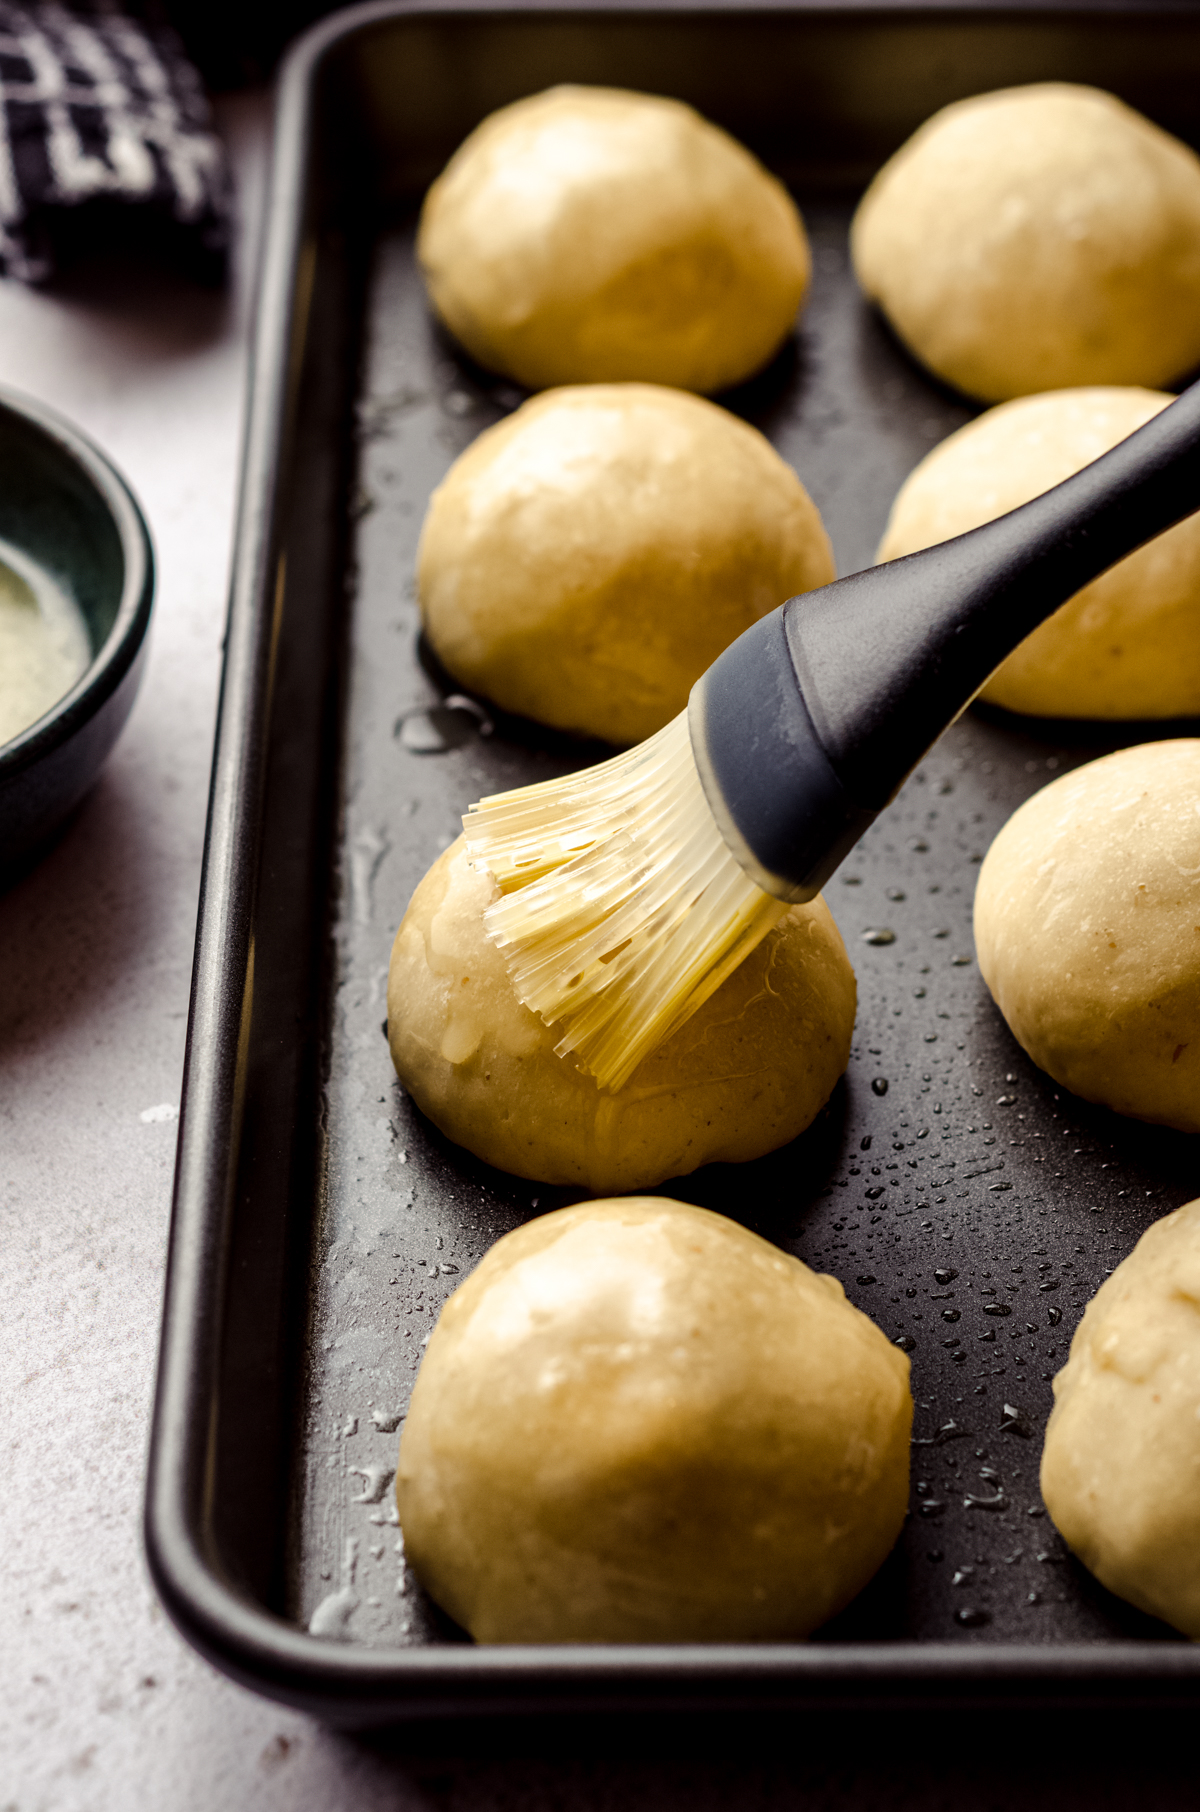
STEP #17
Bake the sourdough rolls for 25-30 minutes or until golden brown on top, then remove them from the oven.
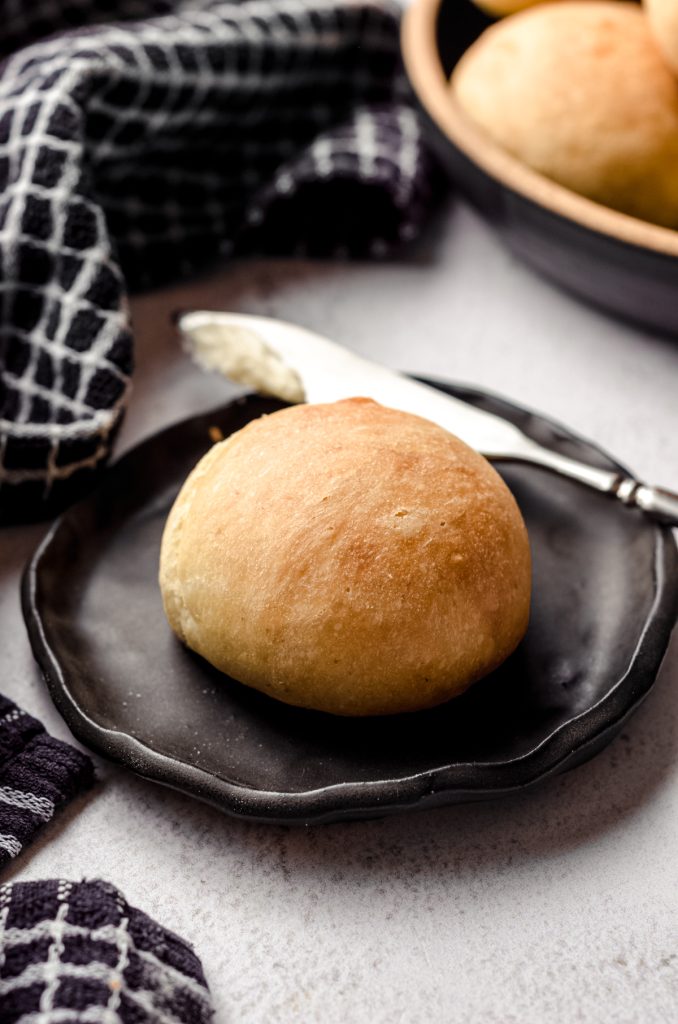
STEP #18
Melt the final Tablespoon of butter, add a generous pinch of salt, and brush hot rolls again with the melted salted butter and serve immediately. While I think warm rolls from the oven are the most spectacular, the rolls, of course, can be warmed later if enjoyed as leftovers.
Sourdough Roll Sample Schedule
Here is a rough outline for a schedule that works well for me when I make sourdough breads. It’s easiest to work backwards from when you want to bake and/or eat the rolls, so adjust the schedule as necessary, plugging in your finish time and working your way back to a start time. You can then decide when you want to feed your starter so it’s ready to go.
- 8:00 PM: feed your sourdough starter.
- 7:45 AM: melt 2 Tablespoons of the unsalted butter and allow it to cool while you gather the rest of your ingredients.
- 8:00 AM: mix the sourdough rolls dough and allow to rest for 1 hour.
- 9:00 AM: perform the first set of stretches and folds. Cover the dough and let it rest for 30 minutes.
- 9:30 AM: perform the second set of stretches and folds. Cover the dough and let it rest for 30 minutes.
- 10:00 AM: perform the third set of stretches and folds. Cover the dough and let it rest for 30 minutes.
- 10:30 AM: perform the fourth and final set of stretches and folds. Cover the dough and let it rest for 90 minutes.
- 12:00 PM: divide the dough, shape into rolls, place in baking dish, then cover the rolls and let them rise 3-4 hours.
- 4:00 PM: brush the rolls with salted butter and bake.
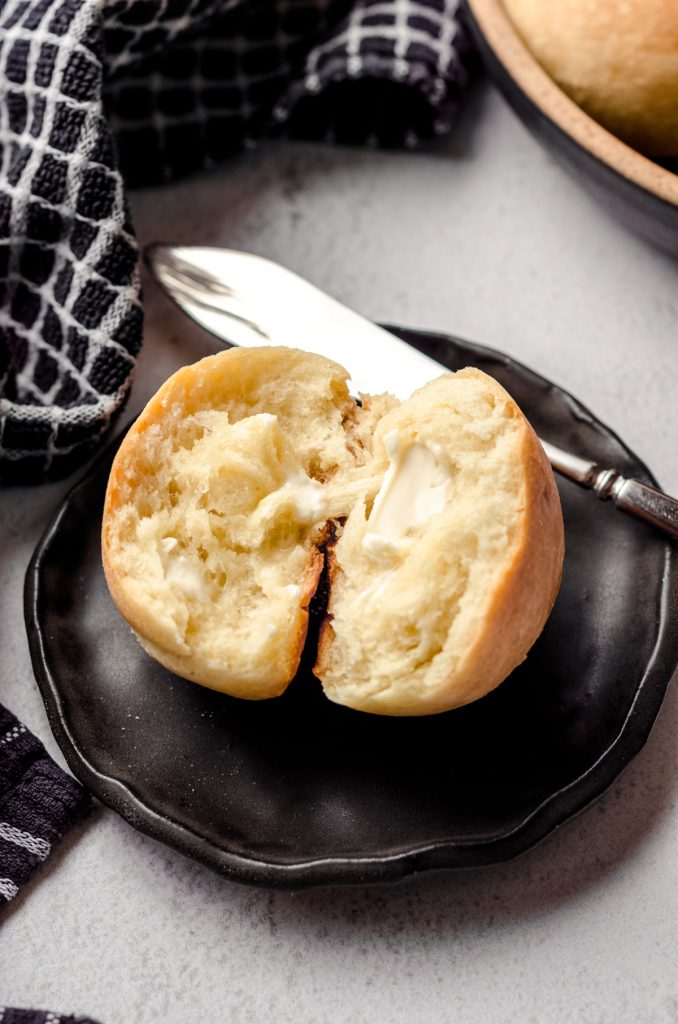
How to serve these Sourdough Bread Rolls
Serve these rolls any way you’d serve traditional yeast rolls! They make a great standalone side with a pat of butter, with your favorite slider fillings, or as a way to soak up sauce or dressing left on your plate. We like to serve them at holidays because they feel a little “fancy.”
Sourdough Roll storage
Store sourdough rolls covered tightly at room temperature or in the refrigerator for up to 4 days. Rolls freeze well, up to 3 months. Thaw in the refrigerator or at room temperature and warm in the oven, if desired.
SOURDOUGH ROLLS FAQs
If you’re looking for more sourdough or sourdough discard recipes, check out these recipes: sourdough cinnamon rolls, sourdough English muffins, and 40+ Sourdough Discard Recipes.


Sourdough Dinner Rolls Recipe
Ingredients
- ¼ cup (56g) unsalted butter divided
- 1 cup (240mL) warm milk I prefer whole but any is fine
- 2 and ½ Tablespoons (31g) granulated sugar
- 1 teaspoon salt plus more for salting the butter you will brush onto the rolls
- ½ cup (100g) active sourdough starter
- 3 cups (360g) all-purpose flour be sure to measure properly
Instructions
STARTING NOTES
- Since this recipe for sourdough dinner rolls uses active sourdough starter, you will need to do some planning ahead and work backwards to determine when to start this recipe. See this section in the post for a sample schedule.
- About 12 hours before you plan to start the dough, feed your starter. You will need to use 100g of active starter, so make sure you're doing a feed that will leave you with some discard to continue your starter.
START THE DOUGH
- Melt 2 Tablespoons of the butter. Allow to cool for a few minutes at room temperature.¼ cup (56g) unsalted butter
- In a large bowl, combine the cooled melted butter, milk, sugar, and salt. Whisk until combined. Add the sourdough starter to the bowl, then whisk again until the mixture is homogenous.1 cup (240mL) warm milk, 2 and ½ Tablespoons (31g) granulated sugar, 1 teaspoon salt, ½ cup (100g) active sourdough starter
- Add the flour to the mixture then stir with a spatula or wooden spoon until everything is combined and there are no flour pockets remaining. The mixture will look very craggy, uneven, and wet. This is ok. Cover the bowl and allow to rest at room temperature for 1 hour.3 cups (360g) all-purpose flour
STRETCHES AND FOLDS
- Perform the first set of stretches and folds: use your hand to pick up the dough on one side of the bowl, stretch it by pulling it straight up, then fold it over the ball of dough and gently tuck it into the dough on the opposite side (see photos in the post). Turn the bowl ¼ turn and repeat this step until you have turned the bowl one full circle.
- Cover the bowl, then set a timer for 30 minutes, and repeat three more times. After each set, you will notice the dough getting smoother and more cohesive.
- Once you have performed four total sets of stretches and folds, cover the dough and allow it to rise at room temperature for 1 and ½ hours.
SHAPE THE ROLLS
- Spray a 9" x 13" baking dish with non-stick spray. Set aside.
- Turn the dough out onto a lightly floured surface and divide it into 12 equal pieces, which will be approximately 65-70g each. Shape each piece of dough into a ball by gently pressing it into a disc, gathering up the sides, and pinching the ends together to make a sort of "pouch."
- Turn the ball of dough over so that the seam side is down on the work surface. Use your hands to gently tuck the bottom under itself while you turn the ball of dough, creating surface tension on the dough. Place shaped rolls into the prepared baking dish (4 rows of 3), then cover the baking dish and allow to rise for 3-4 hours (until slightly puffed).
BAKE THE ROLLS
- Arrange a rack to the middle position in the oven, then preheat it to 375°F (190°C).
- Melt 1 more Tablespoon of the butter, add a generous pinch of salt to it, and brush the melted salted butter onto the rolls with a pastry brush. Bake sourdough rolls for 25-30 minutes or until golden brown on top, then remove from the oven.
- Melt the final Tablespoon of butter, add a generous pinch of salt, and brush hot rolls again with the melted salted butter. Serve immediately. Store leftover sourdough rolls at room temperature up to 4 days. Rolls freeze well, up to 3 months. Thaw at room temperature.
Nutrition Disclosure
All nutritional values are approximate and provided to the reader as a courtesy. Changing ingredients and/or quantities will alter the estimated nutritional calculations.
A nice change of pace for my sourdough loving hubby.
Totally! Thank you, Lynn 🙂
These heavenly rolls served warm with butter are the MOST delicious dinner accompaniment. We had them with salmon and asparagus, and that complex, tangy flavor was so perfect!
Thank you so much, Liza!
Thank you so much, Michaela!
I am looking for a dinner roll recipe that allows for storing the shaped dough balls in the fridge for 24-36 hours prior to baking. Can that be done with your recipe?
Hi, Jennifer– yes, it can. After shaping the rolls, stash in the fridge, COVERED, for that time. Remove from the fridge about 4 hours before you want to bake, and let them come to room temperature and rise a bit. Then bake as directed!
When you get to the stretching and folding, should the dough be sticky or do I need to add more flour?
Hi, Kayana– it will be sticky and that’s totally normal and expected. It will get less sticky as the flour hydrates! Let me know how you like them 🙂
At what point in the recipe would you suggest a long ferment–say 12 hours? My daughter needs a longer ferment to break down the gluten farther. Would you suggest this after the initial mixing or after the stretch and folds? Thank you for any guidance you can provide. Looking forward to trying these.
Hi, Beverly– you’ll want to to this after the shaping step, actually. So, in the “schedule” I provided, at the 12pm step. Refrigerate for 24-48 hours (the longer the better) then bake them from cold. Let me know if you try it!
Can the dough be frozen after shaping before rising and then thawed and allowed to rise?
Hi, Mindy– yes, it can! Enjoy!
I am interested, but about the starter for the rolls
Can I make it at home? If so do you have a recipe?
You have several recipes using the starter, but never a recipe
I am new on your page, so you may have given it before I started
Virginia
Hi, Virginia– I don’t have a post about that, but my good friend Kristen does! Here is a link to her super thorough post.
Rolls were soft and fluffy with a spring to them! Best rolls I’ve made!!
Thanks, Cat! SO happy you enjoyed them 🙂